When I was planning my trip to the Blue Mountains, I knew I wanted to get a full day of hiking in while experiencing the most that the area had to offer.
Since there were just so many hiking trails and different areas to choose from, it got a bit overwhelming and confusing what to decide.
At the end of the day though, I was able to put together one of the most all inclusive Blue Mountains hikes that includes a little bit of everything.
This guide is not just going to list out trails that are part of the longer hike. It is here to give you step by step directions on how to take on this hike on your own.
* Affiliate Disclosure: This post may contain affiliate links, which means I may receive a commission if you make a purchase through the links provided, at no additional cost to you. Thanks for supporting the work I put into TripTins!
Since the hiking is the main topic of this guide, I am going to get started right off the bat with the Blue Mountain hike itself. Later on I will go into more detail of some important information to know about logistics, weather, and more.
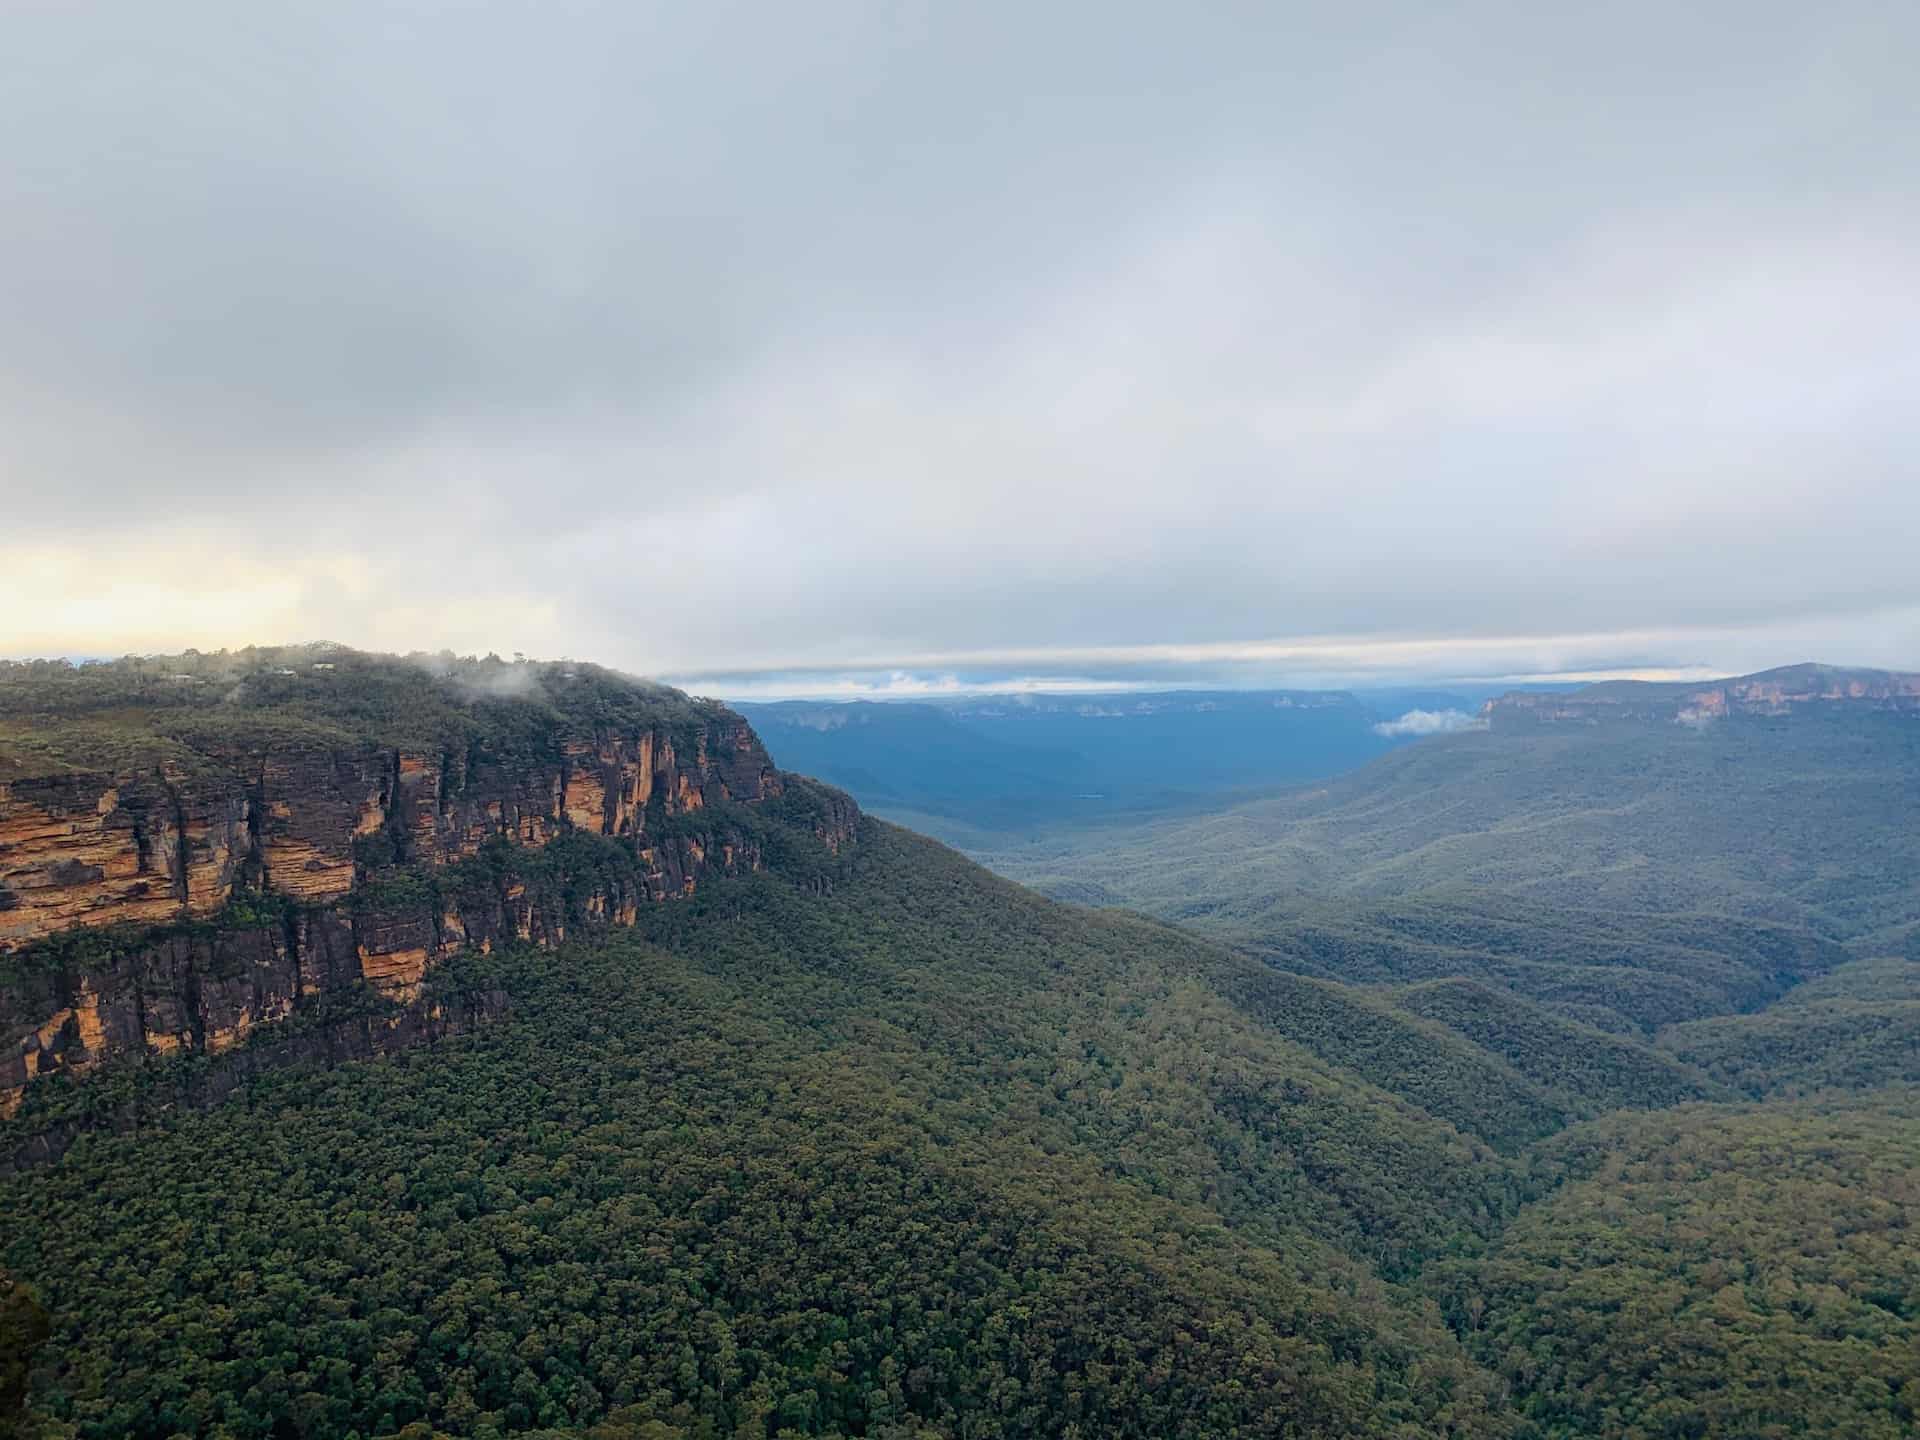
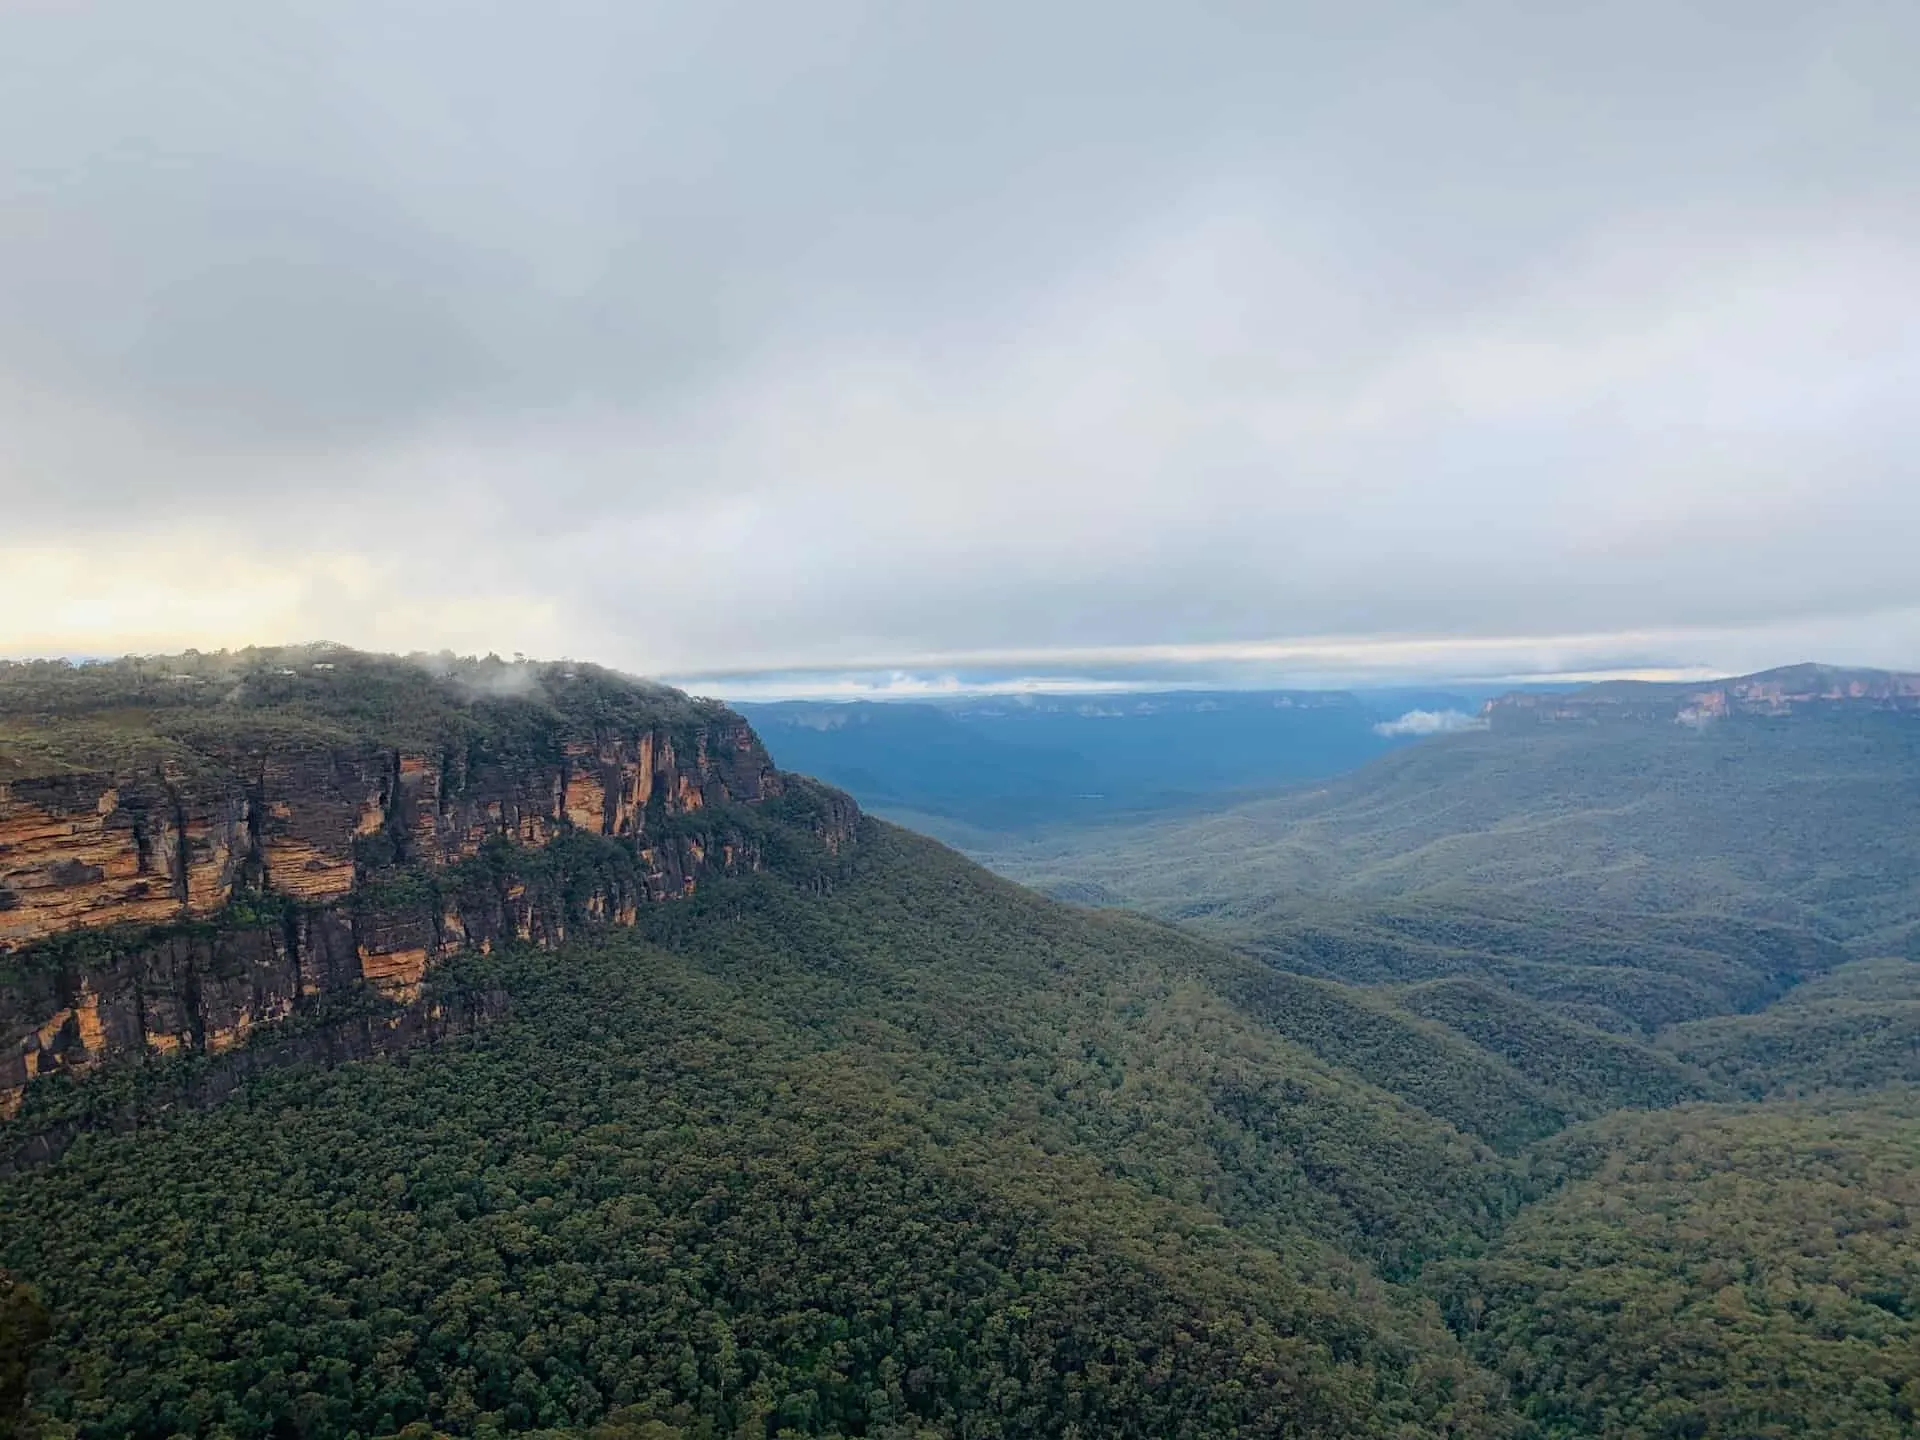
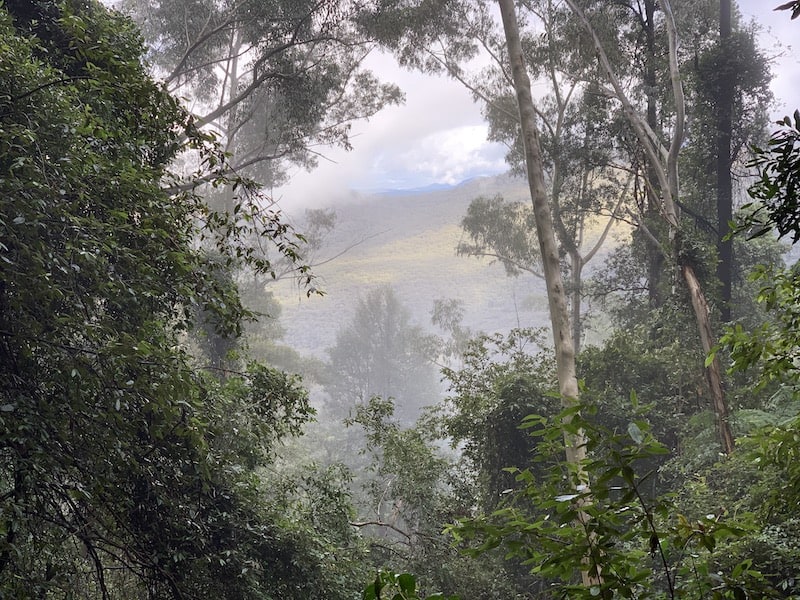
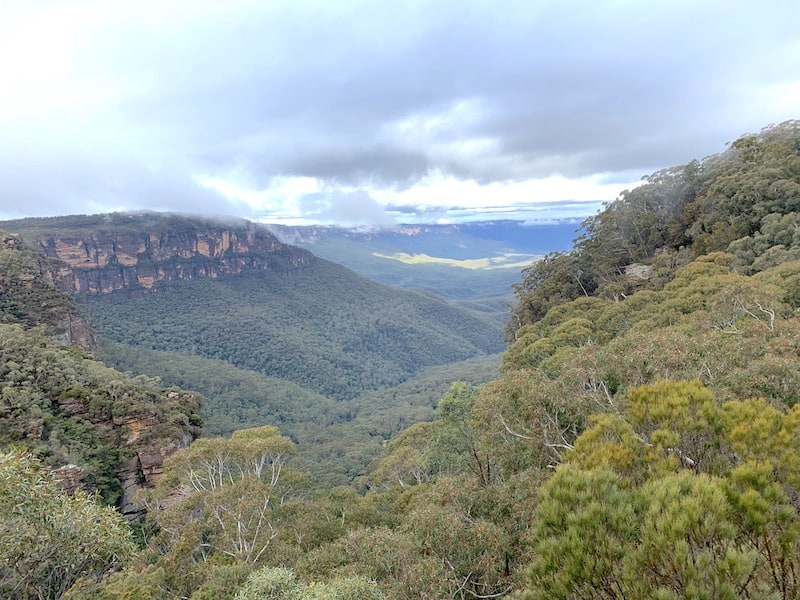
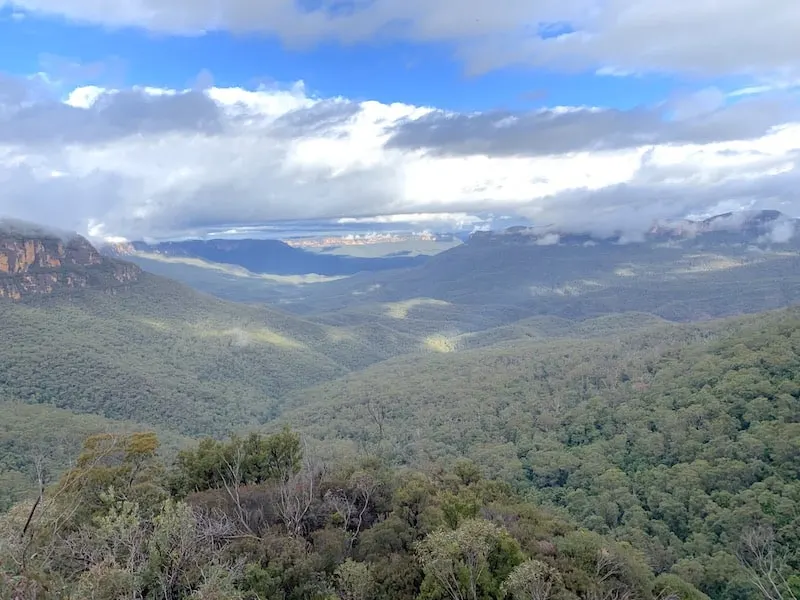
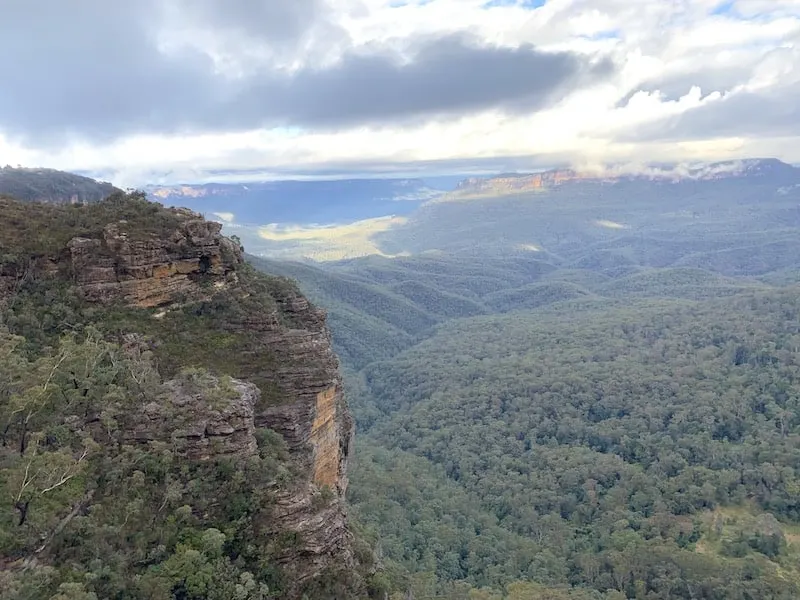
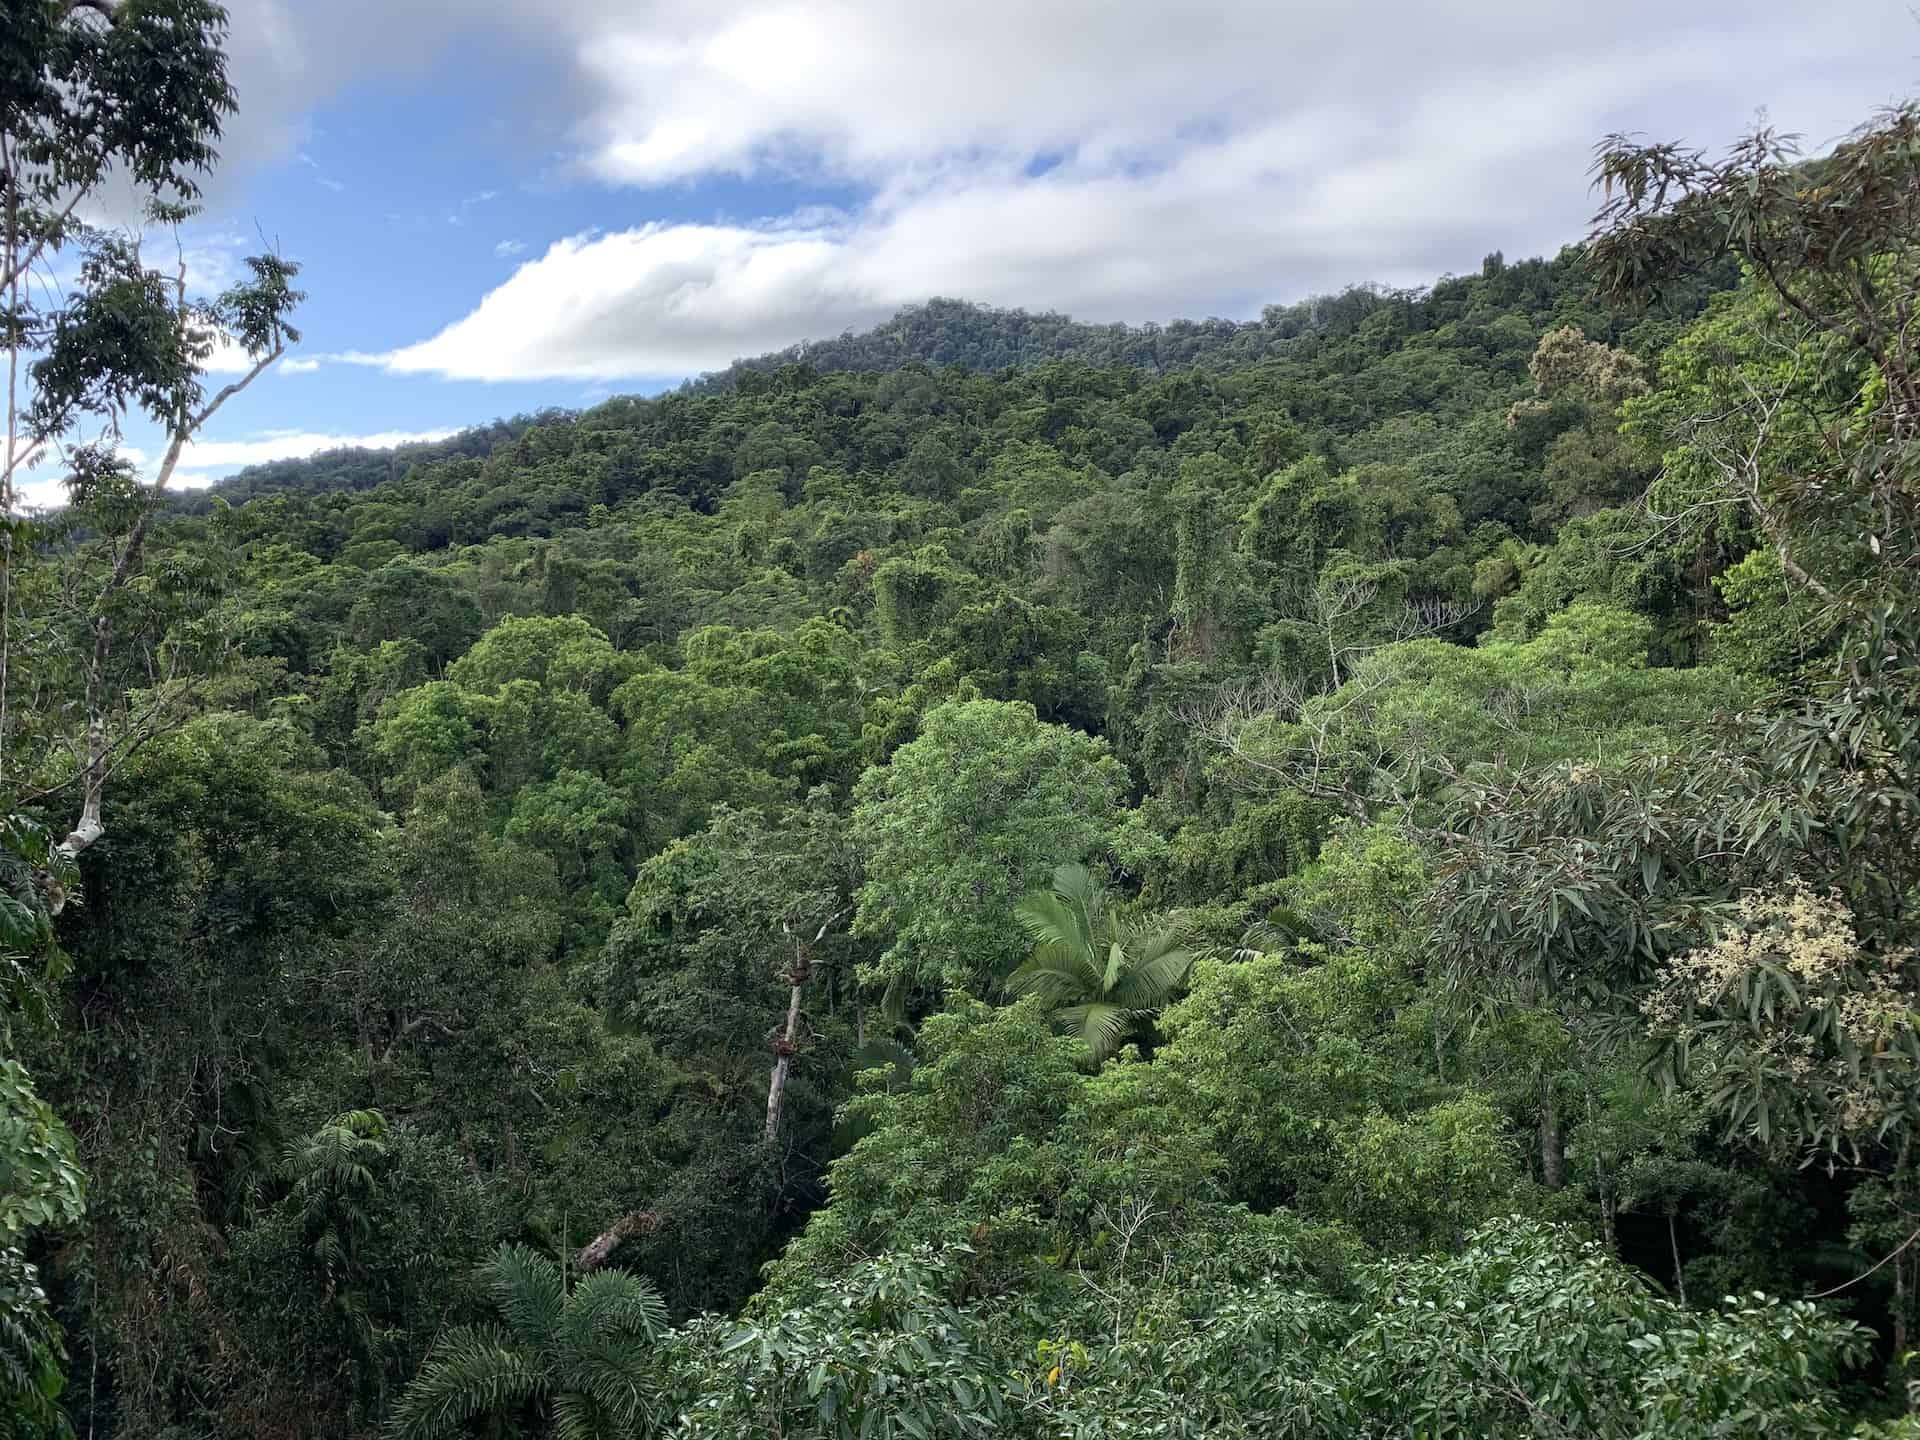
I also want to point out that the pictures below are from a pretty overcast and cloudy day (more on that later!), but the views were still incredible. On a sunny and clear day, you can just imagine how much more special this place can be.
1) Blue Mountains Hikes Overview
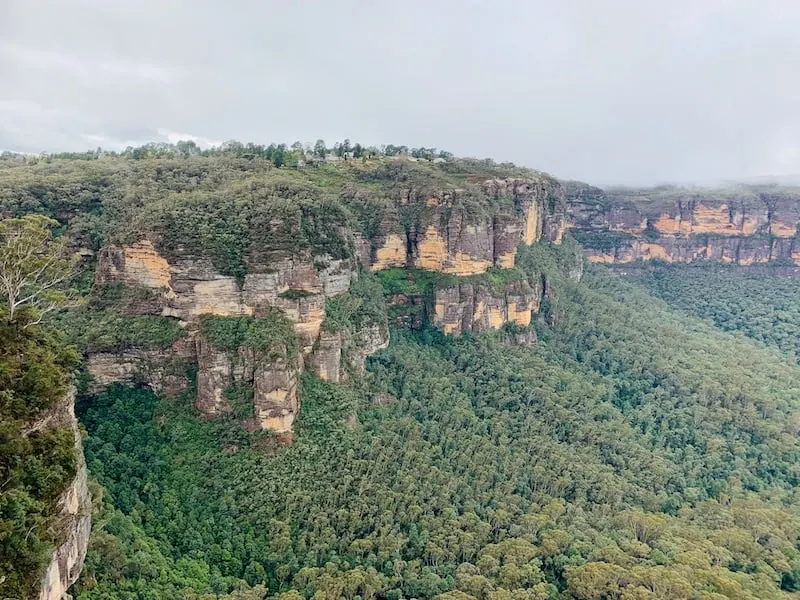
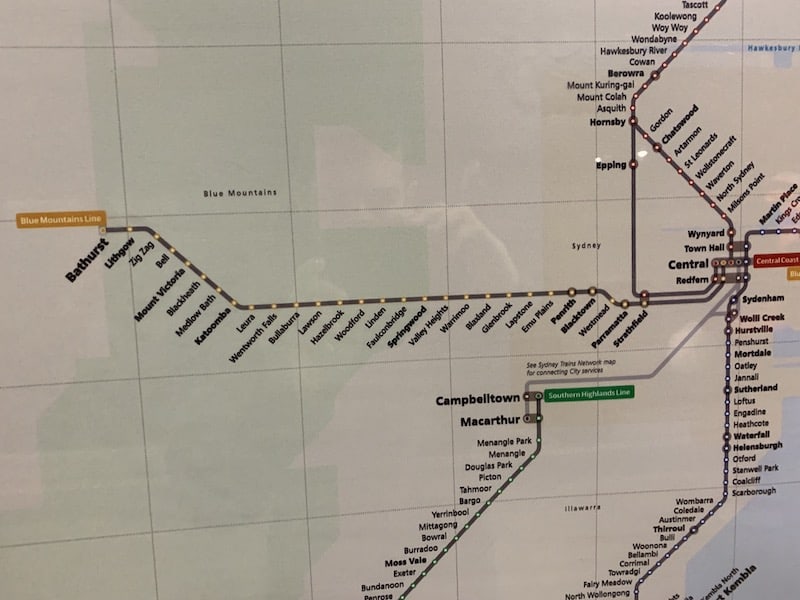
There are several different regions in the Blue Mountains, however I am going to focus in around the Katoomba to Leura part of the national park.
I thought instead of just choosing one hike though, why not combo a whole bunch of them into one incredible day hike.
The hike that I put together starts at Scenic World on the left hand side of the map.
It then continues down the Furber Steps, onto the Federal Pass, Dardanelles Pass, Giant Stairway, Three Sisters, Echo Point, and finishing up along the Prince Henry Cliff Walk to Leura.
Along the way there are SO MANY different viewpoints to check out that may take you off the main trail for a few minutes. I will list most of the main ones out so you can keep an eye out for them as you take part of the trail.
The whole trail should take about 5-7 hours depending on fitness level and how long you stop along the way at different viewpoints. The main few sections of trail would be:
- 1) Scenic World to Bottom of Furber Steps – 45 Minutes
- 2) Bottom of Furber Steps to Giant Stairway via Federal and Dardanelles Pass – 90 minutes
- 3) Giant Stairway to Echo Point – 30 minutes
- 4) Echo Point to Leura via Prince Henry Cliff Walk – 120 minutes
RECOMMENDATION: this is one hike that I really recommend downloading the app Maps.me to your phone. It is basically an offline map that will show you the different trails and key points along the way. It is also great because it highlights some viewpoints to head off to that are not too obvious when on the trail itself.
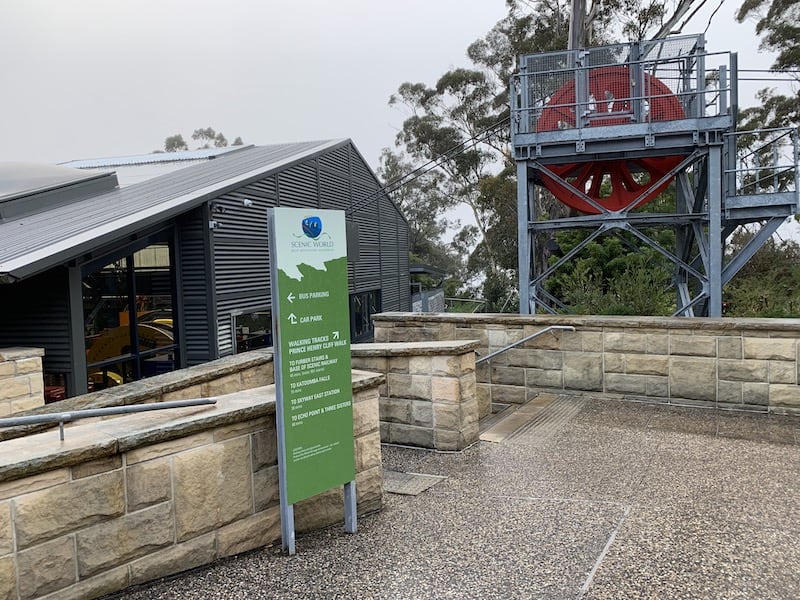
A) Scenic World to Furber Steps
Once you made it to Scenic World (either by the 30 minute walk from Katoomba Station or taking the 686 bus), start following the signs for the Prince Henry Cliff Walk.
You will only be on the Price Henry Cliff Walk for a short while before you are pointed down in the direction of the Furber Steps (you will join back onto the Cliff Walk later on in the day near Echo Point).

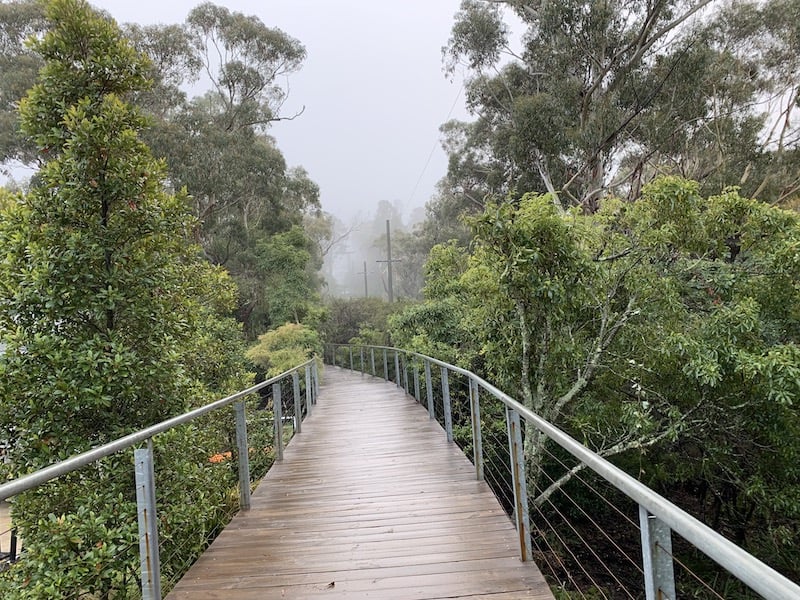

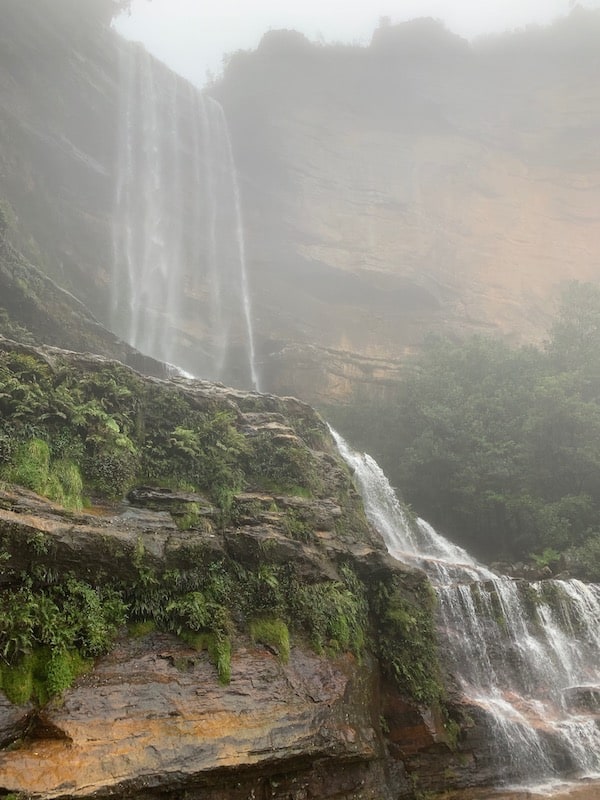
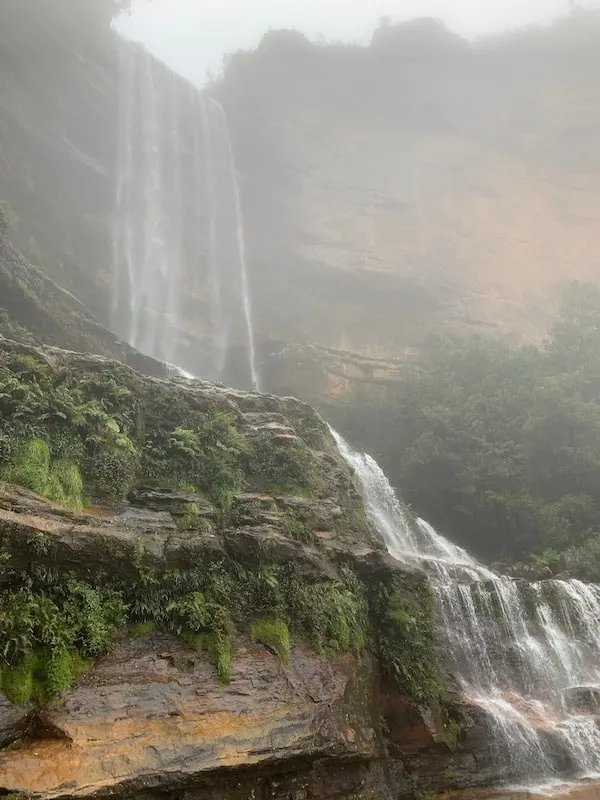
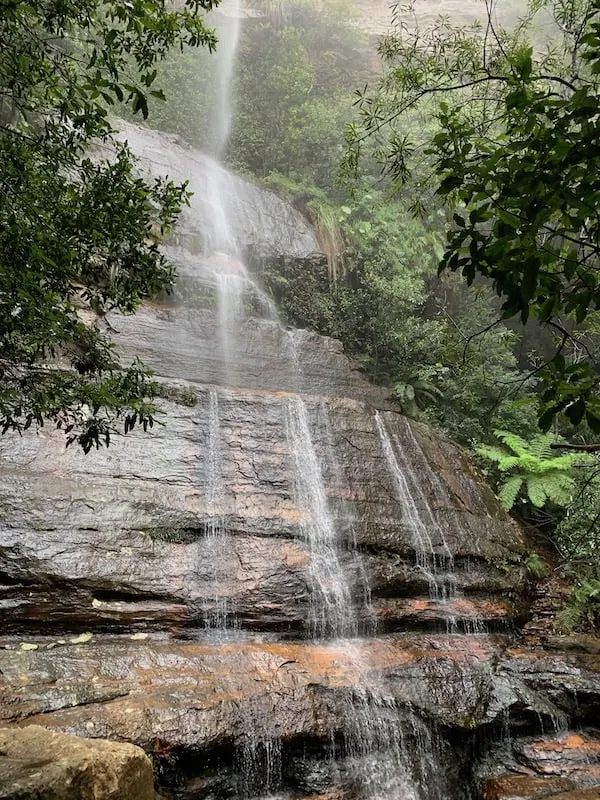
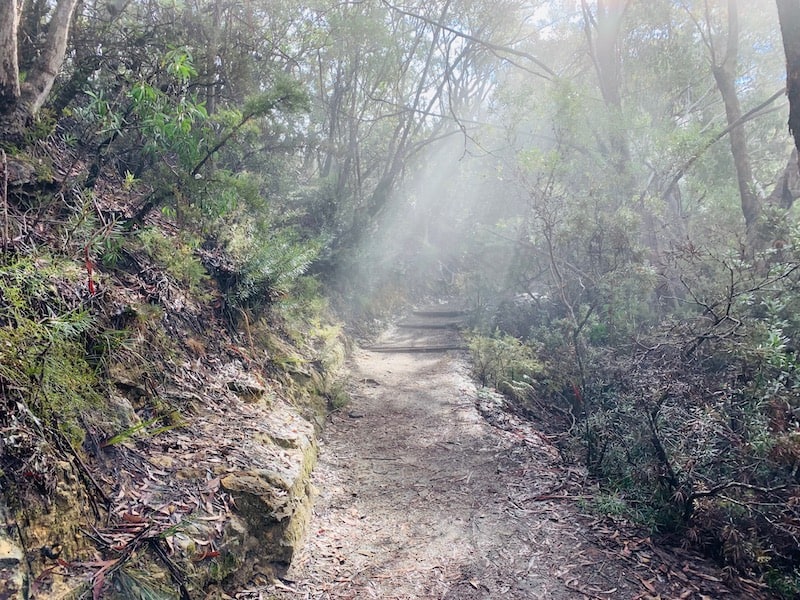
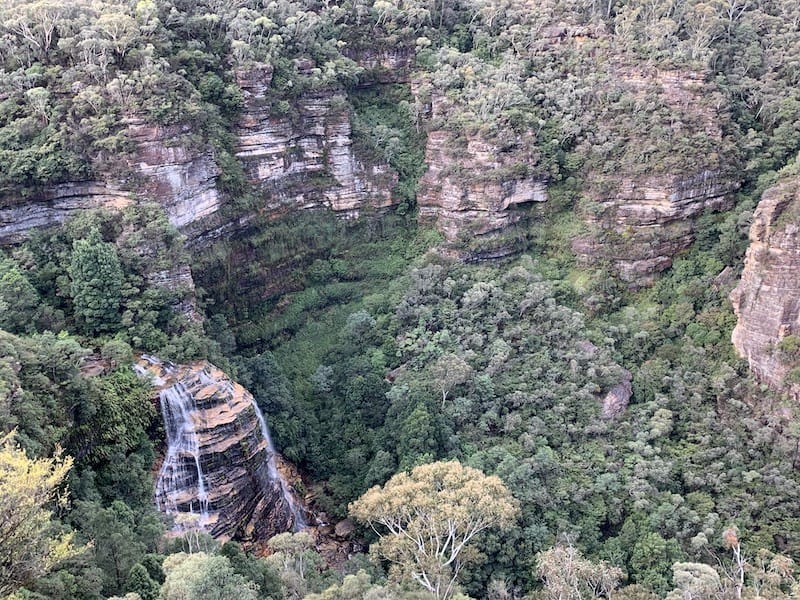
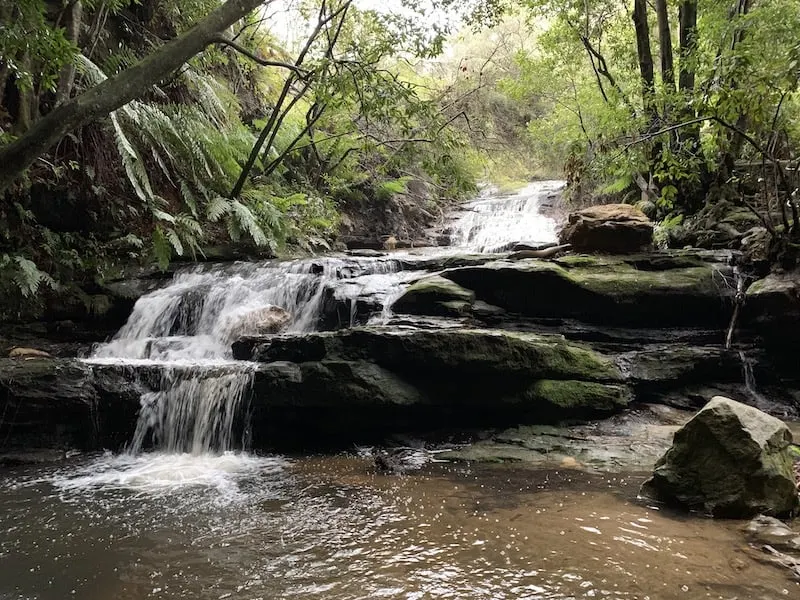
Along the way to the Furber Steps, you will be walking through a dense forest with plenty of trees, wildlife, and some waterfalls to enjoy.
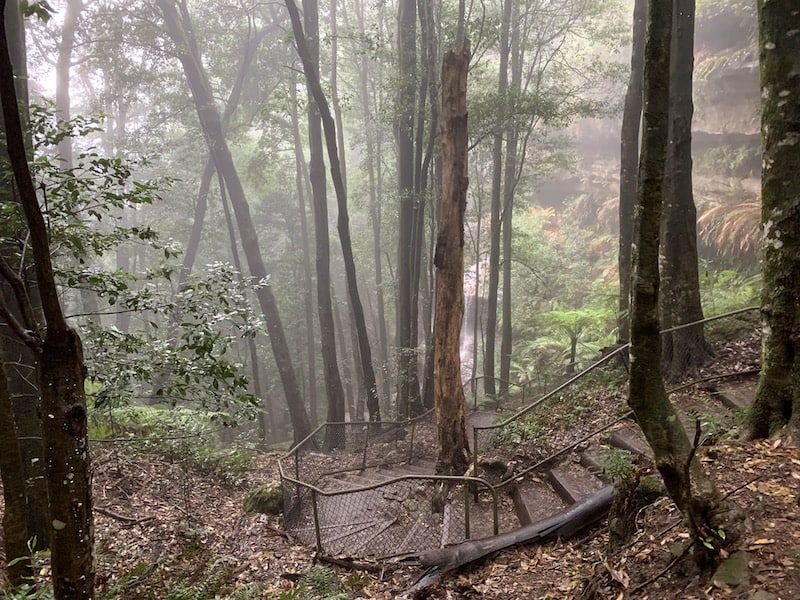
You will begin to head down the Furber Steps and soon after you will see a path to the Underfalls Walk.
This is a 20 minute round trip detour that takes you right up and close to Katoomba Falls from down below. I definitely recommend taking the time to head there yourself.
Either way you choose, you will then continue the climb down the Furber Steps, where you will come across a few more viewpoints as well as the very quick detour to Vera’s Grotto.


After passing by the views and the grotto, it is just a little bit further until you reach the bottom of the steps at the intersection with the Federal Pass.
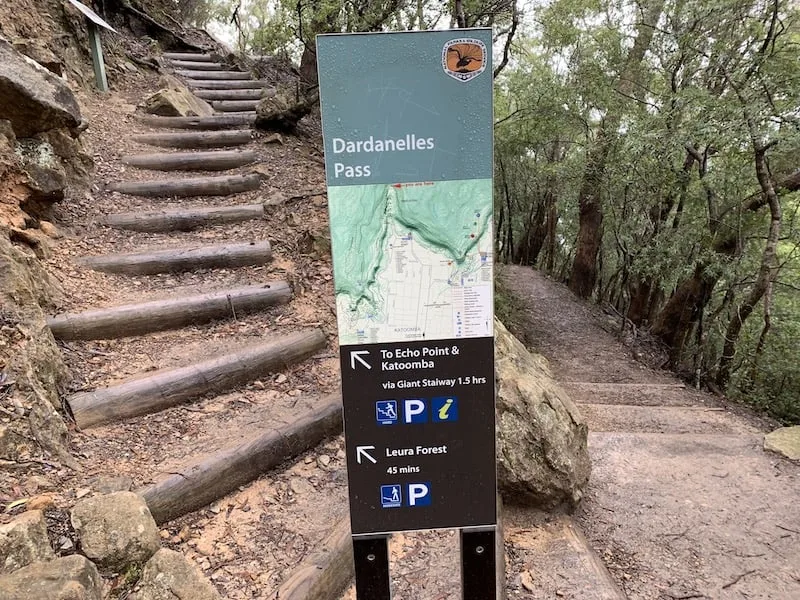
B) Furber Steps to Giant Stairway
Now that you are closer to the bottom of the national park valley, things will start to flatten out a bit more. At the intersection after the Furber Steps, you will turn left following the signs to the Giant Stairway.
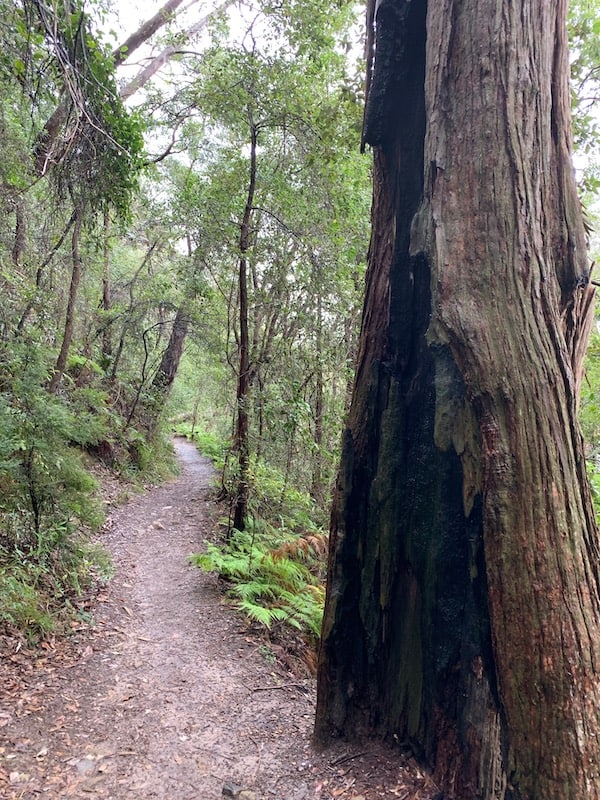
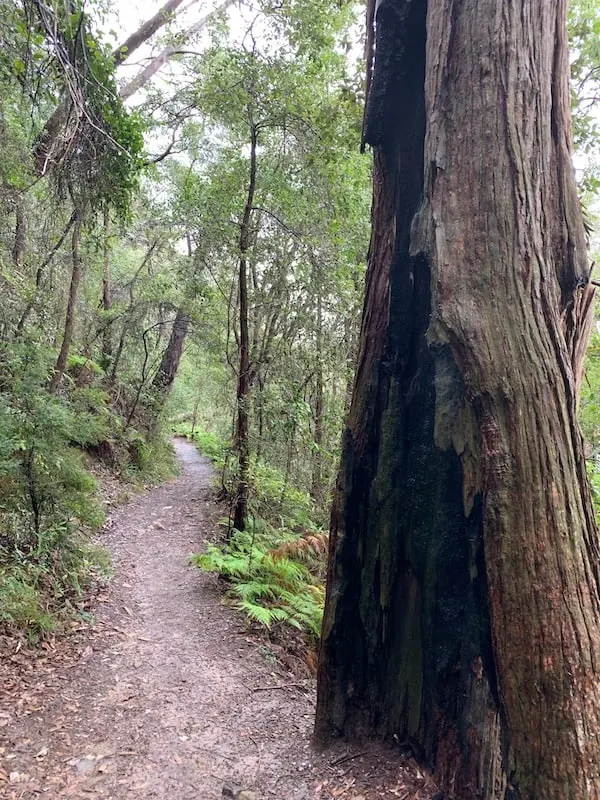
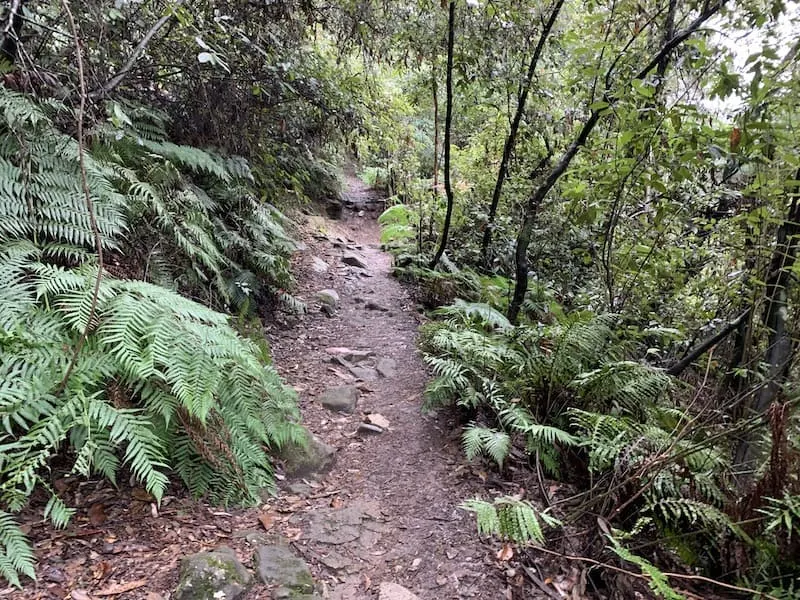
The next portion of this Blue Mountains hike will take you through the forest as you enjoy being immersed in the nature of Australia. There may be a few viewpoints along the way to take in the vast forest below. I
t is a bit of a longer stretch of the hike (maybe around 1 hour or so) but it is still a very scenic one.
Soon enough though you will come to another intersection. Here you will be directed up to Echo Point via the Giant Stairway.
This is where you will turn off of the Federal Pass and onto the Dardanelles Pass. It is pretty well signposted so you should not have much trouble here with the navigation.


You will now slowly make the climb up back towards the rim of the Blue Mountains National Park.
It should take another 30 minutes or so to get to the base of the Giant Stairway, and along the way you will continue the walk through the forest with some nice views out in the distance.
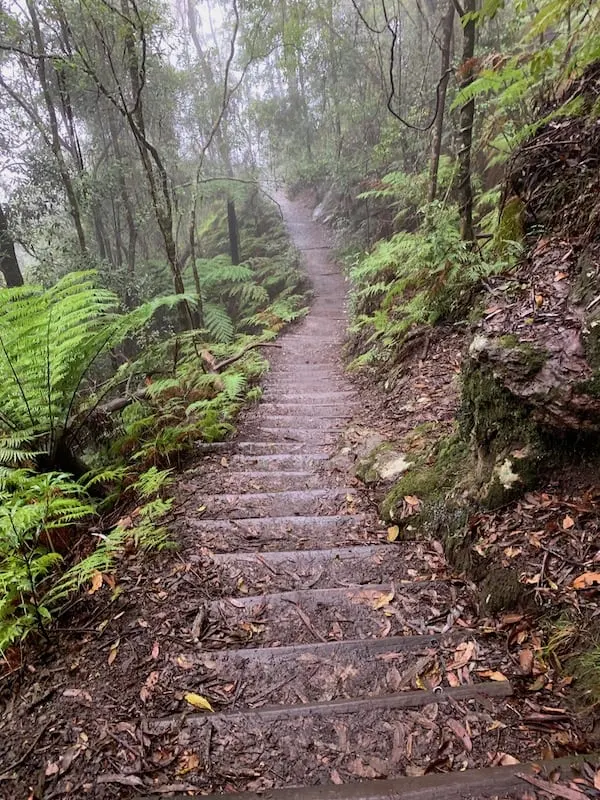
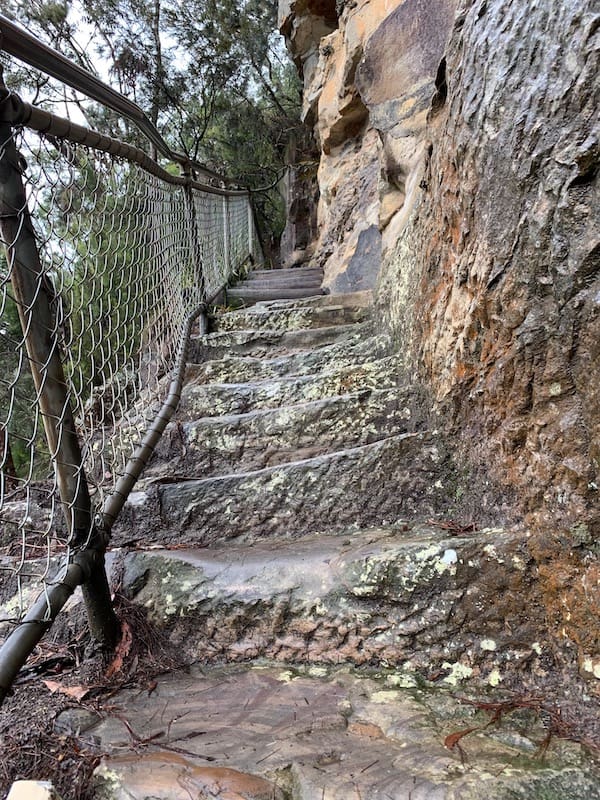
C) The Giant Stairway
This is definitely the most exhausting part of this Blue Mountains hike. A 45 minute climb will take you up 900 stairs that are cut alongside the cliff towards Echo Point.
You will see some warning signs here to take your time and be cautious through this portion.
Along the way there will be some resting points to enjoy the surrounding views of the Blue Mountains so there is really no reason to rush through the ascent. Just take it nice and slow, and you should have no trouble getting on up.

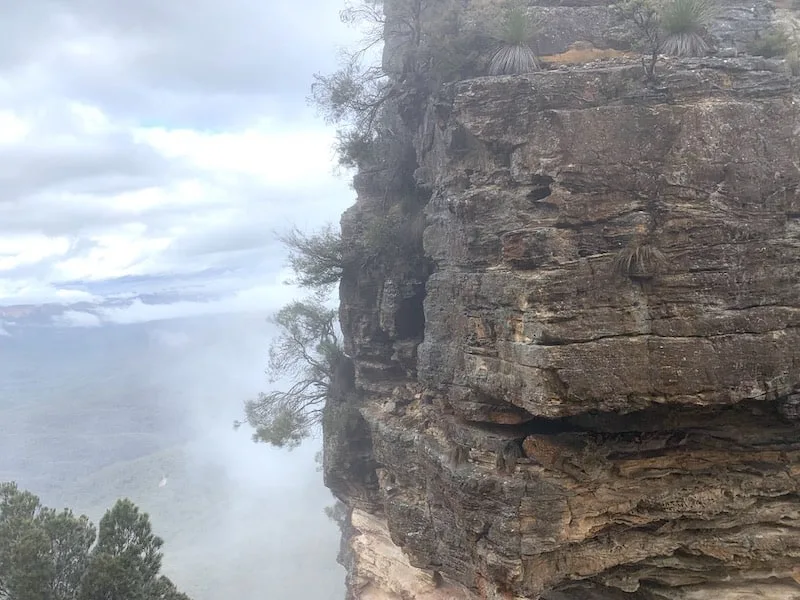
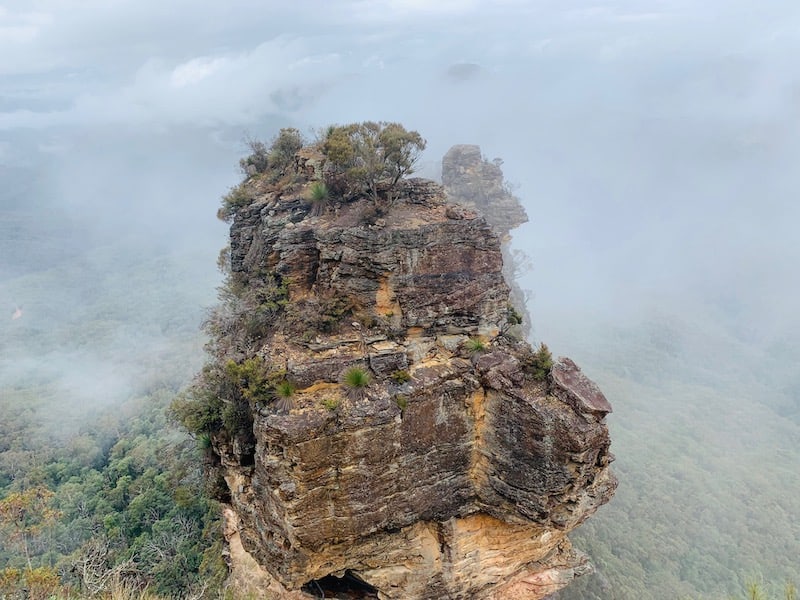
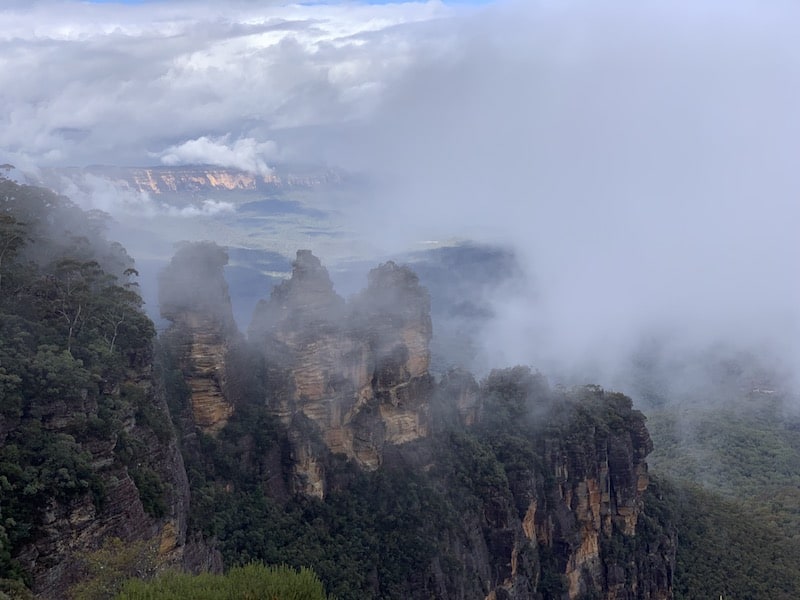
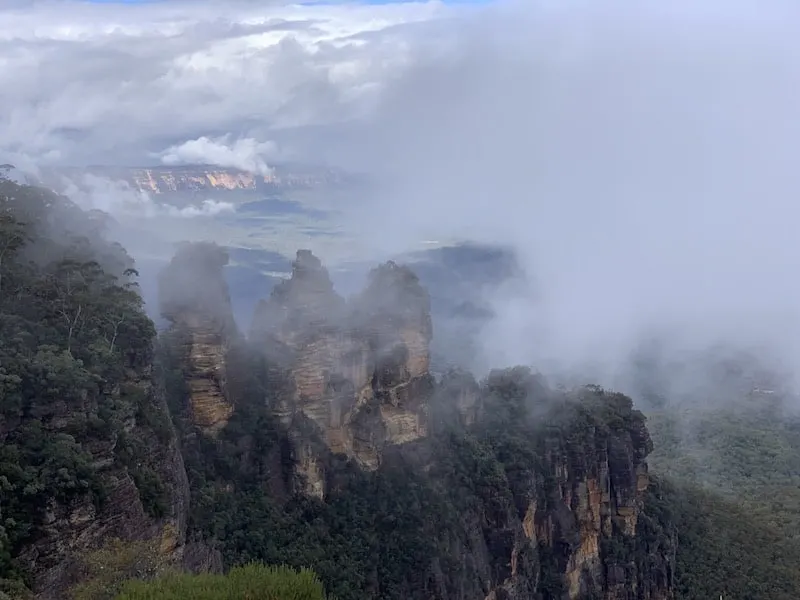
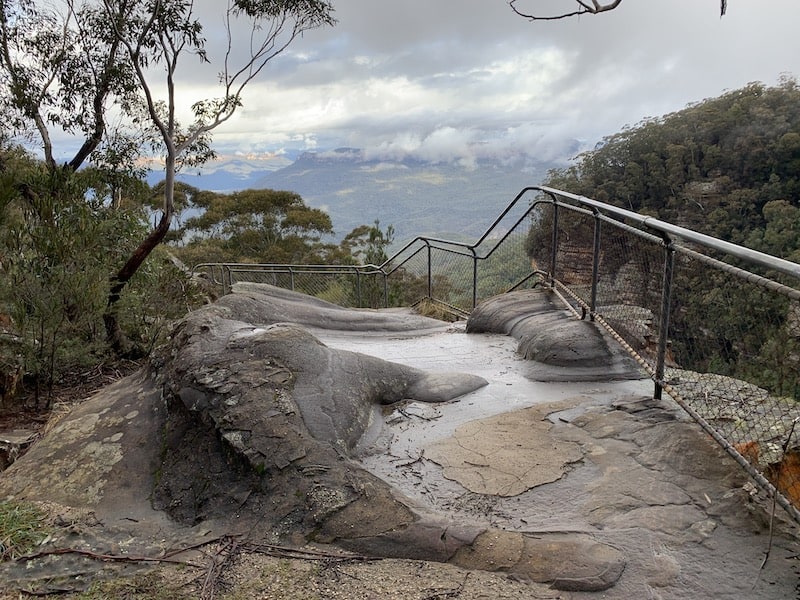
What is great about the Giant Stairway, is that it will take you right up close and personal to the Three Sisters – the most famous of rock formations in the Blue Mountains.
The Honeymoon Bridge Lookout is the main platform here to take in the views of the Three Sisters with the national park out in the background.

After enjoying some time up close, you will then continue the climb up as you pass by a couple more lookout points along the way up towards Echo Point.

D) Echo Point
My advice here would be to head all the way up to Echo Point to get in the iconic view of all Three Sisters. Along the way up, you will see a sign pointing you to the Prince Henry Cliff Walk.
However, before heading off on that part of the trail, make your way to Echo Point at the Queen Elizabeth Lookout to enjoy the view.
After you take in the view from above, then you can backtrack back down the way you came and follow the signs to the Prince Henry Cliff Walk.
Near Echo Point you will also find restrooms and some food options if you are looking to take a midday break from these Blue Mountains hikes.
E) Prince Henry Cliff Walk
Once all done in the Echo Point area, it is time to rejoin the Prince Henry Cliff Walk. If you remember from the very beginning of the trail, I actually started on the Cliff Walk before heading down the Furber Steps.
Now it is time to meet back up with the path as you take it all the way to the town of Leura. The ending point of this hike will be at the Gordon Bay Reserve, another 2-3 hours from Echo Point.

This portion of the walk is one of the most scenic as you walk from viewpoint to viewpoint enjoying different perspectives of the Blue Mountains from above.
You will continuously see signs pointing you in the direction of different lookouts as you continue your way through the forest.
Note: if you are not someone who is comfortable with the downs and ups of the Furber Steps and Giant Stairway, taking the Prince Henry Cliff Walk all the way through from the beginning at Scenic World could be a great option for you.
Blue Mountains Lookouts #1
- → Lady Carrington Lookout
- → Minnamurra Lookout
- → Honeymoon Point
- → Burrabarroo Lookout
- → Flat Top Lookout


After taking in some views, the path will end up on Cliff Drive near the Solitary Restaurant. This is not the end of the trail!
Just continue following the signs back into the national park as you make your way to even more incredible views of the Blue Mountains.
Blue Mountains Lookouts #2
- → Fossil Rock
- → Copelands Lookout
- → Bridal Veil Lookout

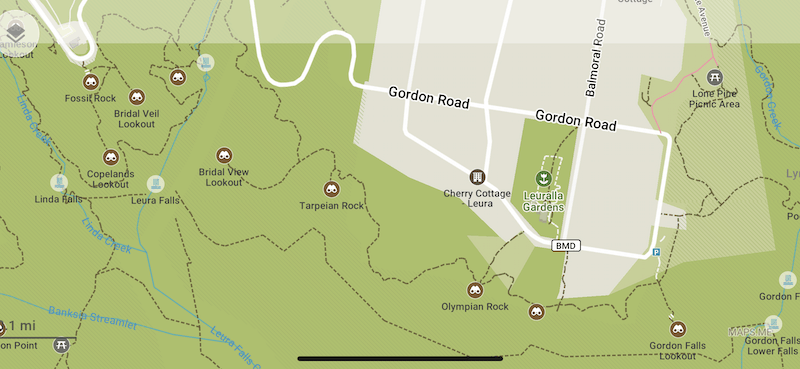
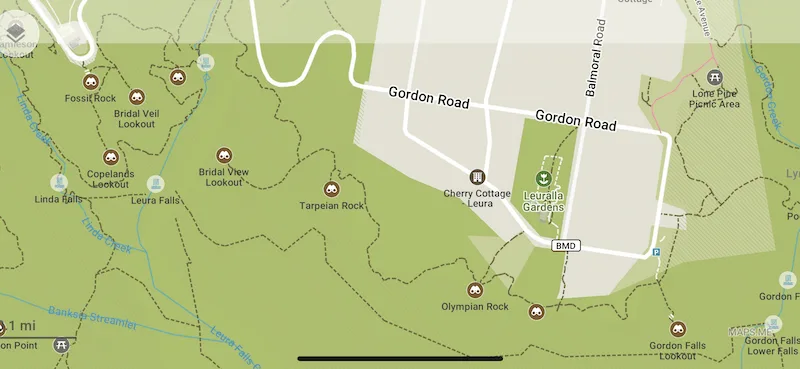
At some point you will come to the below intersection. During the time I was there, a very small portion of the Prince Henry Cliff Walk was closed.
There is a route around to Leura Cascades that meets back up with the Cliff Walk soon after. My advice would be to take the path to Leura Cascades either way as it was a great little spot to enjoy.

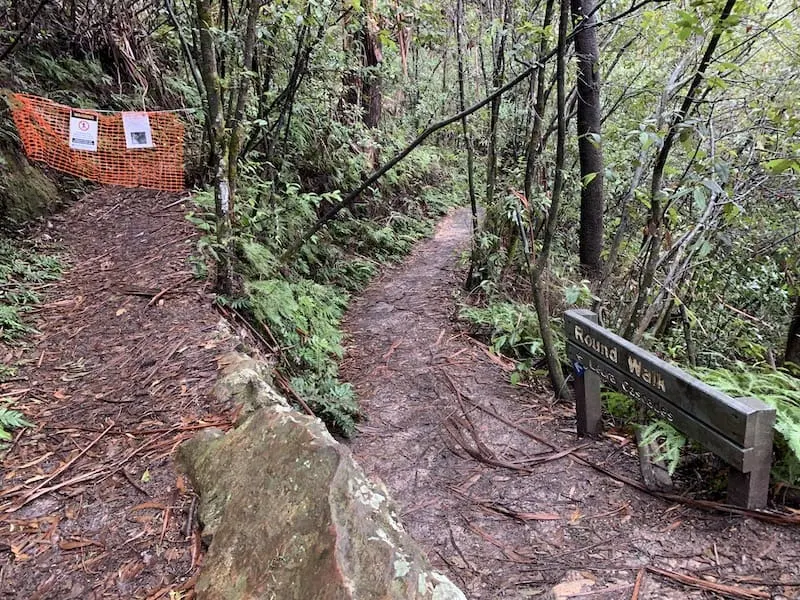

After the cascades, continue along as you meet back up with the Prince Henry Cliff Walk and stop along at any additional viewpoints you would like during the trail.
Below I will list out a few more of the main ones that you will come across:
Blue Mountains Lookouts #3
- → Tarpeian Rock
- → Olympian Rock
- → Elysian Rock
- → Gordon Falls Lookout


Most of these lookouts are signposted and you should also be able to see them on Maps.me. Once you have finished up your time at the Gordon Falls Lookout, you can make the quick backtrack to the parking lot area of Leura.
From here it is about a 20-25 minute walk to the Leura train station, where you can catch the train back to Sydney.
2) Sydney to Blue Mountains
Now that you know how to combo all these Blue Mountains hikes into one incredible trail, you will need to figure out how to get there from Sydney. There are two main options here if you want to experience the area on your own.
A) Train
The easiest option is to take the 2 hour train from Central Station in Sydney to the Katoomba Station in the Blue Mountains.
The train from Sydney runs every hour and costs only $6.20 for a one way off peak ticket (costs vary a bit by time and day).
Once you arrive in Katoomba, you can either walk the 30 minutes to the beginning of the hike or you can hop on the 686 bus that takes you from Katoomba Station to Scenic World.
At the end of the hike, instead of taking the train back from Katoomba, you can make your way to Leura Station instead (25 minute walk) since it is closer to the trail’s ending point.
B) Rental Car
If you happen to have a rental car in Sydney and do not want to rely on train schedules, then driving yourself is a good choice.
The car ride will take 1.5-2 hours depending on traffic and you will be able to park right at Scenic World to begin your day.
The only downside of this is that you will need to figure out a way to get back to your car at the end of the hike (as this is a single way hike to Leura). You can try for the bus or Uber, or you can walk the hour back on the side streets.
→ Feel free to check out Rentalcars.com that will have various options to browse through. You can filter by car type, price, and more to find the perfect car for your trip.
3) Blue Mountains Day Trip
If you do not feel comfortable heading out to the Blue Mountains all on your own, your next best bet is to take part of a group tour. There are plenty of tour options to choose from that leave from Sydney on a daily basis.
The downside here is that you probably wont be able to take part of too much hiking (and you certainly wont be able to hike this trail).
Instead, a normal itinerary may take you to Scenic World, where you will take part of one of the attractions, then head on to the Three Sisters View Point at Echo Point, and then finish up at some viewpoints along the way.
Tour Option: If this is something you are interested in, then head on over to check out this Blue Mountain Day Trip Tour
4) Blue Mountains Weather
The one thing I always say you just cannot control on vacation is the weather.
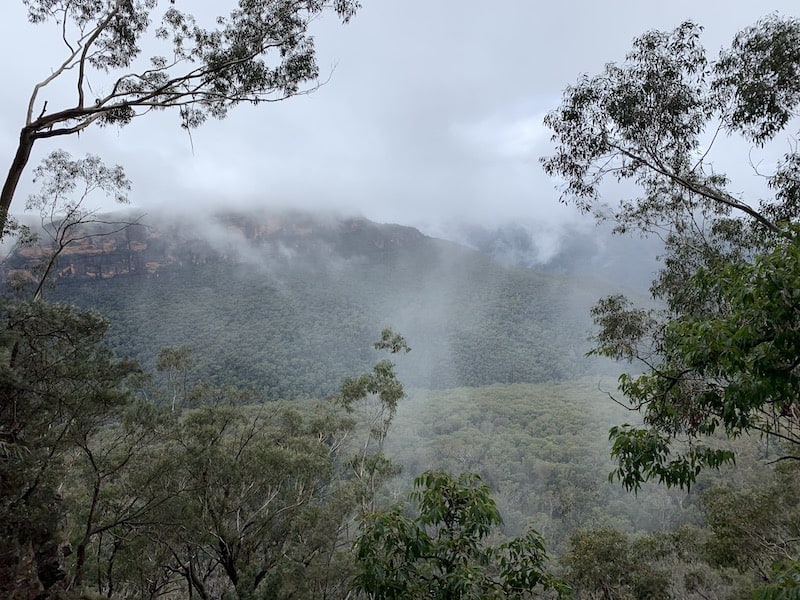
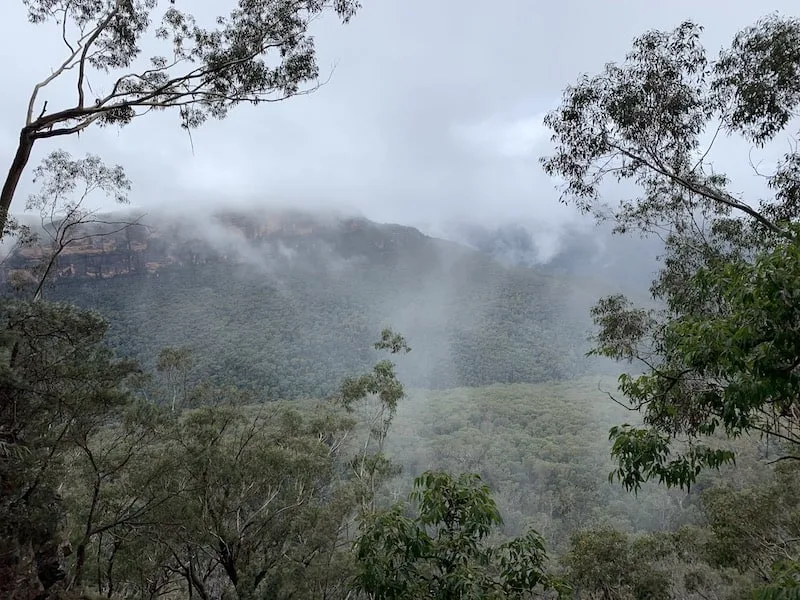
When I visited Sydney, every day around the Blue Mountains area had the same forecast – partly cloudy. Now while that is what the forecast said, in reality the weather was very cloudy with some rain as well.
You can see by my pictures throughout the guide, that it was not the clearest day to take part of some Blue Mountains hikes. However, the hiking was still 100% worth it and I was able to take in plenty of views along the way.
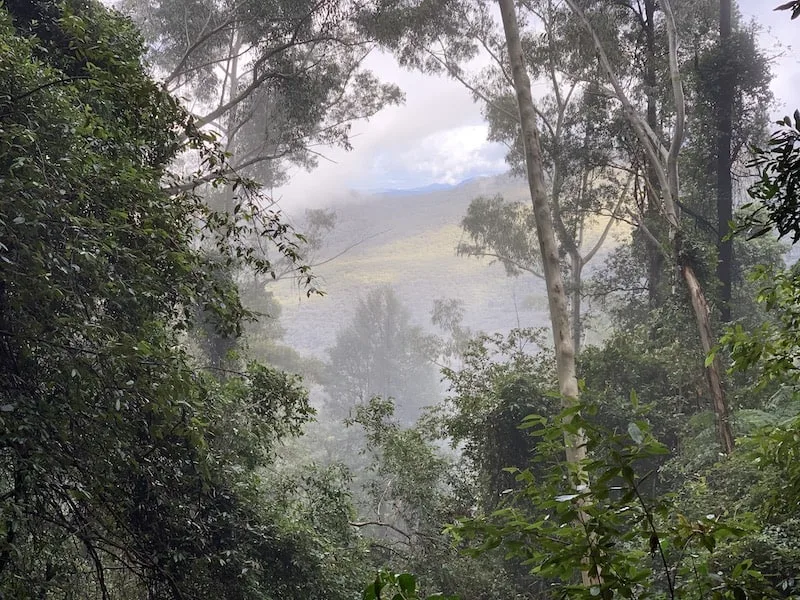
One thing to note here – on cloudy days, the clouds might hover around the rim of the national park. So for example the picture I took below was taken right in front of Scenic World at the start of the hike.
Once I started hiking a bit further down and away from the rim and into the park, the views got MUCH clearer. So, do not be too down if the day doesn’t start out too well. You never really know where those low laying clouds will end up.


5) Scenic World
Many people visit the Blue Mountains just to take part of some of the activities of Scenic World.
While I started my hike there I did not join in on any of the “rides” that they offer. If you are interested though, you can take part of some of the options before (or part of) your hike around the area.
- A) Scenic Cableway – a 510M cable car descent down into the national park
- B) Scenic Railway – a steep 310M descent into the national park
- C) Scenic Skyway – a 384M cable car across the national park from Scenic World to the Skyway East Station
At the bottom of the valley, nearby where the cableway and railway head down to, you can walk the 2.4KM Scenic Walkway boardwalk.
Below is a visual to get a better understanding of where the three different transportation options take you.


6) Blue Mountains Lookouts
If you are headed to the Blue Mountains, odds are you will want to take in some views of the vast national park throughout your time there.
As you saw from the route that I listed out above, it passes by a ton of lookouts along the way.
I stopped at nearly every one, sometimes just to take a quick picture and other times to sit back and enjoy the view.
You can pick and choose which ones to go to depending on how you are feeling and how far out of the way the lookout may be.
Again, this is also where maps.me comes into play to really help out with your hike. You will be able to see the different lookout points on the map to give you a better sense on how far a viewpoint is from the main trail and help direct you in the right direction.
At the end of the day though, there will be no shortage of views to pick from and I am sure you will enjoy any and all of them that you head on off to.
7) Where to Stay in Sydney
There are a variety of different options to choose from when deciding where to stay in Sydney. One of the most popular options is to just stay within the Sydney Harbour / CBD / Downtown Area.
There you will find plenty of restaurants and bars, easy public transportation access and of course be close by to some of Sydney’s best attractions.
Below are some accommodation choices at different price points to better help you make your pick.
I also would recommend staying in the Blue Mountains area too if you want to experience more than just a day trip.
There are several places to stay around Katoomba that would be in walking distance to the trails.

» Also if staying in Sydney for a few days be sure to take a look at the 3 day Sydney itinerary I put together that includes a do it yourself walking tour along with some of the best coastal walks that the city offers – Coogee to Bondi, Coogee to Maroubra, and Spit to Manly!
I hope this guide has given you a better sense of how to take part of one of the best Blue Mountains hikes that the area has to offer.
Of course, there is plenty more to see and do around the Blue Mountains but for those looking for a single day around the area, you can’t go wrong with the above!
Feel free to check out some of the other Australia itineraries and guides up on the site. Also don’t hesitate to write in any questions or comments below! Have fun out there and safe travels!


Linda
Monday 30th of December 2019
Thanks for this great post. Im looking forward to my trip. Can I ask how long all this took you? And does this trail require you to be a very confident hiker?
Charles
Monday 30th of December 2019
I took my time on this hike to really enjoy all the views, waterfalls, Three Sisters, etc so it was around 6+ hours I believe but it could take longer or shorter depending on how many of the views and all you go to.
I would not say it is too technical or anything. Everything is pretty well sign posted besides for just a couple of the viewpoints (where maps.me comes in handy). The only real climb here would be the Giant Stairway but beyond that, nothing was too bad,
Hope that helps!