So, you want to start a travel blog? Have you done some research already and continuously read the same thing over and over – choose a name, set up hosting, pick a theme, and you are ready to go right?
Well…I wouldn’t say it is that easy. Anyone telling you that is just being unrealistic. While yes, you do need to do each and every one of those things to set up a blog, there is a lot that goes into making certain decisions.
This guide on how to start a travel blog is the journey I took to get here and what I did right and wrong along the way.
* Affiliate Disclosure: This post may contain affiliate links, which means I may receive a commission if you make a purchase through the links provided, at no additional cost to you. Thanks for supporting the work I put into TripTins!
1) The Travel Blog Decision
The first thing you need to ask yourself is why you are starting a travel blog and what your ultimate goal is. If you simply want to do it for fun and don’t care about a supplemental (or full time) income, then this guide is probably not for you.
But if your goal from the start is to build a successful travel blog, help thousands of people travel, and make some money off of it, then read on.
There is not an easy step by step formula to follow that will magically get your travel blog organic traffic and bring in cash flow. Realistically it will take at least a year if not years to get to a point where you are making some real money off of your blog.
There is so much behind the scenes work to create a successful travel blog – from setting the groundwork of your site to content based and technical search engine optimization (SEO), to boosting your domain authority. There is a lot that has to be done in between to get you there.
You also have to be at peace with the possibility that you will never make a real income off of your travel blog. For the longest time I was doing it just because I truly enjoyed writing up itineraries and not because of money.
Eventually, after a couple years of hard work I was able to bring it a healthy cash flow each month. But in reality for most travel bloggers, that is not always the case.
I will say though, for those that are dedicated to their blog from the start and work consistently on it, good things usually will come.
Finally, I also think it is important to note that once you start a travel blog, travel itself may never feel the same. Instead of truly enjoying each and every moment out there in the world, you may be worrying about what to write about and getting the perfect pictures.
I catch myself doing this and it inevitably happens from time to time. You will need to find a balance between being present in the moment and just being there for writing content.
If I haven’t scared you off just yet, and you still have your mind set on starting up a travel blog, then continue reading along on how to get yourself going in the right direction.
So, to recap, step #1 is not “choosing a name” for your blog. Step #1 is making the decision to actually want to start a travel blog and whether you want to do it for fun or with the goal to make an income from it.
You will also want to think about the work and dedication behind creating a blog, the patience and frustration that comes with it, and the idea that your future travels may not be the same as your previous trips.
2) Choosing a Name
Once you have an answer from step 1, then it is time to actually choose a name for your travel blog. A lot of people have opinions here on what is the right and wrong way to go about choosing the name.
While I do not think there is a “right” answer here, I do think that a name should be in line with the content you are planning to write about.
So, if you want to focus on an outdoor type blog, then work that into the name. If you want to write about food travel, then have a name that is relevant to that. For me, I really wanted to focus on the itinerary aspect of traveling. That is how I came up with the name TripTins – aka Trip iTINeraries.
I would not recommend choosing a name that may be irrelevant in a few years’ time. So, if you are a solo traveler and think a solo travel blog may be the way to go, then go for it.
But if you believe that solo travel is just your mindset today, and in the future, you plan on traveling more with friends and significant others, then maybe a solo travel blog won’t fit as well.
I can say the same thing for myself – itineraries are what I wanted to focus on when I started, but in reality, it has gotten much more diverse than just itineraries. Now I don’t think that is necessarily a bad choice because I still put up plenty of itineraries, but you get where I am going with this.
Common Tips for Choosing a Travel Blog Name
» Name should be relevant to the topics you plan on writing about
» Don’t be too niche and choose a name that may be irrelevant in a few years
» Avoid numbers, special characters, and misspellings
» Check main social media channels to see if the name is available (Instagram, Facebook, Pinterest, Twitter, Youtube)
» Purchase a “.com” domain vs. other offerings (“.co”,”.net”, etc)
Now, once you have a name in mind, it is time to see if that domain name is even available – i.e. does someone else already have that website name. You will want to head to a domain site like GoDaddy or Google Domains and search for your name.
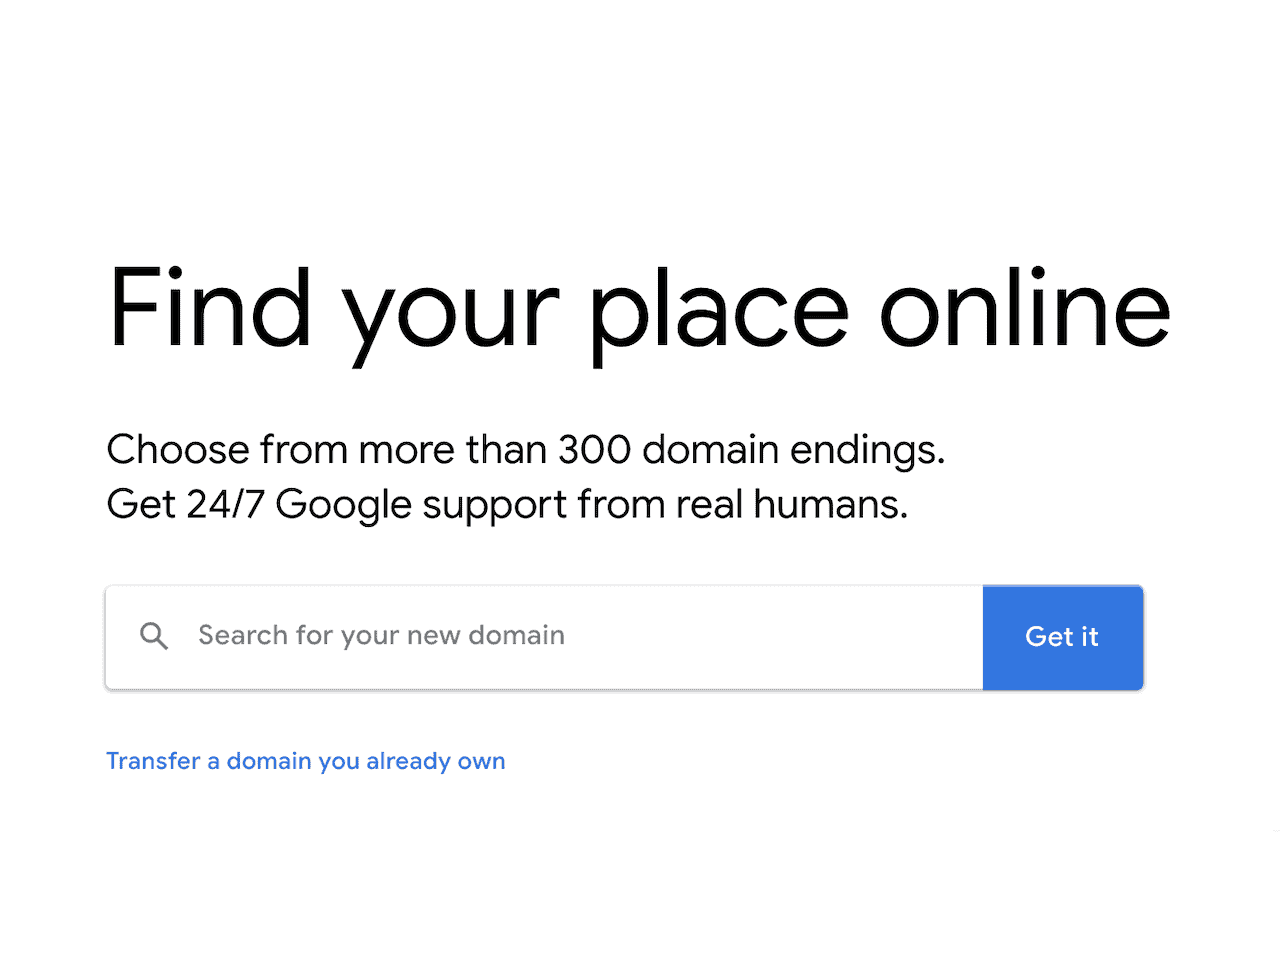
The most frustrating thing that I came across was that there were so many domain name ideas I had that were taken.
However, these domains were not even real websites. They were simply domains bought by someone years ago and now they just wait until people approach them to buy the domain name off of them.
So, while an unclaimed domain can cost just $12 per year, some domains that are being sold by third parties can be thousands of thousands of dollars.
Especially for a travel blog, I do not think you need to purchase a domain like this. I just don’t see it as a good investment since there are so many choices to choose from. Maybe if it was just a couple hundred dollars and you really liked the name, then sure go for it. But when we start to talk about domains in the $1,000+ range, I don’t think it is worth it.
3) Hosting Account
Once you have landed on a domain name, the next thing that you need to set up is a hosting account. If you are not familiar with what a hosting account is, essentially it is the service that stores the content of your website and delivers it to your website visitors.
All websites are hosted on servers, but there is not just one hosting platform that the entire internet runs on. That is where choosing a hosting provider comes into play.
You will want to choose one that is within your budget but also one that performs exceptionally well. There can be a lot of reasons why certain hosts charge more than others – whether it is storage space, customer support, number of visitors, etc.
I am positive that nearly every other post you read about setting up a travel blog has named the same web hosts over and over. While these may be just fine for beginners who are just doing it for fun,
I would not recommend choosing a hosting platform just because it is cheap and many other blogs may recommend them.
One increasingly important aspect of your site that you need to think about from day 1 is your website’s speed and performance.
Google has made it clear that site speed is part of their algorithm when ranking your website among the thousands out there. So, why would you want to be a step behind in the SEO game by choosing a host that has poorer quality service?
If you are looking to take your travel blog seriously, you should have it set it up in the optimal way in order for it to be successful. Going with low cost and low quality providers is not the way to do it.
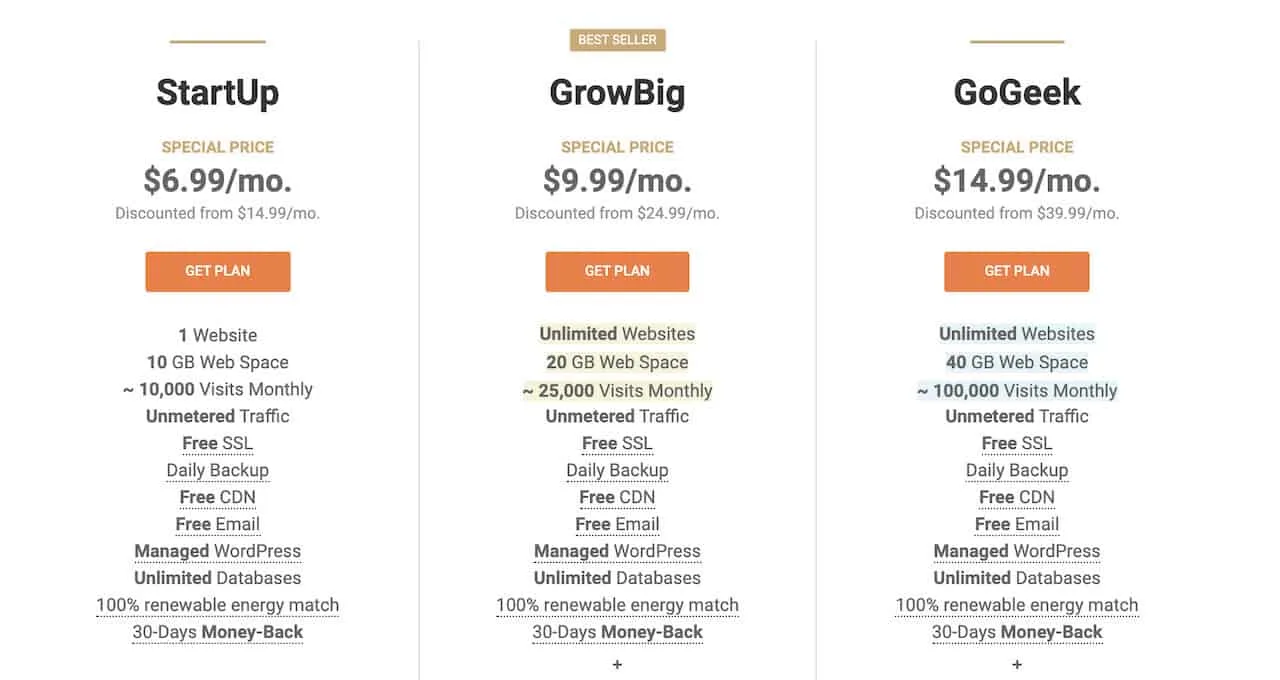
Instead I will recommend three different web hosts that have exceptional service and support:
» SiteGround (starting at $7 per month)
» BigScoots (starting at $35 per month)
» Agathon (starting at $80 per month)
I believe SiteGround is the perfect platform to choose when just starting off as a travel blogger. BigScoots and Agathon can be the next step once you have built up a substantial audience and need that web hosting power to keep you site going.
If you were wondering why all those other blogs consistently recommend lower quality web hosts, it can be for a variety of reasons – they may not know any better, they care more about low costs than better performance, or they happen to get a pretty sizable affiliate check for every time someone clicks their link and purchases those web hosting plans.
End of the day, this guide is meant to talk about how to set up the groundwork for your blog from day 1. If you are serious about your travel blog and the content that you will write, then you should be serious about the backend of your site and how it performs.
4) WordPress and Choosing a Theme
This is probably the most difficult section for me to write about due to the trajectory and mistakes that I took along the way.
When I first started TripTins, I was doing it purely for fun to assist my family and friends use my itineraries to help with their trips.
I actually had zero interest in how to start a blog, and because of that I made the eventual mistake of building it on Wix – something I would not recommend for someone who wants to build a successful travel blog. Website builders like Wix and Squarespace are not meant for blogs.
Once I decided that I wanted to take the blog more seriously (as I was seeing some organic traffic coming in), I knew it was time to move over the WordPress – honestly the only real option to choose from.
However, as I was making the transition I made the second mistake of caring more about design than performance. I spent countless hours trying to get all these one off additions to the site that I thought were necessary at the time.
At the end of the day though, Google does not care about the most aesthetically pleasing site with all these little additions here or there.
Google cares about the performance of your site and the content you actually write about. If you focus on your content more than site design, you will be putting yourself in the best position to succeed.
Most people want their sites to be beautifully designed with a lot of bells and whistles all throughout. In reality though, all these additions diminish overall performance of the site – metrics such as site speed, largest painful content, first input delay, and cumulative layout shift can be negatively affected.
Essentially these are all metrics that are considered / will be considered in Google’s SEO algorithm.
If you want to have the best chance at ranking high on Google, it is so important to have the backend of your website built in a way that puts you in the best position to do so. While the content of your site is super important, so is the technical side of your site too.
Similarly, to how your hosting provider affects the performance of your site, the same goes for how the website is built. Again, SEO should be in your mind from day 1. If you set up your blog for success from the start, then you have a much better chance of actually succeeding down the line.

I am going to dive a bit more into what Mediavine is later on, but as an aspiring travel blogger, getting accepted onto Mediavine’s exclusive ad management platform should be your #1 goal. Mediavine will be the way to bring in a steady (and hopefully growing) income stream on a monthly basis.
I am actually not the one here to give you advice on how to actually build your site and pick a theme. That really can be a full course on its own. What I can do though is give you advice on is what in my eyes (and in Mediavine’s eyes) is the best theme out there.
There is a new framework called Trellis, which is actually created by Mediavine. Every aspect of Trellis was built out with the idea of SEO and site performance in mind.
They care way less about all the intricacies and additions to a site and much more about how to put your site in the best position possible in Google’s eyes.
All those confusing terms from before – largest painful content, first input delay, and cumulative layout shift – Trellis has those on top of mind. Site speed, user experience, and technical SEO is what Trellis is all about. It is a mindset that few themes out there put their main focus on.
So, if building out your site and you want all of those technical portions of SEO covered for you, then Trellis is the way to go. As a new travel blogger, it will not be the cheapest of options out there – the current cost is $150 per year. But in the long run, the investment is bound to be worth it.
» If Trellis is not the way you want to go, you can find so many themes out there to choose from – but keep in mind the technical SEO side of things as you are making your choice.

5) Plugins
Once you have a theme in place, you will also want to download certain plugins for additional functionality. This is where I went wrong initially and just tried to do too much at once. Because of this I just had a whole bunch of plugins that I definitely did not need to have.
The more plugins you have, the slower your site will be. Having too many plugins can also be a recipe for disaster as each plugin is developed by third parties. There can be conflicts with the plugins, the theme, and with WordPress itself as things get updated over time.
I have had a few instances where my whole site basically malfunctioned because some plugins just didn’t update when the latest theme/WordPress updates came out.
Some of the essential plugins though that are necessary in my opinion include:
WP Rocket – helps with technical SEO side of things – caching, lazy loading images, file optimization, etc.
ShortPixel – optimizes your image sizes so they don’t slow down your overall site.
Titan Anti Spam – automatically removes spam comments from your comment section. This can be a real issue as your site grows.
Grow or Social Warfare – not 100% necessary but social sharing can ultimately become a big part of your website’s traffic depending on your strategy.
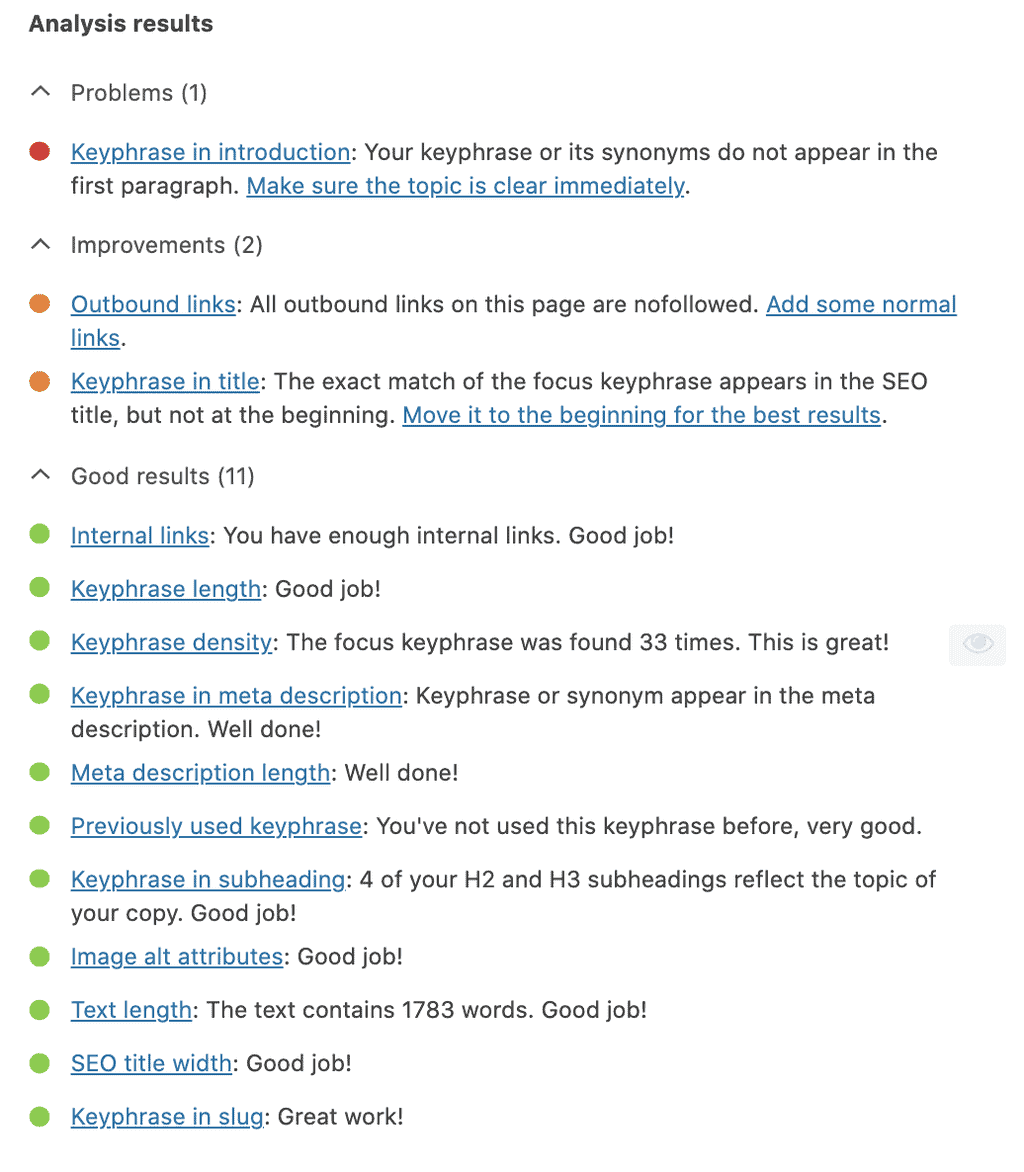
Yoast – this is the #1 plugin out there for helping with content SEO. Essentially it is a checklist making sure that your blog posts contain the relevant information in regards to your keyword of choice for the article (screenshot below). It also has other important frames of reference such as links, content length, etc.
» Note that if you end up on Trellis, some of these may not be needed as they would already be built into the framework
6) Understanding Google’s Technical SEO
I know I have touched upon technical SEO a bit – both with choosing a host and with choosing a theme. You may be asking yourself, how do you even know how a site is performing from a technical SEO side?
Well, for that Google has created a tool called PageSpeed Insights, where you can test various web pages.
Below that you will see some of those Core Web Vitals I spoke about earlier in their Field Data section – First Contentful Paint, First Input Delay, Largest Contentful Paint, and Cumulative Layout Shift.
Just below that is their Lab Data section, which also includes Speed Index, Time to Interactive and Total Blocking Time (FYI – field data is actual user results from people visiting your website. Lab data is Google testing your site in their optimal conditions).
If you scroll further down the page you should see an opportunities and diagnostics section – the better your scores are, the fewer lines you should see down here. However, if you are performing at a low level already, then you may see a lot of potential things to fix to improve scores.
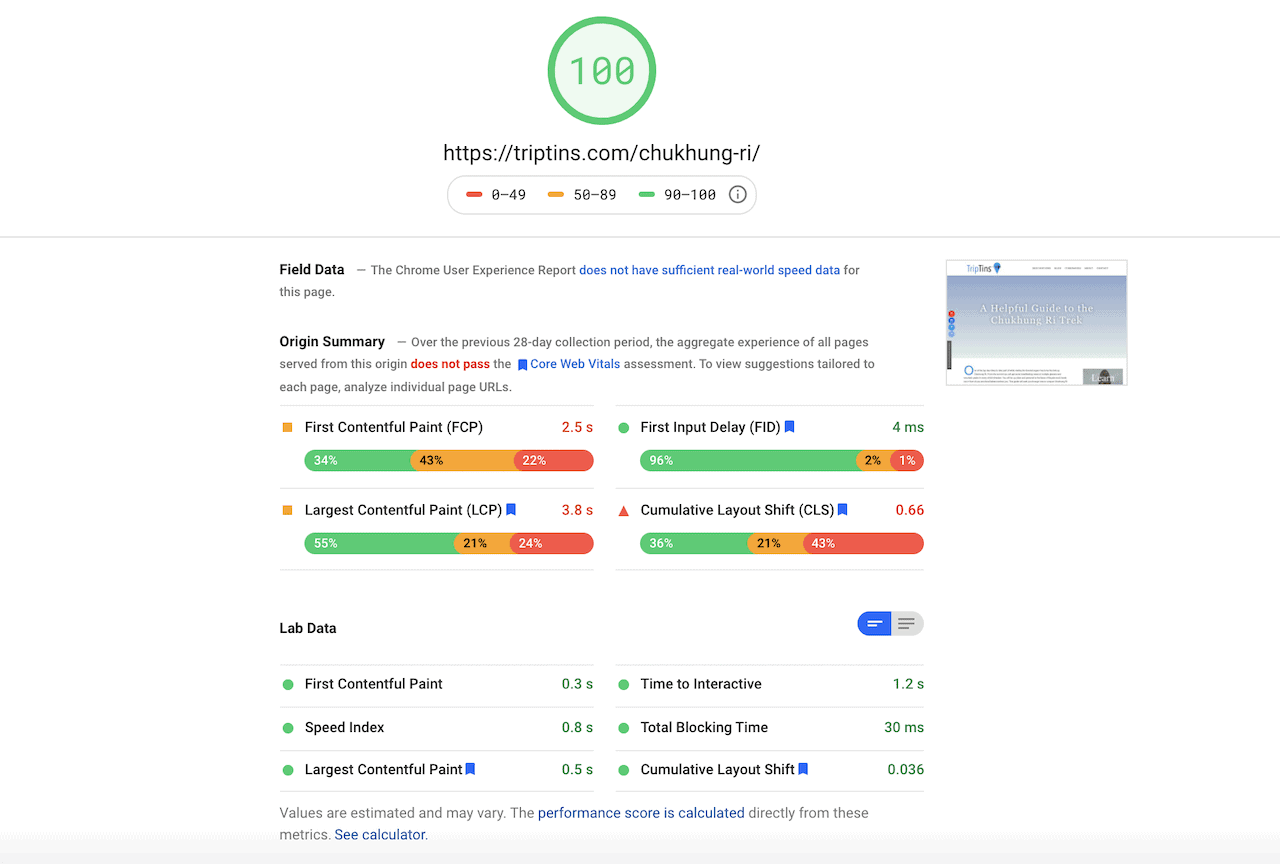
End of the day, having a high performing web host, coupled with the Trellis framework, should put you in an ideal position to cover the technical SEO side of things and focus on your content moving forward. Believe me, you do not want to continuously worry about these scores, so why not set yourself up for success from day 1.
7) Writing Content
The second side of SEO is the actual content that you decide to write about. Your goal here is to have your articles come up on the search engine results page (aka SERP) when someone types in a relevant keyword into the search bar.
My first piece of advice here is to actually study what SEO is, and why it is so important in growing your site. Without understanding SEO, you will have such a harder time actually getting visitors to your site.
My biggest mistake from day 1, was that I was writing random content without any SEO in mind. At the time, getting onto the first page of Google results wasn’t even a goal of mine. If I was committed to the blog from the start, it would have probably taken me much faster to organically grow the site.
It wasn’t until I realized a few people besides my family and friends were visiting the site, that I actually jumped into the world of SEO. From there, I essentially redid ALL of my content to take into account best practices and the rest is history.
A few helpful resources to browse through as you dive deeper into the world of SEO:
» The basics of SEO are actually outlined by Google themselves. That’s right – they are telling you what are considered the best SEO practices and how to write content. You can read Google’s SEO guidelines to get you started.
» After reading through the guidelines, I would also take some time to read up on Mediavine’s blog post series called SEO like a CEO. They essentially talk about many of main SEO topics and dive into more detail on some of the most important aspects out there.
» If you enjoy podcasts, then start listening to Theory of Content – a podcast all about SEO. It is hosted by Joshua Unseth (Alarm Grid) and Amber Bracegirdle (Mediavine), who talk about best practices, answer listener’s emails, and give advice based on their SEO experiences.
» Lastly, if you are looking to continuously stay in the know about the most recent SEO changes and best practices, keep an eye out for new articles on Search Engine Journal.
8) Content SEO Example
For those who have no idea why SEO is important, let me just give you a quick example about one aspect of SEO – keyword research. Essentially when doing keyword research you are trying to figure out exactly what to write about.
The “keyword/s” will show up in your title, meta description, URL, header tags, alt text, and all throughout your article.
So, instead of just writing about the first thing that pops up in your mind, take a step back and understand if that is a topic that you will be able to rank for on Google.
For example, let’s take the topic of Iceland as a starting point here. If you were to just write an article about “Iceland” in general, that could be a topic extremely difficult to rank for.
Say if someone just typed “Iceland” into Google, look at the top search results – Wikipedia, VisitIceland, Britannica, Wikitravel, etc. All of these websites are very well known and have a high Domain Authority (essentially how trustworthy Google sees the site to be).
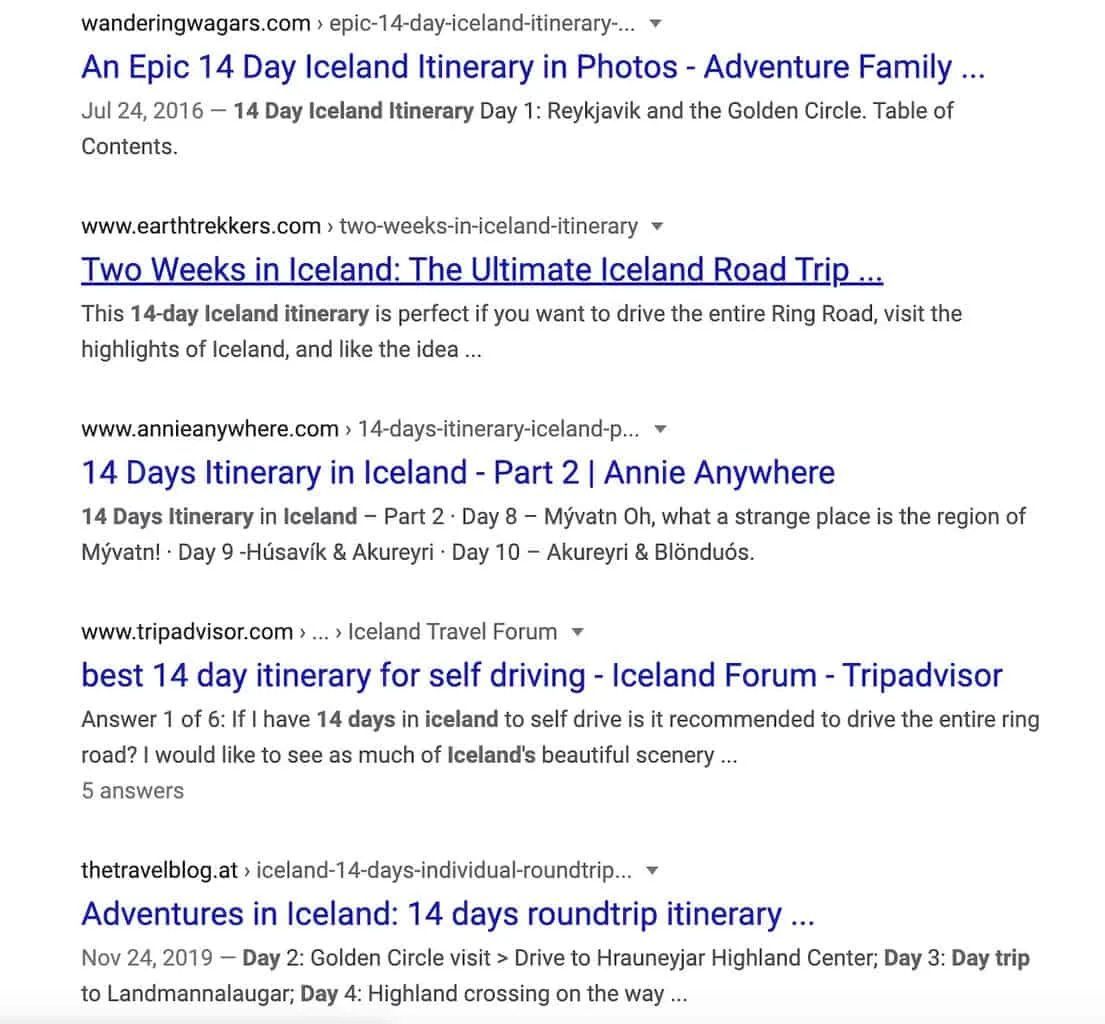
However, instead writing a general article about Iceland, what if you wrote an article focused on a “14 Day Iceland Itinerary”. While this will certainly get less searches than just the word “Iceland”, you will also have a much better opportunity to actually rank for that keyword.
If you take a look at the Google search result page, you can see that nearly all of the results are just of other travel blogs. Some of them surely have high domain authority while others may have very low domain authority. Either way though, writing about a more long tailed keyword (more words = more long tailed), will give you a better shot of showing up in results.
The next question you may have is how do you even come up with these keywords and how do you know how competitive keywords are. For that I use several different resources and tricks to get it done.
The first thing I do is use the Keysearch keyword tool. At just $14 a month, it is by far the most affordable keyword tool out there. For every keyword you type into the tool, it shows you the difficulty of getting onto the first page of search results, along with hundreds of related keyword ideas.
» Learn more in the KeySearch review SEO guide I put up on the site
Once I have a keyword in mind I also do a little bit of digging on Google itself:
» What are the articles currently ranked on the first page and what is their content like? What can I do to improve on the content and show that my article would be superior to the ones showing up.
» What are some related searches to that keyword – this can be found on the bottom of a Google search result page. I will try to touch upon these topics within the article itself.
» What are users asking in Google that is related to the keyword – this can be found in the middle of the search results page under “People Also Ask”. Same idea here – I try to fit the relevant questions within my article
There are certainly some other ways out there to write the best content possible but that is always where I start off when going about my content. While I won’t dive into exactly how to write content, by leveraging all of the above, you should have a great starting point to work off of.
9) Making Money – Mediavine
Like I mentioned, this guide is for those who want to make some type of an income off of their travel site. When it comes to travel blogging, there are usually a few main ways to make money – advertising revenue, affiliate marketing, selling your own products (e-books, courses, etc.), and sponsorship opportunities. Of course, there are other ways as well, but those are some of the main ones.
At least at first, advertising revenue will most likely be your #1 source of income. As you grow your site, affiliate marketing and selling products can very well overtake that depending on where you see your site going.
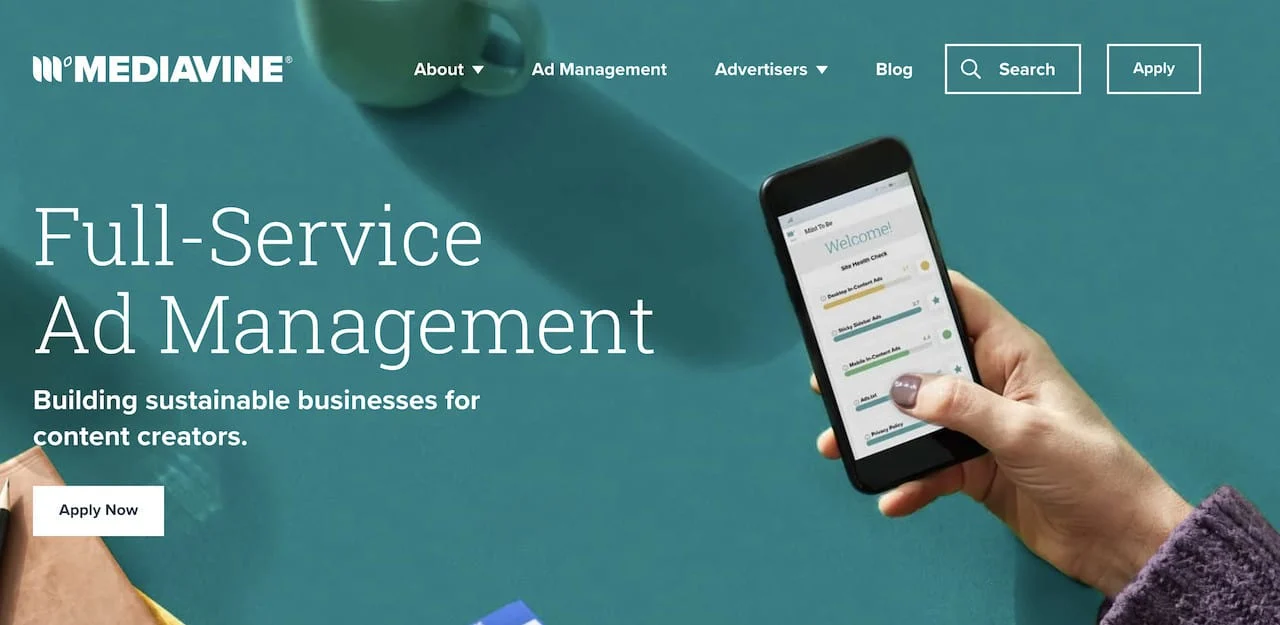
Since advertising revenue can bring in a steady stream of income every month, you should really focus on getting accepted into Mediavine. Mediavine essentially runs their own ad network, and by getting accepted into their program you will be set up with arguably the top ad network in the blogging space.
Getting into Mediavine, however is no easy task. Currently, their minimum requirement is for a website to have 50,000 sessions per month. That is averaging about 1,700 people visiting your site per day.
When I got accepted into Mediavine, the requirement was just 25,000 but given the competitiveness in the blogging space, they recently doubled it.
As you may imagine, it will take time to get a website to those types of levels. Like I said, it can take years to make real money off of your site. While yes, you could just simply have Google Adsense running on your site, the RPMs (revenue per thousand impressions) is closer to just $1-$2.
On Mediavine, RPMs can be 10x-20x or more! So, if you are really serious about your travel blog, then your #1 goal should be getting to that 50,000 session mark, and applying to Mediavine soon after.
10) Affiliate Marketing
The second main income source that many travel bloggers make money from would be affiliate marketing. If you are not familiar with the term, it essentially is promoting other company’s products and getting a percentage of the sale if a customer makes a purchase through the provided link.
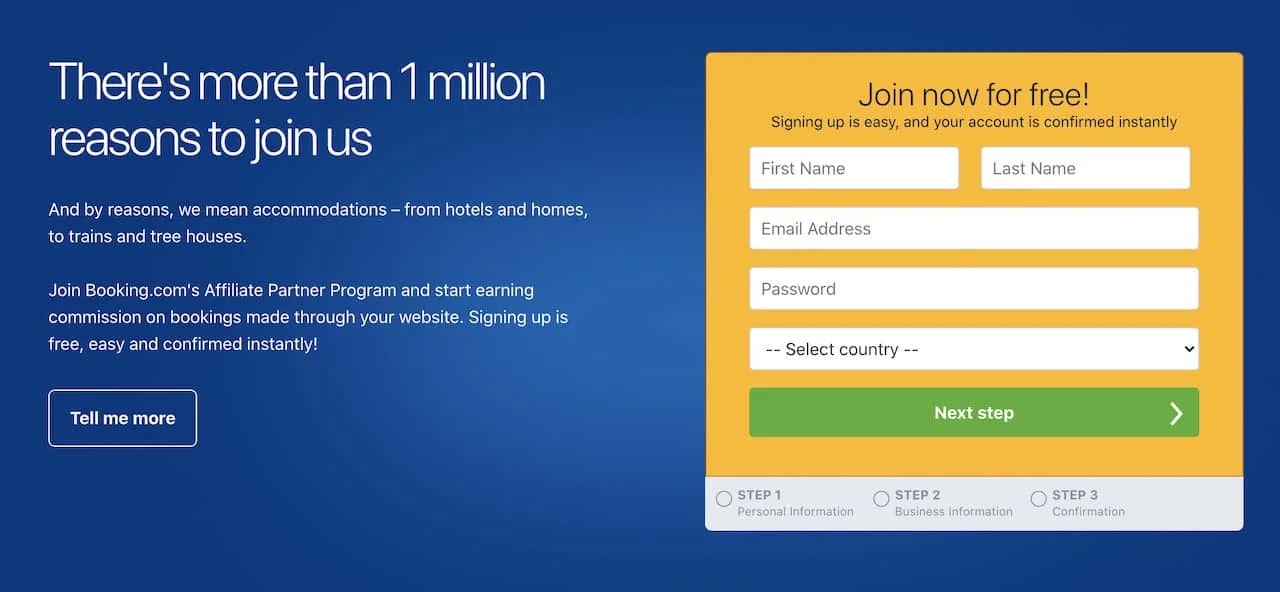
For example, on my site I have affiliate programs set up with Booking.com for hotels, Viator for tours, World Nomad for travel insurance, and Amazon for packing lists, gear, etc.
These companies already have affiliate programs that basically anyone can sign up for. Once you are part of the affiliate program, you simply can insert unique links onto your website, so the affiliate knows where the sale is coming from.
There are so many potential affiliate partnerships out there depending on what type of items or experiences you would like to promote. Even for companies that don’t have an official affiliate program, I have seen many travel bloggers essentially build their own with the company (i.e. use code XYZ to get 10% off your purchase).
There are plenty of other ways to make money off of your site such as promoted partnerships, selling your own products like ebooks or courses, and getting free travel, but it is also important to take things one step at a time. You don’t want to try and do everything right away, and instead build up your audience over time before going after your next income source.
I am sure I can go on and on regarding how to start a travel blog but I am hoping that this guide can get you going in the right direction.
By avoiding some of the mistakes I made and getting your blog in a good position from day 1, you will have way fewer things to worry about down the line.
Remember, you need to think about both the technical SEO aspect and the content side of SEO as you are building the site and writing articles.
If that is in your mind from the start and you are 100% dedicated to growing the site, having a successful travel blog will come with the work.
I am hoping to continue writing additional more in depth content about some of the topics I covered in this article to better help all those aspiring travel bloggers out there.
If you have any questions or comments feel free to write them in below. Have fun out there and safe travels!


Francesca Weeks
Monday 23rd of February 2026
Applicable strategies for international sales development
Semaj Rhodes
Monday 23rd of February 2026
Strong emphasis on real-world trade application
provega
Monday 9th of February 2026
For the reason that the admin of this site is working, no uncertainty very quickly it will be renowned, due to its quality contents.
ketojenik diyet ile 2 haftada 12 kilo
Sunday 8th of February 2026
For the reason that the admin of this site is working, no uncertainty very quickly it will be renowned, due to its quality contents.
Paityn Annabelle Moody
Thursday 5th of February 2026
Thank you for creating such valuable content. Your hard work and dedication are appreciated by so many.