One of the most important considerations to think about when hitting the trails, is the topic of hiking navigation.
Having the ability to track where you are, follow a route, and keep yourself safe is going to go a long way when it comes to taking on a hike.
This overview will go into detail about hiking navigation with deep dives into some of the best GPS apps to use (such as AllTrails, Gaia, and Maps.me).
By the end of reading through, I hope that you will be able to learn a whole new set of skills when it comes to getting yourself ready for hikes.
* Affiliate Disclosure: This post may contain affiliate links, which means I may receive a commission if you make a purchase through the links provided, at no additional cost to you. Thanks for supporting the work I put into TripTins!
1) Why Hiking Navigation is Important
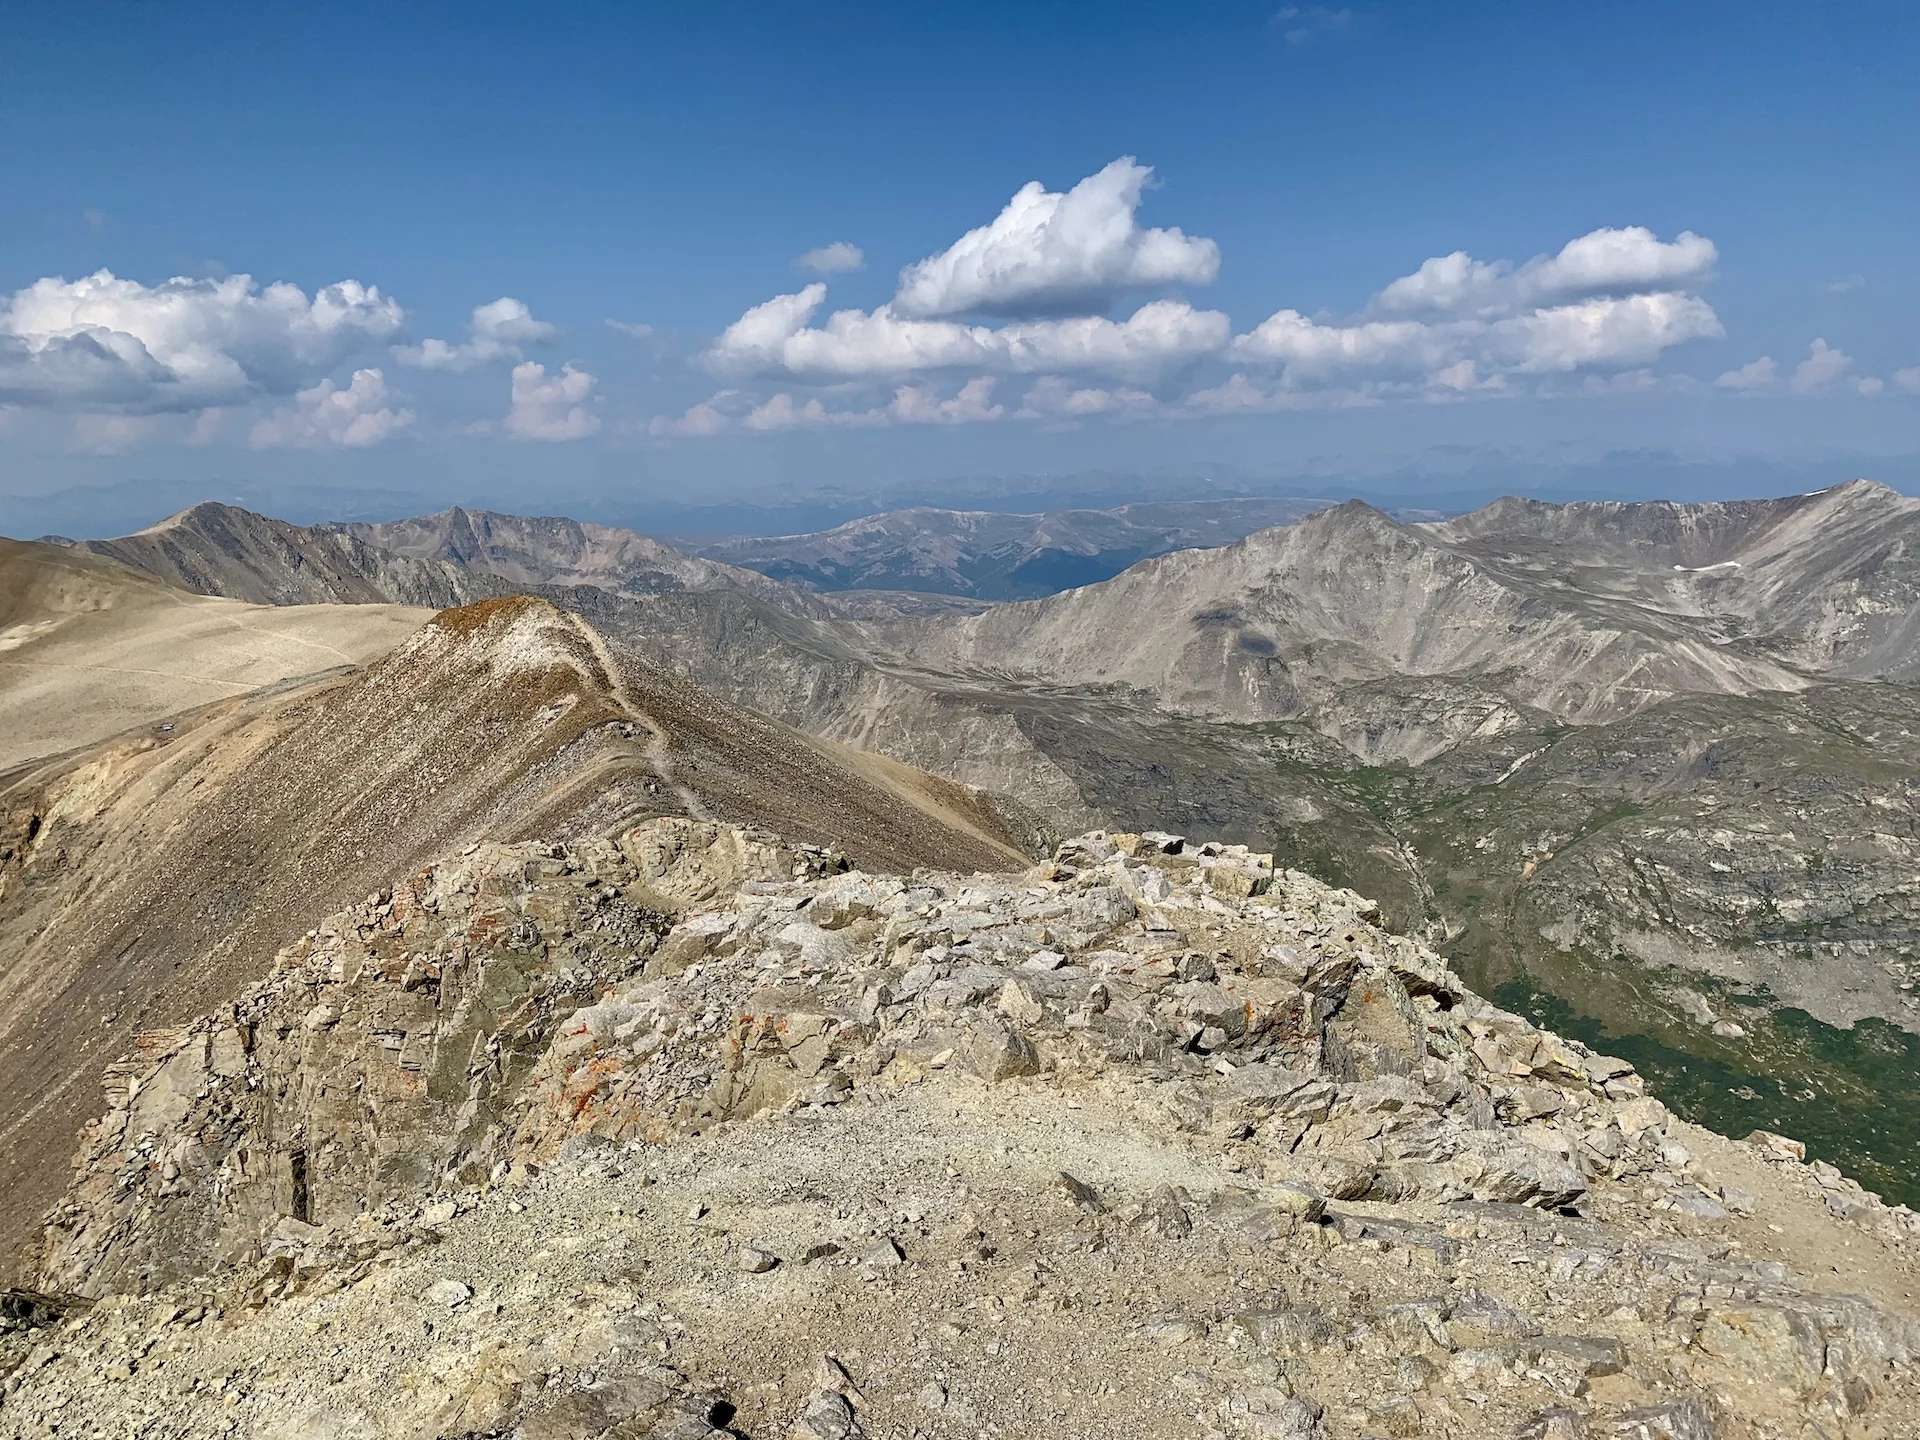
Around the world, there are so many types of hiking trails at different levels of difficulty.
On one hand, you can have easy signposted trails, where it is essentially impossible to get lost. On the other hand, you can have a more complex terrain with various routes and more confusion on the trail.
When it comes to the latter example, you may imagine that being able to navigate the trail can help greatly to keep you on track. Instead of guessing what the correct route is, you can simply look at your phone and be able to tell where to go.
During my first experiences hiking, I didn’t know that having GPS navigation on the trail was even a thing. I took wrong turns, got lost, retraced my steps a bunch, and missed out on various highlights along the way.
Once I got introduced to hiking navigation apps such as AllTrails, Gaia, and Maps.me, it changed the game for me. There was little to no guessing involved anymore when it came to navigating the trail. As long as I had the route downloaded, I was able to stay on track and keep myself from guessing.
This hiking navigation overview is here to provide you many of the tips & tricks I have learned along the way. In addition, it will walk you through how to download hiking routes on your phone so you can have a safer, more stress-free hiking experience.
Other Helpful Hiking Resources


2) Different Hiking Navigation Apps
When it comes to navigating the trail using your phone, you will need to download an app through the Google Play App Store or Apple App Store.
Now, there are many different hiking apps out there, and I certainly haven’t tried each and every one. Some of the main players in the space include:
- AllTrails
- Gaia GPS
- Maps.me
- Hiking Project
- PeakVisor
- Komoot
- Among Others!
The first three apps are what I will focus on in this article as those have done the trick for me. I have felt more than confident using these apps, which has stopped me from taking on or testing other navigation apps.
Of course, if you find one that you enjoy better, then go for it! Many of the topics that this overview will go through are still relevant no matter what hiking app you have.
It is important to note that while many of these apps are free to download, the most useful features will be hidden behind a subscription. If you are someone who will be hiking frequently, then I would highly recommend buying the subscription to unlock the best features.
OpenStreetMap (OSM): Before going any further, I did want to talk about OpenStreetMap (OSM). OSM is essentially an open source way for people around the world to add routes, markers, points of interest, etc., onto an open source map. Many of these navigation apps use OSM as their base layer on which the app is built on.
3) GPX/KML Files
I also want to touch on the topic of GPS format files – GPX (GPS Exchange) & KML (Keyhole Markup Language) being the main two.
When someone records a hiking route through a GPS app or device, the final outputs will either come out as a GPX or KML file. Within these files you will find the route and waypoints of the completed track.
Many navigation apps let you download their own routes OR overlay someone else’s completed route by downloading the GPX/KML files into the app itself (as I will talk about in the next section).
At the end of the day, by having a GPX/KML file downloaded into your navigation app, you will better be able to navigate the trail on your own.


4) Downloading Offline Routes
Once you have downloaded the hiking app of your choice, it is then time to download the offline route of your hike(s) of choice. This way, even if you lose cell service, you will still be able to see the route on your app.
GPS Note: you do not need cell service for your phone’s GPS to work. These hiking apps will be able to pin point your location either way as you hike along the trail. However, you do need service (or an offline map) for the route itself to show up on the apps.
Now, downloading offline routes is not always a necessity. If you are in an area where you will have cellular service for the entire time, then you don’t necessarily need to download the offline route.
However, I have found that it is very common that at one point or another you will lose service on the trail. So, why not just be more safe than sorry and actually download the offline route to your phone.
Subscription Note: downloading offline routes is a popular feature that may only be part of the paid subscriptions for these apps
Once you do this (on these apps or similarly for others), you will be able to see the route and have the ability to navigate even if you drop service. The hiking area will still be in view along with a darkened line that highlights the route.
5) Downloading Your Own Routes
Here is where things get a little more complex. The routes that you can find on AllTrails, Gaia, etc., are verified routes that other people have taken. In many cases, these pre-loaded verified routes can work just fine for you.
In other cases, however, you may want to make a modification to the route. Maybe you want to shorten it in order to skip out on a certain highlight, or you want to make a detour to see a different viewpoint. Or maybe the hike is not even available on the apps to download.
There can be a whole variety of reasons on why you may want to have a more “customized route” created.
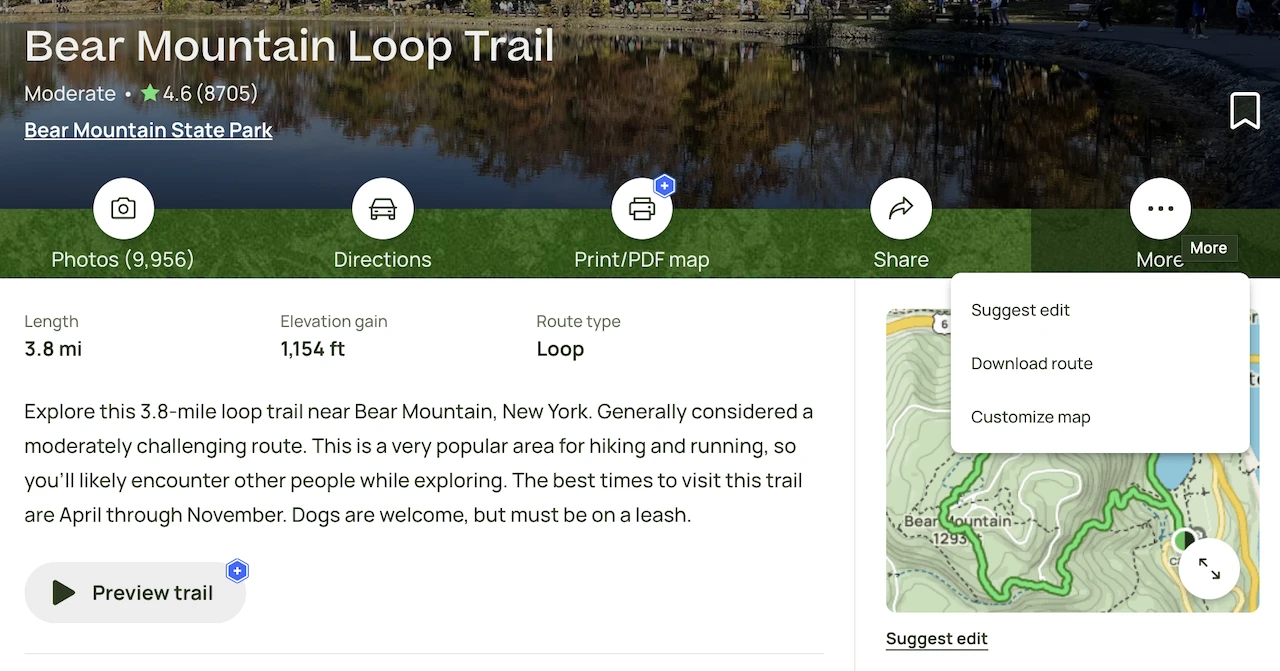
In these cases, AllTrails and Gaia have you covered. Instead of just downloading a route, you do have the ability to customize your own route.

AllTrails & Gaia Custom Routes
I have done this on desktop, as I have found it an easier interface to work off of.
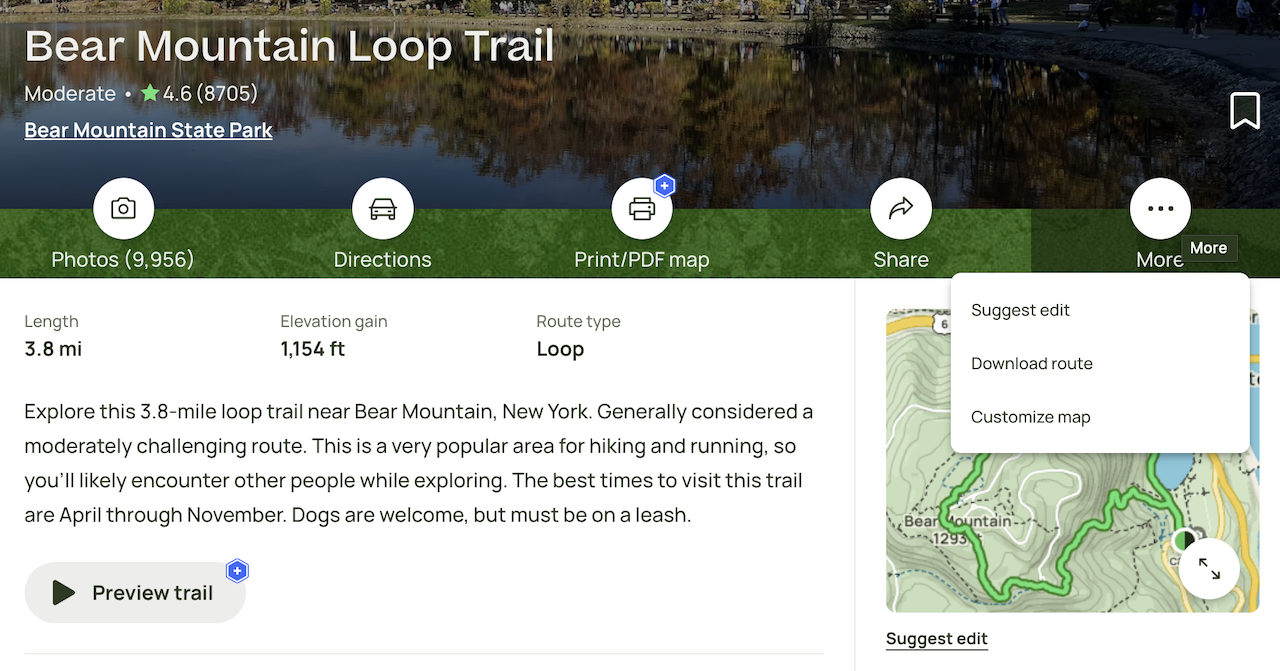
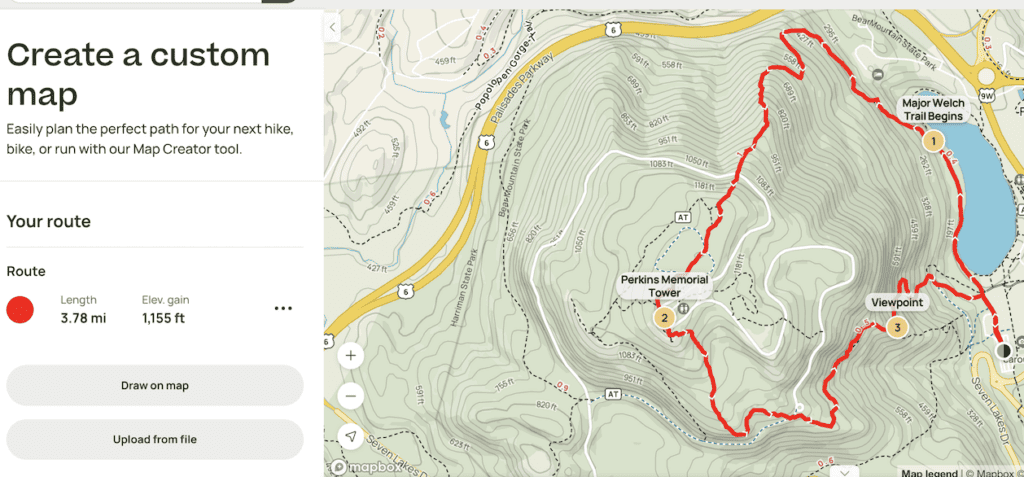
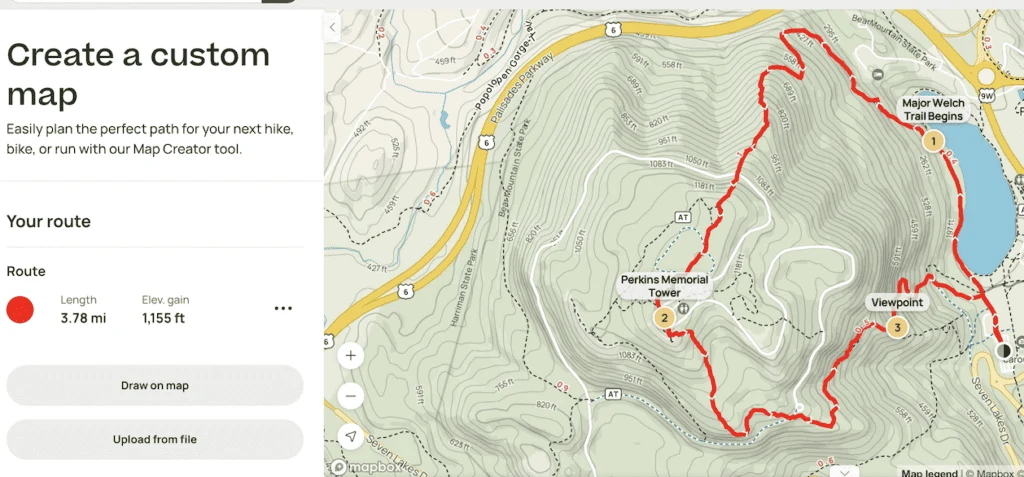
AllTrails: you can start from scratch and create a map under the “Saved” – “Create Map” dropdown. Alternatively, after you land on a hike page, click the “customize map” option. You can then “draw on map” and create your own route. Once you have saved down your custom map, you will then be able to download it for offline use on your app in the “Saved” tab.
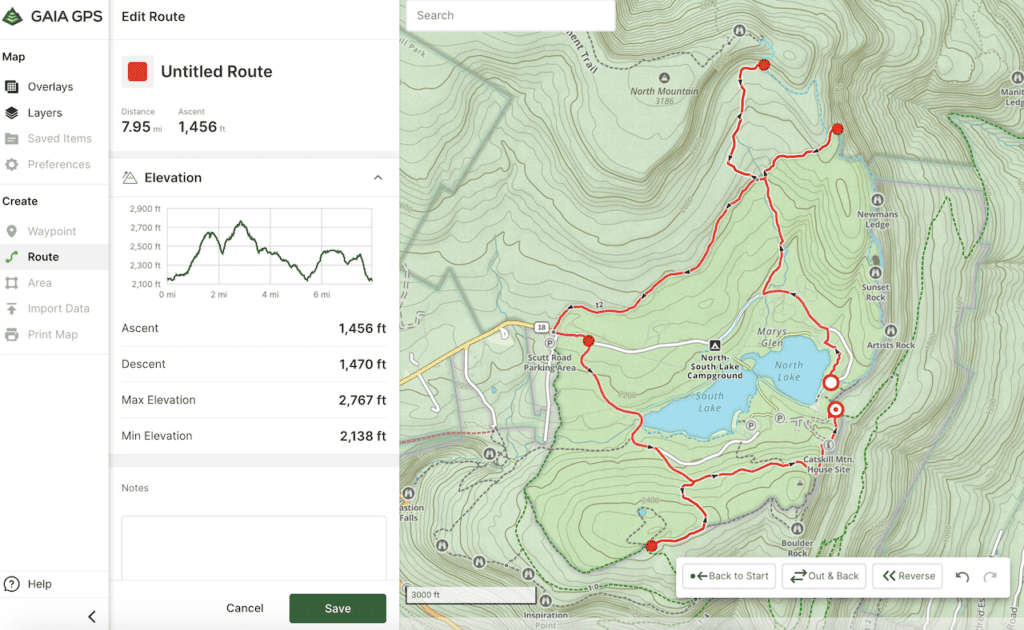
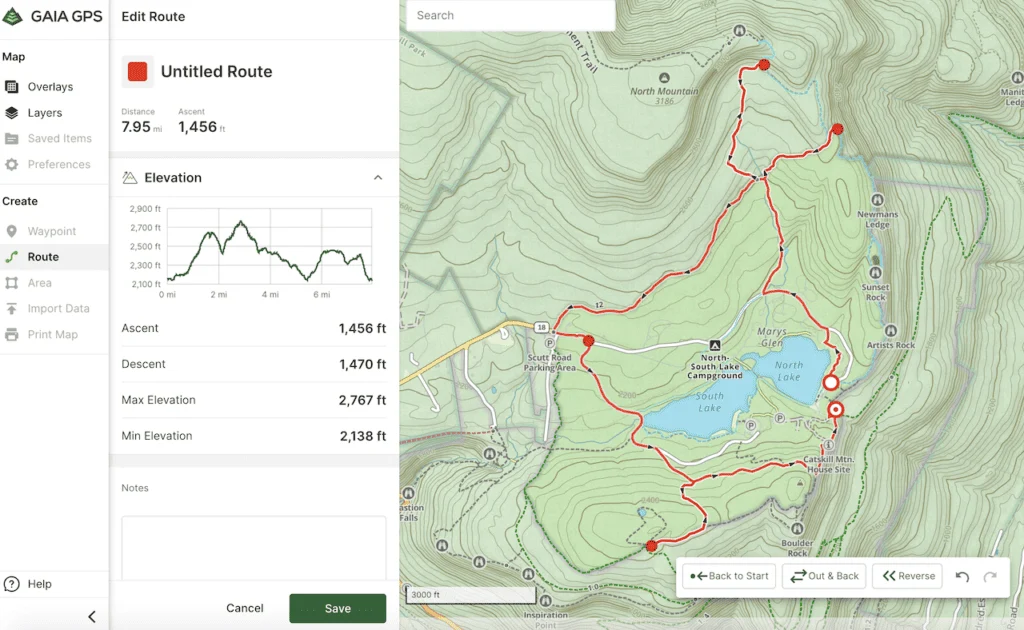
Gaia: on Gaia, you can search for a route/area, and then click the “Create Route” icon in the sidebar. From there, go ahead and manually create & save down a custom route. Similarly, it will go into your “Saved Items” folder, where you can then access it on your phone and “Download Maps for Route”.
Other GPX/KML Files
Another option to consider is using someone else’s route that you may come across (in the form of GPX/KML files). Whether that is a route that a friend completed or a route that you found on the Internet, such as on sites like Wikiloc.
In these cases, you can also upload a GPX/KML file into your navigation app and use these maps instead. Below are some instructions when using the desktop web versions:
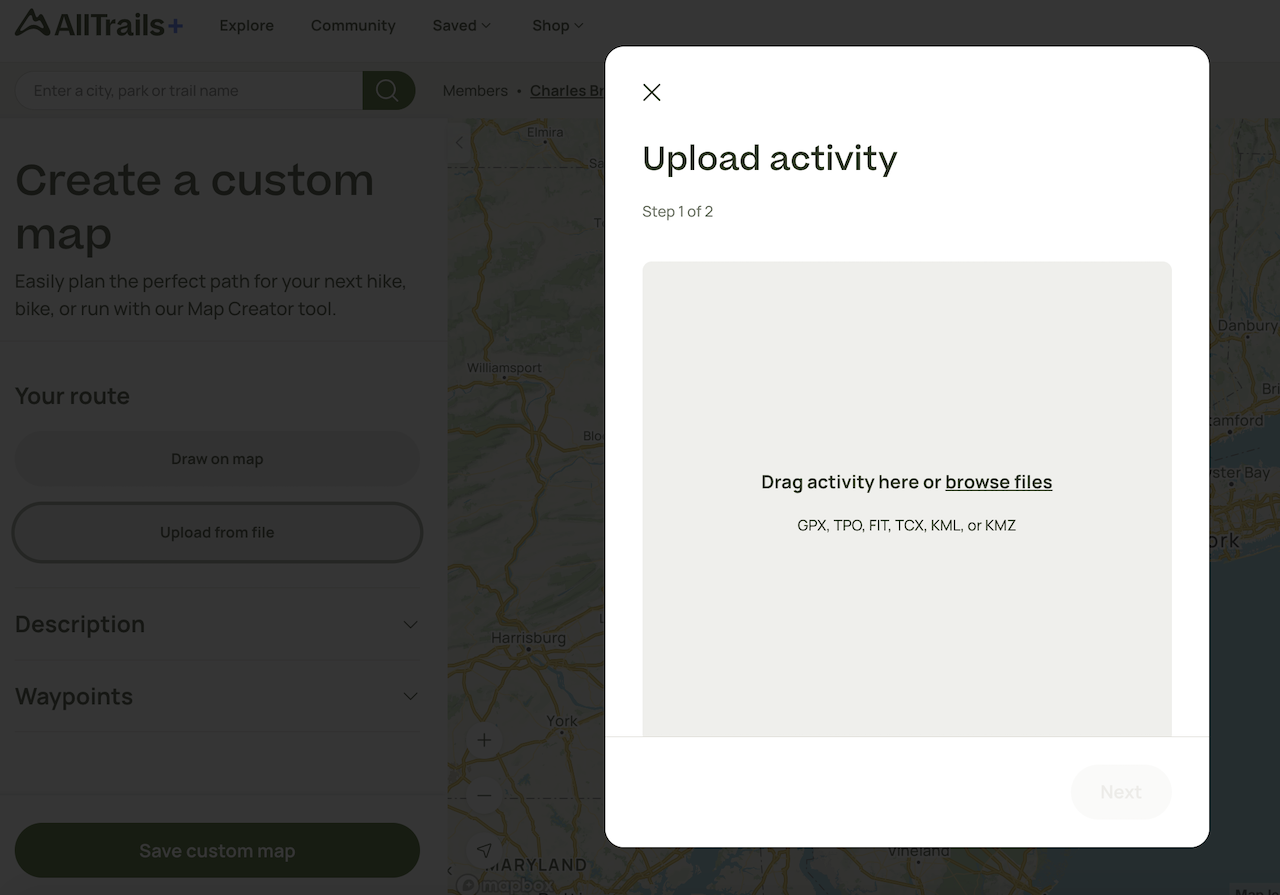
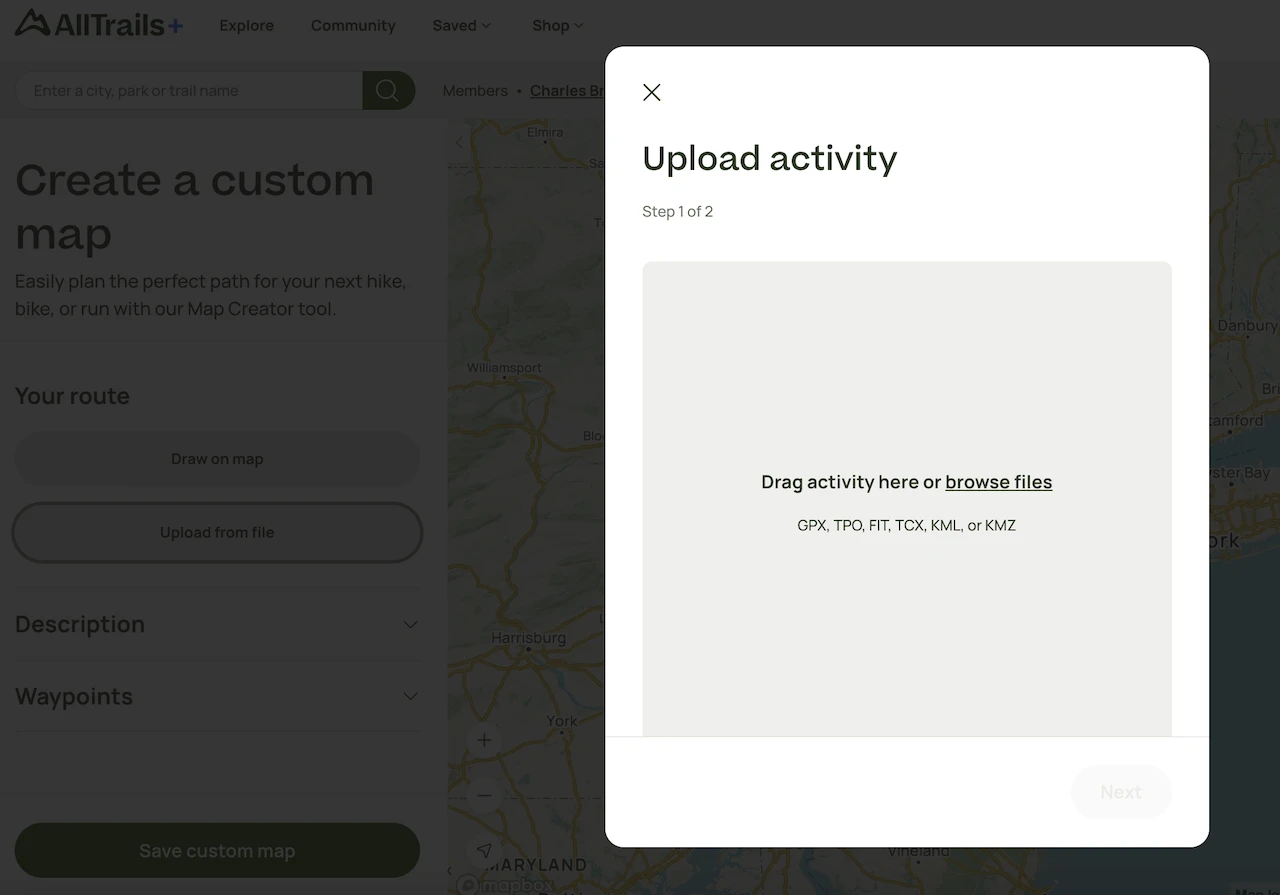
AllTrails: on the top of the page, click the “Saved” – “Create Map” dropdown. From there, “Upload from File”, save the map, and then access it on your app in the “Saved” tab. Feel free to then “Download Map” so you have it available offline.
Gaia: on the left-hand sidebar, simply click “Import Data” and choose the GPX/KML file from your computer. The file will go into your Saved folder, where you can then access it from your app, and “Download Maps for Route”.
Downloading Google Maps Files
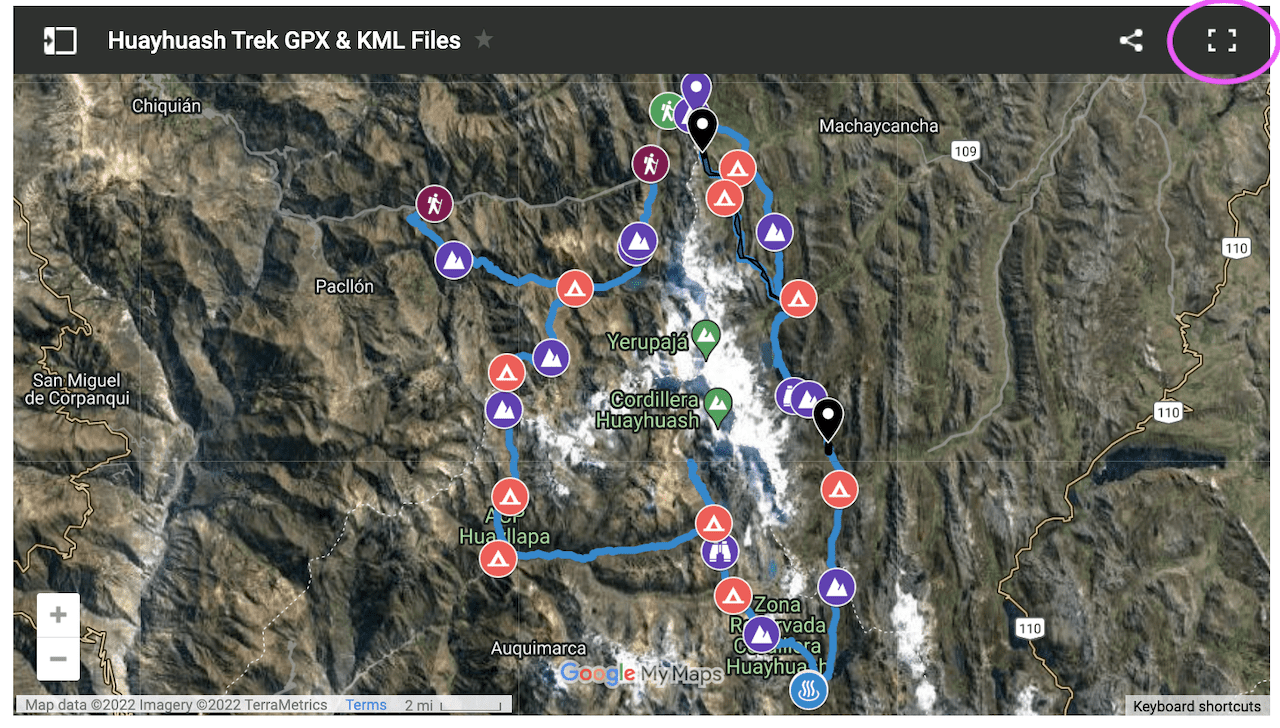
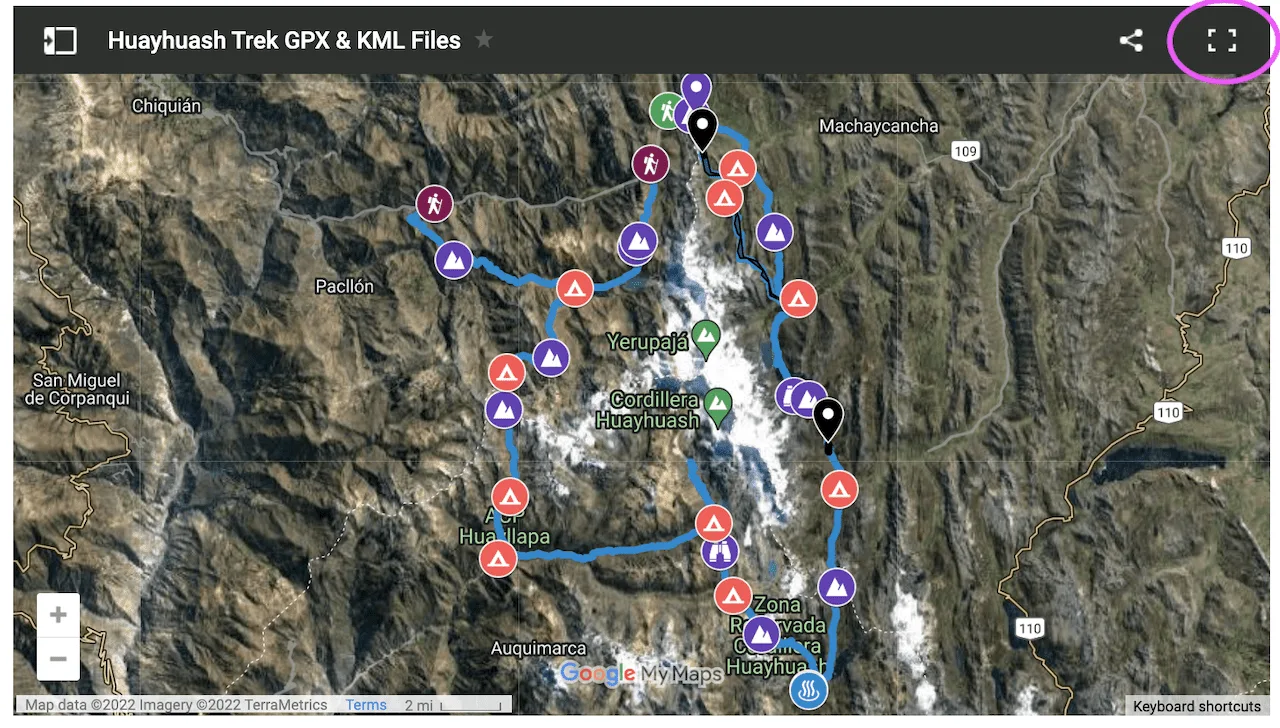
Another topic I wanted to quickly cover when it comes to downloading GPX/KML files, are those that can be found on Google Maps. For example, throughout TripTins you will find hundreds of Google Maps that include hiking routes on them.
If you would like to follow these routes for yourself, you can simply download the GPX/KML file and add it onto your navigation app.
To download the file of the map (on desktop), you can follow these instructions:
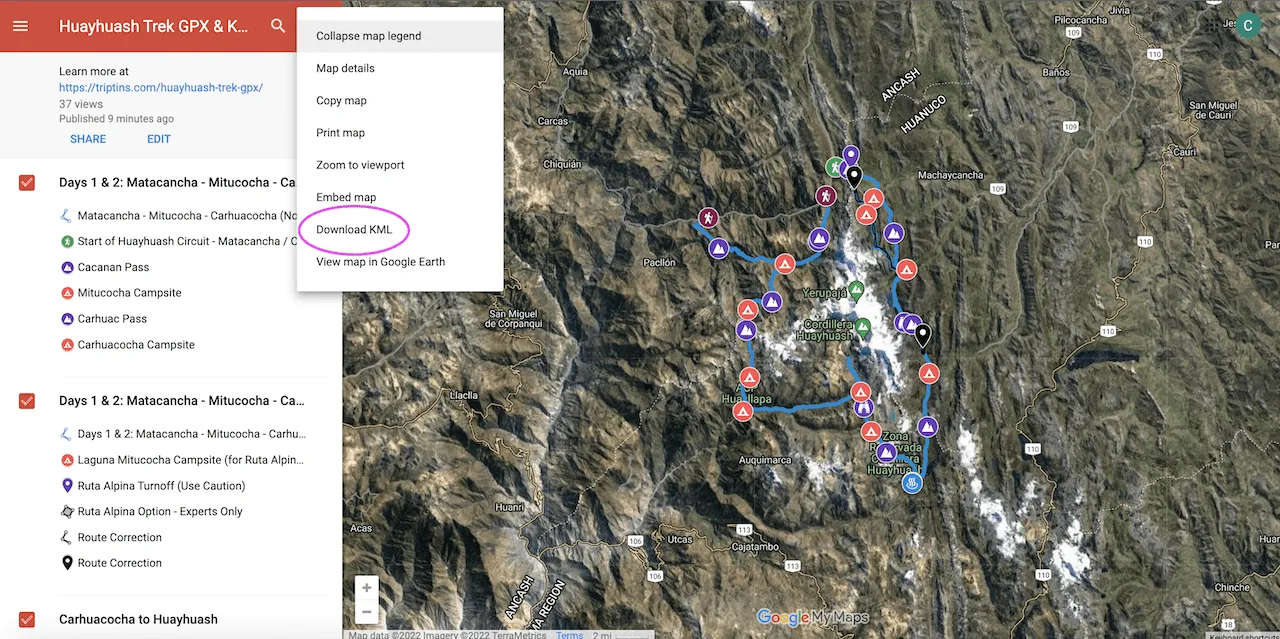
1) Click the top right icon that represents the “View Larger Map”. This will then open a new tab with a larger map.
2) Once on the larger map, click the three vertical dots icon and then click “Download KML”

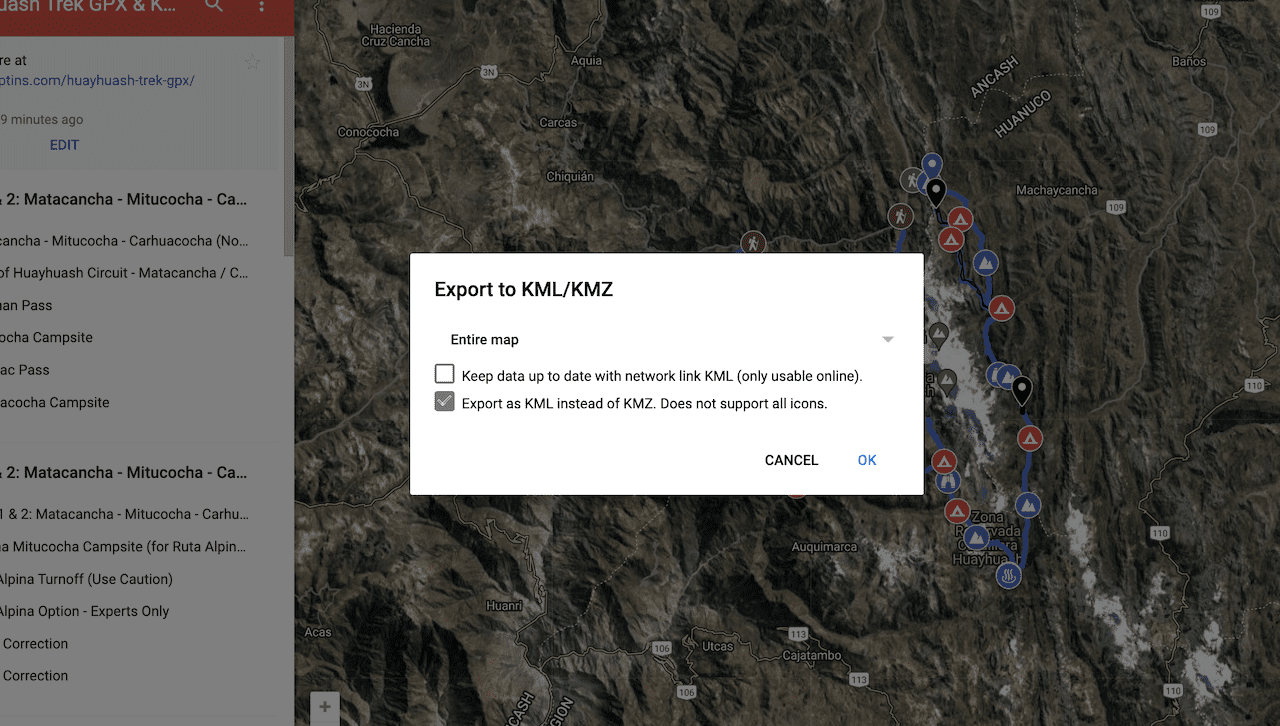
3) A pop up will appear and you can then keep the second box checked to export as a KML. Press OK and the file will download onto your computer.

6) Using Maps.me
By now, I have really only touched upon the more standard GPS hiking apps such as AllTrails and Gaia. However, Maps.me was actually my first (and most frequently) used app for navigation on the trail.
Maps.me actually isn’t marketed as a hiking specific app. While it does have the same trails outlined as other apps (based on the open source OpenStreetMap), it is more so geared towards directions, waypoints, and other logistical aspects of travel.
This actually makes it more of an “all in one” type of app – you can use it for driving directions to the trailhead and then use it on the hike itself.
Maps.me, however, is not an app where you can search for particular routes and download them straight from the app itself. Instead, you will need to find GPS files on the Internet and then upload them into the app. You can do this by downloading files from AllTrails, Wikiloc, or other hiking websites.
Upload Note: if uploading a route onto your phone, Maps.me only accept KML files. So, if you have a GPX file, you will just need to use a quick online conversion tool to get it into a KML format.
While this is an extra step, it is relatively simple to do if you prefer the interface of Maps.me.
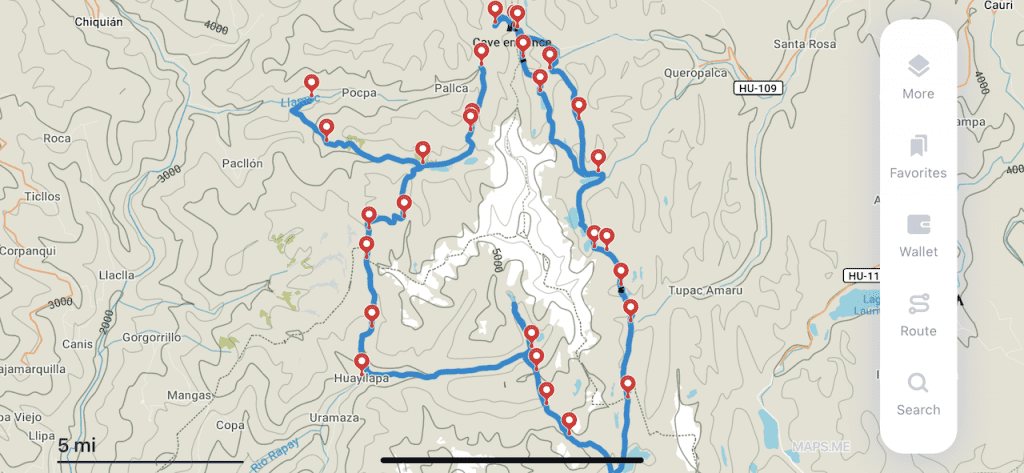
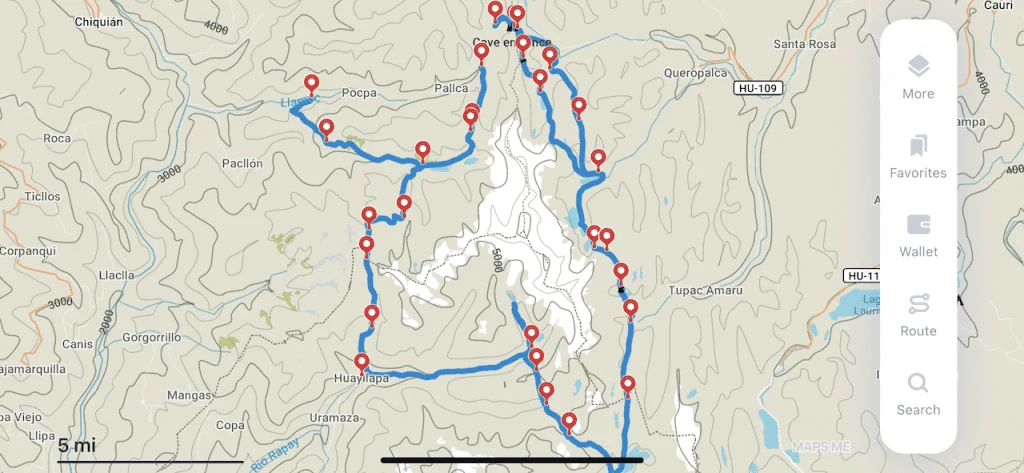
The app also requires you to download an entire region (not just a trail like other apps).
This in turn will give you offline maps capabilities for a broader area. It is very helpful as you can zoom in and out of the region and see the various trails all around you.


7) Using a GPS Navigation App
By now I hope you have a better understanding on how to download a route on your navigation app. But how about when it comes time to actually using these hiking apps on the trail.
Below are a few things to look out for as you go about your time hiking:
Your GPS Location
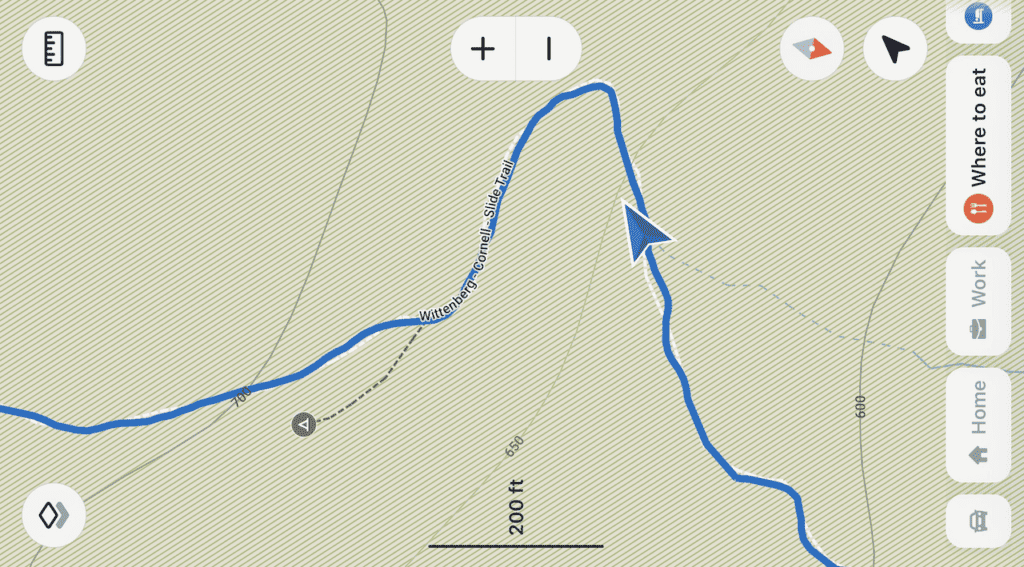
Once you open up a navigation app, you will see an arrow marker that pinpoints your exact GPS location. As mentioned, this should always be working even if you do not have service.
By making sure your marker stays on the downloaded route, you will keep yourself on target and not stray off trail.
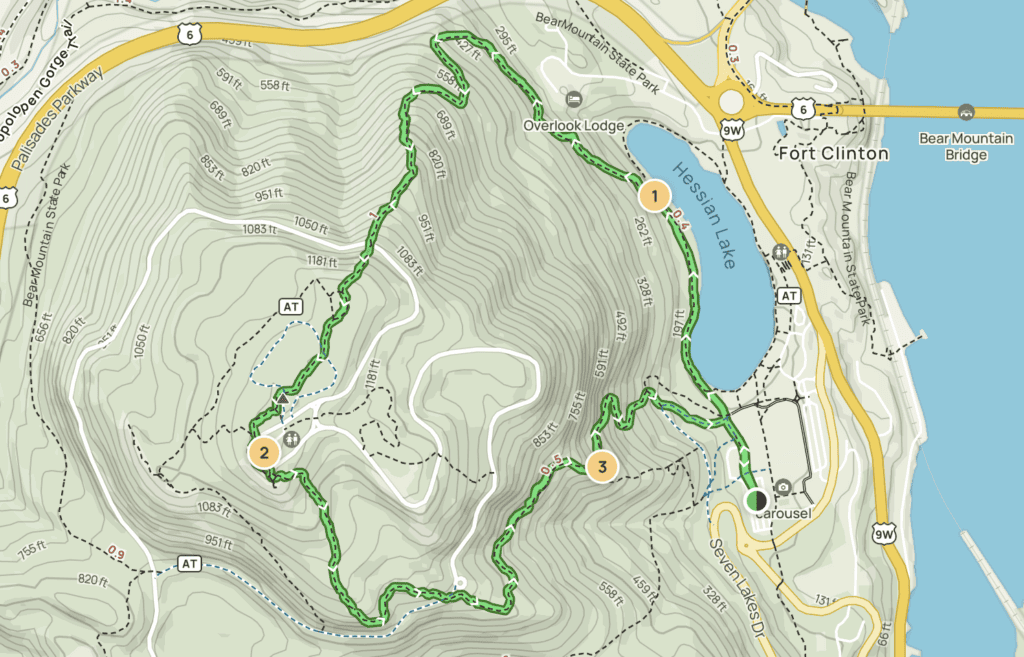
The Route
The most obvious piece of information that you will see on your navigation app is the route itself. These routes will be overlaid onto dotted lines that represent the trails in the area. They will usually be bolded in a color like red, green or blue.
As you go about the hike, just be sure to pay attention to the route, especially as you approach intersections or other points of interest.
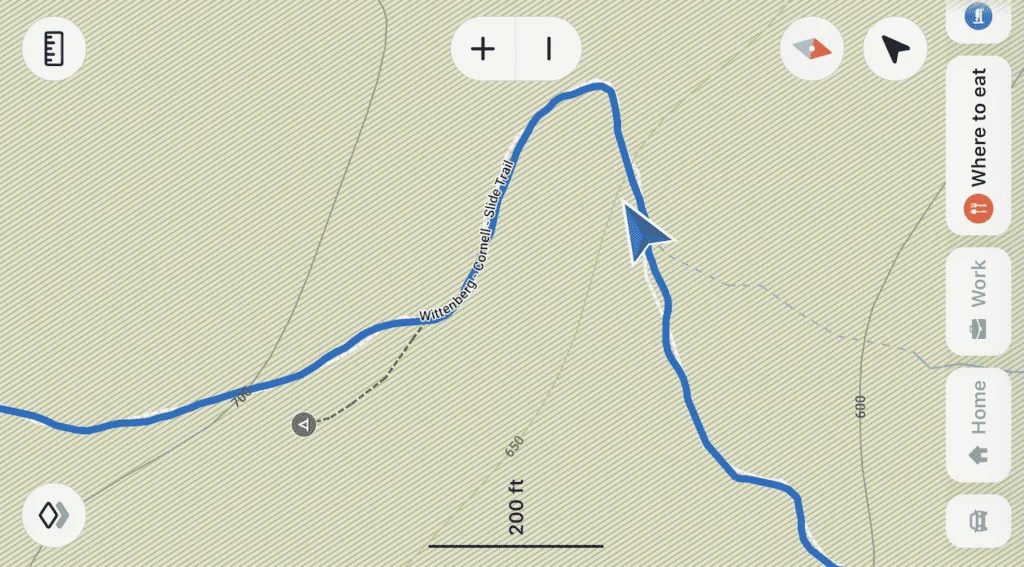
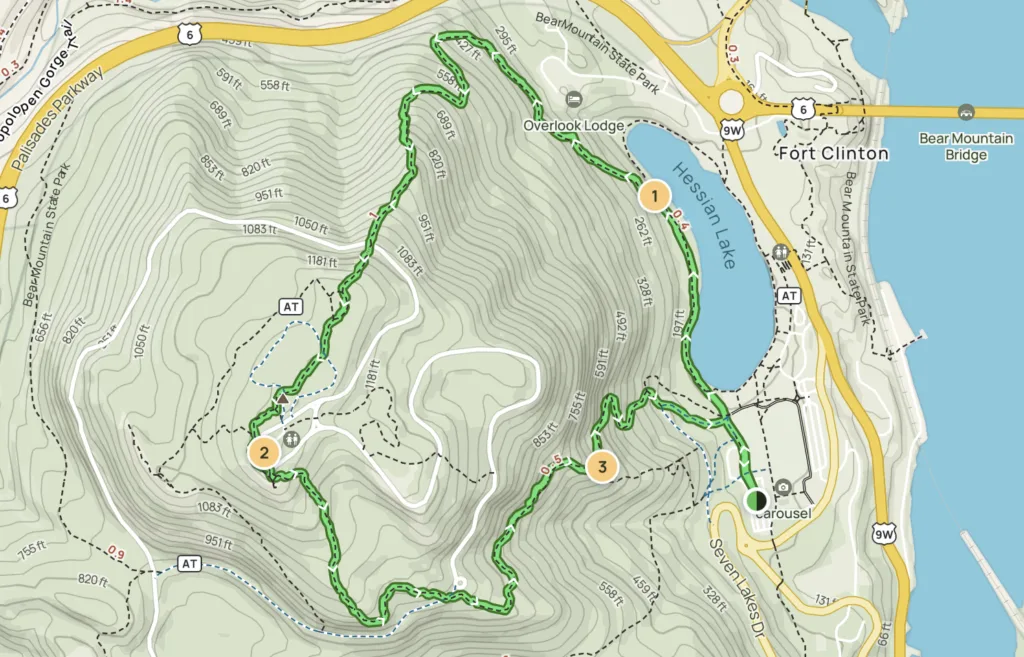
Viewpoints
One of my favorite aspects of navigation apps, is that along the route you can find viewpoint icons. Sometimes these icons are right on the route itself, while other times you may need to take a quick detour to get there.
Before starting a hike, I always make sure to understand where the viewpoints are and when to look out for them.
It is important to note that these viewpoints are added in by users (referring back to OSM from earlier), and may not always be actual viewpoints.
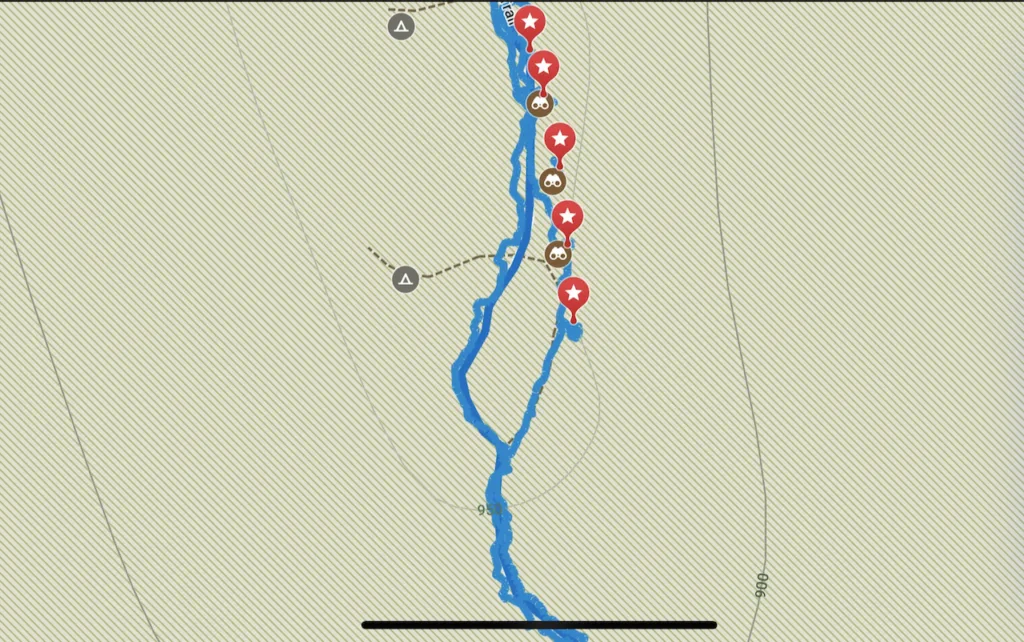
Points of interest
Beyond viewpoints, you may also see various points of interest noted on these apps. These can be trail signboards, hiking notes, water sources, campgrounds, or other important areas.

8) Tracking Your Route
While using your apps for hiking navigation is the more important takeaway from this overview, I also wanted to touch upon tracking your own route.
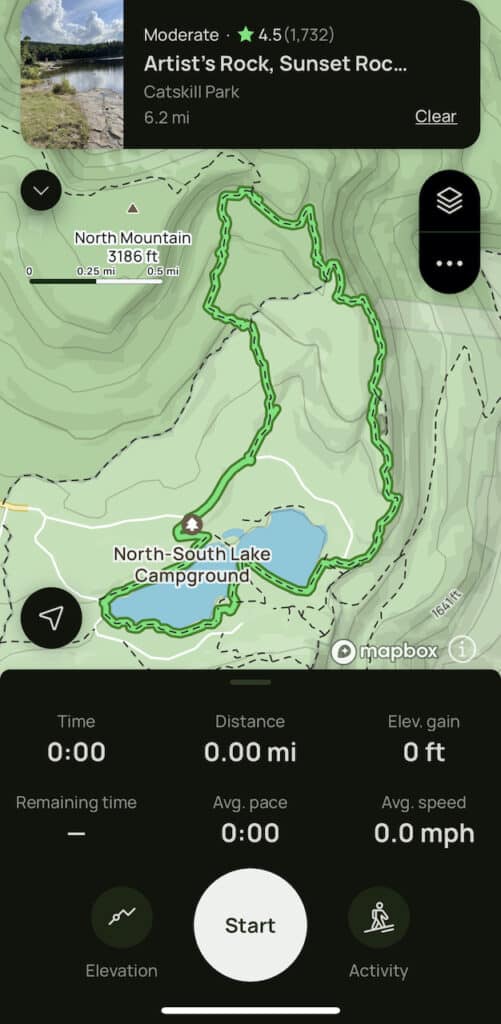
If you wanted to track your route, many of these hiking apps let you do so at the same time that you are navigating.
You will need to open your app of choice, and click the “start the route” (or similar) option, and it will then begin to track you.
At the end of the hike, you will need to stop and save the route down. From there you should be able to see your route (which should match closely with the route originally downloaded), and your hiking stats such as length, duration, & elevation gain.
By tracking on the app, you will also be able to download a GPX/KML file of the exact route you took. This can be shared with friends or uploaded to various hiking websites for others to see.
Note: not all hiking apps have tracking capabilities. Maps.me for example is one that is only used for navigation purposes.

9) Tips & Things to Know
To finish off here, I did want to call out several tips, tricks, and things to know as you go about using a hiking navigation app out on the trail.
You Don’t Need Cell Service for GPS: I noted this at the very beginning of the article, but just to emphasize the point -> you do not need cell service for GPS capabilities. Your phone’s GPS will work either way. You should always see that GPS marker showing you where you are on the trail.
Routes are Not Perfect: while OSM and verified routes are mostly accurate, they are not always perfect. Just be aware when hiking that your GPS marker may not be perfectly aligned to the trail. That can be just fine in some instances as long as you are confident in the path ahead & you are still hiking in the general direction of the route.
Unmarked Routes: don’t be surprised either if you come across secondary routes on a hike that aren’t shown on these maps. Remember, the baseline for the apps is OSM, and it is not updated to 100% accuracy. Stick to the main routes either way if you want to keep yourself on track.
Pay Attention: it is easy sometimes to just continue hiking and thinking you are heading in the right direction, just because a route is out in front of you. But what if you missed an important intersection? Always be sure to pay attention to your hiking app, and understand when intersections may be approaching.
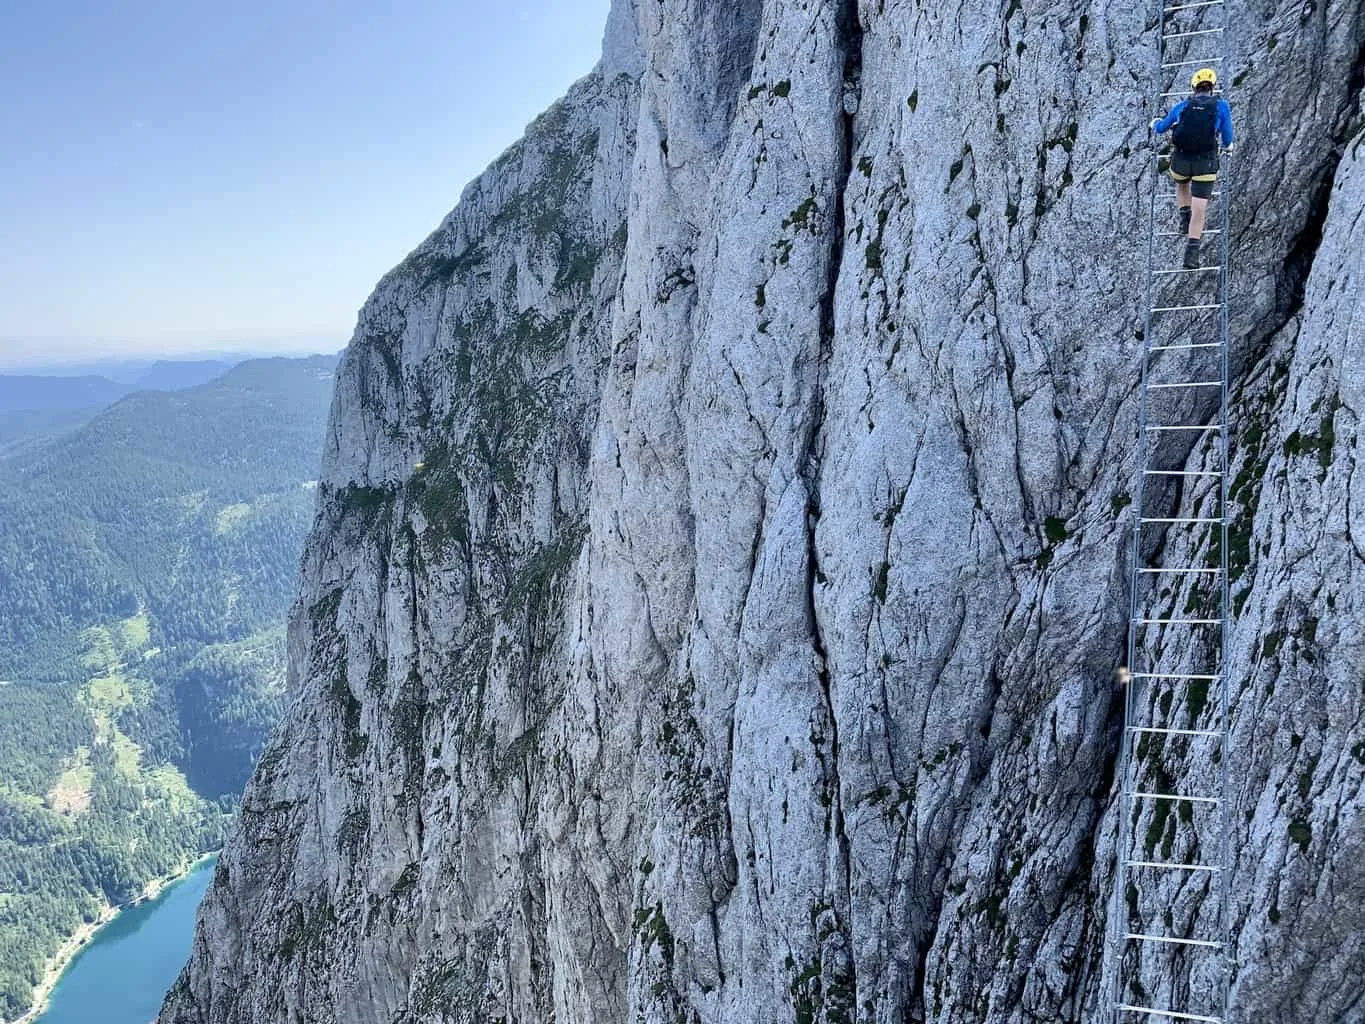
Study & Research the Route: it is never enough to simply download a route and assume you can hike the trail. Be sure to research the route and understand the nuances to a trail. For example, when hiking Mt Triglav in Slovenia, some routes up to the summit require a very technical mountain climb while others do not. By researching ahead of time, you will know which route is best for you.
Clockwise vs. Counter Clockwise: when it comes to loop hikes, there sometimes can be a big difference between clockwise and counter clockwise. As you go about your research, try to figure out which is the appropriate way to go about the hike so you can avoid any setbacks.
Portable Charger: just to keep you all powered up throughout a hike, bring along a portable charger. Since you will be using your phone for navigating, taking photos, and possibly staying connected with others, the battery can quickly die down. A portable charger will solve any issues with that as you can stay charged all the way through.

I hope this has helped you out when it comes to hiking navigation and the best way to use GPS apps. If you do have any questions or comments, be sure to add them in below.
Also feel free to check out the other hiking resources up on the site.
Have fun out there and safe travels!