
As I traveled throughout Europe, I came across a new term that I had not heard of before – Via Ferrata. It was explained to me as a mixture of hiking, rock climbing, and mountaineering. As a big time hiker myself, I was immediately intrigued and wanted to learn more about what these routes entailed.
Over the course of the last couple years, I have taken part of Via Ferrata trails in Switzerland, Austria, Germany, and Slovenia, and from those experiences, I now have a much better understanding what they are all about.
To help others learn more about Via Ferratas, I put together this detailed guide to explain everything there is to know about them, including the necessary equipment, difficulty levels, route configurations, and plenty more.
* Affiliate Disclosure: This post may contain affiliate links, which means I may receive a commission if you make a purchase through the links provided, at no additional cost to you. Thanks for supporting the work I put into TripTins!
Before diving into the world of Via Ferratas check out this quick highlight video of some of my favorite Via Ferrata experiences over the years:
1) Via Ferrata Background
The term Via Ferrata is Italian in origin, meaning “Iron Path”, and is a “protected climbing route”. You may be wondering what does an iron path have to do with any of this.
Well, it’s called an iron path because these Via Ferrata routes are constructed using iron rungs and pegs that are built into the mountainside. These iron rungs and pegs are what will help guide your hands and feet throughout the duration of the trails.
You may also see the word Klettersteig come up when searching for Via Ferratas. A Klettersteig is simply the German word used when referring to Via Ferratas, and translates to “Climbing Path”.
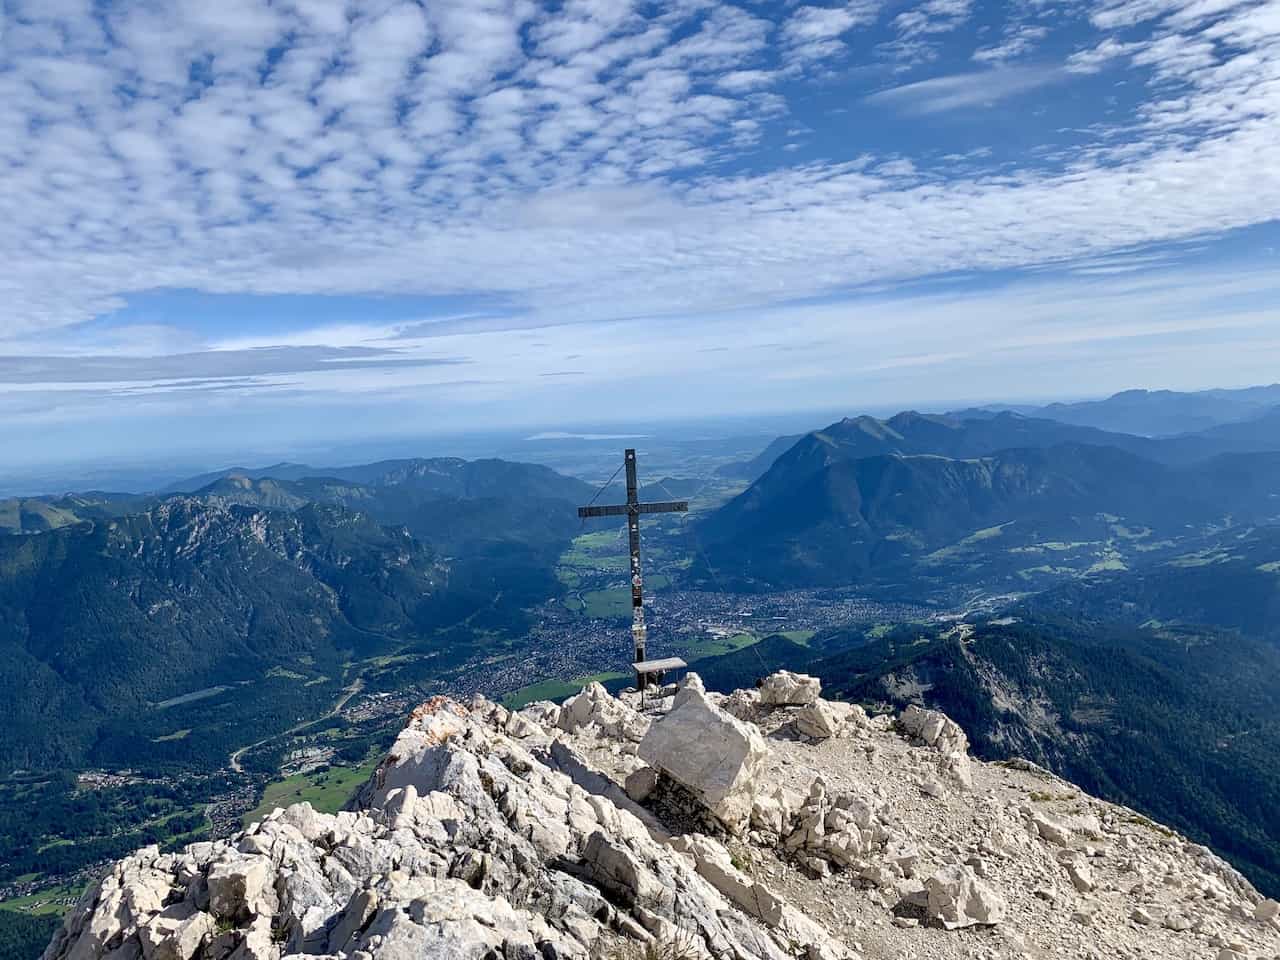
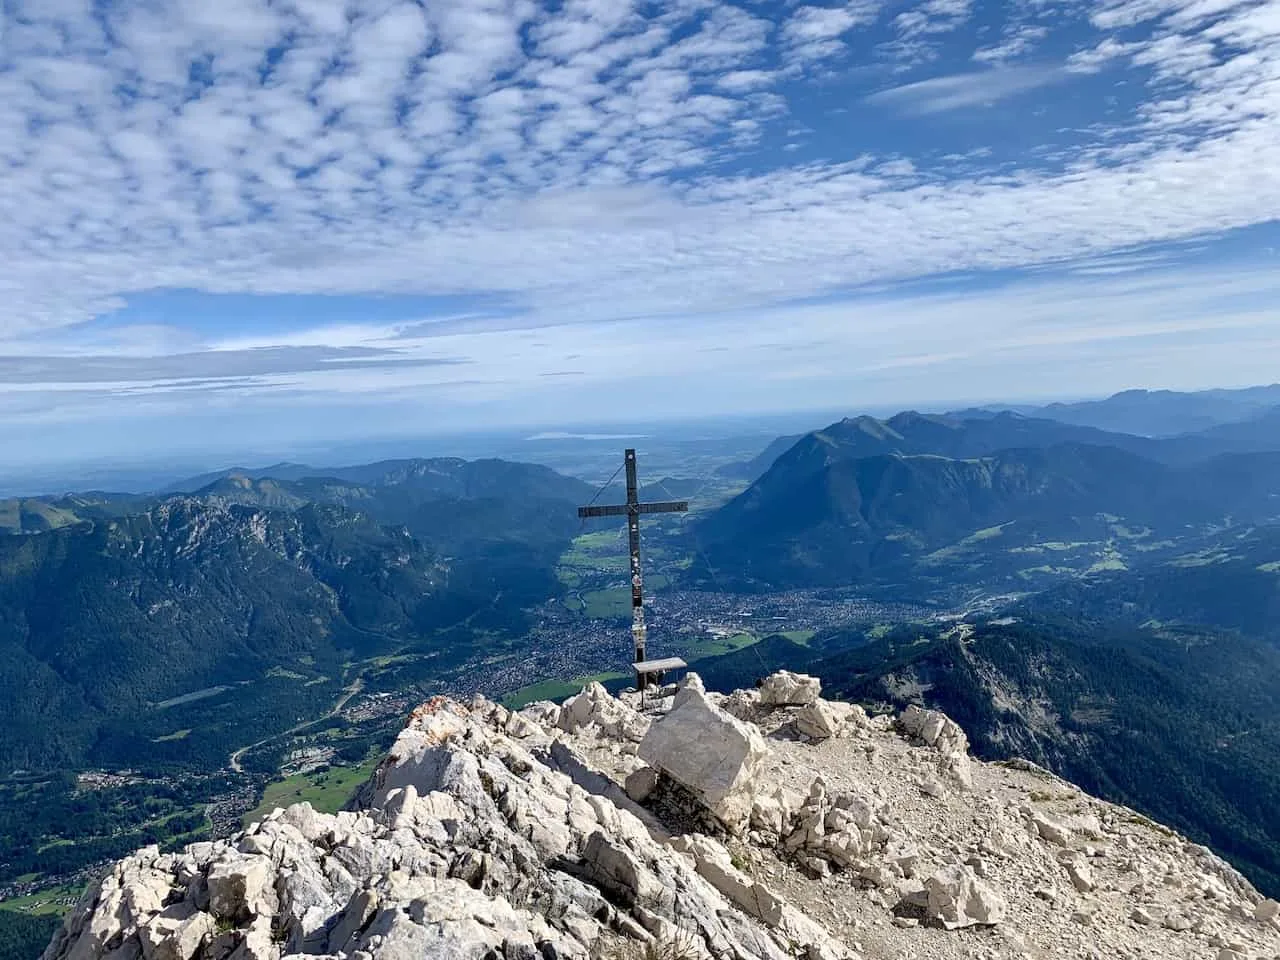
The origin of Via Ferratas can go all the way back to the 1800’s, but many people associate World War I as when they became a popular mechanism in the Dolomites to help soldiers maneuver their way through the treacherous landscape.
Many of these original routes in the Dolomites have been upgraded and maintained over time, and you can even go check them out for yourself today!
While Via Ferratas were popularized in Europe over time, you can now find these sorts of routes all over the world including the US, New Zealand, Peru, among several other countries.

2) What is a Via Ferrata
Now that you have a quick background on the origins of Via Ferratas, let’s talk a bit more about what exactly is a Via Ferrata.
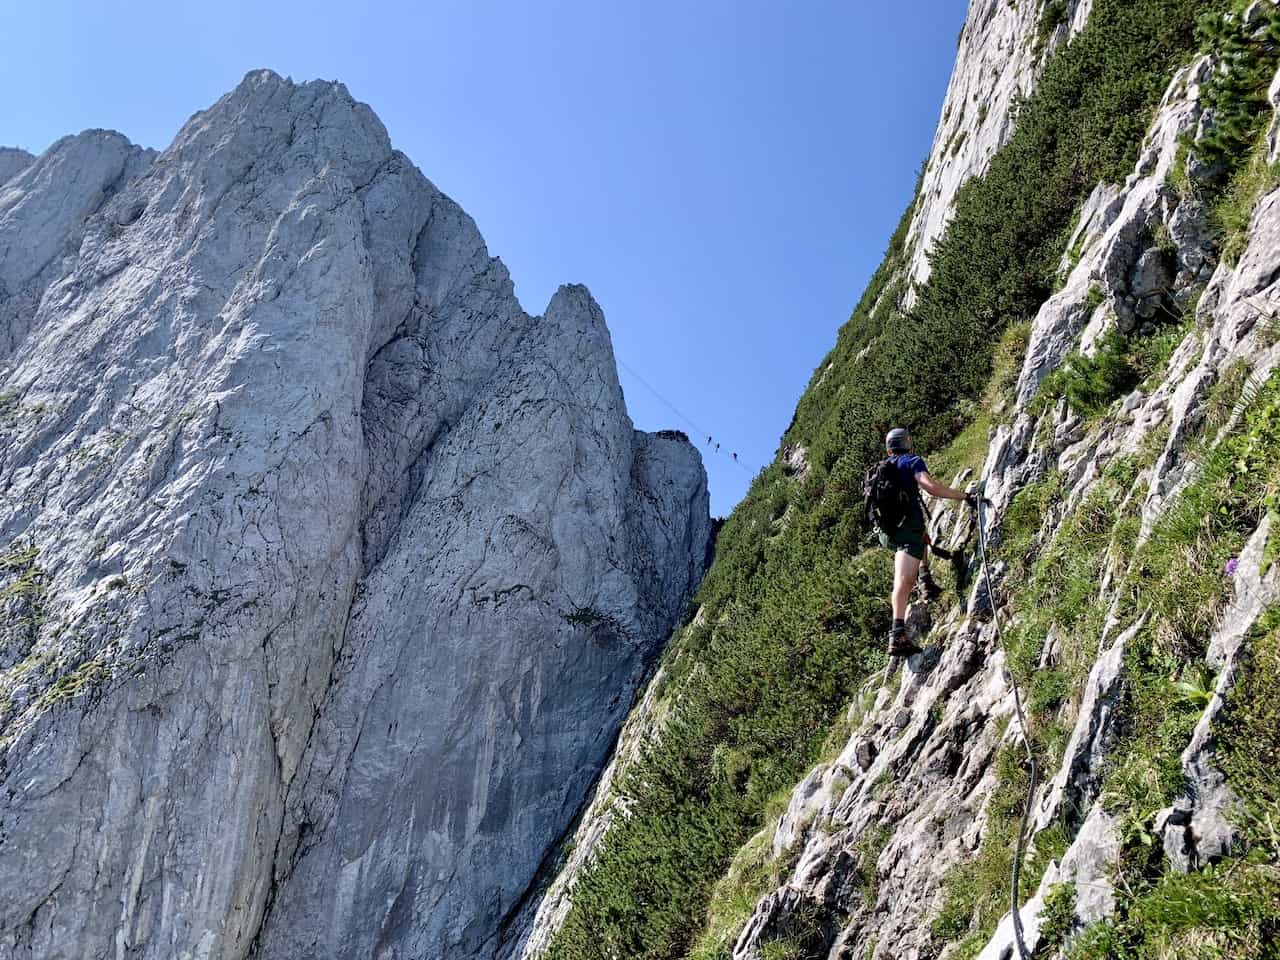
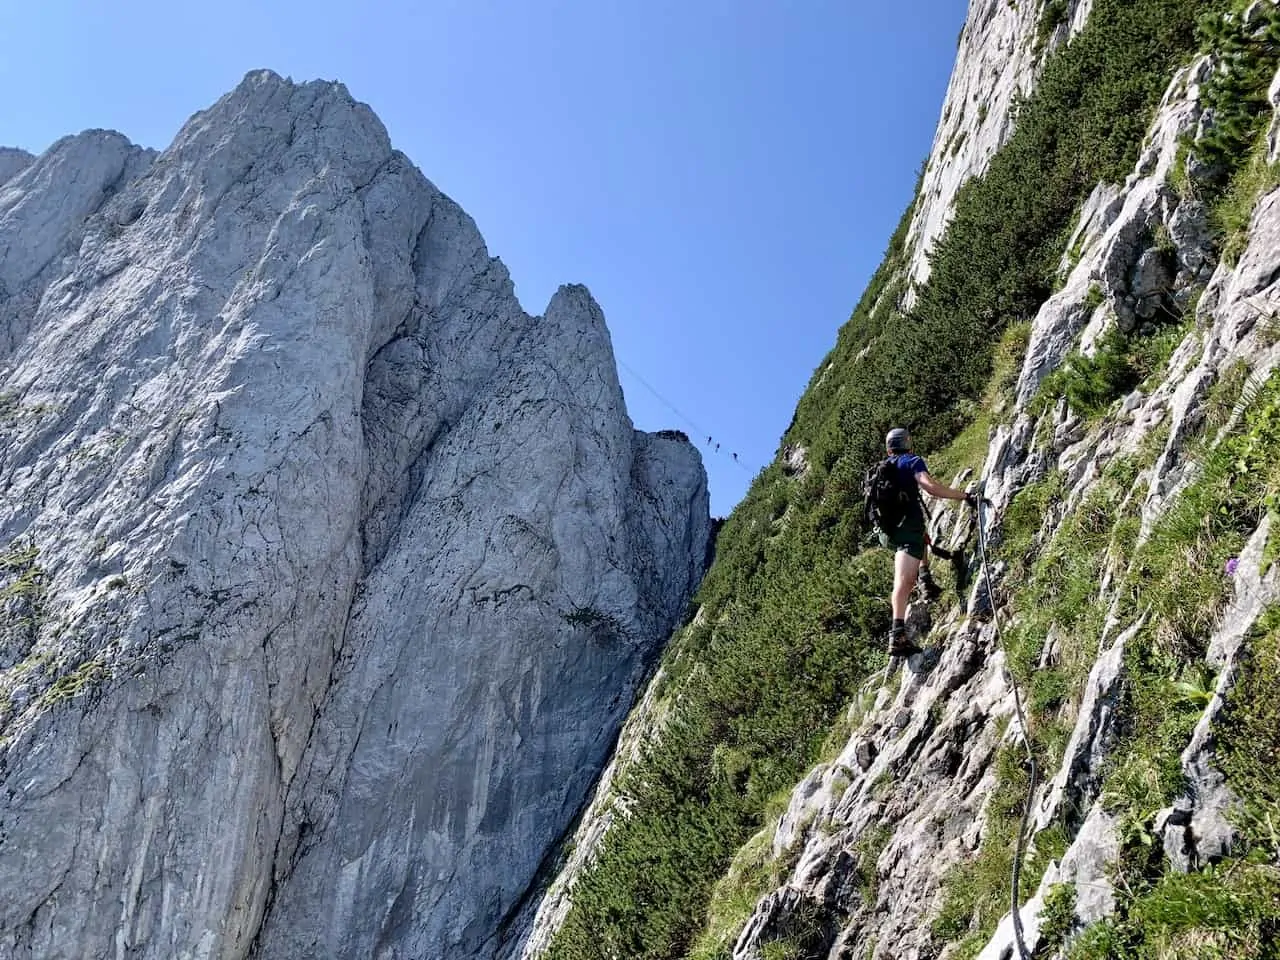
Imagine you are hiking up a mountain and you arrive at a point where you need to walk a thin ledge that drops down thousands of feet, or imagine a steep mountain, where one misstep and you fall backwards. These of course can be fatal hikes to take part of and odds are the risk is just not worth it.
That is where the idea of Via Ferratas come into play – where normal hikers without mountaineering experience can complete these routes in a safe manner.
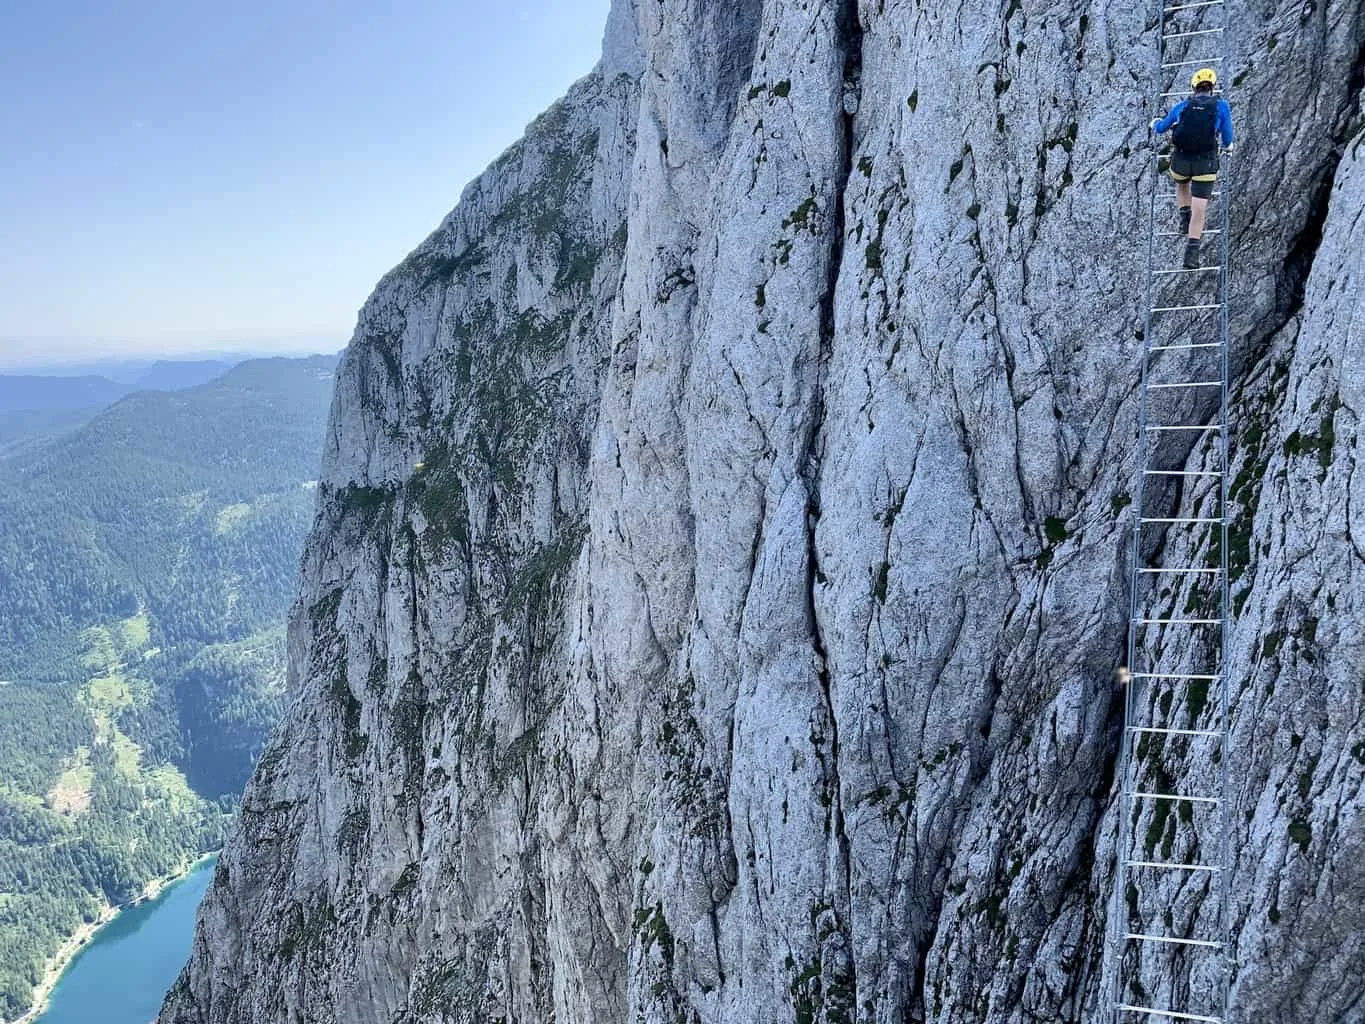
Now imagine that the thin ledge with a precipitous drop has foot pegs to follow and a steel cable to clip yourself onto. And that steep mountain – what if it had several steel ladders installed to avoid the treacherous terrain.
Via Ferratas are built to offset the danger of these types of trails, and in many situations Via Ferrata are created on routes that would be physically impossible without them.
I like to think of Via Ferratas as a mix between hiking and mountaineering. While more difficult and complex than just a normal hiking route, it also does not demand the expertise of mountaineers, who require much more detailed and multifaceted training.

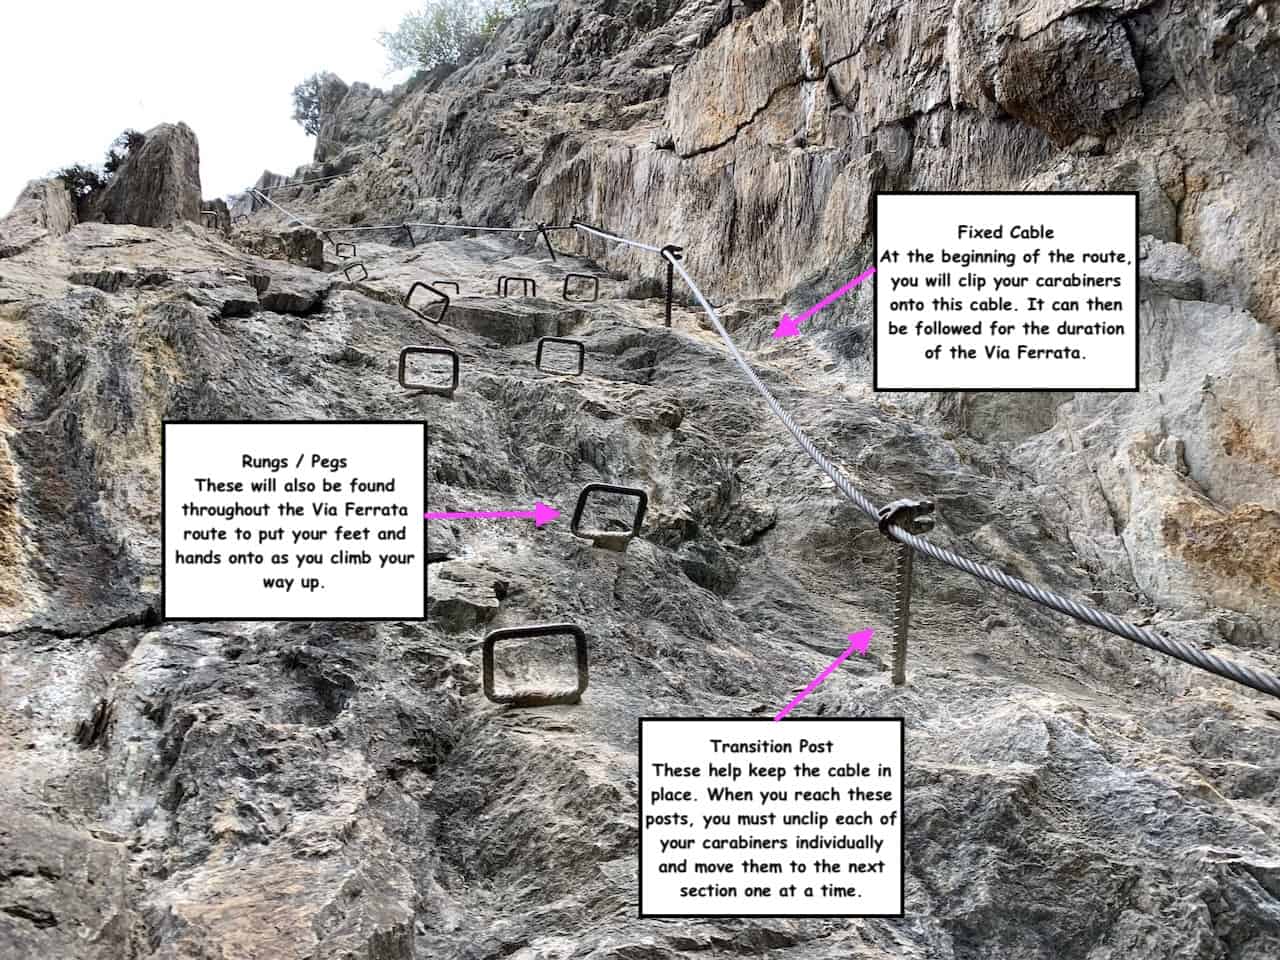
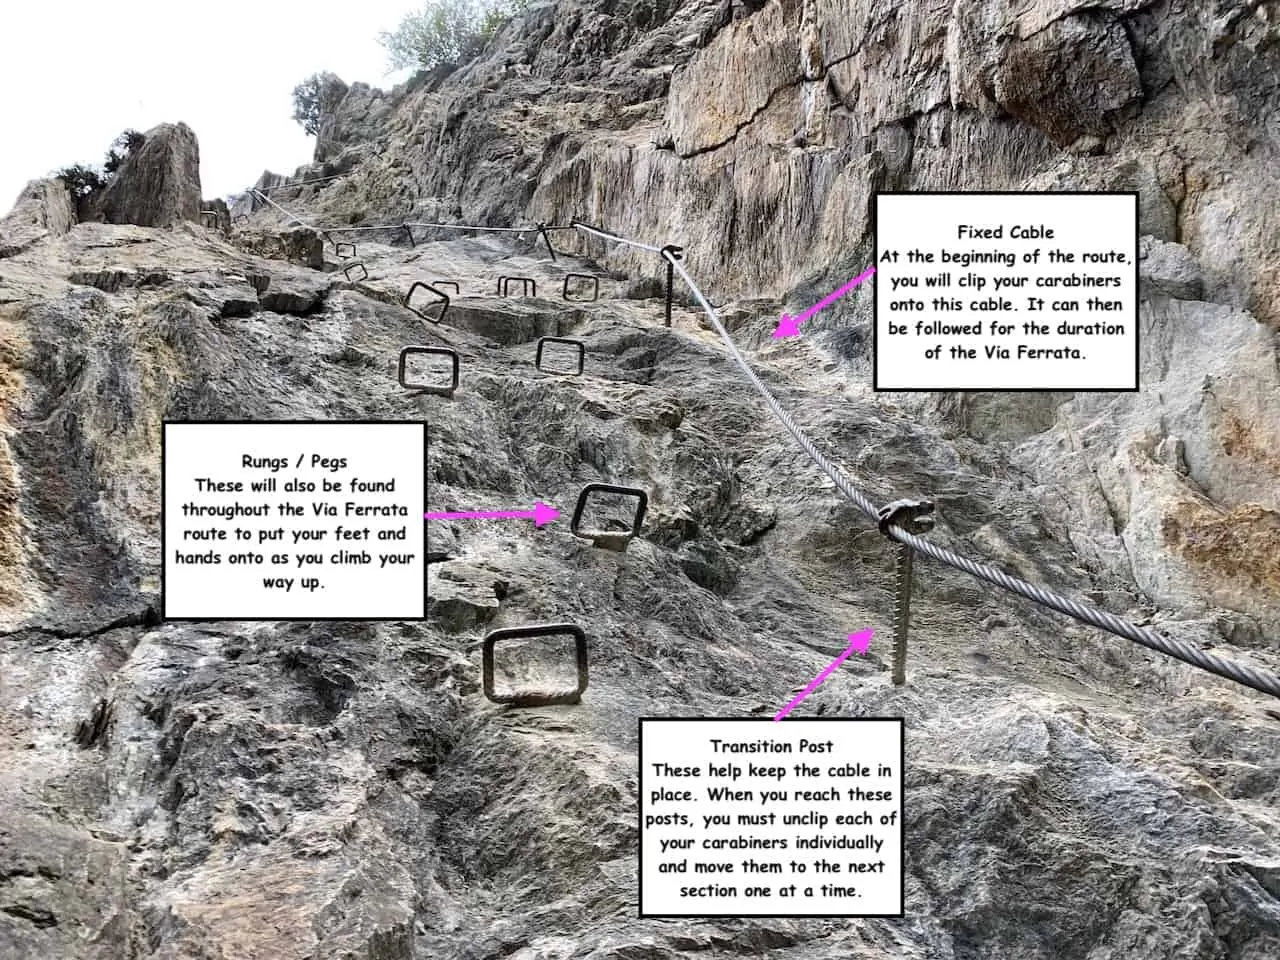
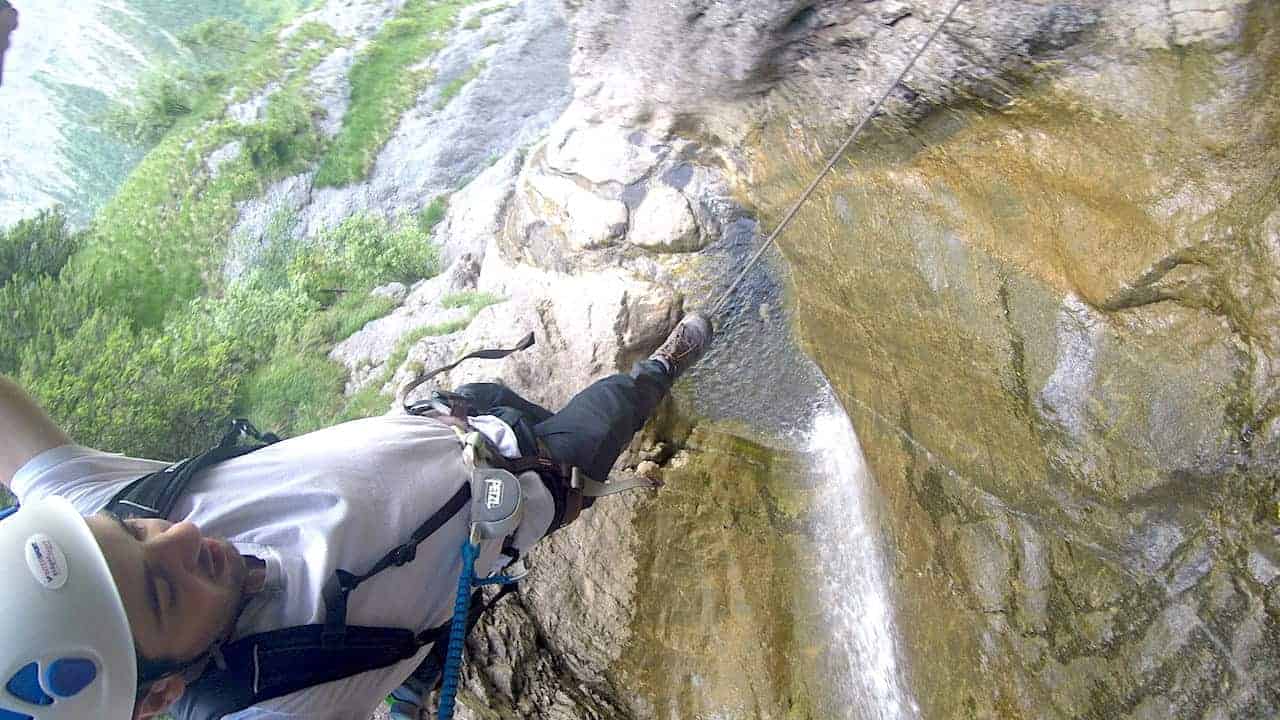
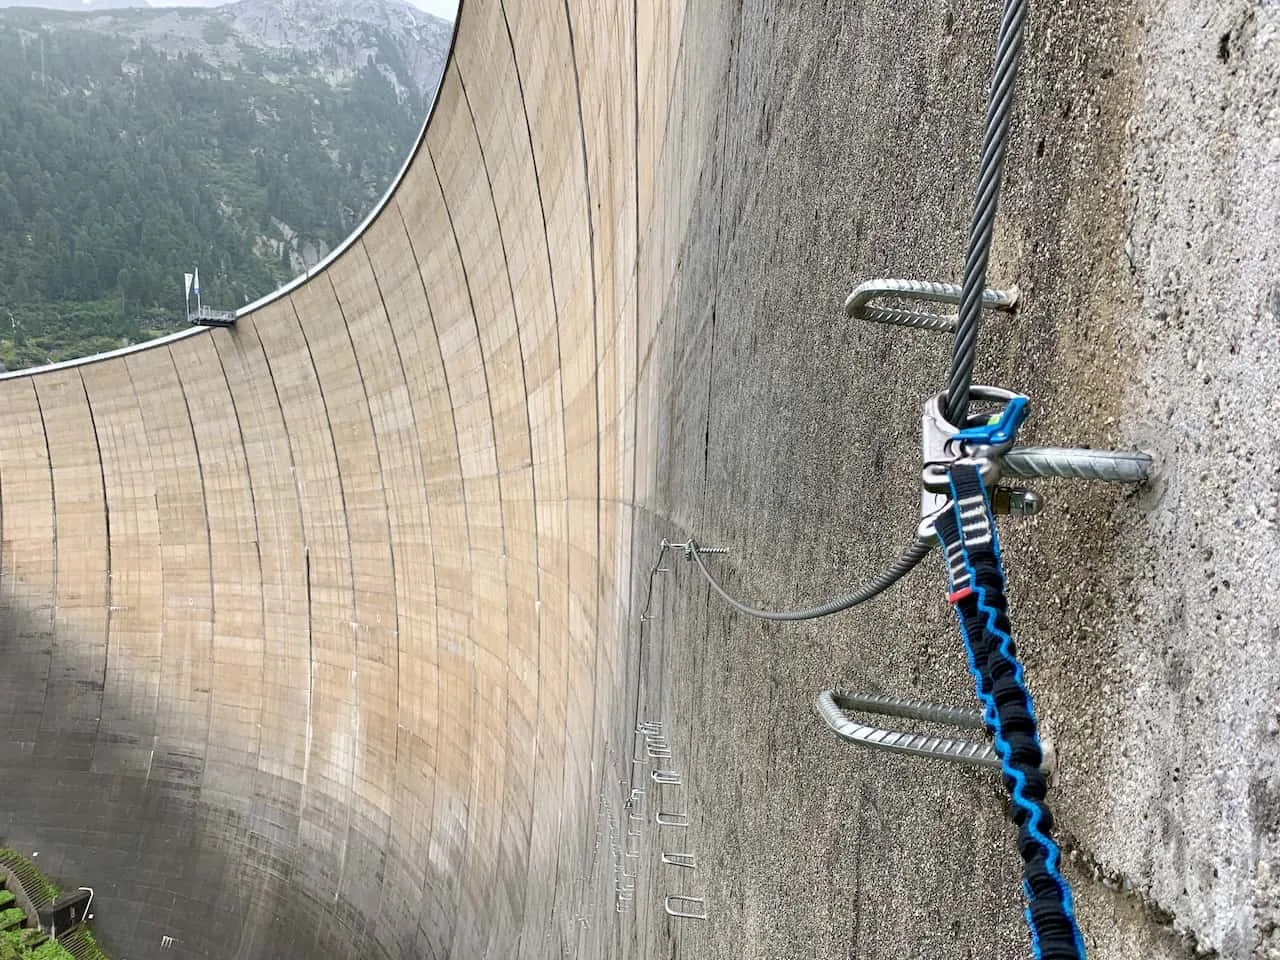
Essentially, a Via Ferrata route has three main features to them that are made out of metal/steel material (note that not every Via Ferrata will have them though, but the majority will):
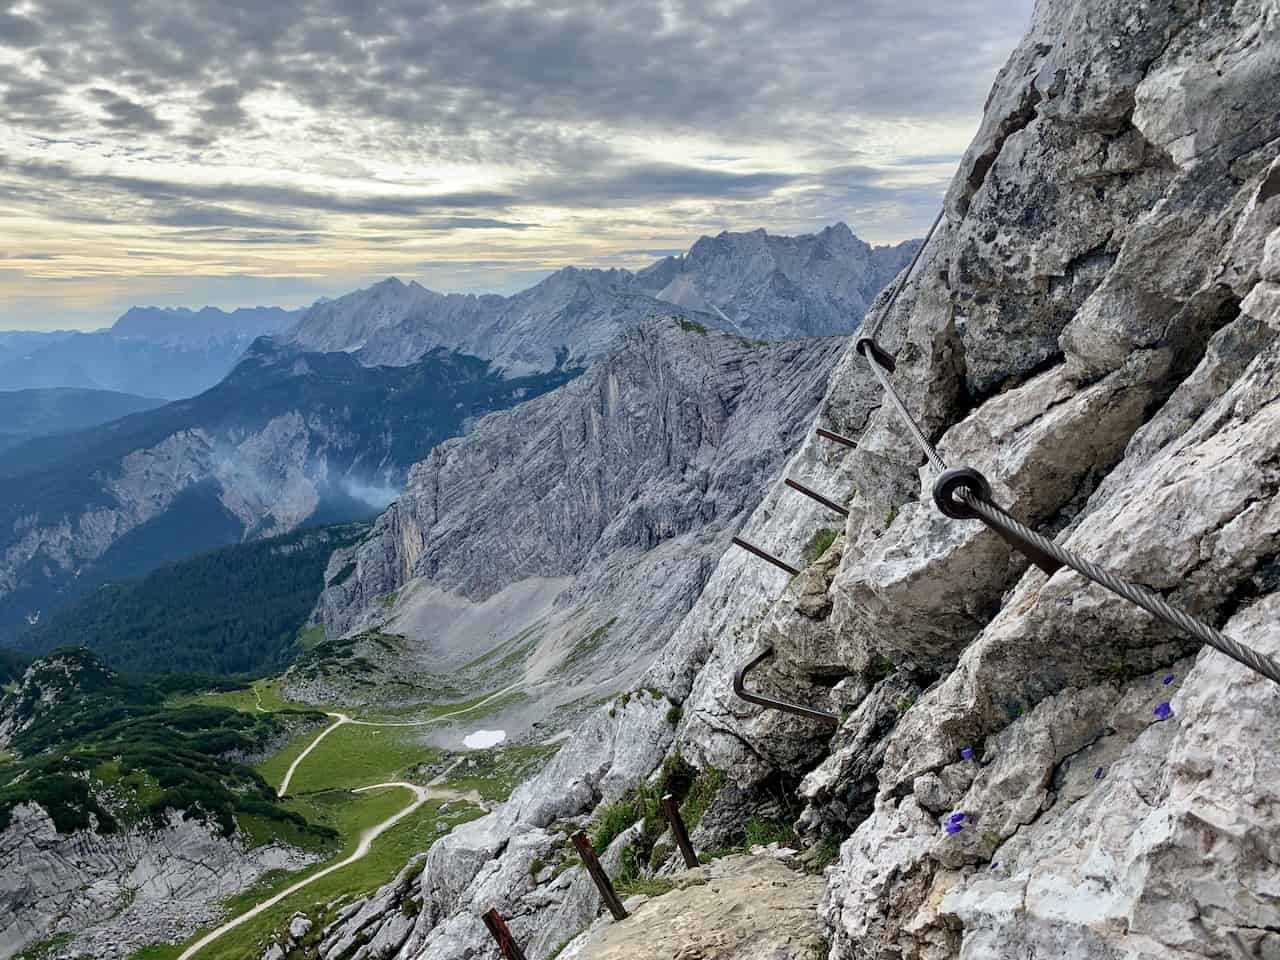
1) Fixed Cable – throughout the entirety of a Via Ferrata you will have a steel cable guiding you along the route. These cables are where you will clip your carabiners onto during the duration of the climb. As long as you are clipped in, you will be safe in the case you do slip or fall.
2) Transition Posts – The fixed cable is not just a single loose cable that runs its way through the entirety of the climb. Instead you will find posts (or similar support) built into the mountainsides that hold the fixed cable steady. When you reach these posts, you will unhook one of your carabiners, clip it onto the next section of cable, and then unclip your second carabiner, and clip it onto the next section of cable.
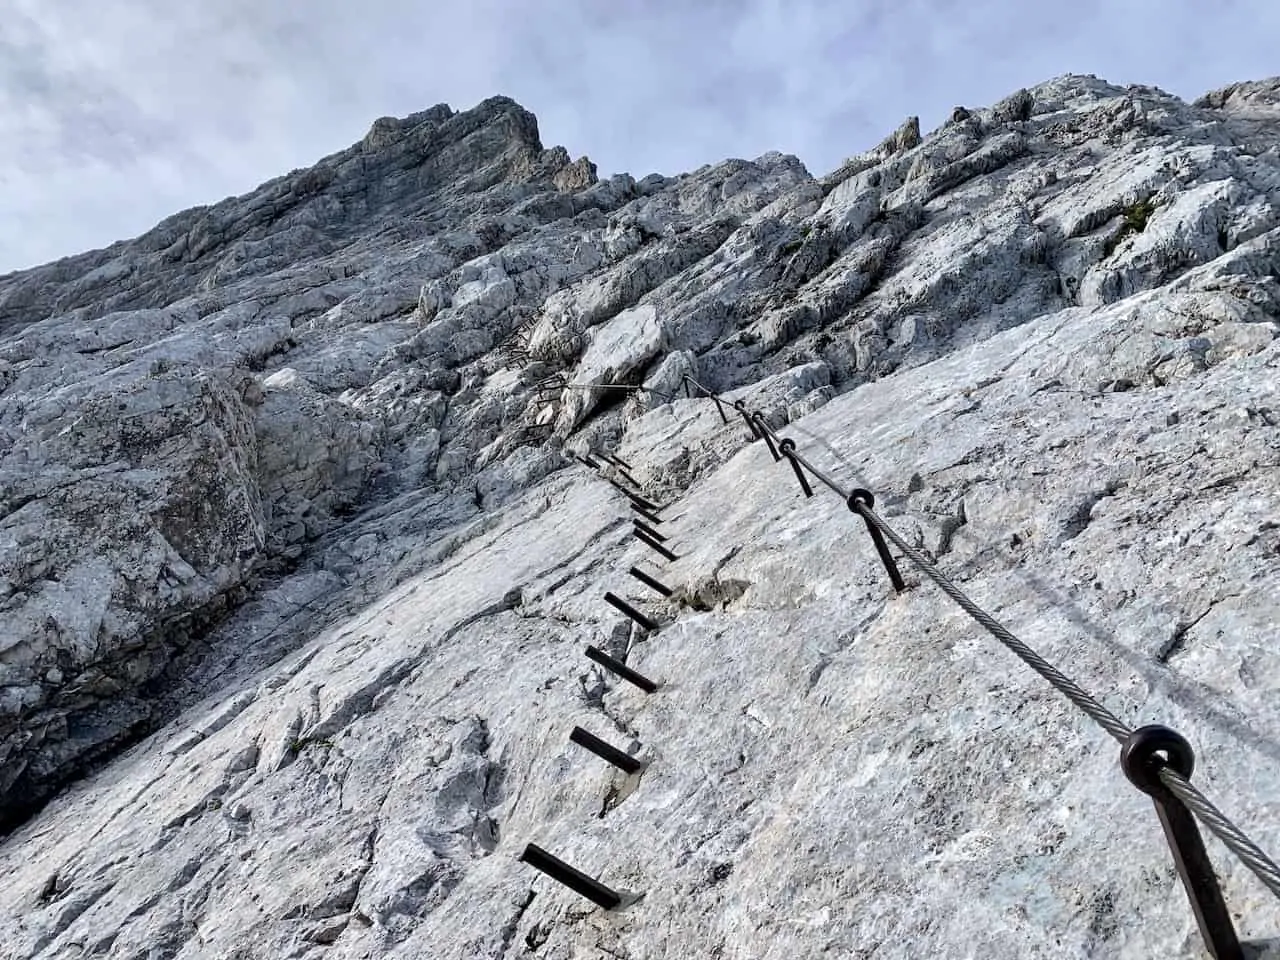
3) Rungs / Pegs – The last main aspect of a Via Ferrata are the rungs / pegs that are built into the mountainside. These rungs and pegs are where your feet (and hands) will go as you are making your way along the trail. As you might imagine, they will always be right next to the fixed cable, so you can safely maneuver the Via Ferrata.
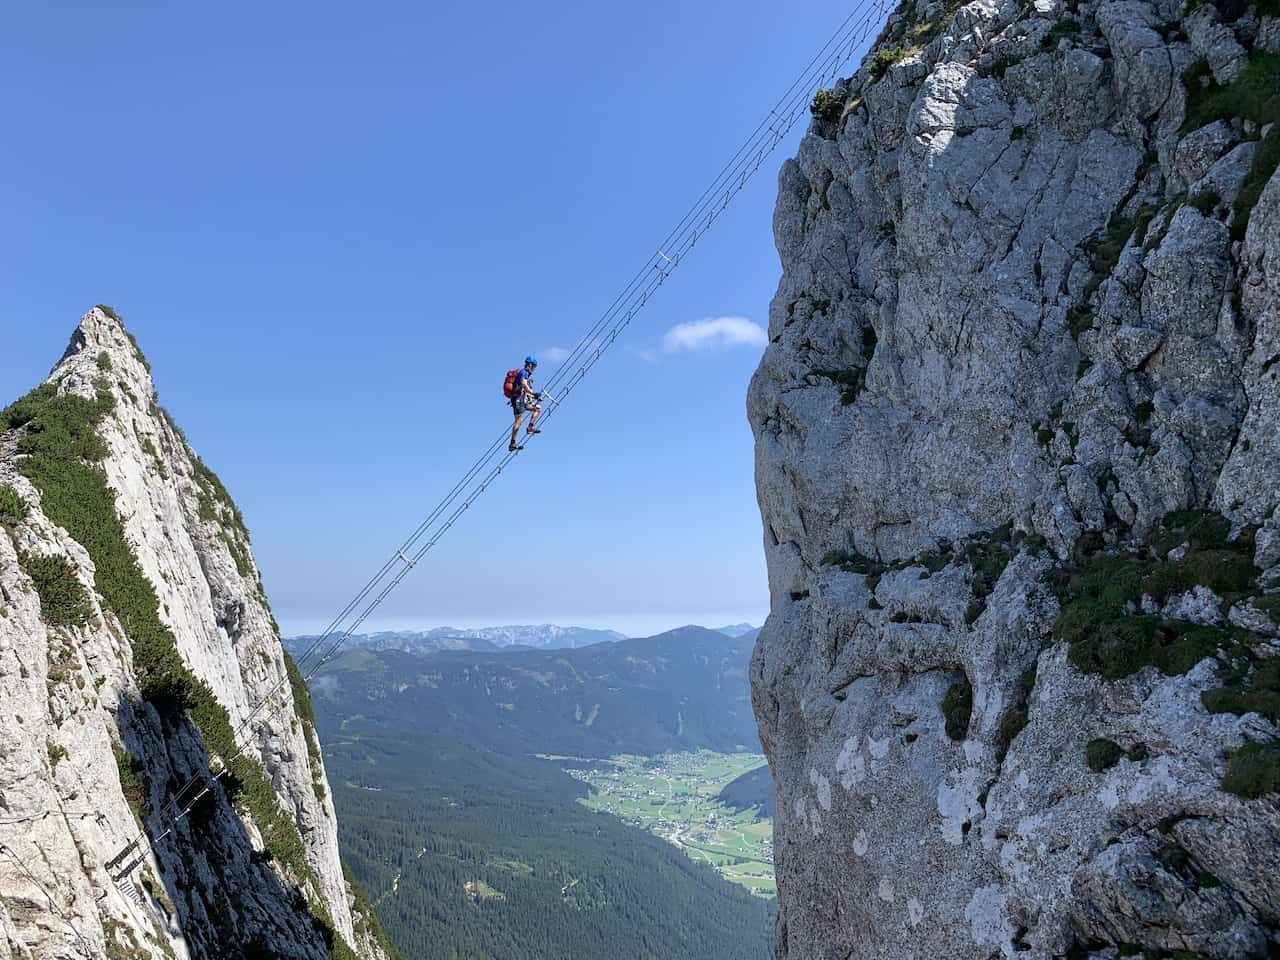
While those three will be found on most Via Ferratas, you may also come across some other unique features depending on the exact terrain that the route is built on. For example, you may come across ladders, bridges, tightropes, among several other aspects.
Odds are you will also need to navigate the terrain of the actual mountain in certain parts. So instead of there being a rung, you may need to find a foothold in the mountainside. Just because there are rungs or pegs in certain parts of the trail, doesn’t mean they will always be there every step of the way.
Below is an image that clearly shows the three features along a vertical climb. These of course can also be set up in a horizontal direction when the route goes along a rock face.
3) Via Ferrata Equipment
I know I touched on it a bit already but having the necessary Via Ferrata equipment is an absolute must when taking part of these routes.
By not using the equipment, you risk the life of yourself and others on the trail, so please be sure to be adequately prepared.
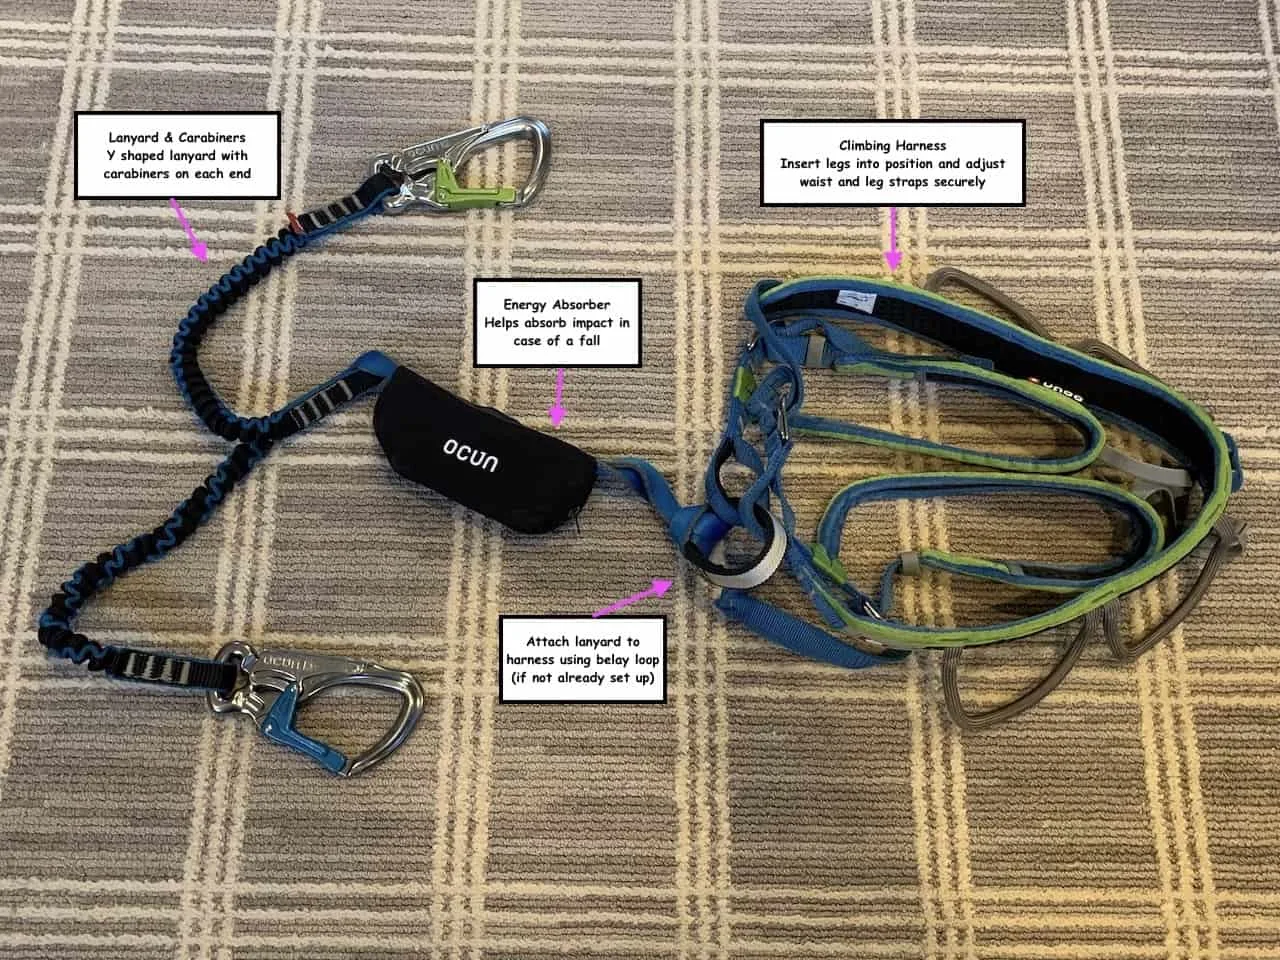
There are three required pieces of equipment that will be needed on all Via Ferrata routes:
1) Climbing Harness – simply step each leg into the harness, pull it up to your waist, and then tighten the straps around your legs and waist to make sure it is all secure.
2) Y Formation Lanyard with Two Carabiners & Energy Absorber – on the front of the climbing harness you will belay loop a lanyard onto it and then attach one carabiner to each end of the Y shaped lanyard (note this may already be done for you when you receive the equipment).
The energy absorber is there in the case you do slip or fall off the rungs. If this does happen, the energy absorber will absorb some of the impact and let out its additional rope to better protect you.
Remember this only works if you have safely clipped those carabiners onto the fixed cable!
3) Helmet – I have experienced multiple situations where a helmet has protected me on Via Ferratas. Whether it be small rocks falling from above or accidentally hitting my head on a metal rung, a helmet has been so important for me during these climbs. On top of those types of situations, a helmet will also better protect you in case of a more dangerous slip or fall.
» I will also recommend a solid pair of climbing gloves that can help with your grip along the way, as well as a pair of sturdy hiking shoes.
Below you can see a detailed image of my own Via Ferrata equipment that I take along with me on all my climbing routes.
If you do want to purchase your own set of Via Ferrata equipment, I would highly recommend a Via Ferrata Kit. It includes the three required pieces of equipment so you won’t need to worry about it when you arrive at your destination.
Note: when renting gear, be sure to always check the condition and try it on before heading out.

Other Hiking Gear
While the Via Ferrata equipment is essential for a safe climb, I would also advise to bring along other hiking apparel and gear when you make your way on the trails.
Hiking Packing List
In general when it comes to hiking, there are a few main aspects to consider. These includes clothing layers, hiking shoes, hydration & fuel, electronics, and other essentials.
Below in a breakdown of some of the top items, but be sure to check out the Hiking Packing List for a more comprehensive view.
Clothing Layers
Layering is going to be a top consideration when hiking. You will want to be prepared for all sorts of weather so you can be comfortable in different situations. Some items may include:
→ Hiking Shorts
→ Hiking Pants
→ Short Sleeve Shirt
→ Long Sleeve Shirt / Sun Hoodie
→ Mid Layer Fleece
→ Puff Jacket (not always needed)
→ Packable Rain Jacket (Columbia Watertight II)Note that your layers should be made of moisture wicking material as they are breathable and quick drying.
Footwear
Having appropriate footwear will also be very important. You will want to have shoes with the necessary grip and support to keep you safe on the trail.
→ Hiking Shoes (Keen Targhee)
→ Hiking Socks (Darn Tough)Other Essentials
Whether it is hiking gear, electronics, or just some miscellaneous items, here are some other essentials to bring along on hikes.
→ Hiking Backpack (Osprey Talon 22) & Rain Cover (Joy Walker Cover)
→ Hiking Poles (Black Diamond Trekking Poles)
→ Water Bottle (CamelBak Chute or Katadyn Filter Bottle)
→ Portable Charger (Anker PowerCore 5000mAh)
→ Action Camera (GoPro Hero)
→ Energy Bars & Snacks
→ Hat & Sunglasses
→ Sunscreen & Bug Spray
4) How to Climb a Via Ferrata Safely
Now that you have a better understanding of how Via Ferratas are built and the necessary equipment, let’s combine the two to get a better idea on how to safely climb a Via Ferrata.
Once you arrive at the starting point of a Via Ferrata and are suited up in the appropriate gear, it is time to begin your route. The first thing you will want to do is take both carabiners and clip them onto the fixed cable.
From there you will soon come across the first transition post section, where you will need to get your carabiners onto the next section of cable.
The first thing you will want to do is make sure you are nicely balanced and have at least one hand available to make the carabiner transition.
Once you are ready, you will take one single carabiner, unclip it from the first cable section and then clip it onto the next cable section.
Only once that first carabiner is secured onto the next section of cable, will you then take the second carabiner and do the same thing.
Remember – NEVER unclip both carabiners at the same time. The whole point of the carabiners is to ensure your safety. If you unclip both at the same time (even for a split second), you are compromising your safety and putting yourself in harm’s way.
These transition posts will be very frequent throughout the trail so do be prepared for a lot of these transitions. If you are a beginner, you should get used to it pretty quickly.
From there, you will follow the fixed line as you traverse the terrain, rungs, ladders and whatever else the Via Ferrata throws your way.
A helpful note here – always be aware of where the next transition post is. You do not want to continue past one, with your lanyard lagging behind you and then all of sudden you feel a tug and you are stuck because you didn’t realize there was a post.
In these situations, you will need to backtrack those few steps until you reach the post where you can transition the carabiners.
For this reason, I always like to make sure my lanyard is right beside me or in front of me and not lagging behind.
It is also important to note that Via Ferratas are mostly just one way routes. You will not have other climbers coming towards you and you will not need to come back the same way you came. At the end of these routes, you should have some sort of safe hiking trail that takes you back down.
However, it is important to note that some routes are one way. This means you will need to descend the same way you ascended. Be sure to do your research on each route beforehand to better understand what the Via Ferrata will entail.
5) Difficulty Levels
Believe me when I tell you, not all Via Ferratas are built the same. Do not assume just because you have successfully completed one Via Ferrata that you are now ready for them all.
I would pay very close attention to the difficulty level of Via Ferratas before deciding to complete one on your own. There are a few different difficulty scales out there but the main two I have come across are graded from A to F or K1 to K6.
There are some other scales out there so be sure to understand exactly what they entail if you see a difficulty level you aren’t familiar with.
You may also see plus (+) or minus (-) symbols when looking at different routes. These just break down the difficulty in more detail with a plus being harder and a minus being easier (i.e. B-, B, B+).
You also may see something rated as a A/B or C/D – these simply mean that the difficulty lays right in between the two.
Here is an extremely helpful chart courtesy of bergfreunde.eu that explains in detail what each difficulty level entails.
» As a pure beginner I would not go past a B/C difficulty unless you already have rock climbing / mountaineering experience, or are a very well-rounded athlete. Once you complete one in the B to C range, you can slowly work your way up the difficulty scale.
» I myself have never ventured past a D- difficulty and I am not sure I would be comfortable doing so unless I get more practice under my belt first. Remember, if you get stuck at a certain part of the Via Ferrata, you can’t just unhook and walk back.
You could literally be thousands of feet in the air on the side of a mountain. So, please, for your safety and others be sure you are well prepared for any Via Ferrata you decide to go on.
» Some Via Ferratas have safe exit routes, where you can get off the fixed cable and hike back to the starting point if you no longer wish to continue. This is not the case with most routes though.
» You may have an entire route be a mix between A/B/C, but there could be just one very difficult D section in there as well. So, although you may be comfortable up to a C, even if there is one D section of the route, you should not attempt the Via Ferrata until you are comfortable enough with a D.
» When looking at Via Ferrata difficulty levels, you may just see a one letter grade, which should represent the most difficult section of the route, or you may see a more detailed map that breaks down each and every section.
6) Weather Preparation
I can’t be more clear here – DO NOT ATTEMPT A VIA FERRATA IN POOR WEATHER CONDITIONS. That means anything from wind to rain to low cloud cover. That also means do not attempt a Via Ferrata after a rainfall.
You are relying on these rungs and fixed cables throughout the climb. Unlike a normal hiking trail, where you are usually on safe landscape, the same cannot be said on a Via Ferrata route.
» Attempting a route during or after a rainfall will significantly increase the danger aspect to the climb. The cable and rungs will be wet and slippery, and that can be very dangerous in these types of situations.
» Some of these routes are highly exposed, as you climb the side of mountains. Strong winds can severely affect your ability to complete Via Ferratas at altitude and I would not recommend taking part if strong wind is in the forecast.
» Lastly, cloud cover can also be a big issue here. It is hard enough to complete Via Ferratas when you can see everything in front of you. Now imagine, you barely can see the next rung because you are surrounded by white clouds in every which direction. Obviously, that is not a situation you want to be part of, so always be sure to check the forecast before heading out.
7) Klettersteig Routes
If you want to get a better idea of what exactly a particular Via Ferrata entails I recommend checking out some of the articles I put together that go over a few of my favorite climbs.
A) Murren to Gimmelwald Via Ferrata
This is a fantastic option for those around the Jungfrau Region of Switzerland. While it does have one very exposed section, it is a great route to take part of that also includes a tight rope and suspension bridge.
» Learn more about the Murren to Gimmelwald Via Ferrata

B) Alpspitze Mountain
The easiest route I have been on was the one up to the top of Alpspitze mountain in Bavaria. This A/B route takes you from the top cable car station up to the summit of the mountain, where you can take in some 360 degree views of the region.
» Learn more about the Alspspitze Mountain Via Ferrata
C) Mayrhofen Zillertal Valley
The valley town of Mayrhofen is packed with various Via Ferrata routes nearby. I took part of a few of these routes, which all varied in difficulty. If headed to the area, you are sure to find something that works for you.
» Learn more about the Mayrhofen Zillertal Valley Via Ferratas

D) Schlegeis 131
This was probably the most unique route I took part of. Instead of a Via Ferrata up a mountain, this one went up the side of a dam wall! While it is a pretty straightforward climb, the end of the route gets intense as you are fighting back gravity with every step up.
» Learn more about the Schlegeis 131 Via Ferrata

E) Klettersteig Donnerkogel
The fan favorite here is the Donnerkogel Klettersteig located 30 minutes away from Hallstatt. While the Via Ferrata itself is a thrilling climb with beautiful views throughout, it really is the famous Stairway to Heaven that makes the route so unique.
» Learn more about the Donnerkogel Klettersteig Via Ferrata

I sure hope you are now better educated and prepared to head on some Via Ferratas for yourself! If you have any questions or comments, please write them in below.
Have fun out there and safe travels!


Юрий Ограничителей
Friday 6th of February 2026
Impressive! tpa.pp.ua is my go-to for pipeline details.
Alison Stockwell
Thursday 9th of February 2023
Nice article but please can you amend it to show how to check that hired VF kit is safe. My friend and I wanted to hire some in Morocco, but when we checked it the absorbers on both kits had already been ripped and there was a label saying "last checked date 2011". Novices would think to do this and the local hirer was clueless. Needless to say we didn't hire the kit.
Charles
Saturday 11th of February 2023
Thanks Alison for the call out. I have included a sentence to always check the gear before taking it out on the trail. Hope you enjoy some better experiences in the future!
Harry
Sunday 11th of September 2022
Hey! Not all via ferratas have rungs and pegs. And, not all ferratas are one way only. So you'll have to learn how to safely move post another climber while on a cable.
Charles
Monday 12th of September 2022
Hey Harry - appreciate the info. I made some changes in the article to reflect that feedback. Thanks!
Hobo
Monday 22nd of August 2022
Excellent information and fotos. Thanks for taking the time and effort to make this available for all.
Sergiu
Thursday 5th of May 2022
Nicely written. Useful information 👍