The mountains around Wanaka offer some of the best hiking opportunities in all of New Zealand. While you have some tougher climbs out there like Roys Peak and Isthmus Peak, one hike that nearly everyone can take part of is the Mount Iron Track.
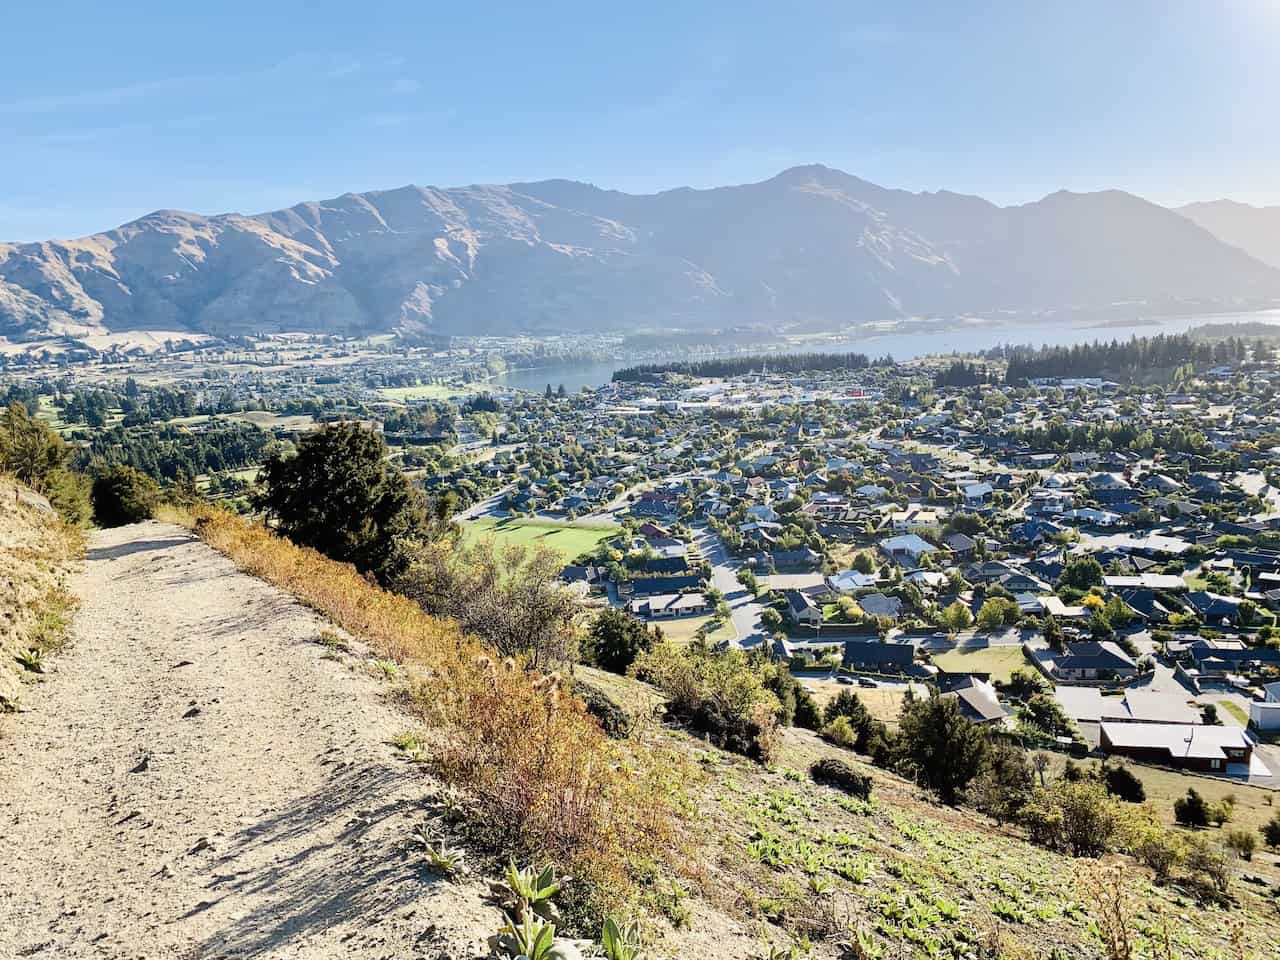
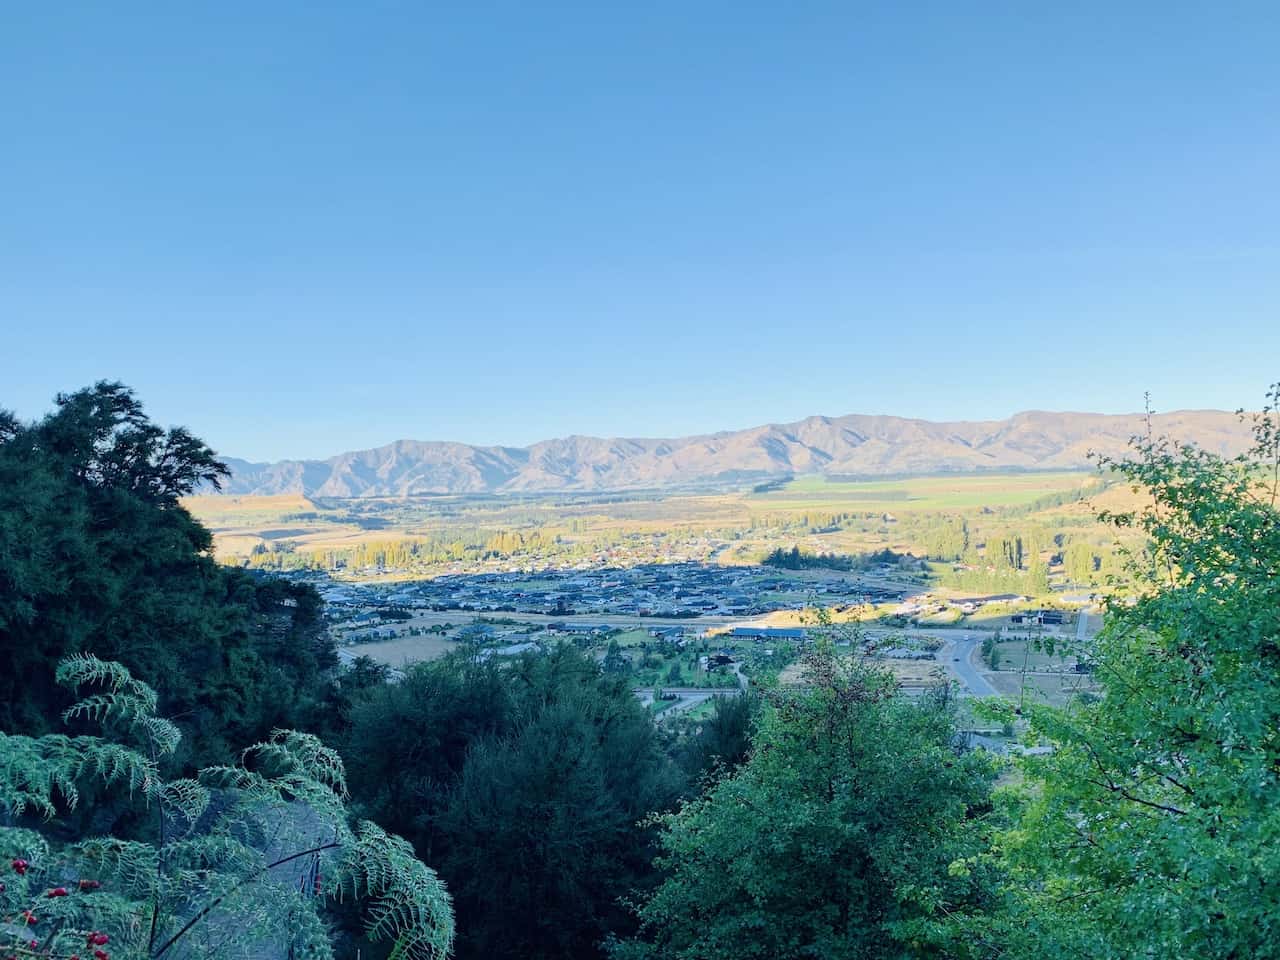
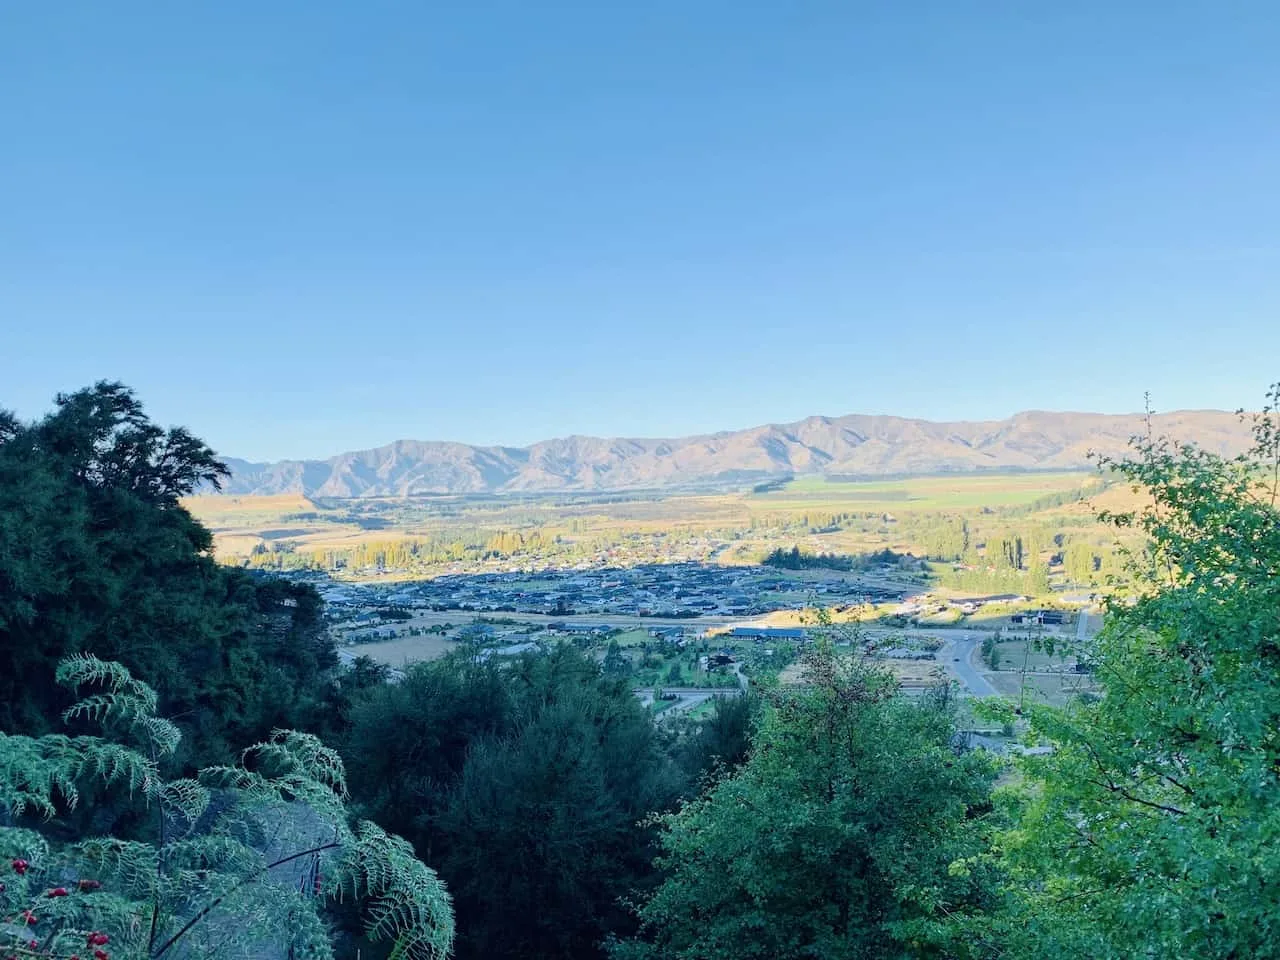
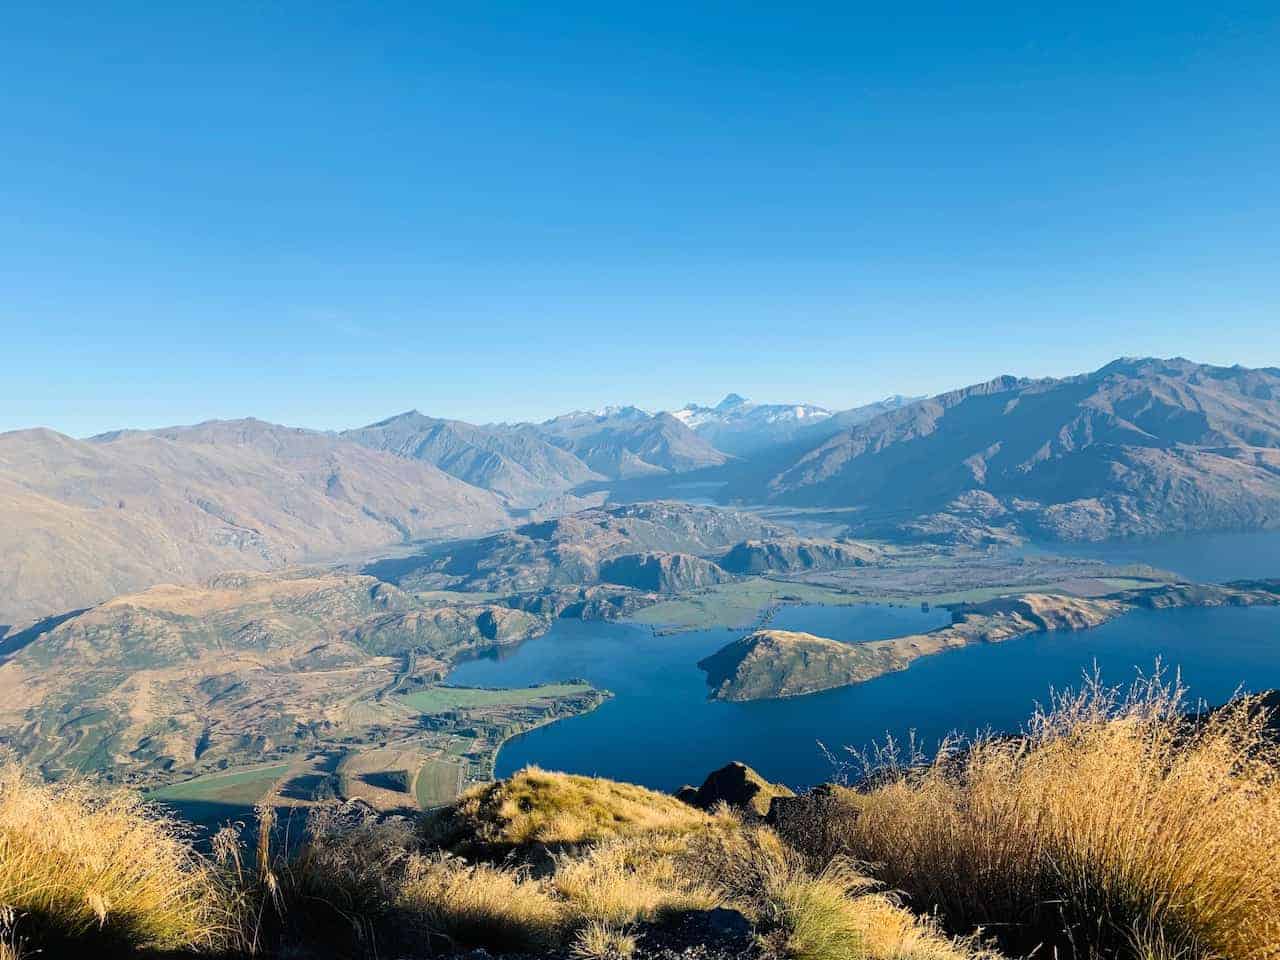
From the top of Mount Iron, you will be able to take in the views of the town below alongside the beautiful Lake Wanaka and the surrounding mountains.
* Affiliate Disclosure: This post may contain affiliate links, which means I may receive a commission if you make a purchase through the links provided, at no additional cost to you. Thanks for supporting the work I put into TripTins!
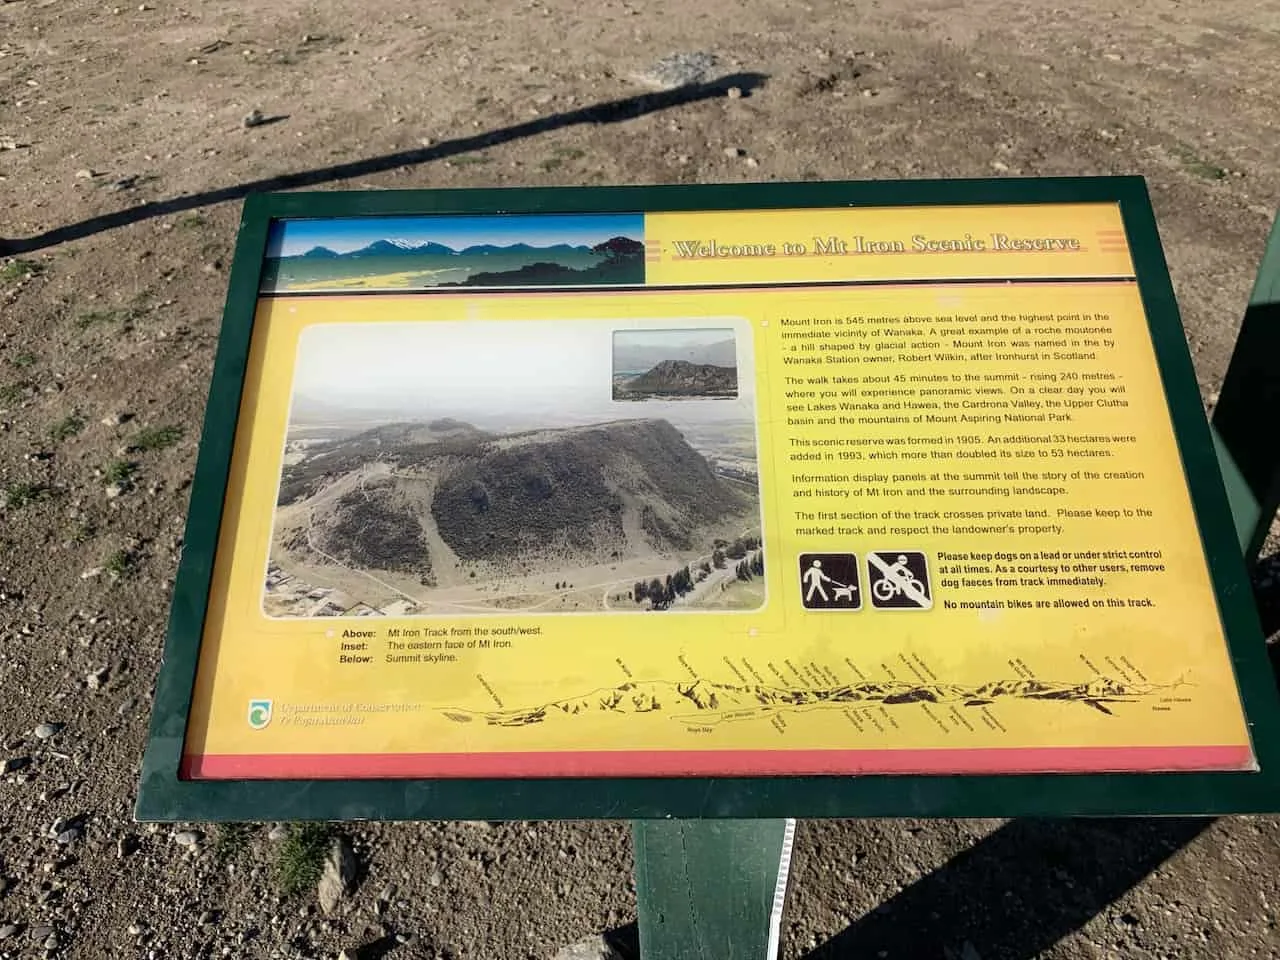
1) Mt Iron Wanaka Facts
If you are looking to take part of the trail, below are some helpful facts to better prepare you for hike up Mt Iron of Wanaka, New Zealand.
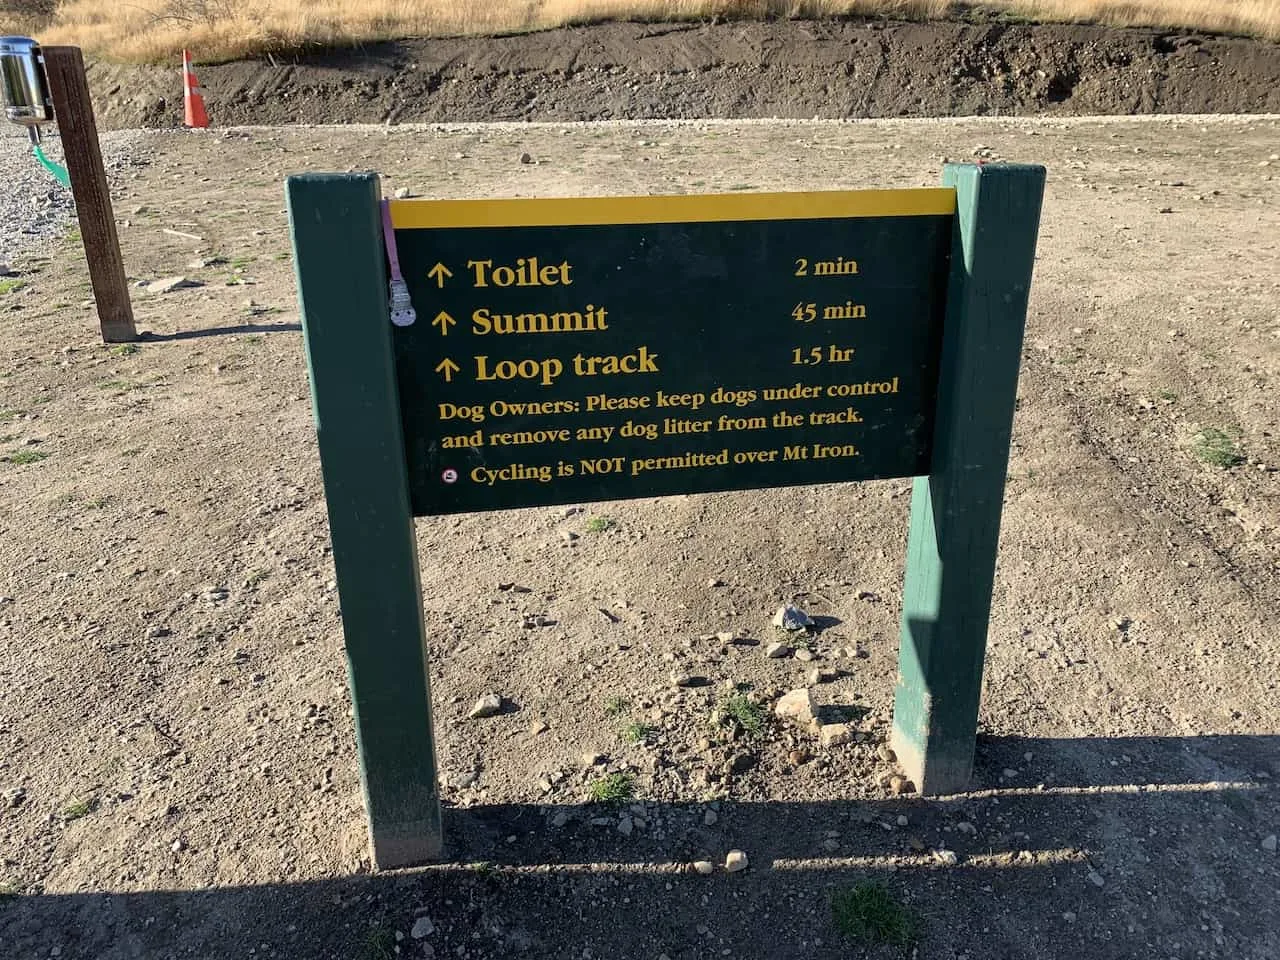
Starting & Ending Point: Mount Iron Trail Parking (see map below)
Mid Point: Top of Mt Iron
Length: 4.5 KM / 2.8 Miles
Duration: 90 Minutes
Elevation Gain: 240 Meters / 787 Feet
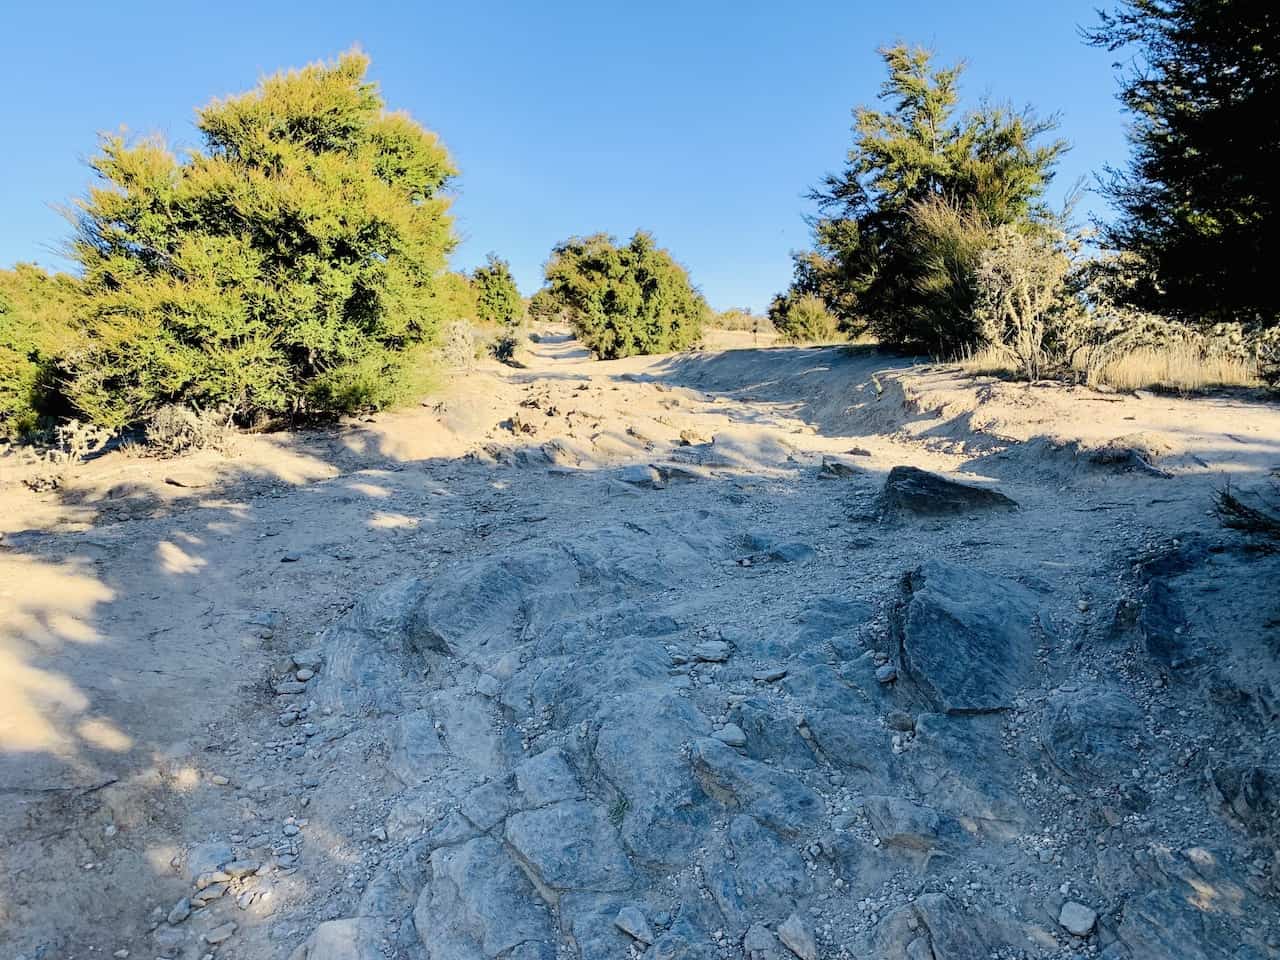
Track Type: Mostly Dirt (some rocks and stairs)
Route Type: Loop
Difficulty: Easy
Tip: Head there for sunrise or sunset for some great picture opportunities!
While I would say this is an easy trail to take part of (especially if comparing to some of the other hikes around the area), it does have a bit of elevation gain to go along with it. So just be aware before heading off onto the trail!


2) How to Get to the Starting Point
The Mount Iron Track starts just outside the main town center of Wanaka. The official address that comes up on Google Maps is:
Mount Iron Trail Parking, Iron Mountain Trail, Wanaka 9382, New Zealand
Since the starting point is so close to the town center, even if you do not have a car, you can still easily take part of the trail.
From Wanaka, it should take less than 30 minutes to get to the trailhead. This would add an additional hour round trip of walking but it still is a pretty convenient hike to take part of.
If you do have a car though, you can drive the 5 or so minutes right to the parking lot and head out from there. Since it is a loop track, you will end right back up at the parking lot at the end of the hike.
To learn more about driving in NZ check out the Driving in New Zealand Guide up on the site.
→ Be sure to check out Rentalcars.com when it comes to renting a car in New Zealand. The site will show you car options & prices from a variety of companies. This ensures that you will be able to choose the perfect car (and deal) for your trip to the country.
3) What To Bring on the Trail
Whenever heading off on day hikes, I always recommend being adequately prepared when it comes to the type of gear to bring along.
Check out the below packing list to get you ready for this hike and other hikes in New Zealand.
While the Mt Iron Track won’t require many of the items, it is always good to prepare ahead of time for any other trails you decide to go on.
Hiking Packing List
In general when it comes to hiking, there are a few main aspects to consider. These includes clothing layers, hiking shoes, hydration & fuel, electronics, and other essentials.
Below in a breakdown of some of the top items, but be sure to check out the Hiking Packing List for a more comprehensive view.
Clothing Layers
Layering is going to be a top consideration when hiking. You will want to be prepared for all sorts of weather so you can be comfortable in different situations. Some items may include:
→ Hiking Shorts
→ Hiking Pants
→ Short Sleeve Shirt
→ Long Sleeve Shirt / Sun Hoodie
→ Mid Layer Fleece
→ Puff Jacket (not always needed)
→ Packable Rain Jacket (Columbia Watertight II)Note that your layers should be made of moisture wicking material as they are breathable and quick drying.
Footwear
Having appropriate footwear will also be very important. You will want to have shoes with the necessary grip and support to keep you safe on the trail.
→ Hiking Shoes (Keen Targhee)
→ Hiking Socks (Darn Tough)Other Essentials
Whether it is hiking gear, electronics, or just some miscellaneous items, here are some other essentials to bring along on hikes.
→ Hiking Backpack (Osprey Talon 22) & Rain Cover (Joy Walker Cover)
→ Hiking Poles (Black Diamond Trekking Poles)
→ Water Bottle (CamelBak Chute or Katadyn Filter Bottle)
→ Portable Charger (Anker PowerCore 5000mAh)
→ Action Camera (GoPro Hero)
→ Energy Bars & Snacks
→ Hat & Sunglasses
→ Sunscreen & Bug Spray
4) Where to Stay in Wanaka
Wanaka is a small lakeside town with plenty of small restaurants, bars, cafes, and shops. There are several accommodation options to choose from at various price points.
Below are some recommended options to browse through:
Budget Friendly
1. YHA Wanaka
3. Wanaka Kiwi
Mid Tier / Luxury
1. Edgewater
3. The Moorings
5) The Mt Iron Wanaka Track
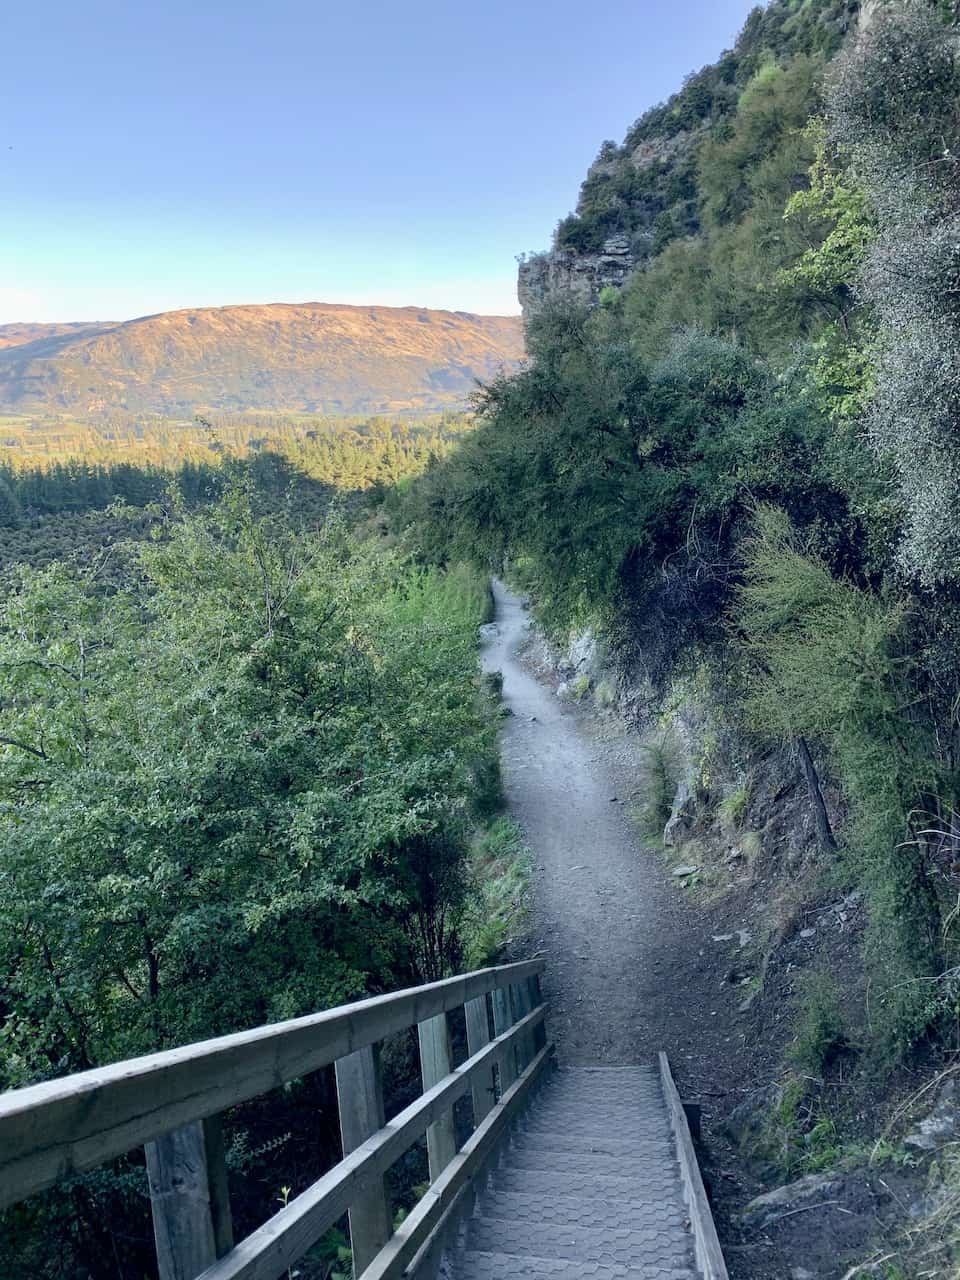
Now that you have a bit of background on the track, lets get a bit more into the hike itself. Overall, the trail is pretty self-explanatory and will not require much navigation on your part.
It is one way up along the trail to the top of the mountain, and then once up top you can decide to head back the same way you came or complete the loop around the other side of the mountain.
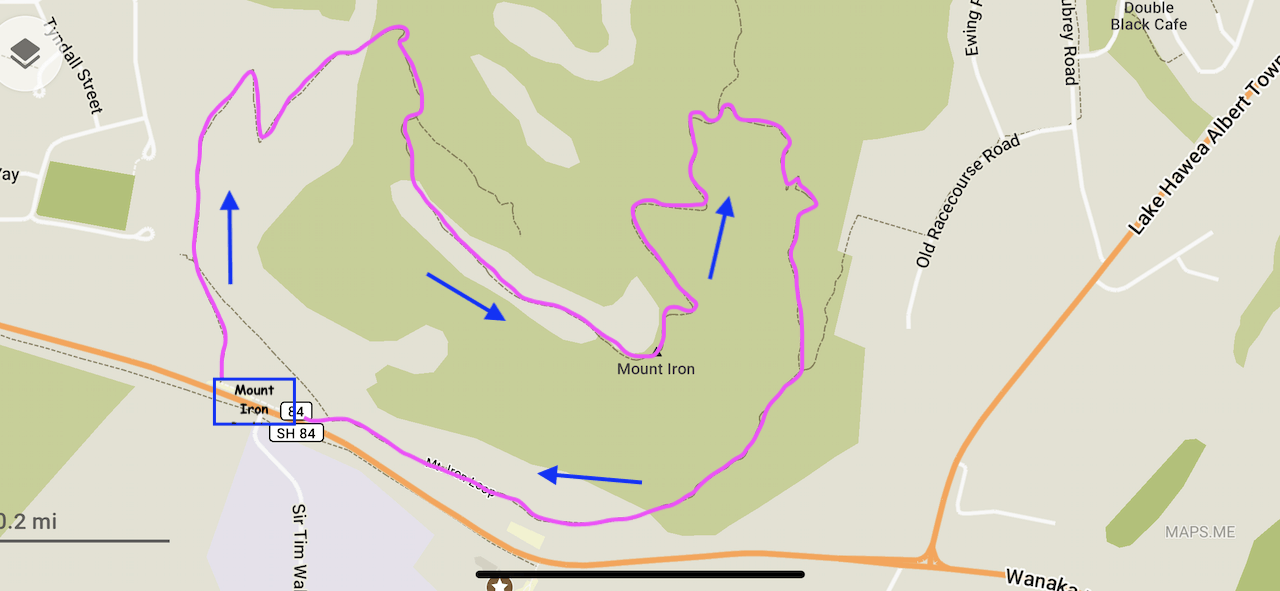
The beginning of the track will slowly take you above the town and you will get to take in some great views over the town, the lake, and mountains farther out in the distance.

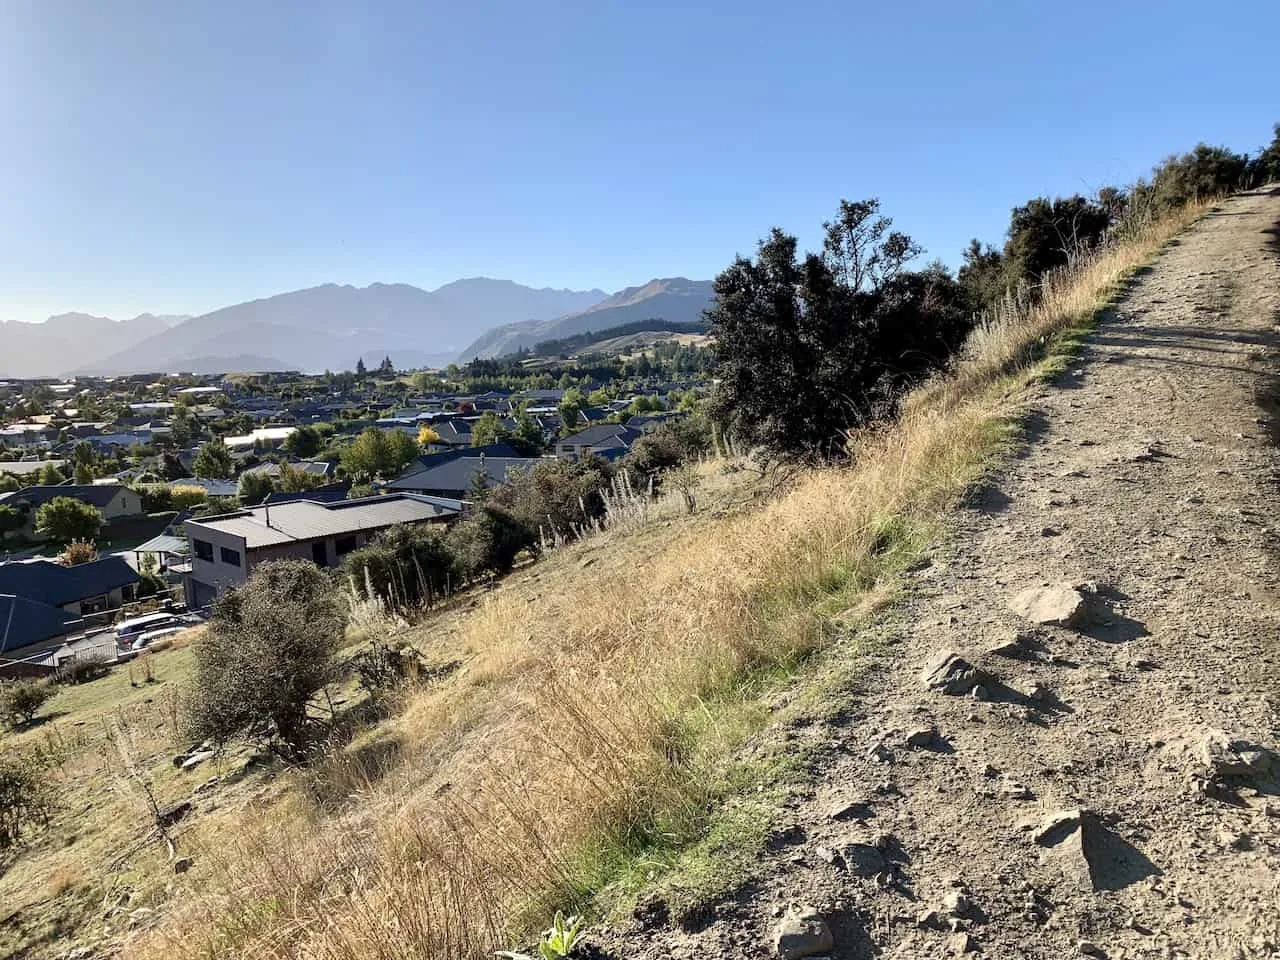


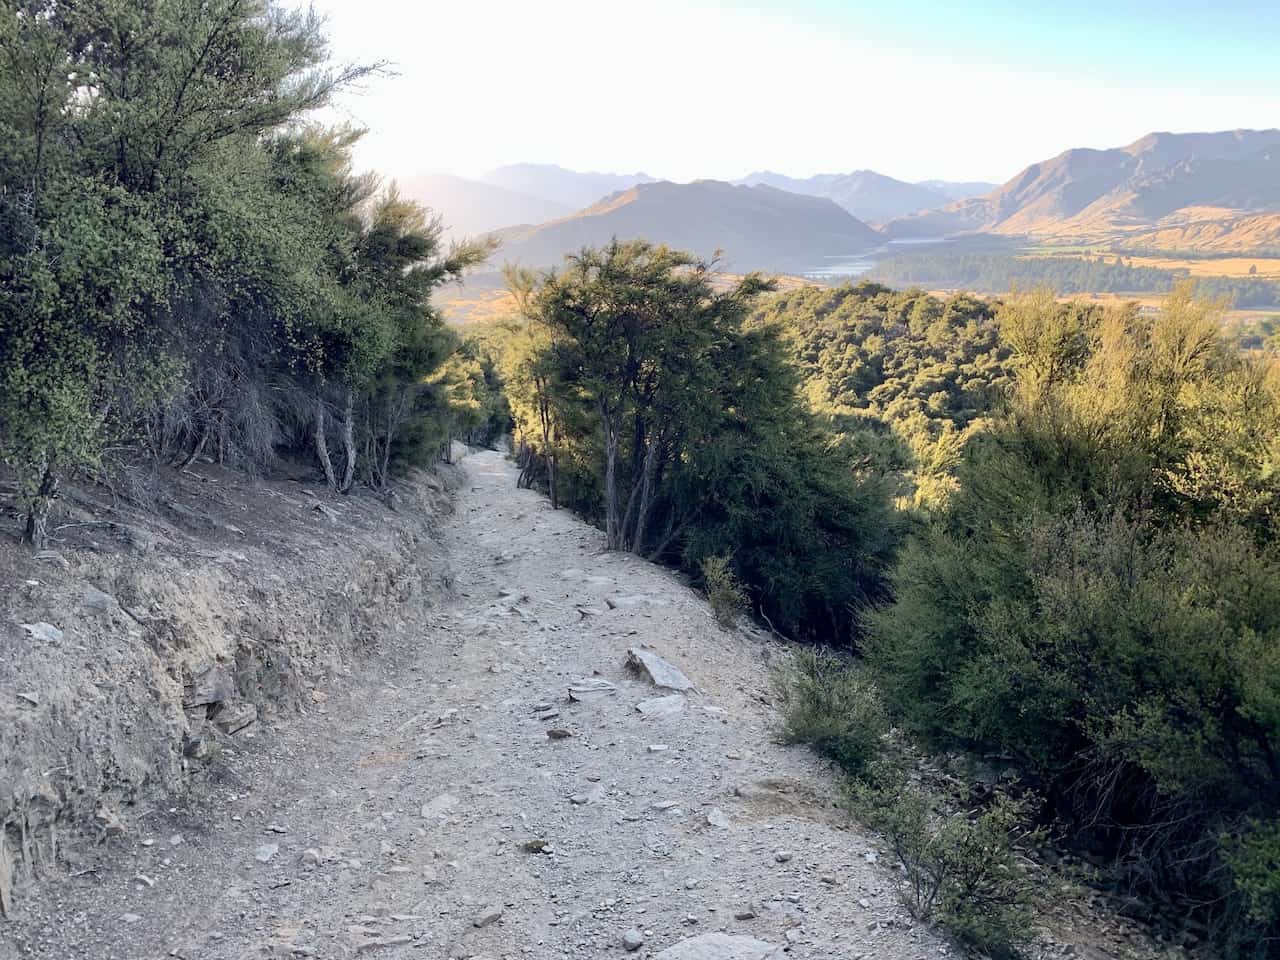
As you continue up the trail, there will be some uneven terrain to maneuver your way around. It is nothing too bad but just be aware that the track will not always be flat.

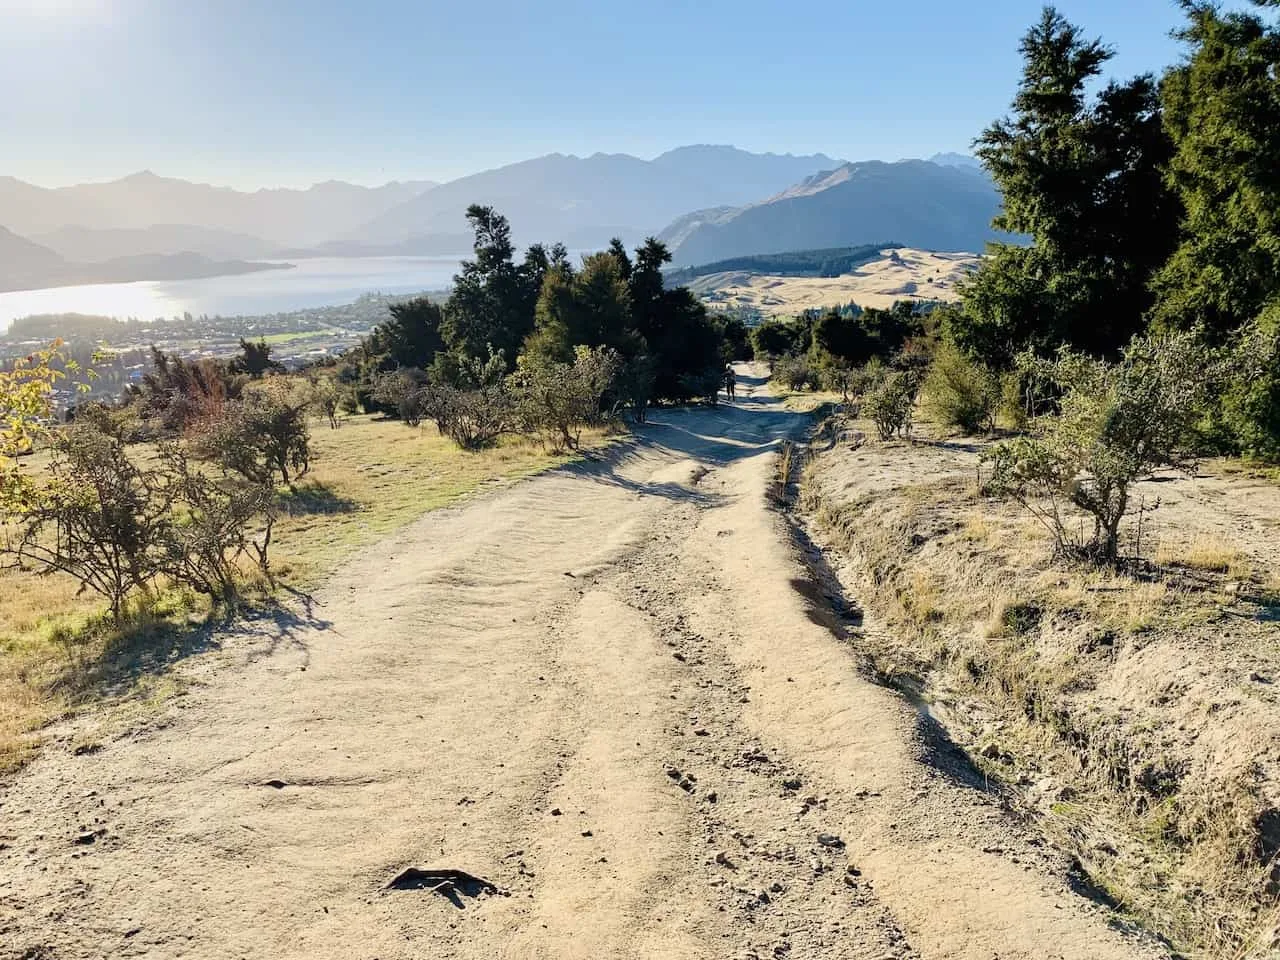
You will start walking further up and along Mt Iron and the views will begin to get more expansive in every which direction.
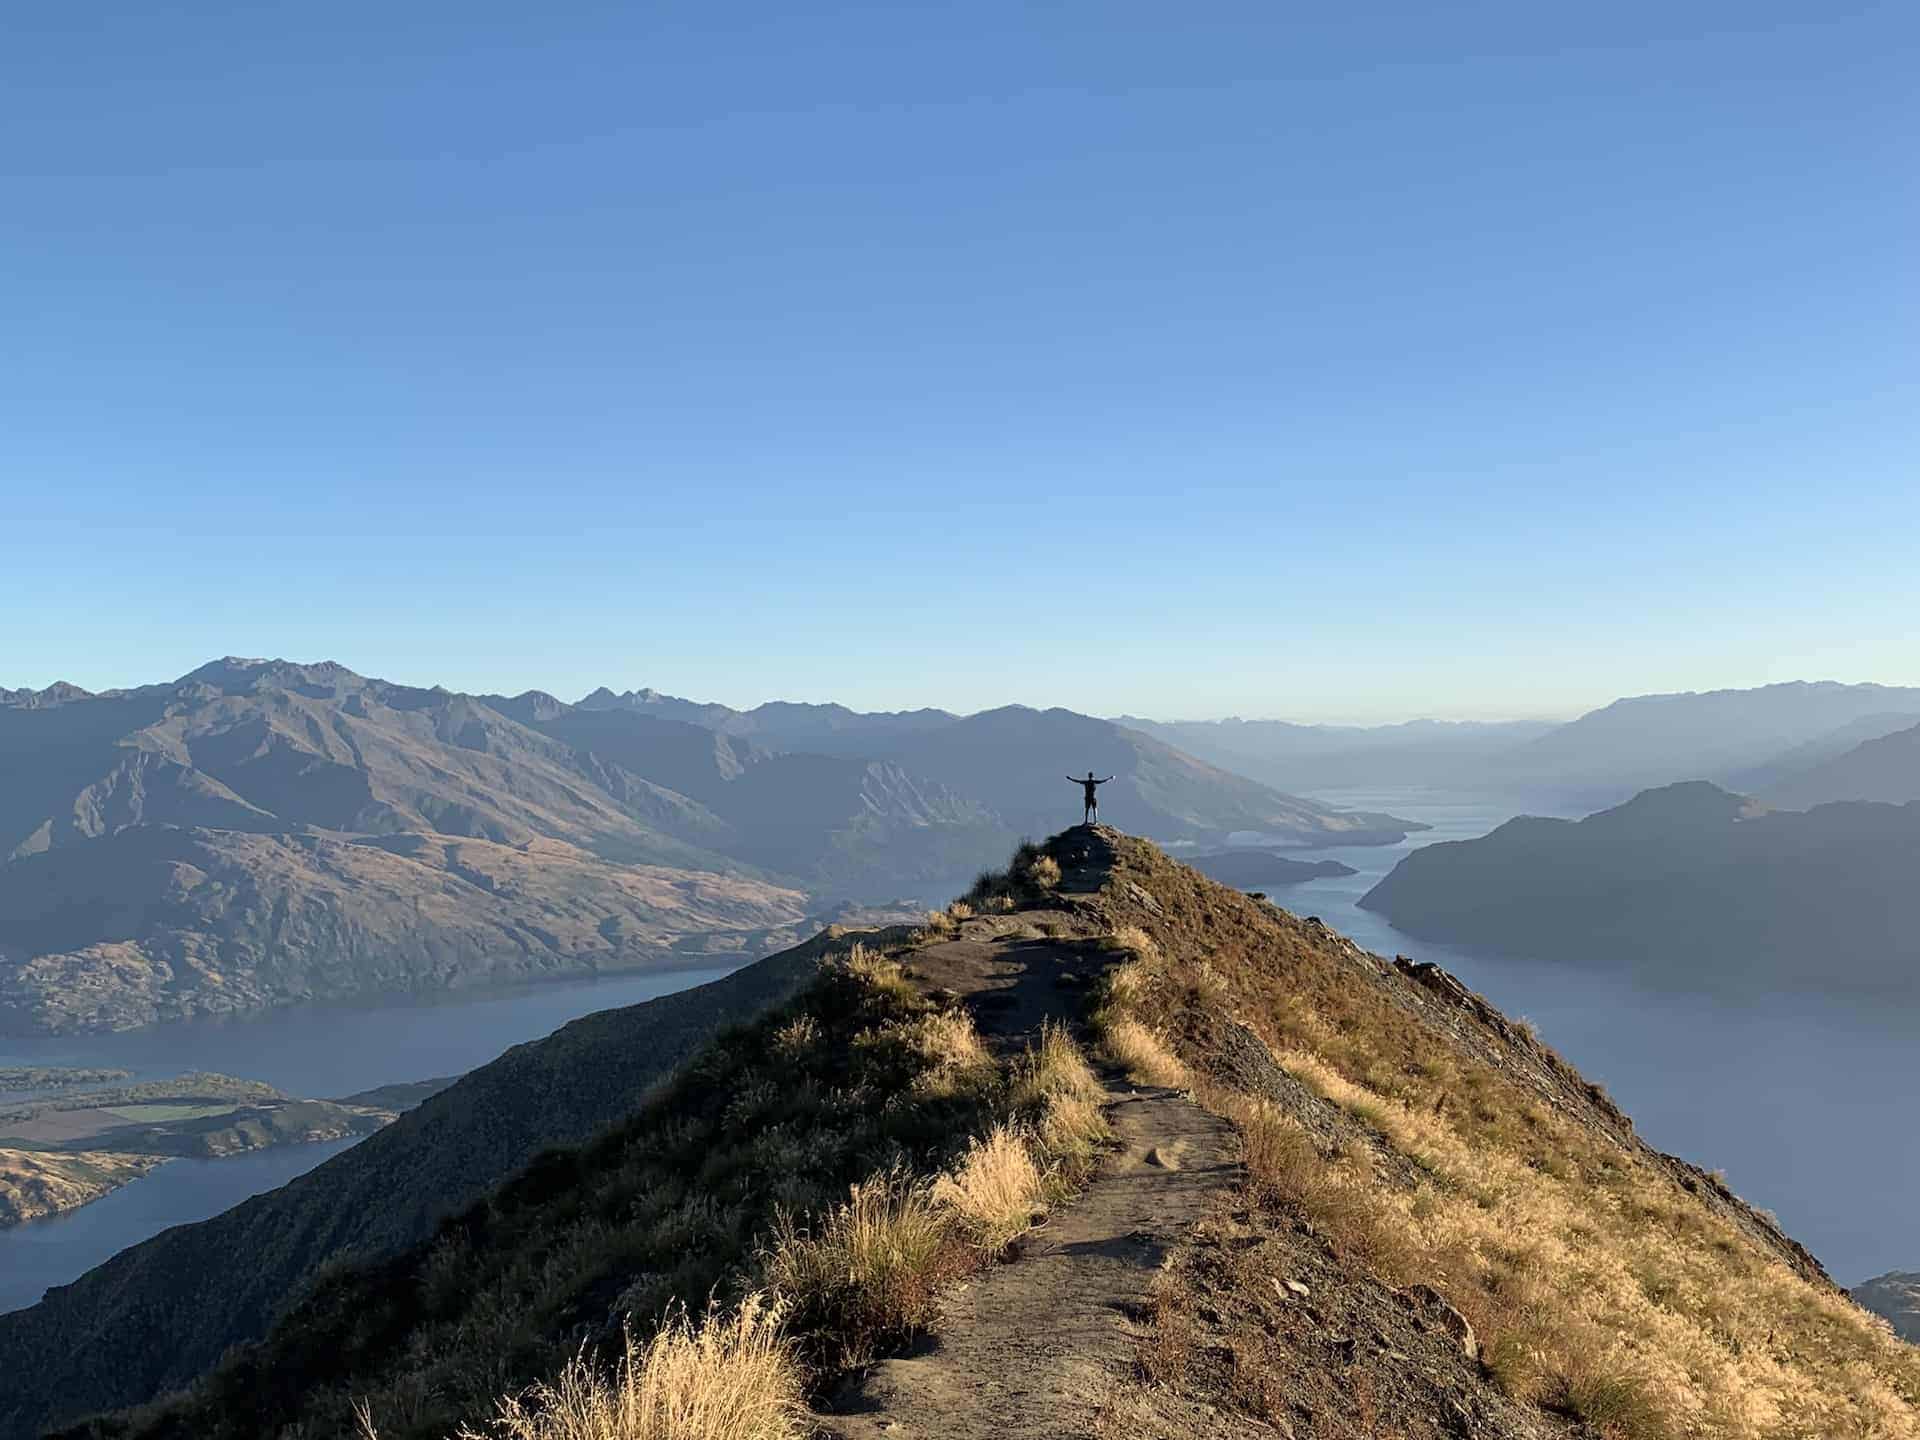
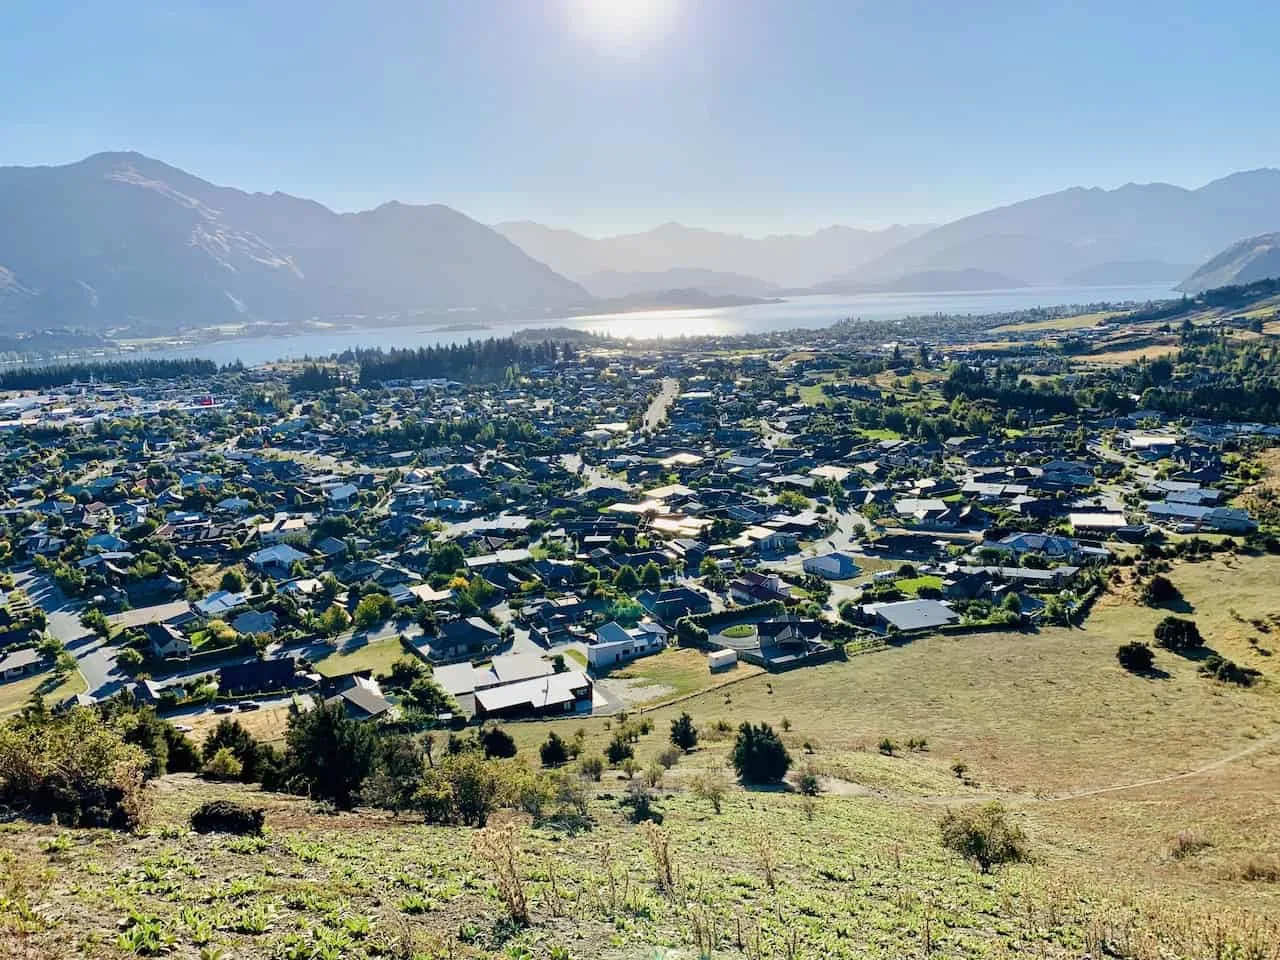
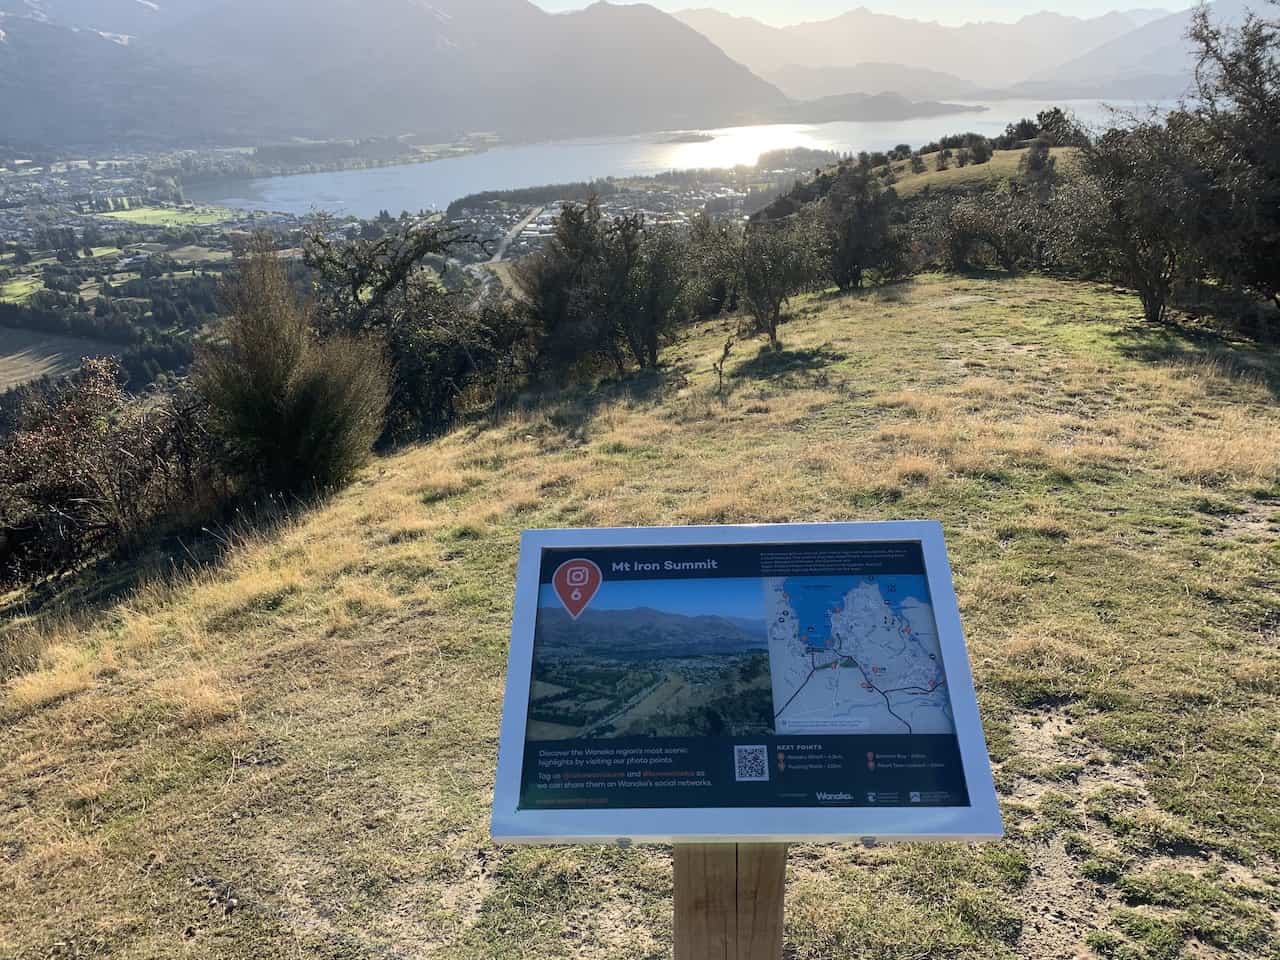
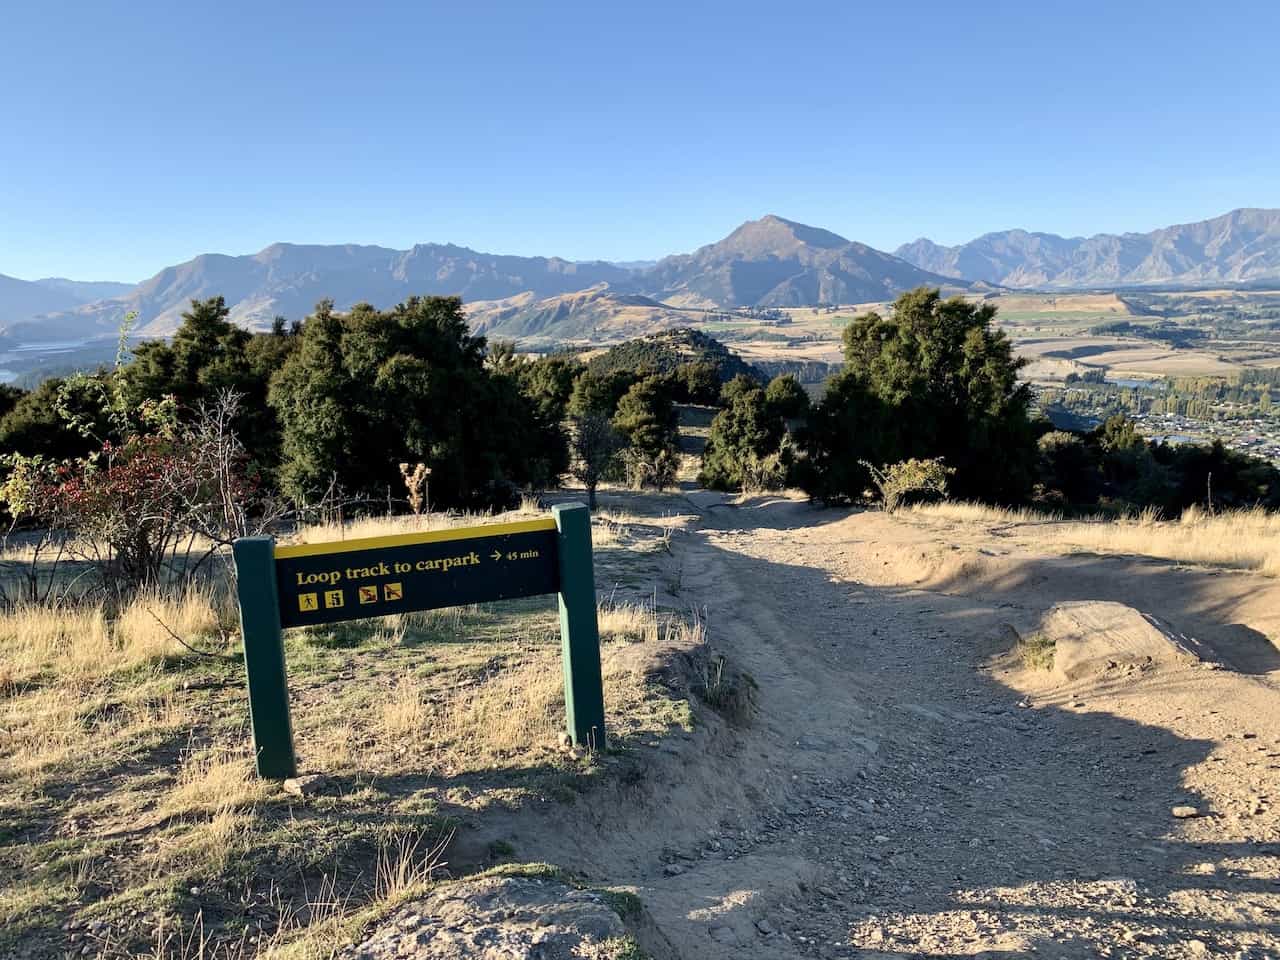
Soon enough you will reach the Mt Iron Wanaka summit and you will not only be able to see the side of Lake Wanaka but you will also be able to enjoy the views on the other side of the mountain as well.

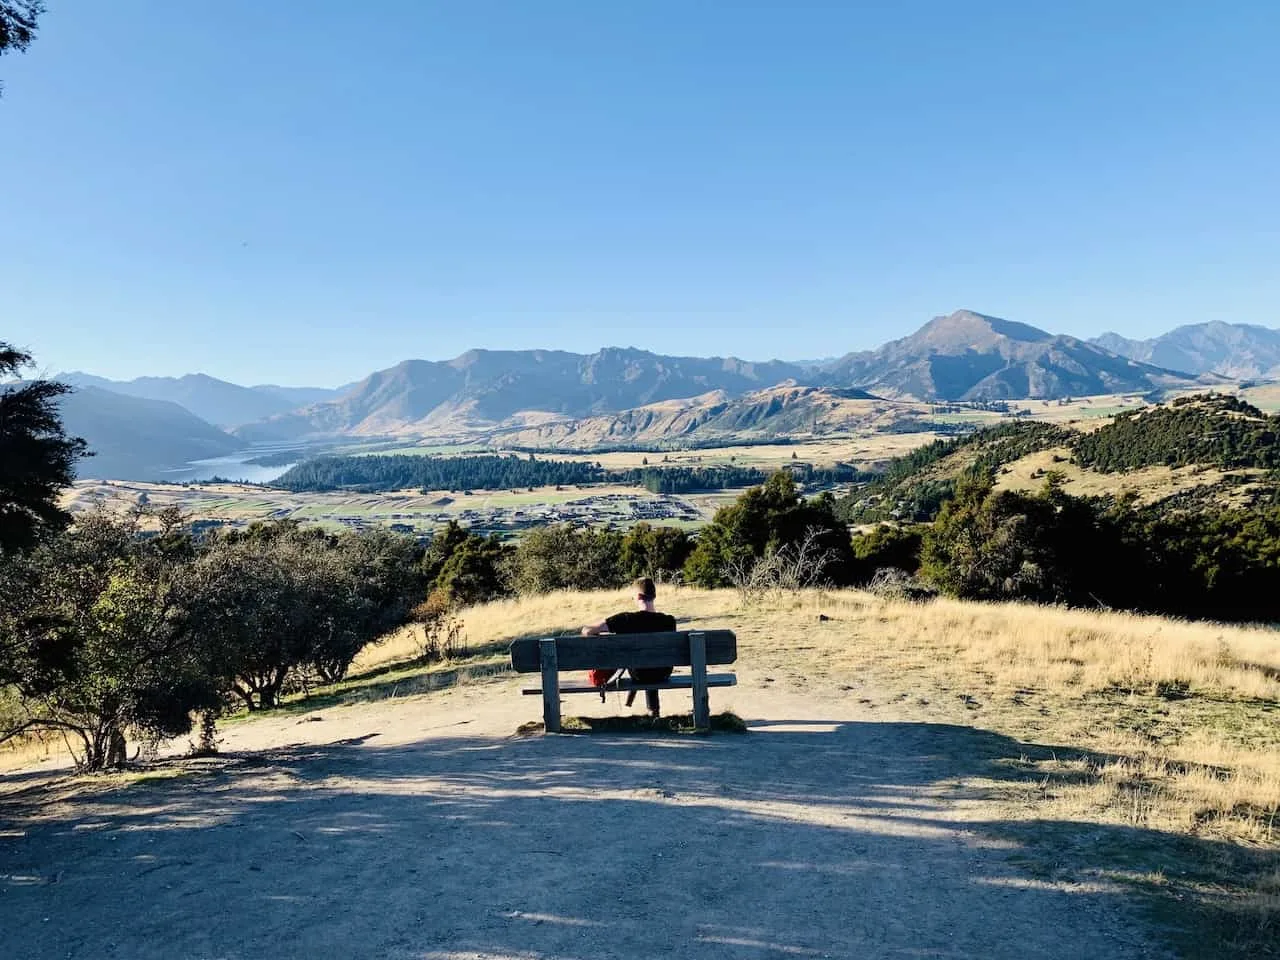


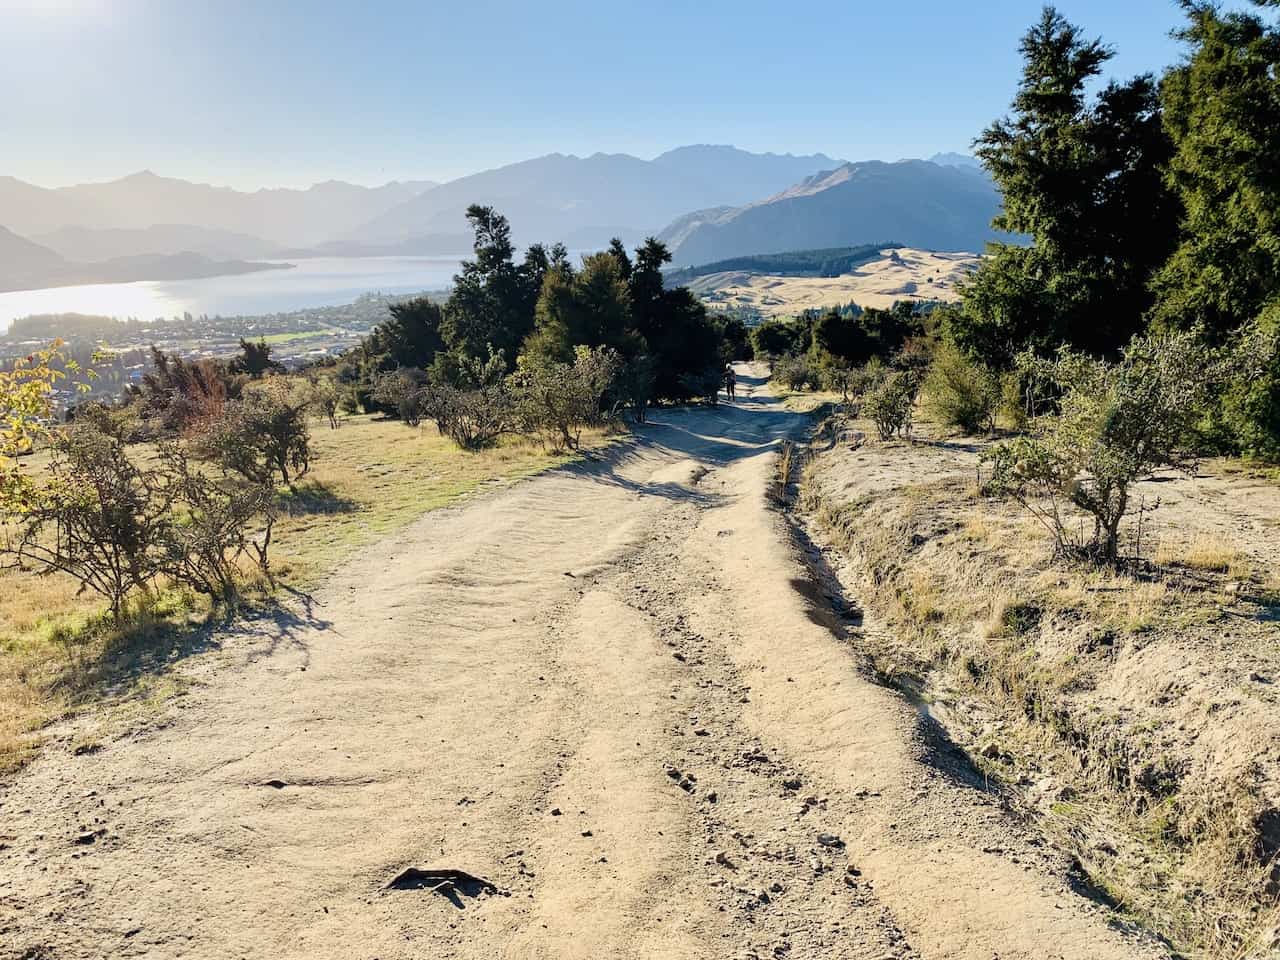
On the other side of the summit you will see a sign pointing you on the “Loop Track to Carpark”. You can follow this trail which will take you all the way around back to the bottom.
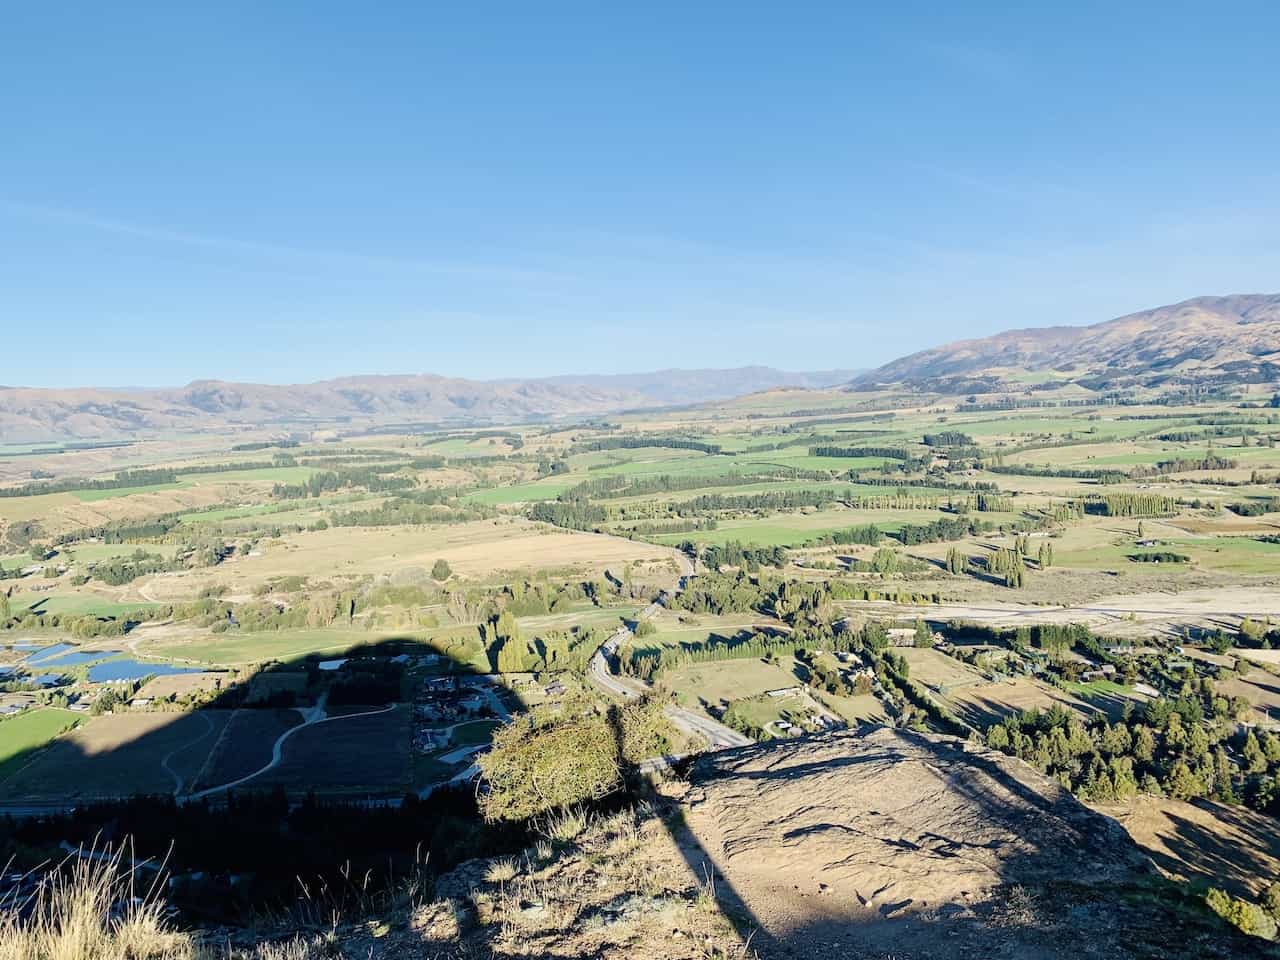
During this portion of trail you will get in some additional views of Wanaka’s surroundings as you make your way down the mountain and towards the start point. Do note that at some point you will also come across some stairs to head down as well.


Eventually you will get back on flat ground and you can walk along the base of Mount Iron right back to the parking lot and end a successful day of hiking one of Wanaka’s best trails. If you are interested in some more elevation, check out the next section..
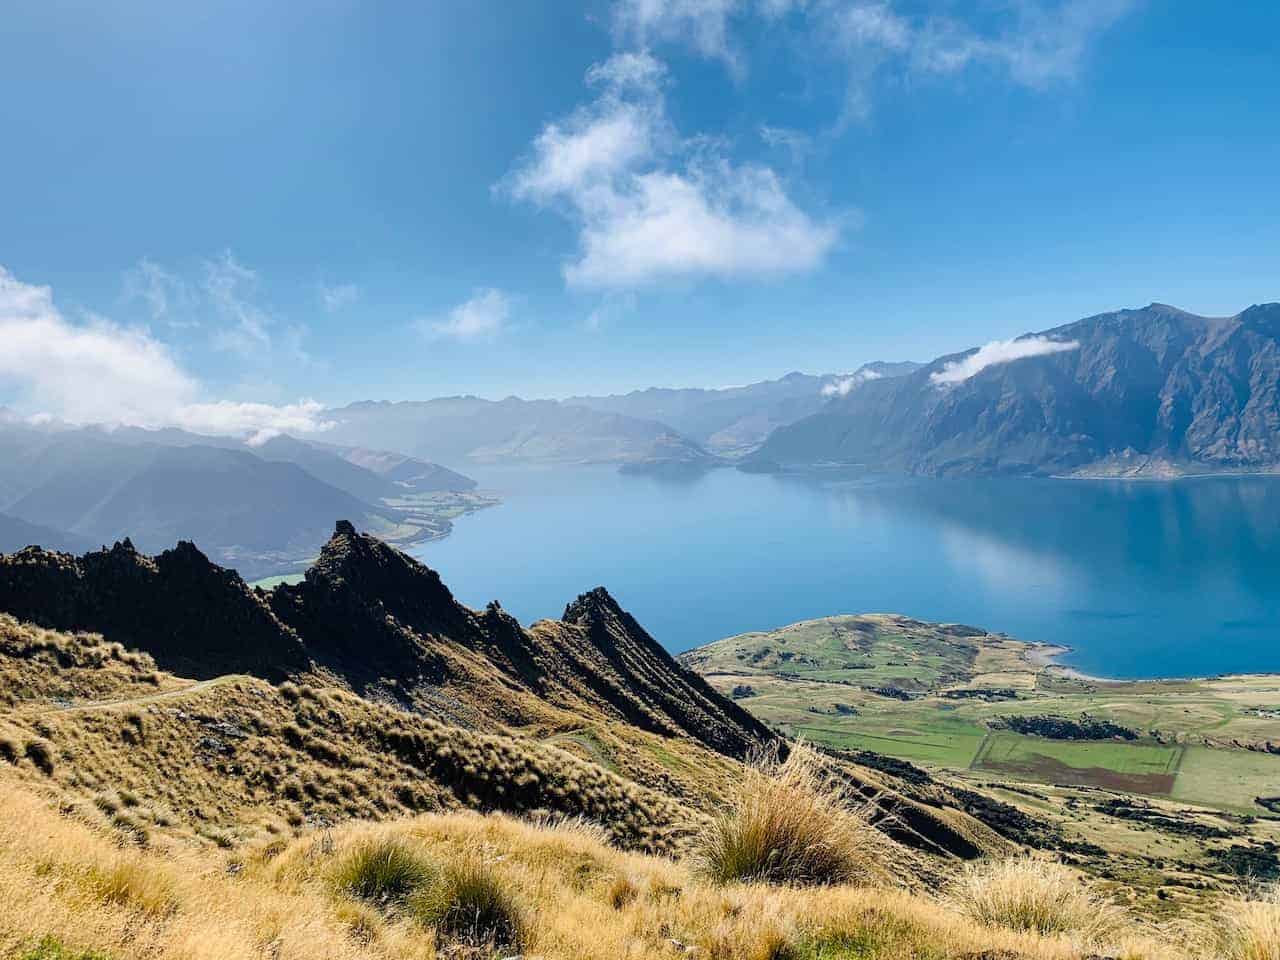
6) Roys Peak and Isthmus Peak
While the Mount Iron Track is a great add on to any Wanaka itinerary, there are a couple more demanding climbs around the area – Roys and Isthmus Peak.
Roys Peak is the most popular hike in the area and is known for some incredible viewpoints overlooking Lake Wanaka.
⇒ Take a look at the Roys Peak Hike Guide for everything you need to know about the climb.

Isthmus Peak on the other hand is another great option if you want to get those views in but avoid some of the crowds.
⇒ Take a look at the Isthmus Peak Hike Guide for everything you need to know about the climb.
Both of these hikes will take the better part of 4-6 hours to complete so come prepared!

That wraps up a guide to the Mount Iron Track of Wanaka, New Zealand.
Feel free to check out the other New Zealand itineraries and guides up on the site like the top hikes in the South Island and feel free to ask any questions below.
Have fun out there and safe travels!