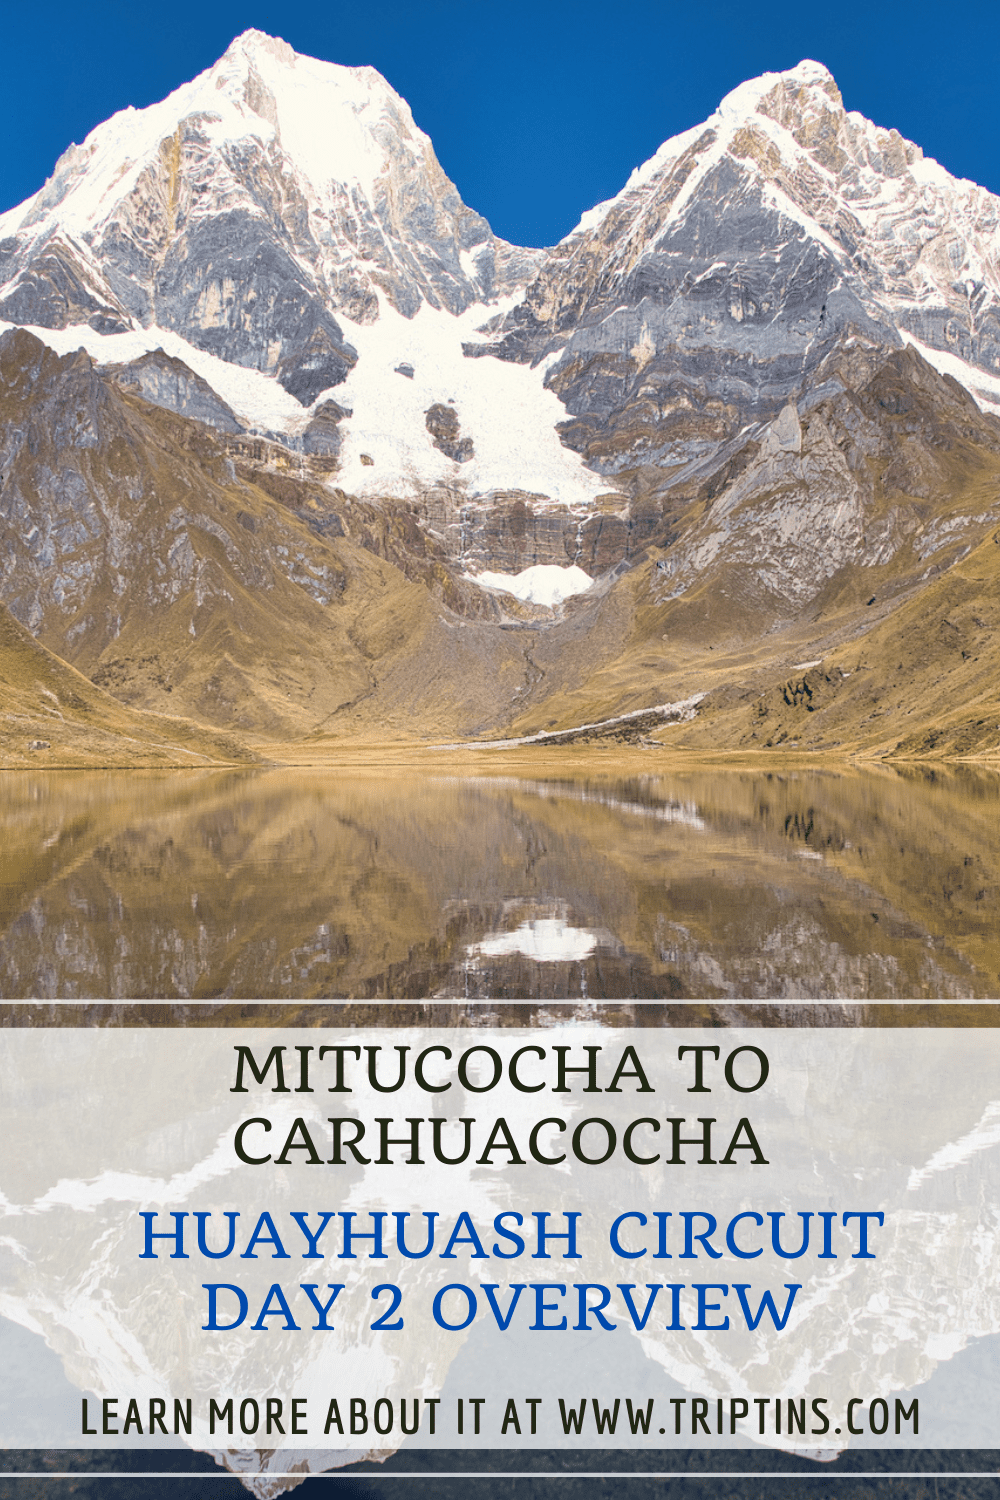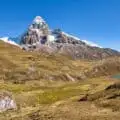
The second day of the Huayhuash Circuit takes you from Mitucocha to the campsite of Carhuacocha. Along the way you will make your way up the Carhuac Pass, take in some beautiful views, and descend down to camp.
Read on to learn more about the route between Mitucocha to Carhuacocha and what to expect out on the trail.
* Affiliate Disclosure: This post may contain affiliate links, which means I may receive a commission if you make a purchase through the links provided, at no additional cost to you. Thanks for supporting the work I put into TripTins!
1) Hiking Overview: Huayhuash Day 2
Day 2 of the Huayhuash Circuit will take you from Mitucocha to Carhuacocha. Below are some helpful stats about the day and what the trail is all about.
Starting Point: Mitucocha
Mitucocha Elevation: 4,230 meters / 13,880 feet
Ending Point: Carhuacocha
Carhuacocha Elevation: 4,140 meters / 13,580 feet
Mountain Pass: Carhuac Pass
Carhuac Pass Elevation: 4,630 meters / 15,190 feet
Distance: 5.8 miles / 9.3 km
Elevation Gain: 1,260 feet / 385 meters
Duration: 3-4 hours
Day 2 Highlights
• Views from the Carhuac Pass
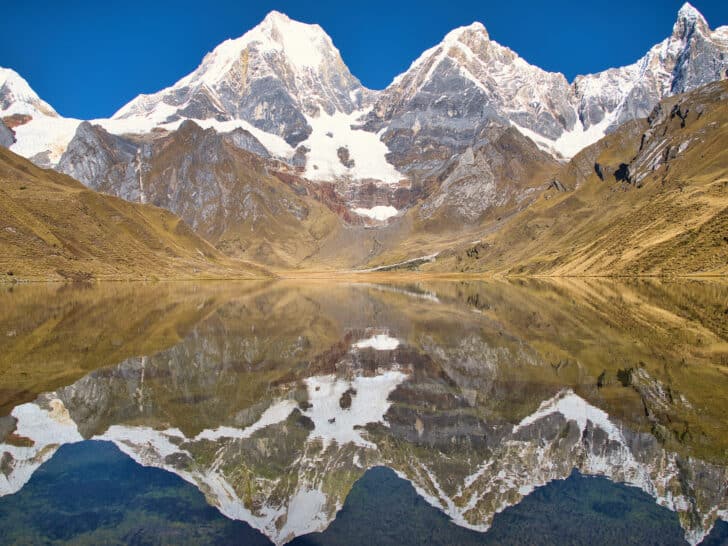
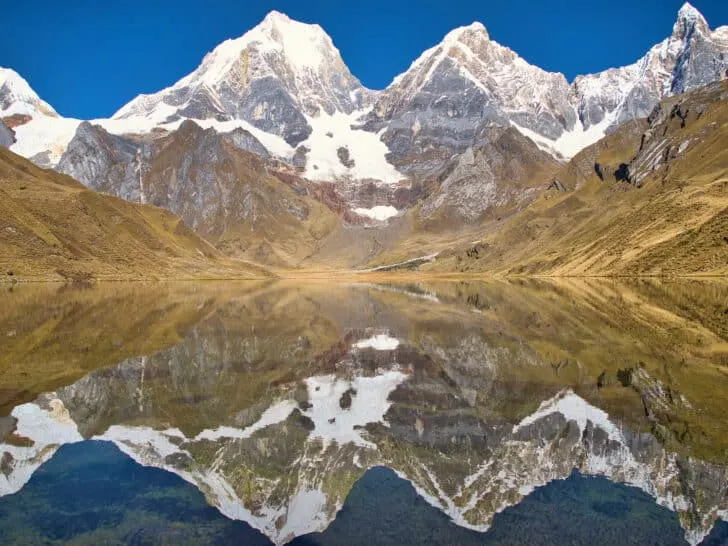
• Views of Yerupaja, Siula Grande, and Jirishanca
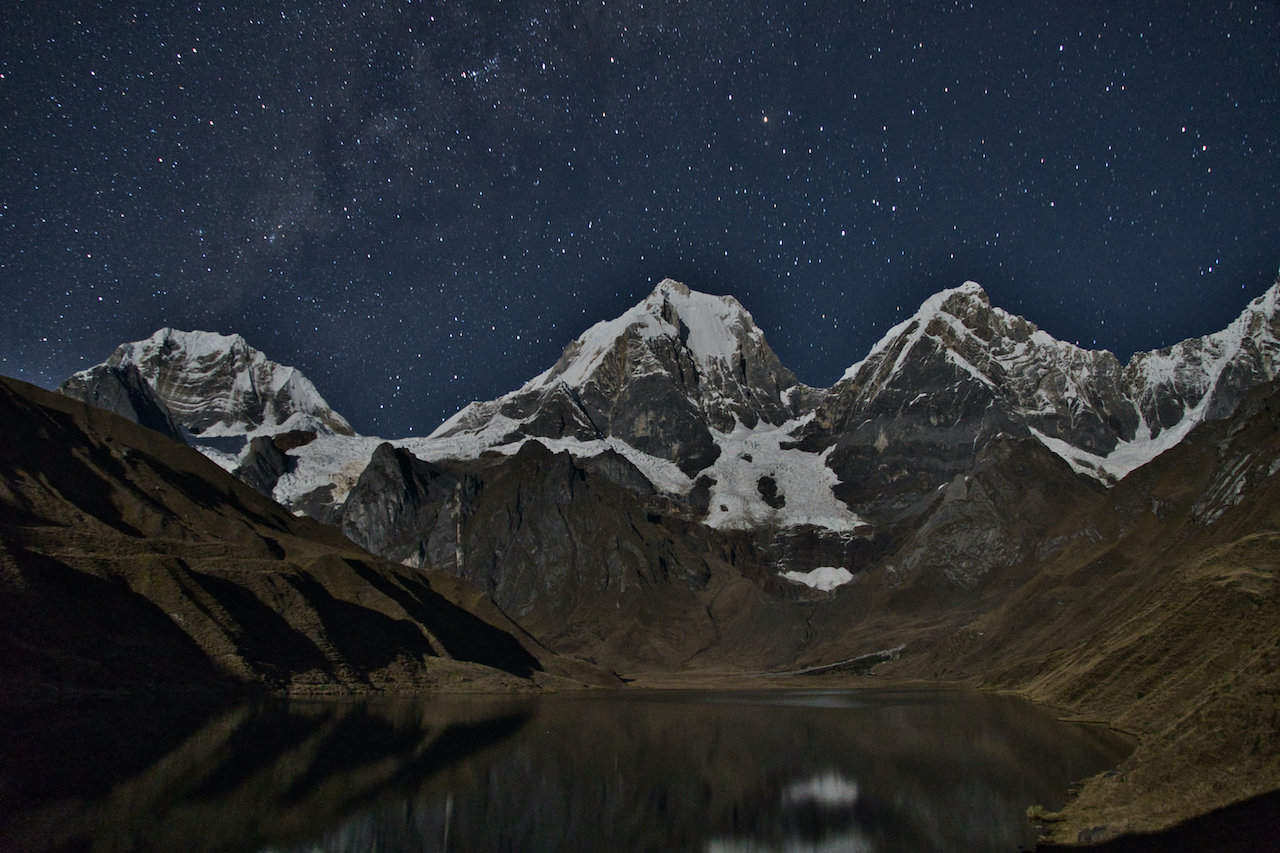
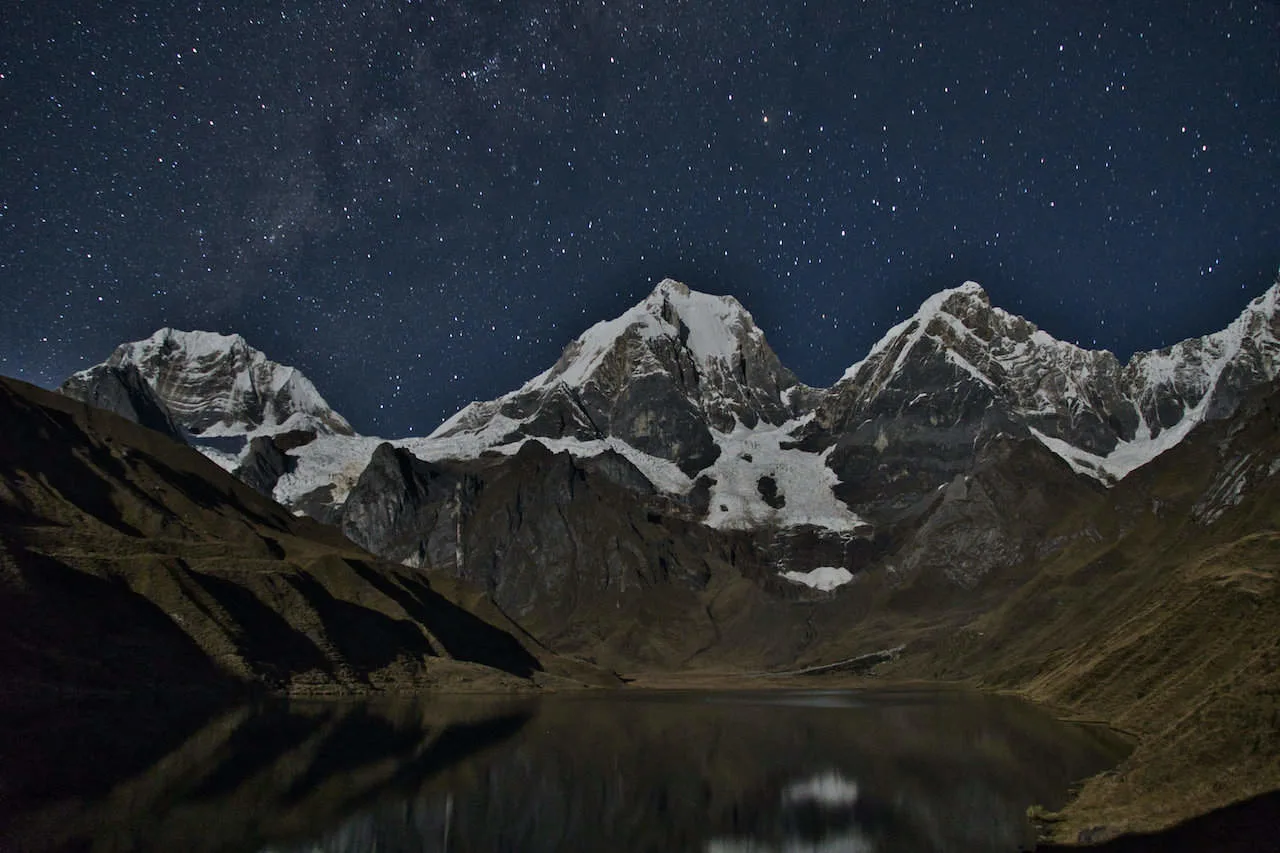
• Top campsite at Lake Carhuacocha
• Ruta Alpina option – for experts only
While this article will simply talk through day 2 of the trek, you can learn much more of the overall experience in the Huayhuash Circuit overview up on the site.
Route Note: this daily trekking guide (as well as the other daily guides on the site) go over a standard 10 day Huayhuash Route. Trekking routes can be greater or fewer days depending on your preferences (learn more about these in the previously mentioned overview above!).
Learn More: Be sure to check out the Huayhuash Circuit resource page that includes many helpful travel guides to get you prepared for the trek.
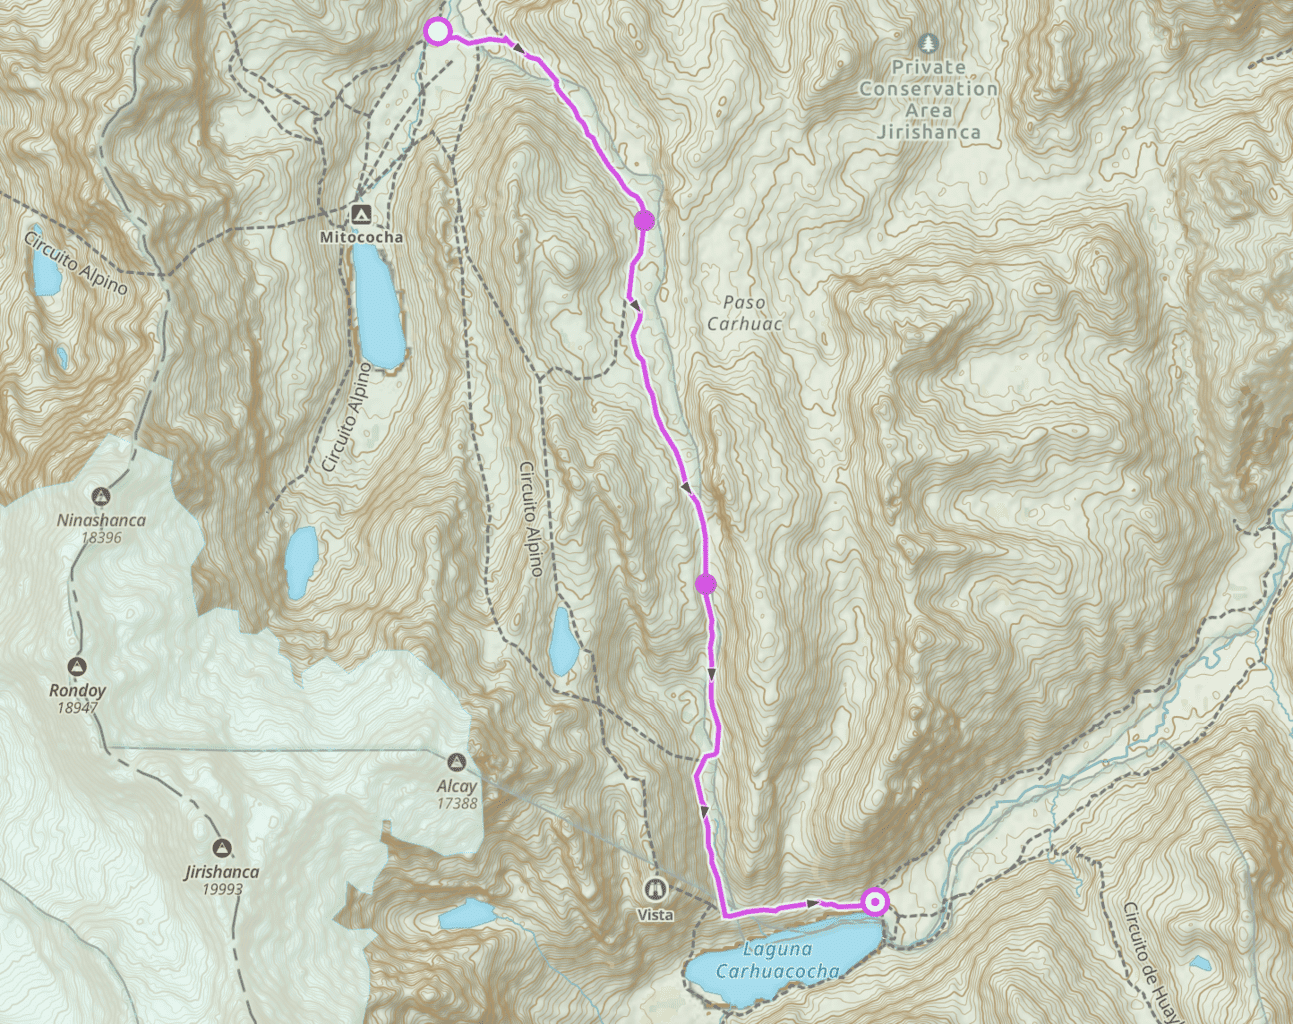
2) Huayhuash Circuit Day 2: Mitucocha to Carhuacocha Map
To better visualize the hiking route on day 2, below you can find a trail map for the second day of the circuit.
If you would like to see the full route, be sure to check out the guides I put together for the complete Huayhuash Circuit Map and Huayhuash GPX file (for navigation purposes).
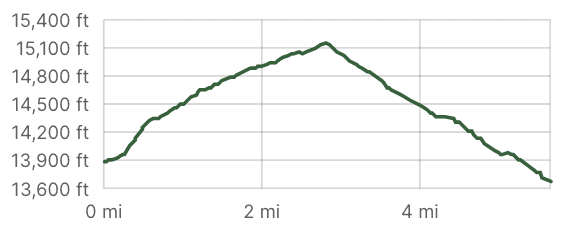
3) Elevation Gain Profile
Below you can find the elevation gain profile for day 2 of the Huayhuash Circuit. The trail heads from Mitucocha to Carhuacocha as it peaks at the Carhuac Pass, which sits at 4,630 meters / 15,190 feet in elevation.

4) Huayhuash Circuit Packing List
A complete Huayhuash Circuit packing list will be essential for your time out on the trail (especially if hiking without a guided tour). Be sure to check out the comprehensive Huayhuash packing list I put together for more detail.
Below you can find just some of the most important camping items to consider for your trek:
• Hiking Backpack | Hyperlite Southwest 3400
• 3-Season Tent | Big Agnes Copper Spur HV UL
• 0 F Degree Sleeping Bag | Thermarest Questar 0
• Sleeping Bag Liner | Sea to Summit Liner
• Sleeping Pad | Thermarest NeoAir Xlite
• Camping Pillow | Thermarest Camping Pillow
• Trekking Poles | Black Diamond Distance Carbon FLZ Trekking Poles
• Water Bottle | Katadyn BeFree 1 Liter
• Headlamp | Petzl Actik Core
• Emergency Satellite Locater | Garmin inReach 2 Mini
• Solar Charger | GoalZero Nomad 10
• Portable Charger | Anker Portable Charger
• Cooking Stove | Jetboil Micromo
• Hiking Shoes | Keen (Targhee Series)
• Hiking Socks | Darn Tough Socks

Considering travel insurance for the Huayhuash Circuit?
World Nomads offers coverage for more than 150 adventure activities as well as emergency medical, lost luggage, trip cancellation and more.
For years, World Nomads has been protecting, connecting & inspiring independent travelers, offering travel insurance & safety advice to help you travel confidently. Their mission is to support and encourage travelers to explore their boundaries.
World Nomads has simple and flexible travel insurance that has been designed by travelers for travelers. Even if you leave home without travel insurance or your policy runs out, you can buy or extend out on the road.
Get a quote for a World Nomads travel insurance policy today!
5) Huayhuash Circuit: Mitucocha to Carhuacocha Hike
The second day of the Huayhuash Circuit is a pretty simple one, and is known to be one of the easier portions of the trek. However, as I will get into in the following section, it is possible to take on a much more scenic option for those with the necessary experience.
For those just doing the standard trek from Mitucocha to Carhuacocha, you should expect a pretty low key day until you reach the campsite. When it comes to campsites on the Huayhuash Circuit, it simply does not get much better than the one at Carhuacocha.
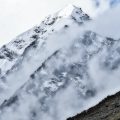
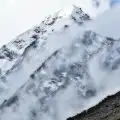
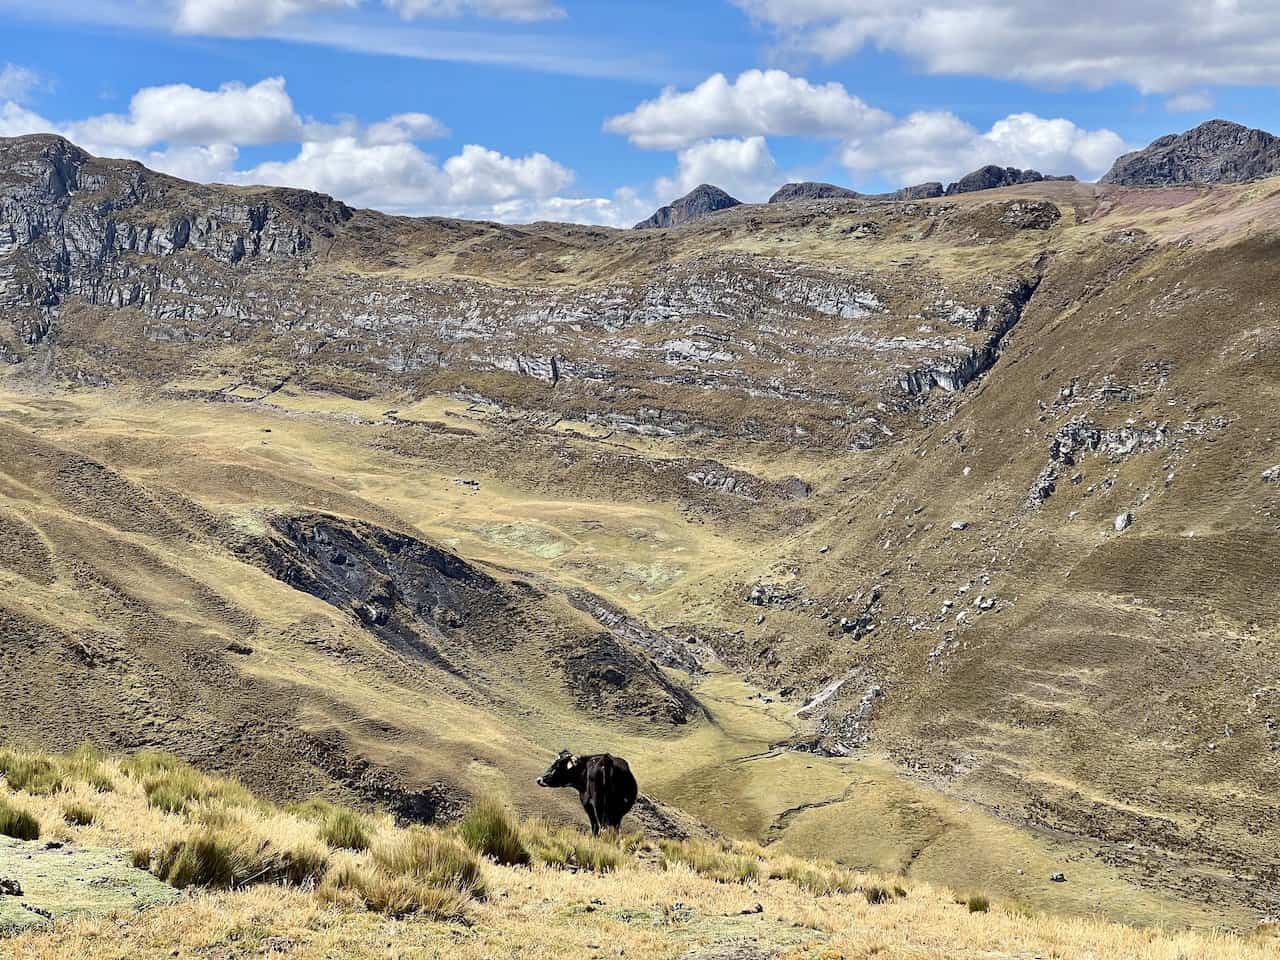
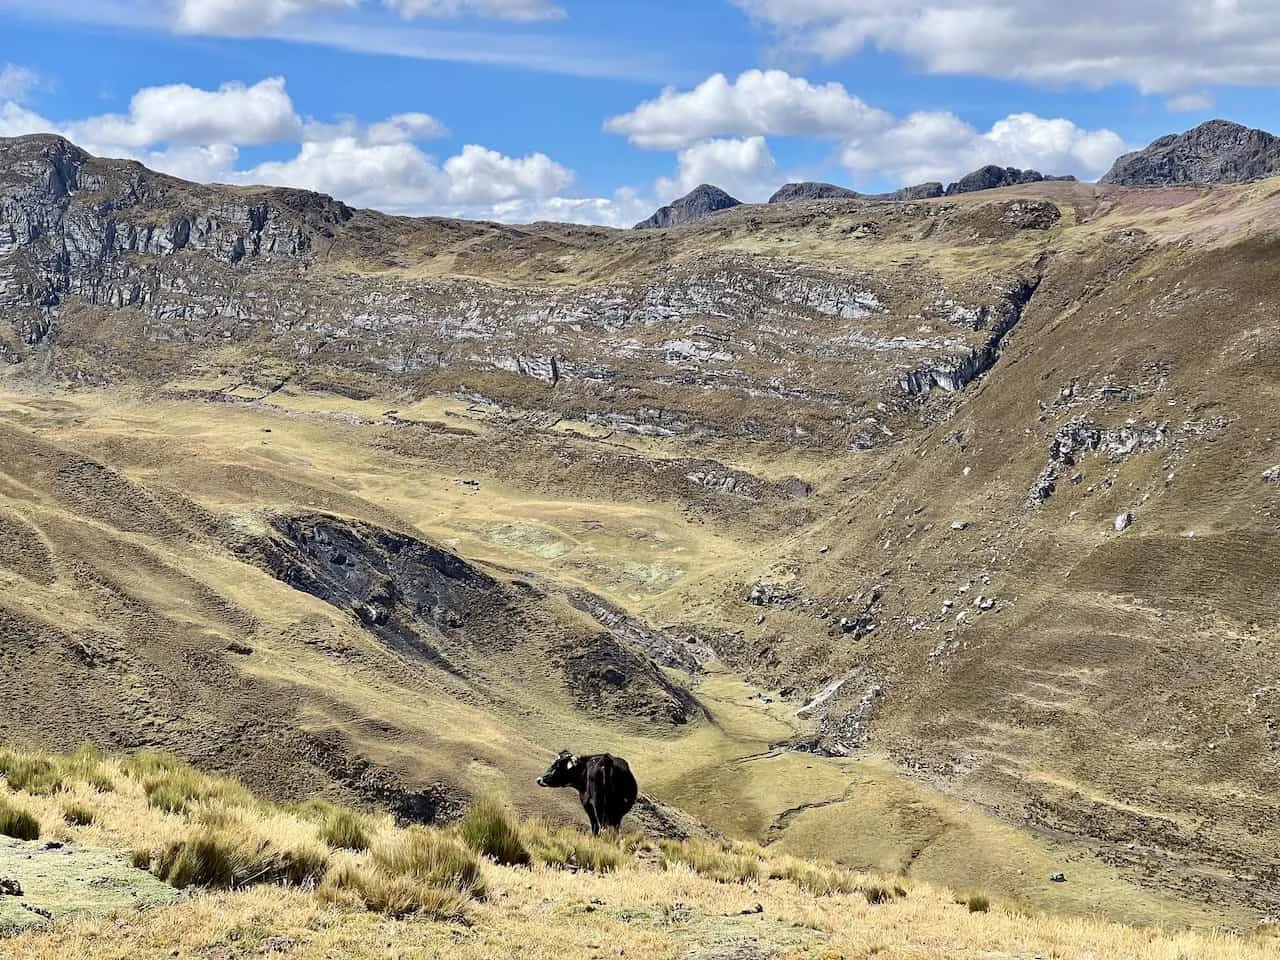
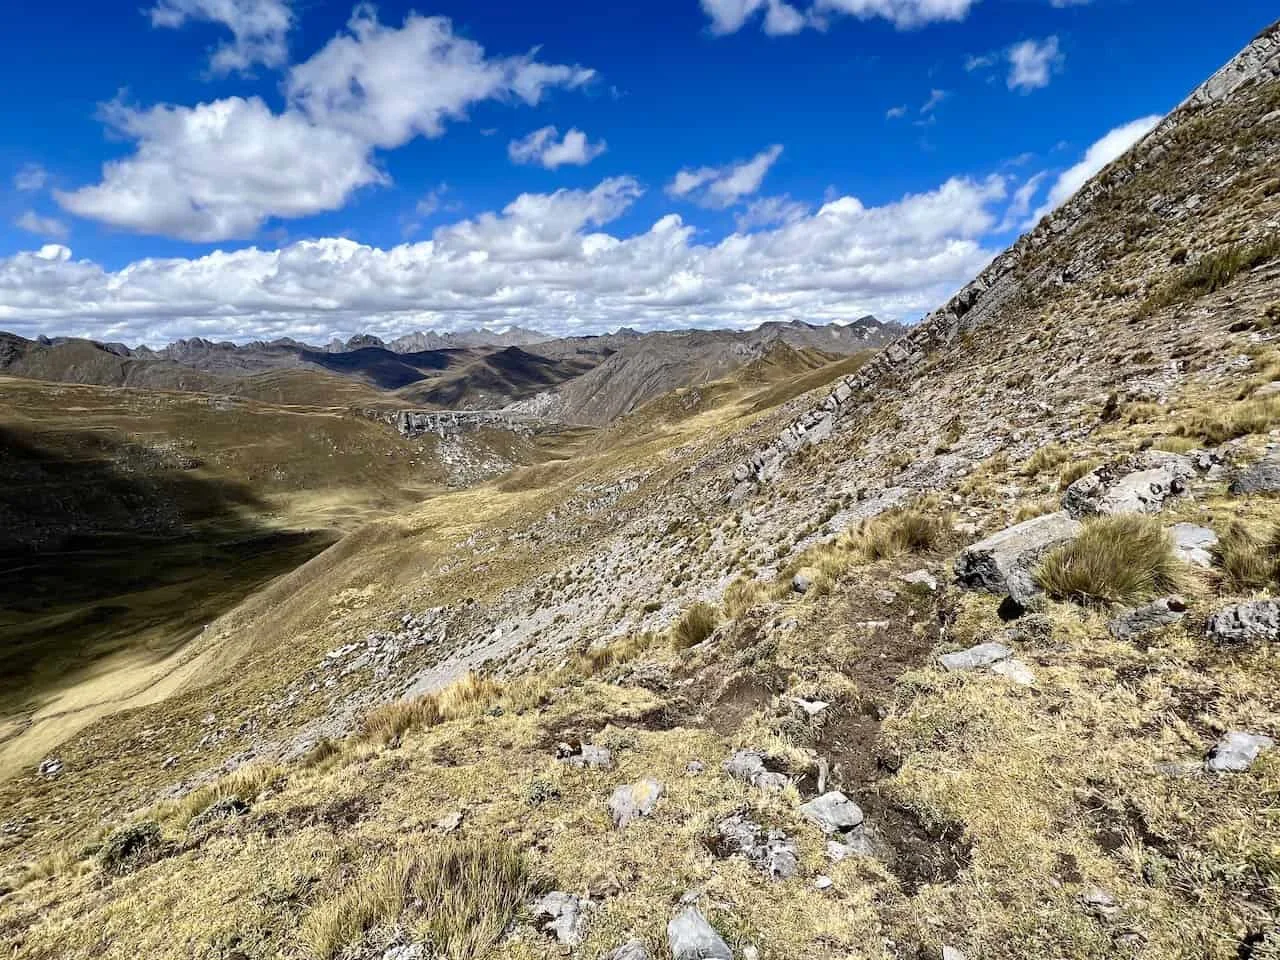
The first portion of the trek leaves behind the Mitucocha campsite, and begins to gain some elevation shortly after. The hike up to the Carhuac Pass doesn’t offer too many views for the 1.5 – 2 hours it will take to get yourself up.
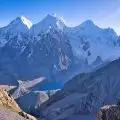
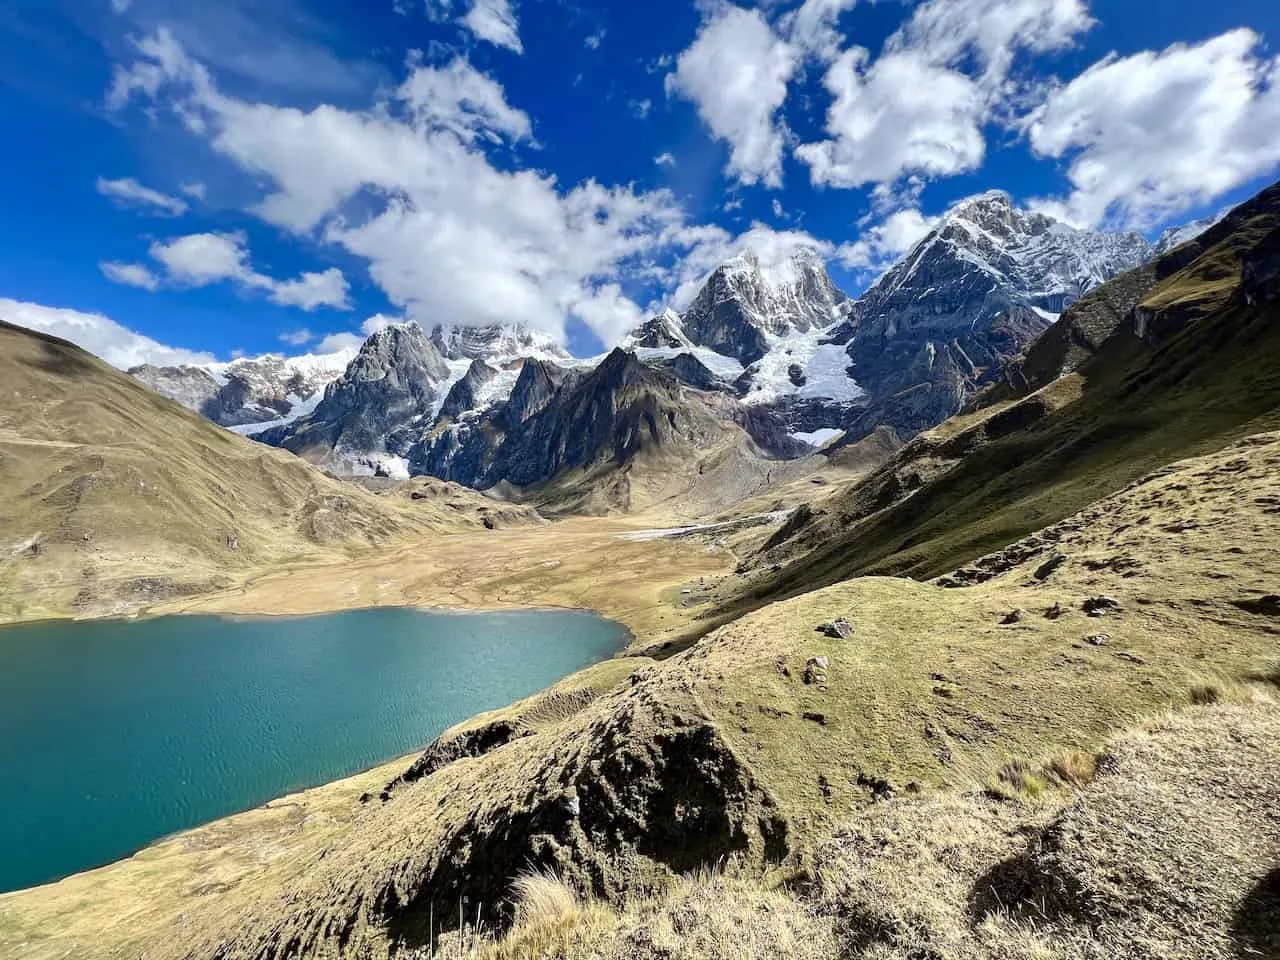
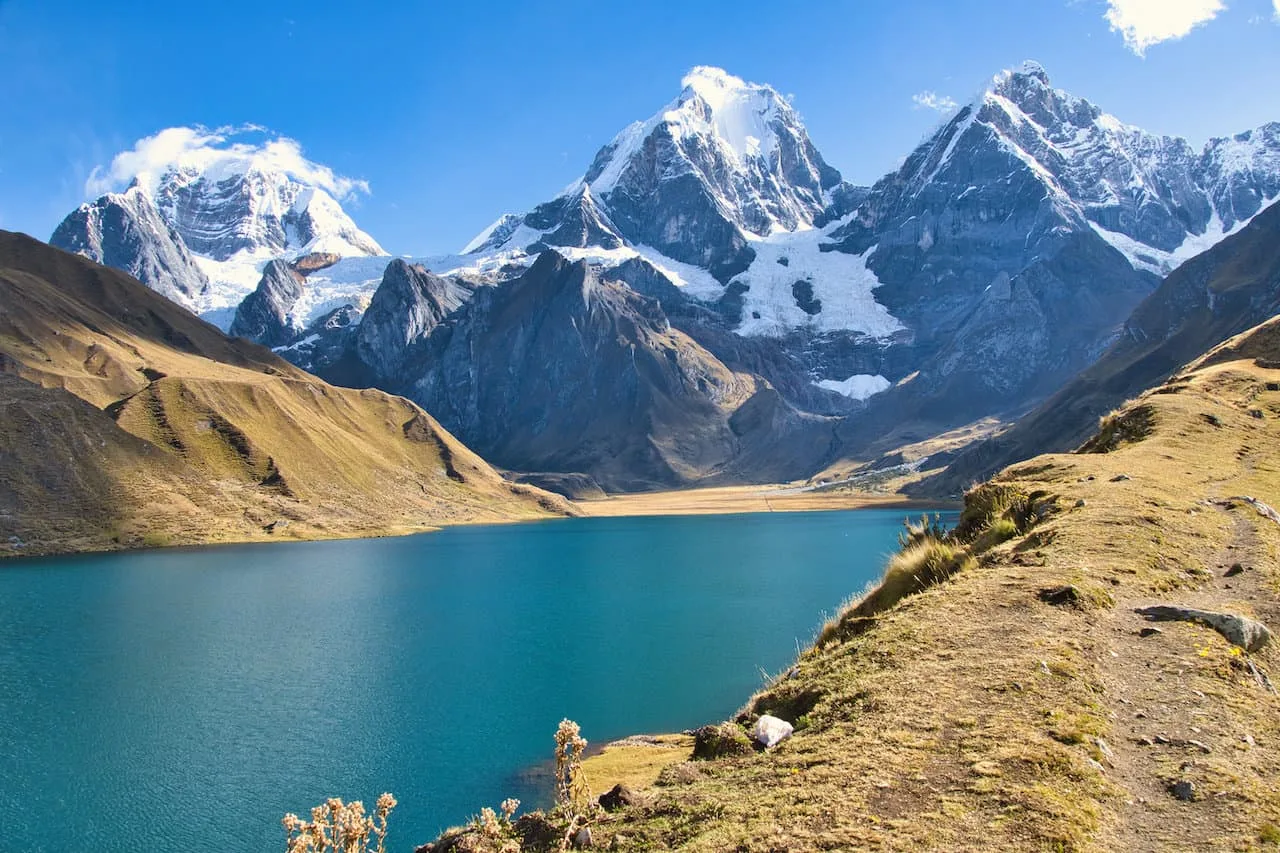
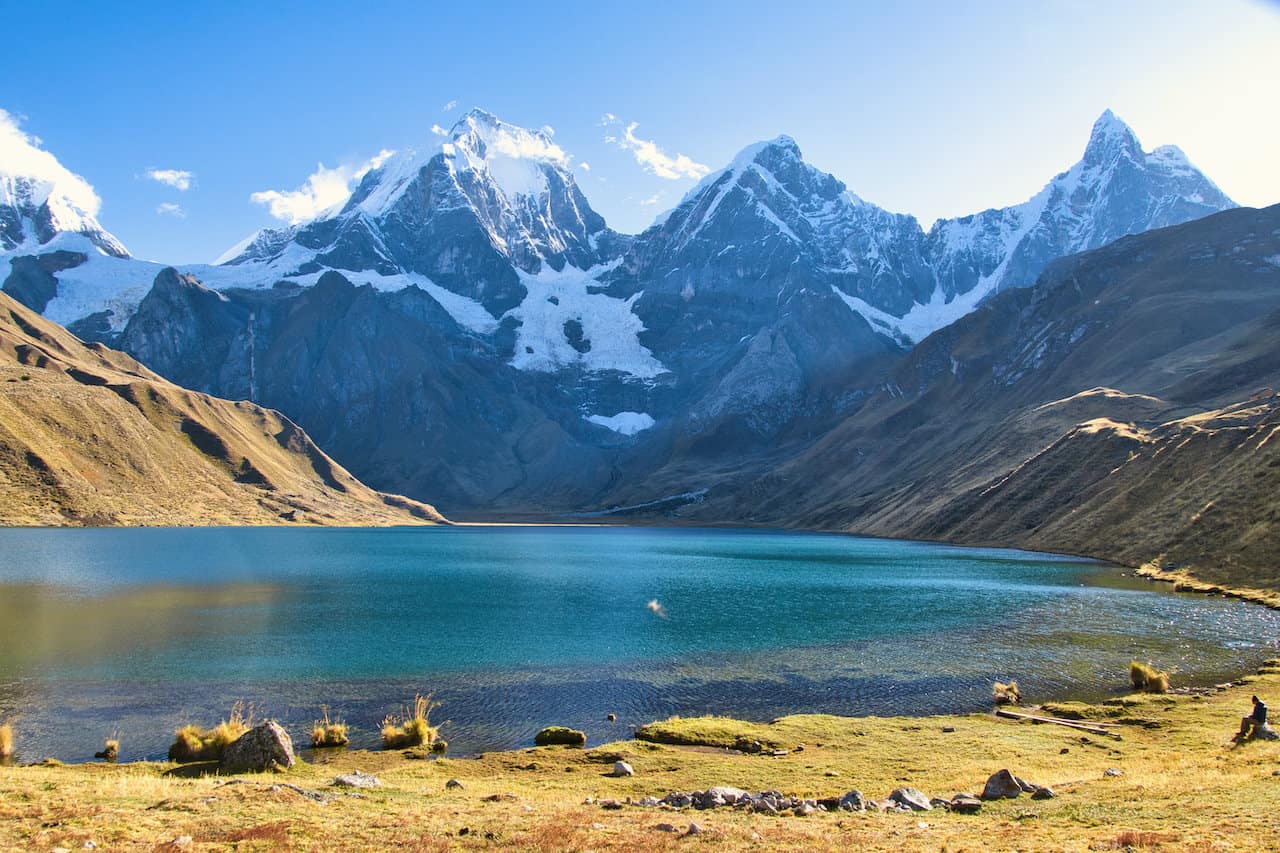
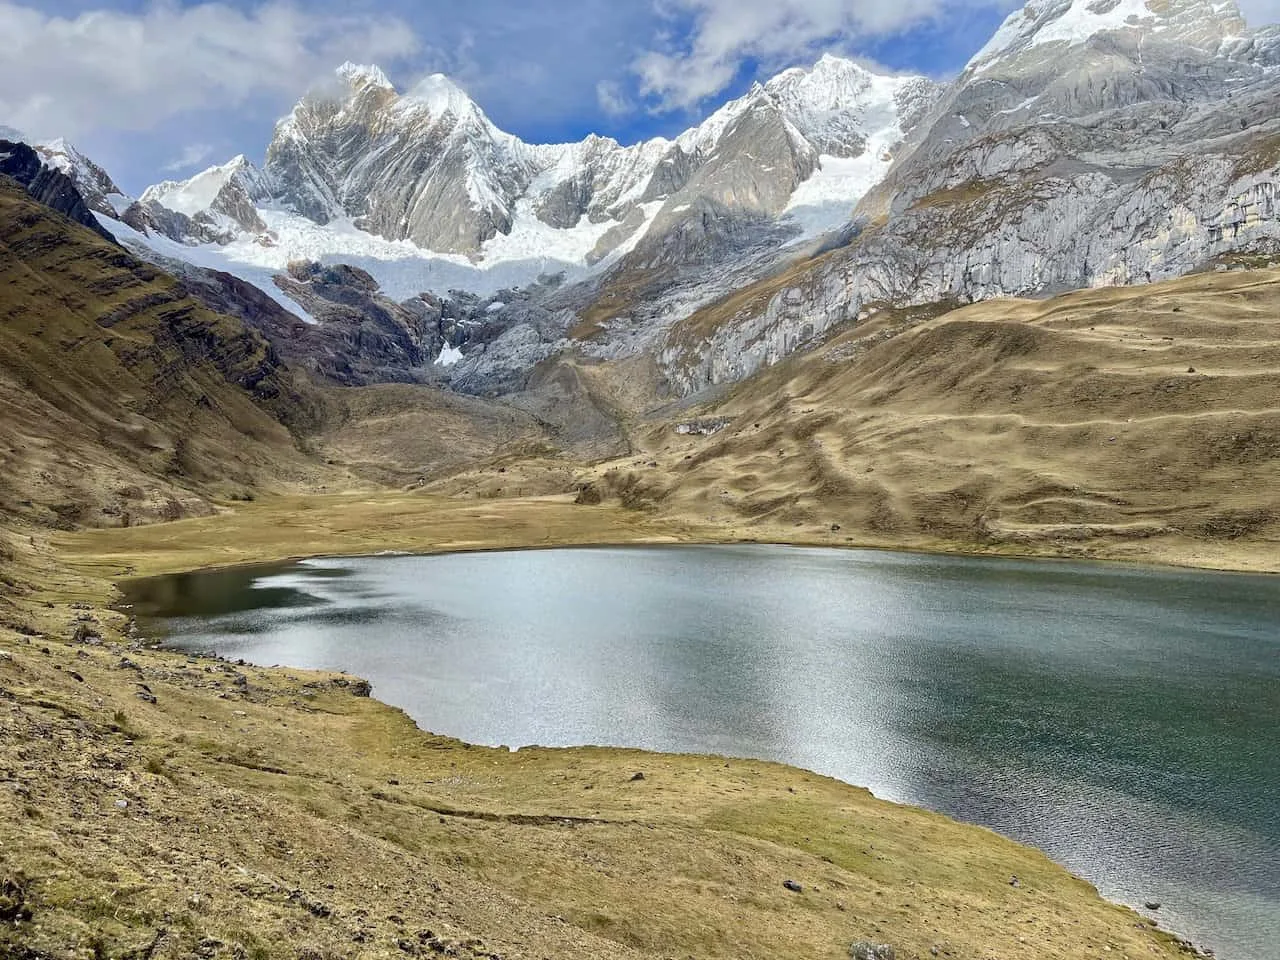
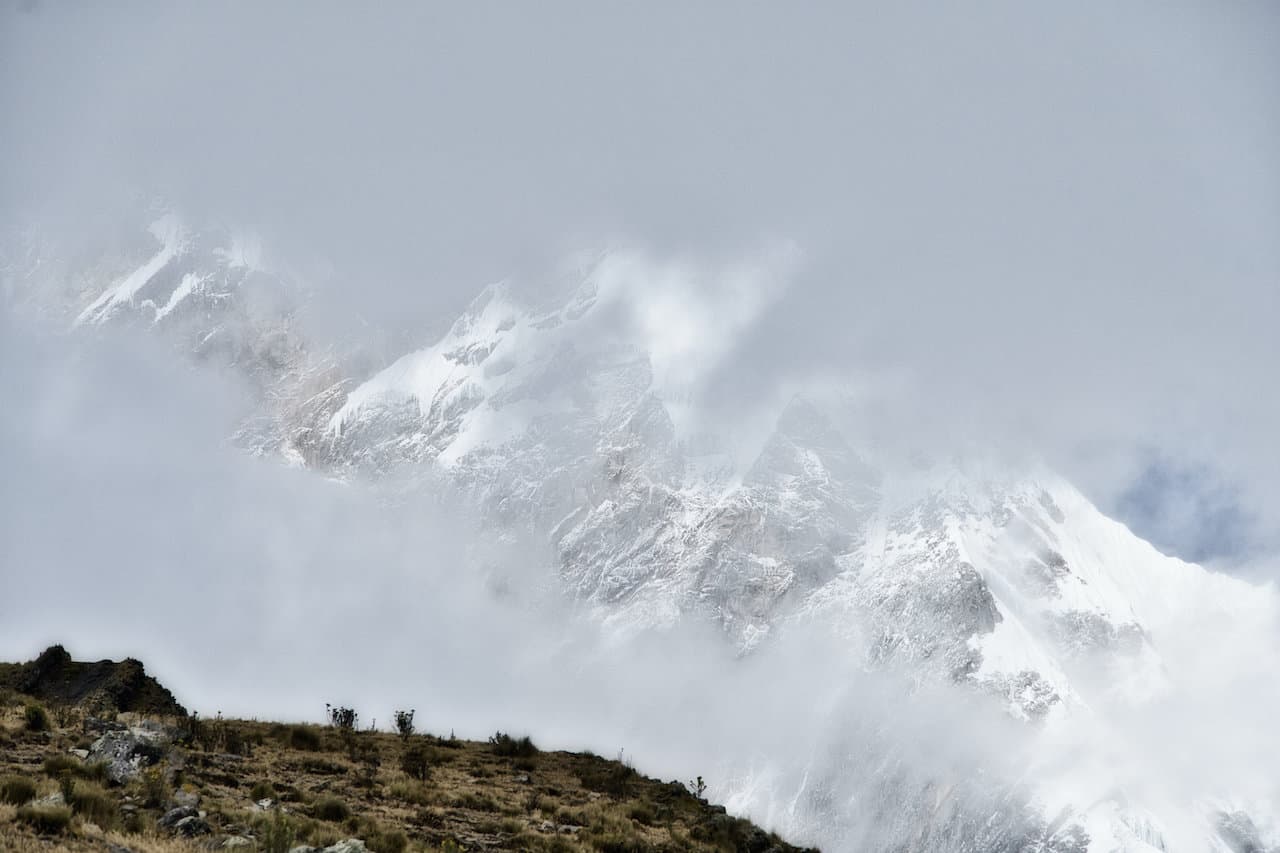
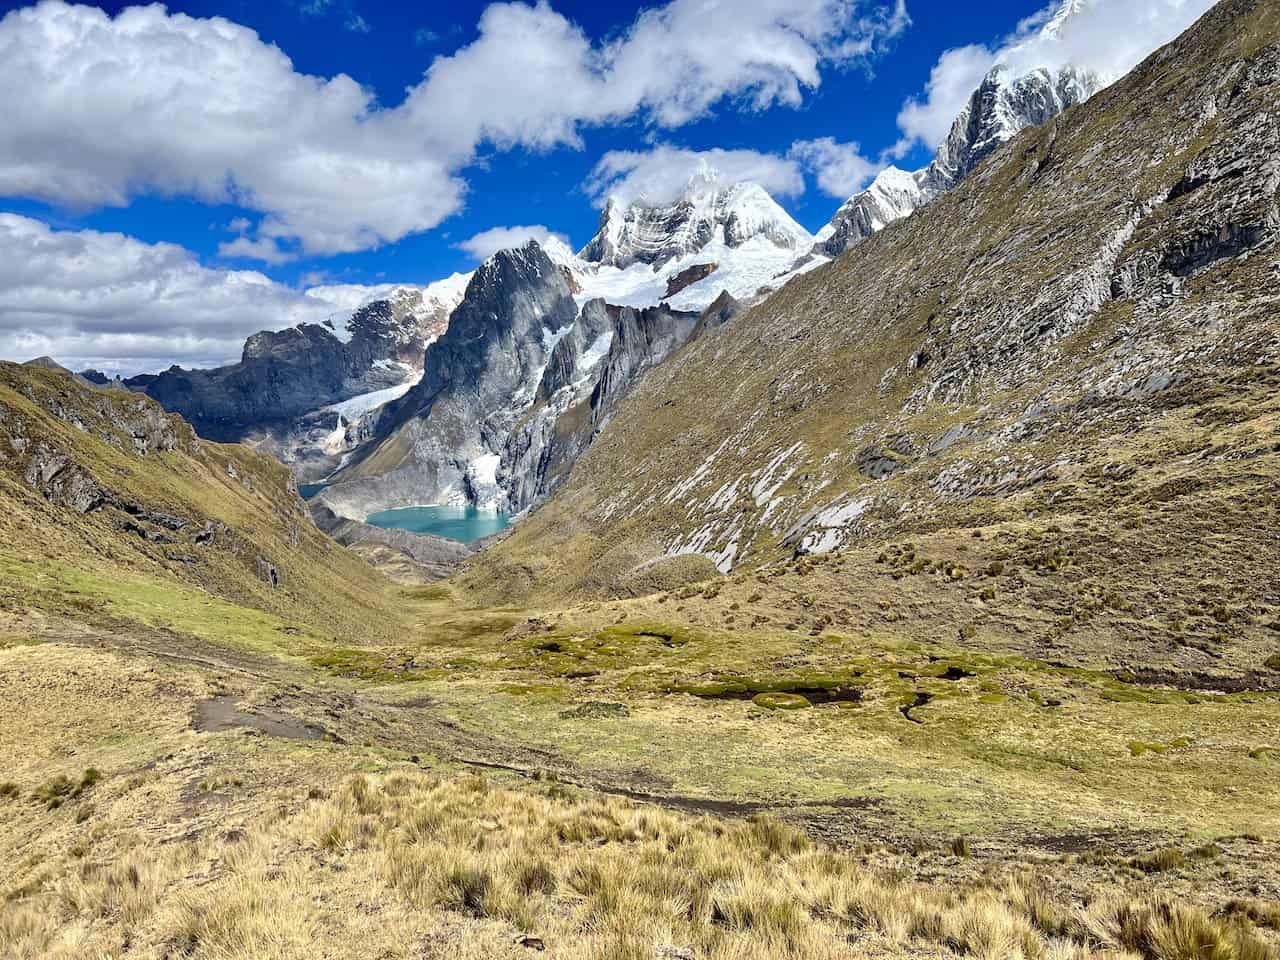
However, shortly after reaching the high point at the Carhuac Pass, the views will start to come into play. Out in front of you will be the beautiful mountains of Yerupaja, Siula Grande, and Jirishanca.
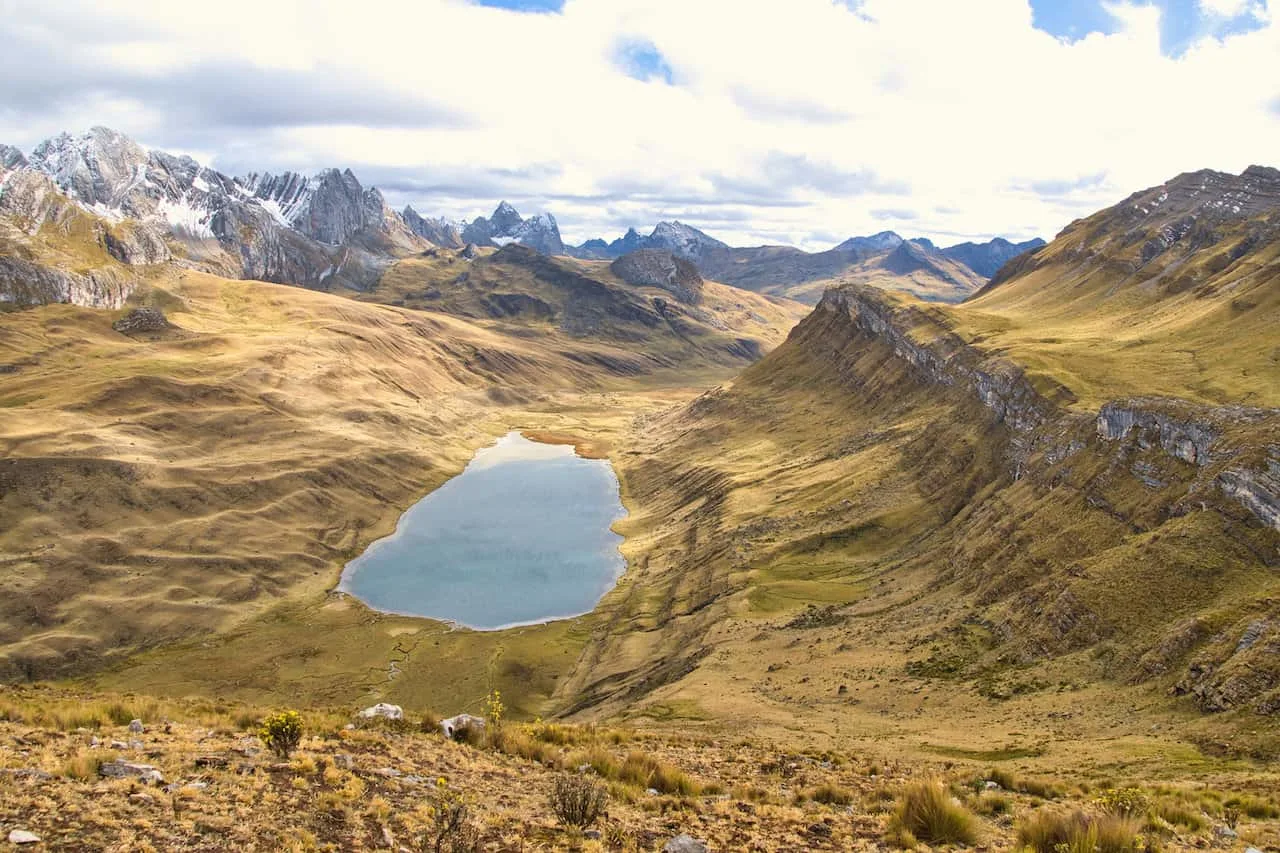
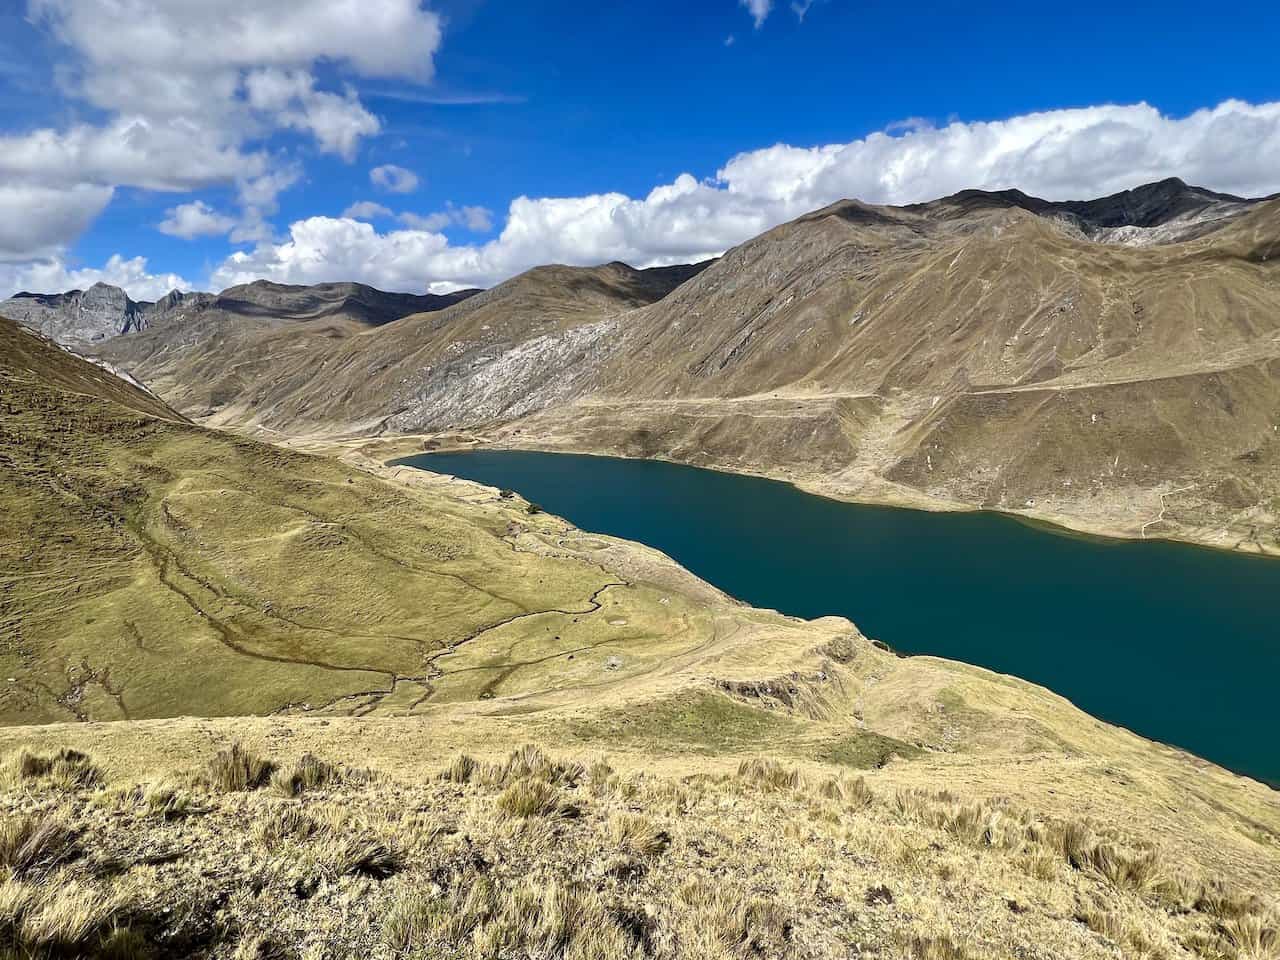
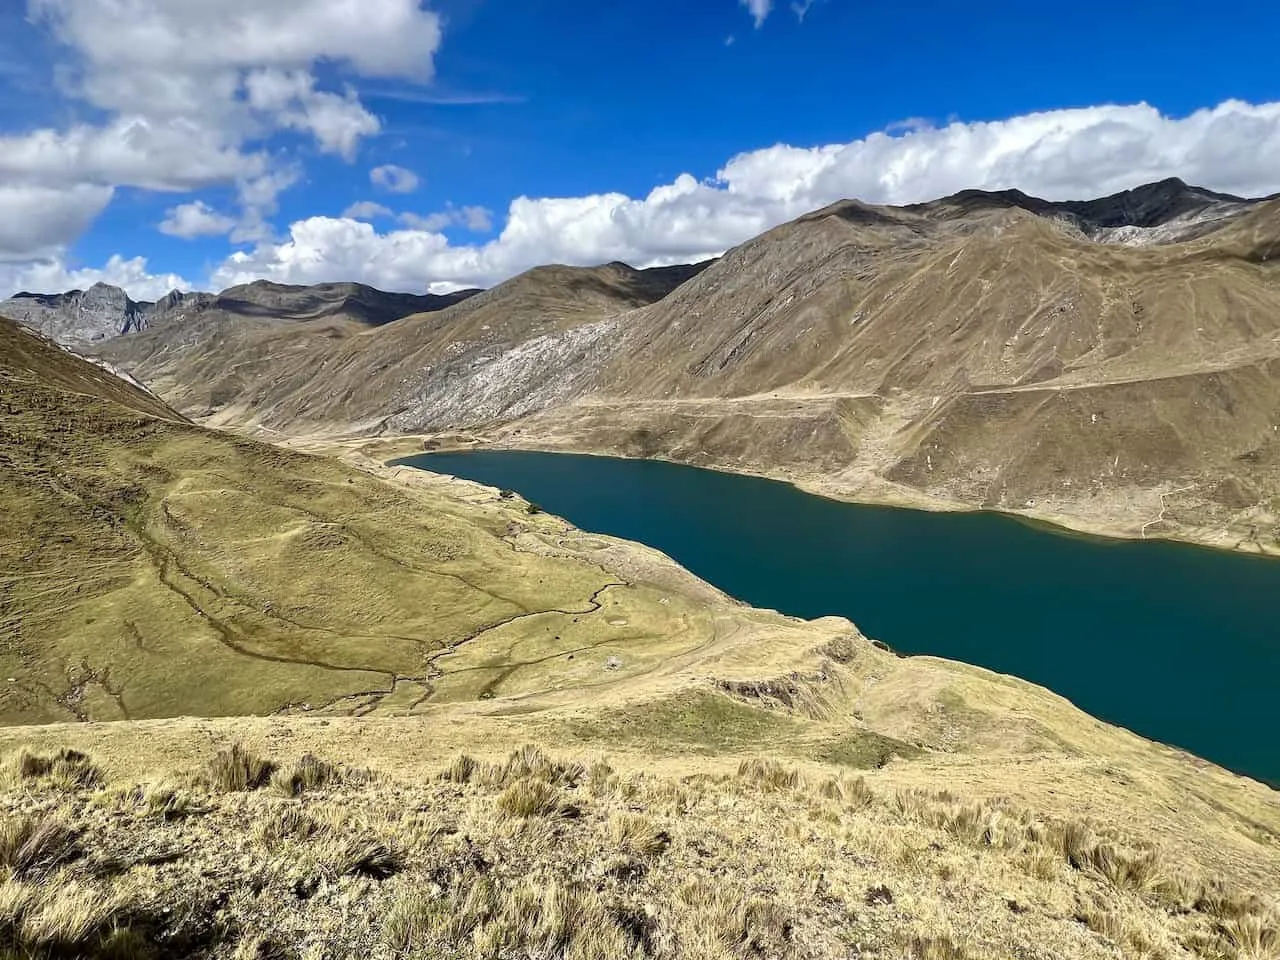
Continue the walk down the valley as you lose elevation but continue to have some nice views out in front. Soon enough, Lake Carhuacocha will be down below right in front of you. The towering peaks up above will make this view one of the best on the circuit.

After enjoying the view, the trail will make a left hand turn alongside the lake and towards the campsite. There are two campsites to consider at Carhuacocha. These are each right across from one another on either side of the lake.
It seemed to me that the second one is geared more towards the larger groups (there were multiple groups just doing “mini” 2-3 day treks here). I ended up at the first one, where I set up camp for the night.
Once you are all settled in at camp, it is time to explore the lakeside. Since this is a shorter day on the trek (unless you opt for the ruta alpina option – more on that next), you should have plenty of time to enjoy it all.
You can make the walk around in either direction, and then find a nice spot to sit down closer by the campsites. This will have you taking in those views with the lake in the foreground and the mountains towering above out back.


If you have it in you, be sure to stay for sunset and even past sunset once the stars come out. Getting to snap some photos of the landscape at night was definitely worth the effort!
It is then time to rest up since day 3 is going to be one of the longer (and most rewarding) days out on the trail.
6) Ruta Alpina Option
While day 2 of the Huayhuash is quite straightforward, you do have an alternative option to make it much more scenic. All along the Huayhuash mountain range, you will find a secondary, more technical route called the Ruta Alpina.
While most sections are not meant for the everyday trekker, there are a couple parts which can be enjoyed (mainly on day 1 and day 2). During my time on the circuit, I opted for the Ruta Alpina on days 1 & 2, so I can give some additional insight.
Note: I would only recommend this option for those that are very confident in their hiking and navigation abilities. There is not an obvious trail all the way through during this portion.
For myself, I went for the ruta alpina option, meaning I only met up with the normal route at the end of the day. While the normal route may only take 3-4 hours, I was on the trail for nearly double that (closer to 7 hours).
To better understand the route, I have included an interactive map below that shows the trail I took, along with the standard route.
Lake Mitucocha to Hillside
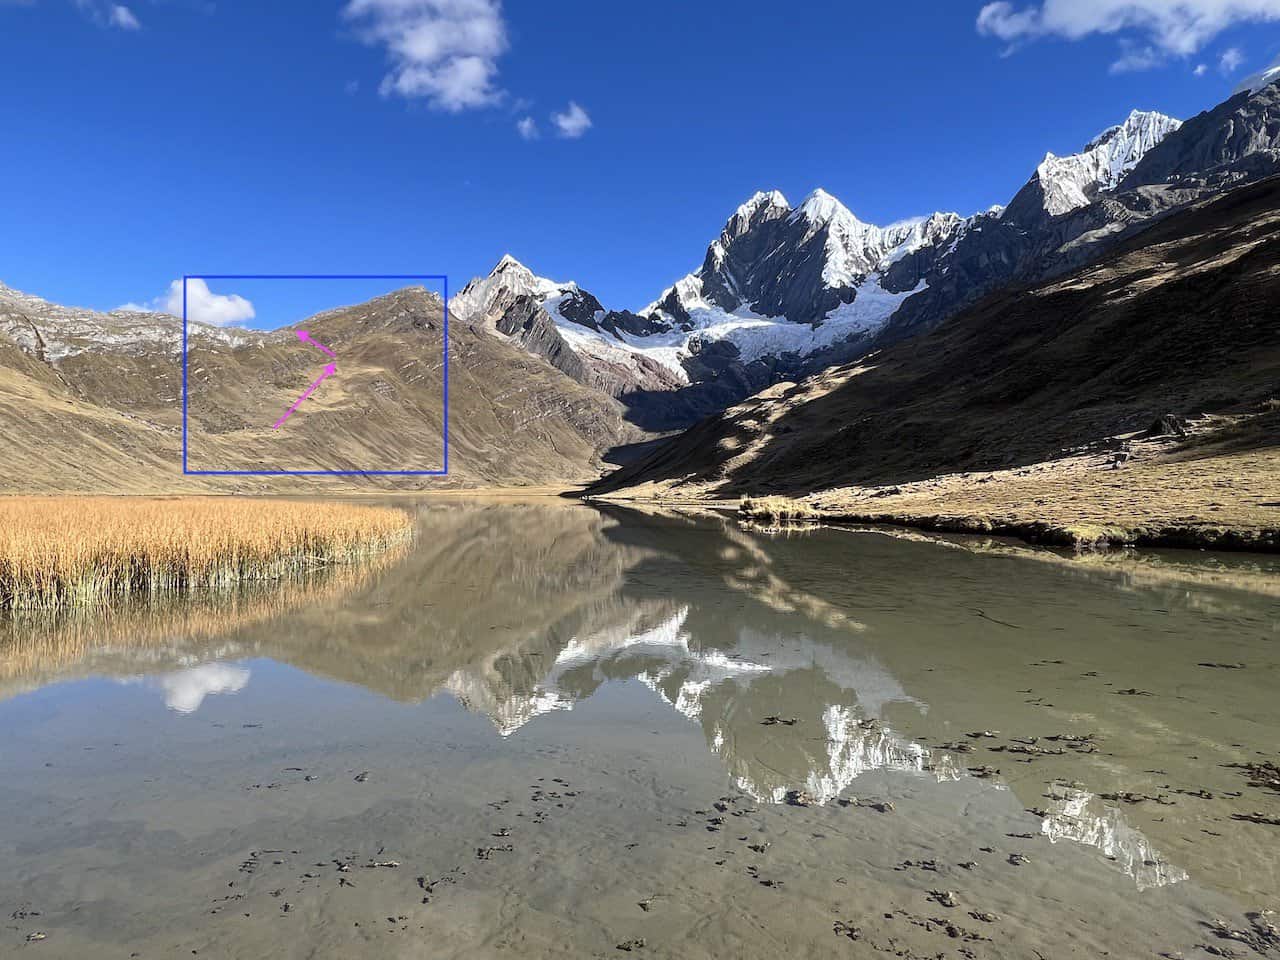
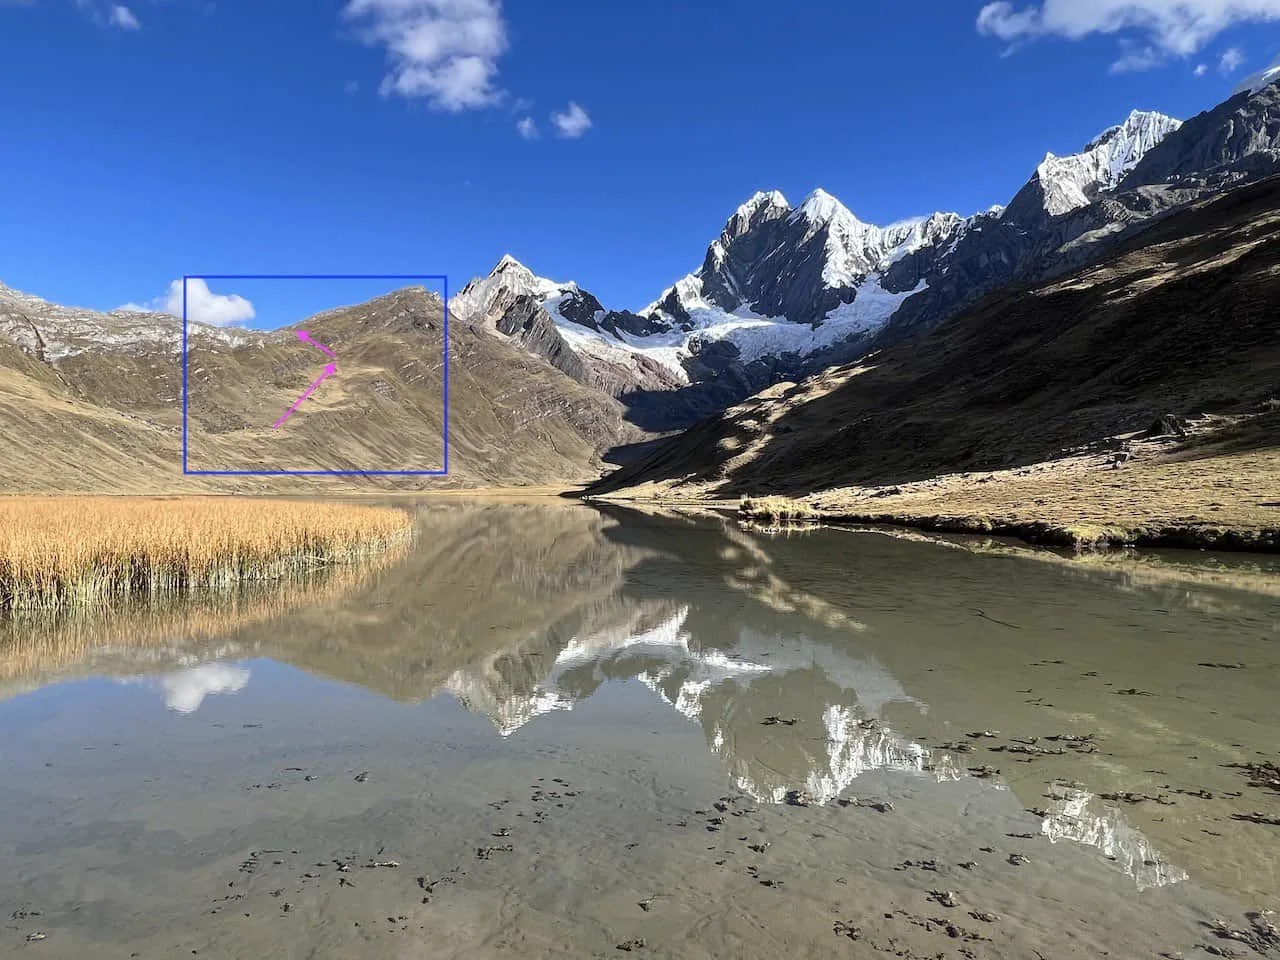
To start, the route makes its way alongside the edge of Lake Mitucocha. There are two ways to go about – either gain elevation right away, or hug the lakeside and gain elevation once you reach the other side of the lake.
I went ahead and gained elevation right away and continued walking across the hillside, with the lake down below. As I continued along, there were some streams of water coming down the hillside – be sure to fill up water here as you won’t have more options for a little while.


After filling up my bottle, I then continued along the hillside, where the elevation began to pick up once again. During this portion, there simply was no trail to follow. I did my best with my navigation app, but this trail is not easily followed.
I found myself struggling to figure out the correct way to get myself from the hillside onto the other side into the “Hidden Valley”.
As I was trying to figure out my route, I took plenty of time to just enjoy the view out behind me. The lake, rolling hills, and surrounding mountains made for one of my favorite views of the entire circuit. This was one of the reasons I wanted to take on the ruta alpina in the first place – for the views!

Hillside into Hidden Valley
So, as I struggled to get into the Hidden Valley, I realized that I certainly hiked too far up the mountainside. Instead of veering left, I continued straight.
This had me in a predicament. While I could have retraced my steps back down, and then find the correct route to head back up, I opted to just see if I could make it into the Hidden Valley from higher up.
I ended up hopping up and over the mountainside, and thankfully ended up right where I wanted to be (just further along on the route). This certainly took a lot of energy out of me, but I was just thankful to get into the Hidden Valley safely.
Note that the map above shows the “corrected” route based on other GPS files I was able to find on the web.

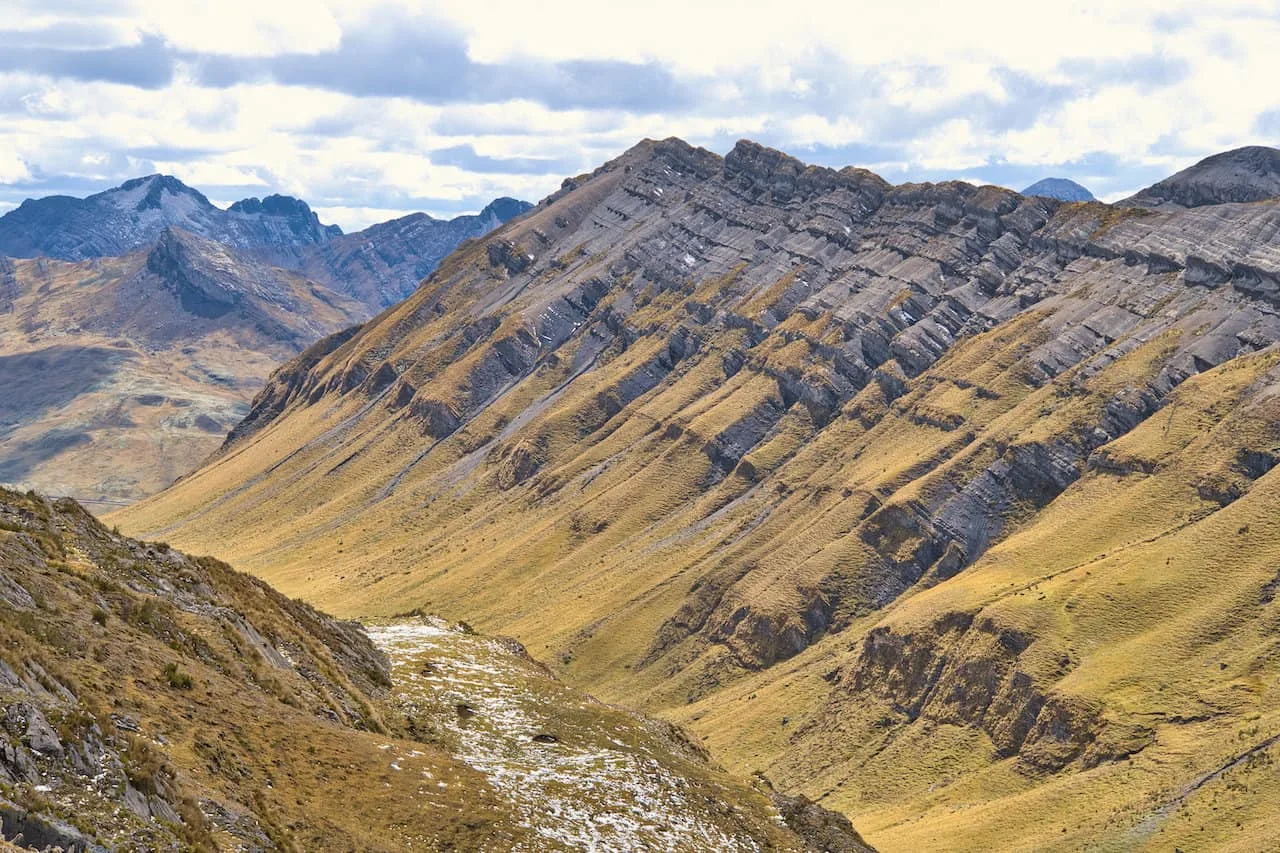
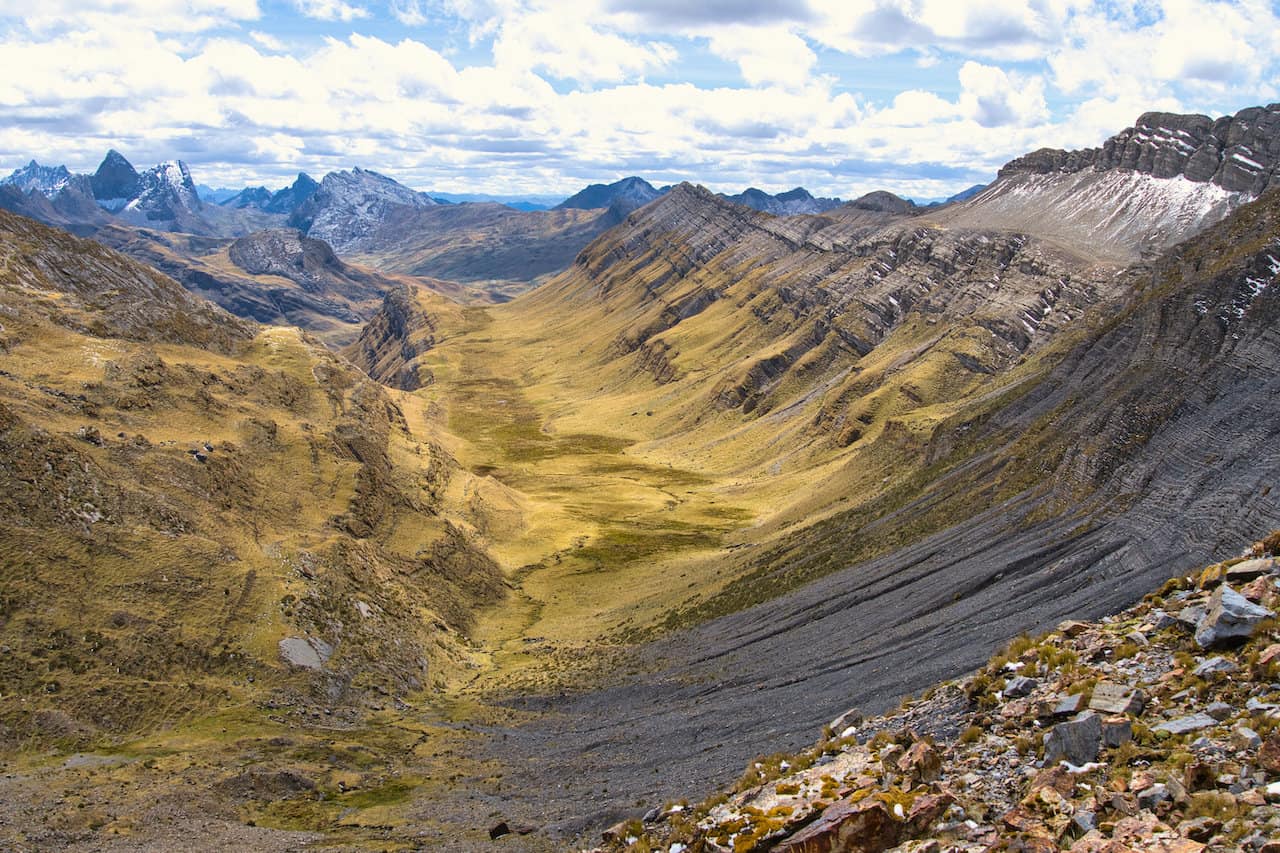
Hidden Valley to Lake Alcaycocha
It is super important to note that once you make it into the Hidden Valley, you should not descend down into it. Instead you will want to stay high and hug the valley walls on your right.
There should be a variety of paths here, so be sure to stay on one that continues higher up on the side of the valley wall.

Your goal here is to aim for the rock scree at the base of Jirishanca Chico. As you continue along, you will soon come across rock cairns, which will be nice and helpful the rest of the way through.
While navigation will get much easier now due to the rock cairns, you will need to gain additional elevation towards the far end of the Hidden Valley.
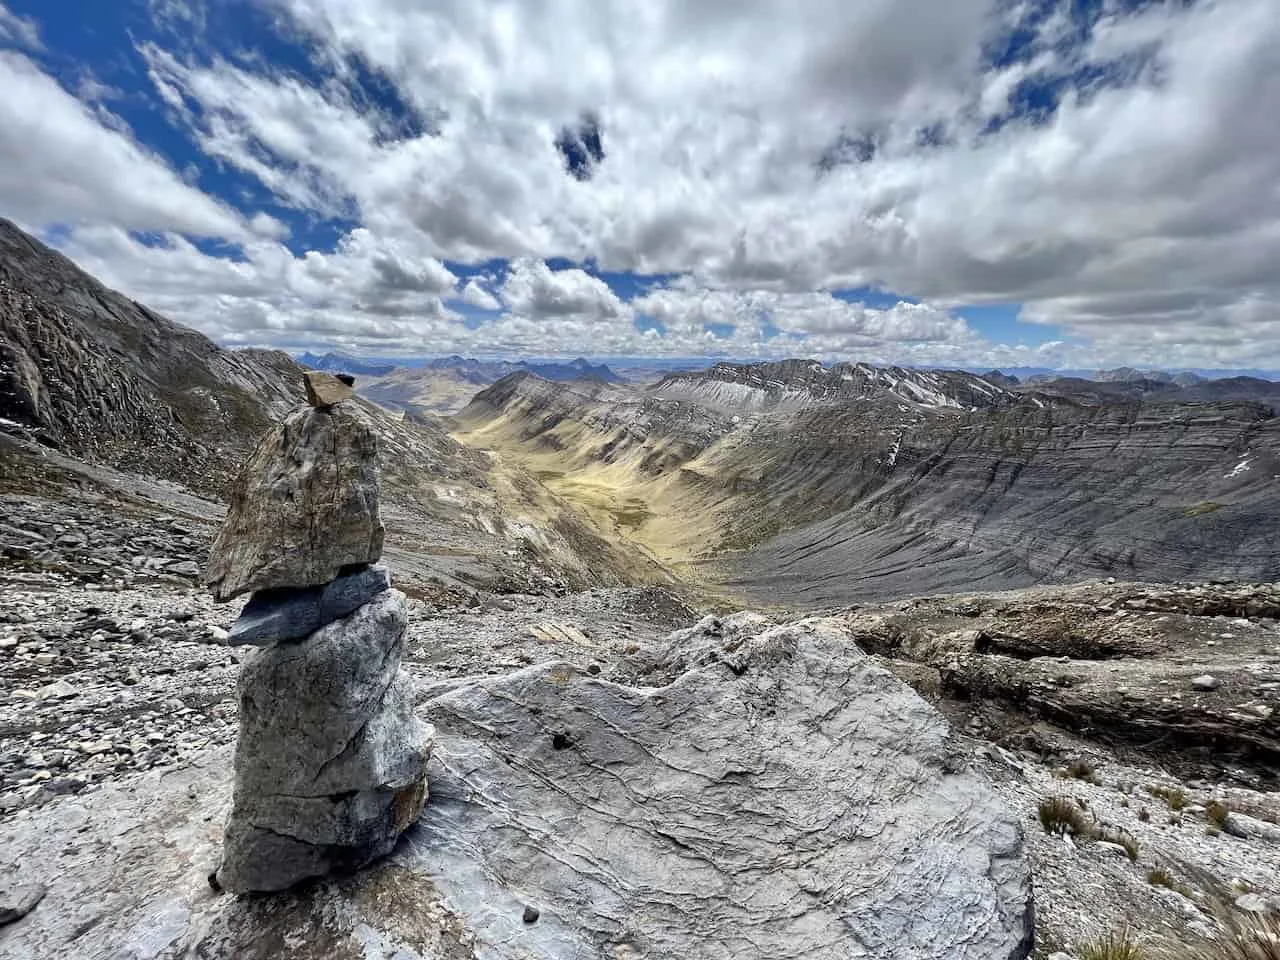
Continue to gain that elevation, follow the cairns, and then slowly make a left hand turn at the back of the valley. You will soon reach the high point, where you will be able to take in stunning views of the Hidden Valley out in front of you.

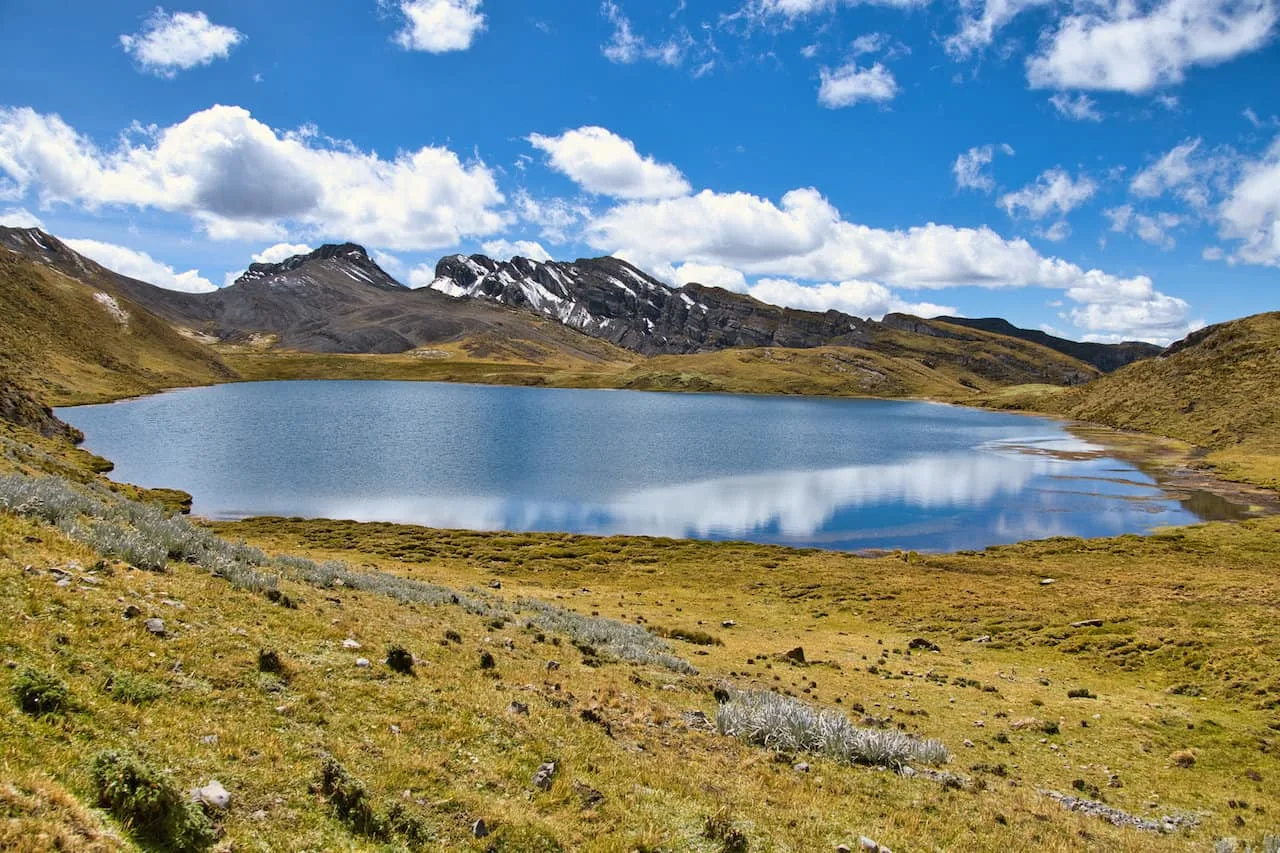
The trail then continues towards Lake Alcaycocha, where it will be time to relax, fill up your water, and enjoy some lakeside time.

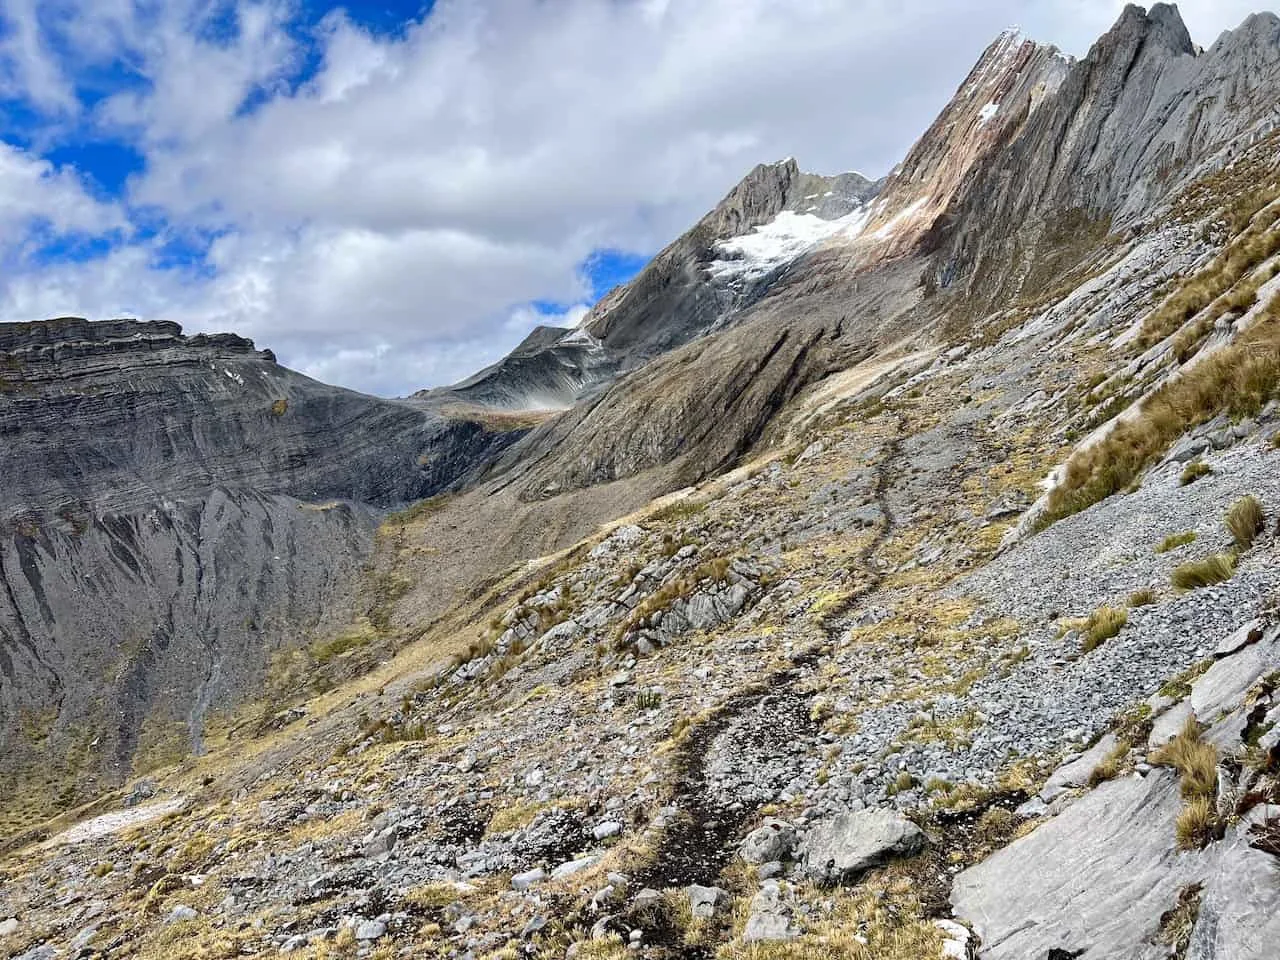
Lake Alcaycocha to Viewpoint
From the lakeside, the trail then continues along a new valley wall. While you can take a trail straight down the valley (and meet up with the standard route), I would highly recommend staying up alongside the valley walls.
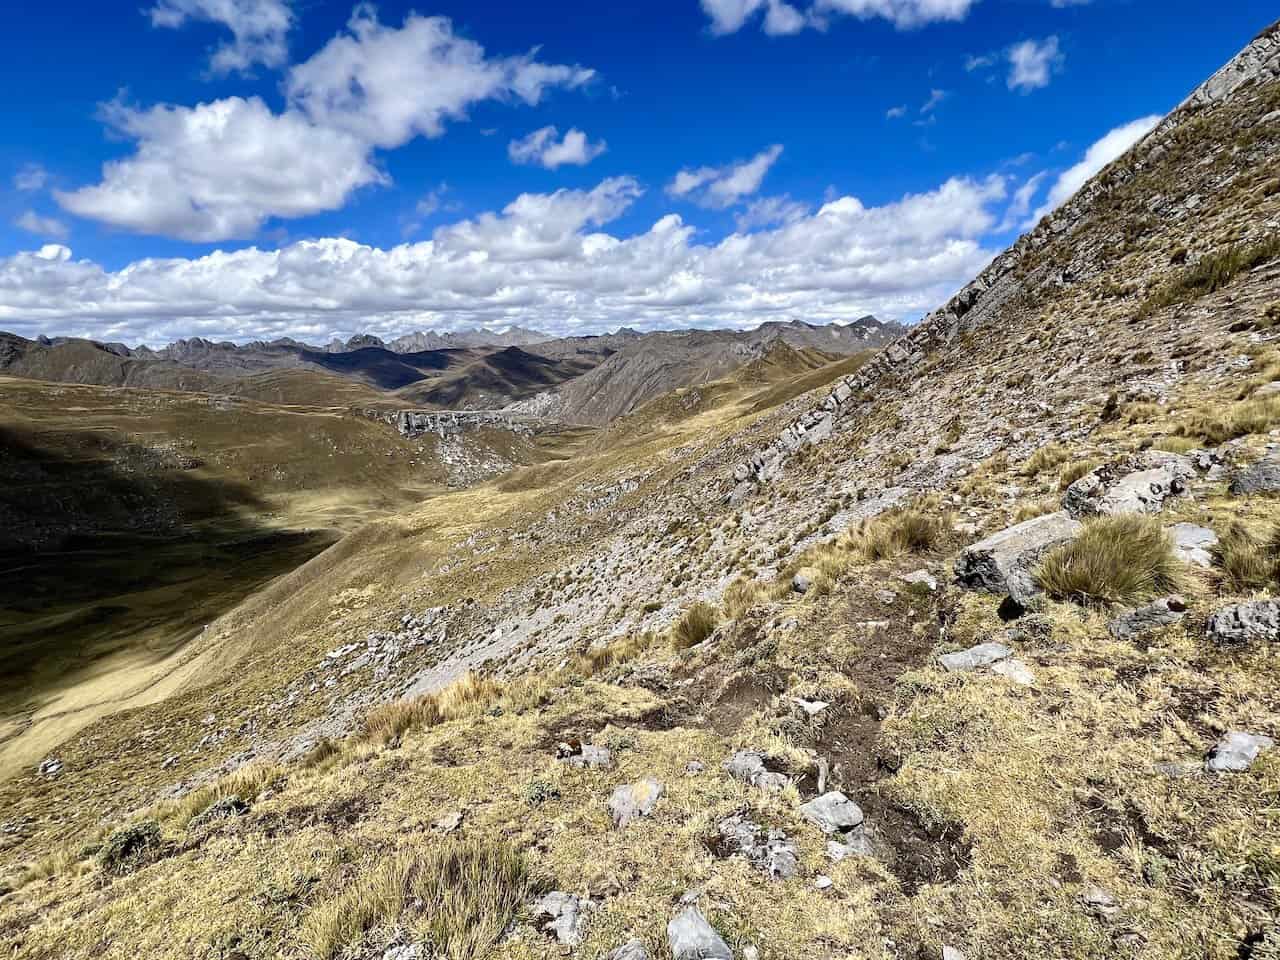
While you will be gaining some elevation here, it certainly will be worth it. After about 30 minutes after leaving behind the lake, you will welcomed to the first of two main viewpoints.
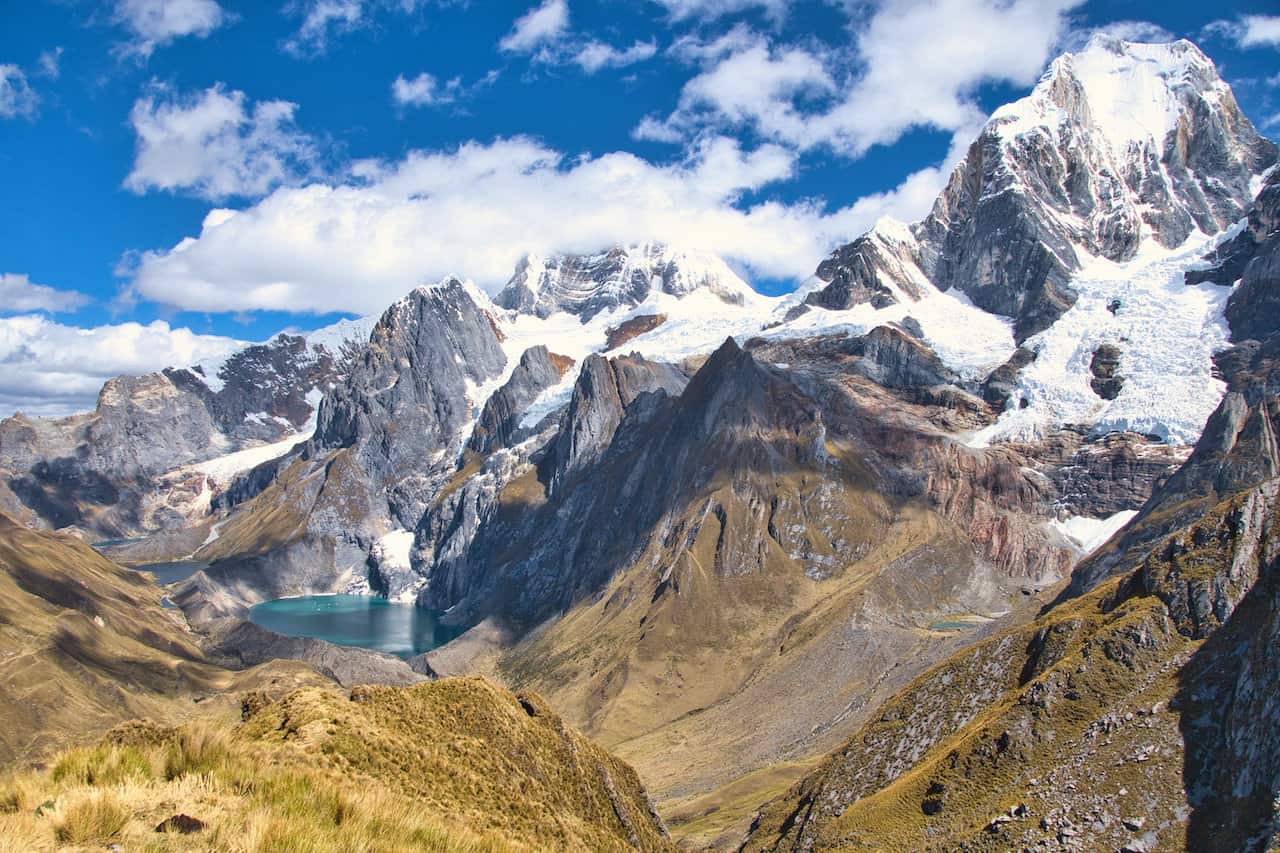
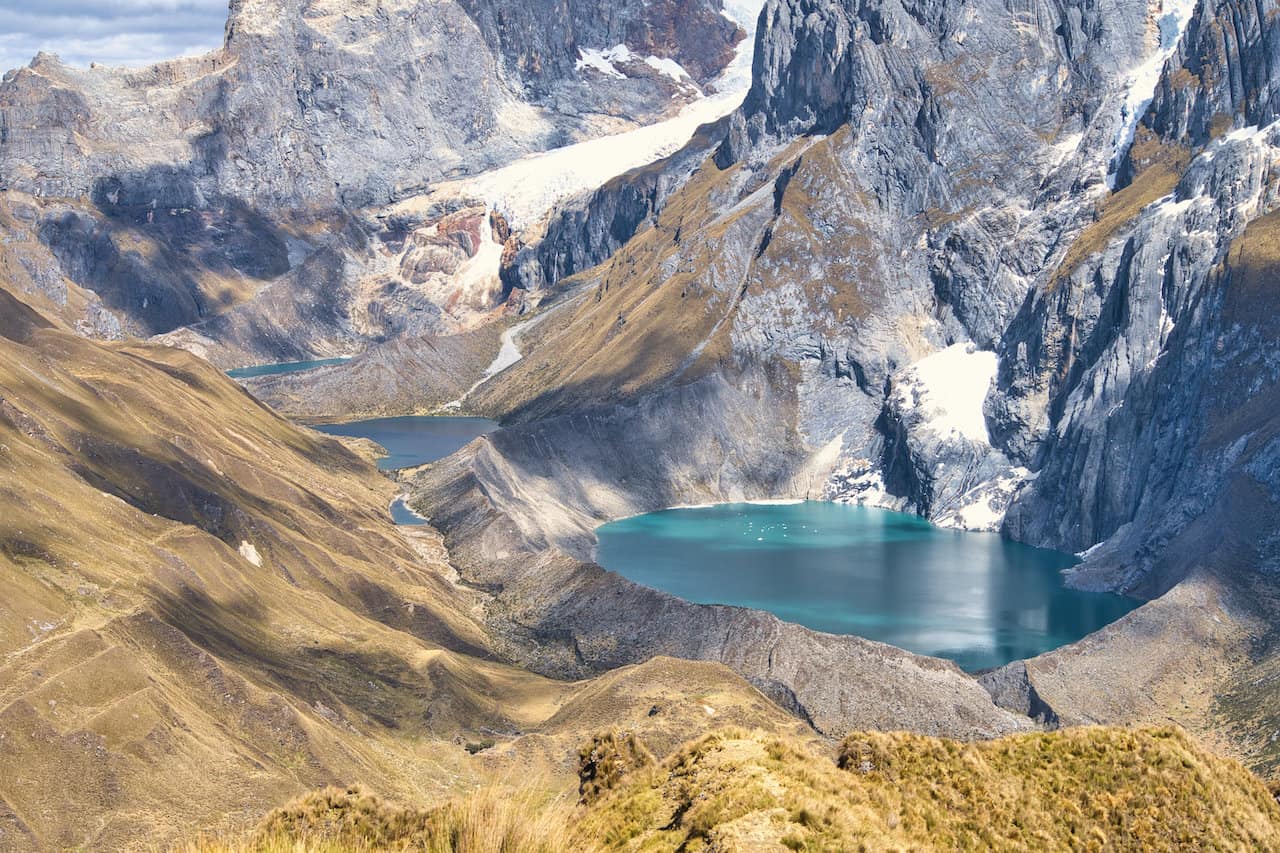
From here you will get to enjoy some further out views of the Huayhuash mountains with the famous “three lakes” down below (the following day you will get to see these lakes from the opposite side).

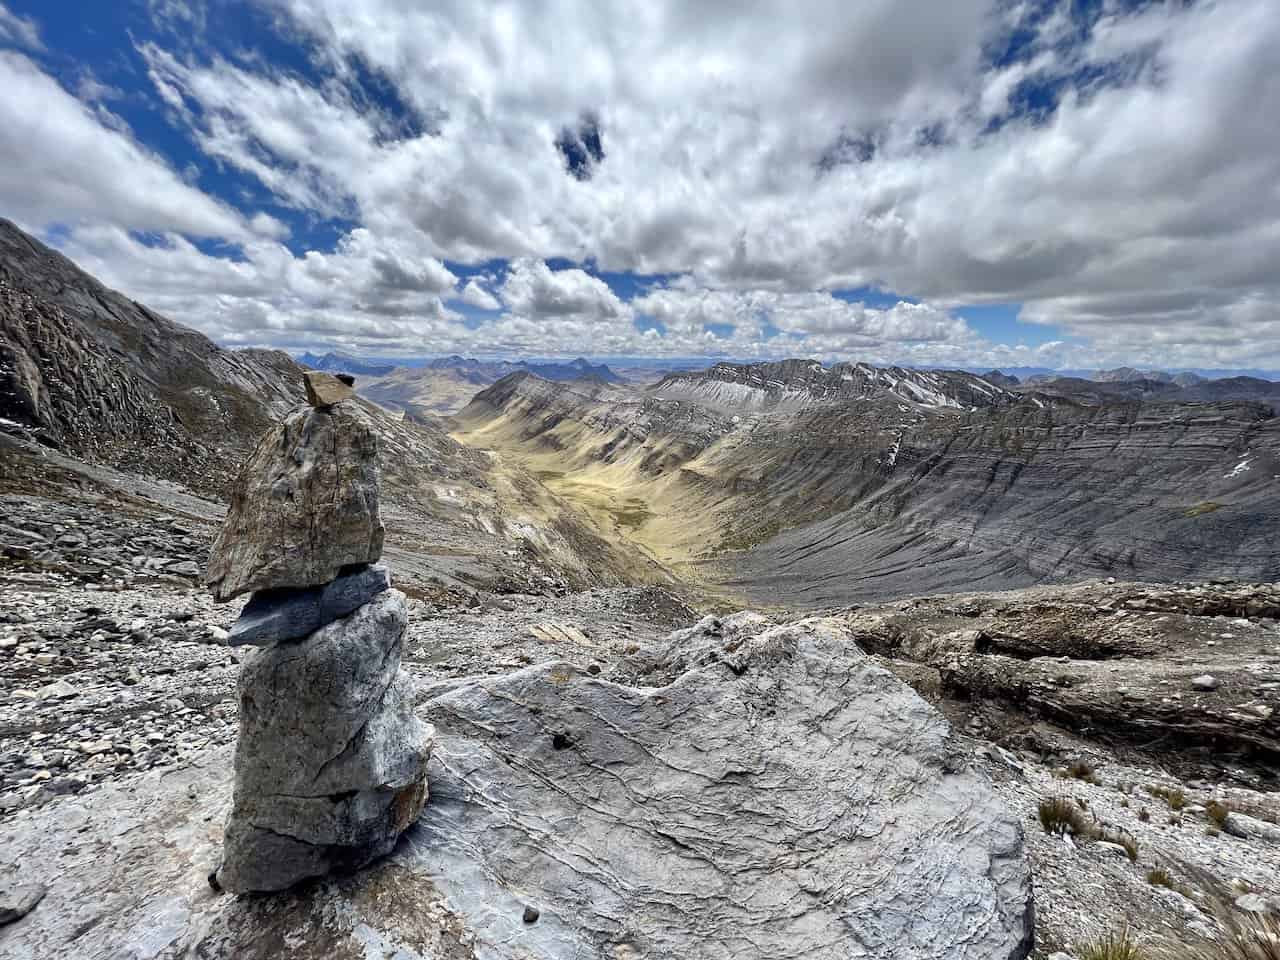
Once all finished with the first viewpoint area, continue along for another 20-30 minutes to the final viewpoint of the day.
From here, you will get some even better views of Jirishanca, Yerupaja, Siula Grande, and the three lakes. In addition, you will have the massive Lake Carhuacocha down below.
Take some time to relax and enjoy the views, as you will have one more difficult portion ahead.


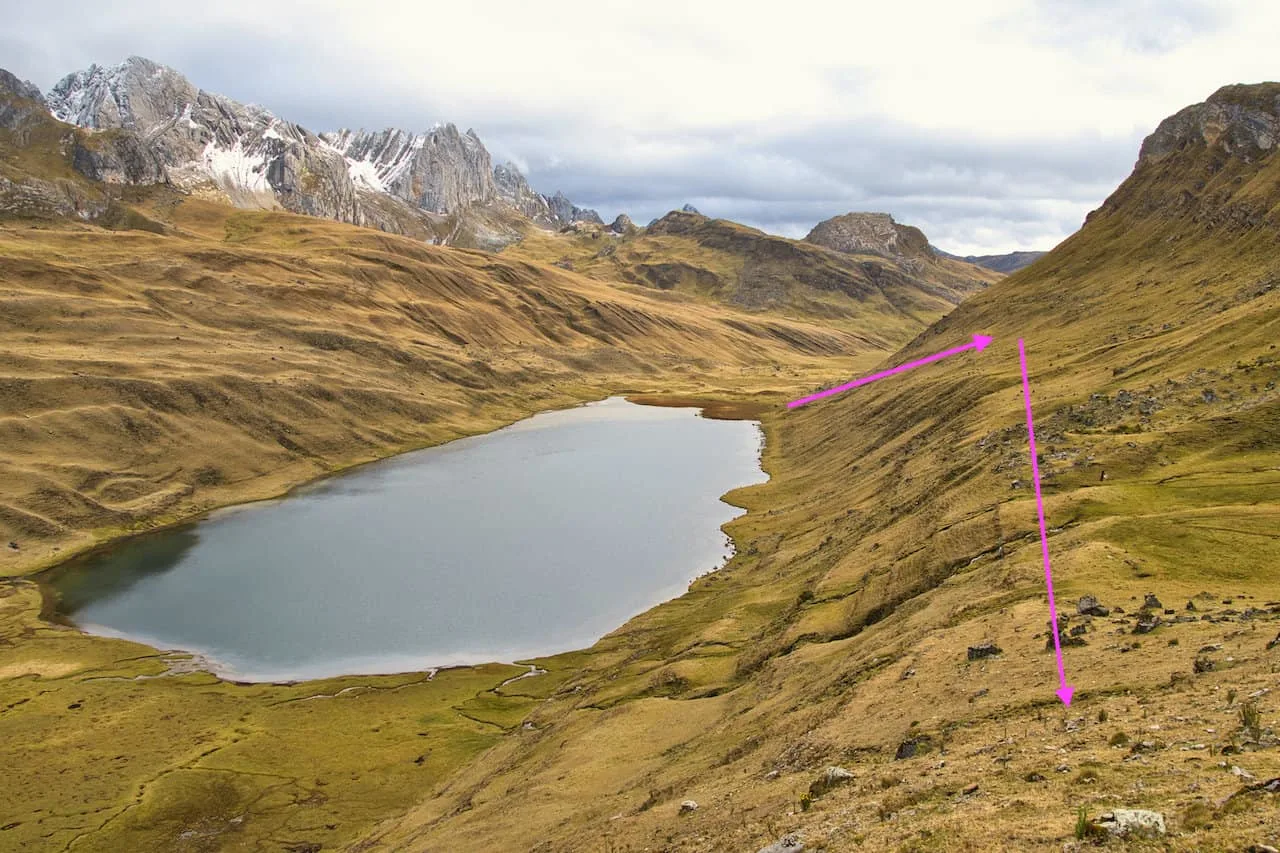
Viewpoint to Campsite
While the campsite will be in view from the viewpoint, it will take some strenuous downhill hiking to get there. You will need to zig zag your way down the steep mountainside in order to get to the main path. This should be taken with caution as it is not the easiest downhill to maneuver.
Once down though, you will soon meet up with the main route, walk alongside the lake, and slowly approach the campsite.
So, while the standard route may be the easiest day out on the trail, I would have to say this ruta alpina option on day 2 was the hardest day for me. Again, this should only be attempted with extreme caution and a high confidence in fitness & navigational abilities.
Whether you opt for the main route all the way through or give the ruta alpina option a try, you are sure to enjoy your time out on the trail.
If you have any questions or comments about this day or the Huayhuash Circuit in general, be sure to add them in below.
Have fun out there and safe travels!