
Are you interested in hiking to the highest point of South Korea?
Well, at 6,388 feet (1,947 meters) in elevation, Mount Hallasan on Jeju Island offers you that exact opportunity.
The full day hike will take you through the forest, up this shield volcano, and to the summit of South Korea.
Read on to learn everything you need to know about hiking Hallasan, and how to go about a visit during your time on Jeju Island.
* Affiliate Disclosure: This post may contain affiliate links, which means I may receive a commission if you make a purchase through the links provided, at no additional cost to you. Thanks for supporting the work I put into TripTins!
1) Mount Hallasan Background & Facts
To start, below are some helpful facts about Mount Hallasan and the trail itself.
- Mount Hallasan is located on Jeju Island, just south of mainland South Korea. It comes in at 6,388 feet / 1,947 meters in elevation, making it the tallest in the country.
- The mountain is actually a shield volcano that created most of the island itself (like the locals say “Jeju Island is Hallasan and Hallasan is Jeju”. It last erupted in the year 1007.
- The name Hallasan translates to “high enough to pull the universe”, and the mountain itself is a spiritual and sacred place for many locals.
- Surrounding Mount Hallasan, you will find Hallasan National Park. This national park is both a UNESCO Biosphere Reserve and a UNESCO World Heritage Site.
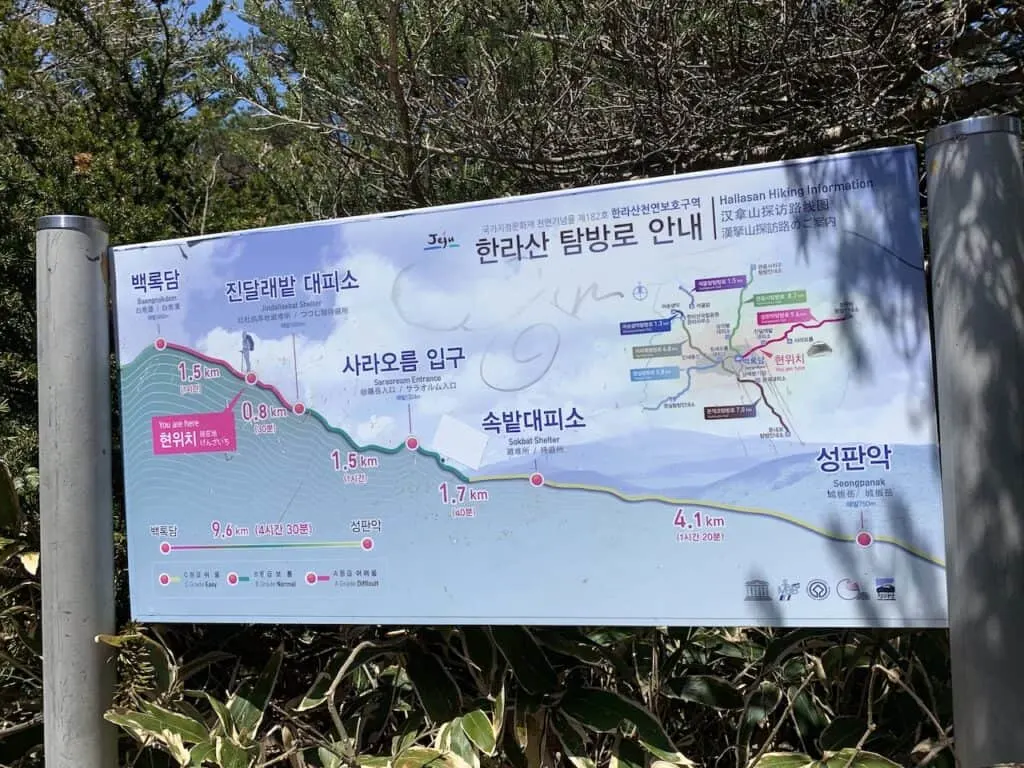
- On Hallasan, you will find 7 hiking trails. However, only two of those hiking trails reach the summit – Seongpanak and Gwaneumsa (more on these routes soon). The remaining trails are great for those that want to take part of a shorter day hike.
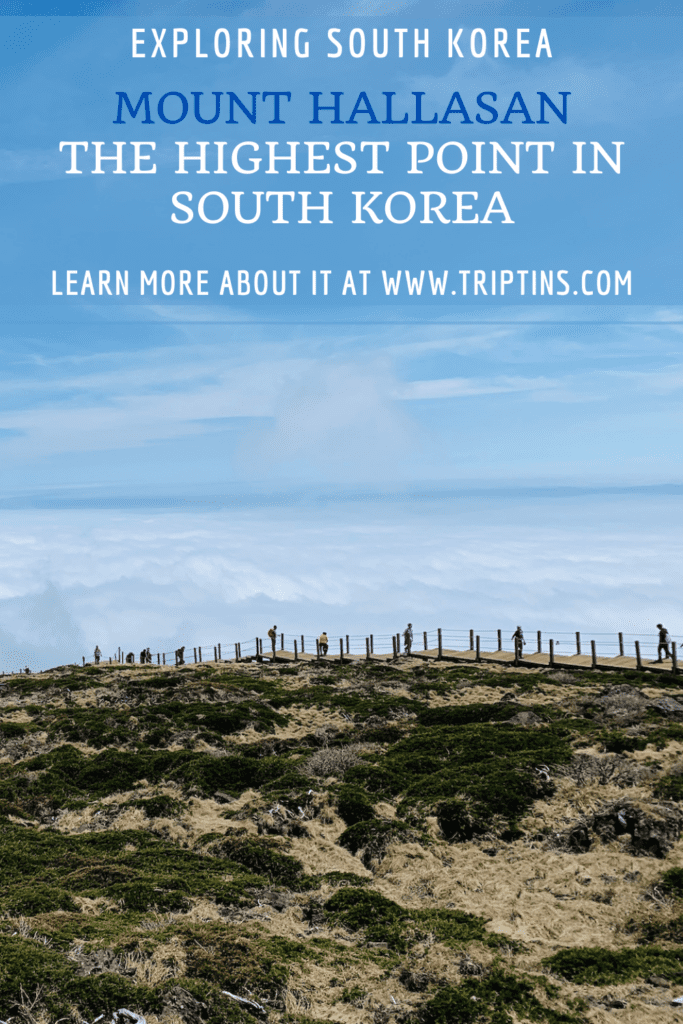
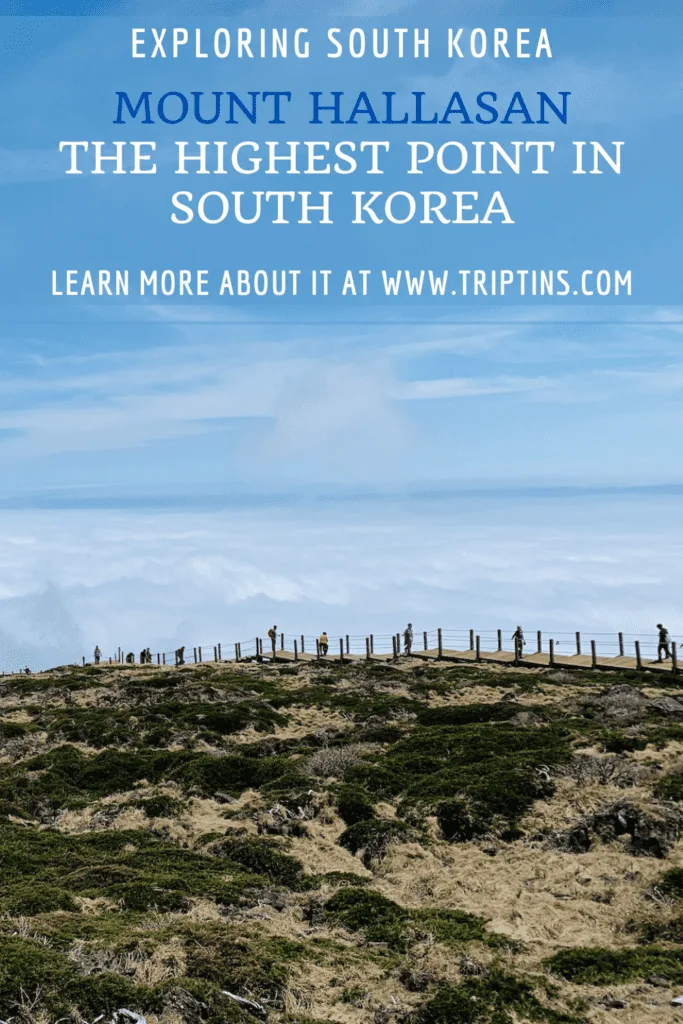
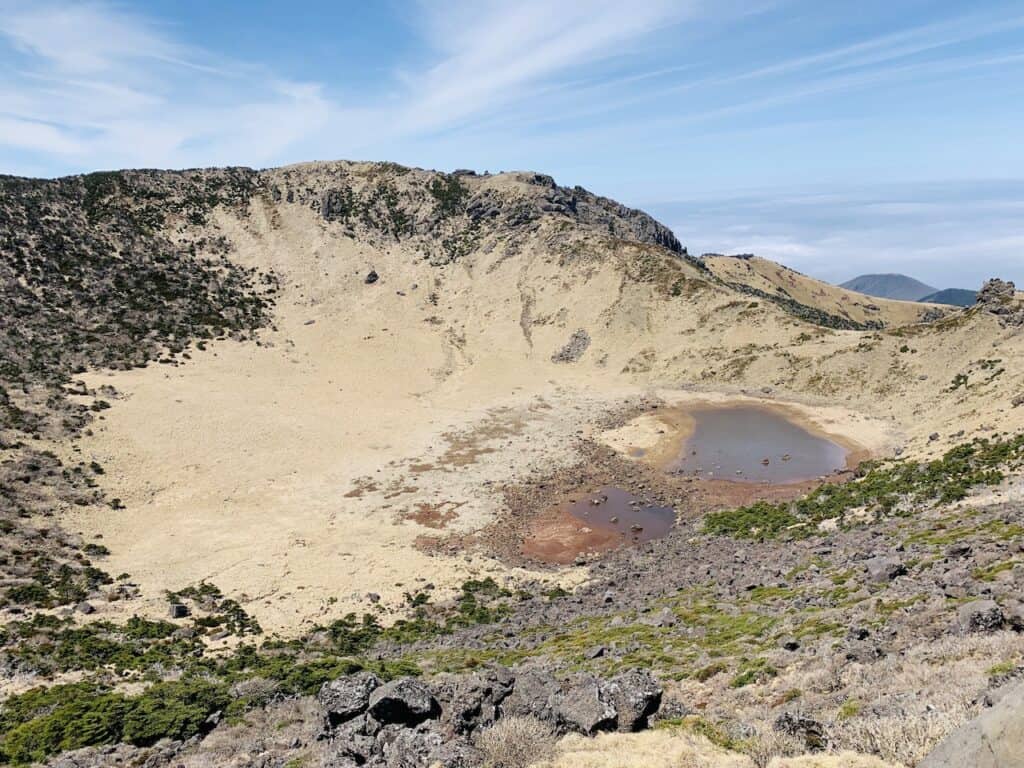
- Once at the Hallasan summit, you will have views of the Baengnokdam Crater Lake and the rest of Jeju Island all around, as you stand at the highest point of the country.
The rest of this guide will focus in on the Hallasan hike and how to get yourself up to the summit.

2) Mount Hallasan Trail Routes
As mentioned, there are two trails that reach the summit of Hallasan – Seongpanak (east) and Gwaneumsa (north).
At each trailhead you will find a parking lot, where you will pay a small fee to park your car. The Gwaneumsa lot also offers a campground for an additional fee if you would like to camp the night prior to your hike.
In general, there are four ways to go about a hike with these routes depending on preferences & logistics:
- Up and Down Seongpanak (most common & easiest)
- Up and Down Gwaneumsa (most difficult)
- Up Seongpanak and Down Gwaneumsa (easier way to hike both routes)
- Up Gwaneumsa and Down Seongpanak (harder way to hike both routes)
There are three main considerations at play here when deciding on your route – difficulty, logistics, and reservations.
Difficulty
For the most part, going up and down Seongpanak is the most popular option. This is because the route gains less elevation and is less steep compared to the Gwaneumsa route.
However, if you did want to change up the route, I would recommend heading up Seongpanak and down Gwaneumsa (this is the route I took part of). While it is a steeper descent, you will be able to enjoy a larger portion of Hallasan National Park.
If going up and back on the Gwaneumsa route, or going from Gwaneumsa to Seongpanak, expect a tougher incline towards the summit.
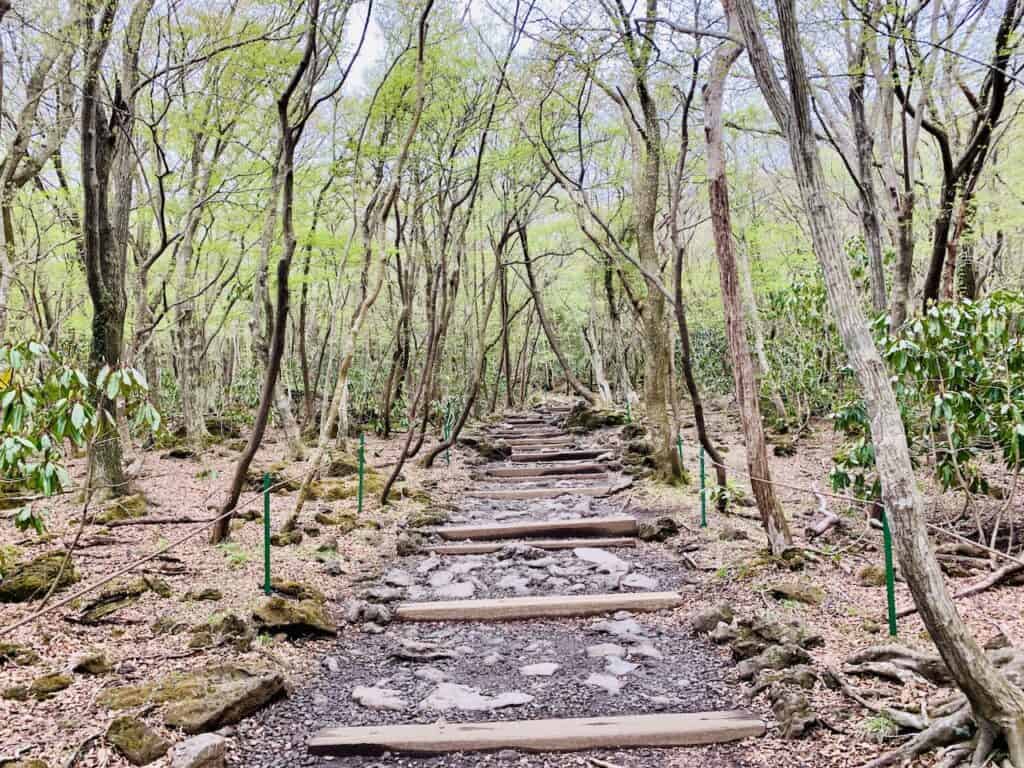
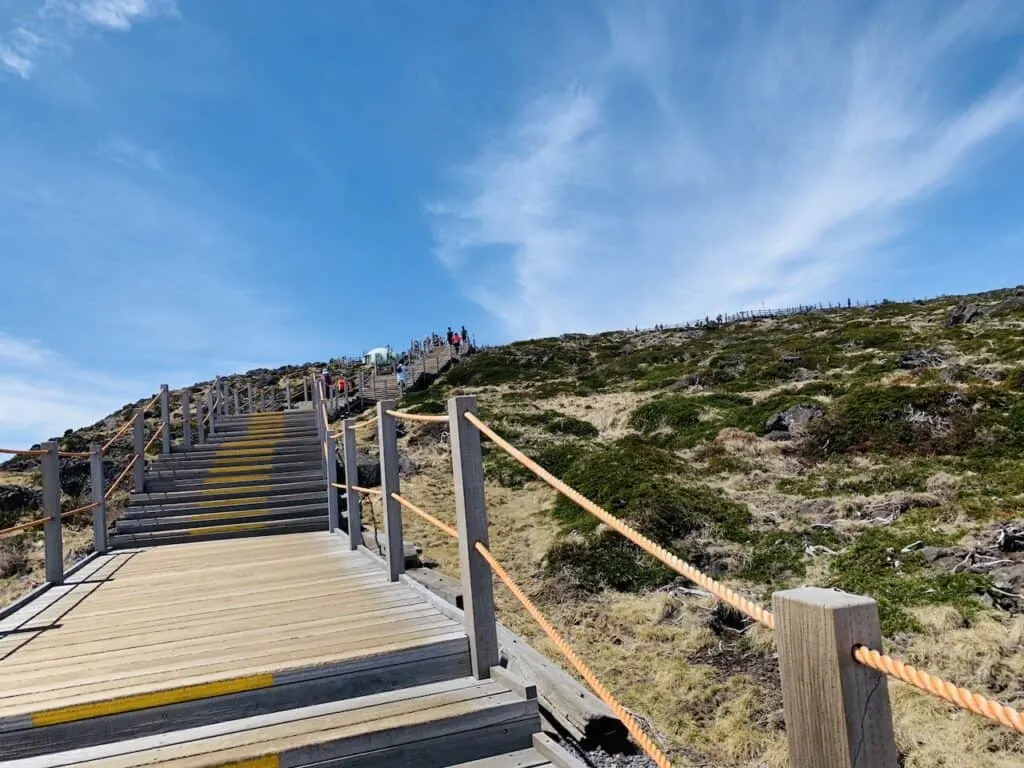
When it comes to the trail itself, you will find a mixture of boardwalks, staircases, and natural rocky terrain on both routes.
I honestly don’t think I have come across another hike that has so much infrastructure built along the route. It will definitely feel like a different type of hike due to the amount of construction built to help hikers up the summit.
Logistics
Now, if you do opt for a one-way route (starting and ending in two different spots), then you will need to think about logistics as well.
This is more so an issue if you are taking your own car. If you park at one trailhead, you will then need to get back to the other trailhead at day’s end. This can be done by taxi or bus (more on that soon).
While I did catch a taxi back to Seongpanak from Gwaneumsa, there were only a couple of them waiting there. I hear in general that there are more taxis usually waiting at Seongpanak (but you never know).
Reservations
The last main consideration are reservations. In order to take part, you must sign up in advance and pick either trailhead as a starting point.
If one route happens to be all booked up, then that may force you to choose the other.
There are 1,000 spots available at Seongpanak and 500 at Gwaneumsa. So, if crowds are a concern, then you may want to consider that as well.
I will talk through the reservation system in the following sections.

3) Route Statistics
To give you some trail stats, below you can see the total length and elevation gain for the 4 different options:
Option 1: Up and Down Seongpanak
- Start: Seongpanak
- End: Seongpanak
- Length: 11.5 miles / 18.5 km
- Elevation Gain: 3,800 feet / 1,160 meters
Option 2: Up and Down Gwaneumsa
- Start: Gwaneumsa
- End: Gwaneumsa
- Length: 10.6 miles / 17.1 km
- Elevation Gain: 4,450 feet / 1,360 meters
Option 3: Up Seongpanak and Down Gwaneumsa
- Start: Seongpanak
- End: Gwaneumsa
- Length: 11.1 miles / 17.9 km
- Elevation Gain: 3,860 feet / 1,180 meters
Option 4: Up Gwaneumsa and Down Seongpanak
- Start: Gwaneumsa
- End: Seongpanak
- Length: 11.1 miles / 17.9 km
- Elevation Gain: 4,430 feet / 1,350 meters
Other Routes
If you do not want to hike to the summit and rather take part of a shorter day hike, then there are other options for you.
These include Yeongsil, Eorimok, Eoseungsaengak, Seokgulam, and Donnaeko.
The routes are great for those that want to hike within Hallasan National Park but don’t want to spend a full day out on the trail.
How Long Does it Take to Hike Hallasan
No matter what route to the summit you opt for, you can expect a total round trip to take between 6-8 hours.
This will entail around 4-5 hours going up and a 2-3 hours to make it back down.
If you spend more time taking pictures and hanging out by the summit, then the time can certainly take longer.

4) Mount Hallasan Map
To better grasp the layout of the two trails, you can see the Hallasan trail map below.
The route that starts on the east will be Seongpanak, and the one to the north will be Gwaneumsa.
They both meet each other at the summit, where you can then decide which route down to take.
5) Hallasan Reservations
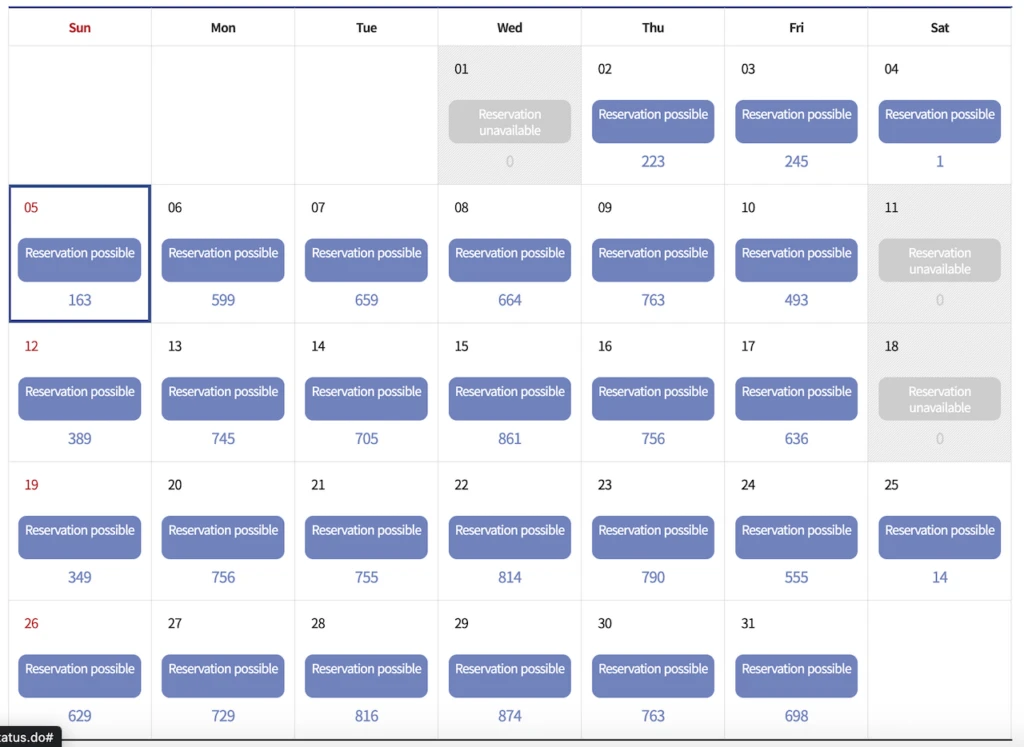
In order to hike Mount Hallasan, you must sign up in advance through their online reservation system.
The reservation system is easy to use and you will be able to choose which route you plan to take up (it does not matter which route you take down).
The Seongpanak route is limited to 1,000 hikers per day while the Gwaneumsa route is limited to 500 hikers.
In order to make your reservation, you will need to wait until the month prior to your hiking date. For example, reservations will open for all of May on April 1. Once May 1 comes along, you can then reserve for June.
You can expect weekends to fill up fast and there is always a chance for last minute reservations too if you are lucky.
While reservations are needed, there is no fee that needs to be paid. The system is in place to ensure the mountain does not get overpopulated with hikers and it helps with mountain safety altogether.

6) Cut Off Times
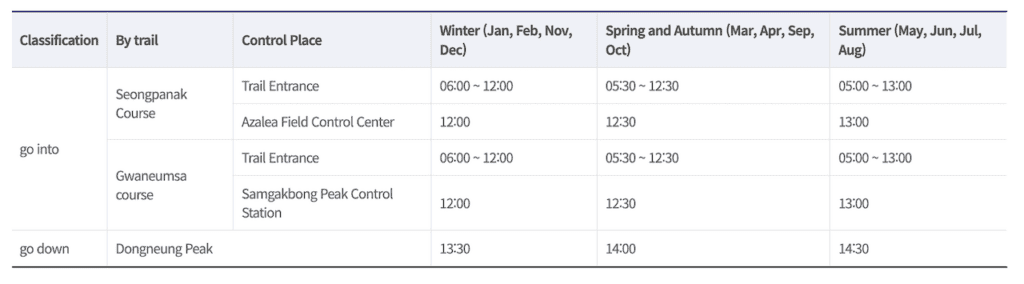
Before getting into the hike, it is very important to note that there are cutoff times on the mountain.
On the Seongpanak route there is a cutoff time at the Jindallaebat Field Control Center (also called Azalea) and on the Gwaneumsa route there is a cutoff at the Samgakbong Peak Control Station.
This means that if you do not arrive at either of these stations prior to the cutoff time, you will be asked to turn around.
In addition, you will be asked to leave the summit by a certain time to ensure everyone is off the mountain before dark.
Depending on time of year, the trails open between 5:00AM – 6:00AM and you must arrive at the stations between 12:00PM – 1:00PM. The summit then closes between 1:30PM – 2:30PM.
Below is a screenshot of the opening times & cutoff times by season to see more detail:

7) Where to Stay on Jeju
When planning a trip to Jeju, you can opt to base yourself in one spot (like Jeju City or Seogwipo), or spend a couple nights in various places around the island (such as Seongsan Ilchulbong and the Manjanggul Cave).
At the end of the day, this will all depend on your own itinerary.
I found that staying in Seogwipo is a great option altogether. It has easy access to the western and eastern parts of the island, and Hallasan is just a short drive away.
Below are a few hotel recommendations for these two main places:
Jeju City
Seogwipo
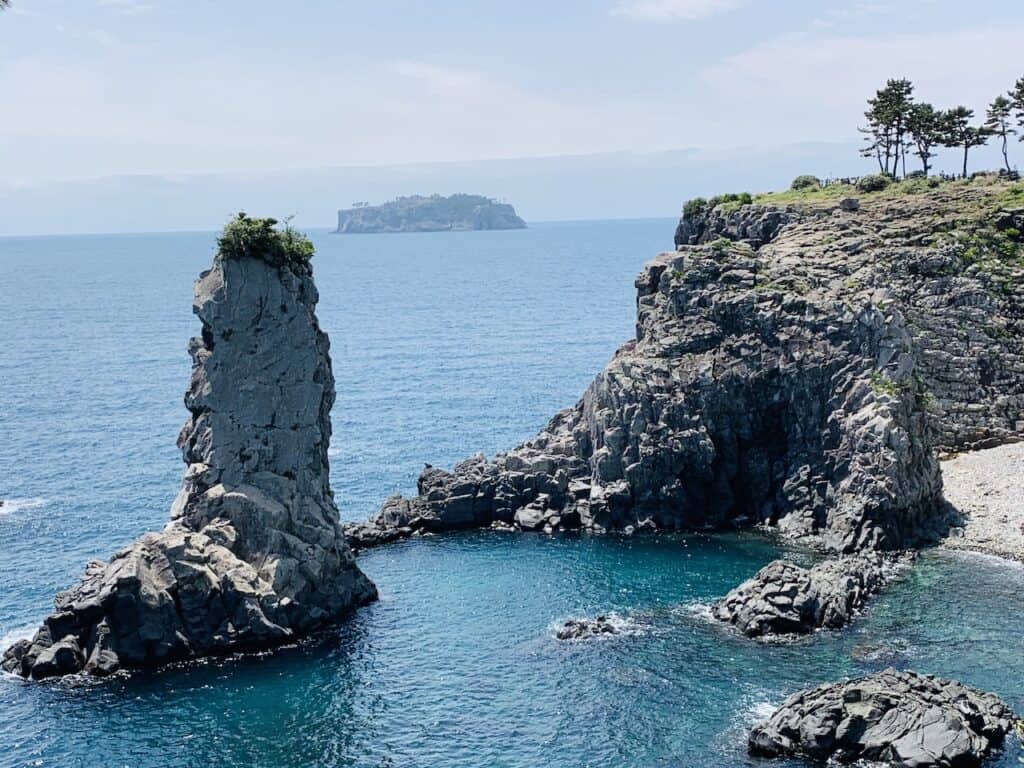
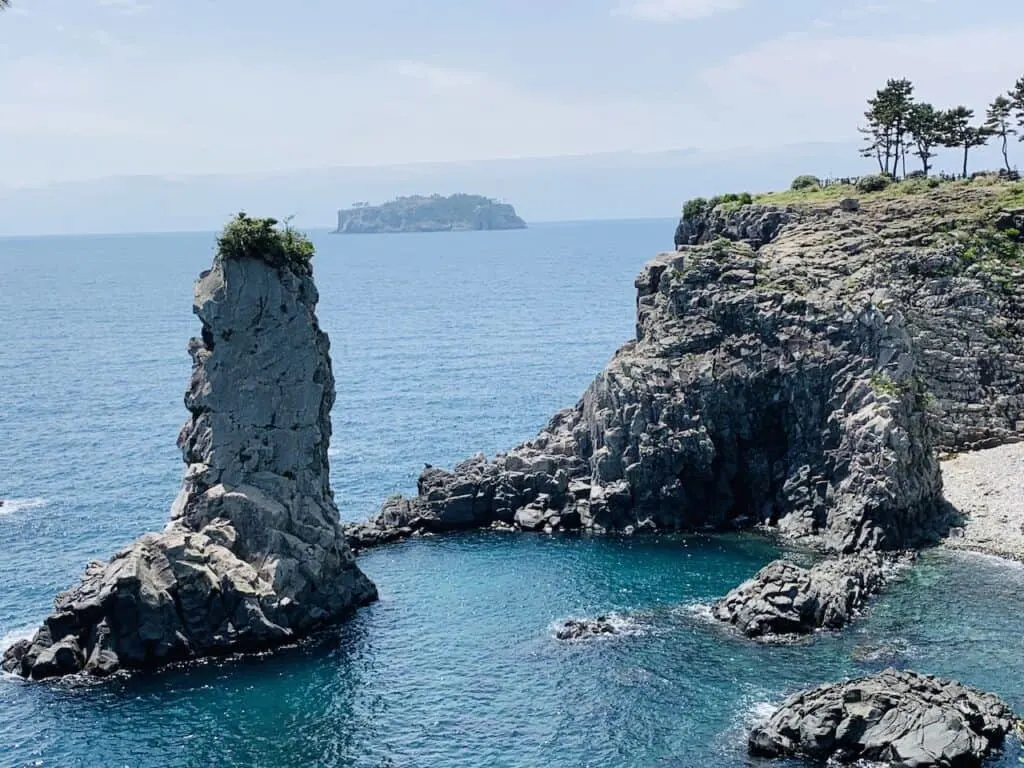
Learn More About Jeju: Check out this guide that goes over the best things to do in Jeju Island
8) How to Get to Mount Hallasan
There are three main ways to go about getting yourself to the Mount Hallasan trailheads – rental car, bus, or taxi.
Rental Car
During my time on Jeju, I decided to rent a car for the few days I was exploring the island. This gave me the chance to see everything I wanted on my own schedule and at my own pace.
I was very happy with this decision as it was quite easy to get around and see all the various sites that Jeju had to offer.
Feel free to check out Rentalcars.com for potential options. You will be able to see a variety of cars by price, size, and type, so you can choose the one best for you.
When heading to the Hallasan trailheads, you can simply type in Seongpanak (GPS: 33°23’05.5″N 126°37’12.1″E) or Gwaneumsa (GPS: 33°25’19.5″N 126°32’59.2″E) and be on your way.
Two important rental car notes:
- You will need an International Drivers License to rent a car in South Korea. Be sure to get one prior to your trip.
- Google Maps does not work in South Korea. Download an app like Naver for driving directions.
Bus
The second option is to take a public bus that stops at the trailheads. This will of course depend on where you are staying but in general, below are the routes to consider:
To Seongpanak: direct bus from Jeju City or Seogwipo to Seongpanak (40 minutes).
To Gwaneumsa: first take a bus from Jeju City or Seogwipo and get off at Jeju University (30/45 minutes). Switch onto bus route 475 to Gwaneumsa (15 minutes).
You can take a look at routes 181, 182 and 281, which travel between Jeju City and Seogwipo, with stops at the Seongpanak trailhead and at Jeju University
The Jeju bus website is also helpful where you can put in the routes/stops to see the latest.
Taxi
The last main option to consider is to take a taxi to/from the trailhead. In order to do so, I would advise to have your hotel help plan this for you.
The taxi can drop you off early in the morning, and then pick you up later in the afternoon at a set time. Just be sure to give yourself enough time to complete the hike of course.

One Way Route Logistics
If taking the bus or a taxi, the idea of taking a one-way route should not be much of an issue.
However, if you have your own rental car and are planning to take a one-way route (i.e. starting in Seongpanak and ending in Gwaneumsa), then you will of course need to find a way back to get back to your car at the end of the hike.
There are a few ways to go about this:
Taxi
During my time on the trail I opted for the route starting in Seongpanak and ending in Gwaneumsa.
Once I reached the Gwaneumsa trailhead, there were a couple taxis sitting around. I would consider myself lucky because there certainly could have been a situation where no taxis would be waiting.
If a taxi is not waiting there for you, then you may need to consider the next option – public transport.
Note: the distance between the trailheads is quite short and should only take about 10 minutes by car.
Bus
In order to go between Gwaneumsa and Seongpanak, you can first take a bus towards Jeju University. Once there, transfer to bus 475 to get to either of the two trailheads.

9) What to Wear
A hike up Mount Hallasan can really bring all sorts of weather. While it can be nice and sunny at one moment, the rain and wind can begin at another moment.
To ensure you are well prepared for a hike up Hallasan, you will want to come with the appropriate packing list.
I also want to point out that you should come prepared with at least a couple liters of water to keep yourself hydrated all the way through.
Hiking Packing List
In general when it comes to hiking, there are a few main aspects to consider. These includes clothing layers, hiking shoes, hydration & fuel, electronics, and other essentials.
Below in a breakdown of some of the top items, but be sure to check out the Hiking Packing List for a more comprehensive view.
Clothing Layers
Layering is going to be a top consideration when hiking. You will want to be prepared for all sorts of weather so you can be comfortable in different situations. Some items may include:
→ Hiking Shorts
→ Hiking Pants
→ Short Sleeve Shirt
→ Long Sleeve Shirt / Sun Hoodie
→ Mid Layer Fleece
→ Puff Jacket (not always needed)
→ Packable Rain Jacket (Columbia Watertight II)Note that your layers should be made of moisture wicking material as they are breathable and quick drying.
Footwear
Having appropriate footwear will also be very important. You will want to have shoes with the necessary grip and support to keep you safe on the trail.
→ Hiking Shoes (Keen Targhee)
→ Hiking Socks (Darn Tough)Other Essentials
Whether it is hiking gear, electronics, or just some miscellaneous items, here are some other essentials to bring along on hikes.
→ Hiking Backpack (Osprey Talon 22) & Rain Cover (Joy Walker Cover)
→ Hiking Poles (Black Diamond Trekking Poles)
→ Water Bottle (CamelBak Chute or Katadyn Filter Bottle)
→ Portable Charger (Anker PowerCore 5000mAh)
→ Action Camera (GoPro Hero)
→ Energy Bars & Snacks
→ Hat & Sunglasses
→ Sunscreen & Bug Spray
10) The Mount Hallasan Hike
Now that you have all the background information necessary for Hallasan, let’s talk about the hike itself.
During my time climbing to the top of South Korea, I opted to start at the Seongpanak trailhead and come down to the Gwaneumsa trailhead. I then grabbed a taxi back to the start.
Since I opted for this route in particular, that is how I will go about the remainder of the hiking overview.
Of course, no matter what route you take, the overview will still be very relevant since it covers both the Seongpanak and Gwaneumsa trails.
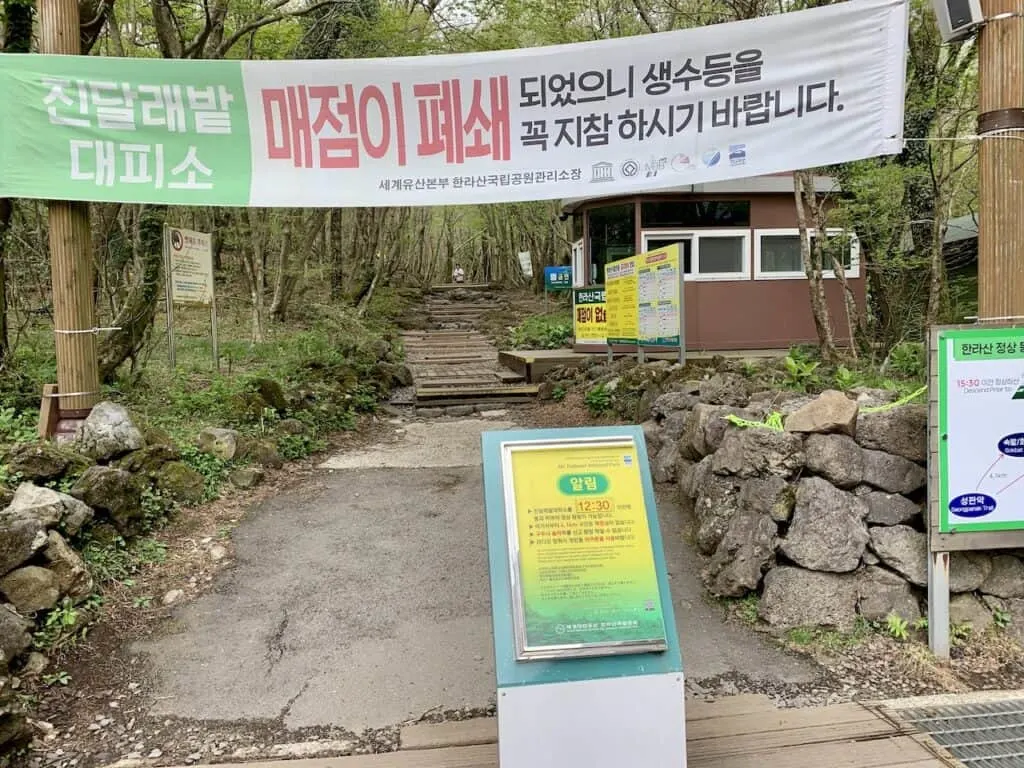
Seongpanak Trailhead to Sokbat Shelter (1 hour)
After arriving at the parking lot, it is time to begin the hike up to the summit of Mount Hallasan.
Once you arrive, there will be plenty of informational boards about the route, cutoff times, and what to expect on the trail.

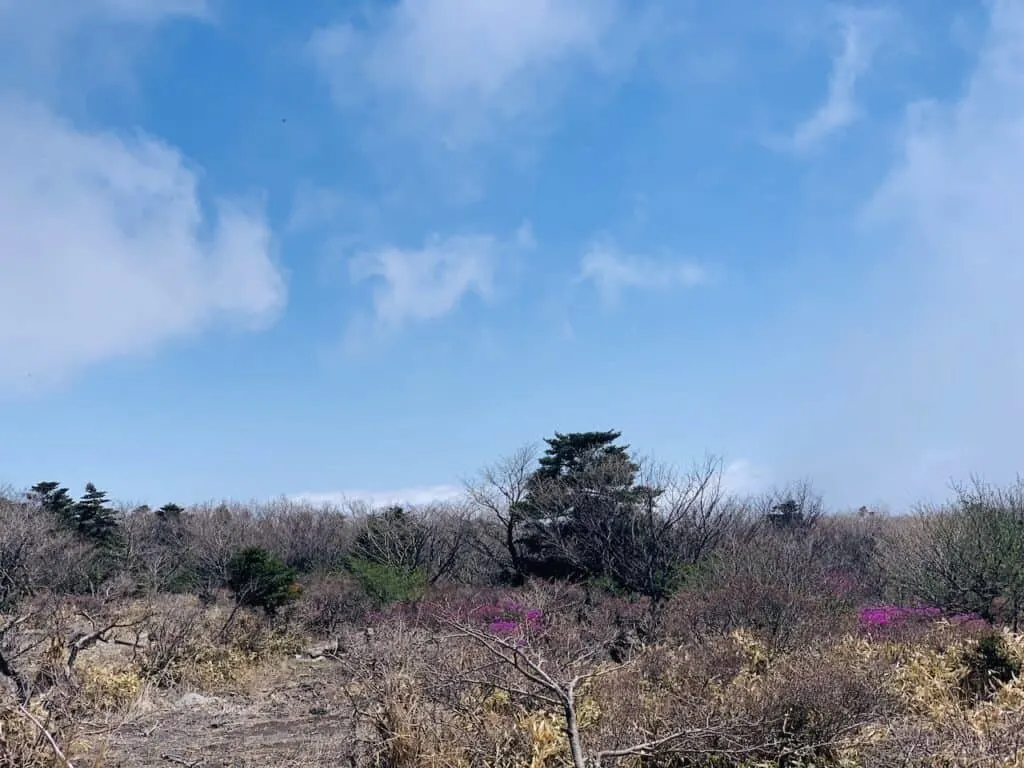
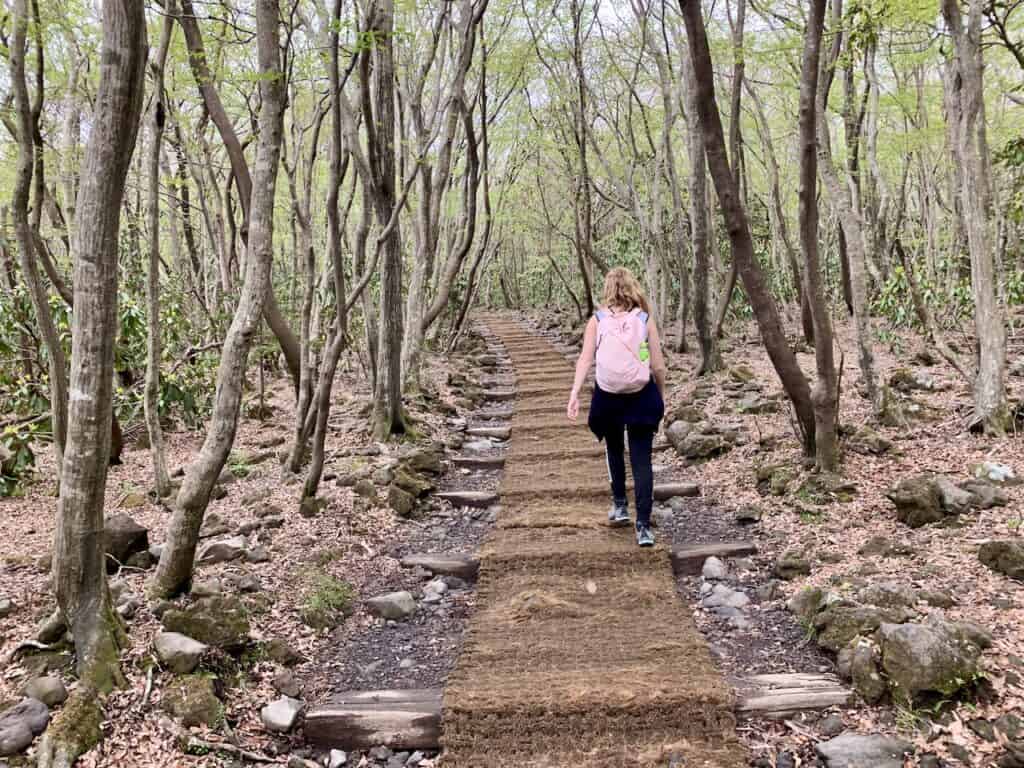
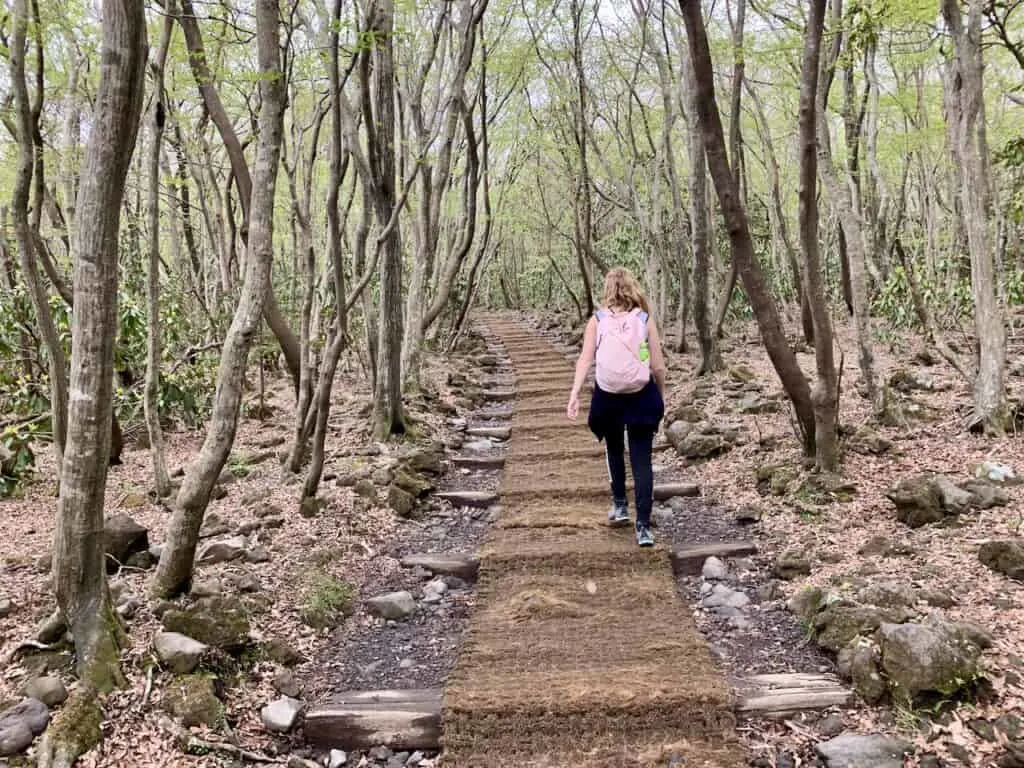
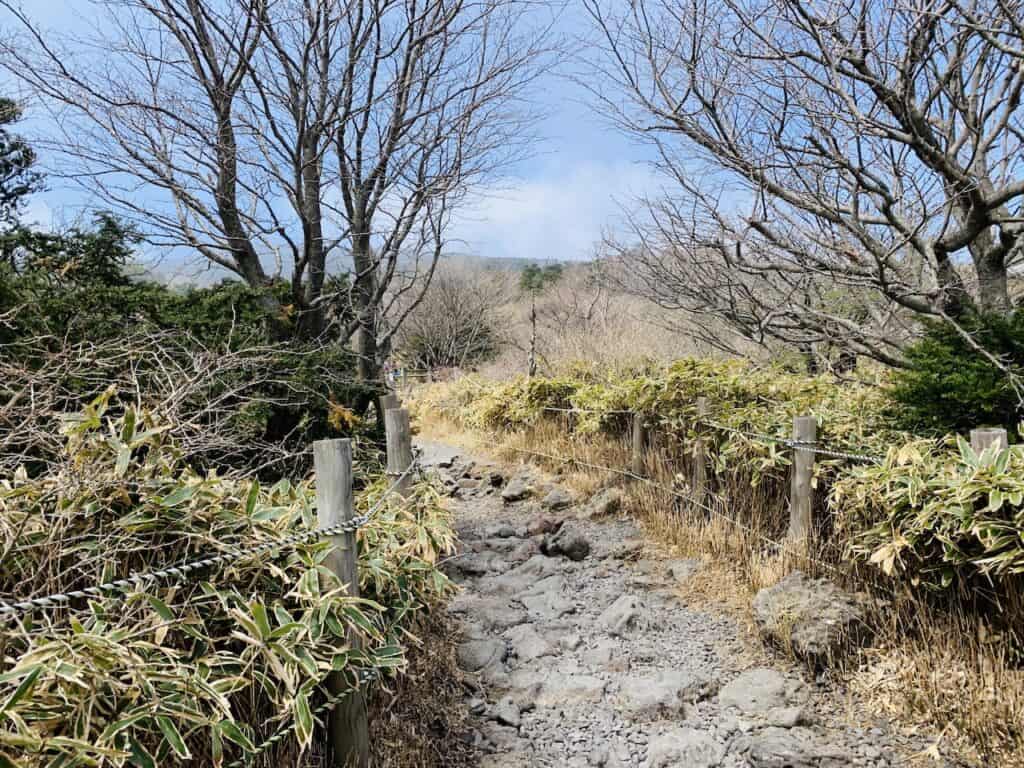
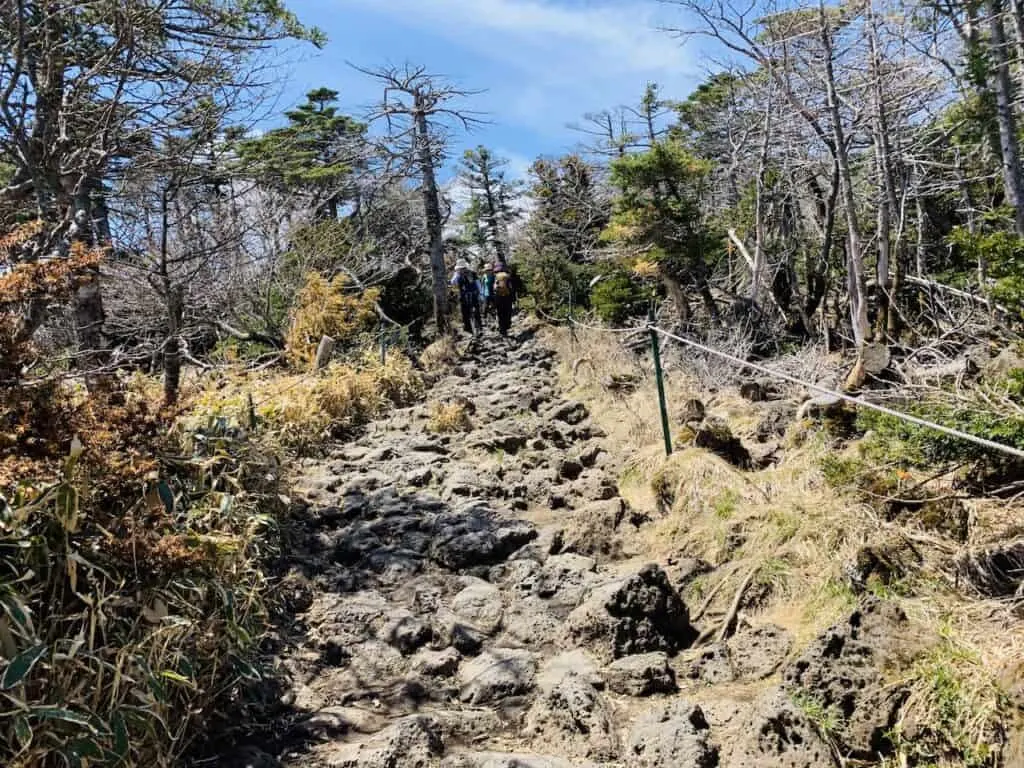
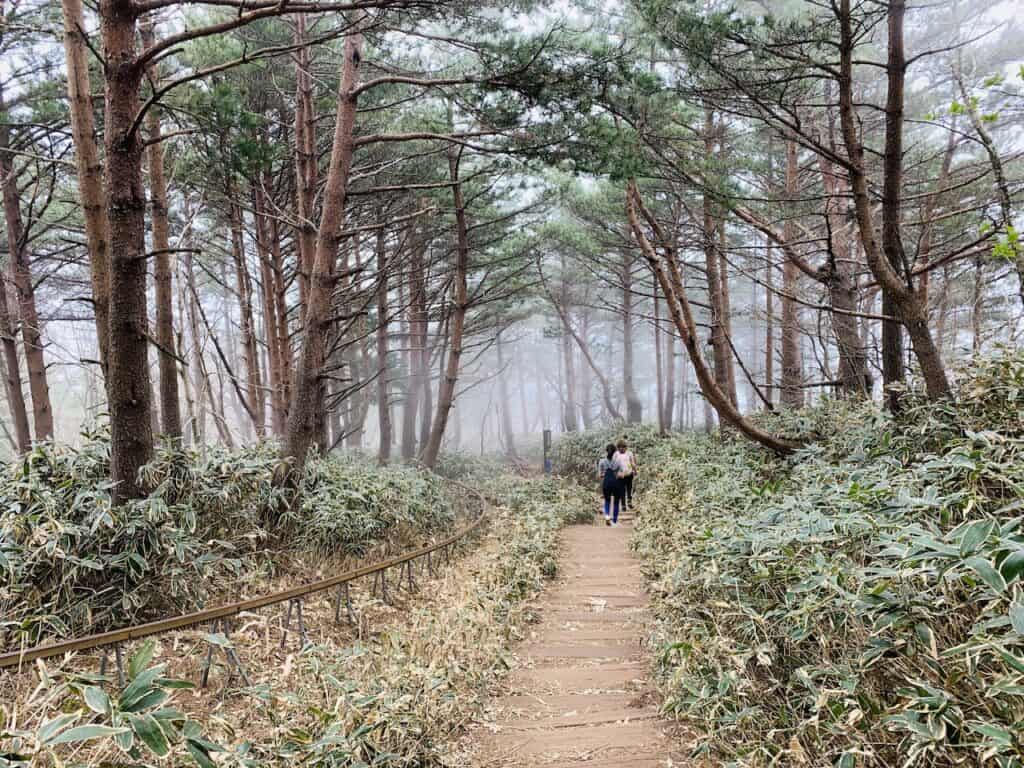
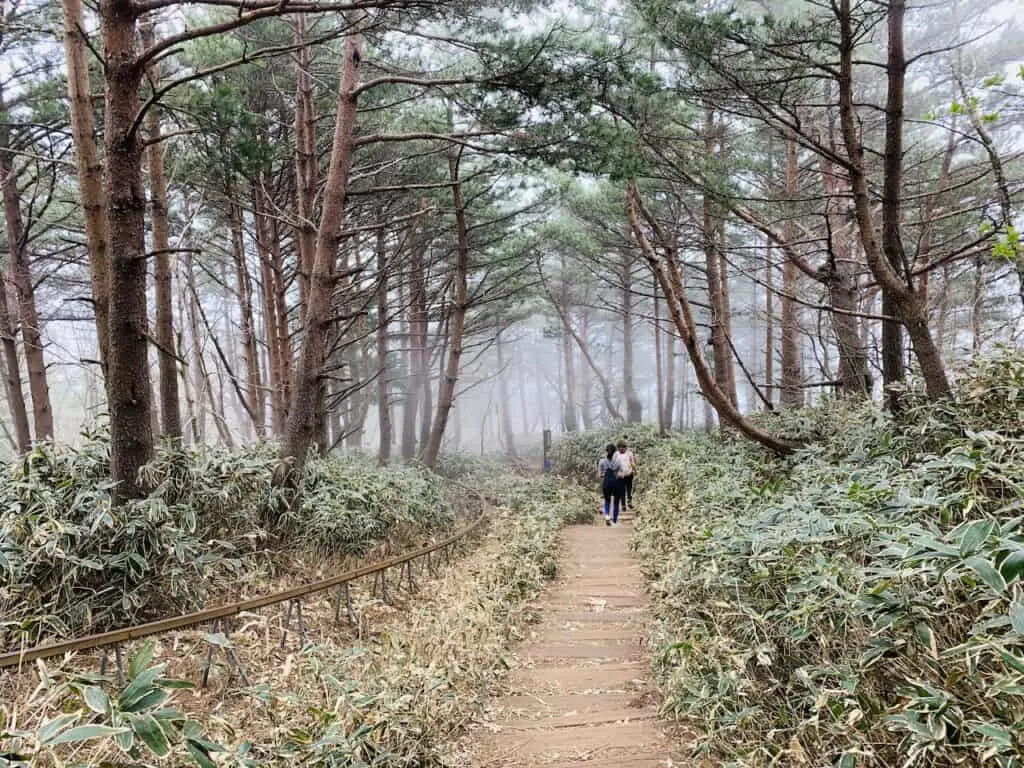
The majority of the hike will be in the forest among the trees. It is not until the end of the hike, that you end up above the tree line.
During this first portion of the hike, you will walk along an easy grade trail towards the Sokbat Shelter (no time cutoff for this one).
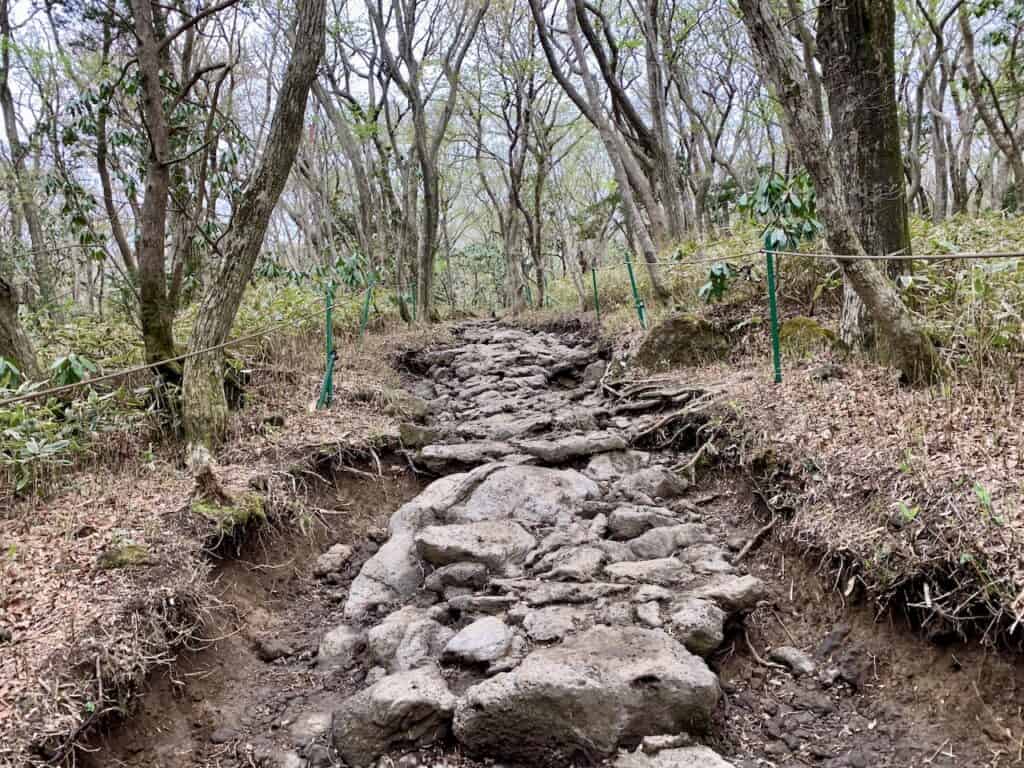
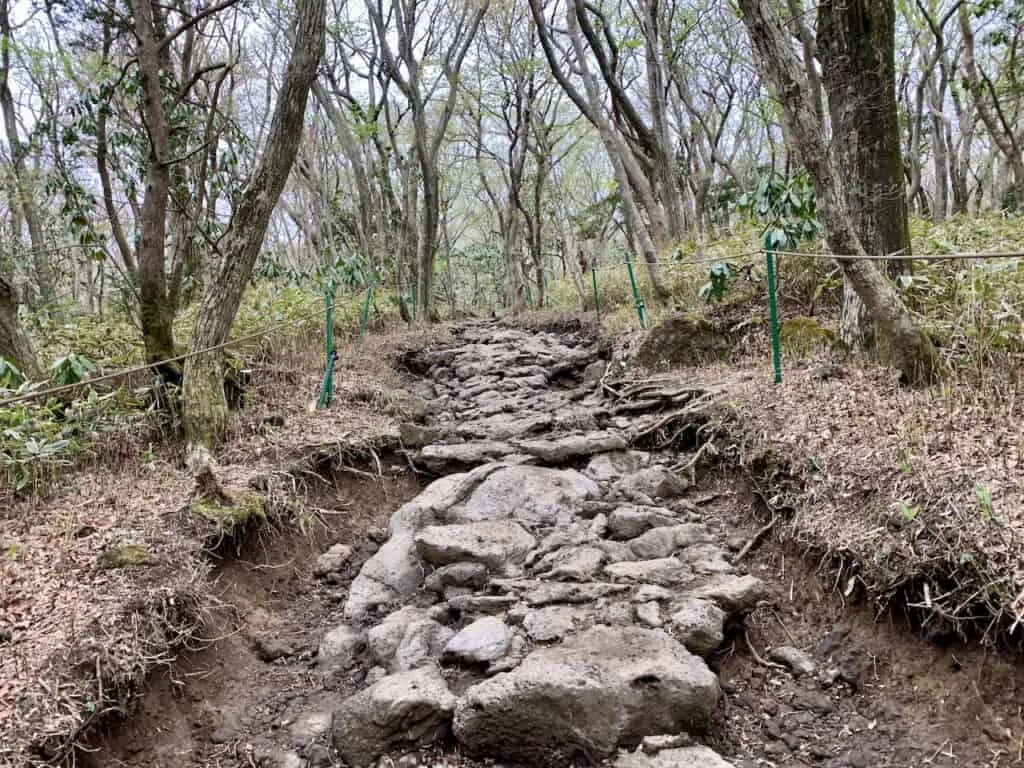
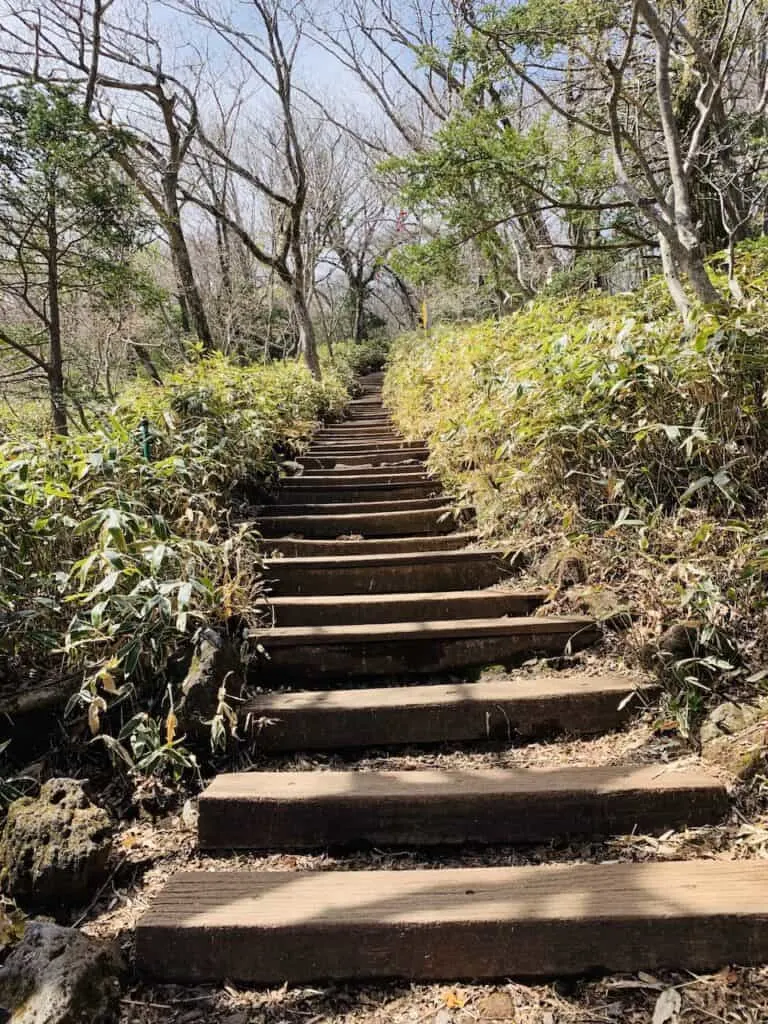
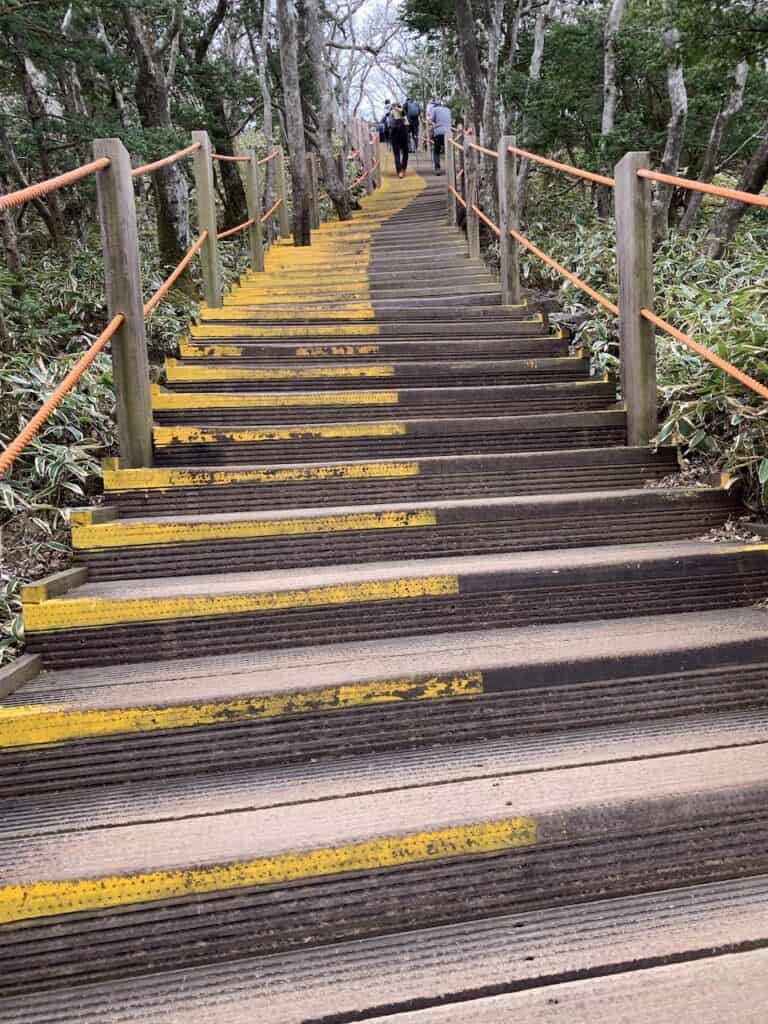
The trail for the most part will be on dirt and rocky terrain with the help of manmade wooden stairs to help with the incline.
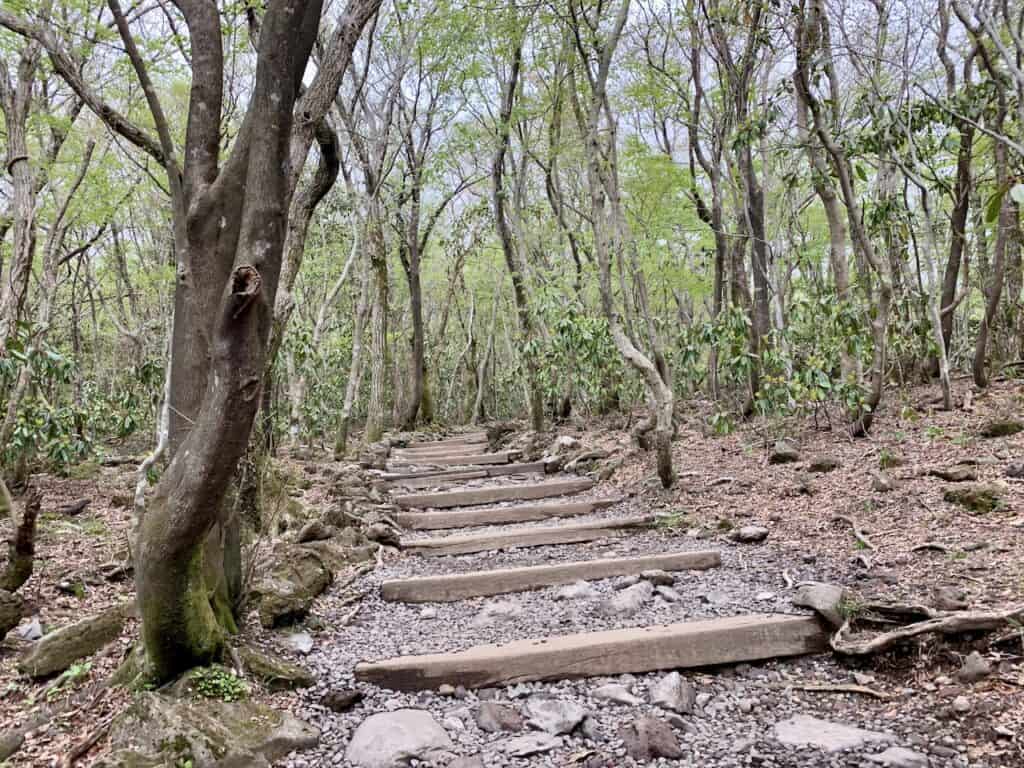

In all directions you will be surrounded by various flora as you follow the obvious path upwards on the mountain.
Some portions will have slightly more difficult rocky terrain so be sure to watch your step. Other portions have a wooden boardwalk and should be nice and easy to stroll along.
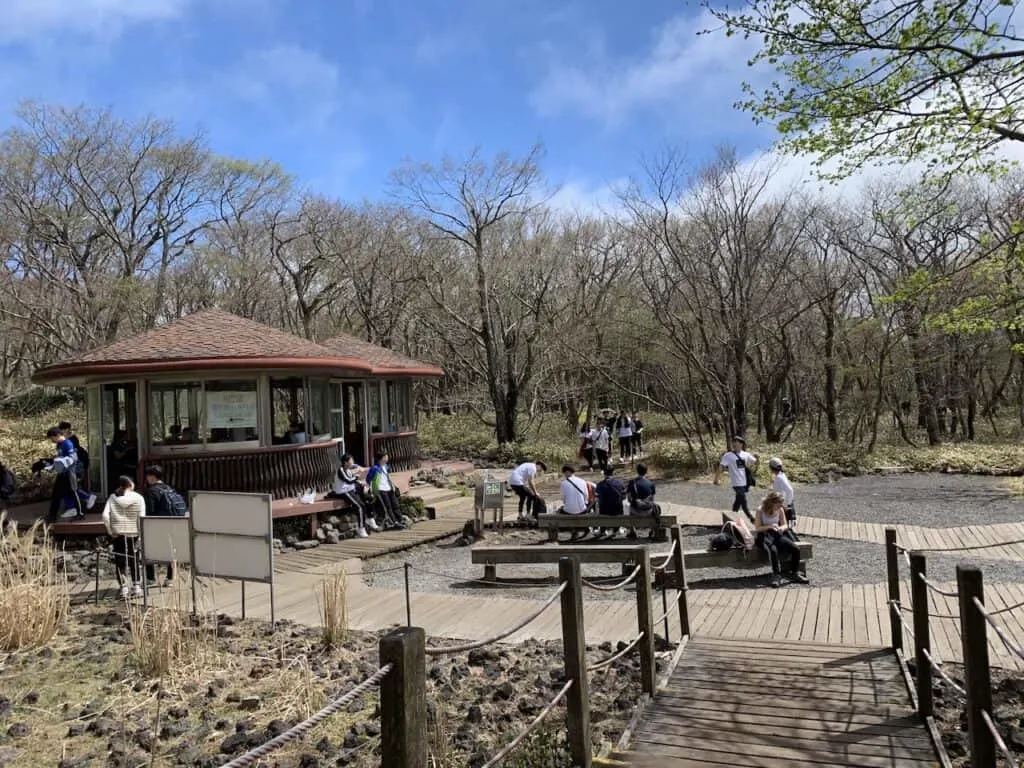
Soon enough you will be welcomed to the Sokbat Shelter. This is an area that you can take a rest break before continuing onwards. You will also find restrooms here as well.

Sokbat Shelter to Saraoreum Turnoff (30 minutes)
After leaving the shelter it is another 30 minutes or so until you reach the optional Saraoreum turnoff point.
At the turnoff, you will have the chance to head on an out and back 1.2 km trail to a lake viewpoint area.
During my time there, I opted not to head out there so I don’t have photos from that section of trail. It is up to you though if you would like to add it onto your overall route.


Either way though, as you do head out from Sokbat, more boardwalks, trees, and rocky stairs await.
The incline will also begin to get steeper at this point, so you will start to feel the hike getting tougher as you continue up.
Once you reach the Saraoreum turnoff, you can decide to make the trip out & back to the scenic spot or just continue along on the trail.


Saraoreum Turnoff to Jindallaebat Shelter (1 hour)
Next up is the Jindallaebat Field Shelter (also named the Azalea Shelter on maps).
Remember, this is where the cutoff times come into play. You simply cannot continue on past the shelter if you do not arrive in time.
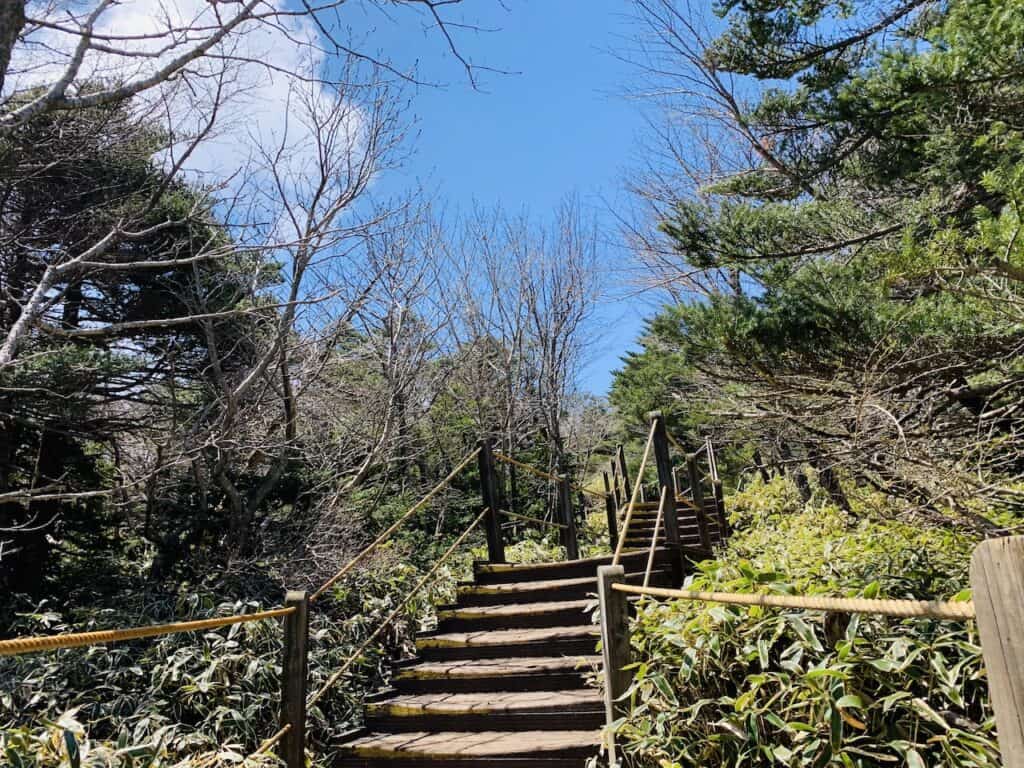
Since the trail does get steeper here, you will find more and more actual steps to climb.


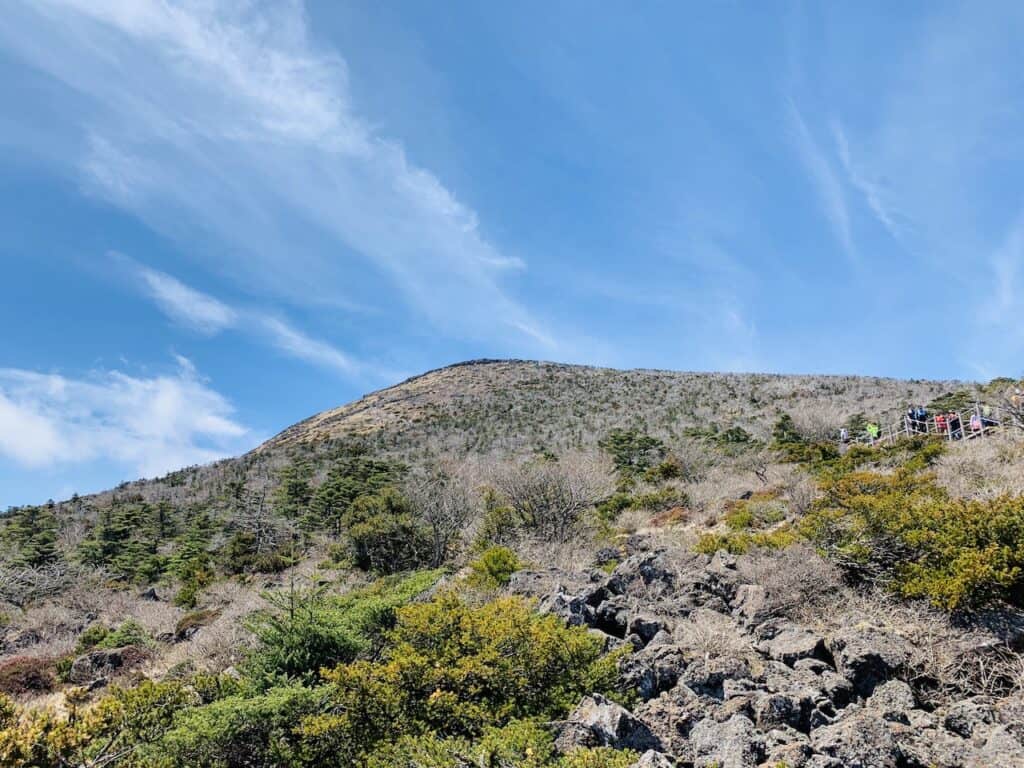
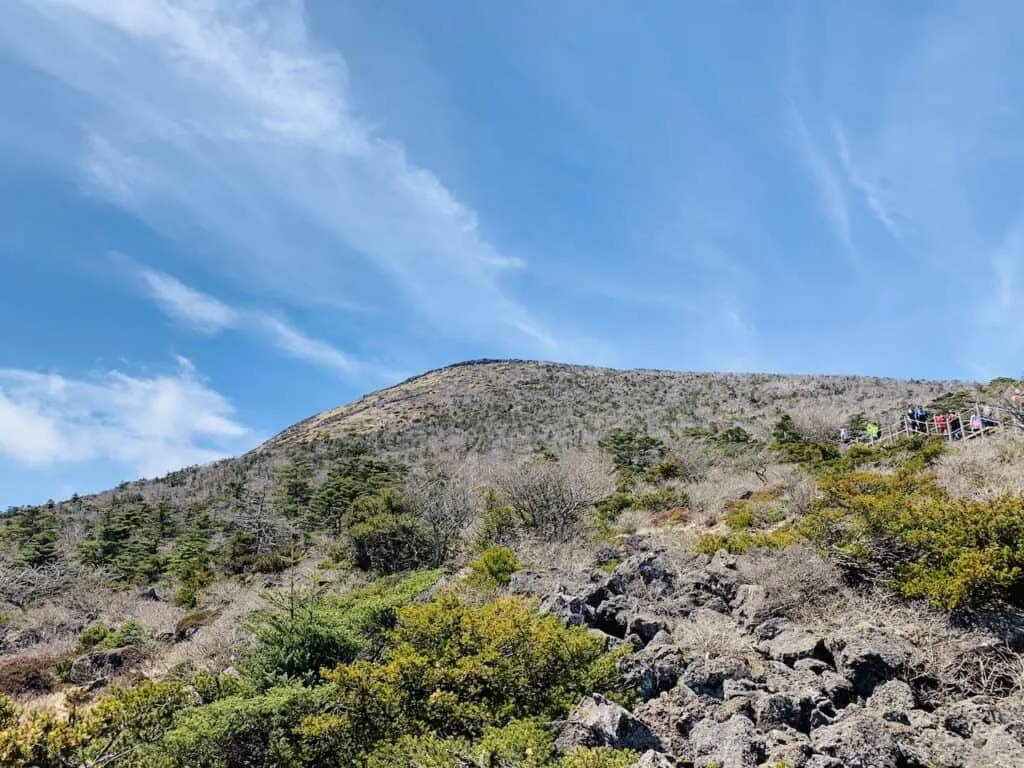
This is also where you will slowly but surely see the landscape begin opening up more. Instead of just being surrounded by trees, you will start to see some views as well.
The shelter will then come into view, where you will find several benches to sit down on as well as restrooms. You may find some snacks for sale too.


Jindallaebat Shelter to Hallasan Summit (1.5 hours)
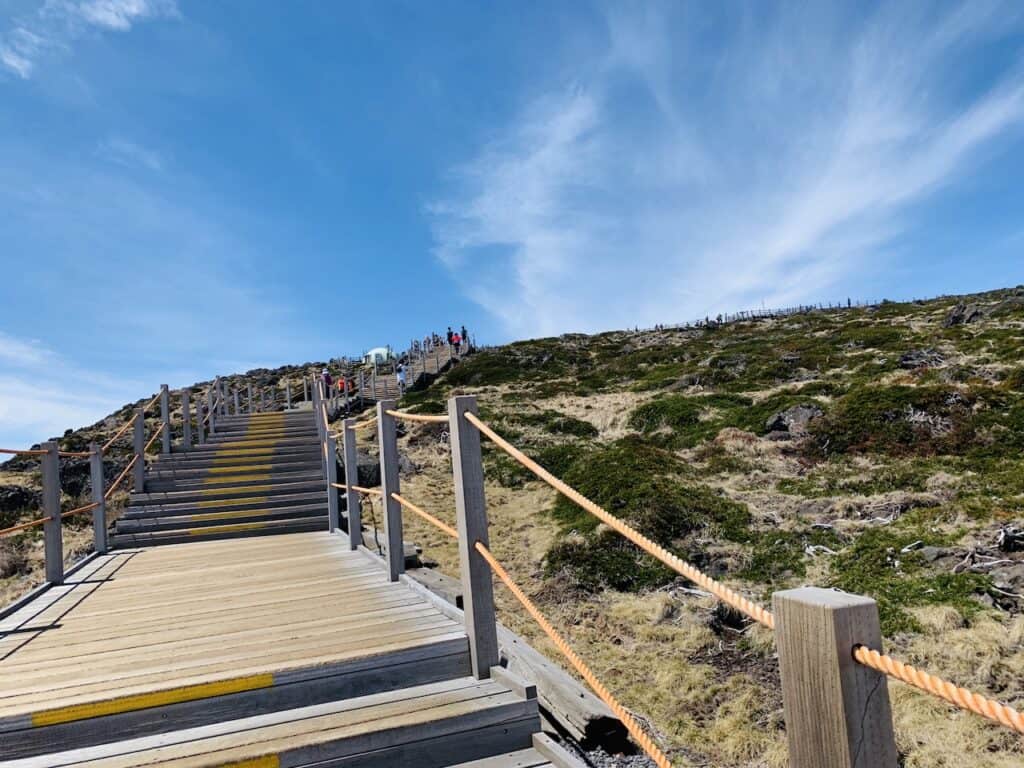
It is now time for the final push to the summit of Mount Hallasan. Over the next 1+ hours, you will get to enjoy some more views (and plenty of stairs) as you finish the ascent.
This portion will be a mixture between actual stairs and rocks. You will want to be very careful during these sections as it may be easy to lose balance for some.
The final section of trail here is also the most difficult when it comes to elevation gain as the grade gets steeper towards the summit.


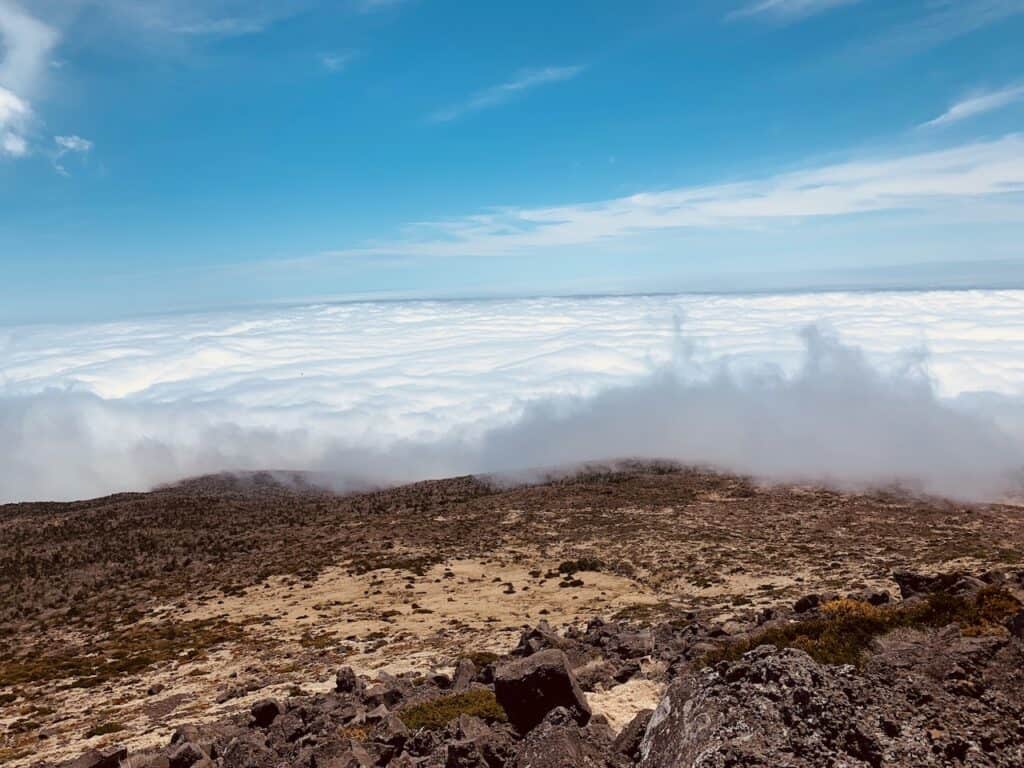
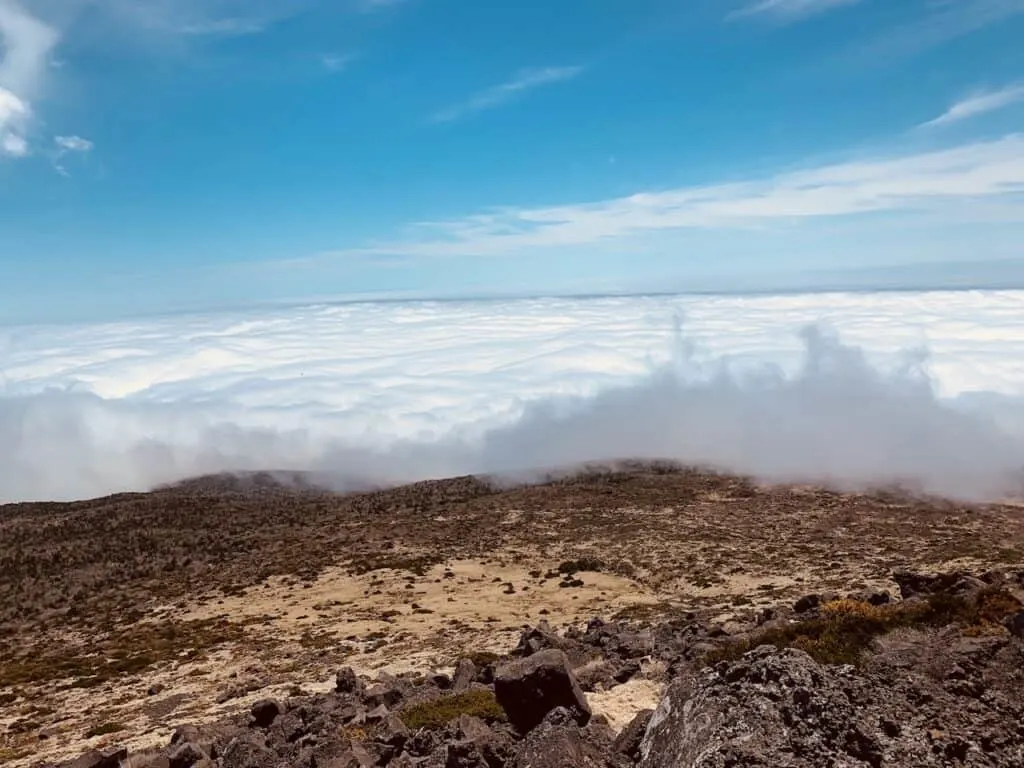
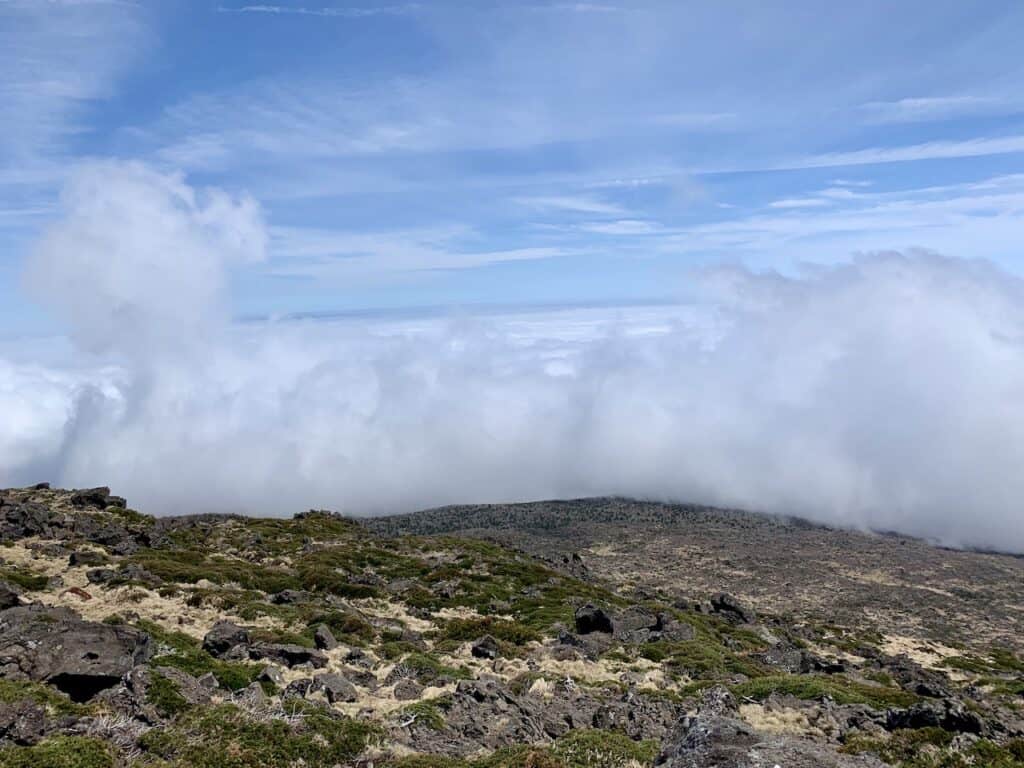
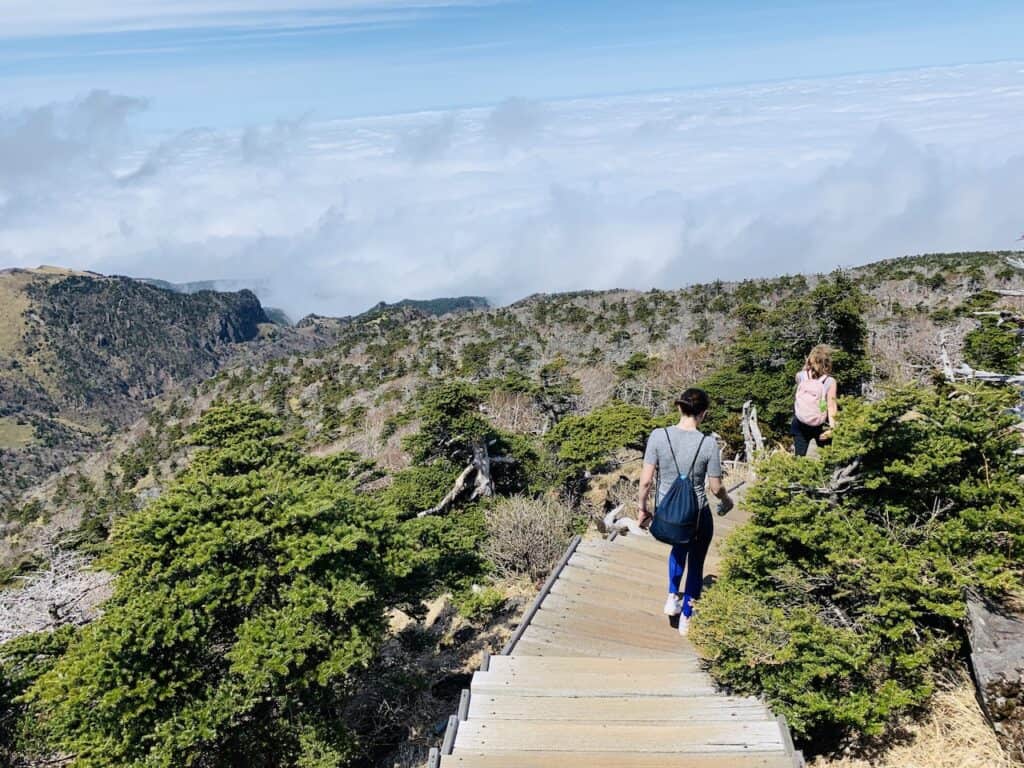
As you head higher, the surrounding views will continue to get better (at least on a clear day at least).
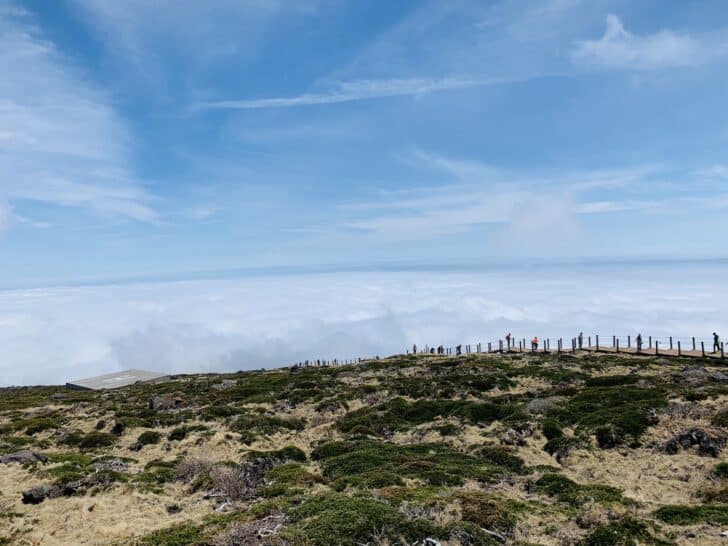
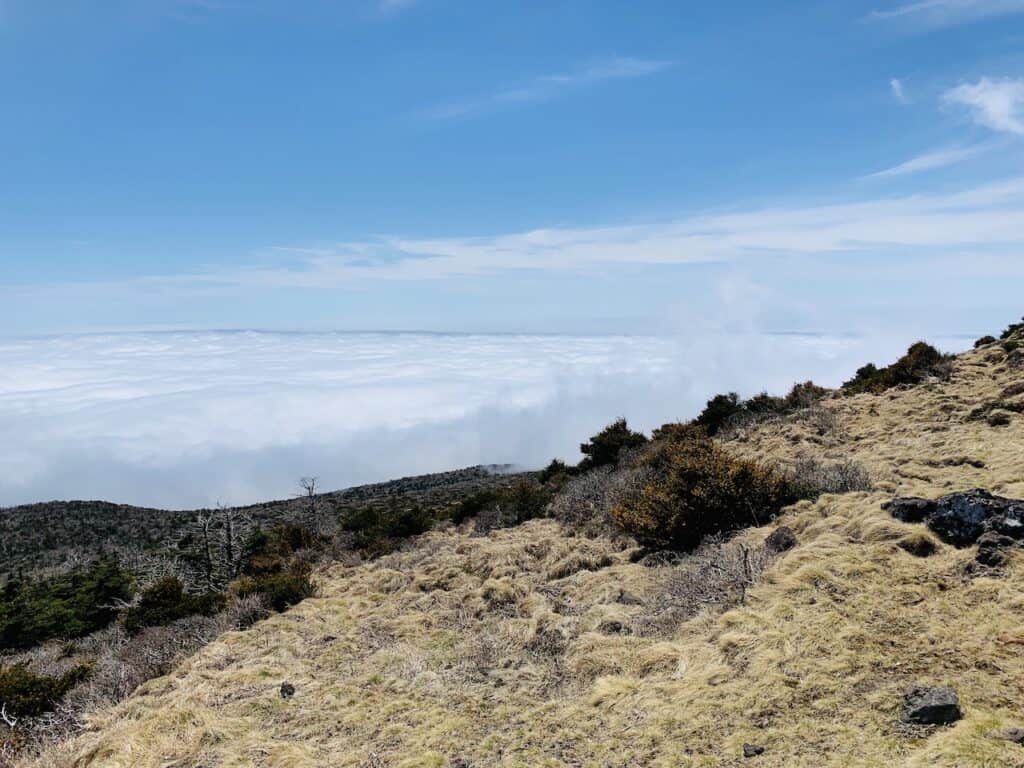
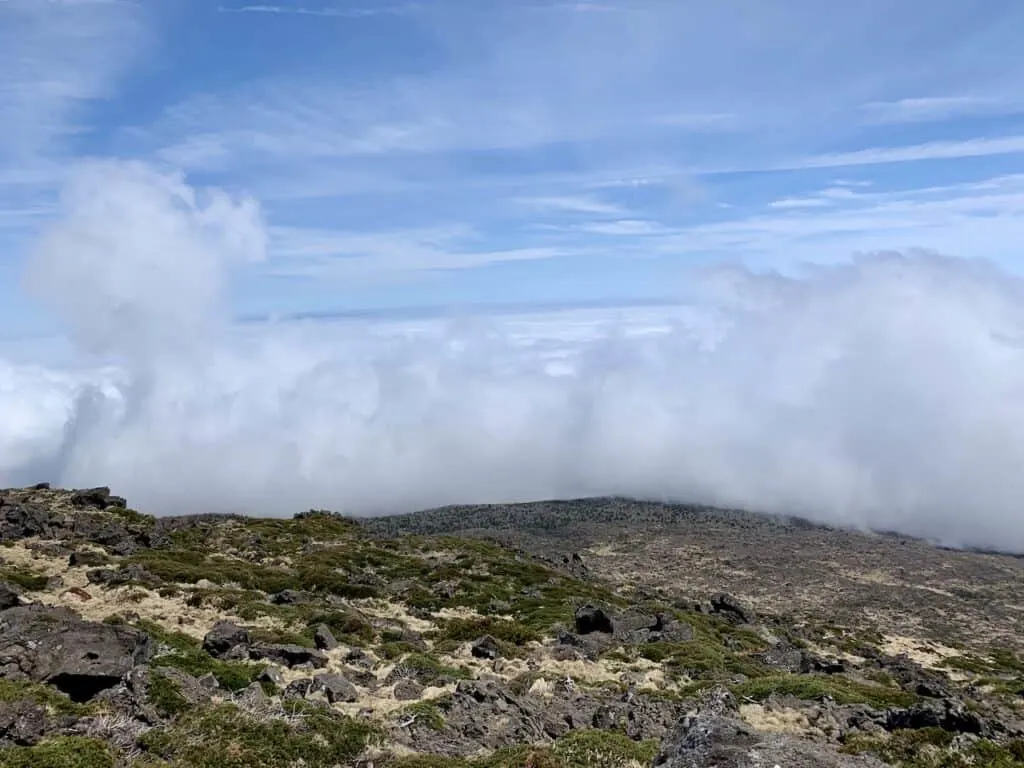
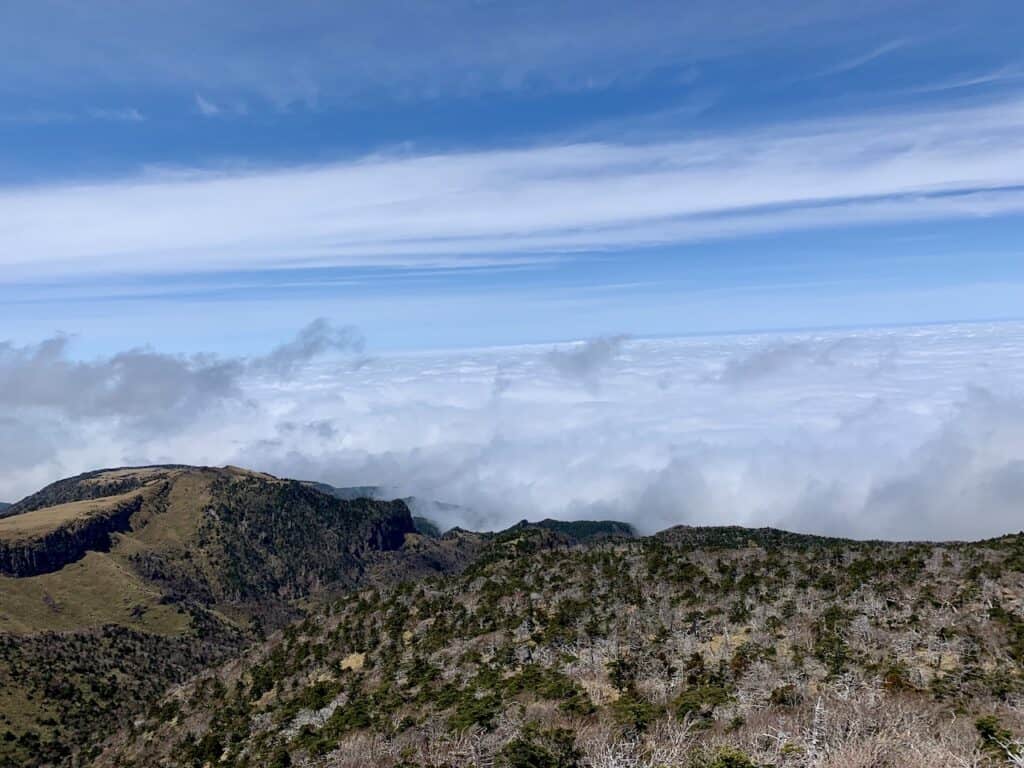
While the hike up to the summit is something special to take part of, I do want to mention that the mountain can frequently be covered by clouds.
Now, this should not deter you even on the day of hiking. Throughout my hike up (and during my time on Jeju), the mountain was constantly covered in clouds.
However, there is always the chance that the clouds stop closer to the summit (see photos below).
When this happens a never-ending view of a white cloud base will be underneath the volcano.
So, while I did not get to see the rest of Jeju Island from up top, the clouds were pretty spectacular to witness.
And if you happen to hike up with no view in site, you still made it to the top of South Korea!
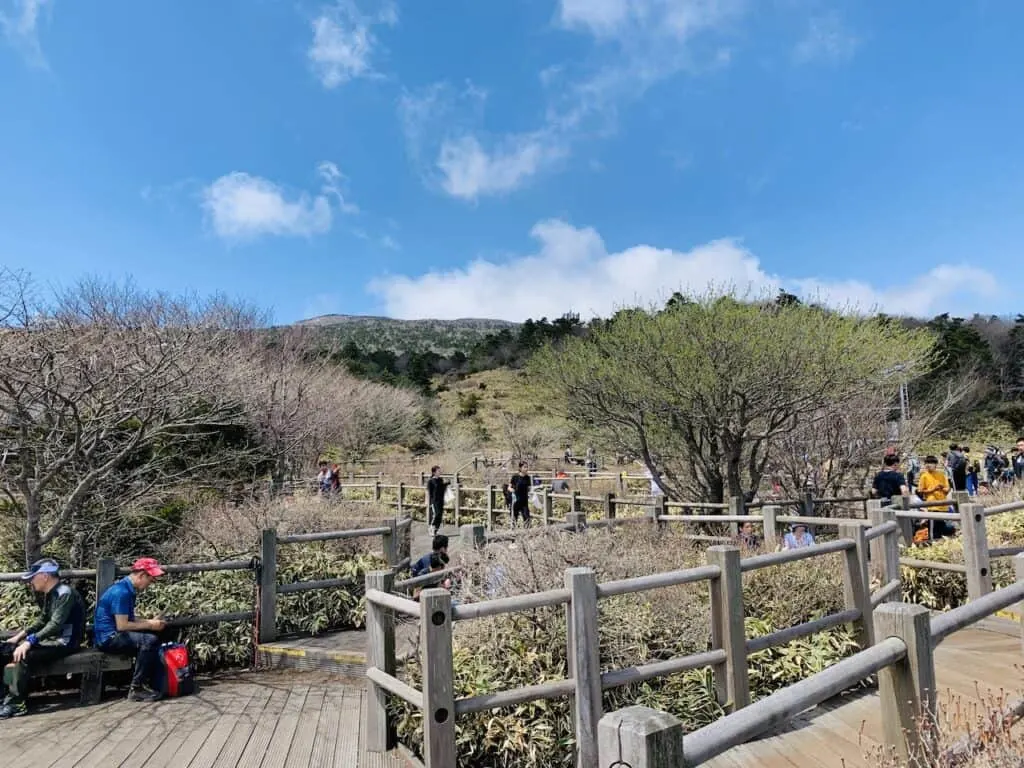
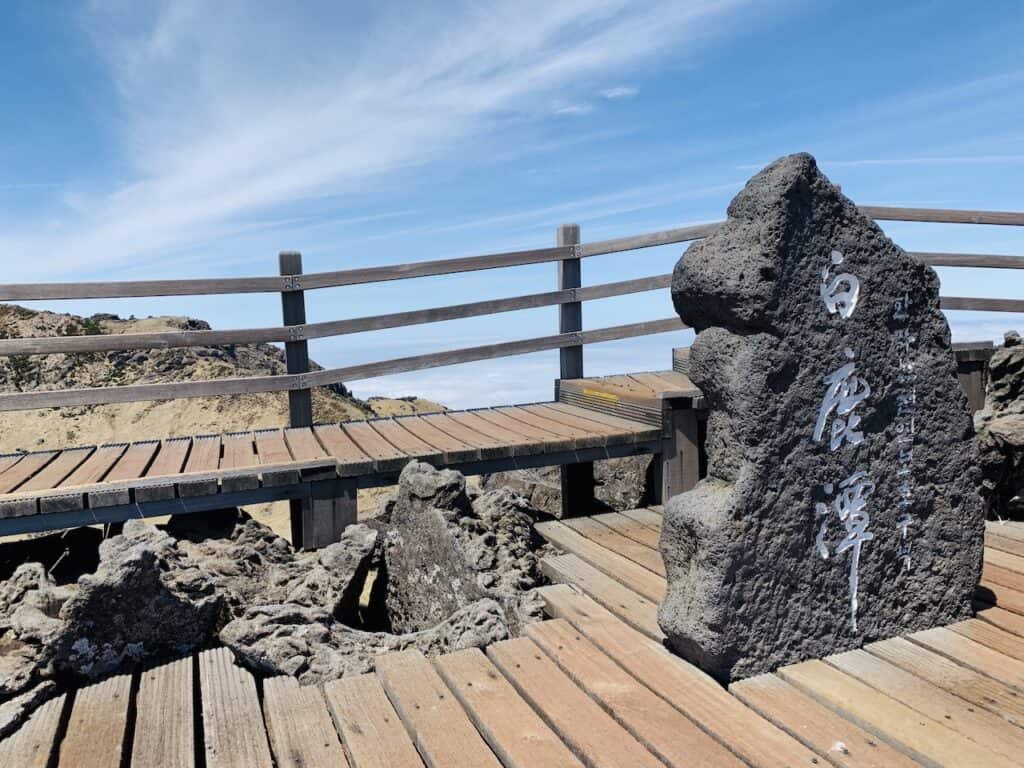
Hallasan Summit
After getting yourself up those final staircases, you will be welcomed to the summit of Mount Hallasan!


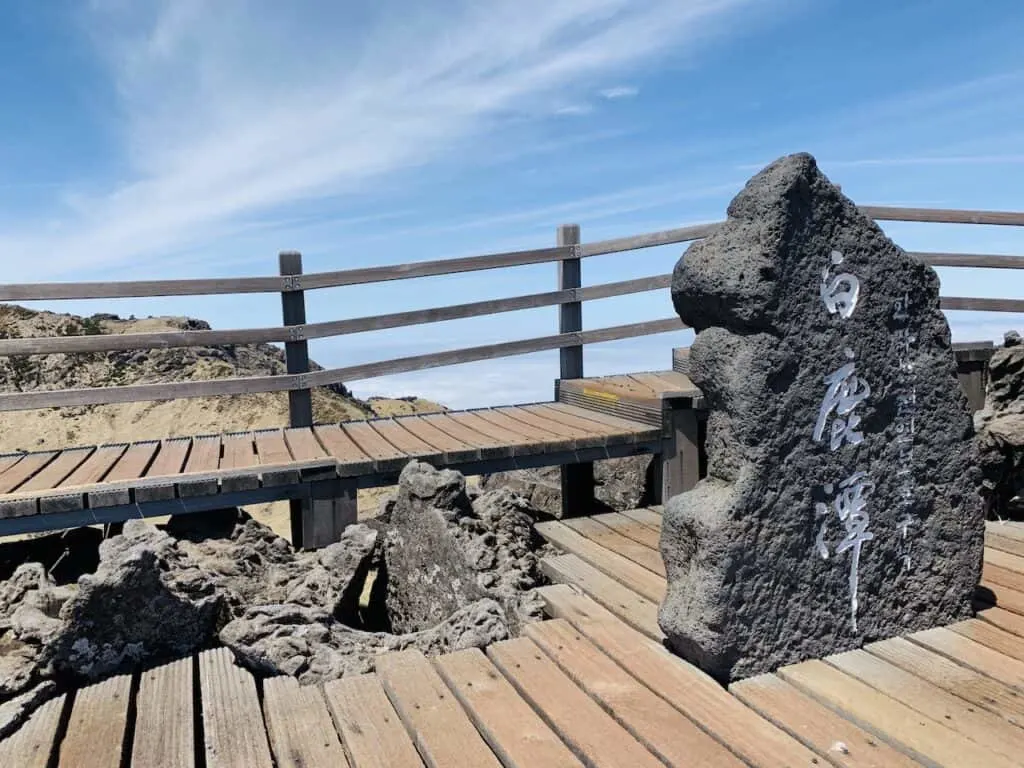
Enjoy the view from all different angles, and be sure to check out the Baeknokdam crater lake down below.
When I was there, the lake was pretty much empty. However, depending on recent weather, it can look much more like an actual lake.

You will find plenty of spots to take a seat and walk around near the summit area.
At the top is also a celebratory summit rock, where many people take pictures with it.
Summit note: the true summit of Hallasan is inaccessible due to erosion. You will be just about 10 meters / 30 feet below the actual summit across the crater lake.
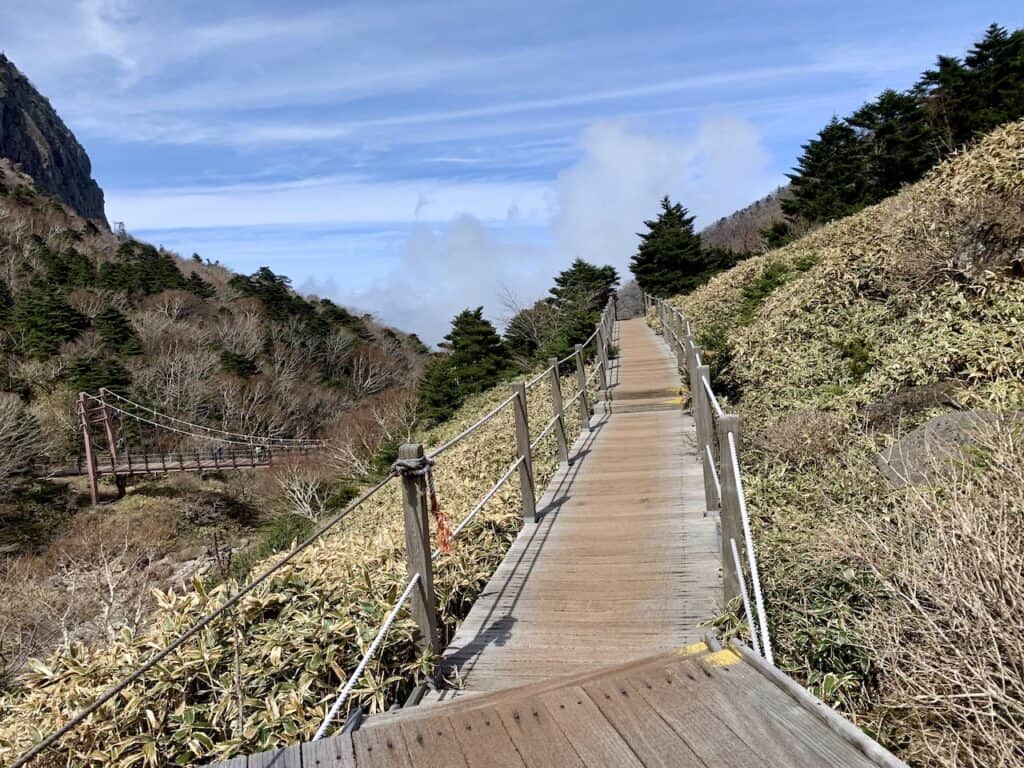
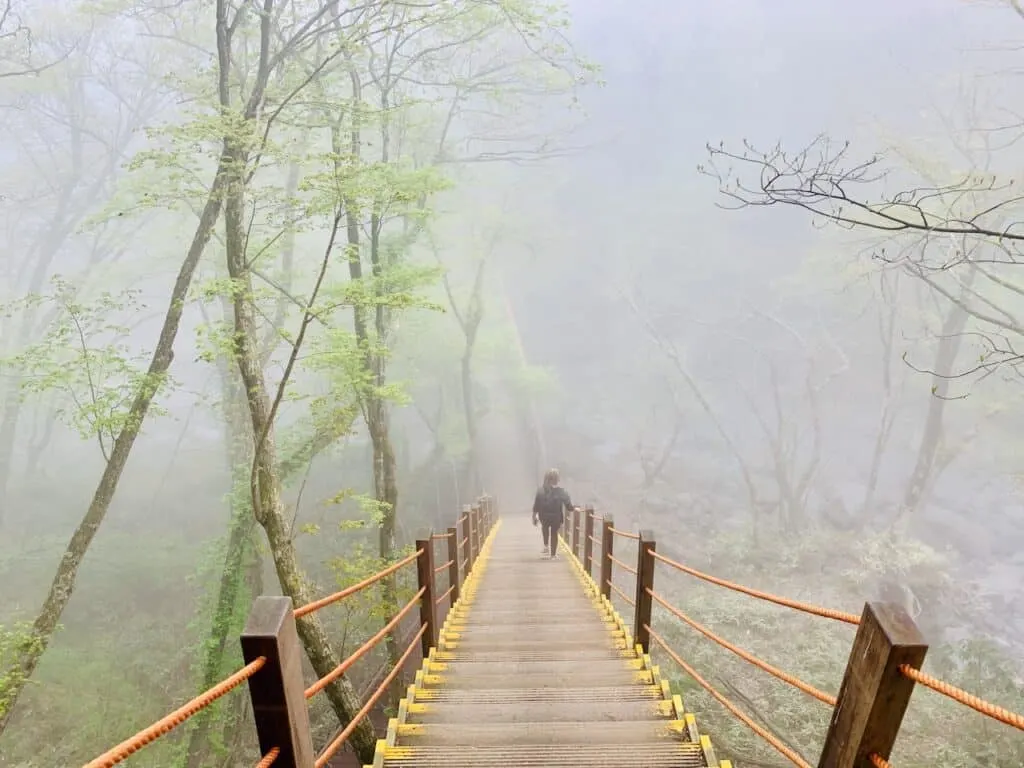
The Descent to Gwaneumsa (3 hours)
Once you are all set on the summit, it is time to head back down. The simple option is to just turn back the same way you came to avoid any logistical aspects if you have a car.
However, to switch things up a bit you can also head down to the other trailhead. In this case it was a steeper descent to Gwaneumsa.
The trails are well marked, so there shouldn’t be any issue figuring out where to go. Over the course of the next few hours, you will head all the way down the mountain.


New views and new landscapes will be all around you as you pass by several points of interest along the way.
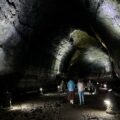
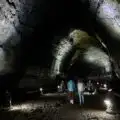
These include the helicopter pad, suspension bridge, Samgakbong Shelter, the forest, Tamla Valley and Gurlin Cave.
You will find that the route down will be steeper and harder on your knees. So, be sure to take it slow and enjoy those surroundings.
Soon, the route will re-enter the forest as you leave the views behind. More stairs and rocky terrain await as you head further down the mountainside.

Before you know it, the trail will approach the Gwaneumsa trailhead and campsite.
Take it all in, because after a long day of hiking, you will have completed the hike up and down the highest point in South Korea.


Mount Hallasan is one of my top experiences in South Korea and I hope you enjoy it as much as I do.
If you have any questions or comments about the climb, be sure to add them in below.
Also feel free to check out the other South Korea itineraries and guides up on the site like the beautiful Hamdeok Beach!
Have fun out there and safe travels!