

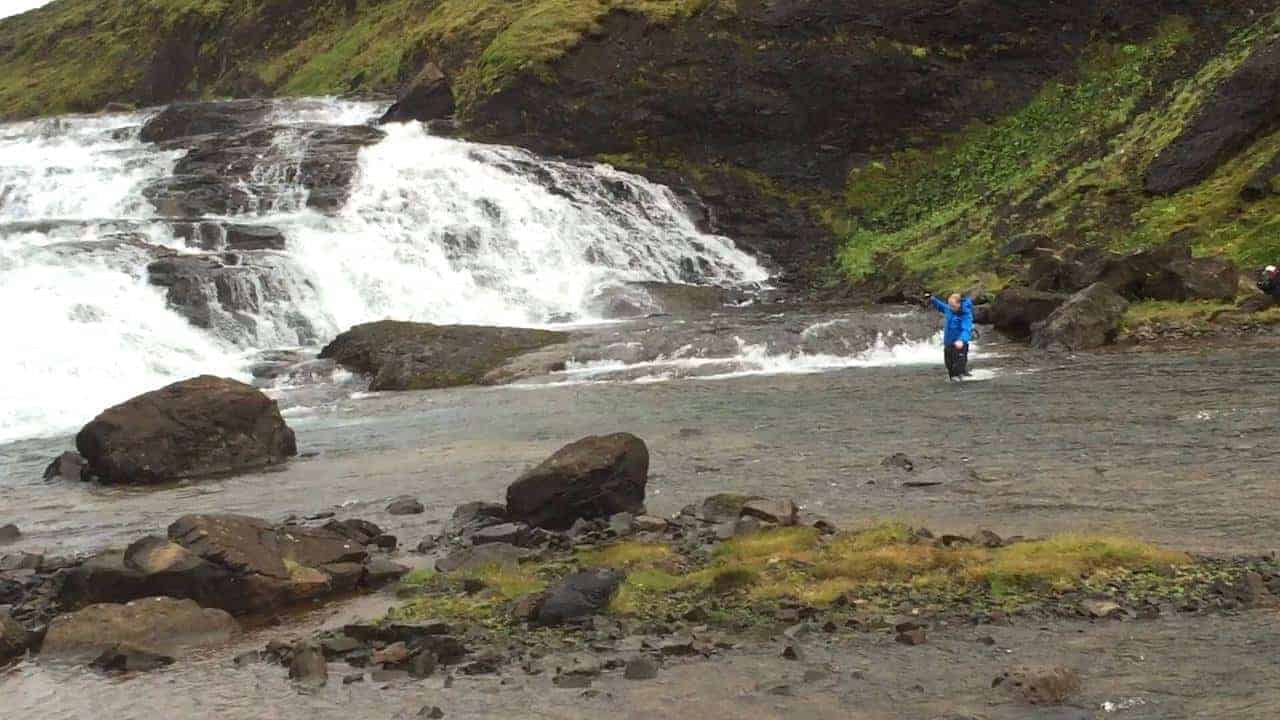
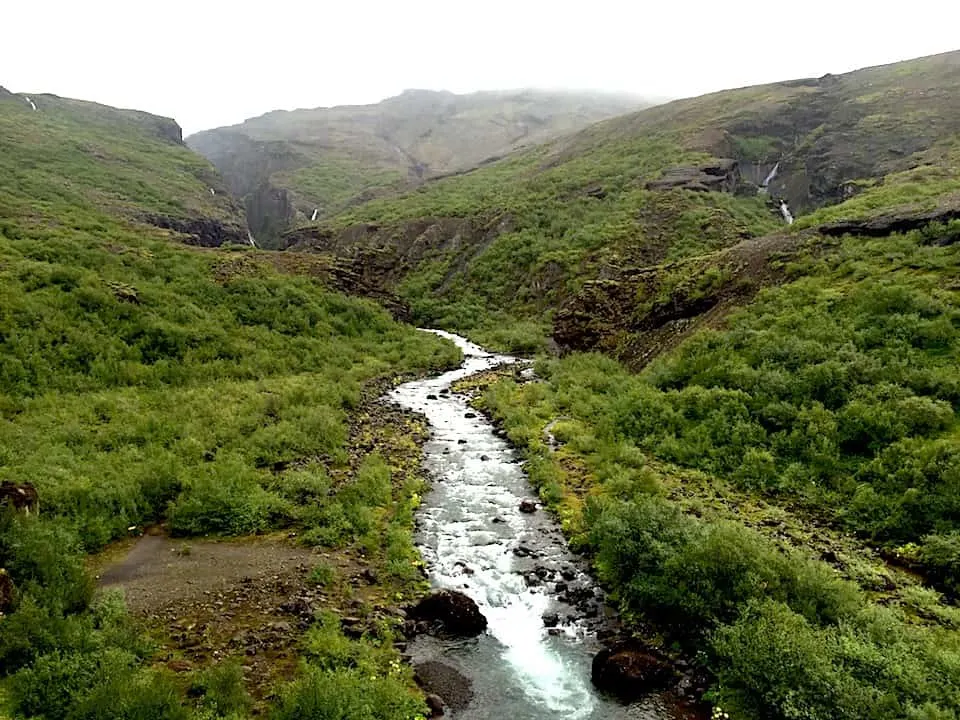
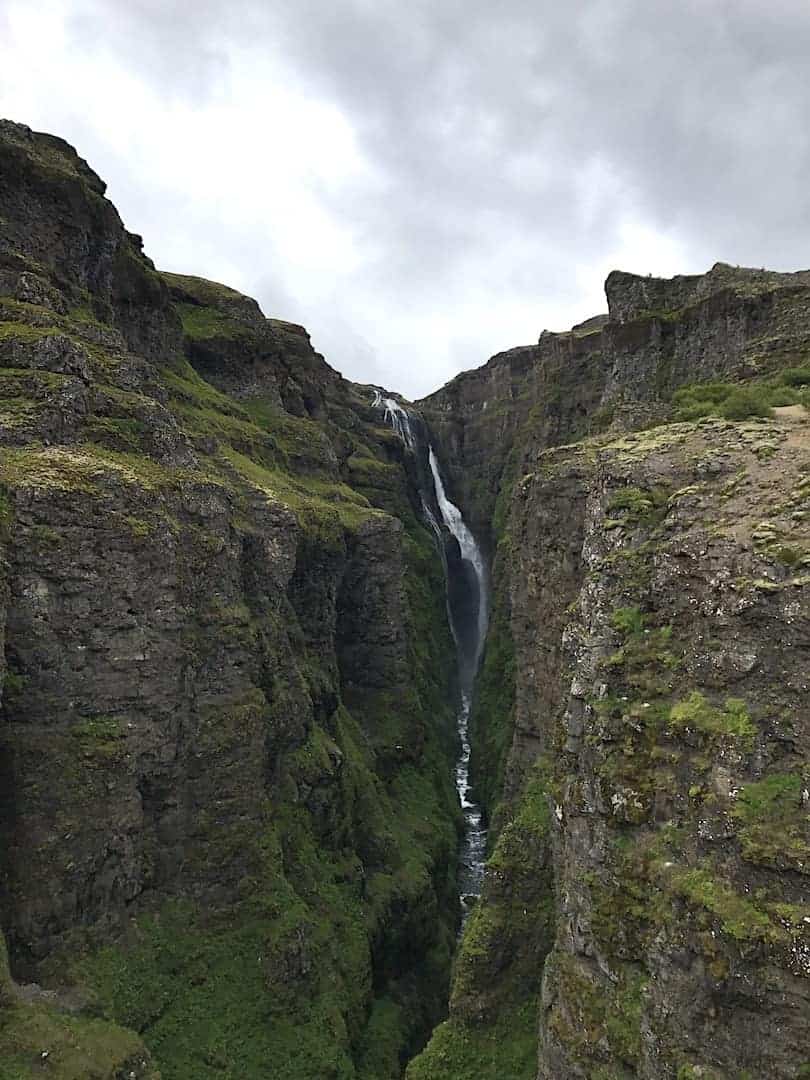
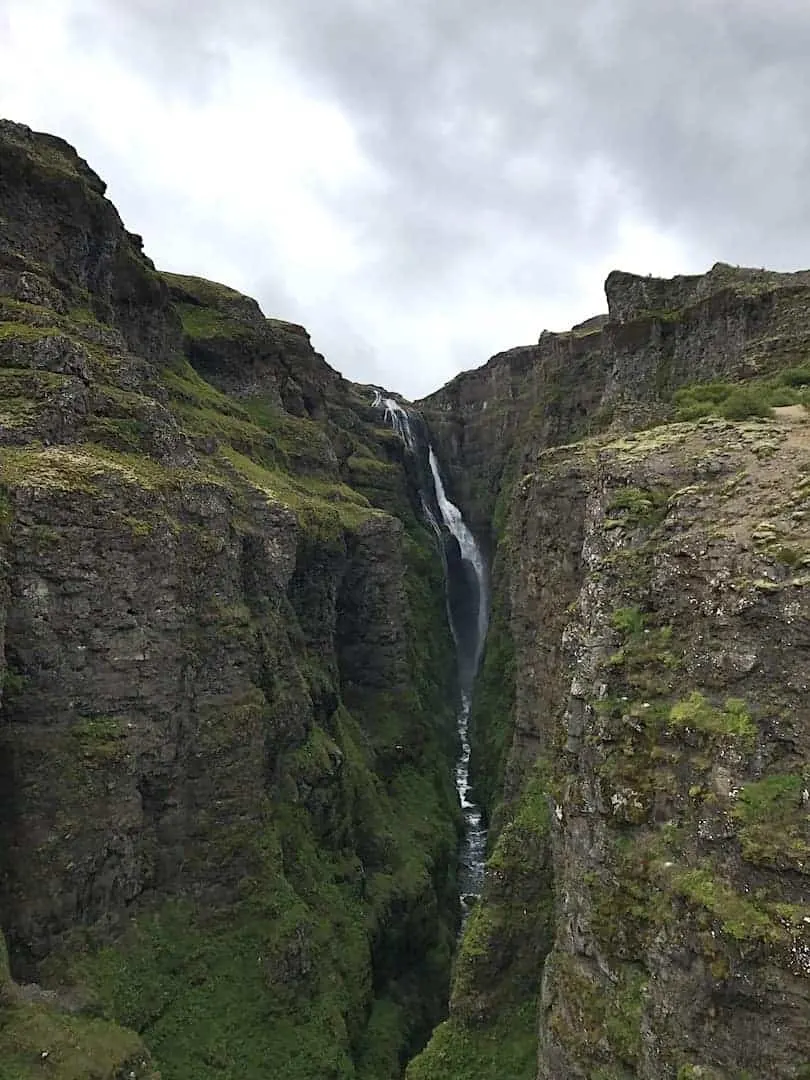
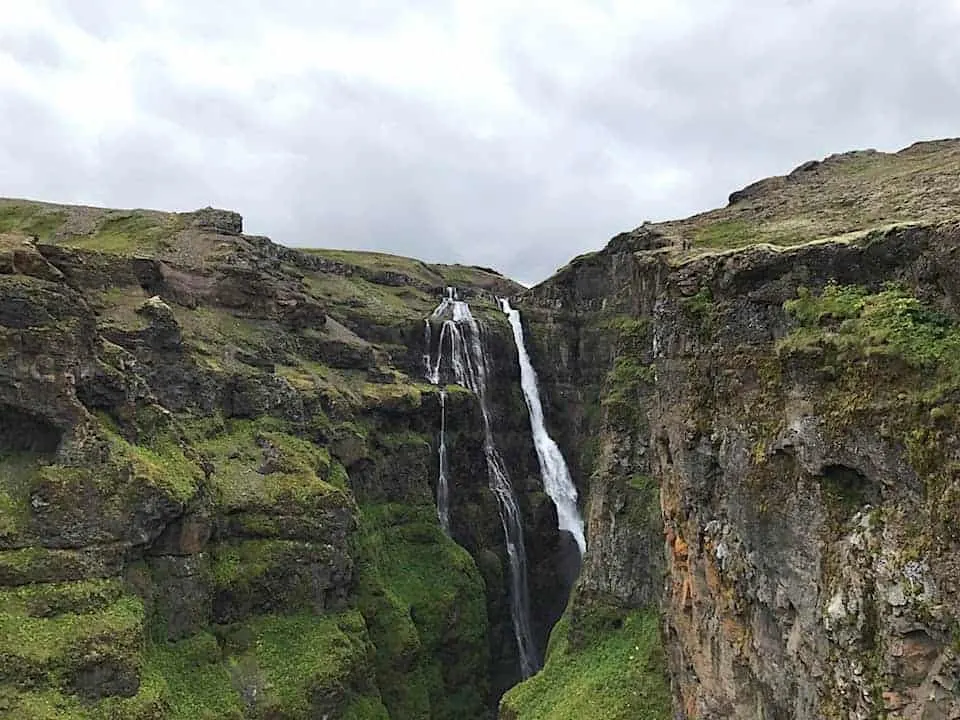
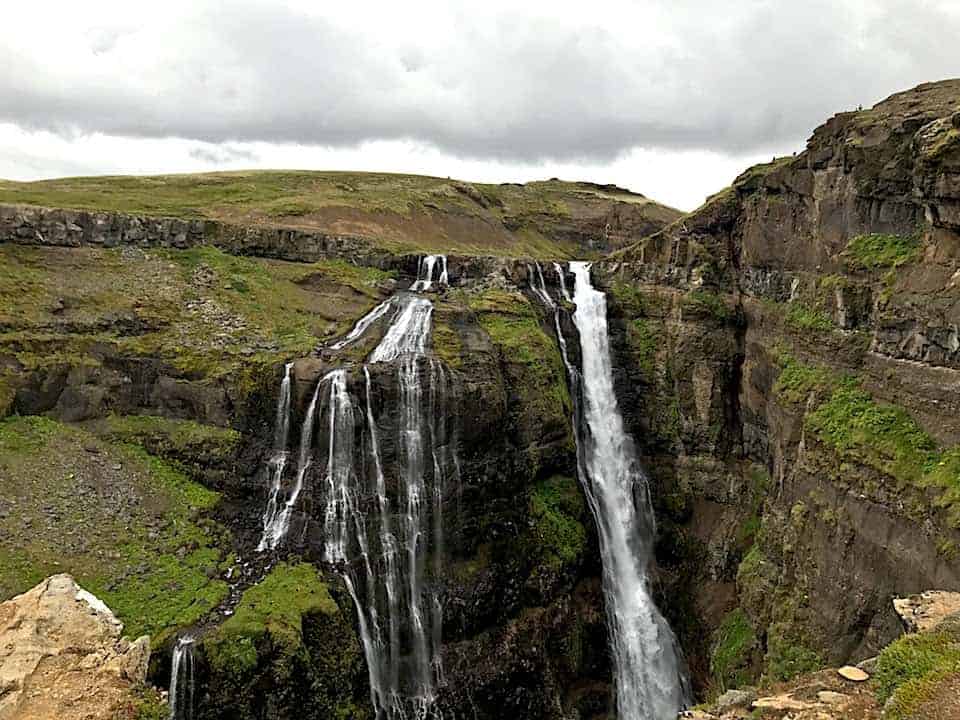
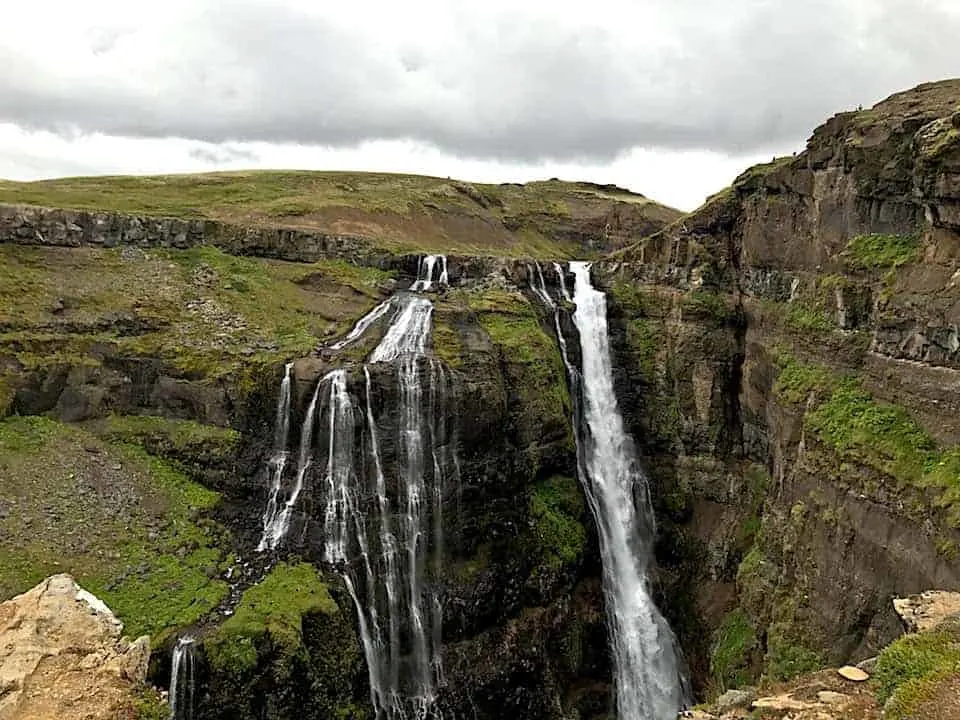
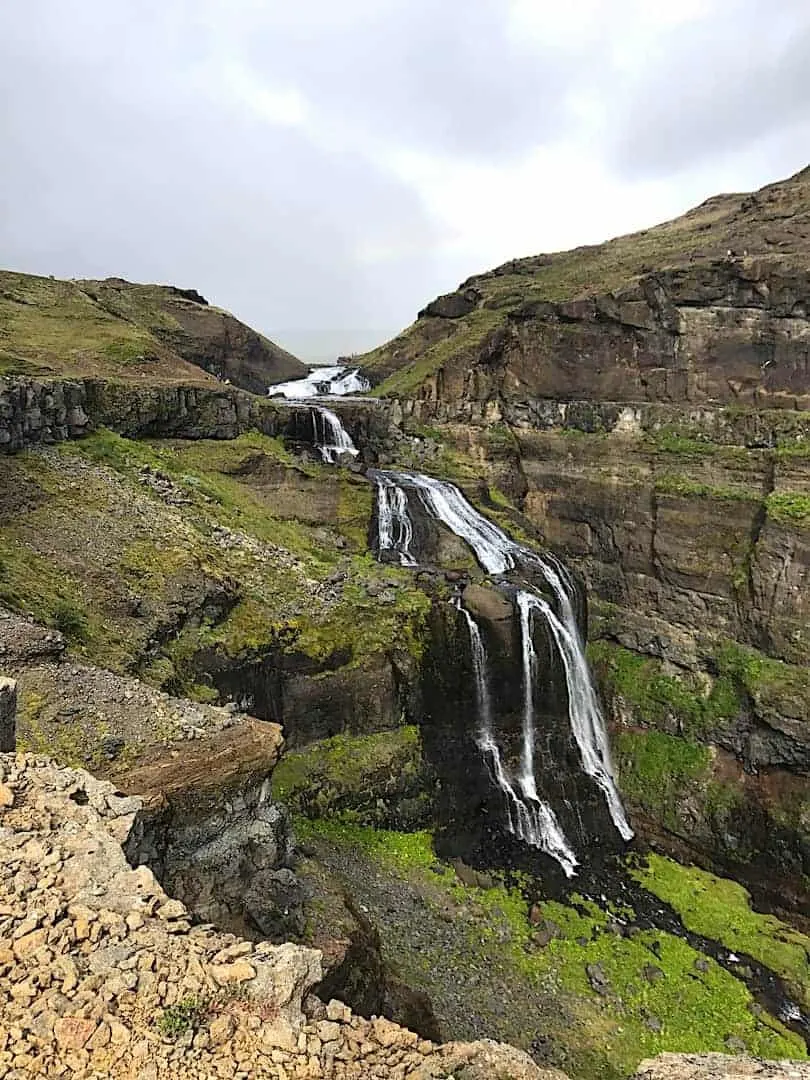
The Glymur Waterfall hike was by far one of my favorites to take part of during my time in Iceland. The combination of the scenic greenery views, the flowing river, and of course the second highest waterfall in all of Iceland made for one incredible experience.
The great thing about Glymur is that it is an easy day trip from Reykjavik. So even if you are in the country for just a few days, you can still take part of this epic trail.
Now let’s get into the logistics of the hike and what to expect all the way.
* Affiliate Disclosure: This post may contain affiliate links, which means I may receive a commission if you make a purchase through the links provided, at no additional cost to you. Thanks for supporting the work I put into TripTins!
1) Summary of Glymur Waterfall Hike
Below are some helpful notes about the trail up to the Glymur Waterfall and back. Overall is it a fantastic hiking experience to take part of and it is a perfect add on to your Iceland itinerary.
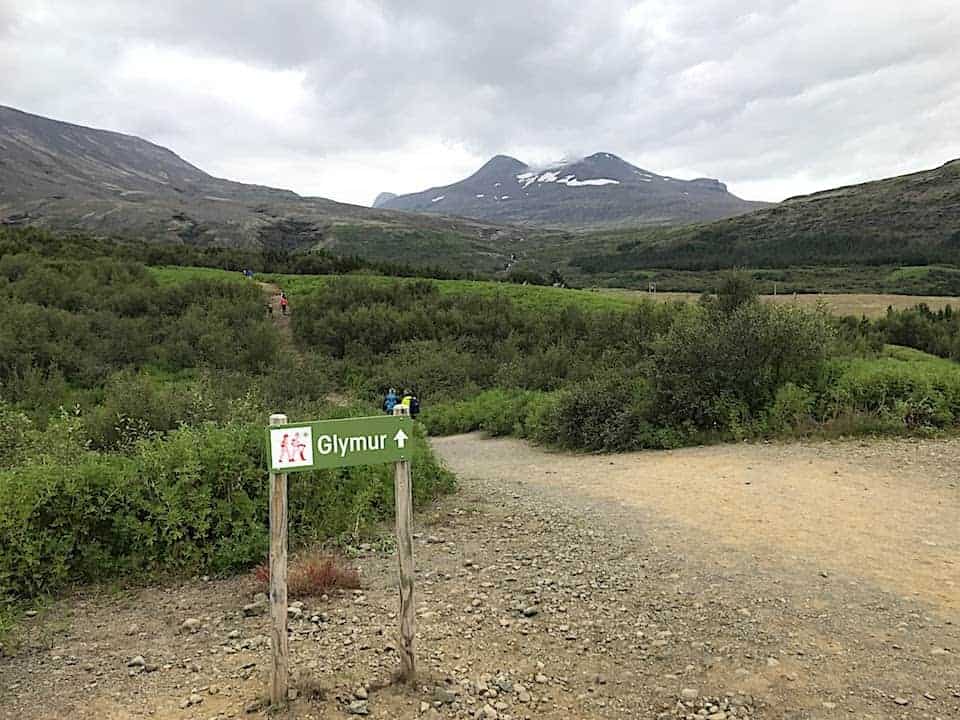
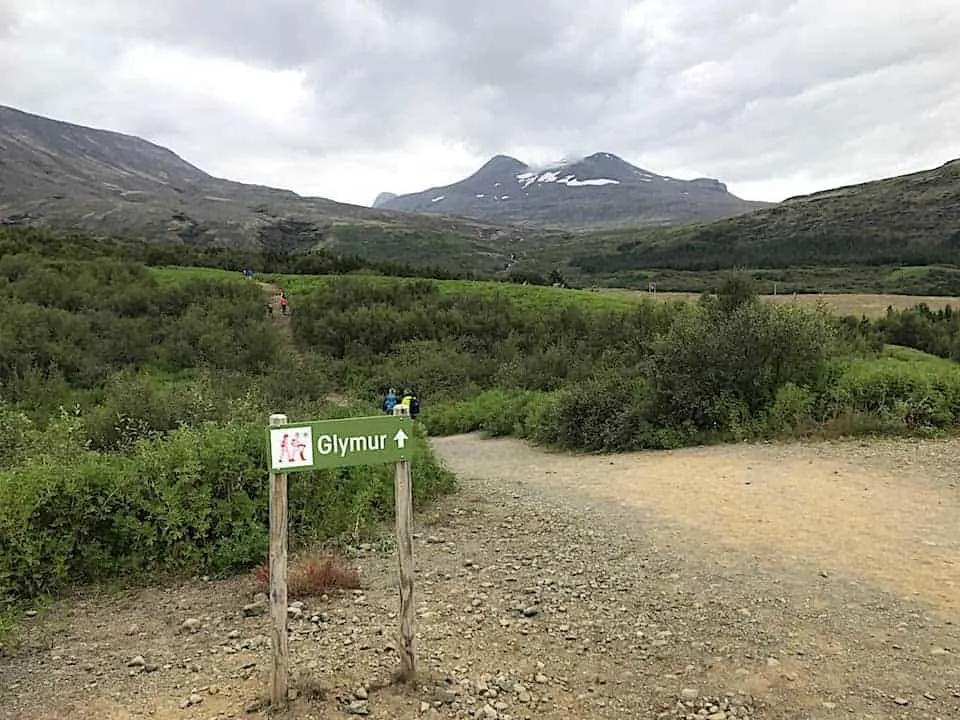
- Starting / Ending Point: Glymur Parking Lot (pinned on map below)
- Length: 7 KM / 4.3 Miles
- Duration: 3 Hours
- Elevation Gain: 365 Meters / 1,200 Feet
- Terrain: Dirt / Rock
- Difficulty: Medium
Route: There are a couple ways to complete this trail, however I highly recommend option number 1. In the next section you can see a map of the trail with the various routes.
» Option 1: Up the south side and down the north side (one water crossing at the bottom of the trail / one water crossing at the top of the waterfall). This would make the route a loop trail.
» Option 2: Up the south side and down the south side (cross the same water crossing at the beginning of the trail twice). This option would be the same way up and the same way down.
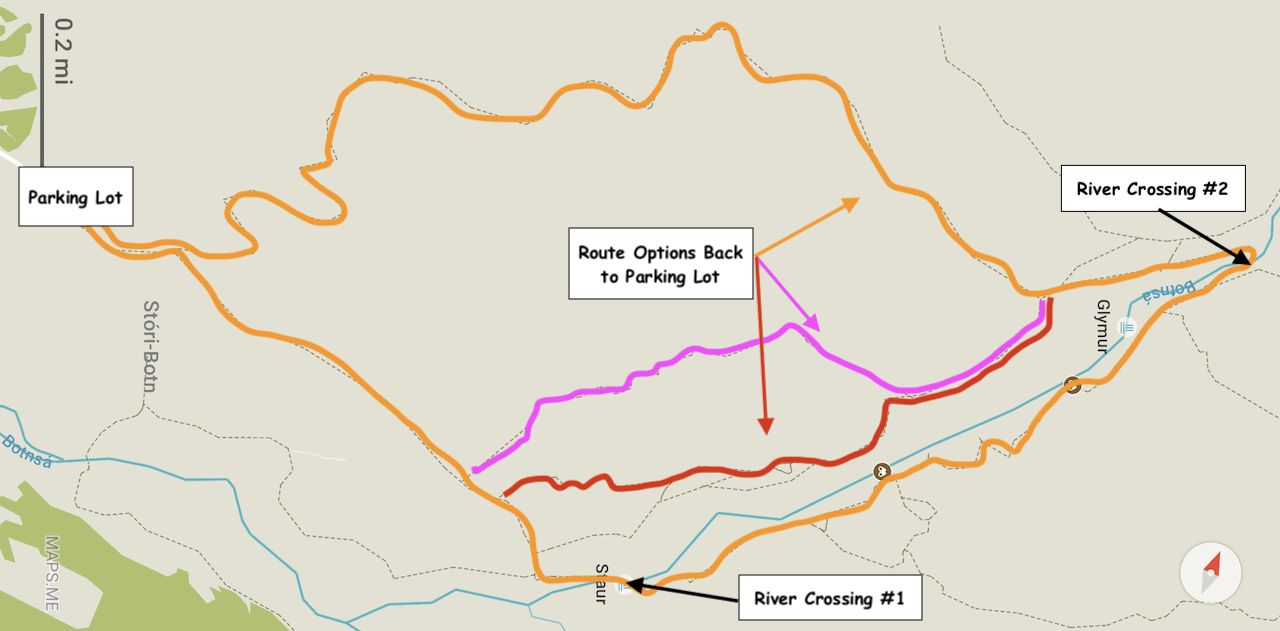
2) Glymur Waterfall Map
Below is a screenshot from the maps.me app with the Glymur waterfall routes highlighted.
The normal loop route is highlighted in orange as you will make your way towards the river, make the first river crossing, head on up towards the waterfall, make the second river crossing above the waterfall and then continue down the other side.
When you cross over the other side, you will see that there are a couple other routes to choose from too (highlighted in pink and red). These are a bit more technical than the orange route but will get you back down to the same spot eventually.
Your last option here is to just make the first river crossing, head up to Glymur, and then turn right back around the same way you came.
Note: the colors on the map do not represent what you will see on the trail. These colors are just to differentiate the routes easily in this guide so you can better prepare for your hike.

Hiking Resources & Checklist
Before heading out for the trails, be sure to read up on some of the hiking resources up on the site. These are here to better prepare you for all types of outdoor adventure.
- Gear: Hiking Packing List
- Weather: How to Prepare for Hiking Weather
- Navigation: Hiking GPS & Navigation
- Tips: 20+ Hiking Tips & Tricks for the Trail
- Accommodation: Book Your Hotel Today
- Rental Car: Book Your Car Rental Today
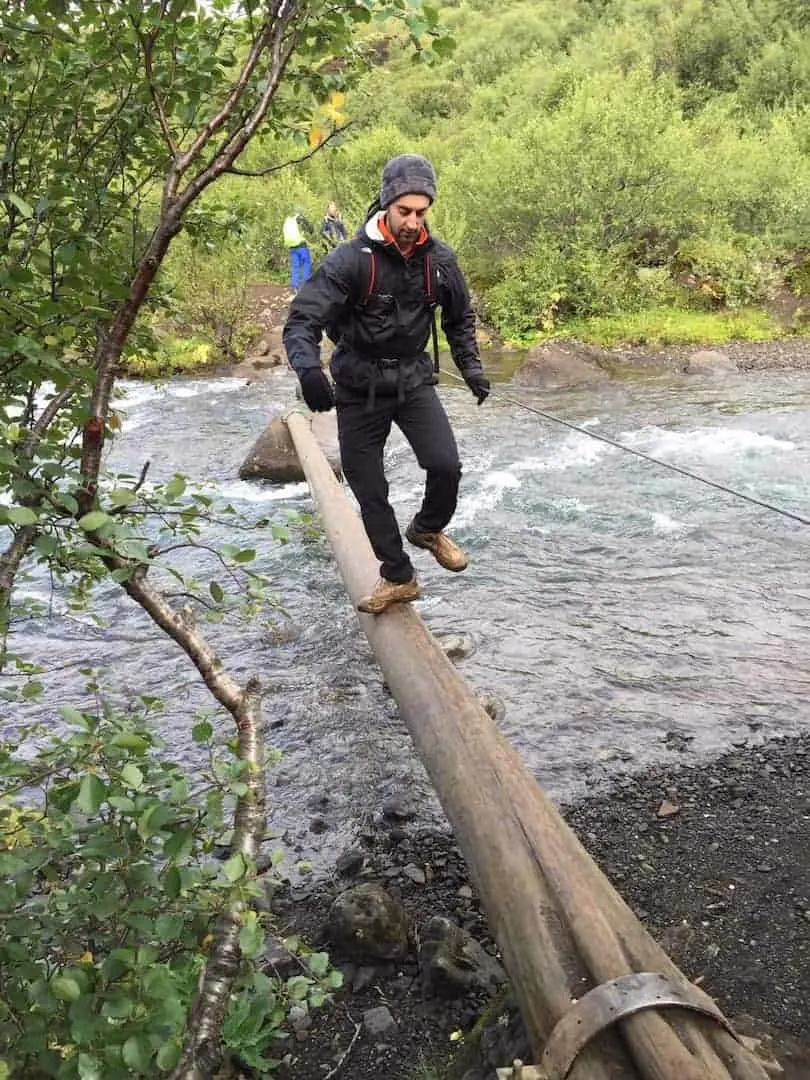
3) Water Crossings
I wanted to bring this up here so you are well aware of the water crossings before getting into the hike. One of the reasons this hike is so unique is because of two different water crossings that you can take part of during the trail:
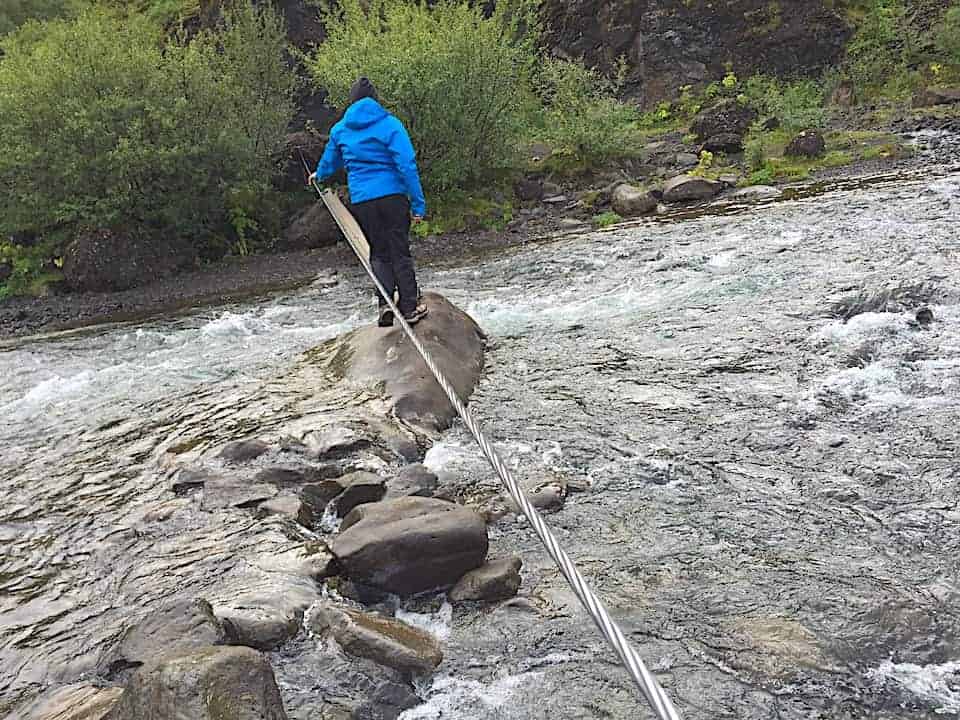
The first river crossing is towards the beginning of the hike.
This crossing takes you from the north side of the river to the south side of the river – going up the south side has much better views of the scenery and waterfall.
The first crossing has a log and guide wire to help you get across (note that this log is only accessible to get across safely in the summer months).

The second river crossing is on top of the waterfall itself, to get you from the south side of the river back to the north side of the river – going down the north side is less dangerous and less technical.
This second crossing however DOES NOT have any sort of log or wire to guide you across.
If you want to make the round trip hike, and not go down the same way you came up, you can continue upstream until you find a shallow enough portion of water where you feel comfortable crossing.
Here you will get wet! So be prepared to bring waterproof shoes or make your way across barefoot.
Note: we crossed the river way too early. If you continue further past the waterfall, you will see areas that are much shallower and easier to cross.

4) When To Go
The best time to take part of the hike will be in the summer months from around June to September give or take.
Now you technically can take part of the hike year round but I cannot advise you doing so for a couple reasons.
First of all, if there is snow on the ground, it can get very tricky following the trail and making sure you are on the correct path.
Secondly, as mentioned, you must cross to the southern side of the river by making your way across a log. Outside of the summer months, the log is either fully submerged in fast moved water or the log is not there altogether.
It can get quite treacherous crossing but that will be up to you to decide. On the other hand, in the summer months, it is quite easy balancing on the log while holding onto the wire.
Another thing to note here is I would advise you starting the hike earlier in the day when there are less people on the trail. When I hiked to Glymur, I got an early start around 9:00AM.
On the way up I barely saw anyone else during the trail. At the end of the hike, I could see a backlog of people hiking up the trail which seemed pretty crowded.
Recommended Reykjavik Hotel | Eyja Guldsmeden Hotel – Book Today!

5) How To Get To Glymur
Below is the route from Reykjavik to the Glymur parking lot. The route is about 70KM long (44 miles) and should take a little over an hour to get there from the capital city.
You simply need to follow route 1 north before switching to route 47 and then following the few turns to get you to the parking lot. I have also starred the location of the waterfall, which would basically be the halfway point of the hike.
When it comes to renting a car in Iceland, I would highly recommend checking out Rentalcars.com for potential options.
By going through Rentalcars.com, you will have the chance to compare car prices among a variety of rental companies, and choose the best option for you.
Hiking Packing List
In general when it comes to hiking, there are a few main aspects to consider. These includes clothing layers, hiking shoes, hydration & fuel, electronics, and other essentials.
Below in a breakdown of some of the top items, but be sure to check out the Hiking Packing List for a more comprehensive view.
Clothing Layers
Layering is going to be a top consideration when hiking. You will want to be prepared for all sorts of weather so you can be comfortable in different situations. Some items may include:
→ Hiking Shorts
→ Hiking Pants
→ Short Sleeve Shirt
→ Long Sleeve Shirt / Sun Hoodie
→ Mid Layer Fleece
→ Puff Jacket (not always needed)
→ Packable Rain Jacket (Columbia Watertight II)Note that your layers should be made of moisture wicking material as they are breathable and quick drying.
Footwear
Having appropriate footwear will also be very important. You will want to have shoes with the necessary grip and support to keep you safe on the trail.
→ Hiking Shoes (Keen Targhee)
→ Hiking Socks (Darn Tough)Other Essentials
Whether it is hiking gear, electronics, or just some miscellaneous items, here are some other essentials to bring along on hikes.
→ Hiking Backpack (Osprey Talon 22) & Rain Cover (Joy Walker Cover)
→ Hiking Poles (Black Diamond Trekking Poles)
→ Water Bottle (CamelBak Chute or Katadyn Filter Bottle)
→ Portable Charger (Anker PowerCore 5000mAh)
→ Action Camera (GoPro Hero)
→ Energy Bars & Snacks
→ Hat & Sunglasses
→ Sunscreen & Bug Spray
6) The Glymur Waterfall Hike
If these river crossings have not scared you away just yet, lets now get into the remainder of this beautiful hike to Glymur.
The overall Glymur Waterfall Hike is not too difficult, however you must be super cautious as you make your way around certain areas.
If it has been raining at all, you might find that the trail can get slippery and there are some metal wires along the way to hang on to in order to keep you safe.
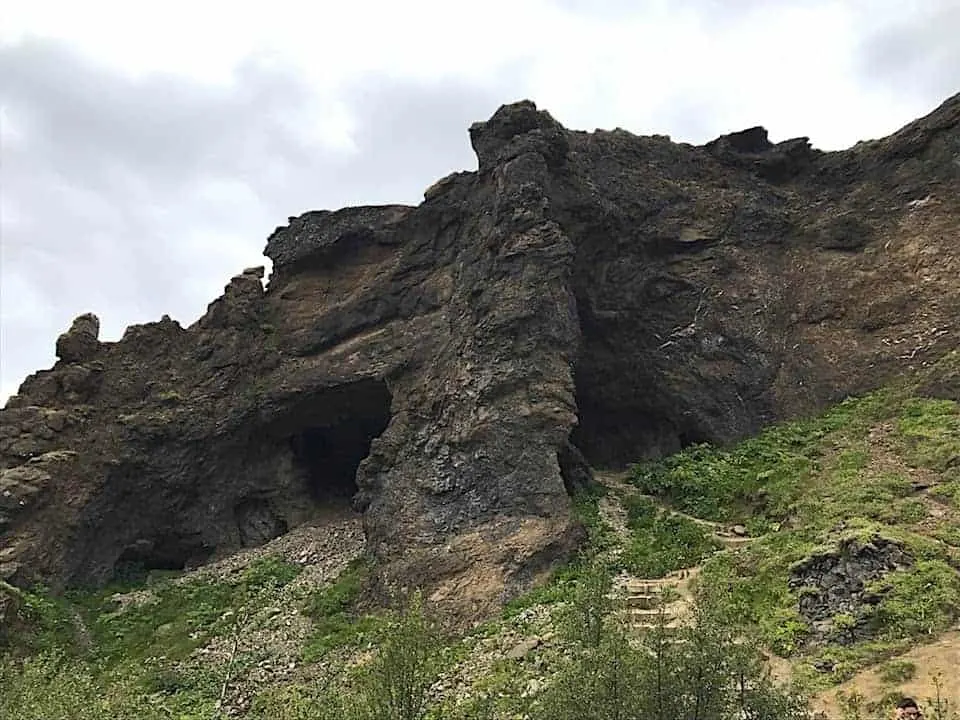
The beginning of the trail is pretty straightforward as you make your way towards the river. You will soon come across the famous cave archway that you must pass through to continue on the trail.


Once out of the archway, your next point of interest will be the first initial river crossing to the south side of the river.
As mentioned prior, during the summer months the water is low enough to make this log crossing quite easy (still watch your step though!). Outside of the summer months, it can get a bit tricky to get across.

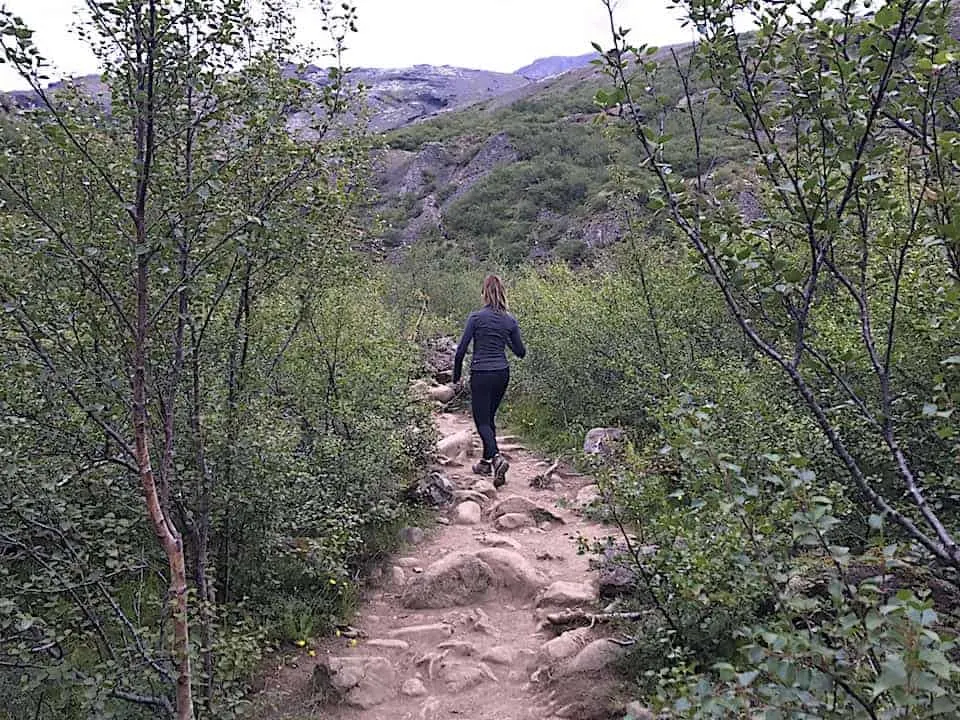
Now that you are on the south side of the river, it is time to make your way up the trail and towards Glymur.
Note that you will not be able to see the waterfall itself until you get up towards the top. But no worries at all as the hike towards Glymur offers some of the best views in Iceland.
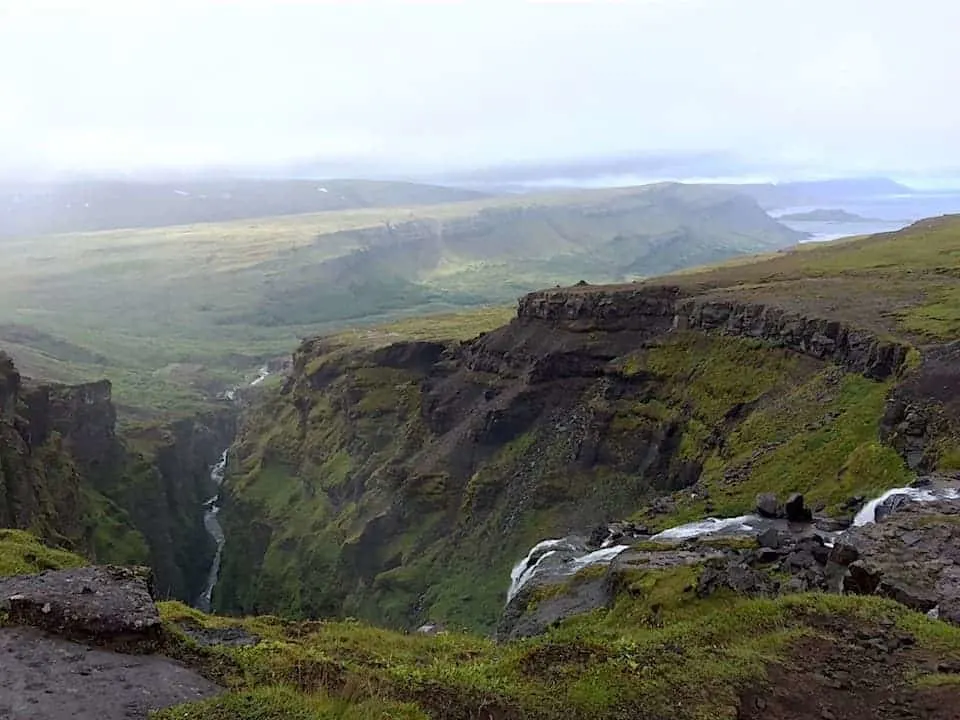
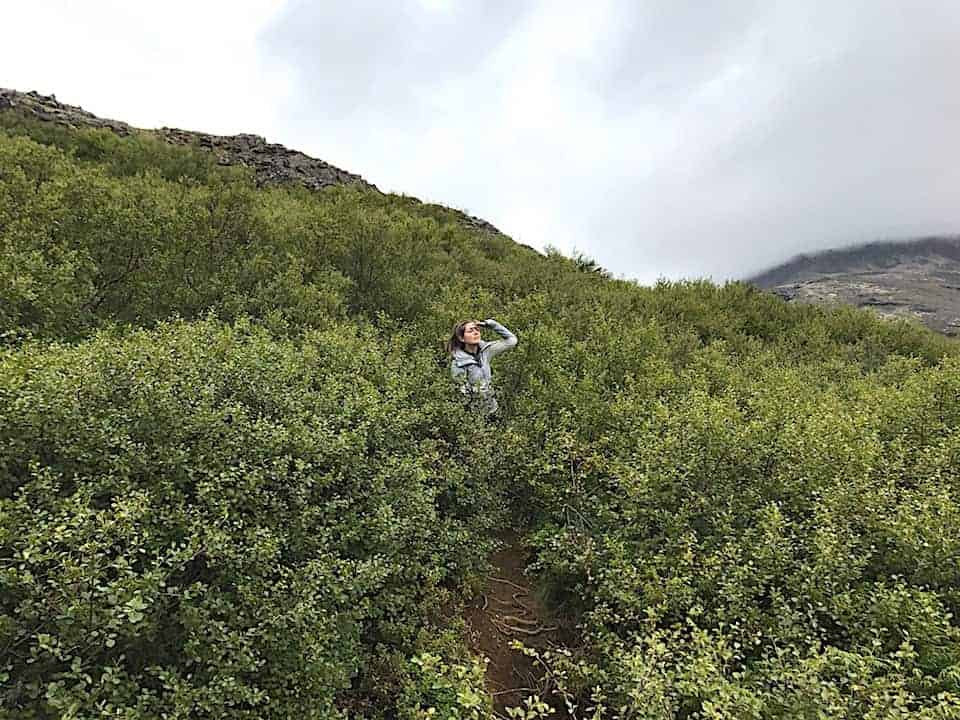
You will be surrounding by greenery, the beautiful canyon, and plenty of smaller waterfall streams falling down the mountains into the river.
At one point or another the trail does get a bit technical and that is where you will have a metal guide rope to help you make your way along the hike.


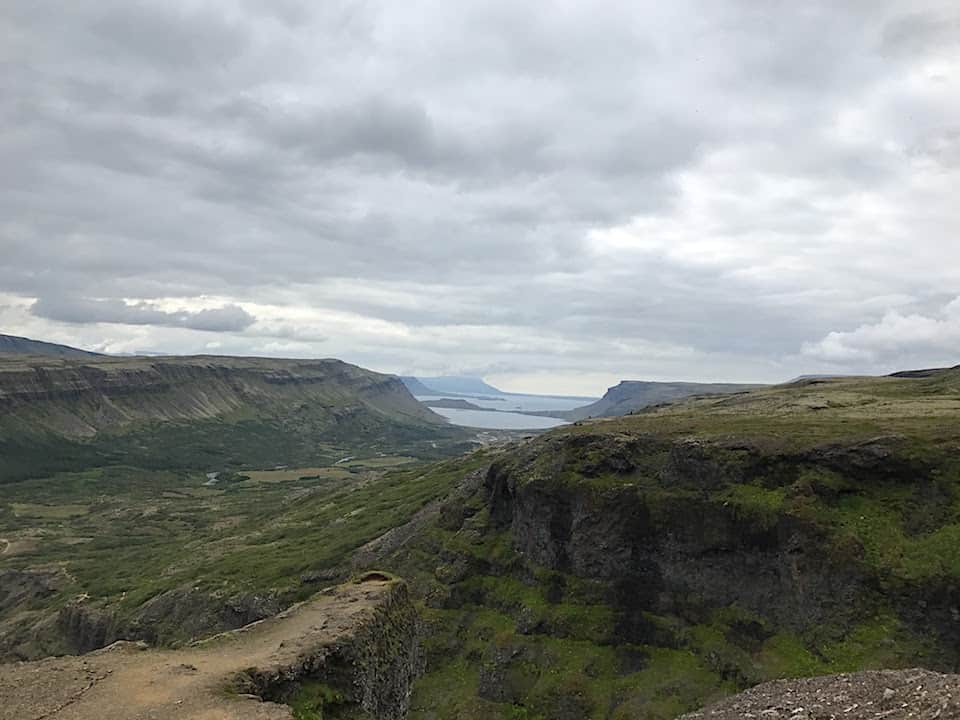
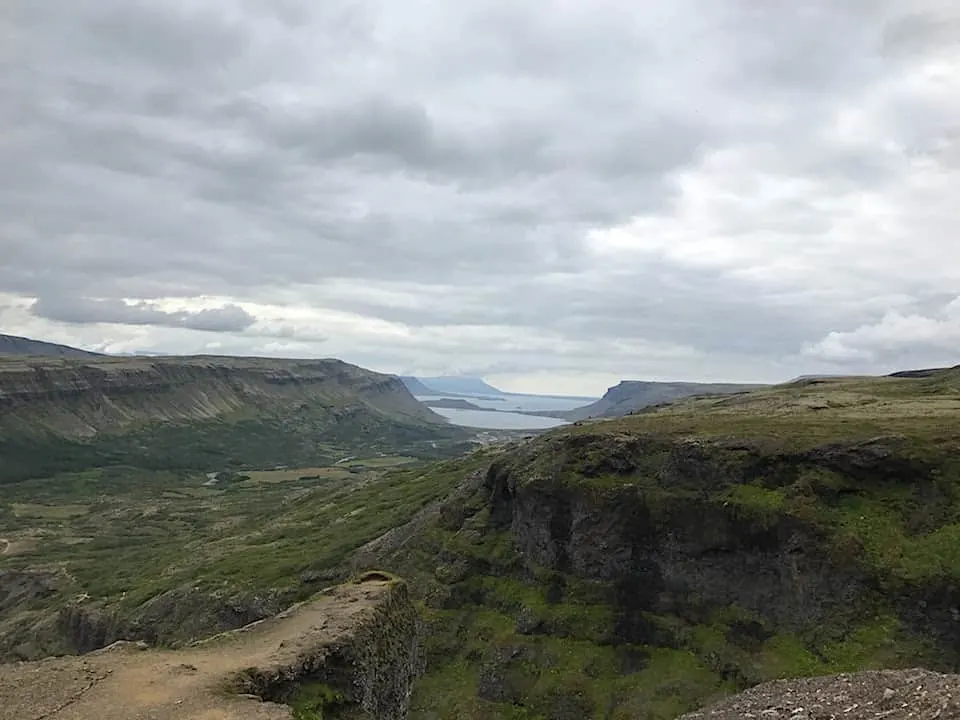
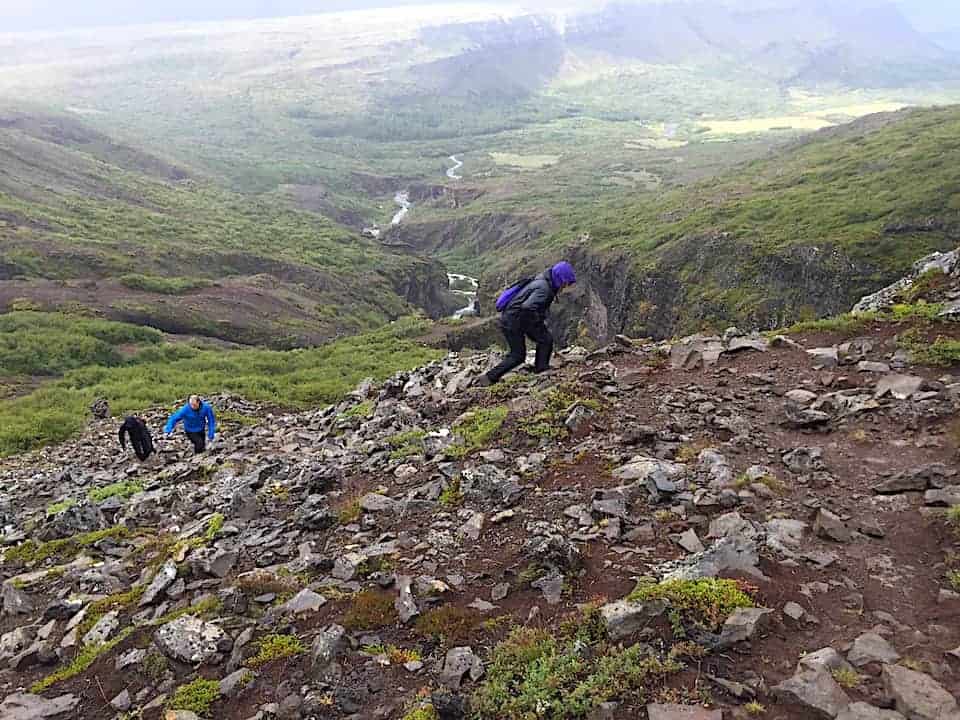
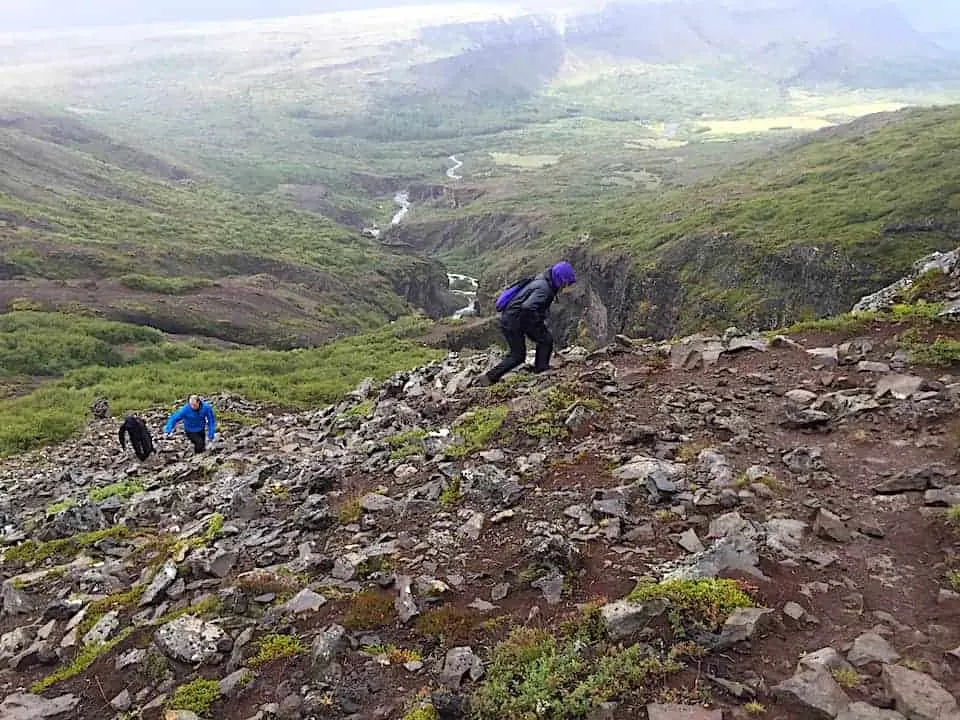
As you get up towards the top, there will be some incredible views to take in as you turn around and see the valley below. Soon enough you will arrive at Glymur!
Be careful though as you look down as it’s a steep drop! You can spend some time up top taking it all in and enjoying the second highest waterfall in all of Iceland.


Now comes the tricky part – you can either turn around and go down the same trail you came up. Or the more adventurous option would be to cross over to the northern side of the river.
To get to the northern side of the river, you will continue walking alongside the river until you find a point shallow and safe enough to cross.
YOU WILL GET WET! So be prepared for that. Watch your step as you walk across the slippery rocks and onto the northern side. Once you get to the other side you will follow the trail back down the mountain and towards the parking lot.
As mentioned earlier, the spot where we decided to cross was probably not the best option. Heading further along the river, where the water gets shallower is the better choice here.
The trail down is quite easy as you make your way through some trees and enjoy the rest of the picturesque landscape around you. There are a few different routes to take but we ended up just taking the easier out of the bunch.
You will continue down, passing the valley, trees, and greenery, and soon enough you will arrive back at the parking lot to end an epic hike.


Note: if you decide you do not want to cross the river at the top of the waterfall, you will then just turnaround and follow the same path you took up.
You will then cross back across the log that you initially crossed at the beginning of the hike and back to the parking lot from there.
7) Where to Stay
If you are going to Glymur as a day trip from Reykjavik, here are a few recommended hotel options to look into. Feel free to also browse through some other top rated hotels around the area on Booking.com.
Top Accommodation Options
That about does it for your guide to the Glymur waterfall hike of western Iceland. It is surely not to disappoint and it will be a highlight of your time exploring all that the country has to offer.
Feel free to comment below with any questions you may have and I will get back to you as soon as possible. Safe travels out there and have fun!
Check out all the other Iceland guides and itineraries up on the site to better help you plan your next trip!
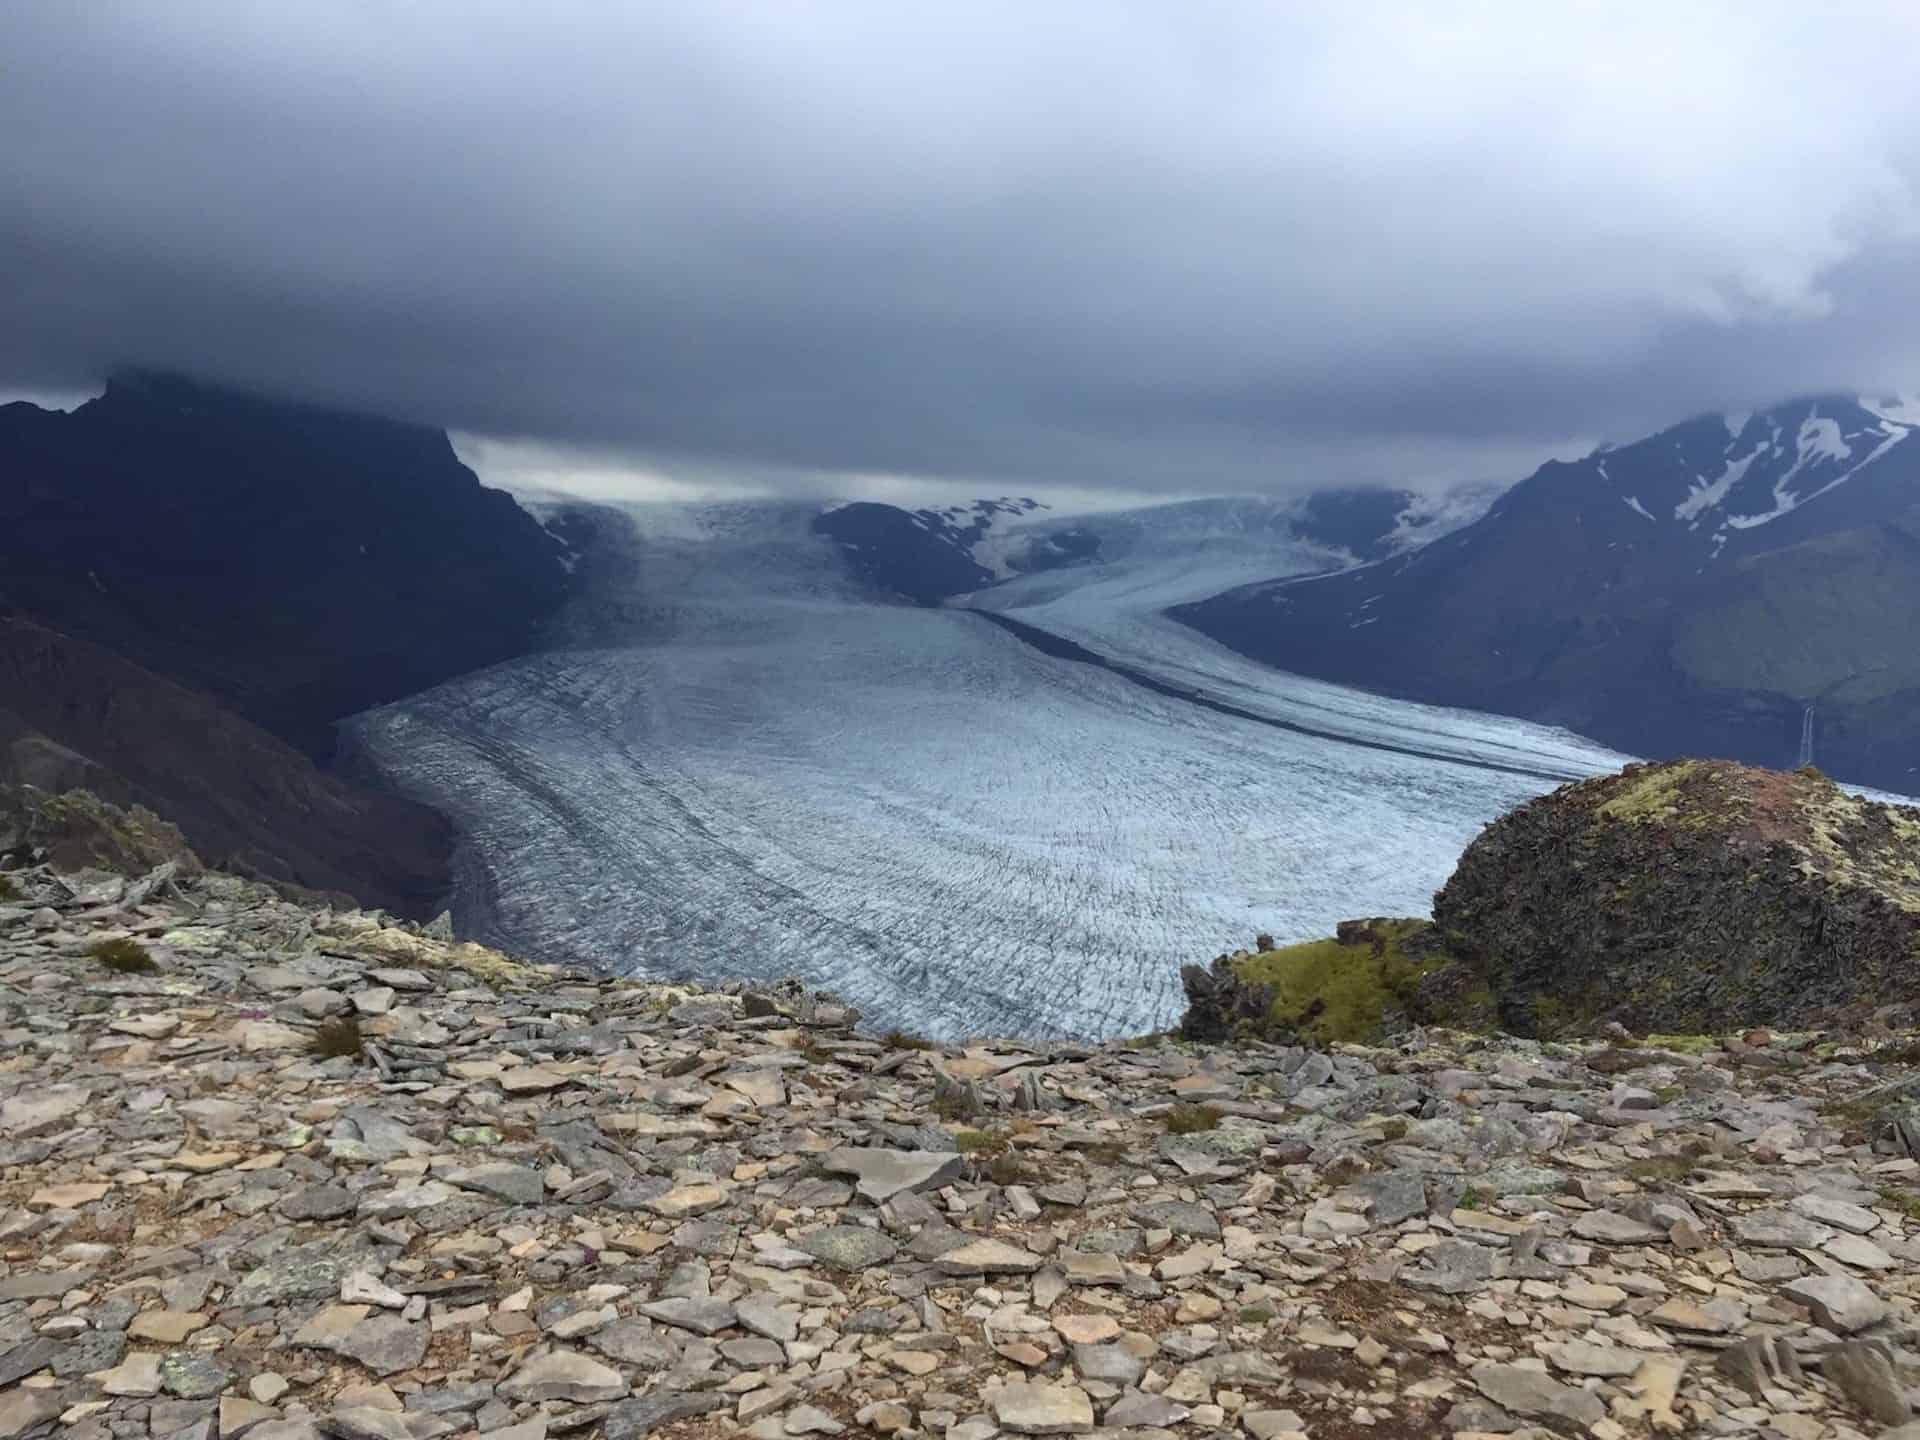
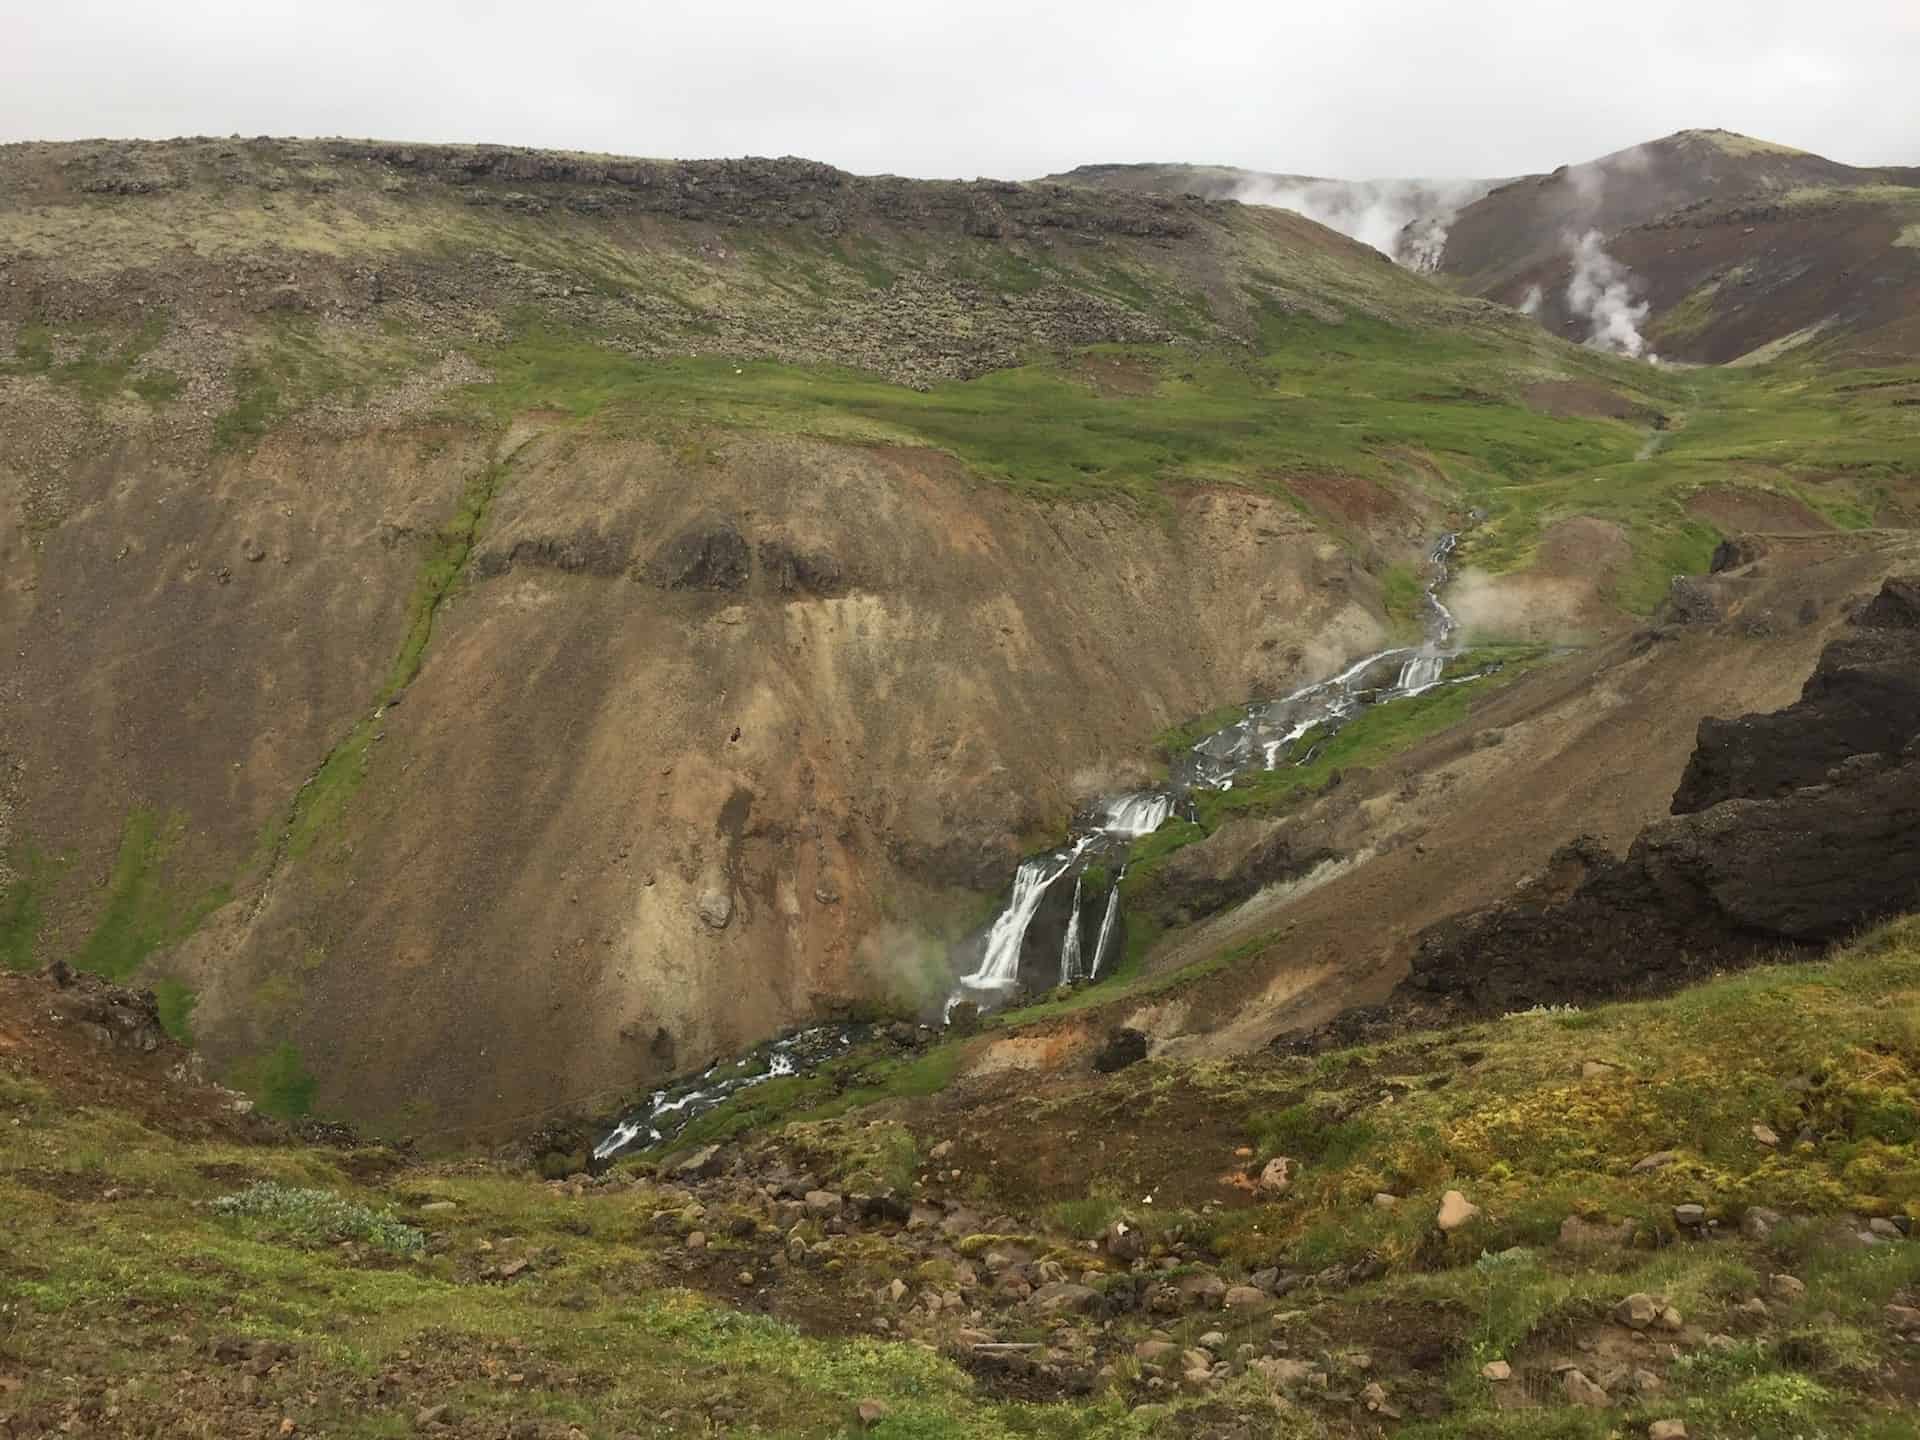
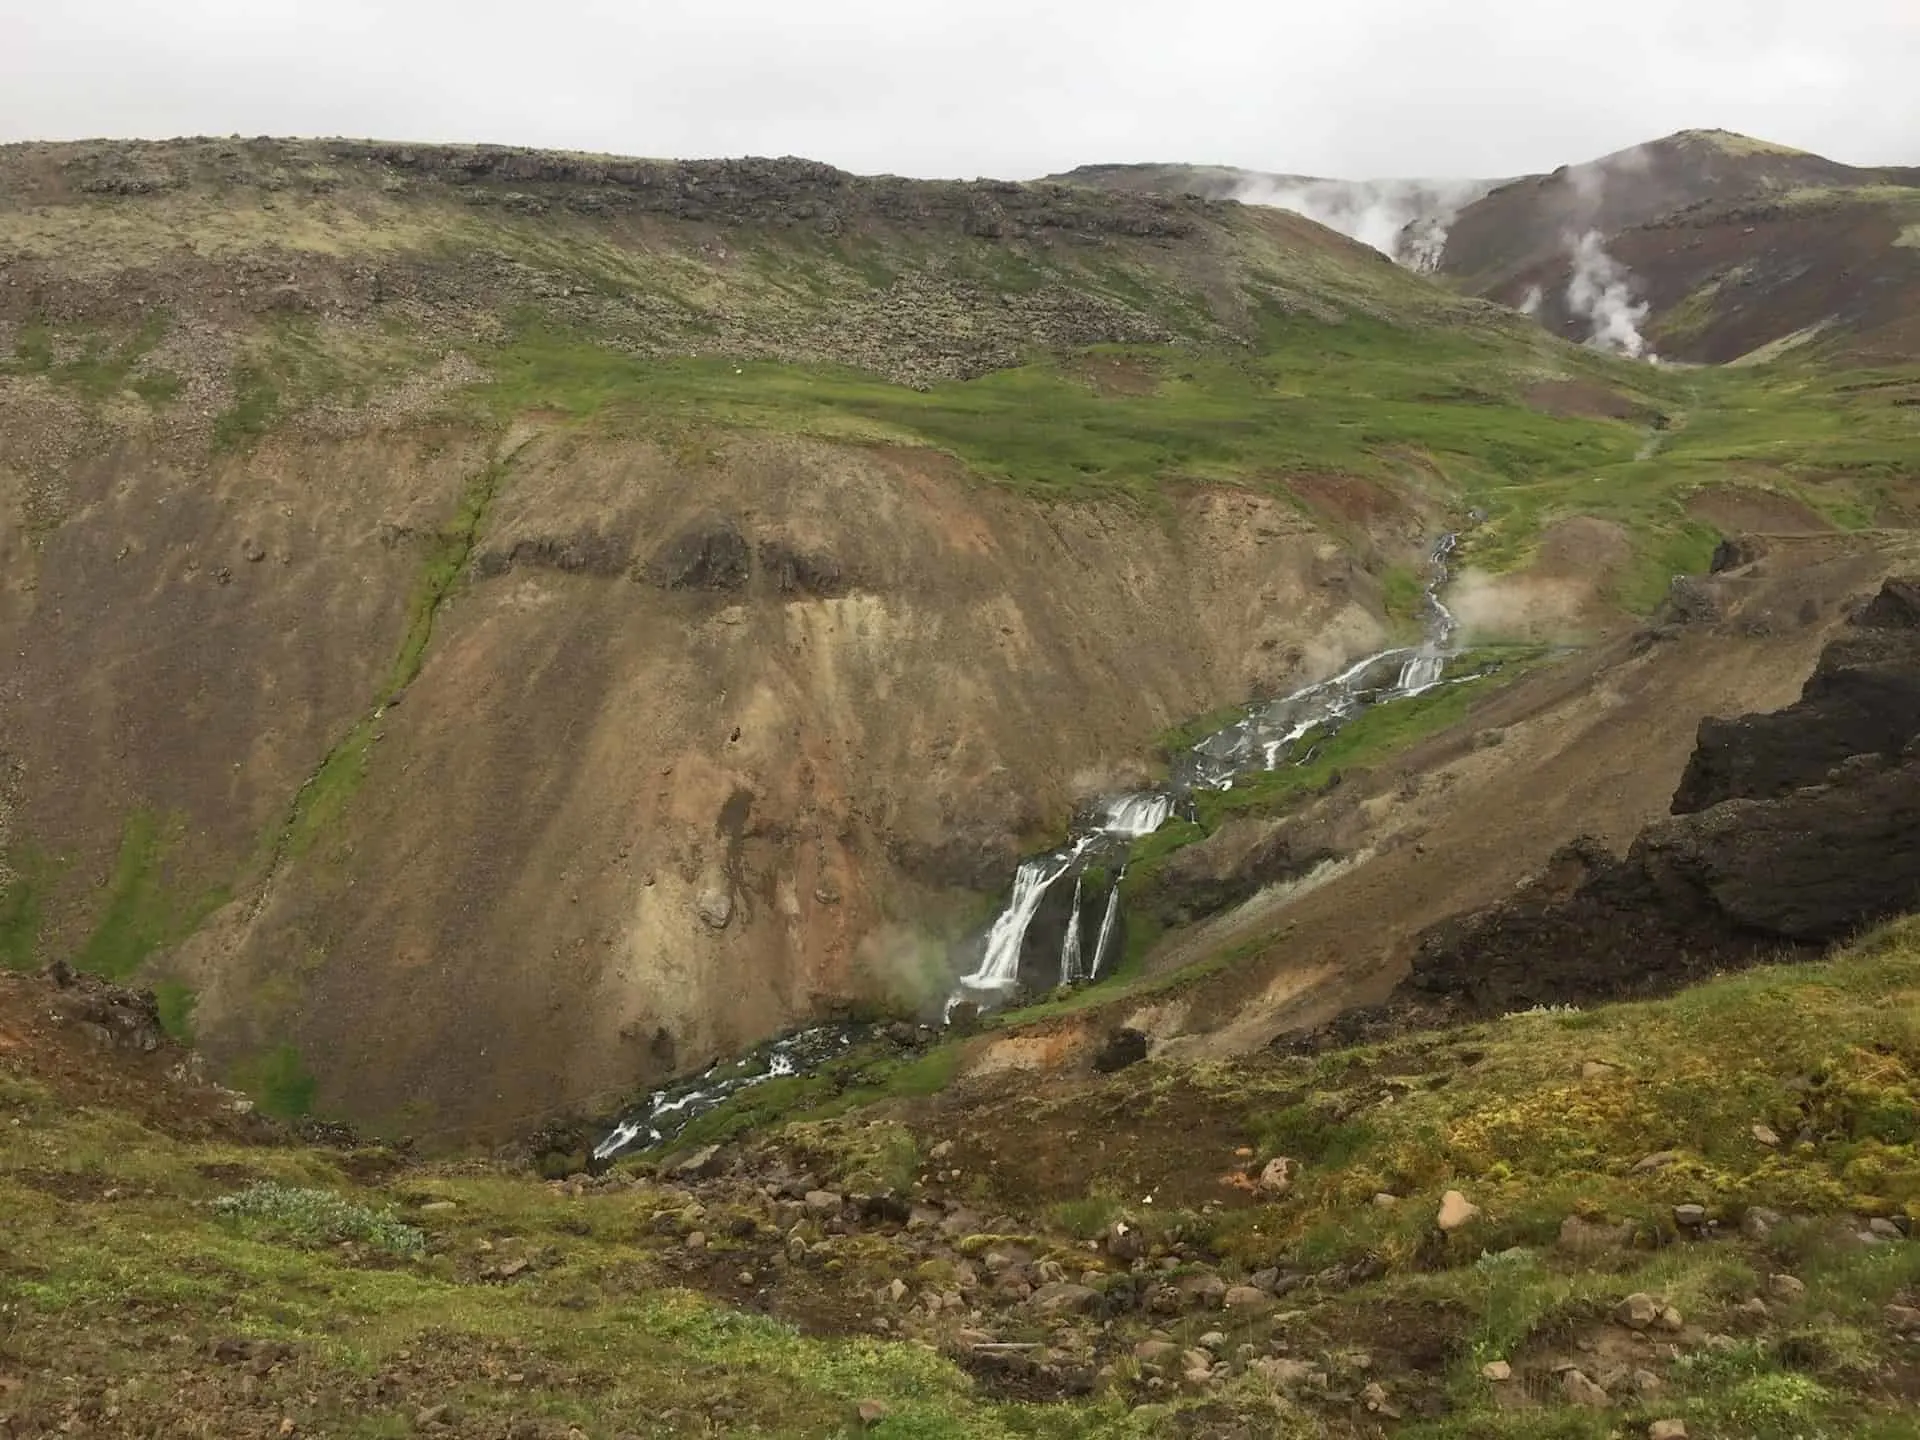
If you enjoy this hike feel free to check out the Reykjadalur Hot Springs, Hiking Skaftafell National Park, and the Skogafoss Hike.

casey
Tuesday 27th of December 2022
I plan on going in March. Everything I've read makes it seem dangerous to do this time of year. Would taking the North Trail up and back make a difference? Would this path sacrifice any views that worth just doing the full loop?
I would rather do it safely than not do it at all. I appreciate any advice
Charles
Wednesday 28th of December 2022
Hi Casey - while I have not visited in March, that is also what I came across during my research - outside of the summer/shoulder summer months, it is too dangerous to cross the river to the south side. The best views will be on the south side of the trail however, but you will still be able to enjoy some views from the north side (if taking the path closest to the valley). These won't be as vast though as those from the south side. Hope that helps a bit.