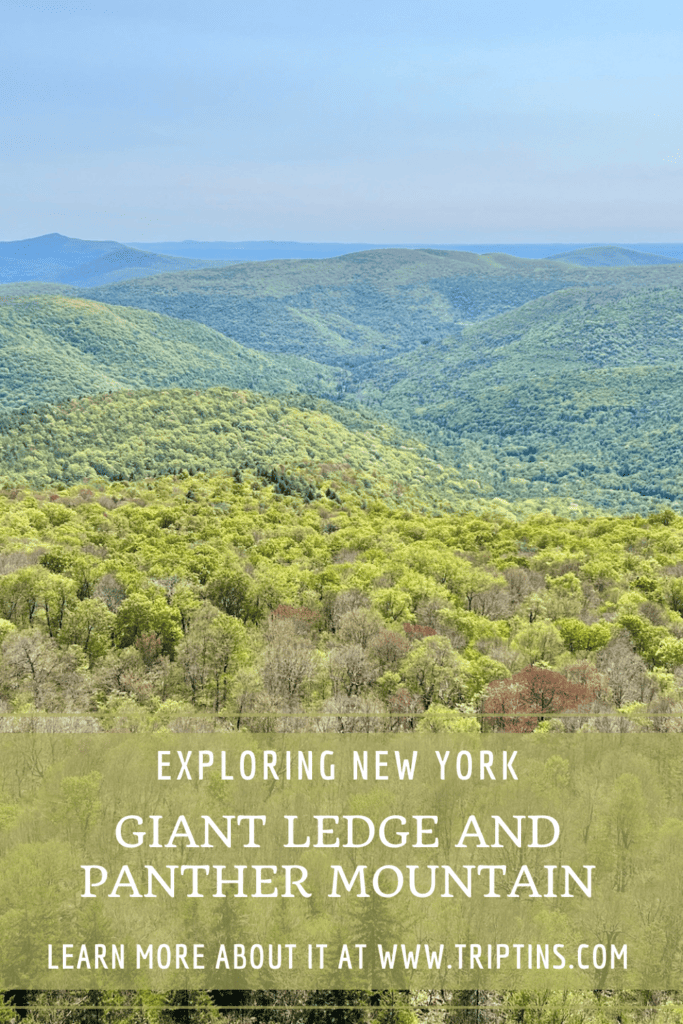
If you are looking for some of the best views that the Catskills have to offer, then a hike up the Giant Ledge and Panther Mountain should be high on your list.
The hike is located in the Slide Mountain Wilderness Area, near the towns of Phoenicia & Shandaken, New York. It makes for the perfect getaway for those that want to take in the natural beauty that the area has to offer.
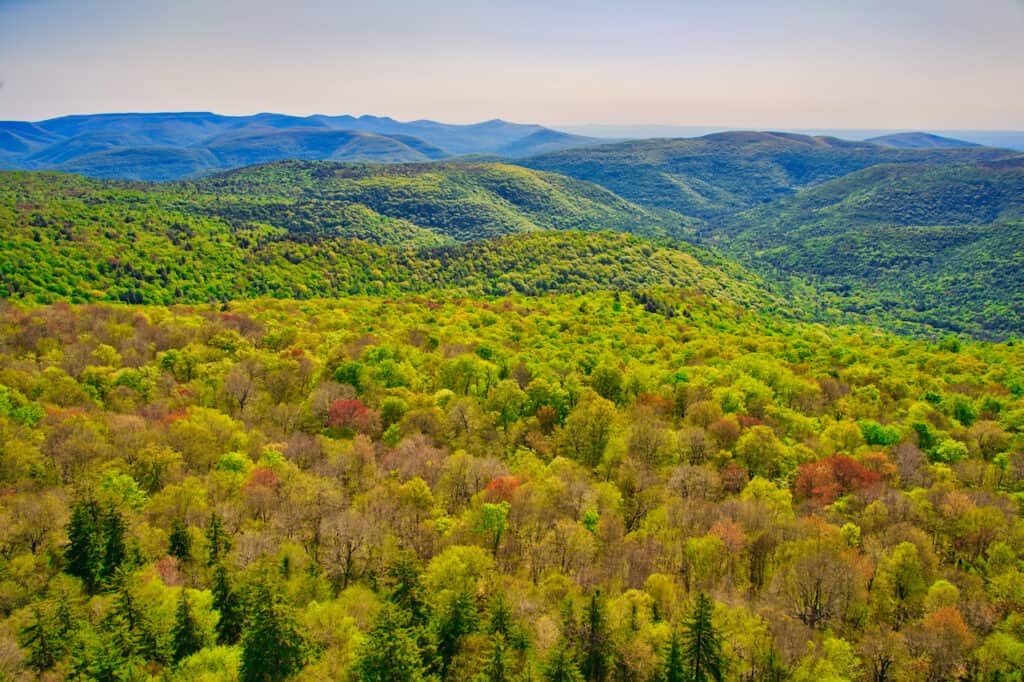
After hiking up through the treelined forest, you will be welcomed to some absolutely jaw-dropping panoramas of the never-ending views of the surrounding landscape.
Read on to learn everything there is to know about the Giant Ledge & Panther Mountain hike and how to take it on for yourself.
* Affiliate Disclosure: This post may contain affiliate links, which means I may receive a commission if you make a purchase through the links provided, at no additional cost to you. Thanks for supporting the work I put into TripTins!
1) Giant Ledge and Panther Mountain Trail Stats
Before we get started I want to clarify that this hike can be done in one of two ways. You can either just hike up to the Giant Ledge & back down to the trailhead or you can also add on the Panther Mountain summit.
Later on, in this overview, I will talk through whether or not hiking all the way up to Panther Mountain makes sense to you.
For now, I will include trail stats for both options:
Giant Ledge & Panther Mountain
- Length: 7.3 miles
- Elevation Gain: +1,930 feet
- Duration: 4 hours
Giant Ledge Only
- Length: 3.8 miles
- Elevation Gain: +1,100 feet
- Duration: 2 hours
General Trail Overview
- Trailhead Coordinates: 42°01’35.2″N 74°24’12.6″W
- Parking at Trailhead: Yes, limited
- Route Type: Out & Back
- Terrain: Dirt, Rocks
- Difficulty: Moderate
- Giant Ledge Elevation: 3,170 feet
- Panther Mountain Elevation: 3,720 feet
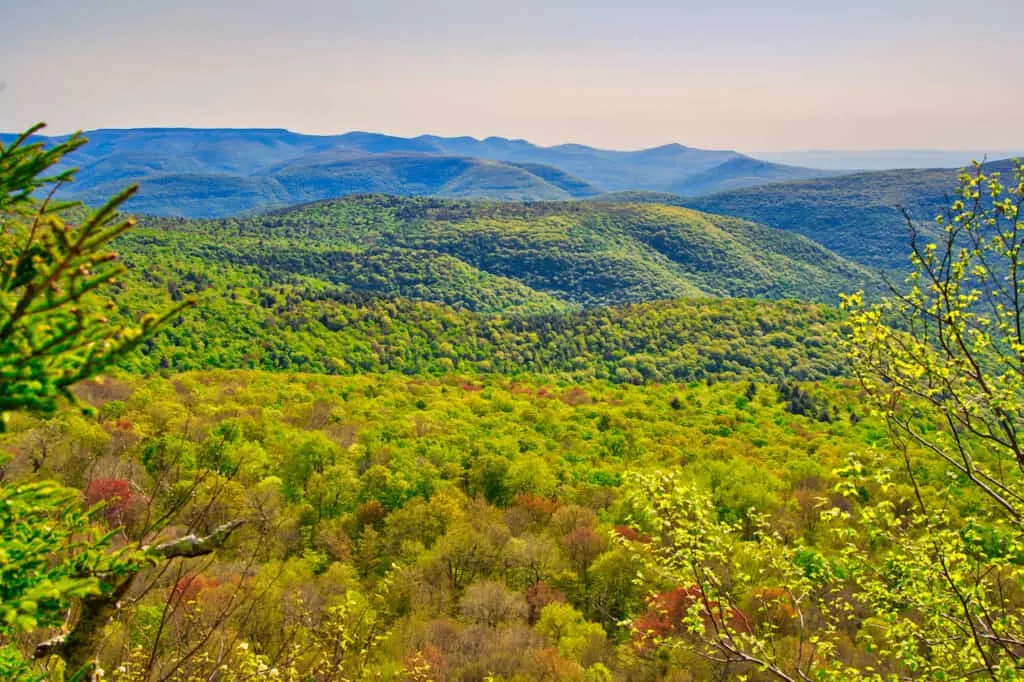
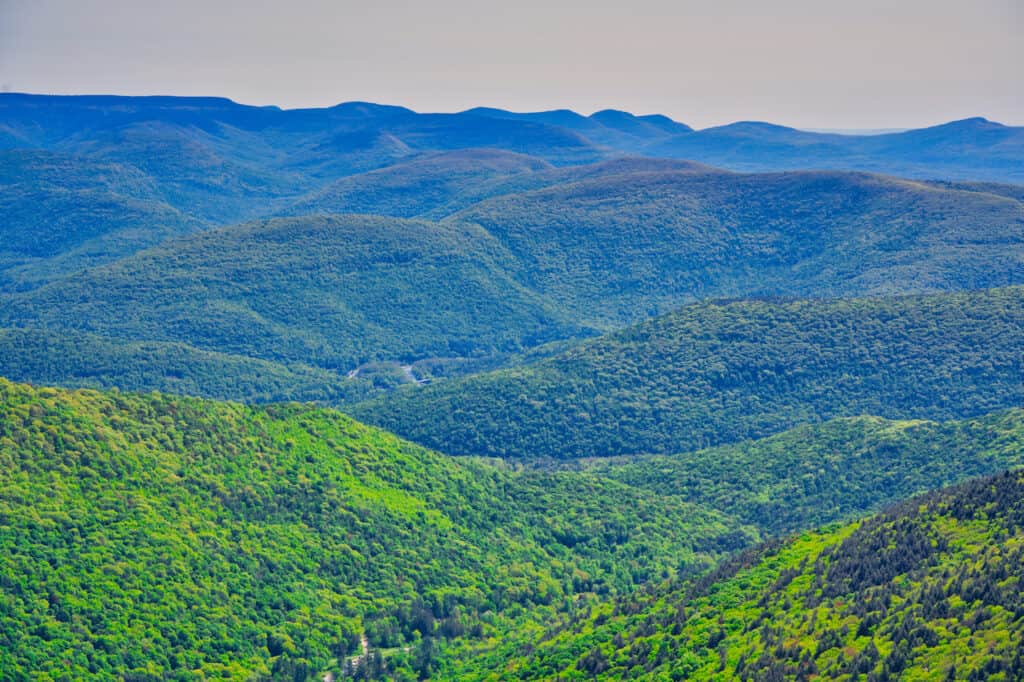
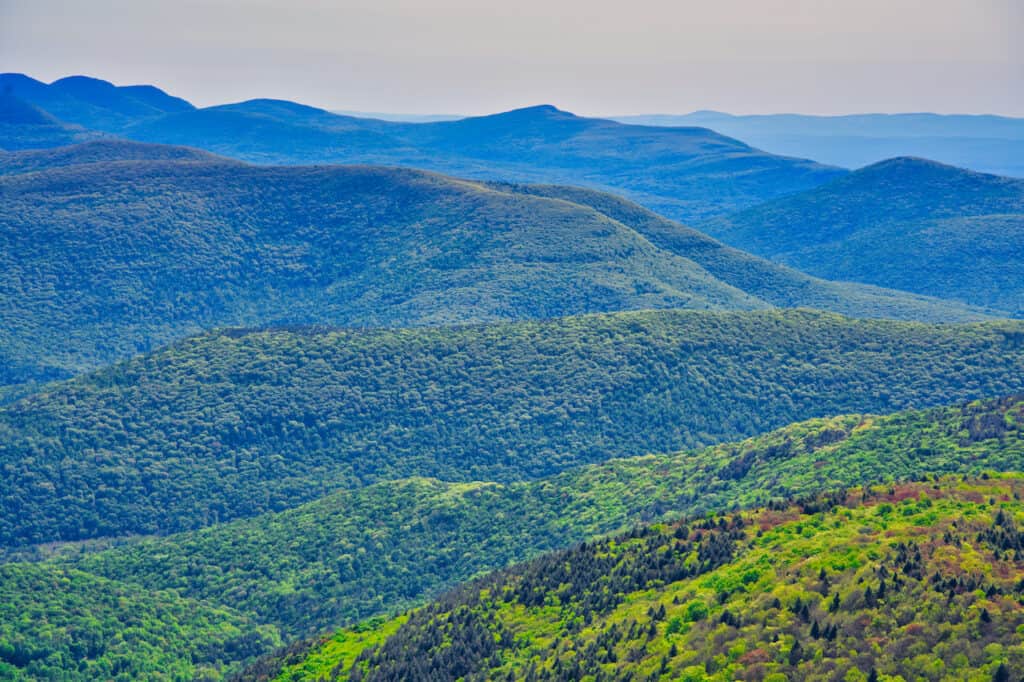
From the top of the Giant Ledge (multiple ledges) and Panther Mountain, there will be never-ending views of the Slide Mountain Wilderness Area and beyond!
Is Giant Ledge Catskills Dog Friendly: yes, the Giant Ledge trail is dog friendly but it is advised to keep them on a leash due to the steeper sections & exposed ledges.
2) Giant Ledge Catskills Directions & Trailhead
First things first, you need to make your way to the Giant Ledge trailhead. The only realistic way to go about getting to the trailhead will be if you have your own car.
There is no nearby public transportation, so plan to grab a car for the trip out to the Catskills.
Directions to the trailhead will of course depend on where you are coming from. For those coming in from the NYC area, expect the drive to take around 2.5 hours.
You can take I-87 to exit 19 and continue on NY-28 W. From there it is about 7 miles until you reach the turnoff onto Oliverea Road.
The address of the trailhead/parking lot is 1564 Oliverea Rd, Shandaken, NY 12410. The GPS coordinates 42°01’35.2″N 74°24’12.6″W will also get you there.
Note: I would recommend downloading offline maps for the region. You will find limited cellular service near the trailhead. By downloading offline maps, you will be able to receive directions when you depart.
Hotel Options
Understandingly, many people may not want to simply take a day trip out to the Catskills. Instead, staying overnight and getting to fully enjoy the area can be a better way to go about it.
You can take part of other nearby hikes & attractions like Kaaterskill Falls and the North South Lake.
If that sounds like something of interest, below are a few of options within a 15-40 minute drive to the trailhead (and many other Catskill hikes).
- Hunter: Bluebird by Lark
- Phoenicia: Phoenicia Lodge
- Shandaken: Catskill Seasons Inn
- Big Indian: Urban Cowboy Lodge
You can also browse through many more Catskills hotels if those don’t work for you!


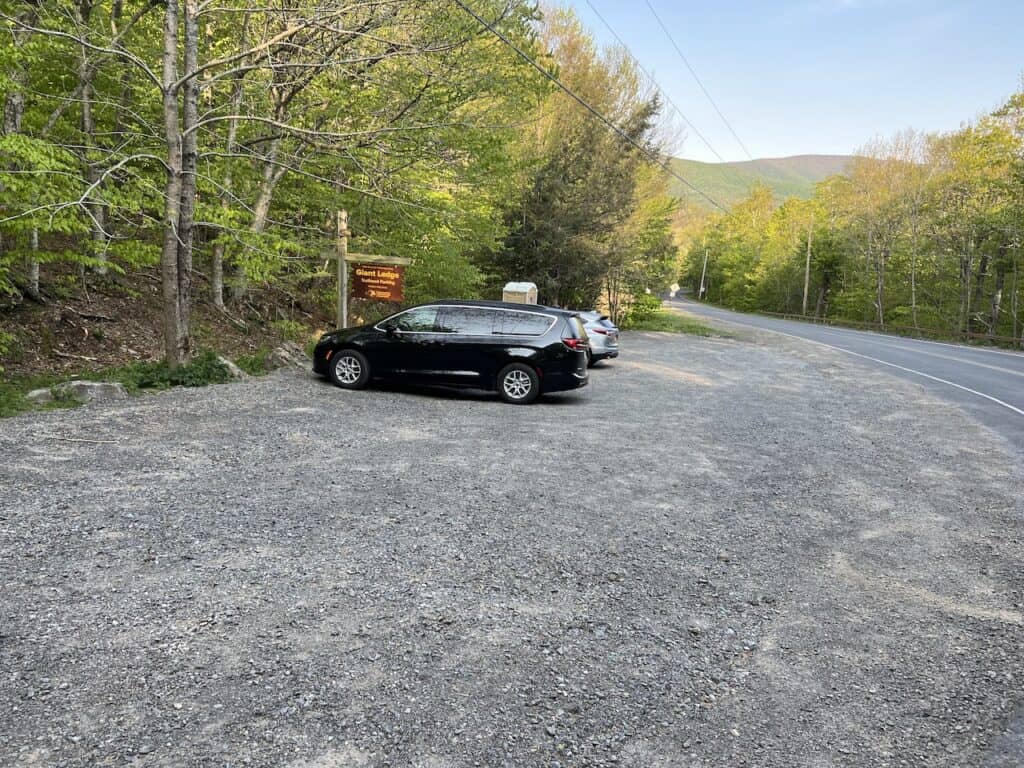
Giant Ledge Parking
The trailhead itself is along a hairpin turn. Just prior to reaching the turn, you will see a parking lot on the right hand side (following the directions above). The lot can maybe fit around 15 cars give or take, and it will fill up early.
If you are interested in hiking this trail, be sure to do so early on in the morning. During my time on the trail, I hiked on a weekday in late May. The lot was nearly empty when I arrived at 7:30AM. By the time I was back around 11:30AM, it was completely full.
I would expect weekend parking to fill up prior to 9:00AM during the June – October time period. Perhaps even earlier depending on the weather.
From the parking lot, you will just need to carefully cross the street, where the trailhead is located.

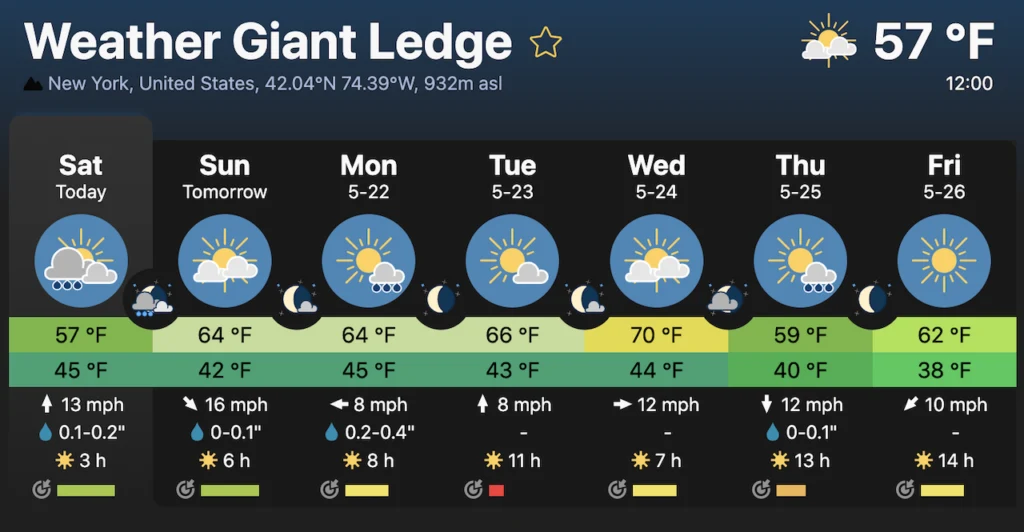
3) Giant Ledge Weather
One of the biggest concerns when going on a hike (where viewpoints are a highlight), is going to be the weather.
You of course want to enjoy the beautiful views that the Giant Ledge has to offer. But sometimes the weather can get in the way of those views in the form of low lying clouds.
Before heading off for the hike, I would recommend checking out the weather forecast for the area. Here are the weather forecasts from two more reliable “mountain” weather sites:
You want to keep your eye out for the number of hours of sun, and the cloud levels. If the clouds are too low, then your views may just not be there.

Hiking Resources & Checklist
Before heading out for the trails, be sure to read up on some of the hiking resources up on the site. These are here to better prepare you for all types of outdoor adventure.
- Gear: Hiking Packing List
- Weather: How to Prepare for Hiking Weather
- Navigation: Hiking GPS & Navigation
- Tips: 20+ Hiking Tips & Tricks for the Trail
- Accommodation: Book Your Hotel Today
- Rental Car: Book Your Car Rental Today
4) Giant Ledge Camping
If you want to make more of an experience out of it, you can opt for a Giant Ledge camping experience.
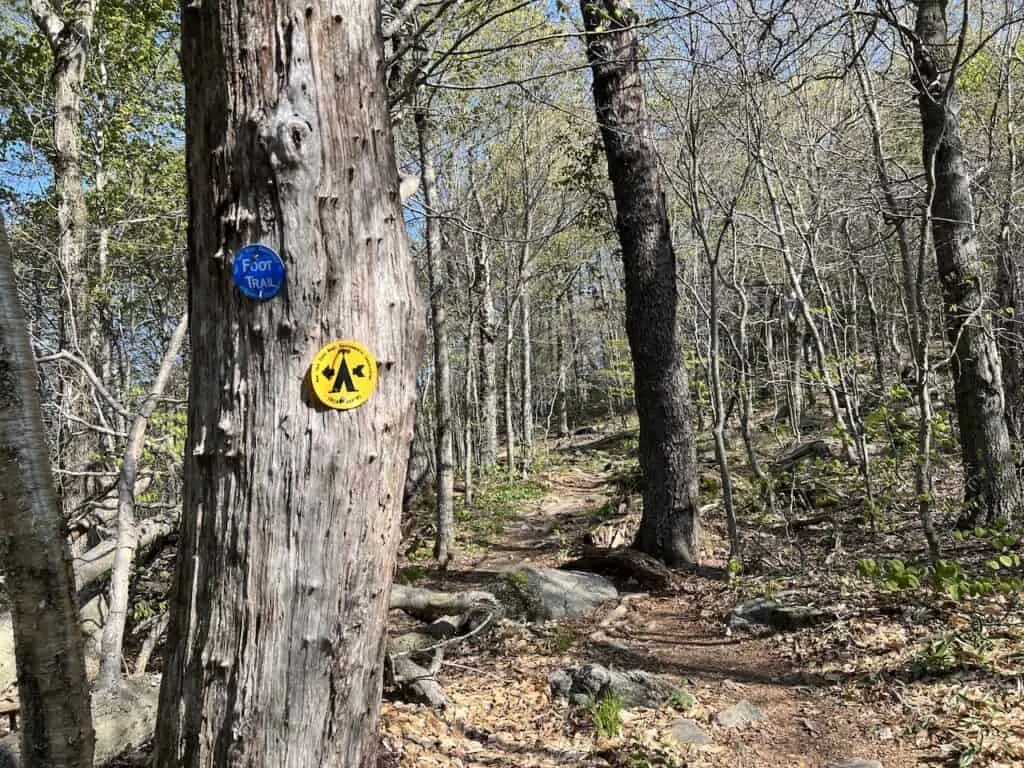
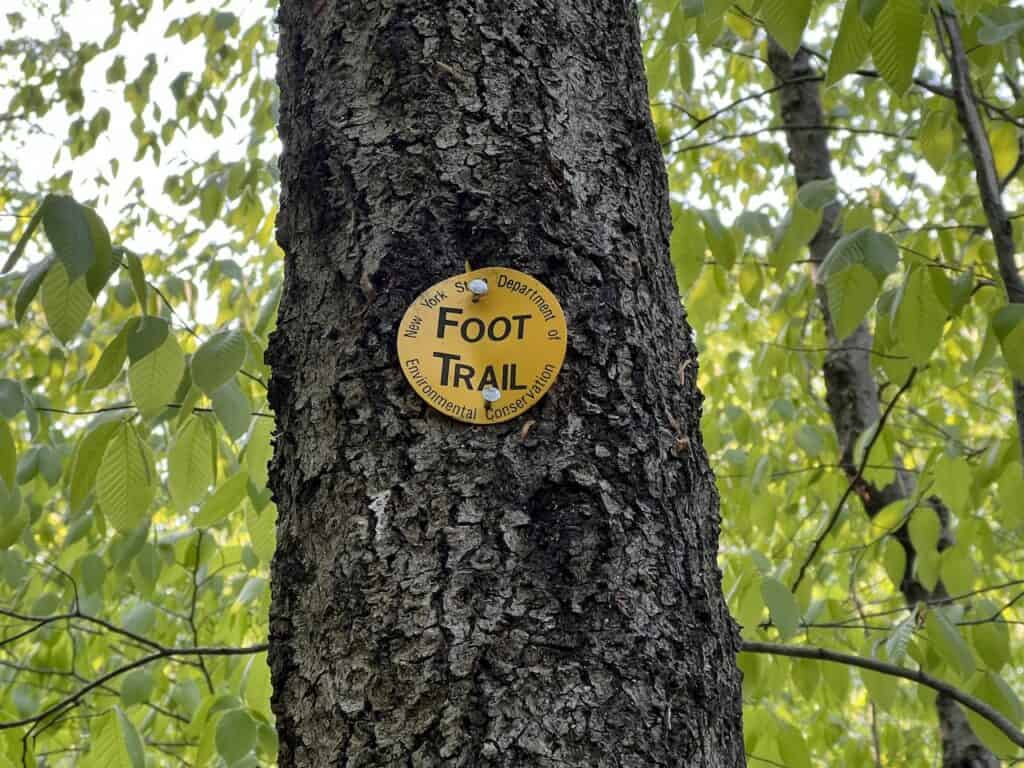
On the navigation apps (i.e. Maps.me), you will see small turnoffs for official camping areas. These are also marked on the trail by yellow trail markers (see below).
Be sure to follow leave no trace principles and clean up after yourself once you are all packed up.
Camping is a great way to experience both a sunset and sunrise at the Giant Ledge. Having that view is one thing, but the view at sunrise/sunset is going to be even better.

5) Giant Ledge & Panther Mountain Map
Before getting into the hiking overview itself, below you can find a map of the hike. The trail route is exported from my own navigation app, and highlights several of the viewpoints along the way.
Tip: I would recommend downloading a trail navigation app like Maps.me or AllTrails handy. You can download the route and be able to see the route offline.
6) Hiking Packing List
If you were wondering what type of gear to take along with you on the trail, check out the hiking list overview below that can better help you out.
Hiking Packing List
In general when it comes to hiking, there are a few main aspects to consider. These includes clothing layers, hiking shoes, hydration & fuel, electronics, and other essentials.
Below in a breakdown of some of the top items, but be sure to check out the Hiking Packing List for a more comprehensive view.
Clothing Layers
Layering is going to be a top consideration when hiking. You will want to be prepared for all sorts of weather so you can be comfortable in different situations. Some items may include:
→ Hiking Shorts
→ Hiking Pants
→ Short Sleeve Shirt
→ Long Sleeve Shirt / Sun Hoodie
→ Mid Layer Fleece
→ Puff Jacket (not always needed)
→ Packable Rain Jacket (Columbia Watertight II)Note that your layers should be made of moisture wicking material as they are breathable and quick drying.
Footwear
Having appropriate footwear will also be very important. You will want to have shoes with the necessary grip and support to keep you safe on the trail.
→ Hiking Shoes (Keen Targhee)
→ Hiking Socks (Darn Tough)Other Essentials
Whether it is hiking gear, electronics, or just some miscellaneous items, here are some other essentials to bring along on hikes.
→ Hiking Backpack (Osprey Talon 22) & Rain Cover (Joy Walker Cover)
→ Hiking Poles (Black Diamond Trekking Poles)
→ Water Bottle (CamelBak Chute or Katadyn Filter Bottle)
→ Portable Charger (Anker PowerCore 5000mAh)
→ Action Camera (GoPro Hero)
→ Energy Bars & Snacks
→ Hat & Sunglasses
→ Sunscreen & Bug Spray
7) Giant Ledge & Panther Mountain Overview
Now that you have the background needed, let’s get into the hike itself. I have included several photos along the way for you to get a better understanding of the terrain and what to expect on the trail.
Trailhead to Giant Ledge
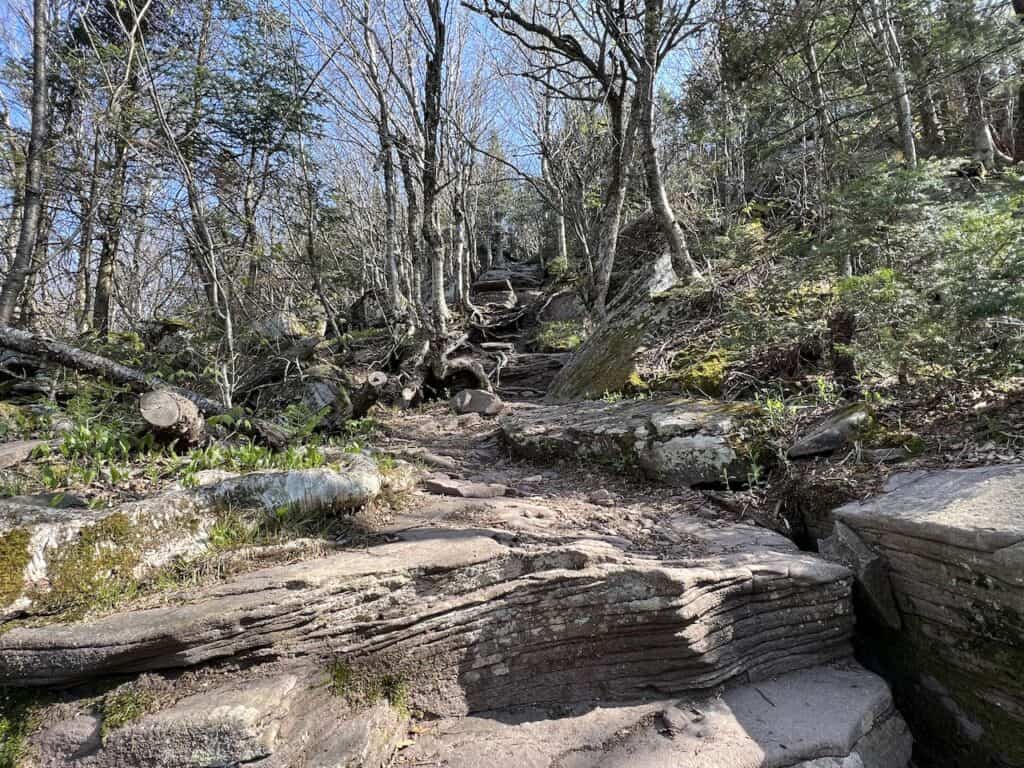
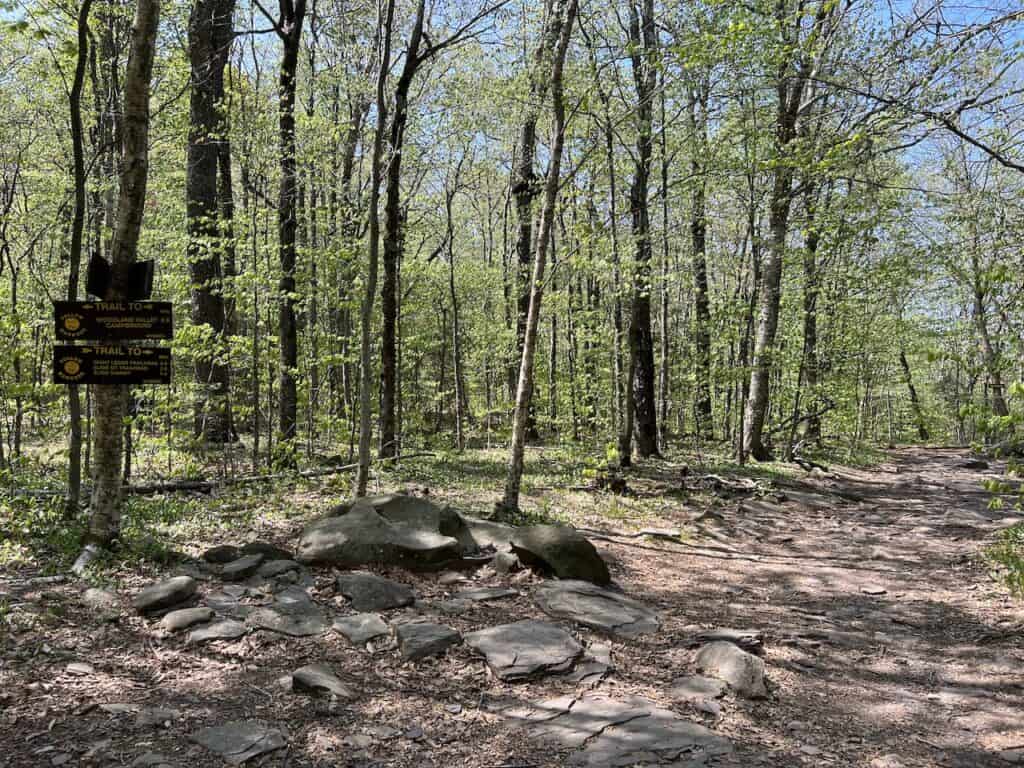
The first portion of the trail takes hikers from the trailhead by the roadside, up nearly 2 miles to the Giant Ledge.
To be clear, there is not just one “Giant Ledge”. Instead I counted up to 10 different viewpoint areas near the top. More on all of those soon!
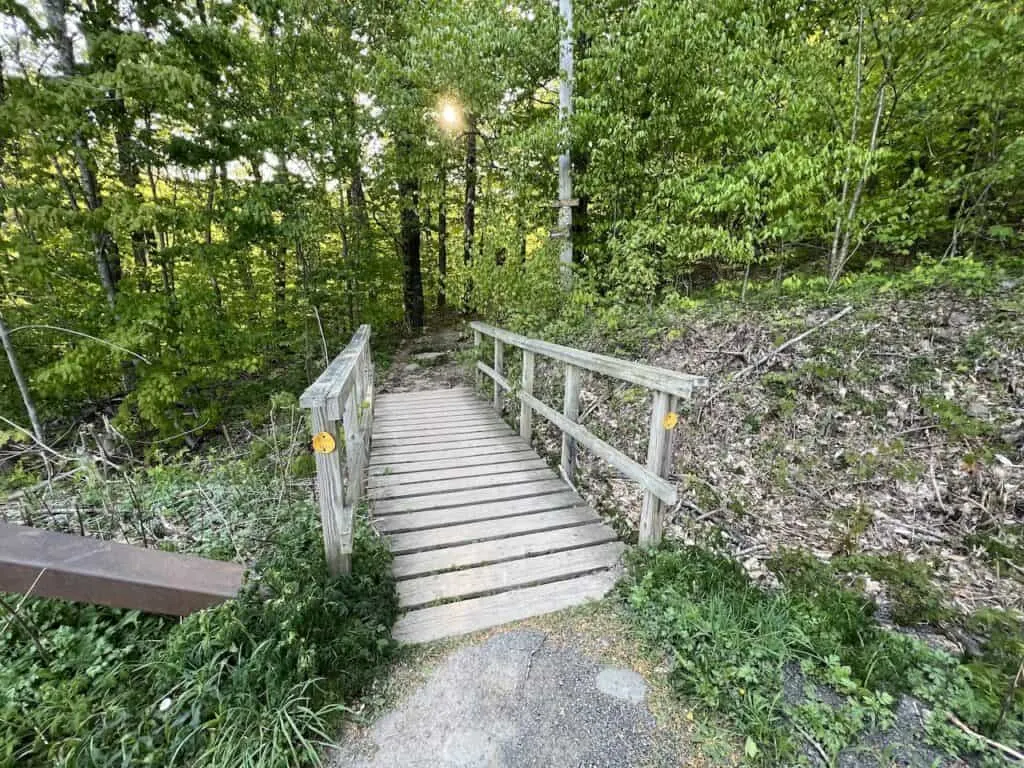
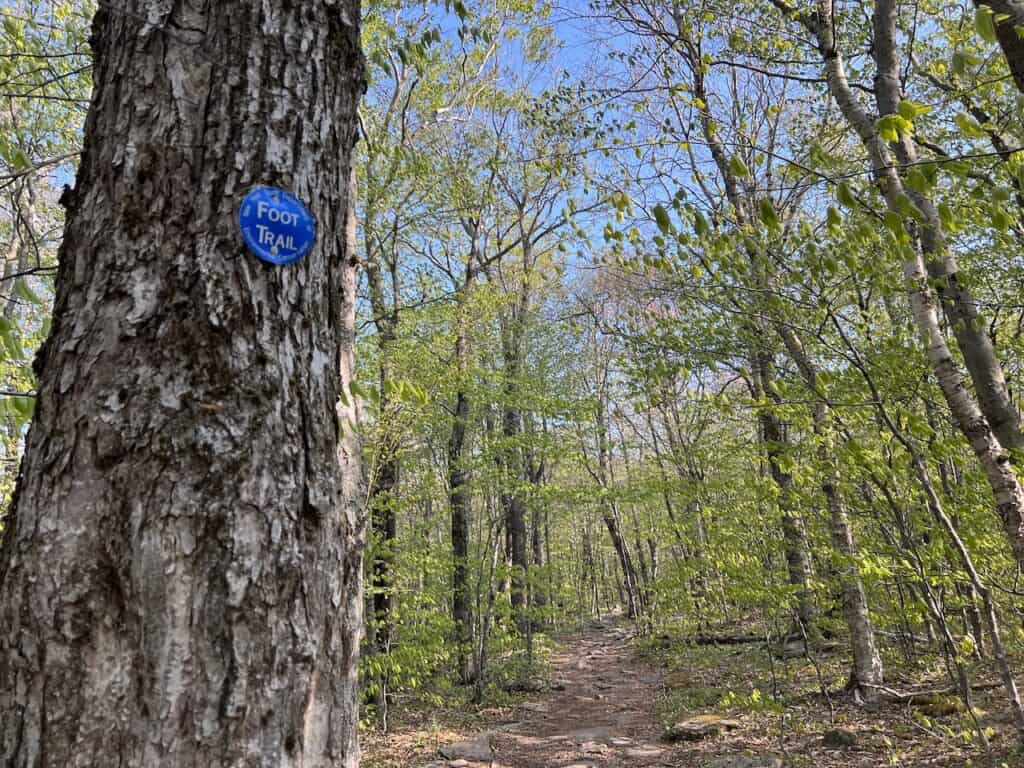
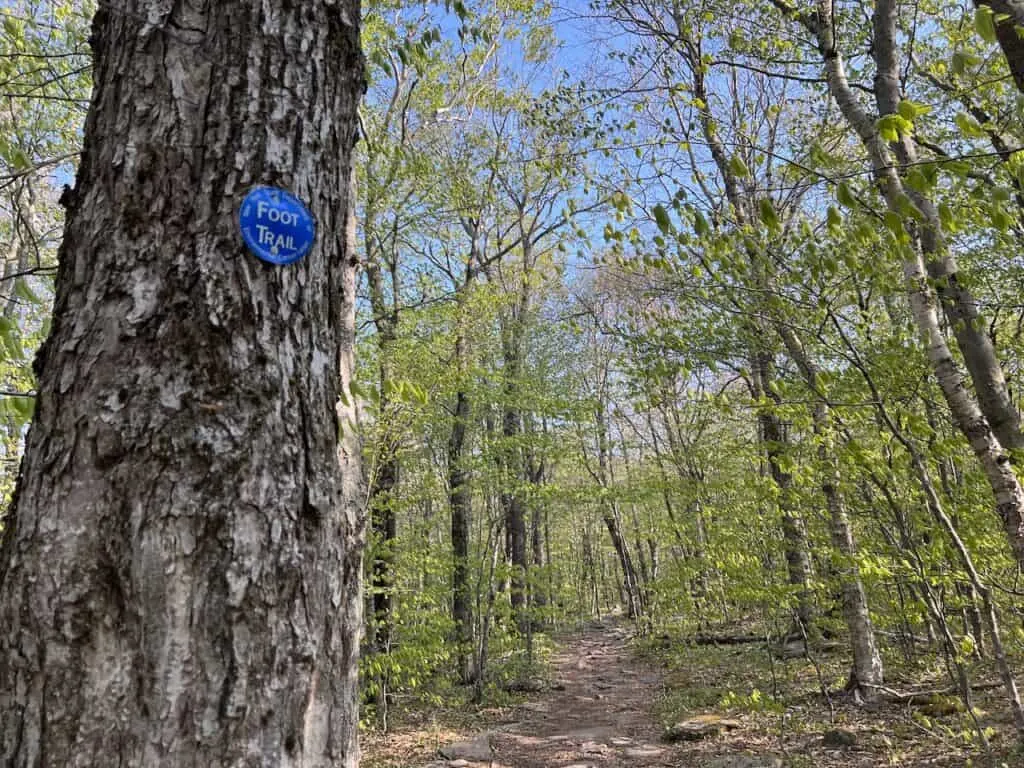
The trail starts by crossing over a bridge, and past the trail sign pointing you on up to the Giant Ledge. From the start of the hike you will be following the Yellow trail markers. Be on the lookout for these markers out on the trees in front of you.


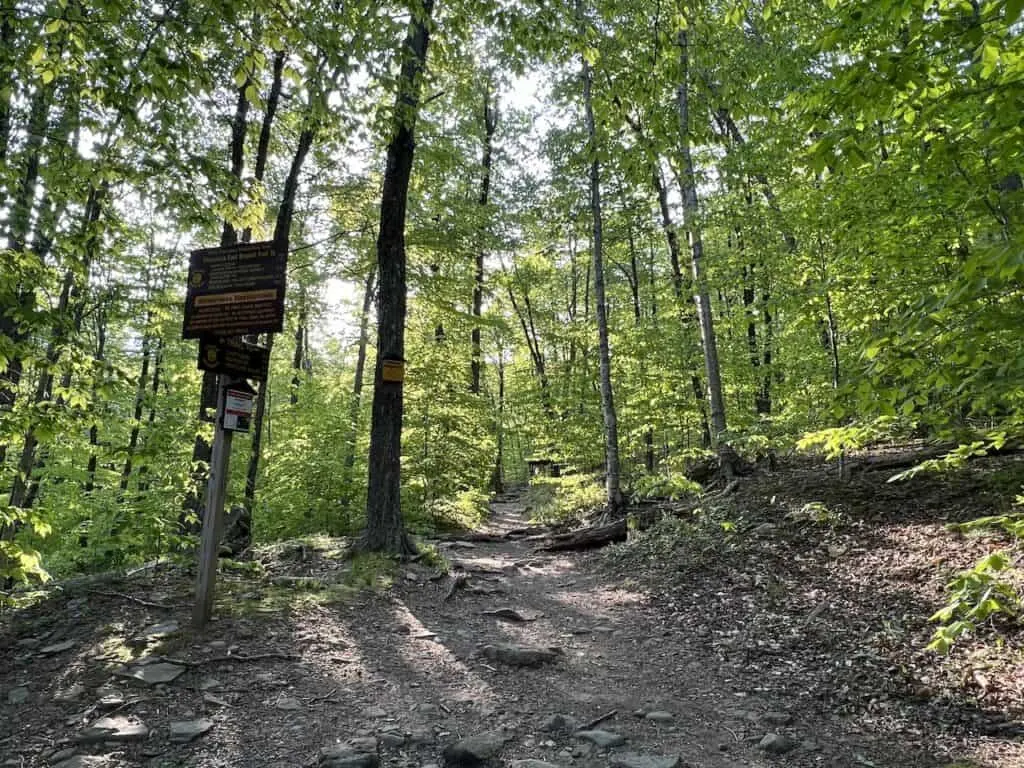
While it is a mostly obvious trail, there may be some sections, where there can be slight confusion. As long as you can keep a tab on the trail markers, you should be good to go.
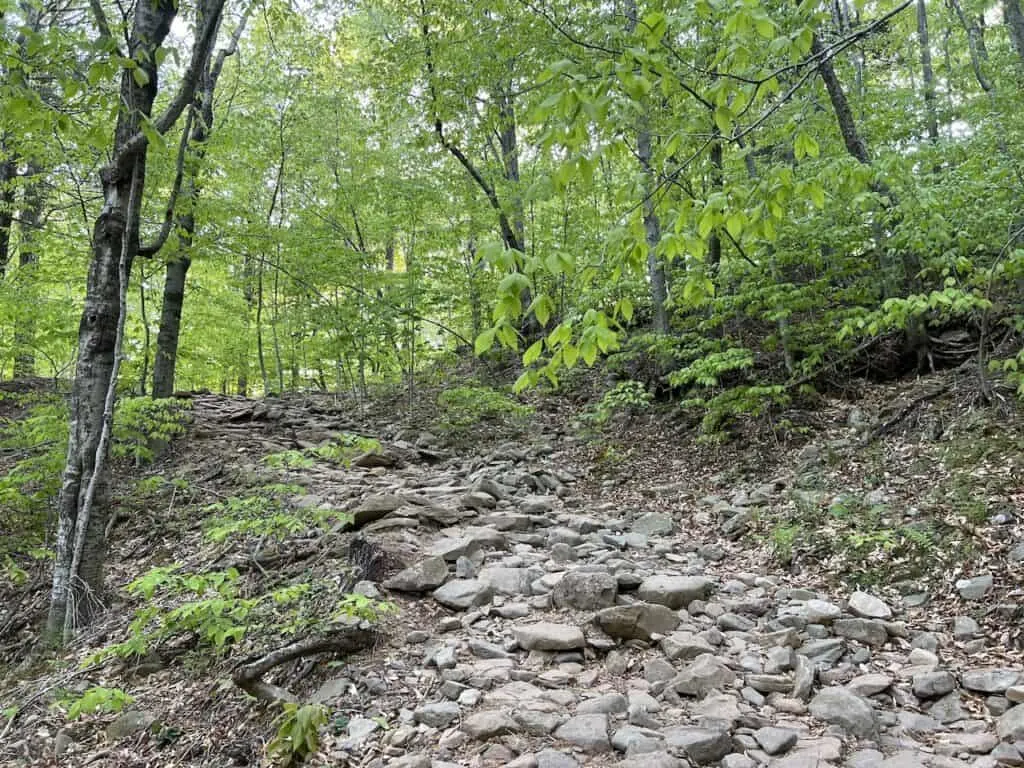
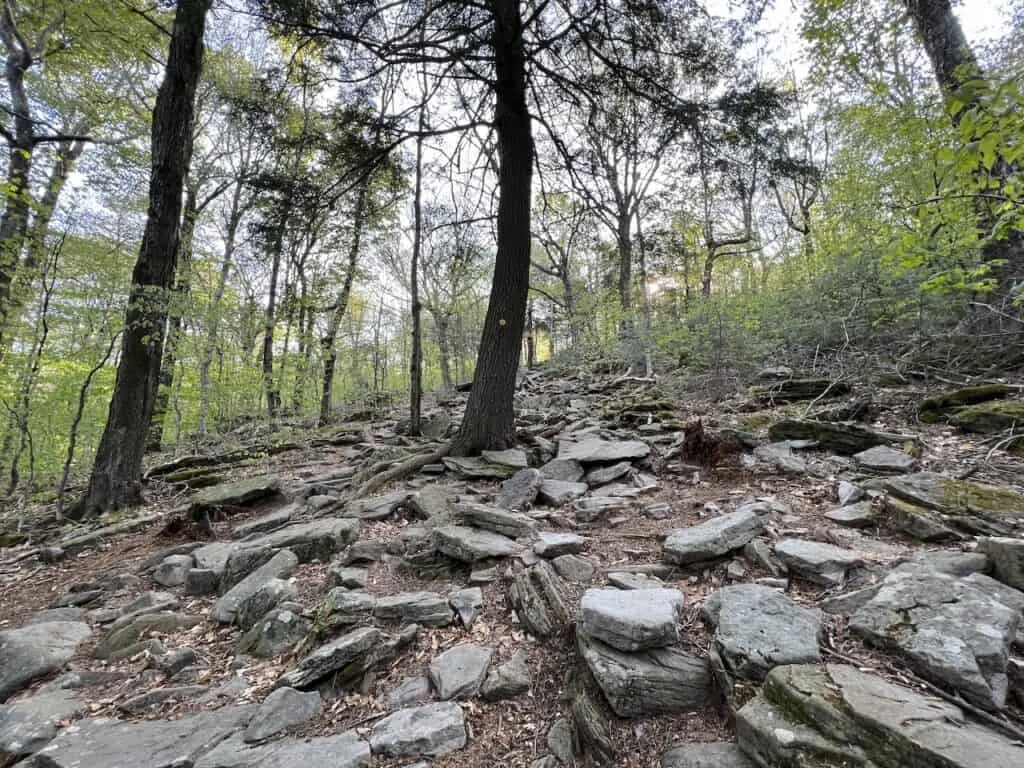
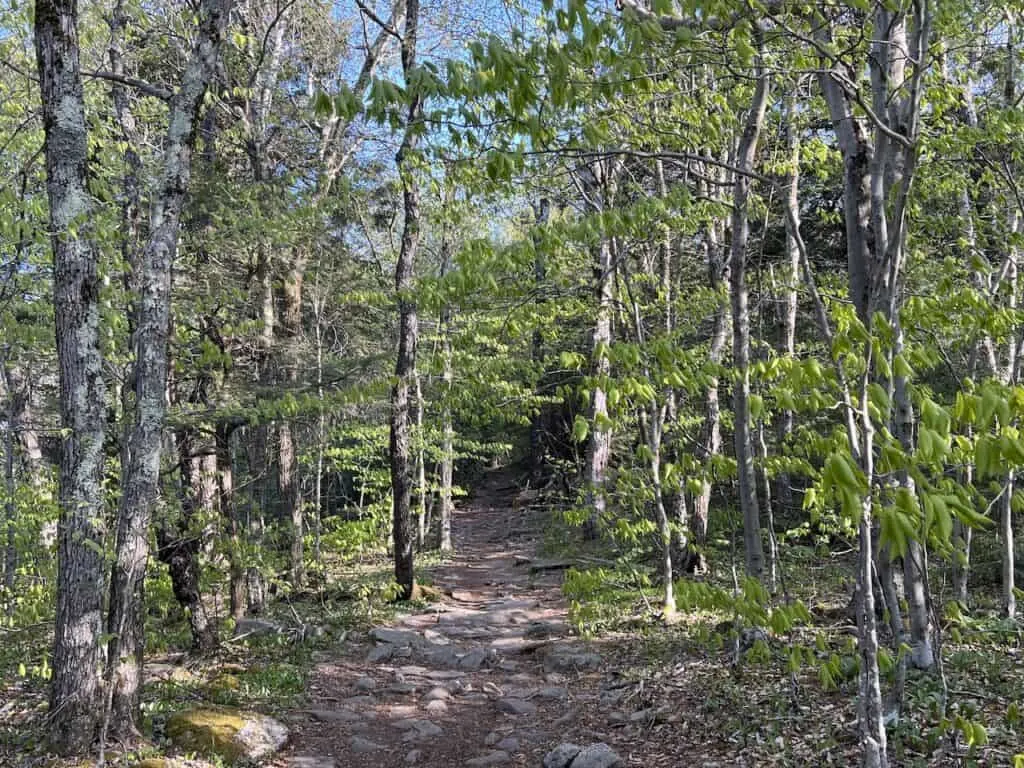
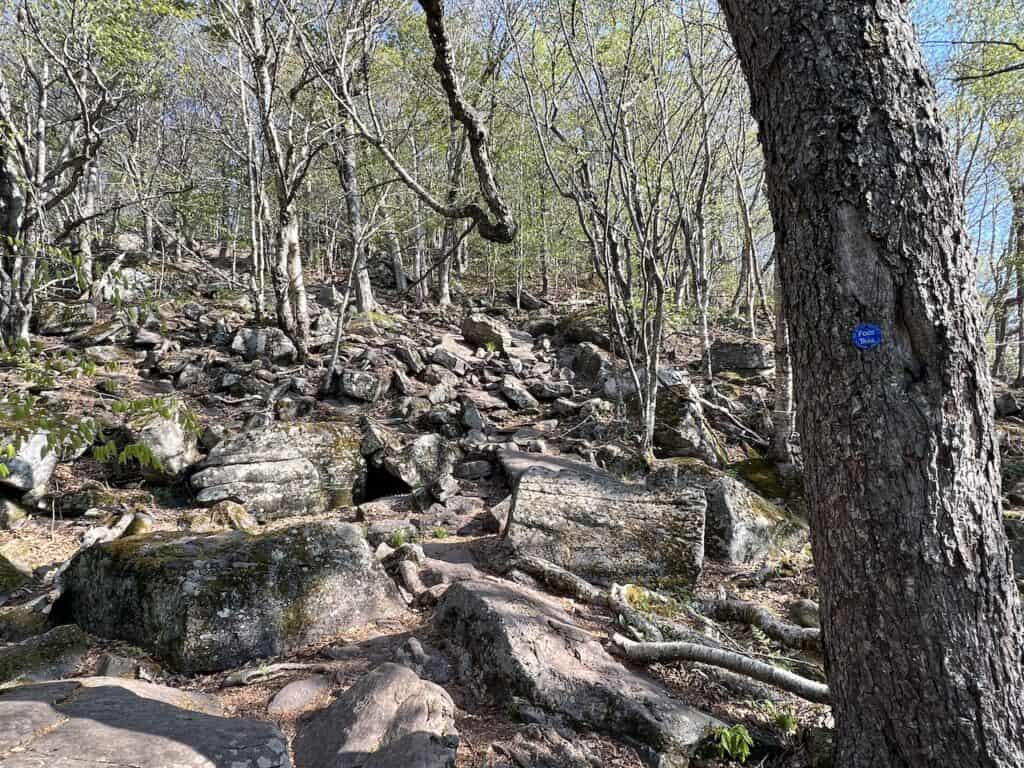
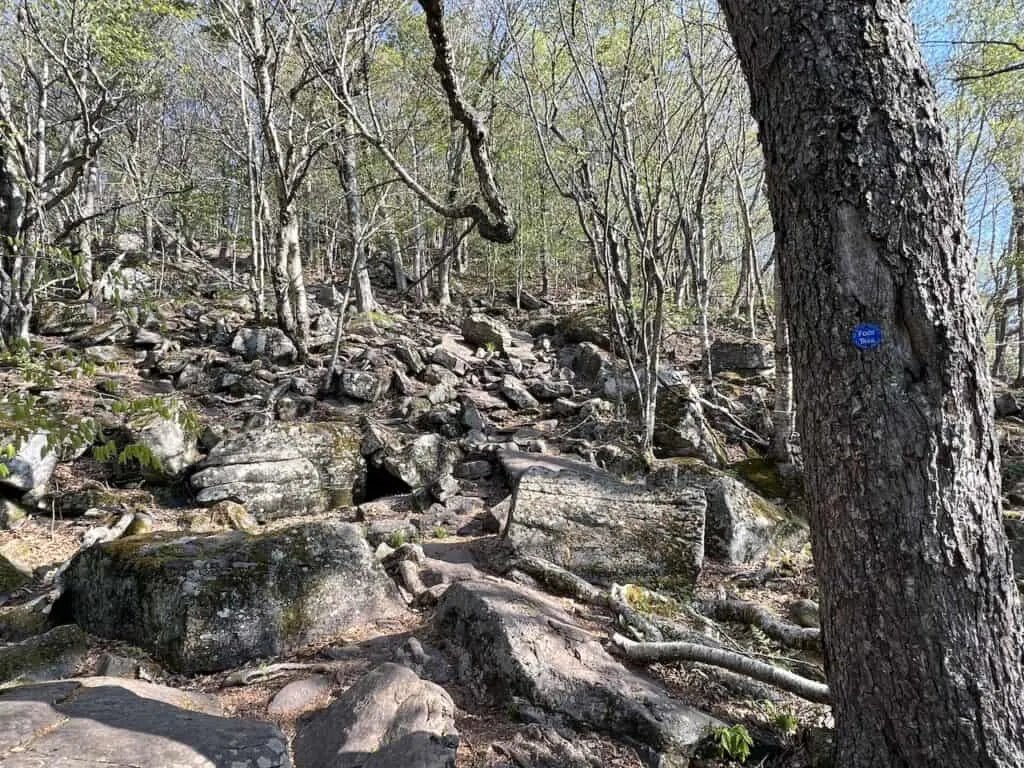
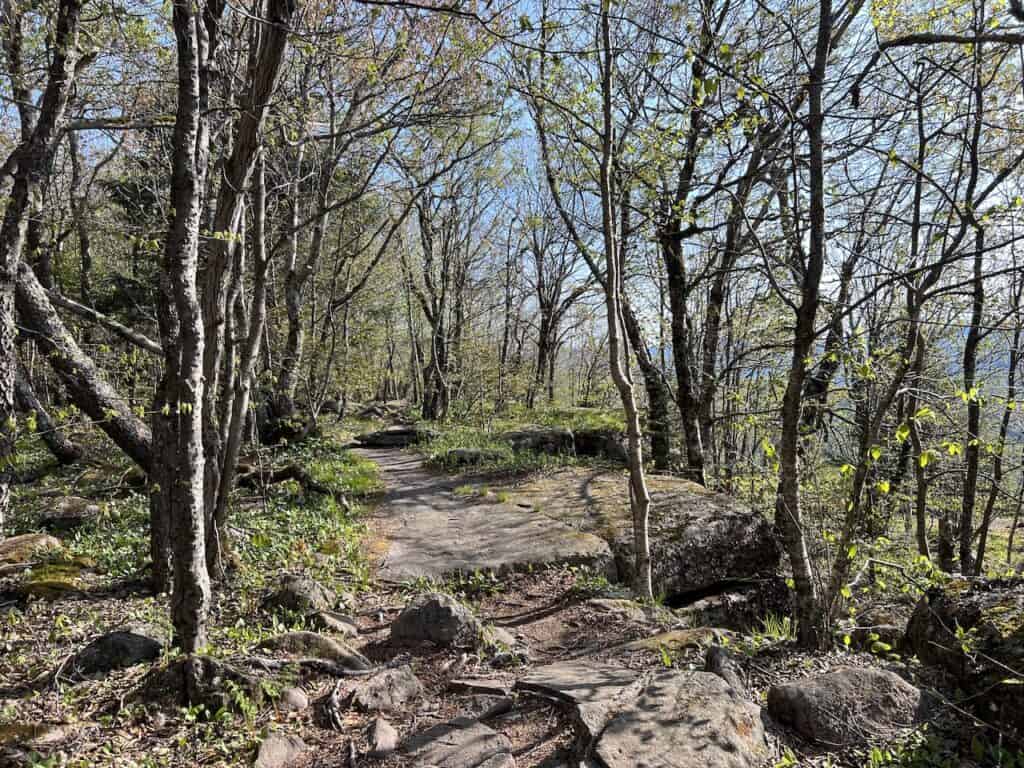
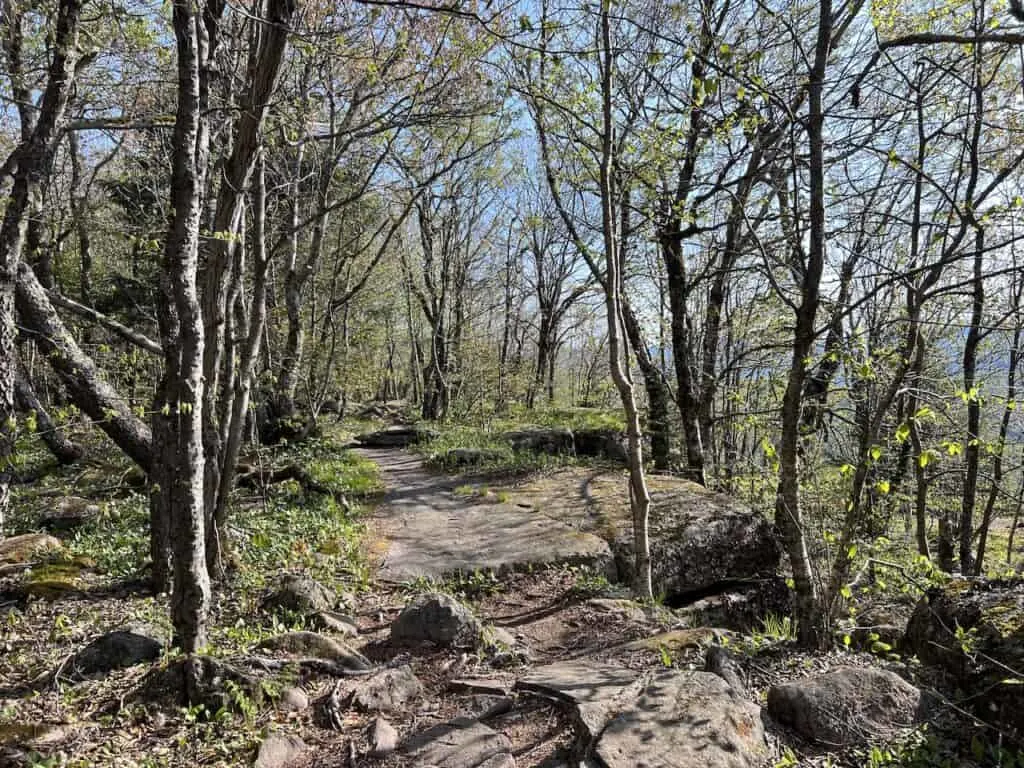
The trail continues through the forest, over another small wooden bridge, and then onto the rocky terrain. This terrain is not the easiest to hike along. While there are some flatter portions of trail, you will find a lot of rocks to maneuver your way around.
Be very careful to watch your step as it can be easy to lose balance.
In addition to the rocky terrain, the trail is also full of elevation gain pretty consistently throughout. This can make it even harder as you are heading uphill on this rocky landscape.


After about 0.75 miles of hiking, you will reach a very important intersection. To your left will be the Blue trail markers that will take you the rest of the way up to the Giant Ledge.
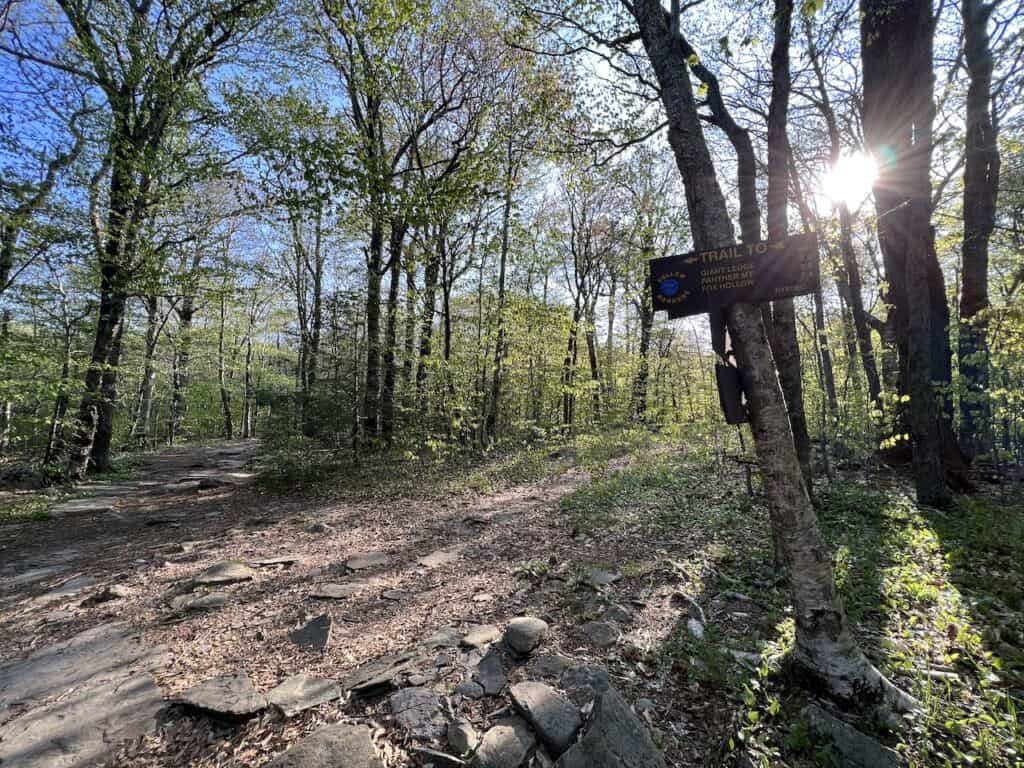

Take that turn as the trail flattens out for a short while. Soon you will come across an intersection pointing to a “Spring”. There isn’t much to see here, but you can check it out if you would like.
After the Spring intersection, you will head up some rocks, before arriving right nearby the Giant Ledge.
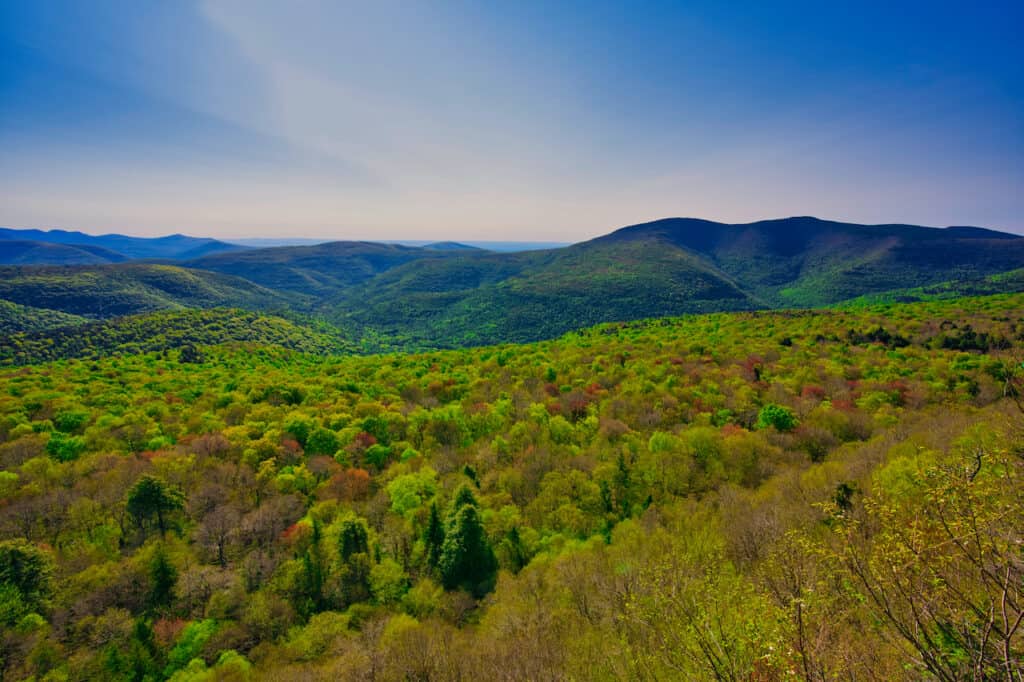
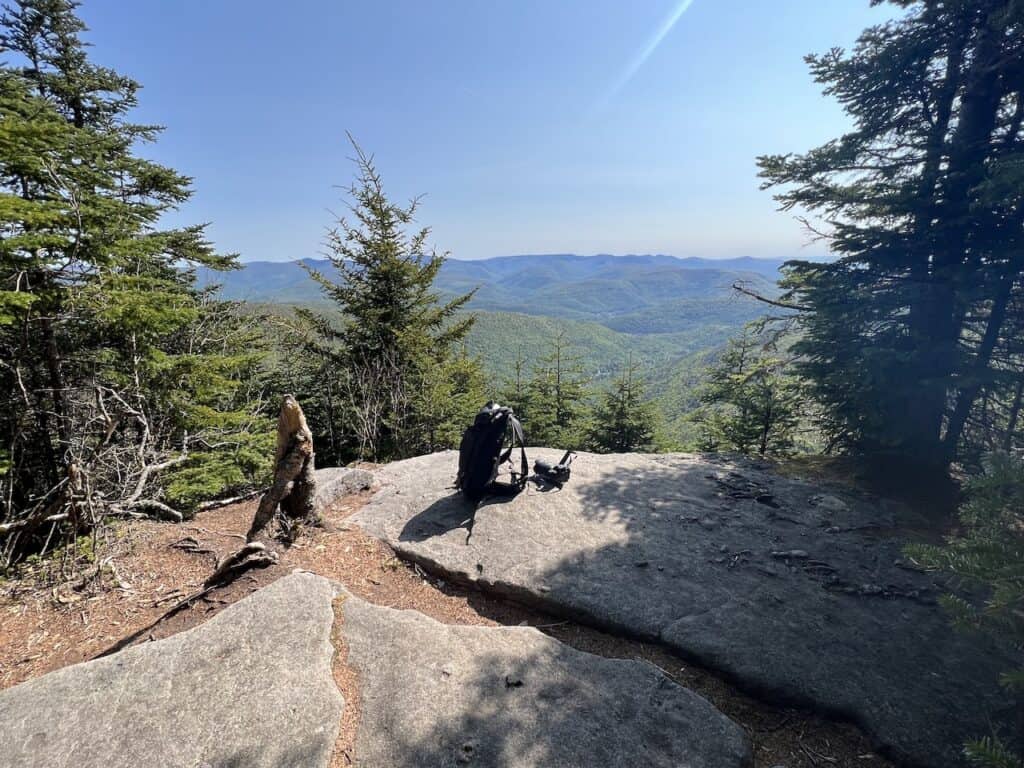
Giant Ledge Viewpoints
Now, here comes the good part – the Giant Ledge viewpoints. As mentioned earlier, there is not just one viewpoint. Instead you will find up to 10 viewpoints all along the trail.
Some of these viewpoints are wide open and unobstructed, while other viewpoints will be more obstructed with trees blocking some of the view.
Just after leaving the Spring intersection, I would recommend opening up your navigation app. This way, you can be sure not to miss a few of the viewpoints off of the “main” trail.
In the image below, you can see there is a route that heads to the right. If you follow this path, you will get to see a couple viewpoints before the trails meet up once again.

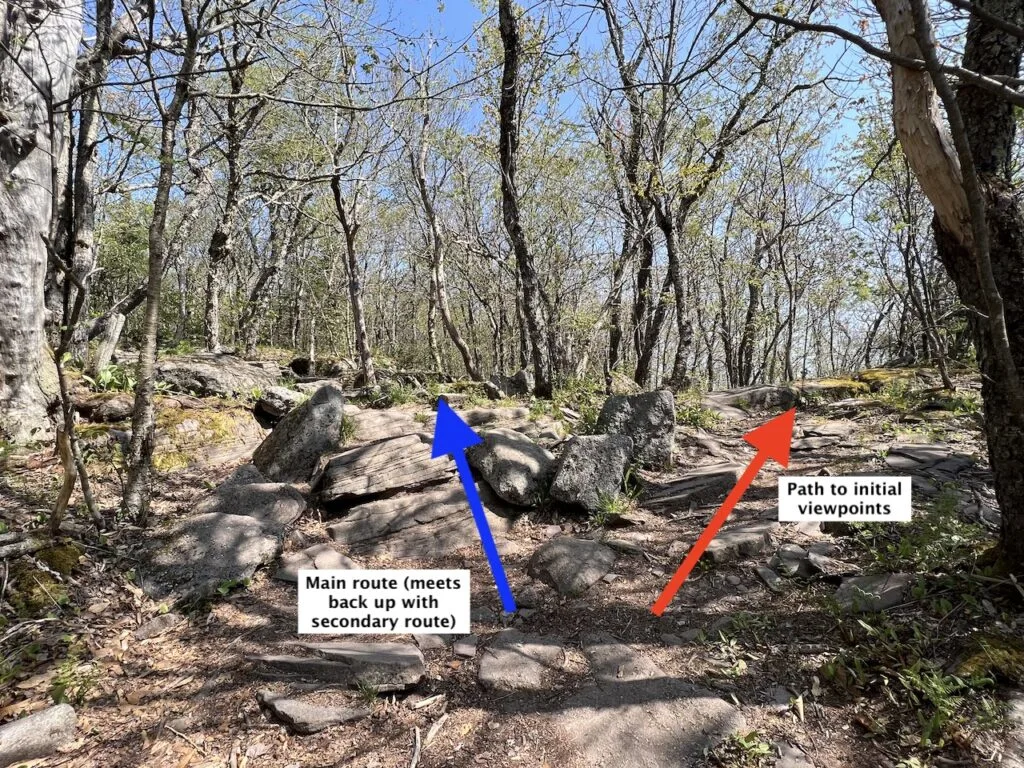
Altogether, I counted 10 ledges throughout the 0.3 mile section of trail. On the map above, I pinpointed each one so you can get a better idea of where they are in relation to one another.
Viewpoint Note: some of these viewpoints are tagged on navigation apps like Maps.me & AllTrails. However, several of the best ones were not. Be sure to head out to the final sets of viewpoints to not miss out!
- Giant Ledge Viewpoints #1 & #2: The first two viewpoints on the “secondary route” are some of the best ones out there. You will get those unobstructed views of the surrounding landscape that just go on for miles and miles.
- Giant Ledge Viewpoint #3: After the two routes connect back up, is another viewpoint. This one is a bit more obstructed though with the nearby trees.
- Giant Ledge Viewpoint #4: This is a great unobstructed viewpoint ledge. You can walk out onto the rocks for a great panorama.
- Giant Ledge Viewpoints #5 & #6: Following the wide open view, there are two more viewpoints that will be more obstructed with the surrounding trees.
- Giant Ledge Viewpoint #7 & #8: Continue on though, because here were my favorite Giant Ledge viewpoints. Just a beautiful wide open view out in front with rolling hills of trees as far as you can see.
- Giant Ledge Viewpoints #9 & #10: If you continue to walk a few more minutes along the pathway, there are two final viewpoints to check out. These again are top views in my opinion. So, if the previous ones were crowded, then walk a bit further to reach these.
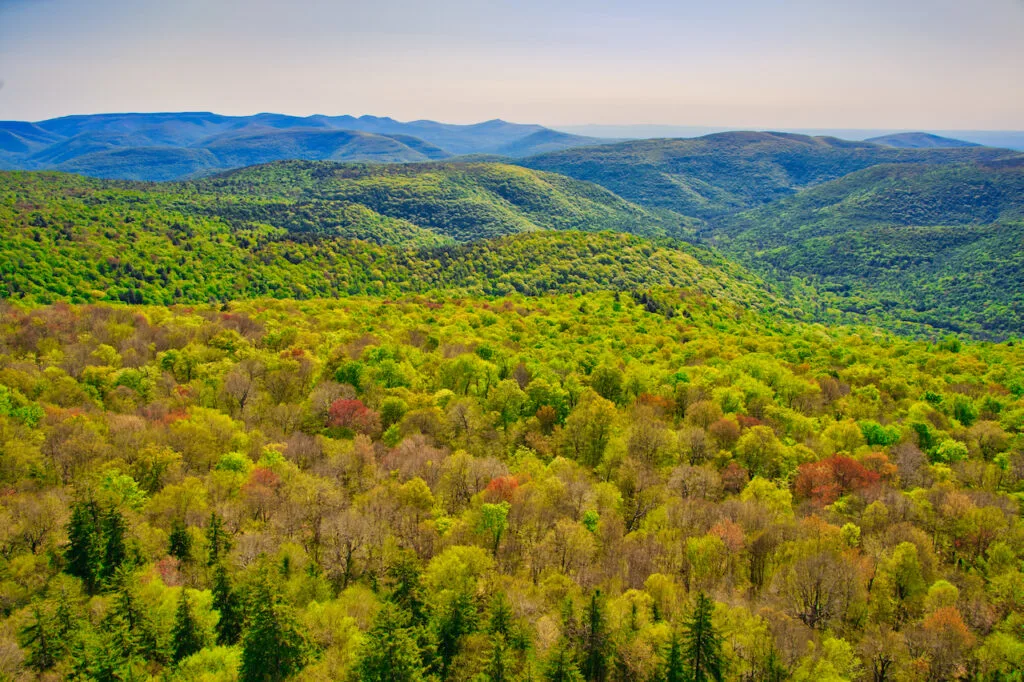
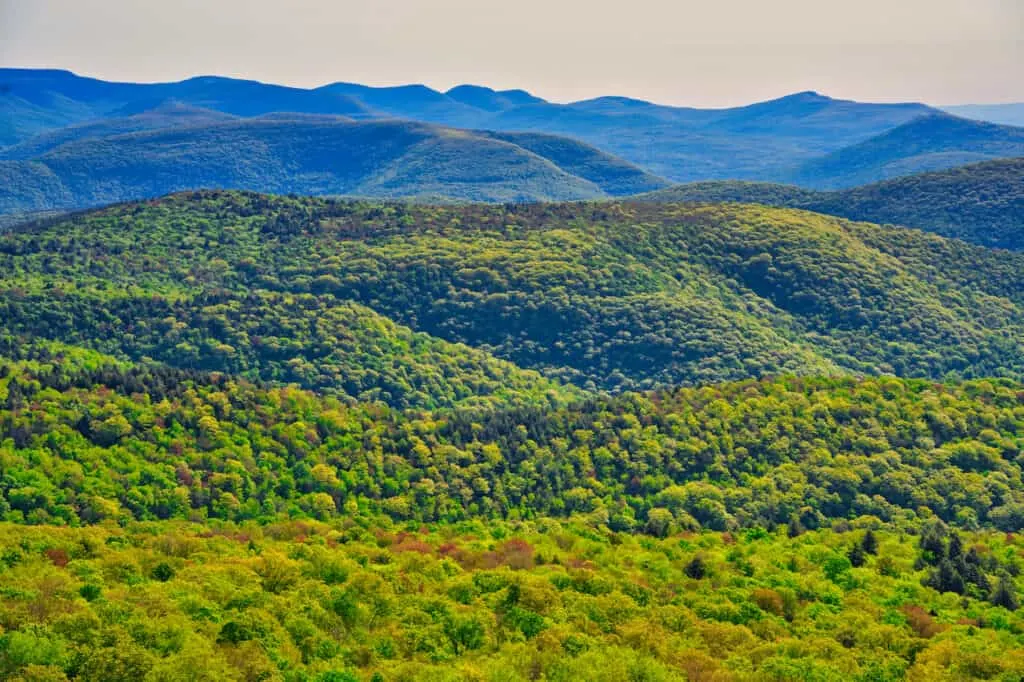
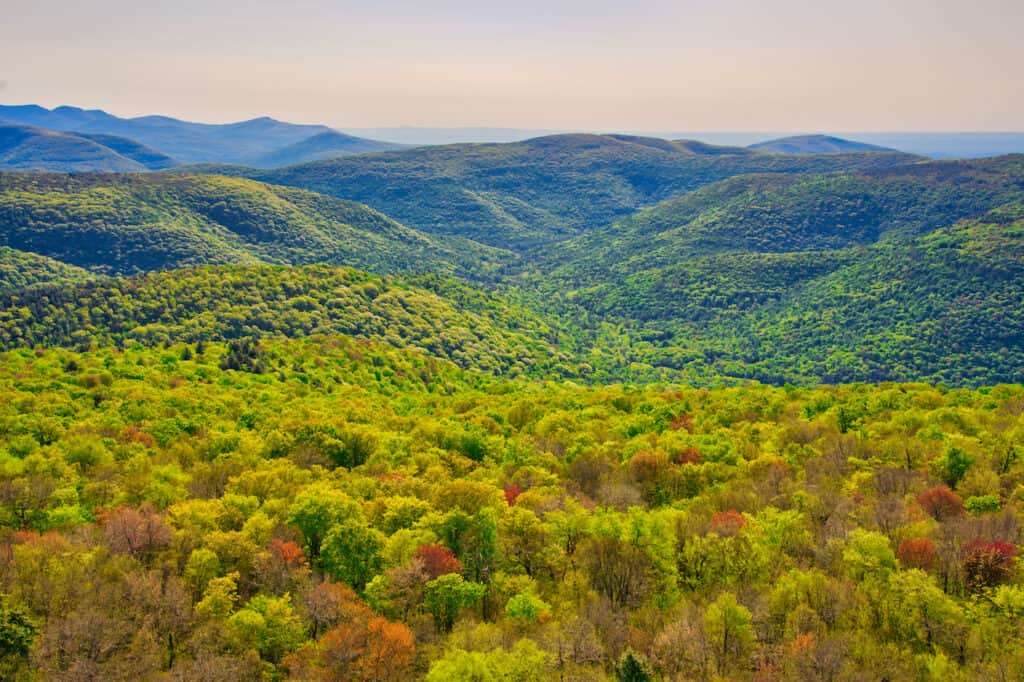
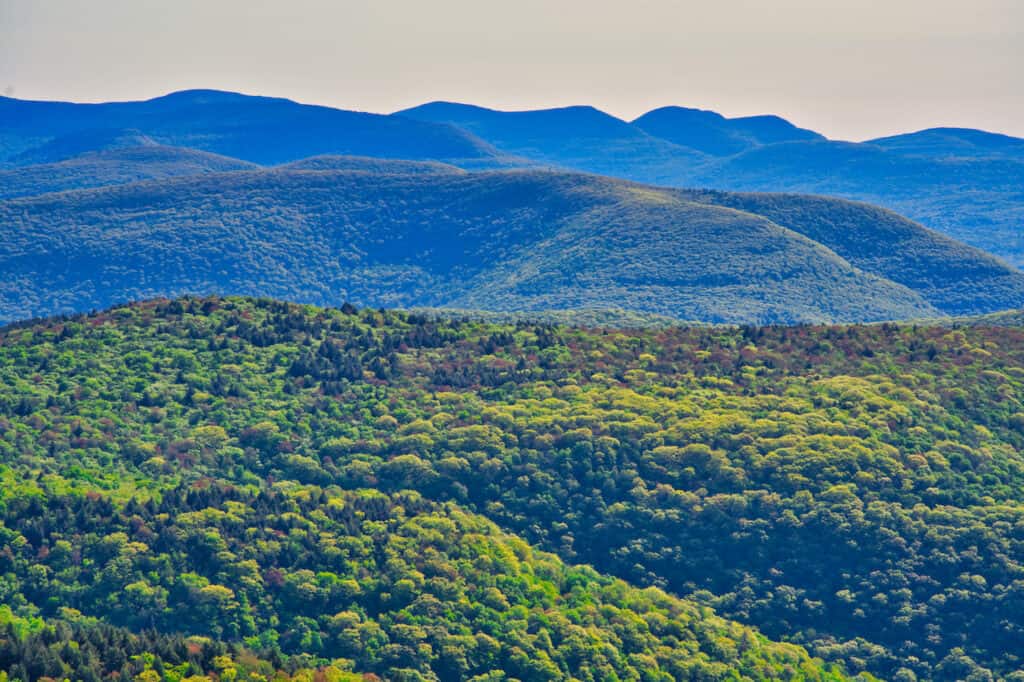
Giant Ledge Photos
Below are a handful of photos of the various views from the Giant Ledge viewpoints. Depending on the season, you may get different colored trees compared to what you see in the pictures.


Giant Ledge to Panther Mountain
So, by now you would have seen the best of the best that this hike has to offer. But if you are up for a challenge, you can continue for another 1.5 miles to reach the Panther Mountain summit.
Now, while there is a viewpoint at the summit, which is high in elevation, it just does not compare to the views that you will get at the Giant Ledge viewpoints.
The main goal to take on Panther Mountain is more so for the hike itself, not necessarily to get better views. Some of these underlying reasons include:
- Reaching the Panther Mountain Summit
- Getting to over 3,500 feet of elevation
- Taking on a ~4 hour hike, instead of a 2 hour one
These are all great reasons to continue on. But if you are more than fulfilled with the hike and the views at Giant Ledge (and prefer a shorter hike altogether), then I wouldn’t say you need to go to the summit.
After leaving the final viewpoint at Giant Ledge, the trail continues through the forest and further up the rocky terrain. You will gain another ~800 feet of elevation over the course of 1.5 miles following the blue trail markers along the way.
Be on the lookout for the 3,500-foot elevation marker! This is one reason why people want to continue up.
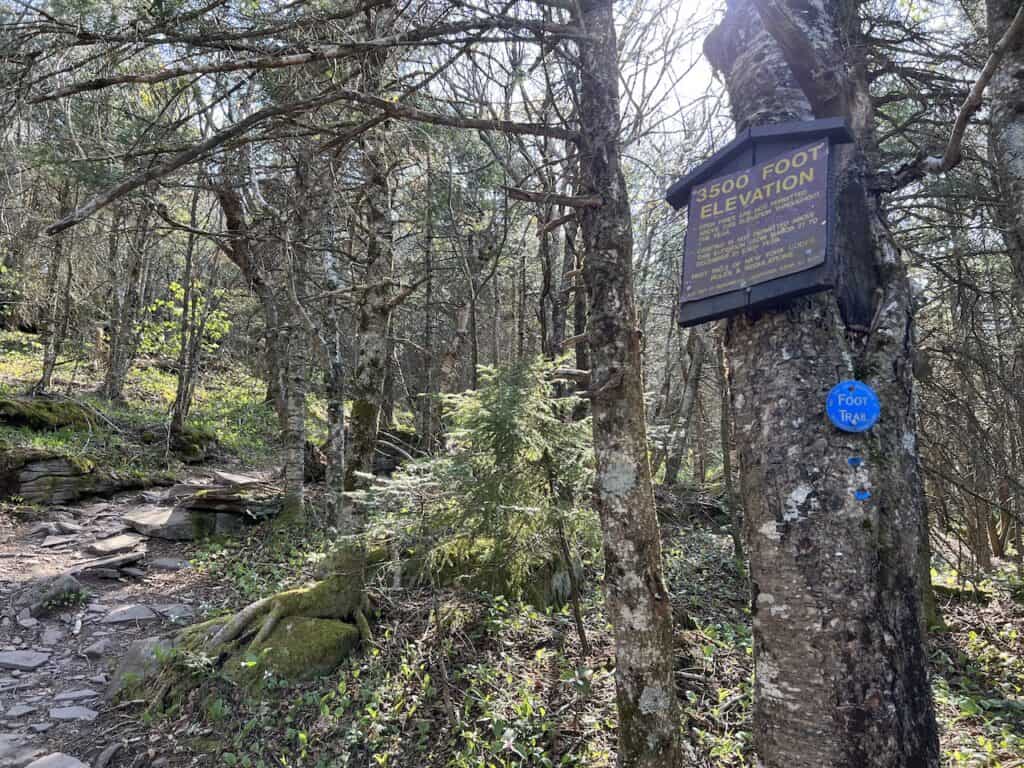

Slowly but surely you will reach the summit of Panther Mountain. You can see on the map, that the viewpoint is just past the summit area.
The view from here is beautiful but it can be a bit obstructed by the trees on either side. Overall though, it is a relaxing place to take a seat and hang out before turning right back around.


Back to the Trailhead
From the Panther Mountain summit, you then will simply retrace your steps all the way back to the trailhead. Be careful as you head down the rocky terrain and watch your footing along the way.
There should just be one main intersection to pay attention to, where you will switch over from the blue trail markers to the yellow trail markers.
Once back at the trailhead, you can simply cross the street and hop back into your car.

That wraps up a guide to the Giant Ledge and Panther Mountain hike. If you have any questions or comments, be sure to add them in below.
Feel free to also check out some other New York itineraries and guides. Some other Hudson Valley hikes include:
- Bear Mountain
- Beacon Mountain
- Storm King Mountain
- Breakneck Ridge
- And Many More!
Have fun out there and safe travels!