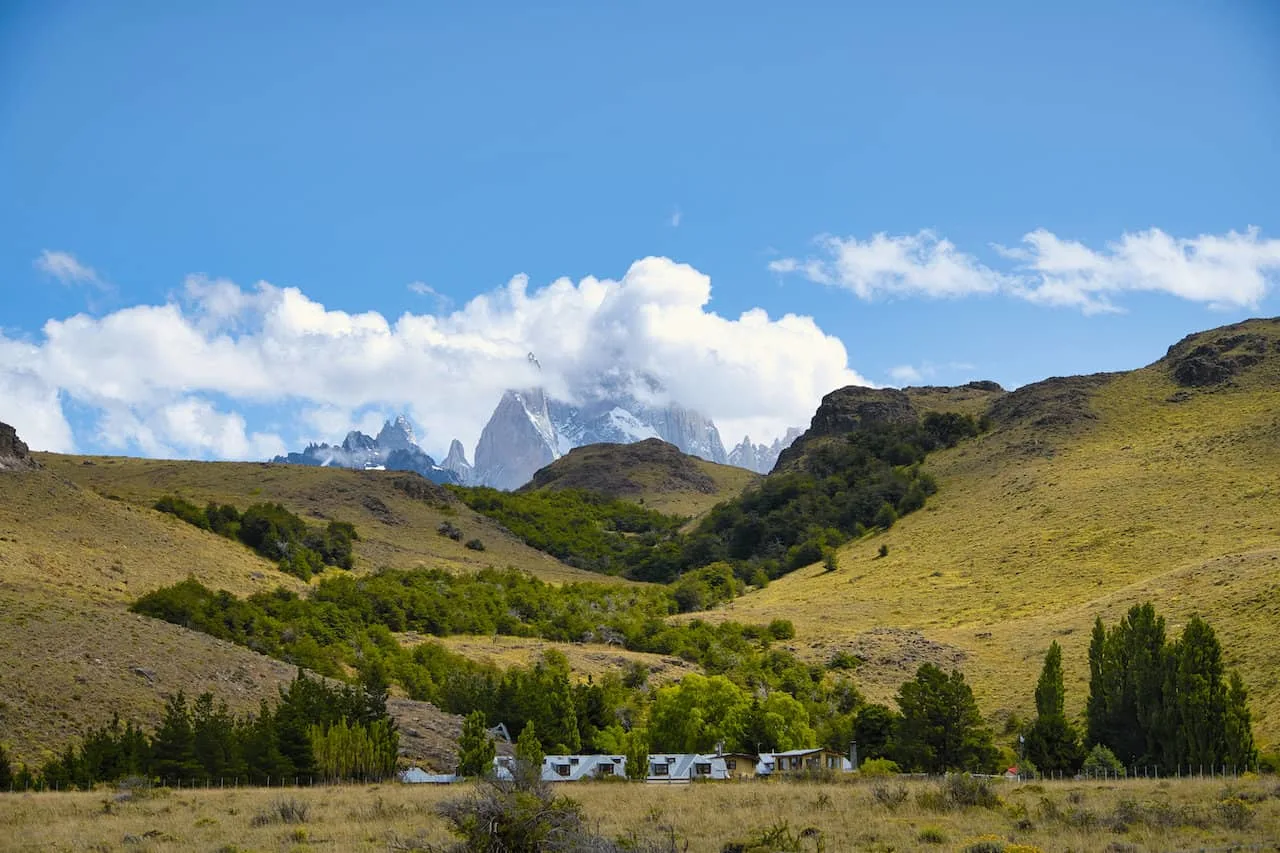
When it comes to hiking in Patagonia, there are so many options out there. While I took part of many hikes across several regions, the Huemul Circuit of El Chalten truly stood out among the rest.
Over the course of 4 days and 3 nights, the Huemul Circuit takes you across some of the most picturesque and unique landscape you can ask for.
Whether it is hiking along rivers, on glaciers, over mountain passes, or even getting a view of the Southern Patagonian Ice Fields, the Huemul Circuit has it all and more.
This trekking guide is meant to be comprehensive, covering all the various topics to consider. By the end of reading through, you should have everything you need to know to take on the trail for yourself.
* Affiliate Disclosure: This post may contain affiliate links, which means I may receive a commission if you make a purchase through the links provided, at no additional cost to you. Thanks for supporting the work I put into TripTins!
1) Huemul Circuit Overview
The Huemul Circuit (pronounced way-mool) is a 4 day / 3 night loop trail located just on the outskirts of El Chalten, Argentina. The trail takes you along some of the most impressive landscapes you can ask for in the region.
This is no ordinary hike though and should only be attempted by those with the appropriate skills and experience. It is mostly unmarked, with technical terrain, two river crossings (where ziplines / Tyrolean traverses are used), two mountain passes, and some steep descents.
Since this is a multi-day overnight trail, you will also need to bring everything with you on the hike. Camping gear, food, clothing, a harness (more on that soon) & more, will all need to go into your backpack and along for the trek.
However, with this difficulty does come much reward. The views, landscape, and experiences on this trek are unparalleled. Some of the highlights include:
- Hiking down the Toro Valley with the Patagonian mountains all around
- Taking part of 2 Tyrolean traverses over Rio Tunel (day 2 & 4)
- Walking along the Rio Tunel Inferior Glacier
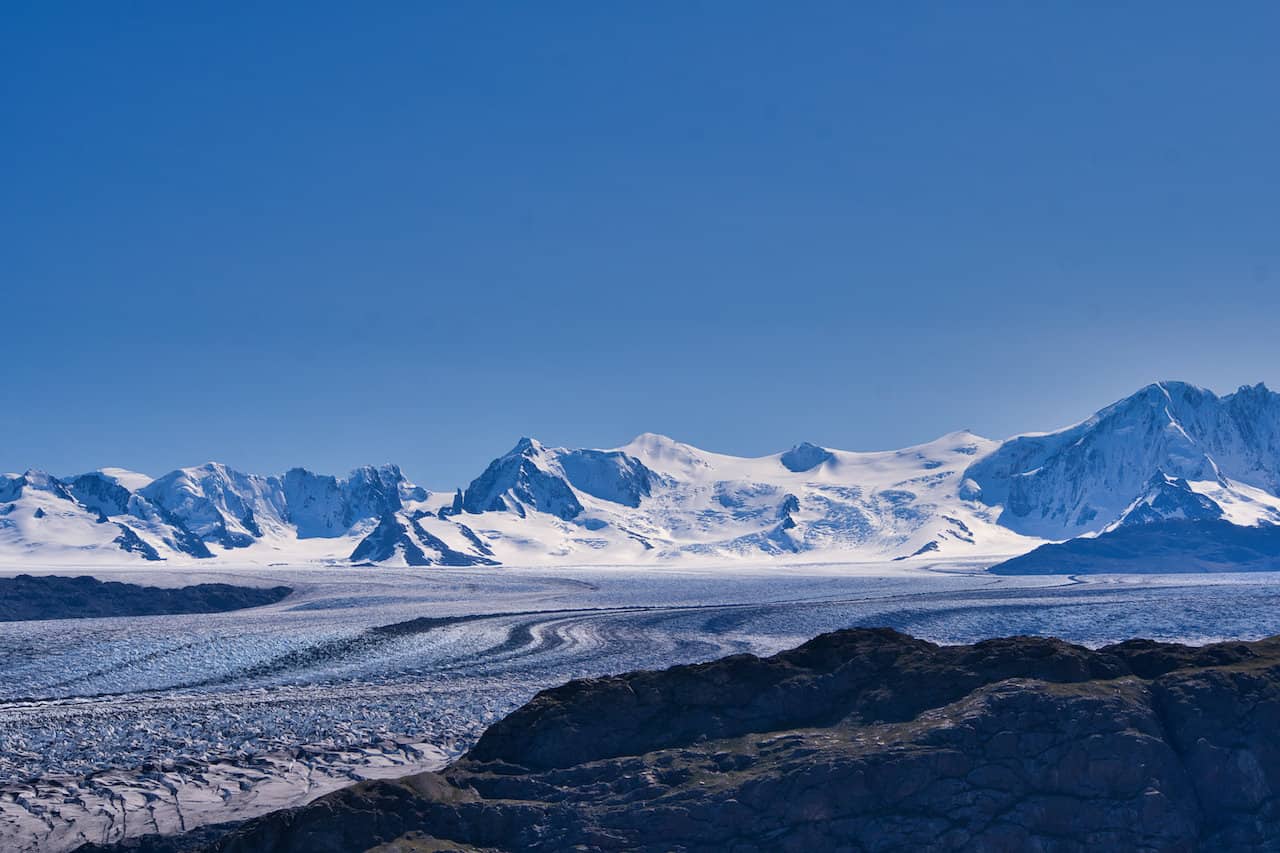
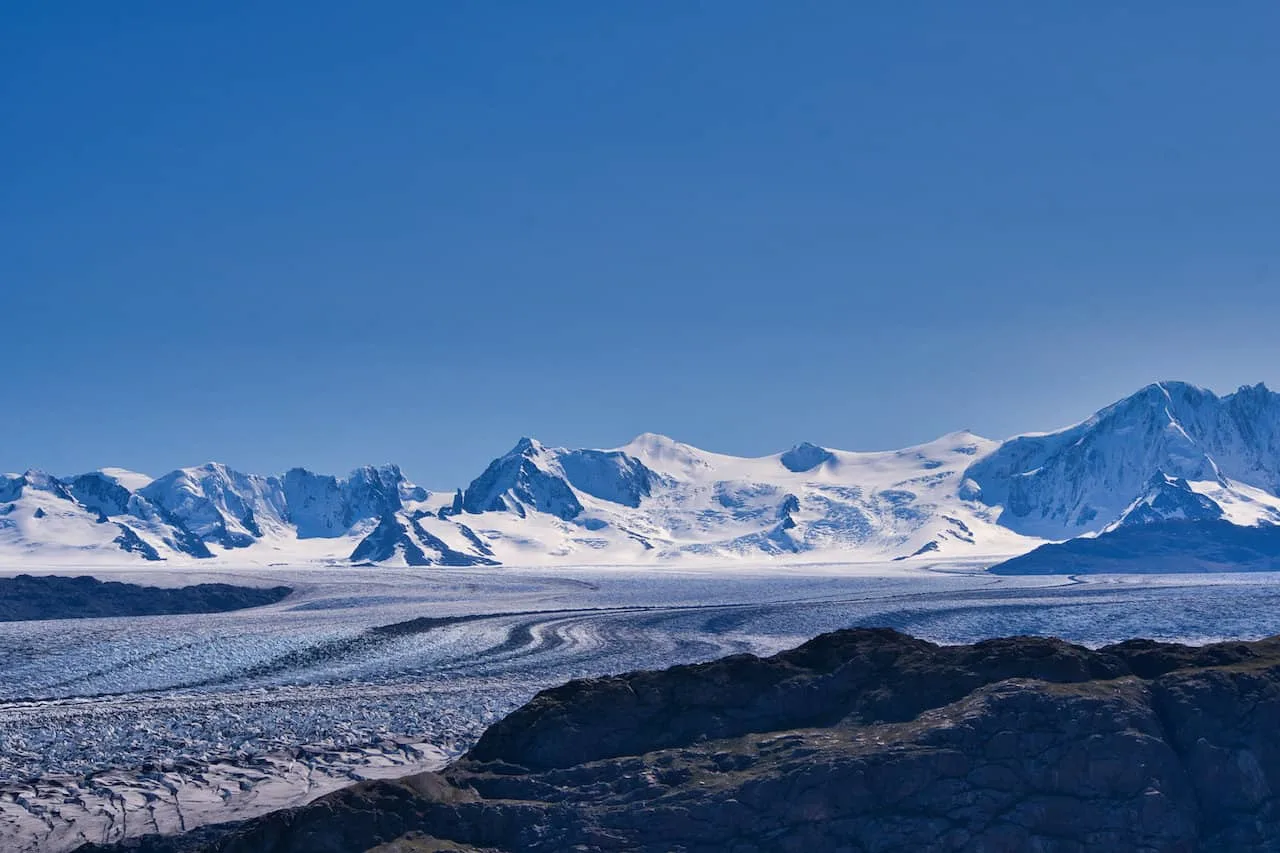
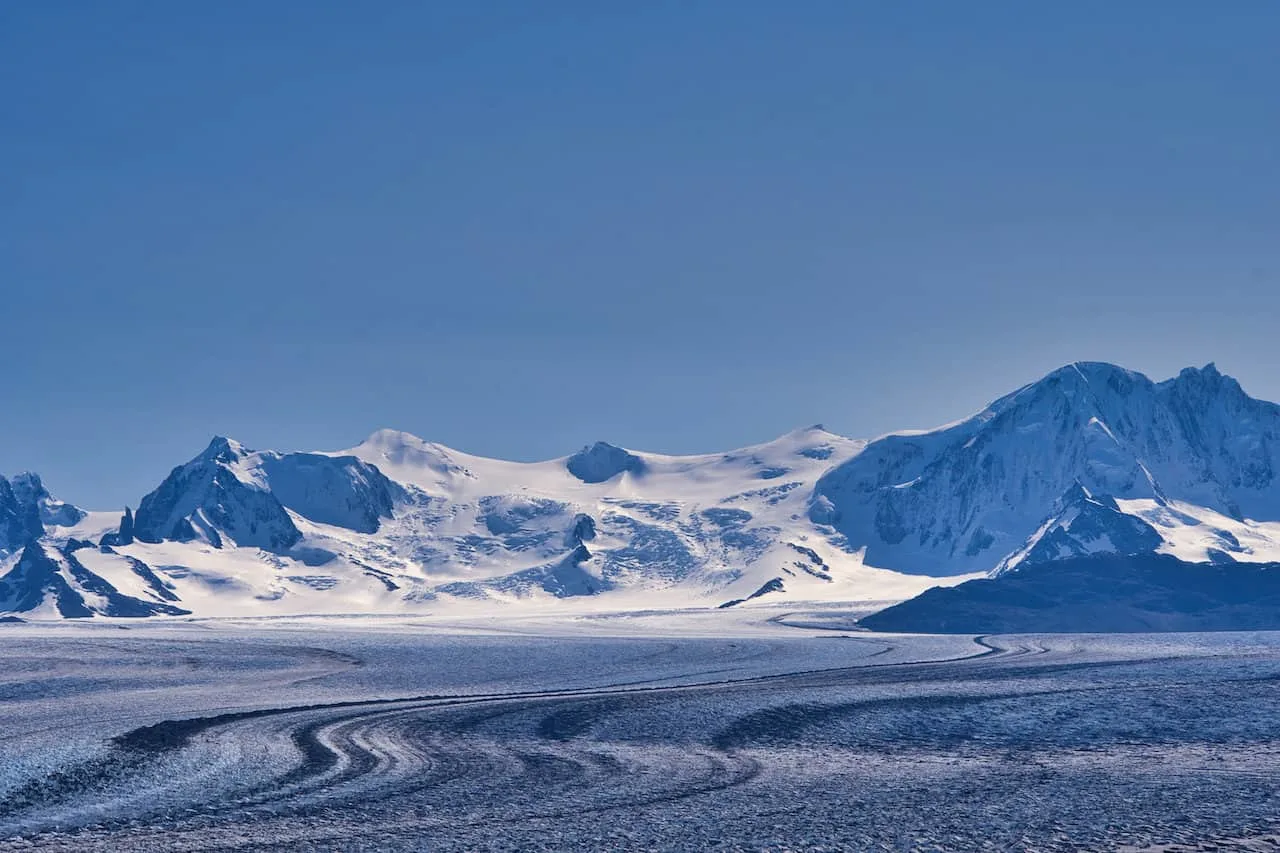
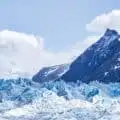
- Taking in the views from Paso del Viento of the Southern Patagonian Ice Field – the second largest contiguous extrapolar ice field in the world, and the only hike in El Chalten that offers the view
- Enjoying the panorama from Paso Huemul of the Viedma Glacier
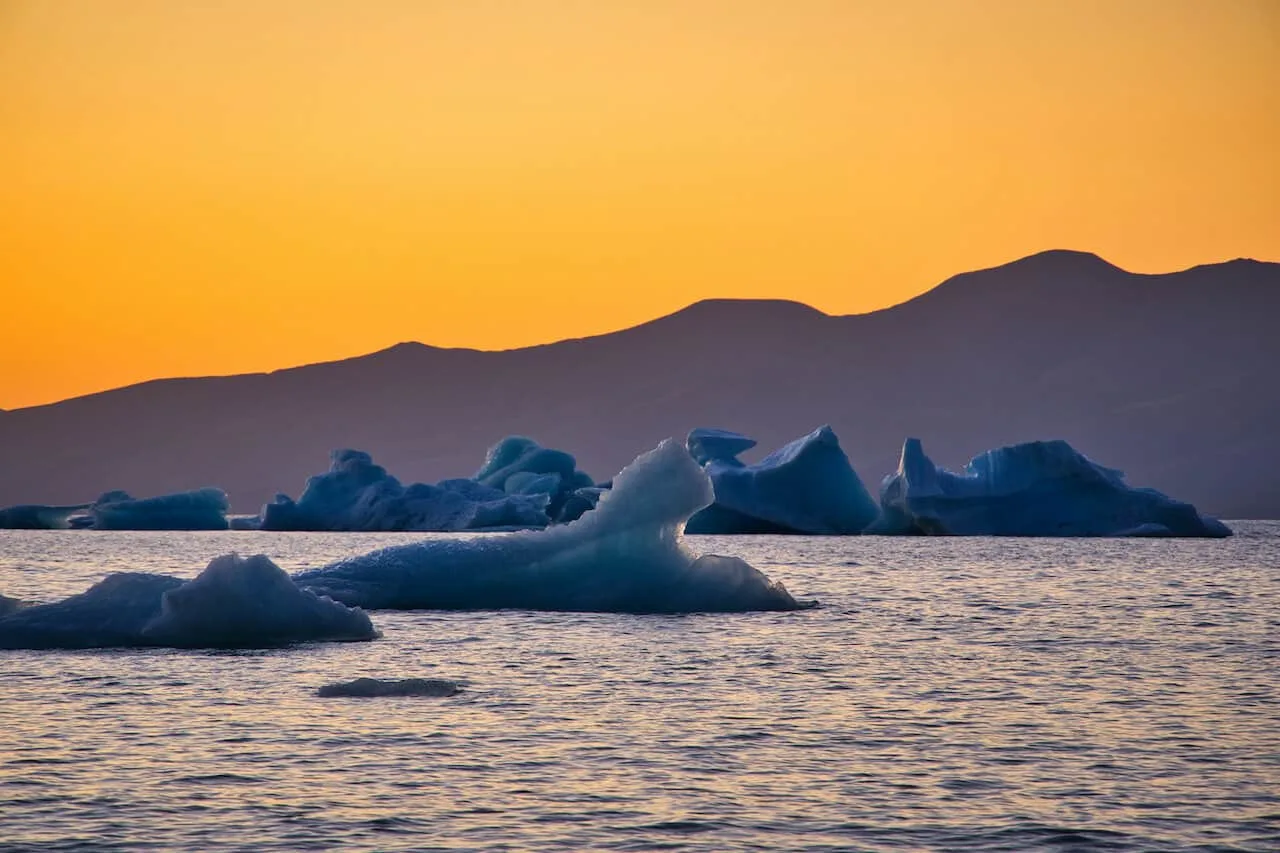
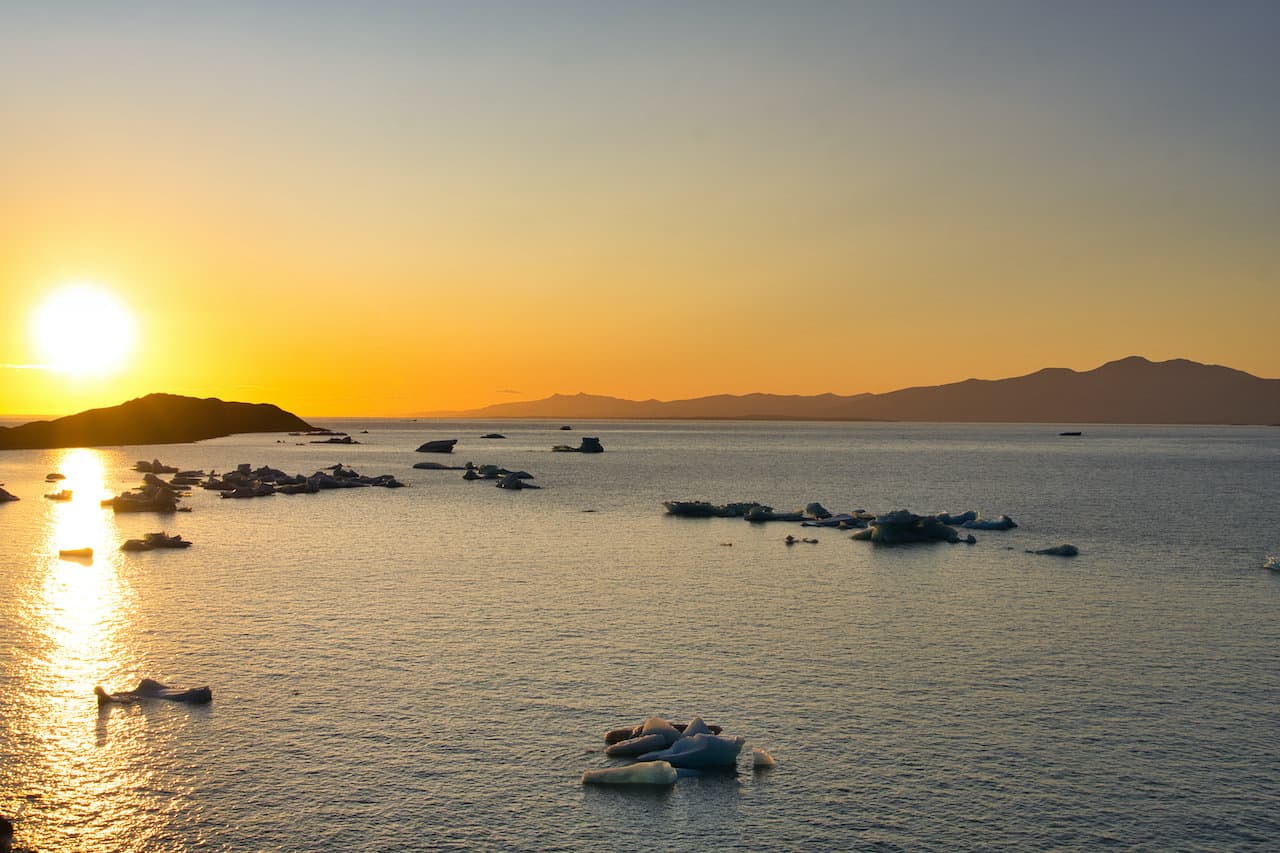
- Waking up at Camp Bahia Tempanos for an iceberg filled sunrise
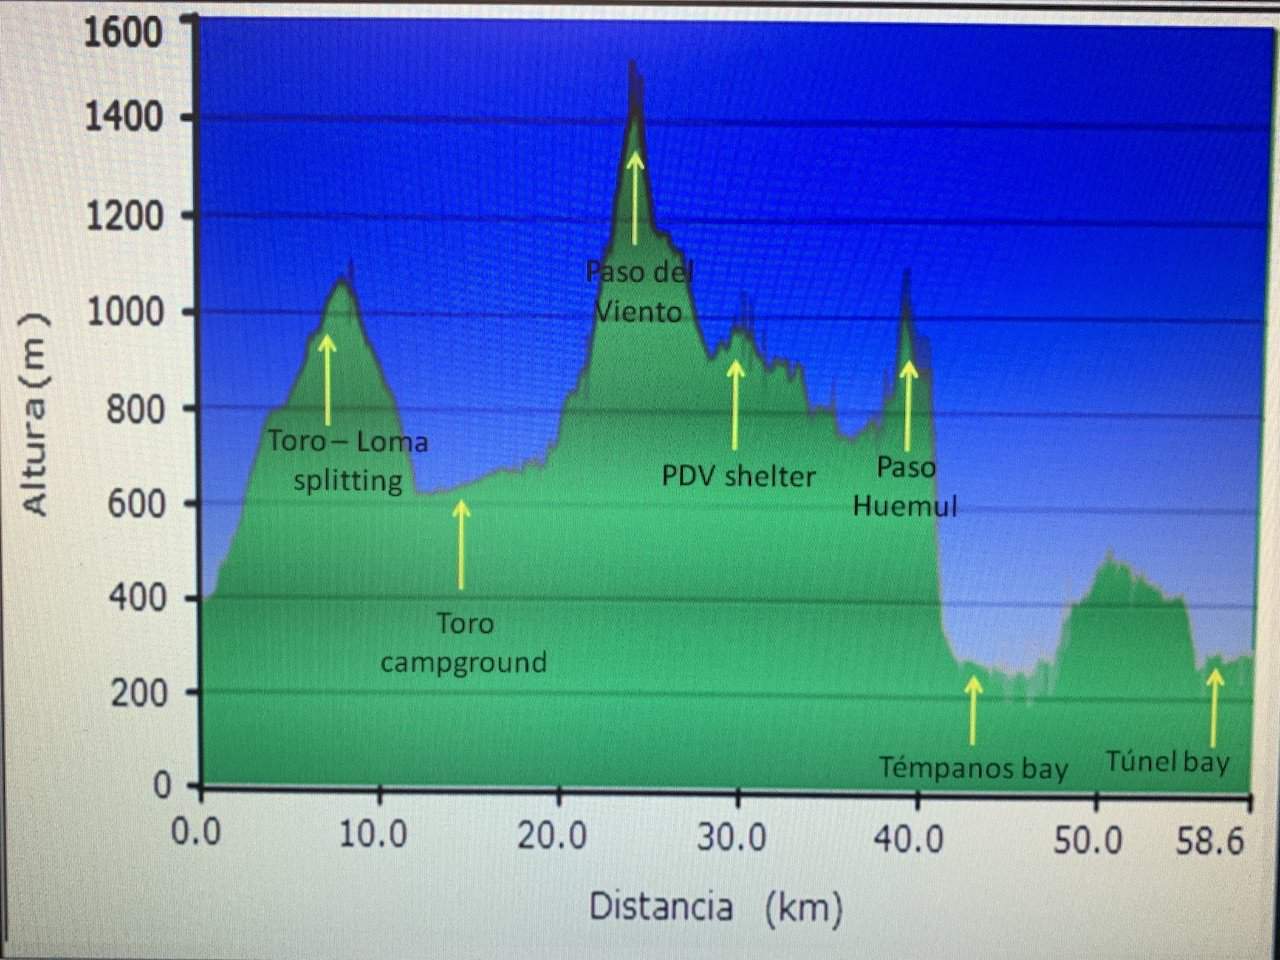
Day by Day Trail Stats
Below is a high-level view of what each day on the trail will entail in terms of logistics, distance and elevation gain. Please note that these distances and gains can vary slightly.
Huemul Circuit Day 1
Starting Point: El Chalten APN Visitor Center
Ending Point: Laguna Toro Campsite
Distance: 10.8 miles / 17.4 km
Elevation Gain: 2,450 feet / 747 meters
Elevation Loss: 1,640 feet / 500 meters
Duration: 5 Hours
Huemul Circuit Day 2
Starting Point: Laguna Toro Campsite
Ending Point: Refugio Paso del Viento
Distance: 8.0 miles / 12.9 km
Elevation Gain: 2,615 feet / 797 meters
Elevation Loss: 1,969 feet / 600 meters
Duration: 6 Hours
Huemul Circuit Day 3
Starting Point: Refugio Paso del Viento
Ending Point: Camp Bahia Tempanos
Distance: 9.3 miles / 15.0 km
Elevation Gain: 1,420 feet / 433 meters
Elevation Loss: 3,937 feet / 1,200 meters
Duration: 6 Hours
Huemul Circuit Day 4
Starting Point: Camp Bahia Tempanos
Ending Point: Bahia Tunel Boat Terminal*
Distance: 10.0 miles / 16.1 km
Elevation Gain: 1,400 feet / 427 meters
Elevation Loss: 1,300 feet / 396 meters
Duration: 6 Hours
*Hike Finish Note: while the official ending point is at the Bahia Tunel boat terminal, you will still need to get back to El Chalten. If you cannot hitch a ride back from the terminal, you will either need to walk another couple of miles to the La Quinta hotel (and grab a taxi from there), or continue onto El Chalten (~5 miles). More on all of this soon.
Huemul Circuit Total
Distance: 38.1 miles / 61.3 km
Elevation Gain: 7,885 feet / 2,403 meters
Elevation Loss: 8,846 feet / 2,696 meters
Duration: 23 Hours
As you can see, each day of the Huemul Circuit will entail quite a bit of hiking and elevation gain/loss along the way. This circuit should only be attempted by those with the necessary experience and skills to take on such a multi-day hike.
Combining Days Note: there are many questions out there regarding combining days to make the circuit three days instead of four. This can certainly be done, but ONLY by those that can handle very long days on the trail (10+ hours). Days 1 & 2, days 2 & 3, or days 3 & 4 can be combined into one, but be sure to start very early and get ready for a full day of hiking.
Before going into the day by day details of the hike, there are many important topics to understand regarding the region and the trek itself. In each of the next several sections, I will be diving into these topics to better prepare you for the Huemul Circuit.

2) Getting to El Chalten
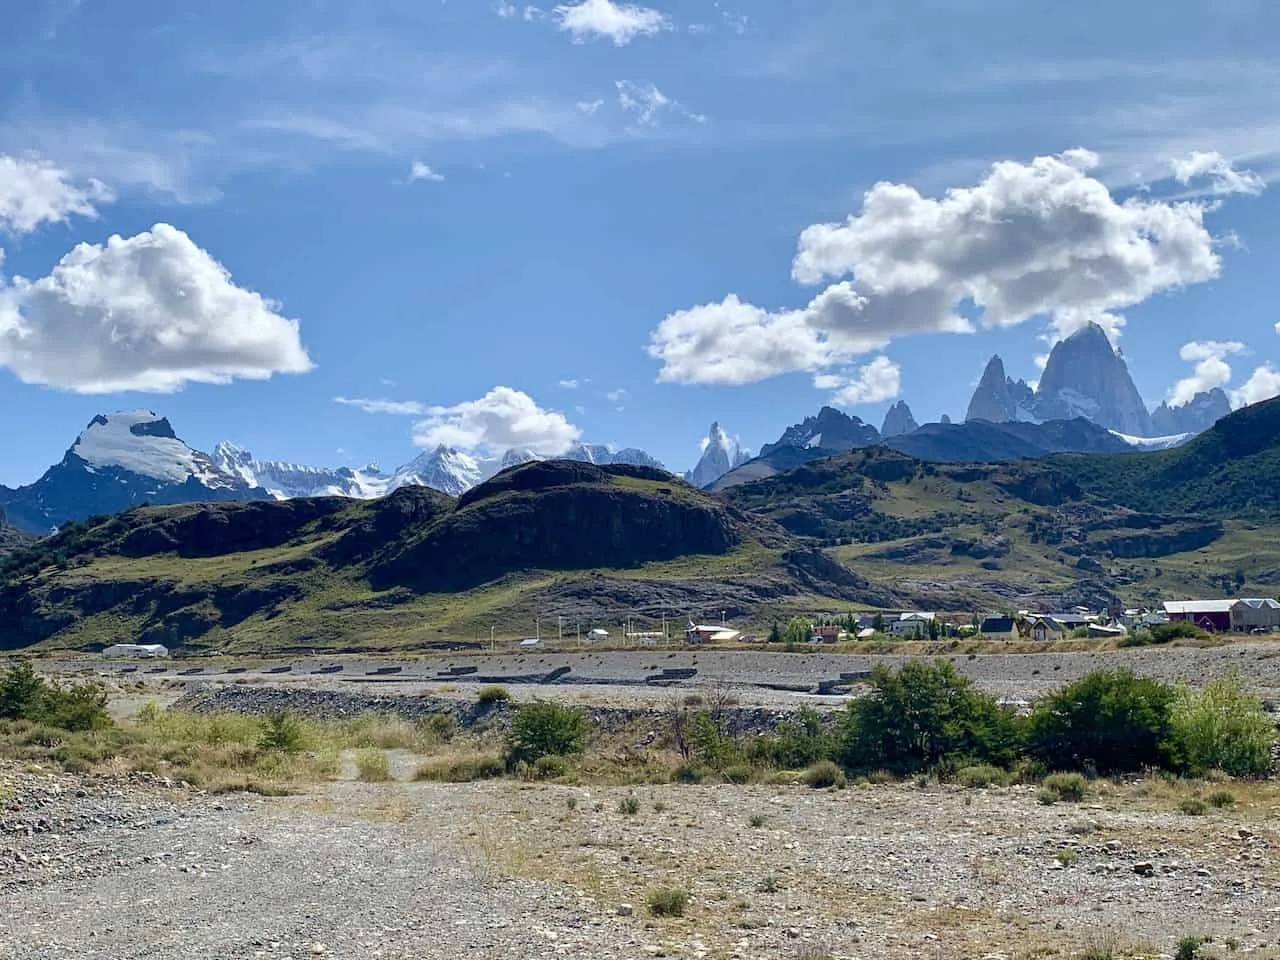
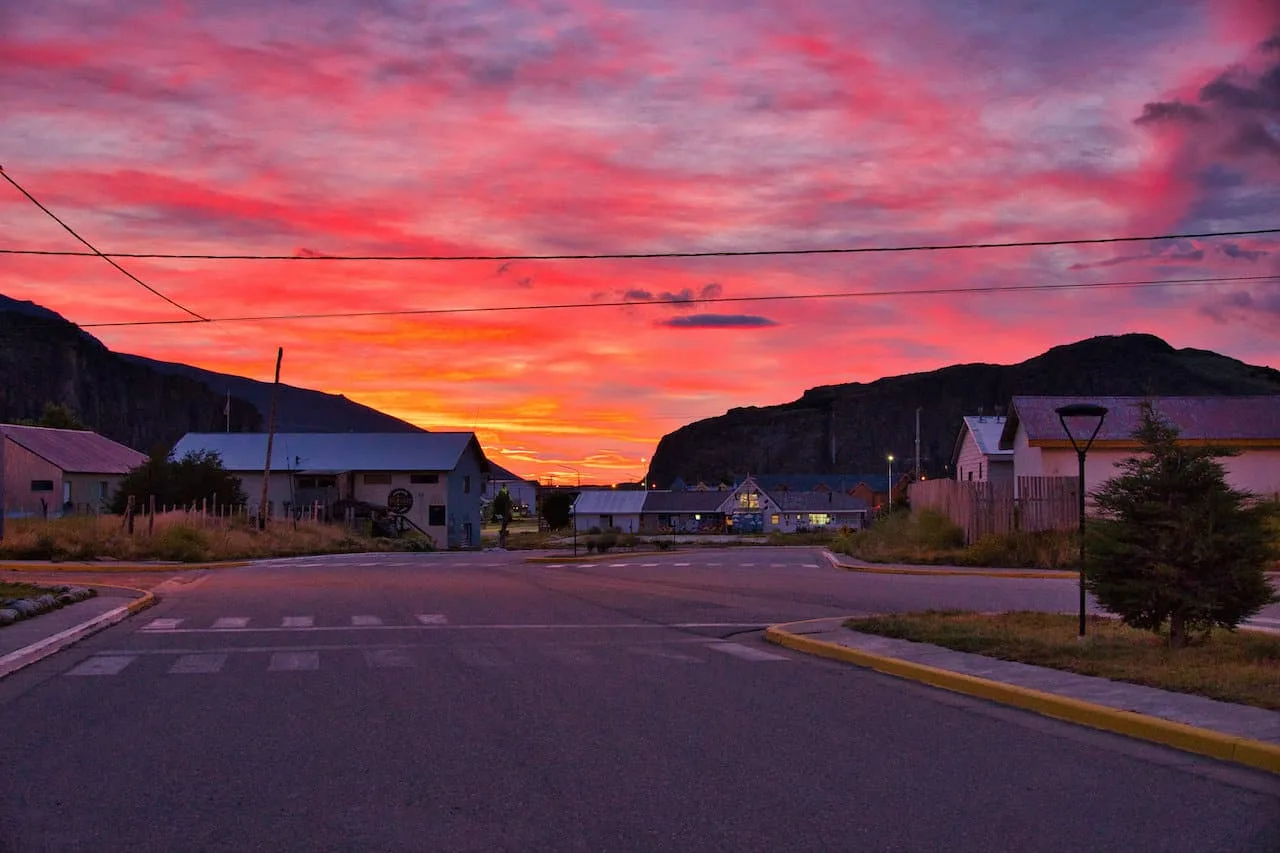
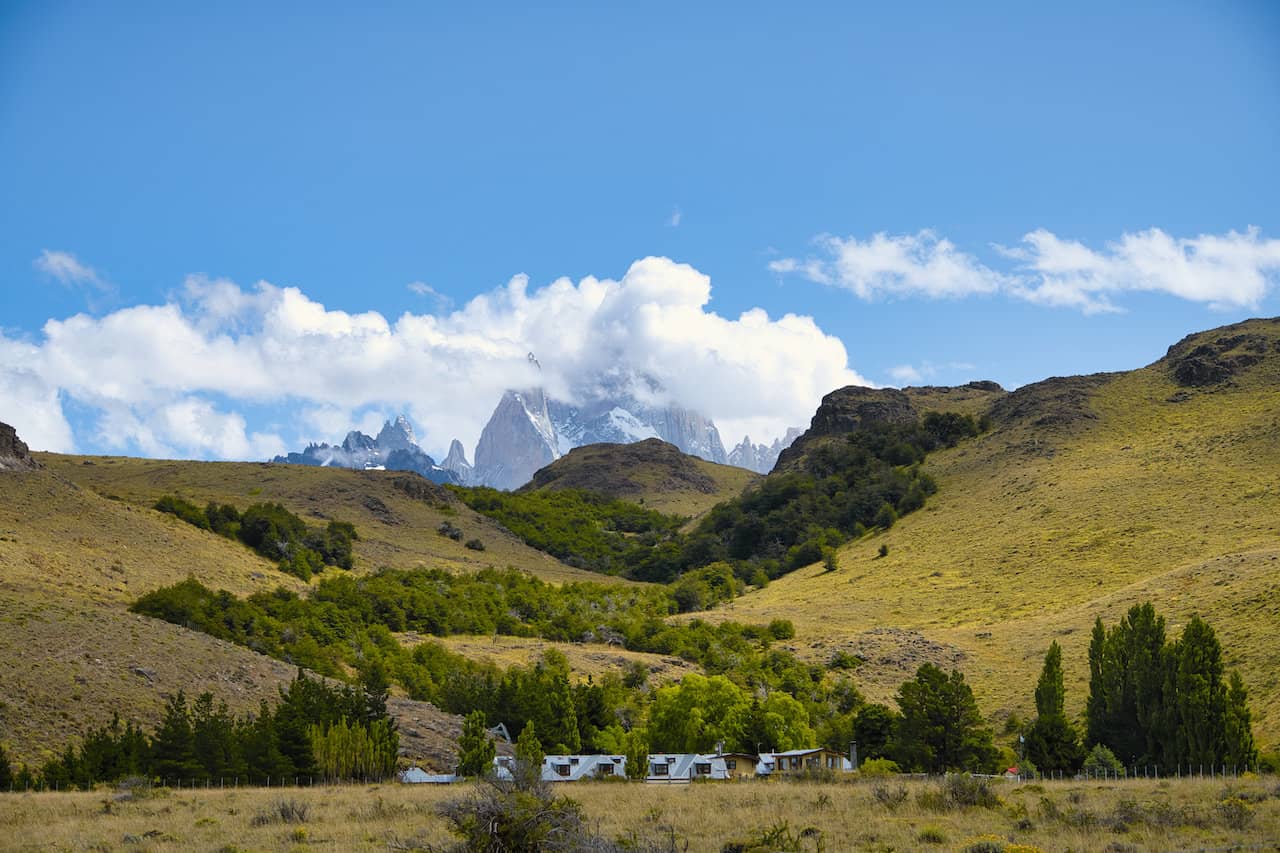
First things first, you need to make your way to El Chalten. El Chalten is a small town within the Los Glaciares National Park of Patagonian Argentina.
Surrounding the town, you will find some of the most beautiful peaks, lakes & views in Patagonia. Since El Chalten was essentially built to cater to the surrounding landscape, you will be able to walk right from town to the various trailheads (including the Huemul Circuit).
There are two main ways to get yourself to El Chalten – either by bus or by rental car.
Bus
Since El Chalten does not have an airport, you most likely will be coming in by bus from El Calafate (home to the closest airport and the Perito Moreno Glacier).
You can reach El Calafate by plane from major cities like Buenos Aires. The bus ride from El Calafate is relatively quick, taking around 3 hours between the two towns.
There are multiple busses a day, serviced by several companies. Feel free to look through Busbud to see options across many of the companies.
Some of these busses stop at both the bus terminal and the airport. You can take a look on the site for the latest schedules and fares for your journey. A one way ticket will cost somewhere around $20-$25 USD.
Rental Car
Renting a car in Patagonia is also a great option for those that want more flexibility. You can make more of a road trip out of it, visiting several places all along the way, such as Torres del Paine.
Depending on where you plan on going, some of the drives may be quite long. However, you will be surrounded by some stunning natural landscapes all around, making the drive a highlight within itself.
Feel free to take a look at Rentalcars.com that has options across several different car rental companies.


Learn More: Check out this Patagonia Itinerary that can better help you put together a complete trip to the region, including time on the Huemul Circuit.
3) Where to Stay in El Chalten
El Chalten is home to many different hotels and lodges for visitors. Essentially, everything will be within walking distance from one another.
Hotels, restaurants, shops, supermarkets, and the trailheads (such as the Laguna de Los Tres hike), are all located within the same general vicinity.
These hotels will sell out during peak season, so be sure to book your accommodation as soon as you know your dates.
I would recommend booking a hotel for the length of time you will be in El Chalten, even if some of those nights may be spent on the circuit. You can touch base with your hotel about cancelling some nights when you decide to head out for the trek.
Below are some of my top recommendations based on budget for your trip to El Chalten:
Mid Tier: Hosteria Senderos | Senderos Aparts & Suites
Luxury: Chalten Suites Hotel | Los Cerros del Chaltén Boutique Hotel
Budget: Hosteria y Cabañas Koonek | Rancho Grande
Note: El Chalten receives its WiFi connection via a radio connection from El Calafate. This means that you should not expect strong WiFi for most of your visit. Phone signals did not work as well, so be prepared to have limited access to Internet during your time there.
Check out this guide to the best El Chalten hikes to consider during a visit to Patagonia

4) El Chalten Weather
The weather could be one of, if not the most important things to consider when taking on the Huemul Circuit.
From a time of year perspective, the most realistic timeframe to enjoy hiking in Patagonia will be during the southern hemisphere’s summer period. From the months of December to March you will have the best chance to have the most suitable hiking conditions in general.
If you are not aware already, the weather in Patagonia can be very inconsistent and unpredictable on a daily and even hourly basis. You can have all types of weather hit you in a single day.
When I visited El Chalten, I ended up staying for 10 days hoping to get around 6-7 days of hiking weather. This was to complete the circuit and a couple other day hikes like Fitz Roy and Laguna Torre.
While some days in El Chalten had absolutely perfect conditions, other days were filled with snowstorms, no visibility, and very strong winds.
The Huemul Circuit is certainly a tough trek to take part of where consistently ideal weather can be had. I mean, one of the main highlights of the trek is called Paso del Viento, which translates into “windy pass”.
Wind speeds can reach up to 100mph up here. So, when eyeing the forecast, you must pay very close attention to wind speed too – hiking in these extreme winds would be impossible.
It is not uncommon to wait several days to get the weather window needed. Luckily, a few days into my time in El Chalten, the forecast began to show a perfect weather window for the hike.
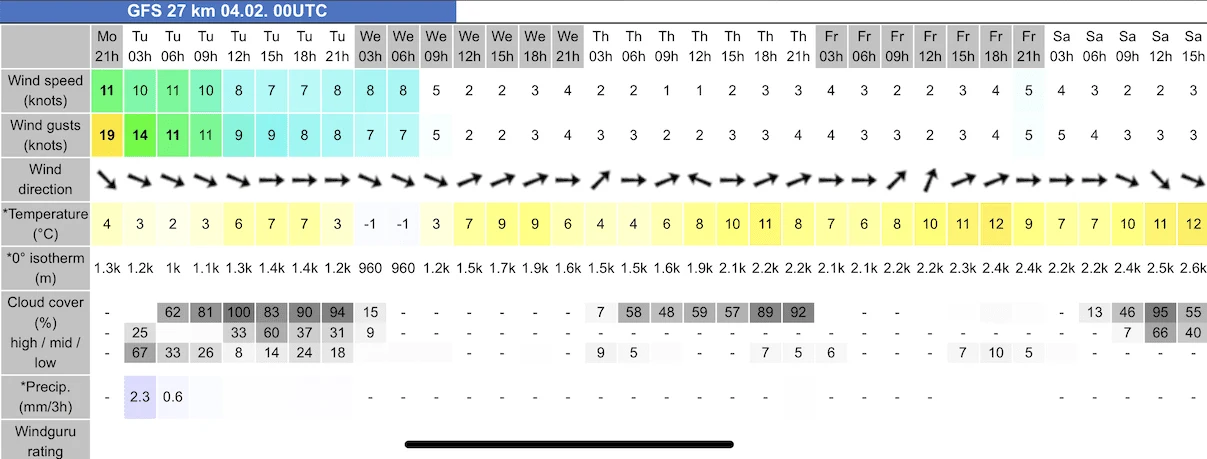
Weather forecasting is tough enough in mountainous regions, but even tougher in a place like Patagonia. The locals were keen on using Windguru as their best source of truth when it came to weather forecasts.
Here is a link to the free version of Windguru for Paso del Viento (the mountain pass visited on day 2). Upgrading to the paid version will give you more insight and features.
What you are looking for here is low wind speeds, low % of cloud cover, and no precipitation. You can see from the Tuesday to Friday that I completed the circuit, that conditions were looking great for a hike on the circuit.
I would recommend heading to the visitor center leading up to your trek to get their thoughts on the best day to head out and ask them any questions you may have.

Hiking Resources & Checklist
Before heading out for the trails, be sure to read up on some of the hiking resources up on the site. These are here to better prepare you for all types of outdoor adventure.
- Gear: Hiking Packing List
- Weather: How to Prepare for Hiking Weather
- Navigation: Hiking GPS & Navigation
- Tips: 20+ Hiking Tips & Tricks for the Trail
- Accommodation: Book Your Hotel Today
- Rental Car: Book Your Car Rental Today
5) Packing List
Hiking the Huemul Circuit will require a gear list that is quite different from just a normal day hike.
Since you will be staying overnight at campsites, you must bring everything along with you for sleeping and eating as well.
Below is my recommended packing list for the circuit, but understandingly each person may be a bit different with what type of gear & clothing they bring along.
Check out the Huemul Circuit packing list overview that dives into some more details about the below
Hiking & Camping Gear
Below is a list of the hiking & camping gear essentials for your time on the trail. Note that much of these can be rented or bought in El Chalten if you do not have everything already. I will talk a bit more about renting in El Chalten in the following section.
- Hiking Backpack | Hyperlite Southwest 3400 (and Backpack Rain Cover)
- 3-Season Tent | Big Agnes Copper Spur HV UL
- Sleeping Bag (20 F – 40 F) | Thermarest Questar 20 ; Thermarest Hyperion 32
- Sleeping Bag Liner | Sea to Summit Liner
- Sleeping Pad | Thermarest NeoAir Xlite
- Camping Pillow | Thermarest Camping Pillow
- Hiking Poles | Black Diamond Distance Carbon FLZ Trekking Poles
- Hiking Map | Purchase in El Chalten
Clothing
From a clothing perspective, you will want to bring along what is needed for four days on the trail. I am usually a bit more lightweight here as I use the same layers on a day to day basis.
Note that the weather can change quickly, so you will want to be prepared with the appropriate layers (all outlined below). Also, be sure to have moisture wicking materials for your clothing items.
- Hiking Boxers (2-3)
- Hiking Socks (2-3)
- Hiking Pants (1)
- Hiking Shorts (1)
- Long Sleeve Sun Hoodie (1)
- Short Sleeve Hiking Shirt (1)
- Puff Jacket (1)
- Hard Shell Jacket (1)
- Sleepwear
- Sunglasses
- Baseball Hat
- Quick Dry Towel
- Packing Cubes & Laundry Bag
Hiking Shoes
A hike like the Huemul Circuit must be done with the appropriate footwear. Be sure to invest in quality hiking shoes for your time on the trail. Some of my recommended shoes include:
Electronics
Most of my electronics were used for photography and navigation purposes. Be sure to also pay attention to the last item listed out – a Garmin inReach. This is key for anyone hiking a trail like this due to the absence of cellular service on the hike.
- iPhone & USB Cable
- Headlamp | Petzl Actik Core
- Portable Charger | Anker Portable Charger 10,000 mAH
Action Camera
- GoPro
- GoPro Stick
- Extra GoPro Batteries
Mirrorless Camera
Satellite Communicator | Garmin inReach 2 Mini
For a trail like the Huemul Circuit it is so important to have a satellite communicator like the Garmin inReach 2 Mini. This small device gives you the chance to communicate with family, track your route, and call for SOS in case of emergency.
Food & Drink
Remember, you will also need to bring all food for four days out on the trail. There are supermarkets in El Chalten where you can stock up on certain items. If you want to come prepared with food that you prefer, then check out my usual food purchases below (high calorie / low weight).
Breakfast
Lunch/Snacks
- Variety of Bars including PROBAR Bars, Honey Stinger Bars, Clif Builder Protein Bars
- Fruit & Nut Mixes
Dinner
- Variety of dehydrated meals including Peak Refuel, Outdoor Herbivore, and GOOD TO-GO
Hydration
Note that you will easily be able to fill up your water bottle consistently throughout the trek. Along most of the hike you will find rivers and streams, where you can get some fresh Patagonian water.
During my time on the circuit, I just filled up directly from these without any filtration. However, if you do want to play it safe, you can get a filtered water bottle like the Katadyn BeFree water bottle. I also brought along some Liquid IV hydration packets to keep hydrated at the beginning of the day.
Cooking Gear
- Cooking Stove: Jetboil Micromo
- Spork: TiTo titanium spork
- Cooking Gas (purchase in El Chalten)
- Lighter
Toiletries
This last section of the packing list will be toiletries. Each person will also be different here, but below are the main items I brought along with me.
- Deodorizing Body Wipes | Alcala Bamboo Deodorizing Body Wipes
- Body Deodorant
- Toothbrush / Toothpaste
- Contact Lenses / Solution
- Travel Shampoo & Soap
- Moisturizer
- Personal Creams & Medications
- Sunscreen
- Lip Balm
- Purell
- Neosporin
- Bandaids
- Nail Clipper
- Small Mirror
- Toilet Paper
Required Items for Tyrolean Traverse
- Harness
- Safety Rope
- Steel Carabiner
- Aluminum Carabiner
- 35 Meter Cord
I will dive more into these items in the following sections
6) Renting Gear in El Chalten
Now, if you are not already coming into El Chalten with all the gear necessary, there is nothing to worry about. You can rent your gear in town prior to the hike.
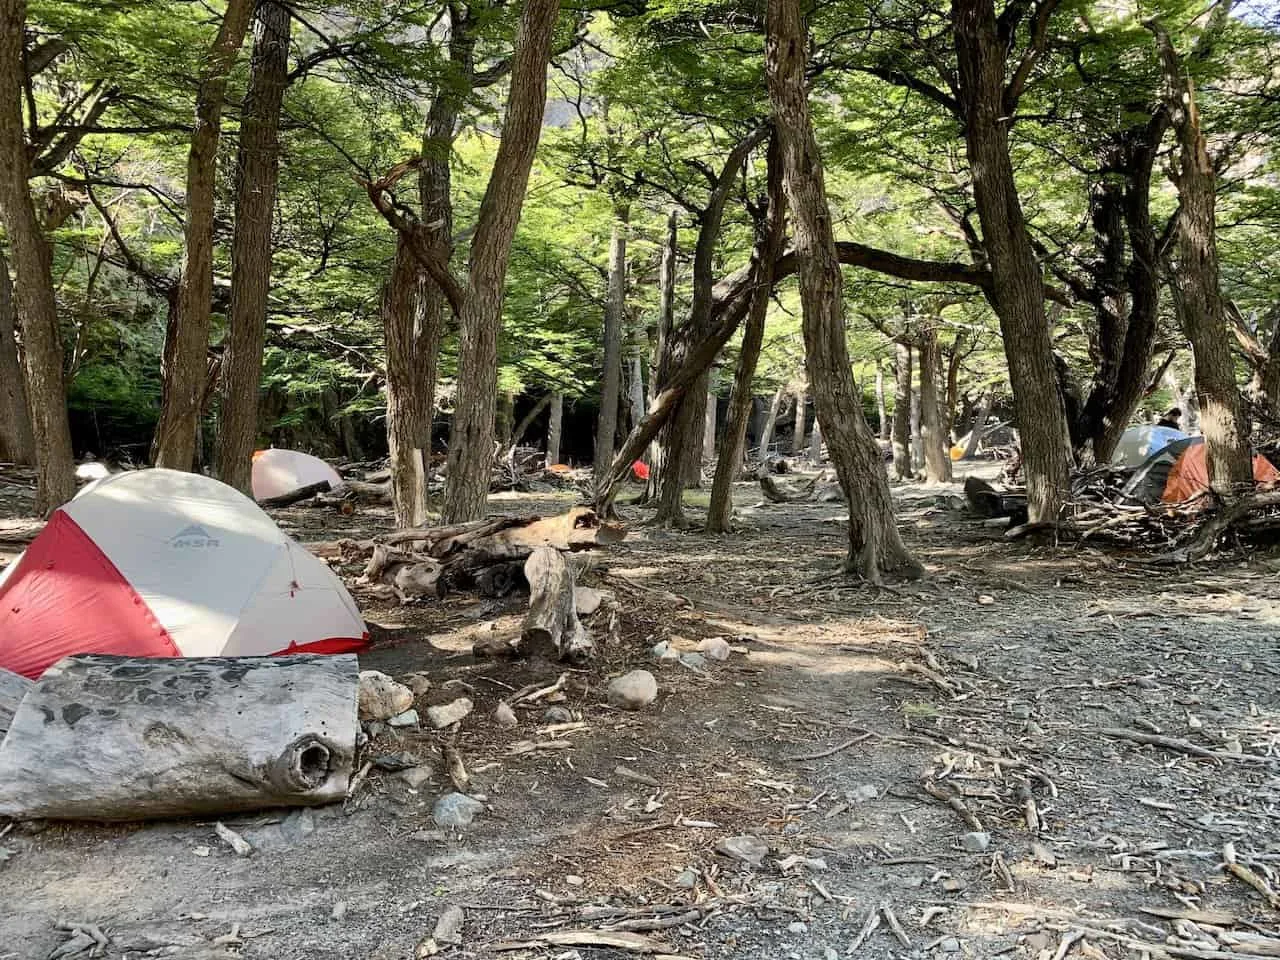
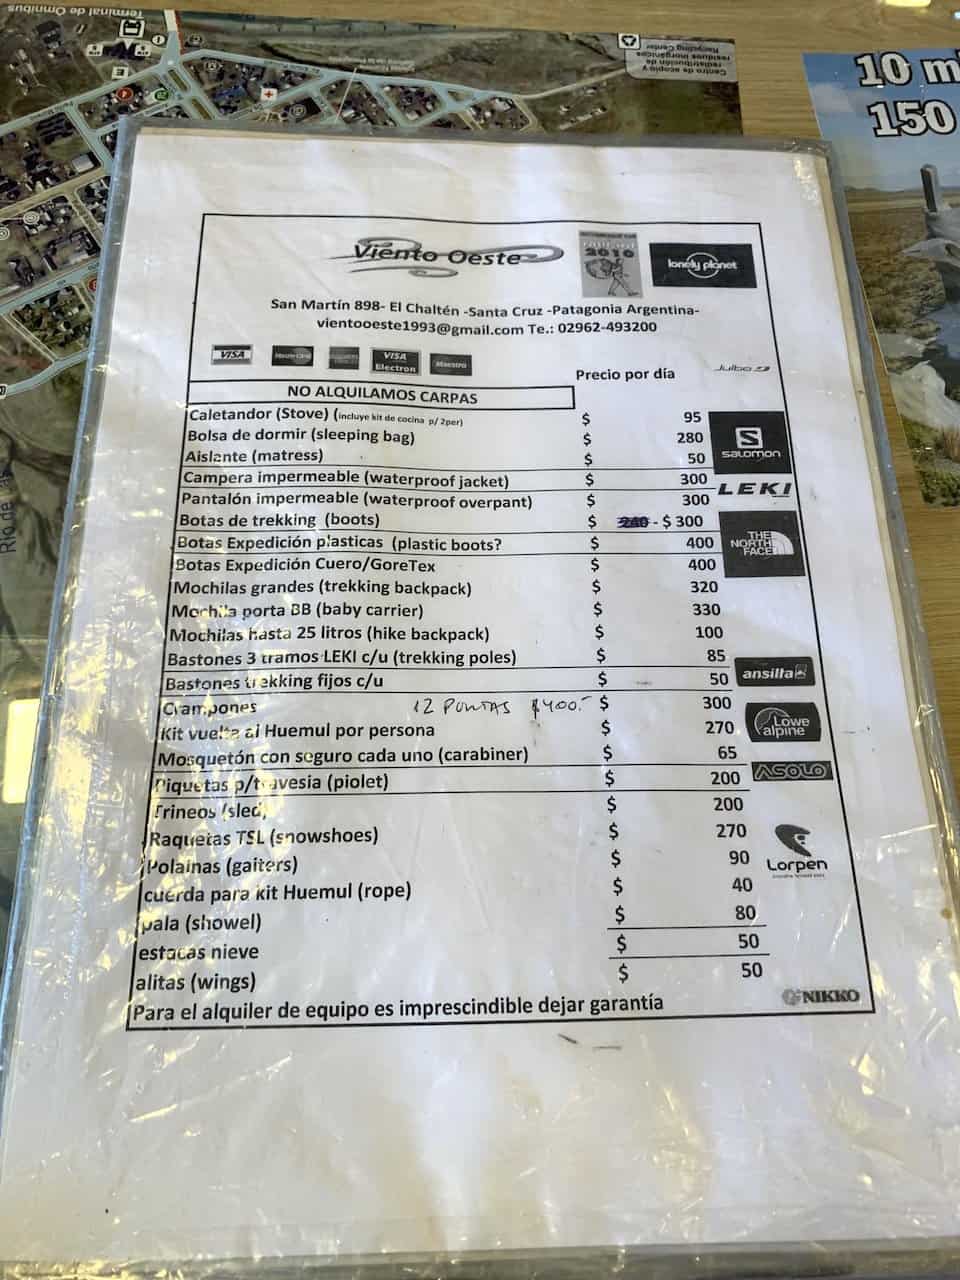
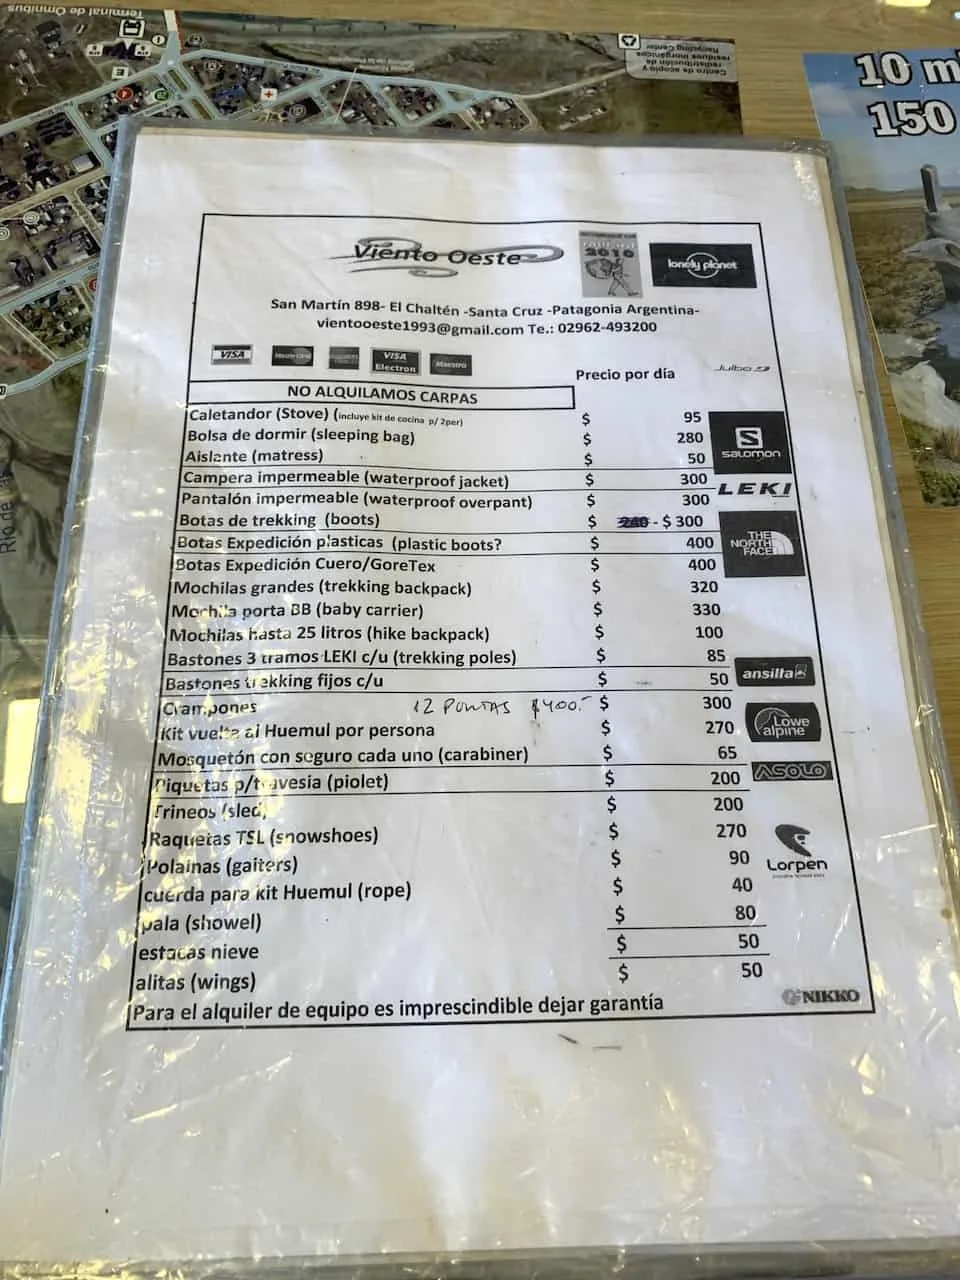
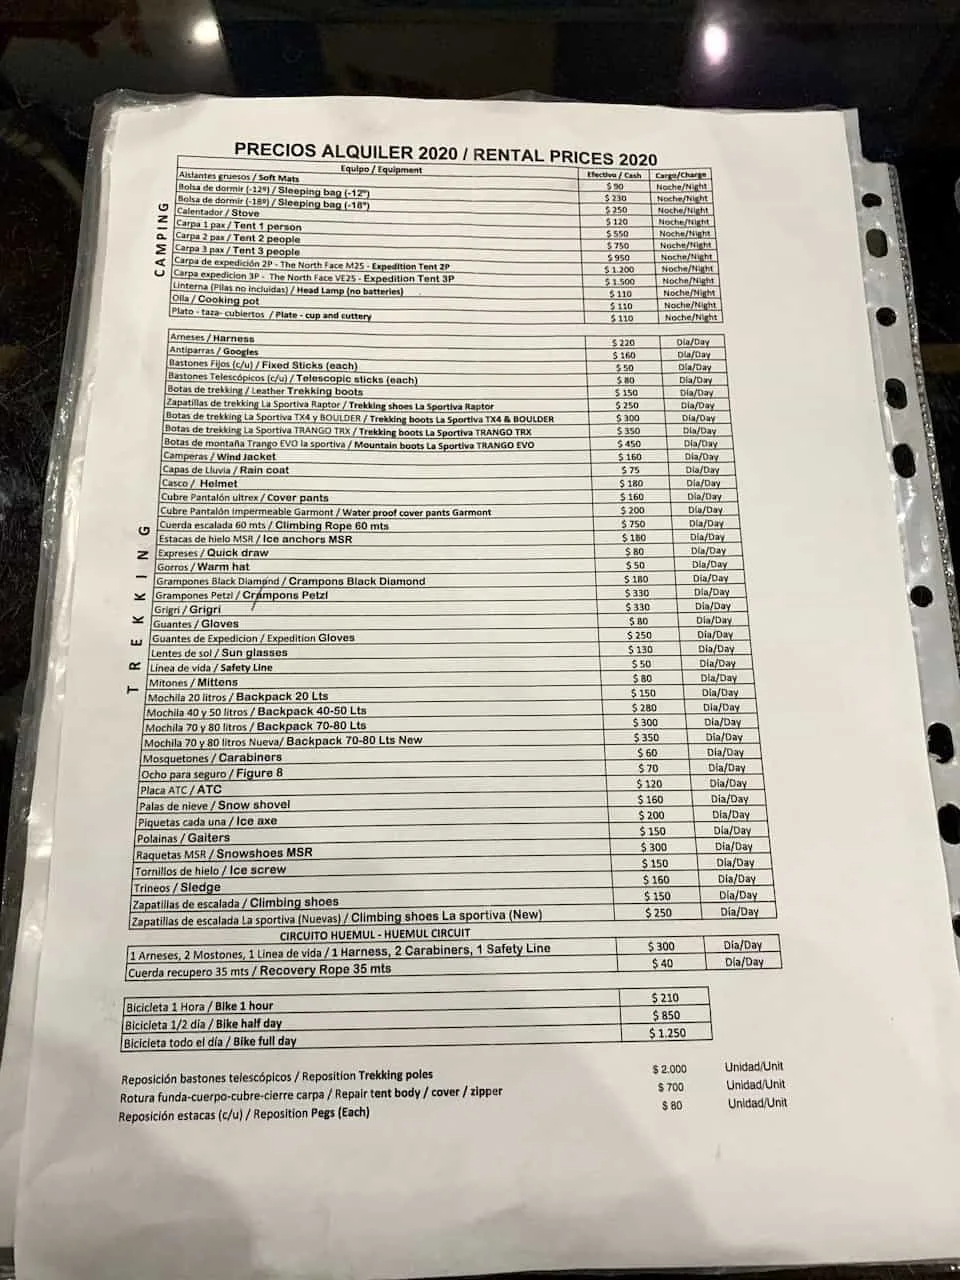
In town you will find several different gear shops where you can buy or rent gear for the hike. Some of these include Camping Center and Viento Oste (no tent rentals), but you certainly can find some more.
If renting camping gear, you will usually be charged per night and you must return the gear prior to ~5:00PM the final day not to be charged an extra night. Each shop may be a bit different so be sure to ask beforehand.
Tip: rent the gear even a couple days early if there is an anticipated weather window so you can avoid any stock outs. It is better paying for an extra day of gear than potentially not having the gear at all.
Below you can find a few photos I took of the camping gear and price lists (but note that prices change drastically over time with the devaluing of the Aregentian Peso):

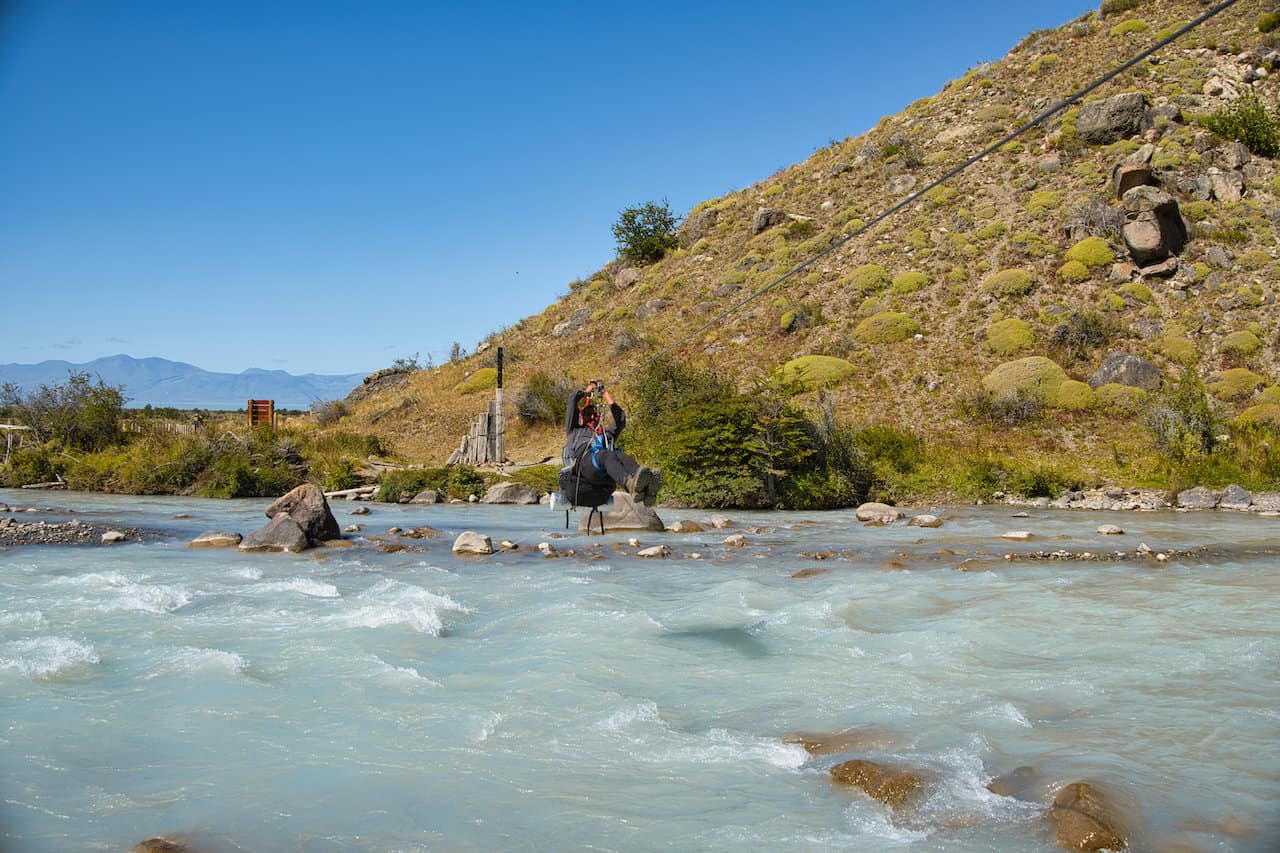
7) River Crossings
There are two river crossings part of the Huemul Circuit – one of the second day and one of the fourth day. Since the route heads from one side of the river to the other in these instances, there are two installed steel wire ziplines (Tyrolean traverse) that connect either side.
I imagine for most people, renting the harness in El Chalten will be necessary. I also imagine that most people may not have the experience using a harness and carabiners to zipline across a river. While it does sound a bit intense, the process is quite simple.
Essentially what you will find in these two places is a steel wire that makes its way above and across the river flowing down below. On this steel wire you will find a pulley. This pulley makes it a more seamless and smooth process to get yourself across the steel wire.
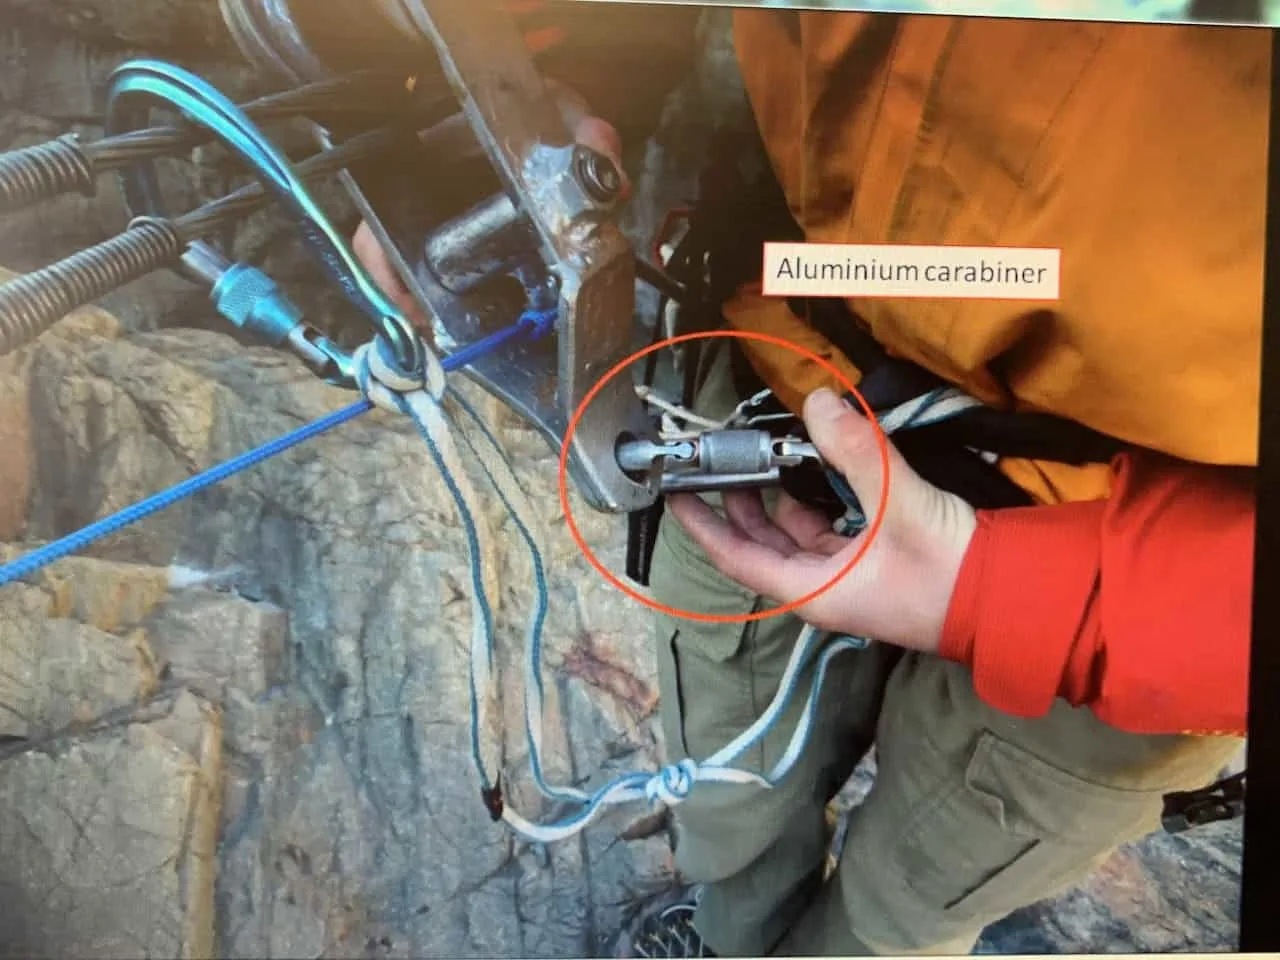
When renting the gear, you will be given a harness along with some safety cords and two carabiners attached – one steel carabiner and one aluminum carabiner.
As you get yourself onto the steel wire, you will want to clip the steel carabiner onto the steel wire and the aluminum carabiner onto the pulley. The aluminum carabiner is considered your main means of safety here, while the steel carabiner would be your backup safety line in case the pulley breaks.
You will also see that a 35 meter thin cord is recommended to bring as well. The idea here, is that once someone goes across the river on the pulley, there should be an easy way to get the pulley back to the starting point.
So, if you attach the 35 meter thin cord to the pulley as well, then someone else will be able to pull the pulley back to the starting point once you have unhooked yourself on the other side.
Ideally, there is already a cord attached, so people won’t need to consistently swap out this cord as new groups come through.
Tyrollean Traverse Setup Recap
1. Step into your harness and properly secure yourself in. Be sure the straps are nice and fitting onto your legs so there is little movement and your body is secure.
2. Approach the pulley and attach the 35 meter rope (if necessary with a group). There is a chance a rope already attached.
3. Attach the aluminum carabiner to the pulley and the steel carabiner to the steel wire. If heading across with your backpack, you can consider attaching the pack to the steel carabiner as well.
4. Secure all of your belongings and slowly make your way across the traverse. You can either lay fully vertical facing up or take a more seated position – whatever is more comfortable for you.
5. Once you reach the other side, get yourself onto the rock securely, before unhooking your carabiners and backpack. From there, someone on the other side can go ahead and pull back the pulley using the 35 meter rope.

Helpful Tips & Things to Know
The first river crossing offers an easier chance to cross by foot instead. Simply make your way a bit further upstream, take off your shoes, and carefully make your way across. This will only be possible earlier in the day as the river flow usually picks up as the day goes on.
There also seems to be a way to cross the second river by foot but I did not see that option when I was there. You must be prepared to cross by zipline either way.
Be sure that all belongings are extremely well secured in your backpack or in your zippered pockets. If something falls out, you most likely will lose it for good.
You can decide to cross with your backpack in a few different ways:
- Have it on your back, nice and snug against your body
- Connect it to the safety line steel carabiner and slowly move along with it on the wire
- Cross the river on your own, then have someone attach your backpack onto the pulley, and pull the backpack across from the other side
Be very careful getting off on the other side. You should already be in a safe position before even thinking of unclipping yourself from the wire.
If you happen to arrive at the ziplines and the pulley is sitting in the middle of the wire (with no cord attached), you may need to first retrieve the pulley from the wire. Be careful when doing so, as that would mean you are attaching yourself directly to the wire.

8) Registration & Permits
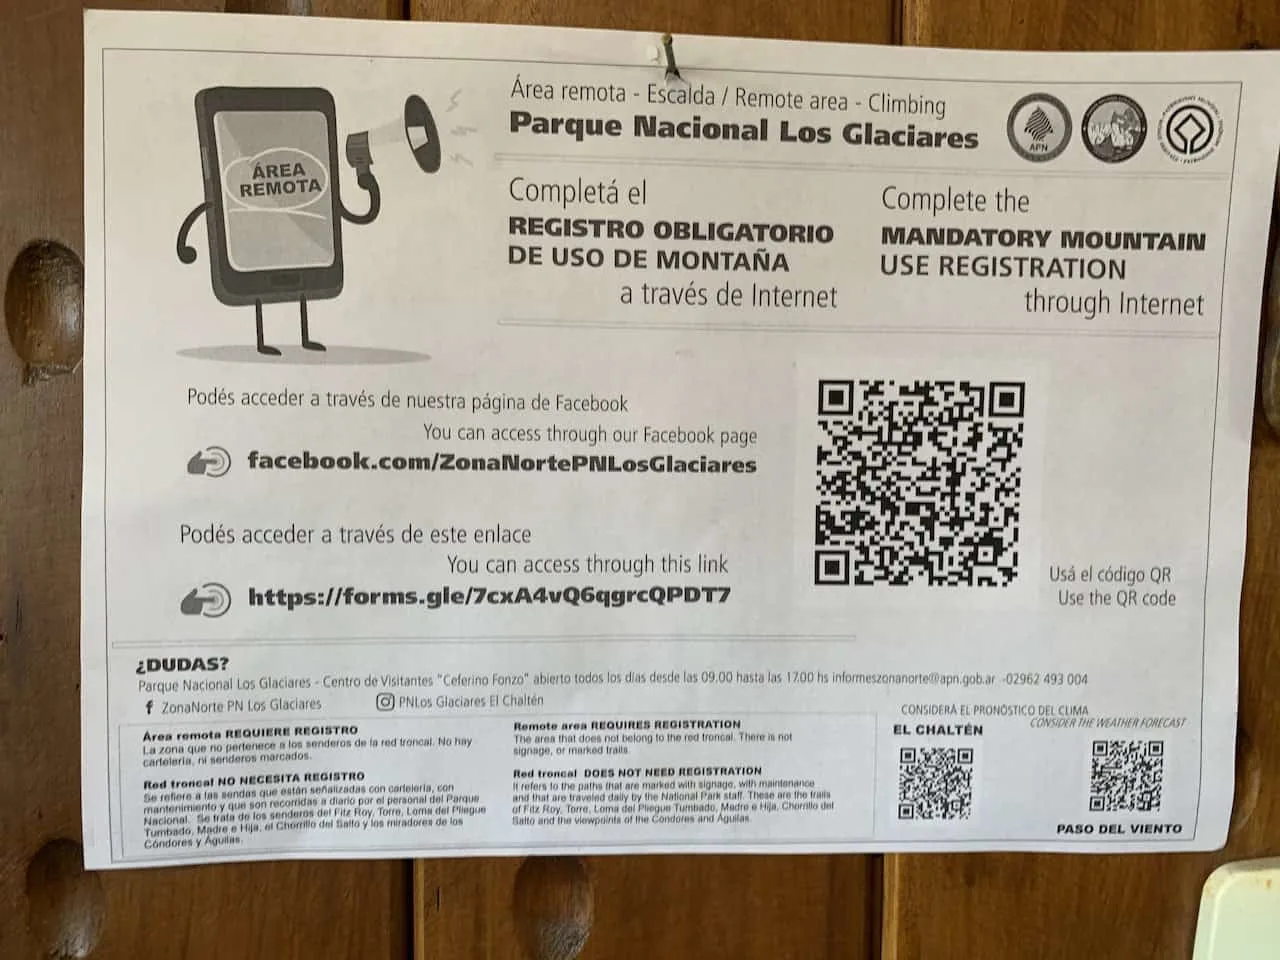
Since this is a more intense hike on the outskirts of El Chalten, you must register yourself with the Parques Nacionales Administration (APN) at the El Chalten Visitor Center prior to departing (open from 9:00AM – 5:00PM). This can either be done in person prior to the hike or you can simply use their Google Form (pictured below).
Either way, I would highly recommend going to the APN office leading up to the hike to learn more about conditions, weather, and to watch their informative slideshow.
Check out their Huemul Circuit slideshow presentation beforehand to get a better idea of what it is all about
The office is also the location of the starting point of the hike. Once you arrive back in El Chalten after the hike, be sure to mark your arrival with them.
I have read in the past that it is 100% necessary to show your harness, carabiners, safety line, 35 meter cord, camp stove and topographic map to receive your permit. However, that was not my experience at all. They simply asked me to fill out the Google Form and be on my way.
Since requirements may change over time, I would highly recommend heading to the visitor center in the days leading up to your hike to better understand if rules have changed.

9) Huemul Circuit Map
Now that you have a bit of background on the hike, I did want to layout a Huemul Circuit Map for you to better grasp the trek in its entirety.
Below is a Google Maps view of the hike, that can be downloaded into a KML/GPX file for your time out on the trail. I have included the route, campsites, ziplines, mountain passes, and starting/ending points.
10) Starting & Ending Points
The Huemul Circuit is a loop trek for the most part. This will just depend on how you decide to finish the hike. Here is a bit more information on the starting and ending points of the trail.
Starting Point
The starting point of the circuit is located at the El Chalten APN Visitor Center. On Google Maps you will see this as “Centro de Visitantes, Guardaparque Ceferino Fonzo, Parque Nacional Los Glaciares”.
The visitor center is located just outside the town center as you head south on Route 23 and cross over Rio Fitz Roy. You will see the visitor center on the right hand side of the road. In addition to the visitor center, you will also find the starting points to other hikes in the area.
Depending on where you are staying in El Chalten, this walk should take anywhere from 5-20 minutes.
Ending Point
The official ending point of the Huemul Circuit is at the Bahia Tunel boat terminal.
Just before arriving at the boat terminal, you will pass through a gate and officially end the Huemul Circuit. The issue however, is that you will still be around 4.5 miles (7.2 km) away from El Chalten.
To get back to El Chalten, you will have a few different options:
1) Hitch a ride back from the boat terminal with someone who may visiting the lake. Unfortunately it does not seem like glacier boat tours use this terminal any longer. So the only real way to hitch a ride back is if you happen to come across someone visiting just for the view.
2) Around 2.5 miles from the boat terminal is the Estancia La Quinta hotel. On Maps.me you should see the route that takes you from the boat terminal up to the hotel. There is a bit of an uphill climb here too, just as a warning.
Once you reach the hotel, you can ask them to call you a taxi. I ending up getting a ride with someone who was leaving the hotel when I was arriving. Staying at the hotel is an option too!
3) The last main option here is to continue the hike back to El Chalten from the Estancia La Quinta hotel, which will be another couple of miles.
I have seen routes that head straight back to El Chalten, while others wrap back around to the visitor’s center.


11) Navigation
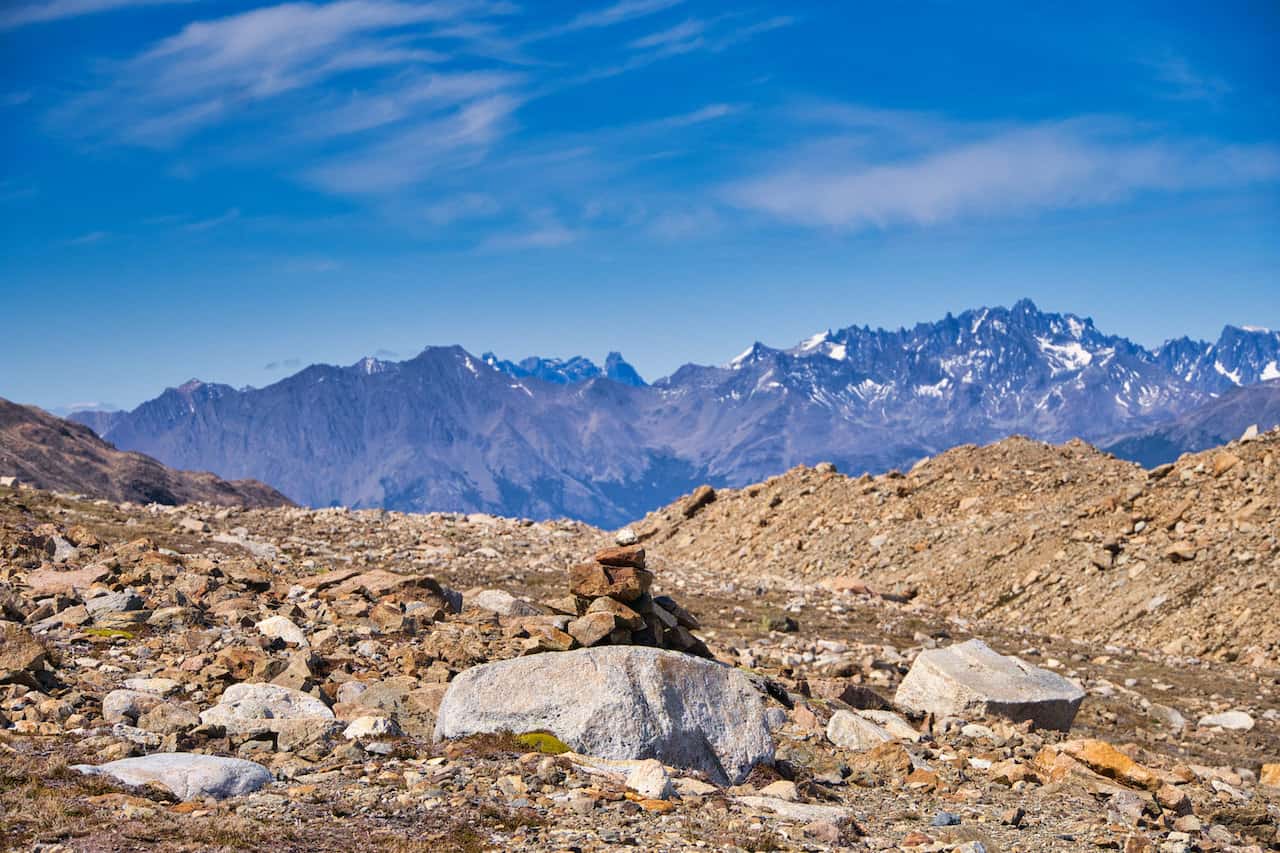
The above maps gives you a great idea of what the Huemul Circuit entails from a logistical perspective. Since the trail is not marked with hiking signs though, you will need to rely on your own navigational skills throughout.
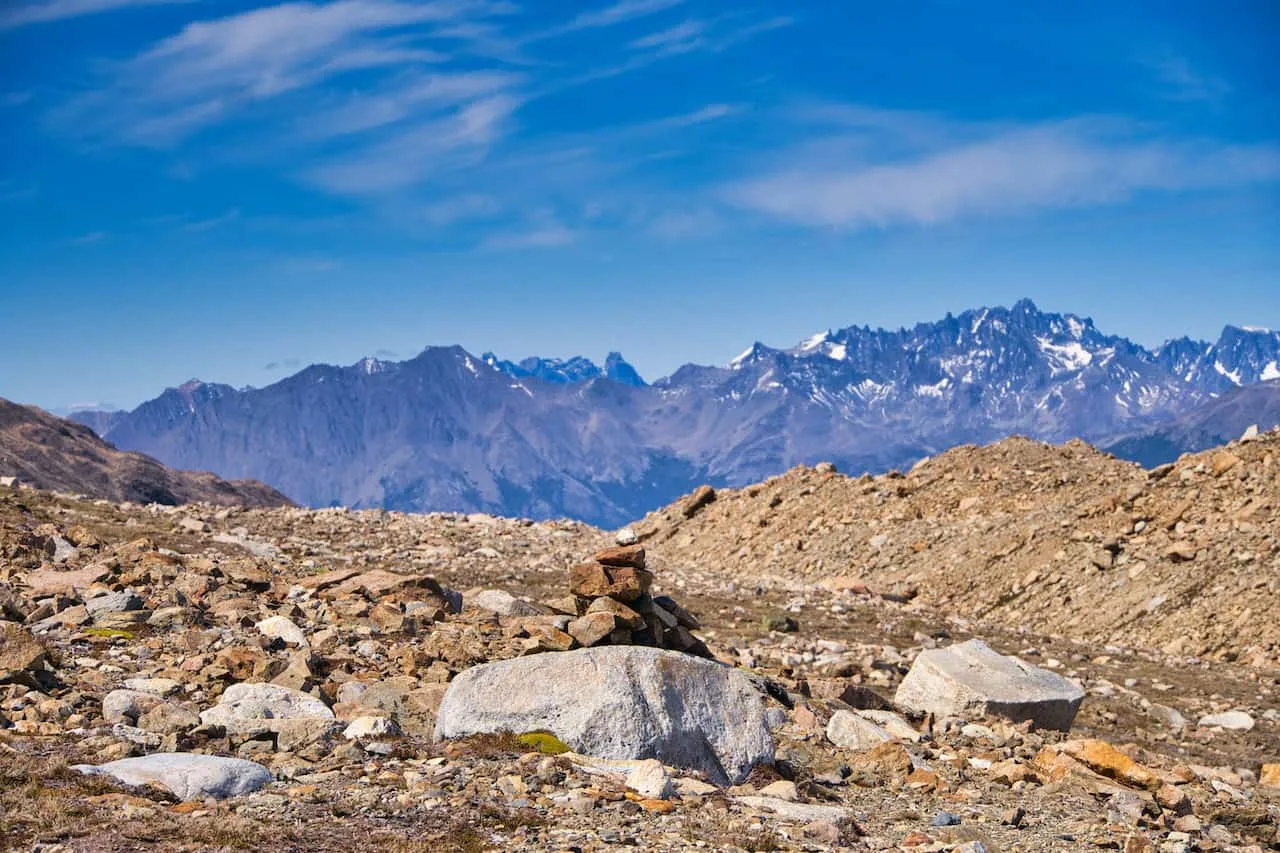
Luckily, the trail is pretty obvious at this point with just a few sections, where it may be a bit confusing. You will also find rock cairns (small piles of rocks – seen in the below photo) and wooden poles located throughout the trail that will help guide you.
Either way though, you should have some sort of navigation app handy on your phone with the route downloaded onto it. That way you can see your location in relation to the trail throughout your time on the circuit.
What makes these GPS navigation apps so great is that you do not need cell service or WiFi. The apps use the internal GPS of the phone, so all should still work just fine.
My go to app has been Maps.me, but other alternatives include Gaia and AllTrails.
12) Guide or No Guide
Since the Huemul Circuit is going to be one of the tougher and more logistically challenging hikes out there, hiring a guide is certainly an option.
The upside of hiring a guide is that you will not need to worry about navigating the trail, they can help you along the ziplines, and they will be able to give you much helpful information along the way.
The downside of hiring a guide is that you most likely will need to book one well in advance. This in turn could be very inflexible as you would be signing up for a particular date. If the weather does not line up well, then you may be out of luck.
Guides cost somewhere around $1,000-$1,500 per person for a four day trek depending on how many people are in your group.
At the end of the day, my recommendation would be to go without a guide so you can have that flexibility. However, if you are more so on the beginner side and are worried about many of the trail’s difficulties, then I would recommend having a guide with you.
By now you should have everything you need to know about getting ready for the Huemul Circuit. Let’s now talk through what to exact day by day, along with many helpful photos along the way.
13) Huemul Circuit Day 1
The first day of Huemul Circuit begins at the El Chalten APN Visitor Center, located at the edge of town.
You will simply need to walk south out of town, cross the bridge over Rio Fitz Roy, and then onwards to the center just a few more minutes away.

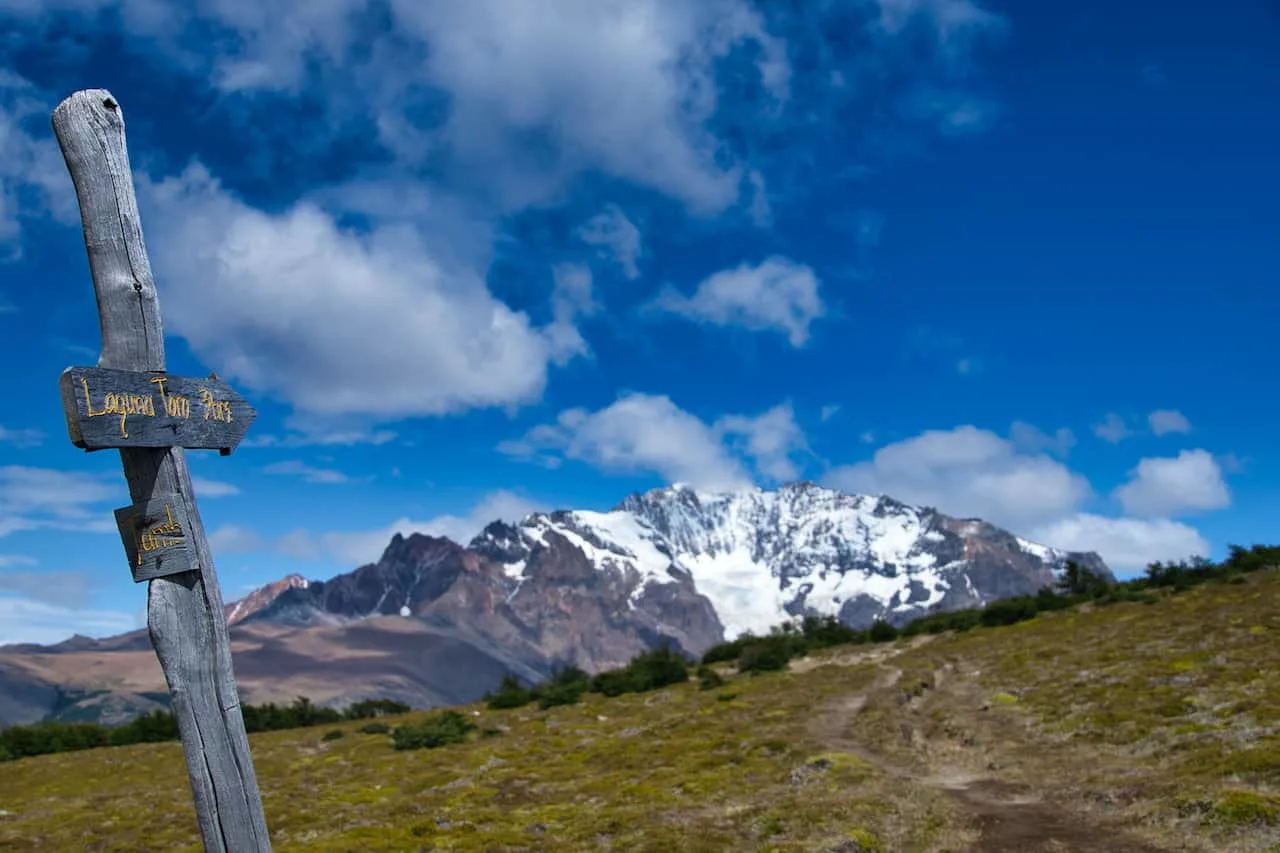
Once you arrive there, you will be welcomed to various hiking signs pointing out the different trails around the area (including the easier Mirador de Los Condores).
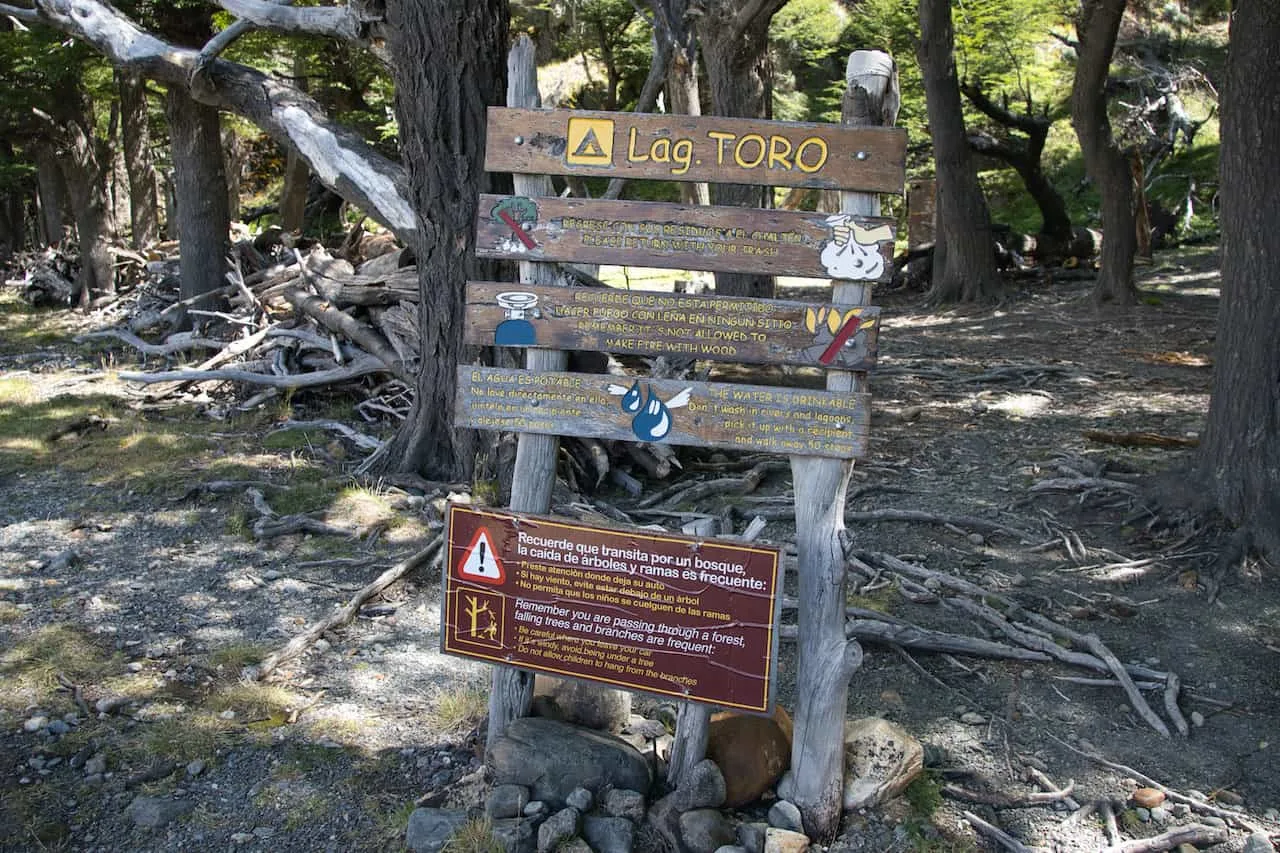
Since there are several different trails to choose from here, you will just want to be sure you are following the signs to Laguna Toro (where the first campsite is located).
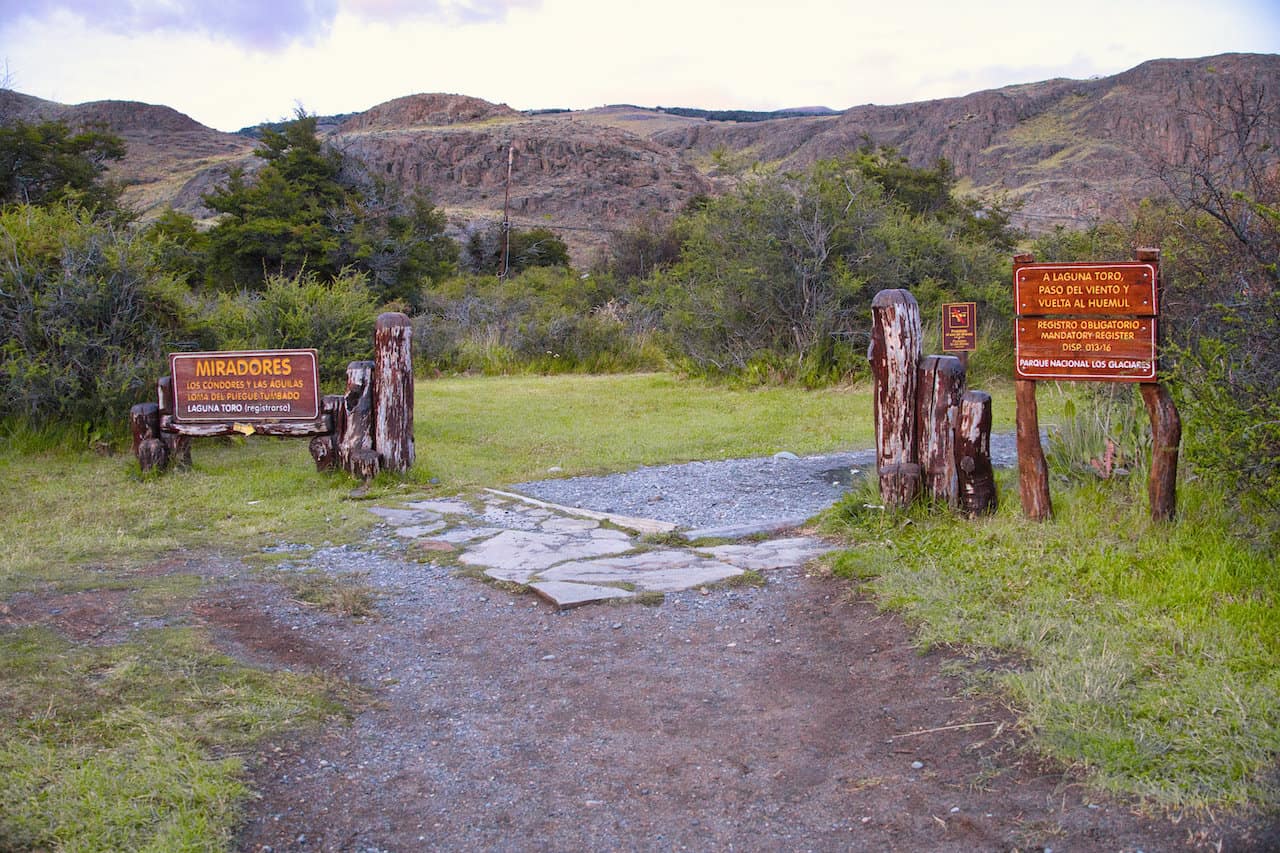

A few minutes into the trail, you will be welcomed to a second hiking sign. This one (shown below) gives the layout of the Loma del Pliegue Tumbado and Laguna Toro routes.
These two routes share the same trail for about 1.9 miles / 3 km, before they split apart from one another. I would highly recommend doing the Loma del Pliegue Tumbado on another day if you have the time (if you start early enough and have the endurance, you could check it out on day 1 too).


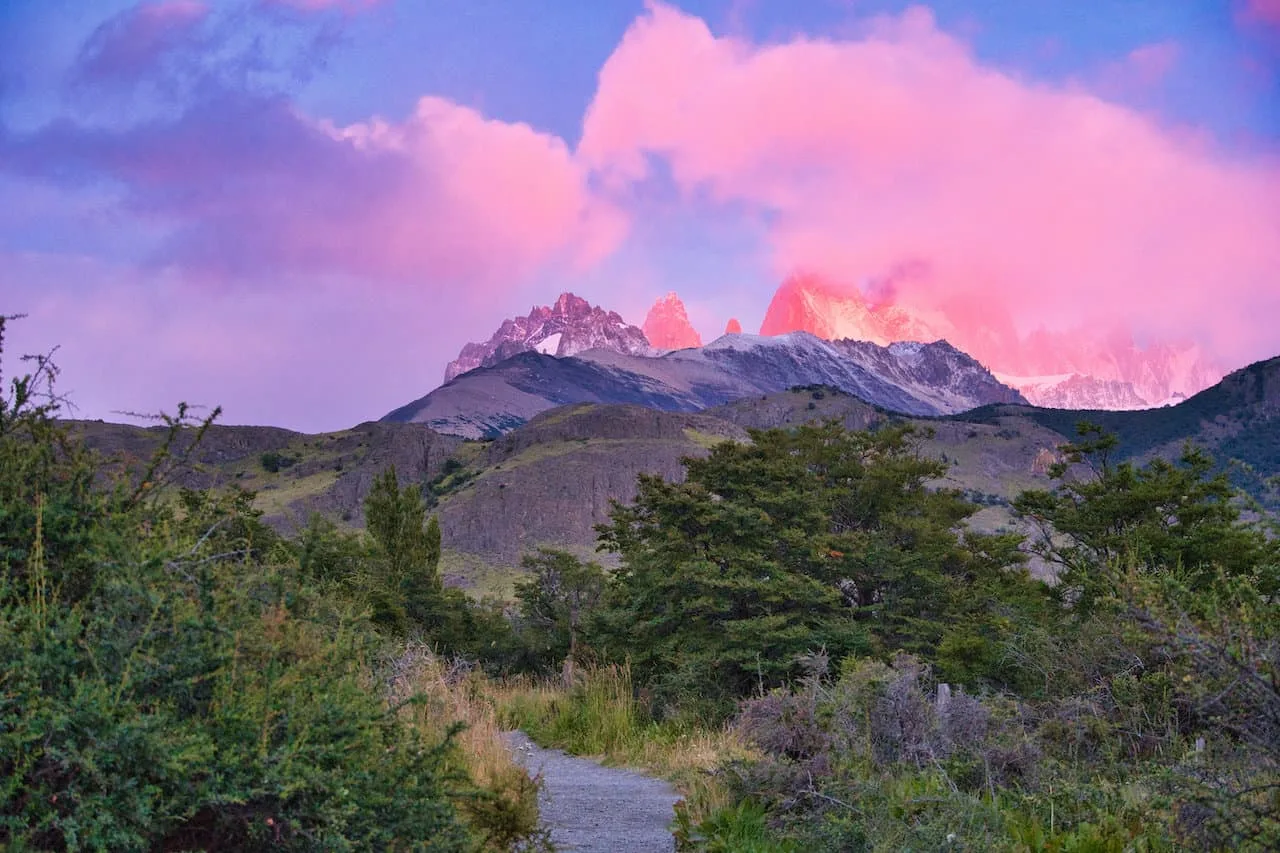
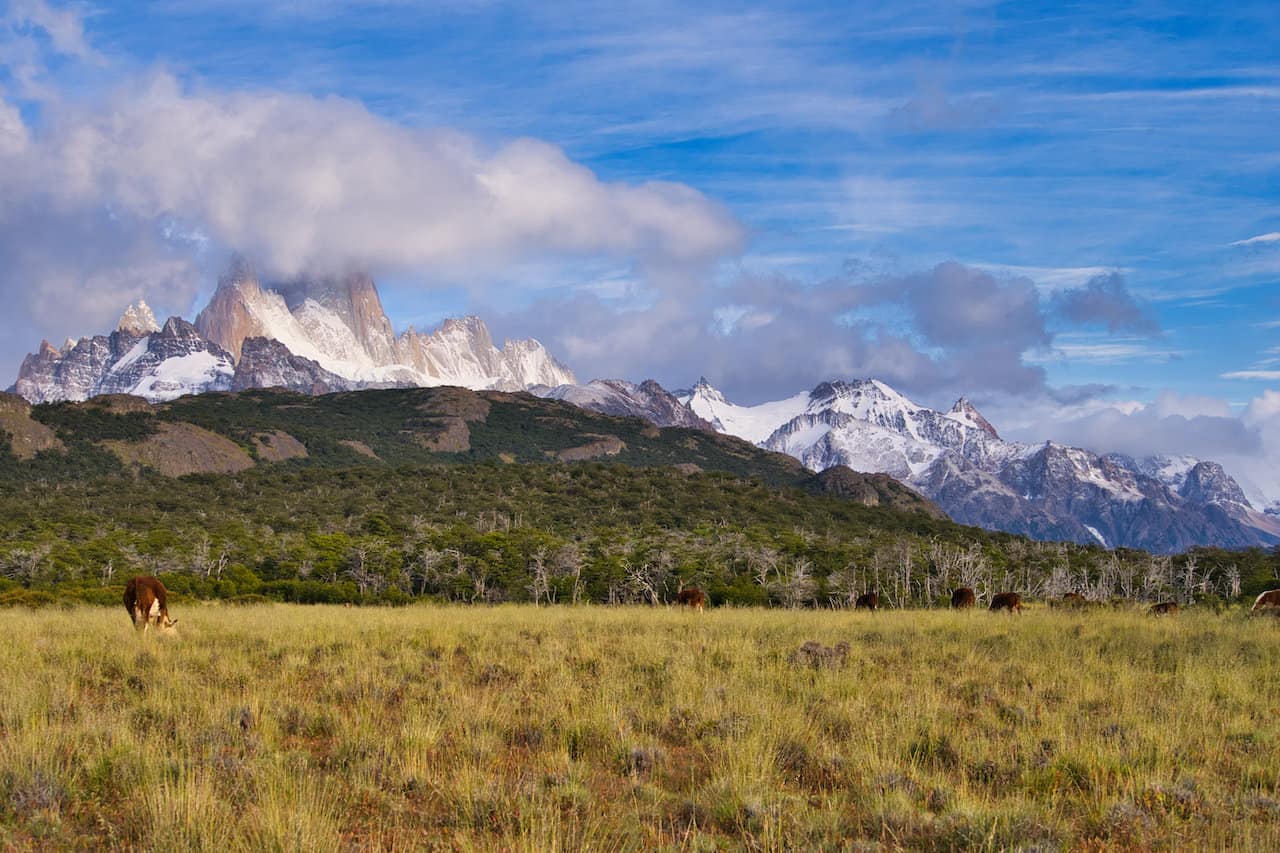
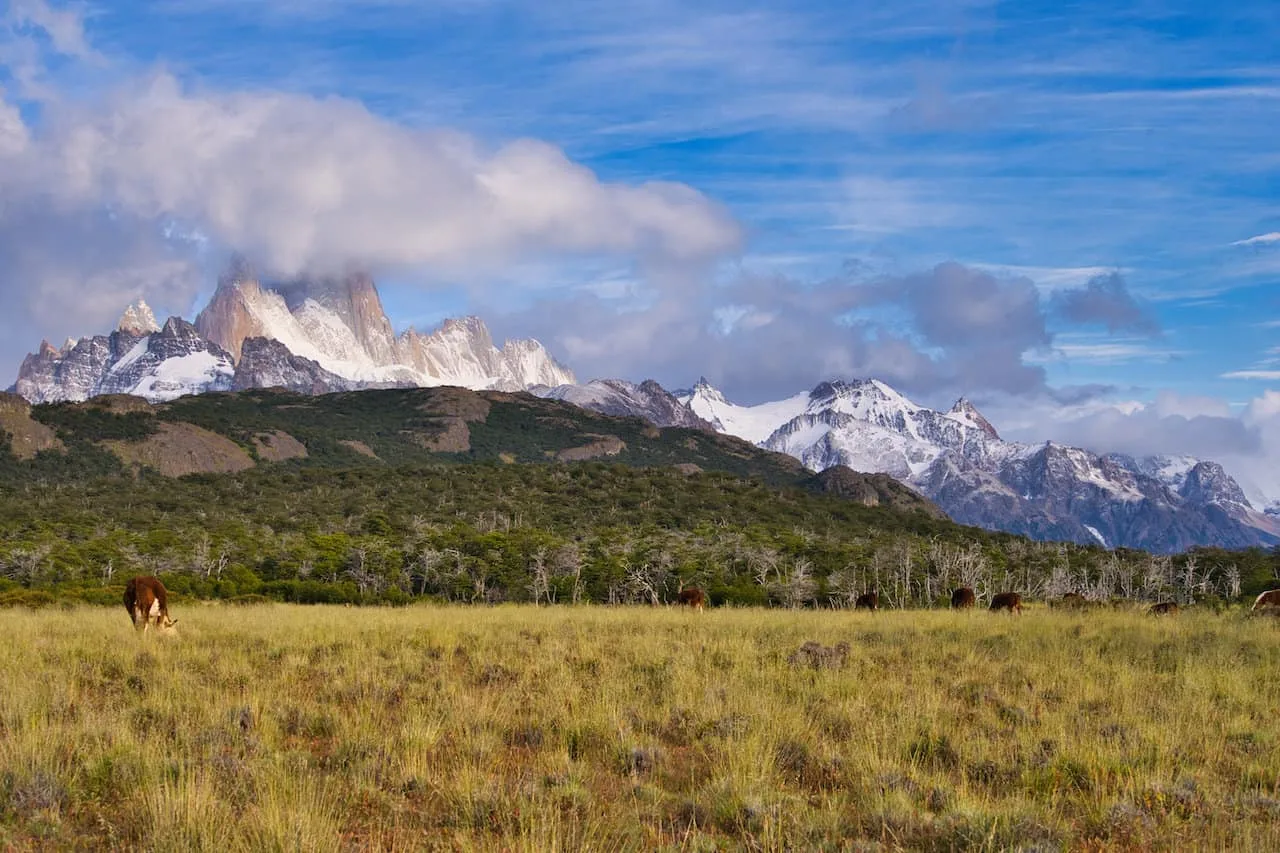
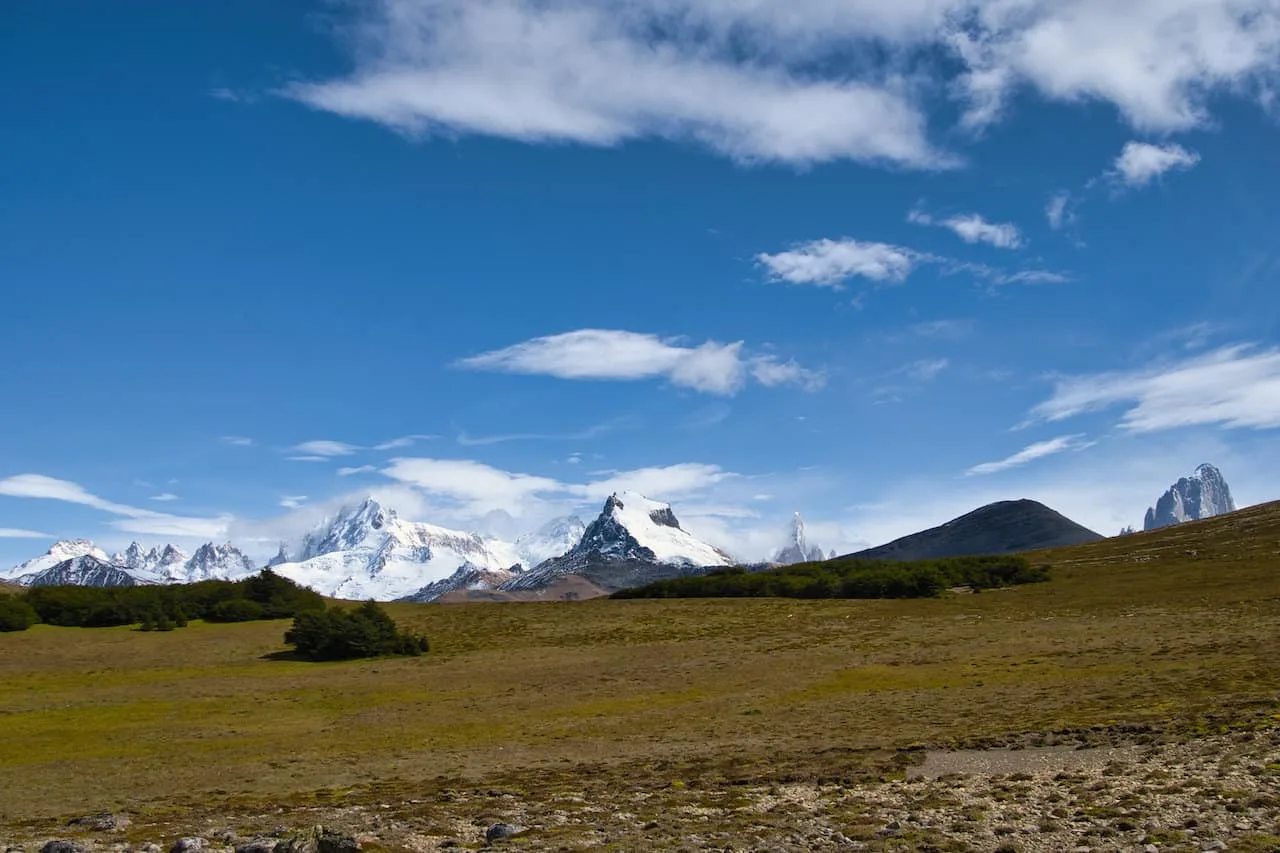
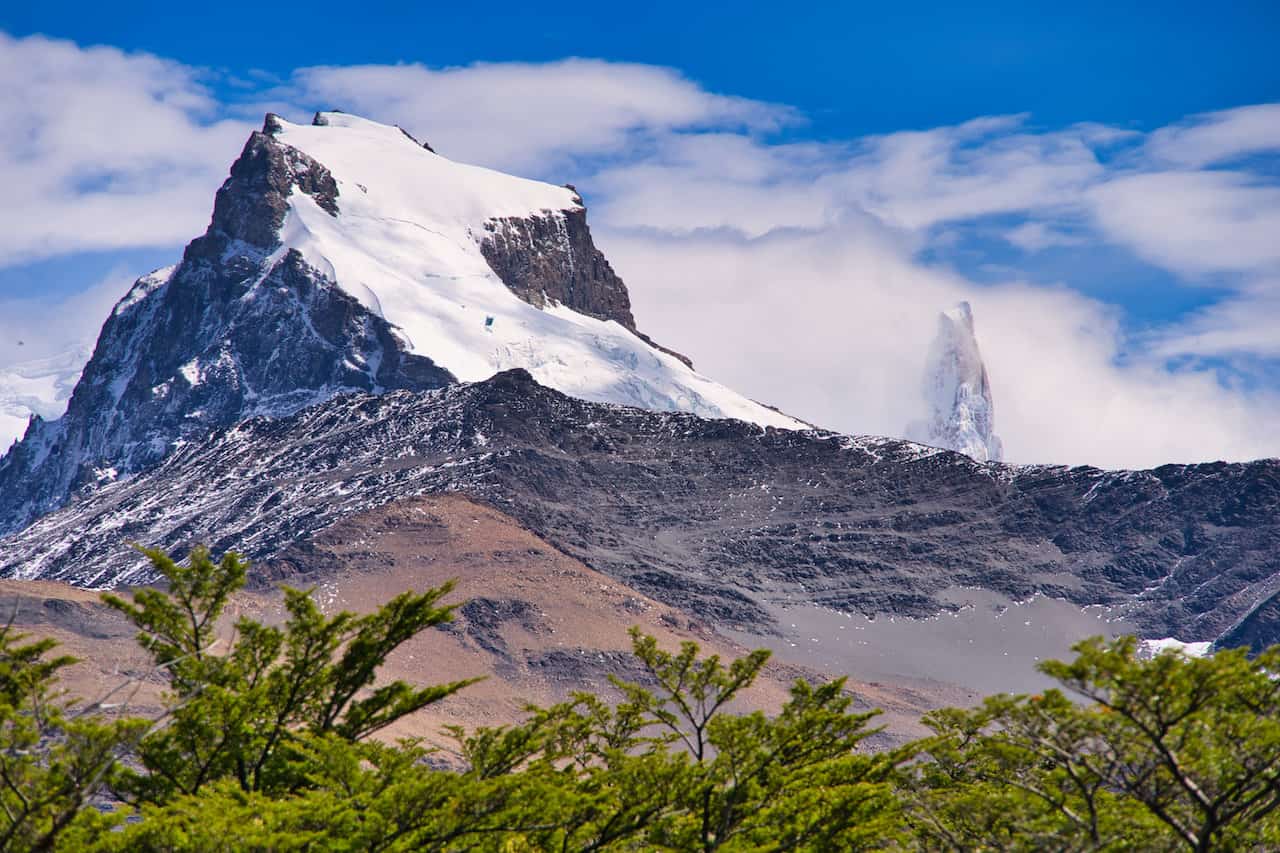
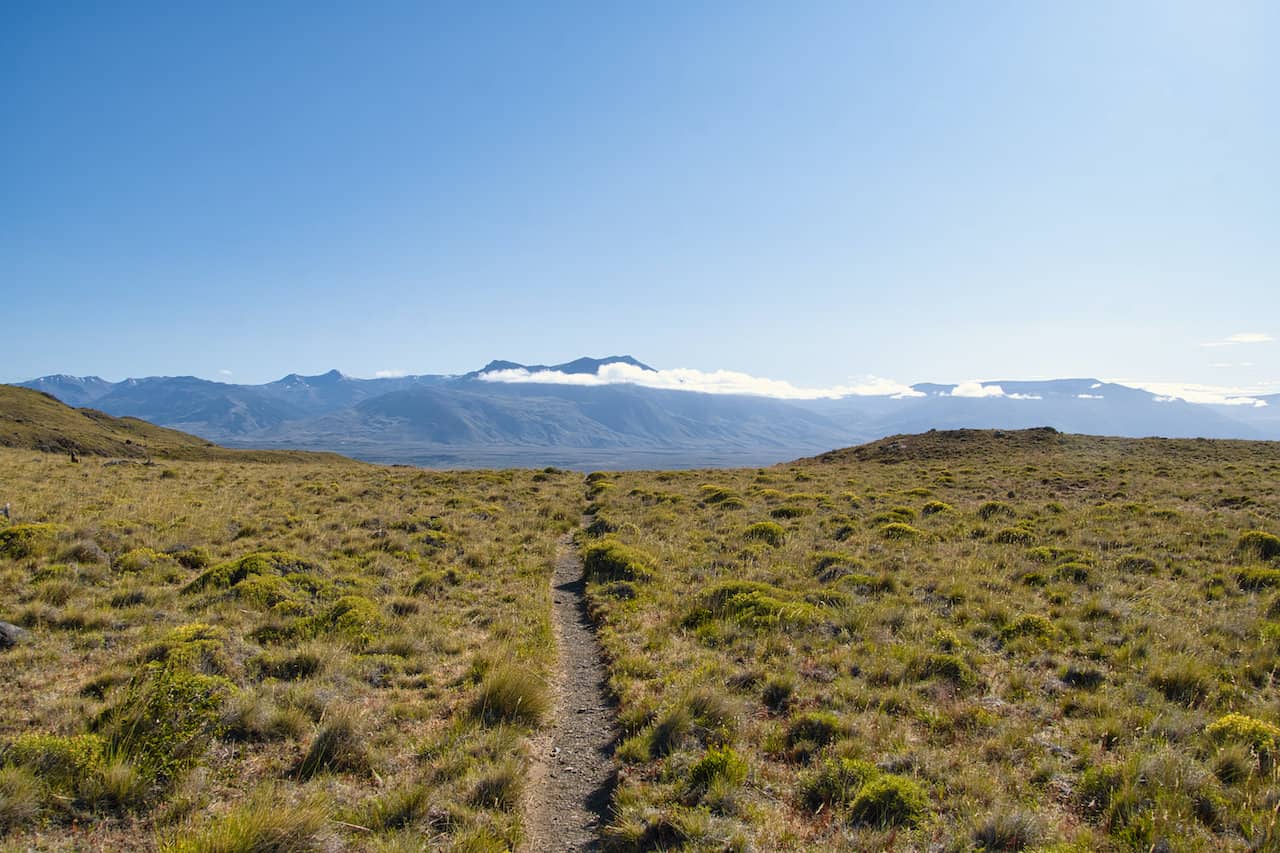
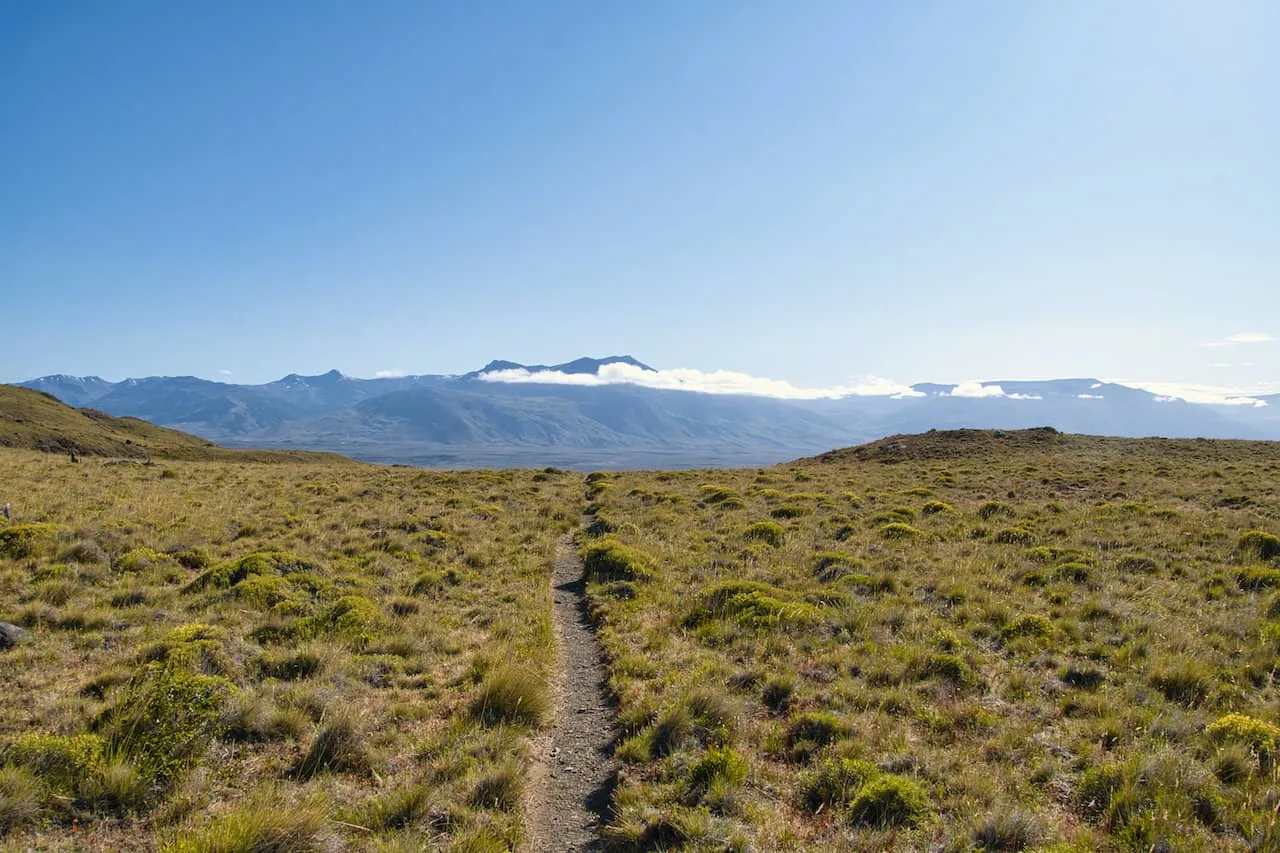
Throughout this portion of trail, the route does continue to gain elevation as you walk through the fields with the El Chalten mountainous landscape out in the distance.
The elevation gain here is moderate and not too steep, although some portions may be tougher than others.

Soon enough, you will be welcomed to the very obvious intersection – to the right will be the trail up to Loma del Pliegue Tumbado, and to the left is the trail to Laguna Toro.


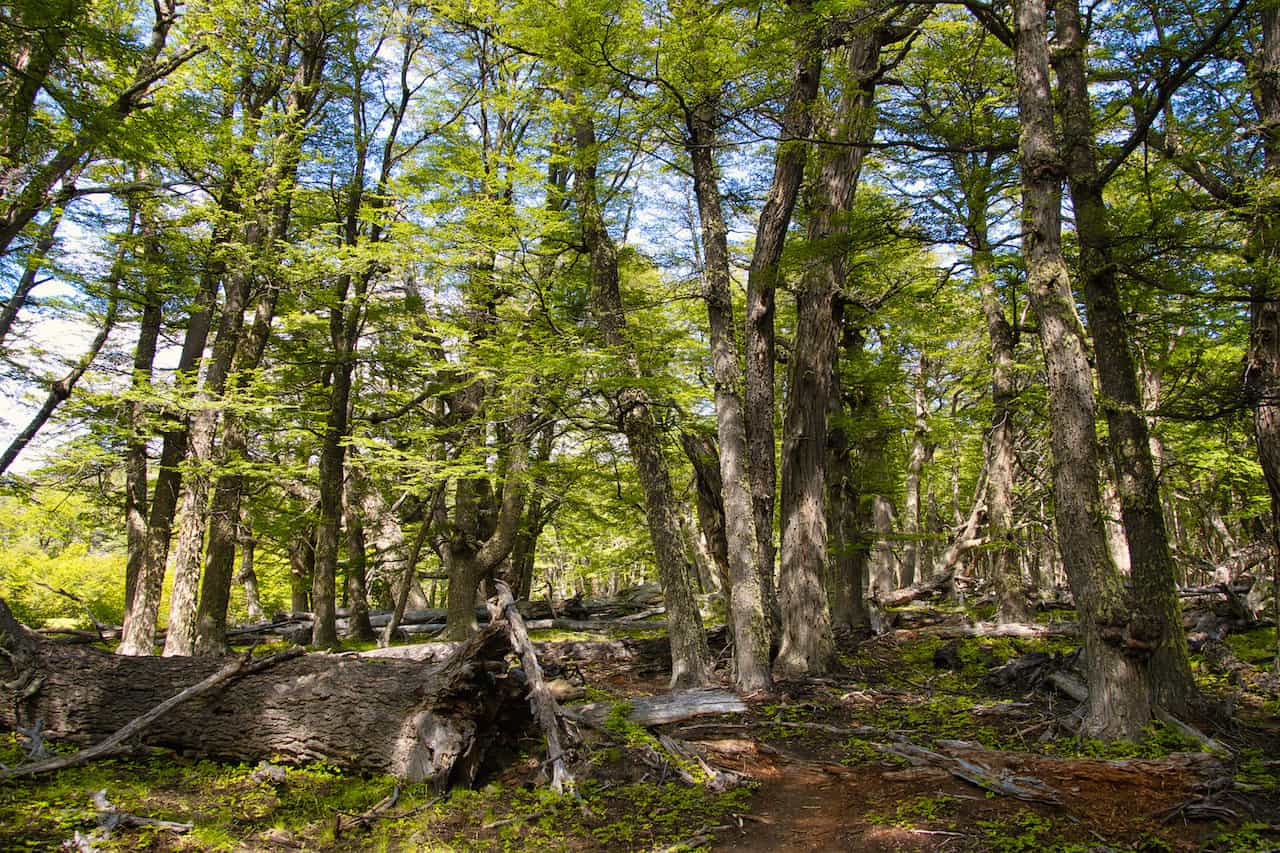
As you continue to the left, the trail then ascends right into the dense forest. This portion of trail is the only main section, where you will be hiking among the trees, rather than the open landscape.
In addition to the trees, you will find some of the harder incline trekking for day 1 of the hike. The trail will be full of rocks, branches, and mud as you gain elevation through the trees.


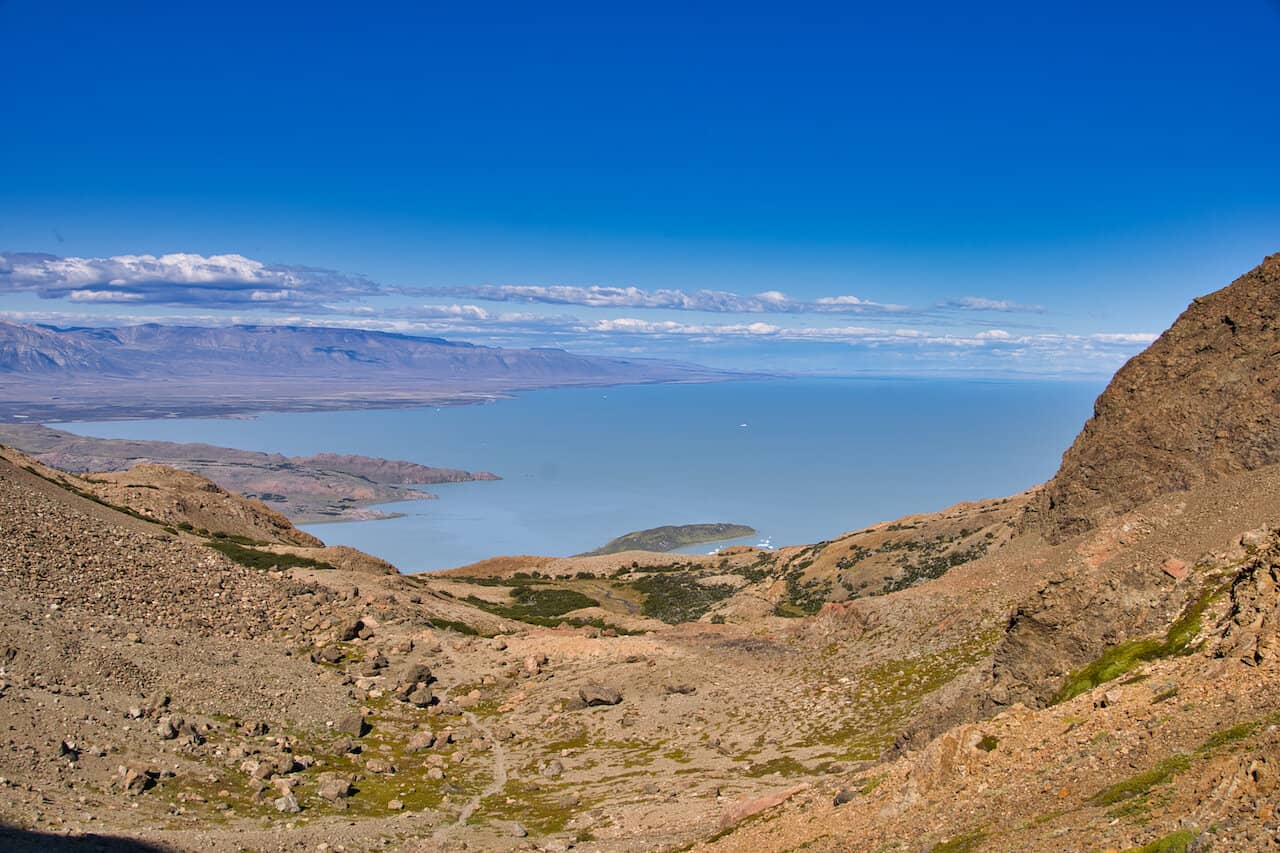
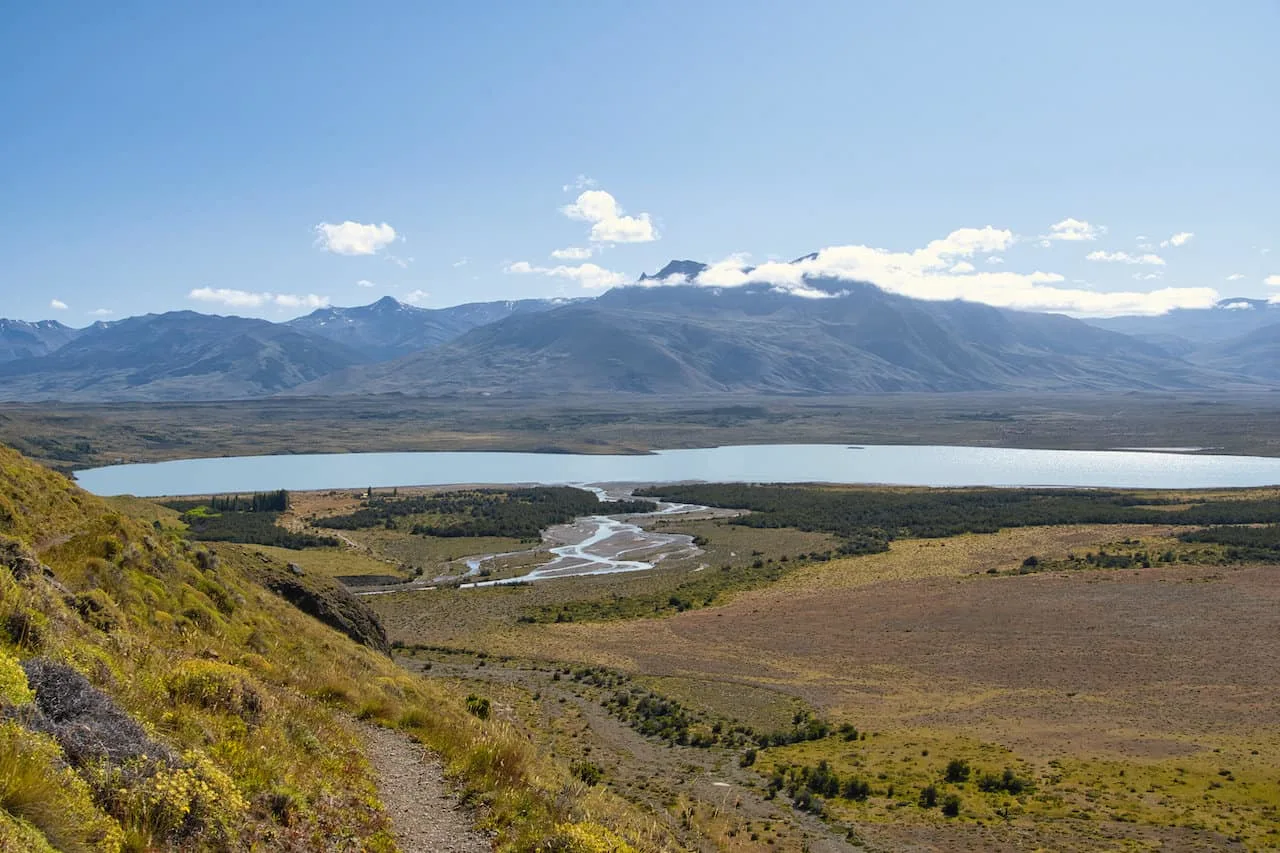
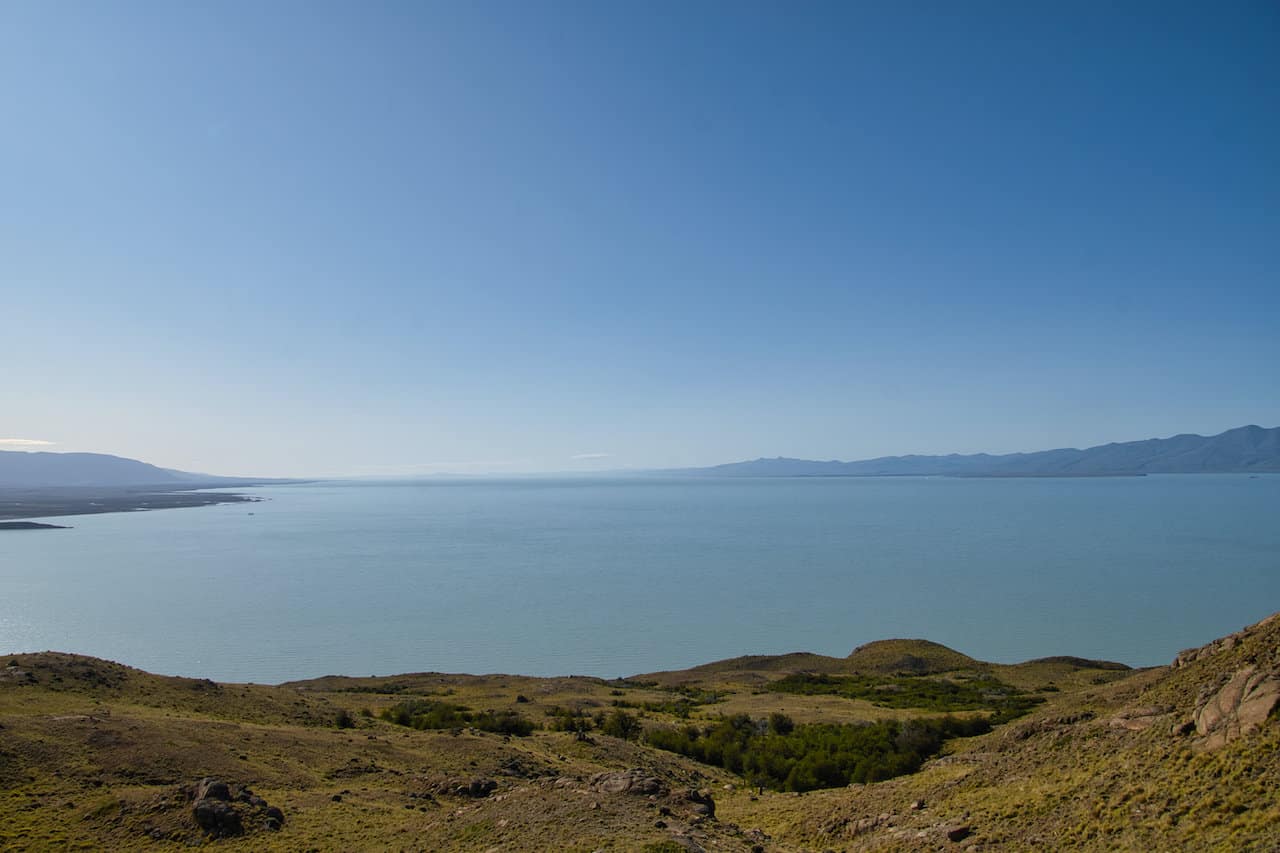
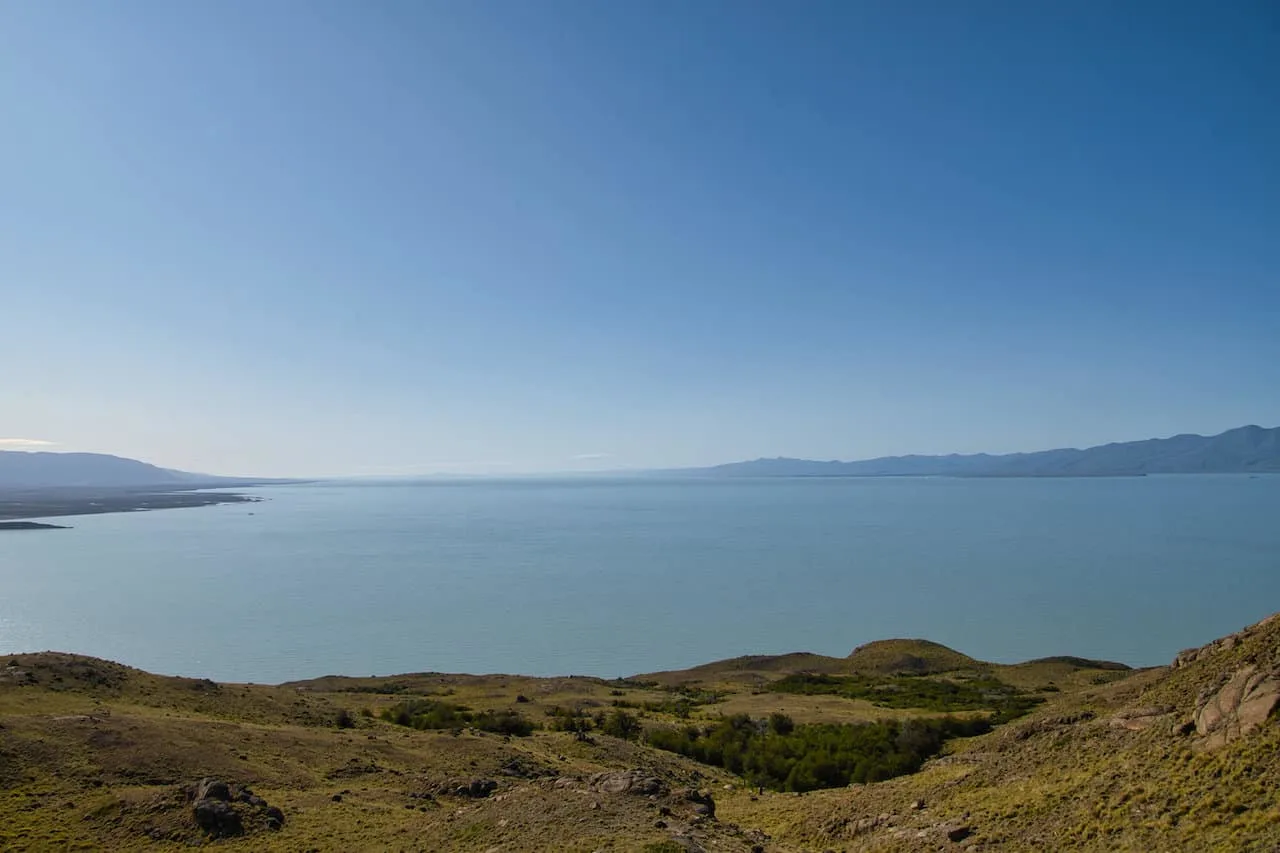
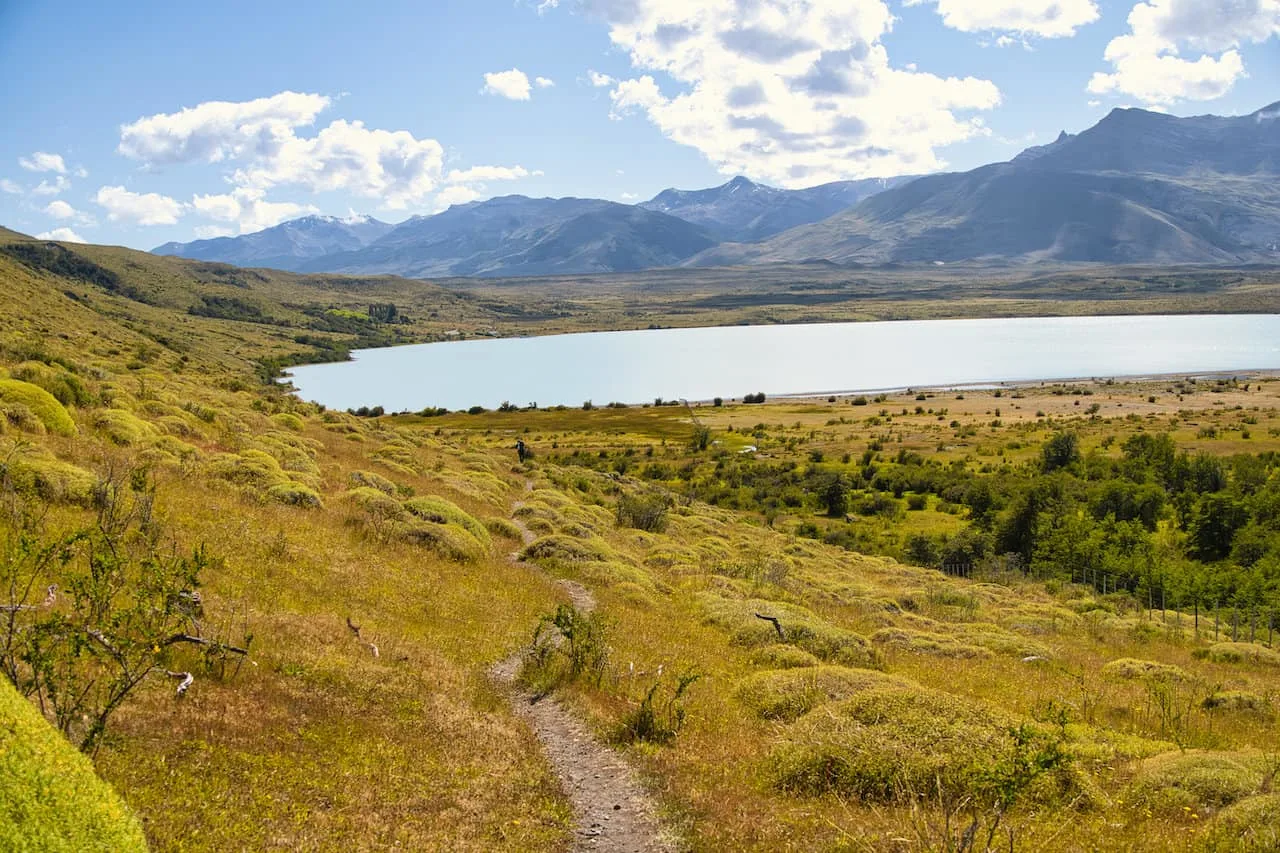
After exiting the trees, the landscape opens up once again as you continue to ascend to the high point for the day. From here you will get great views of Viedma Lake in one direction and the El Chalten mountains in the other.


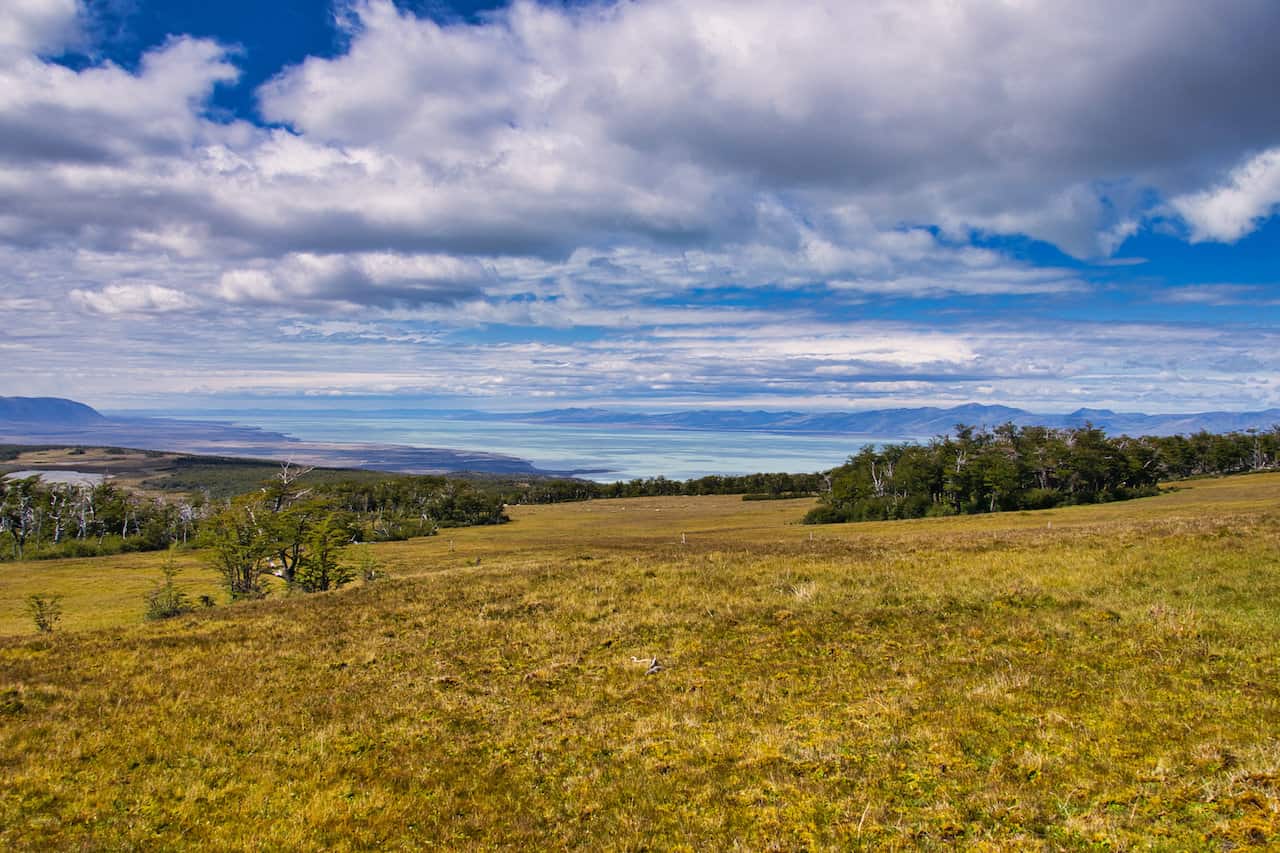
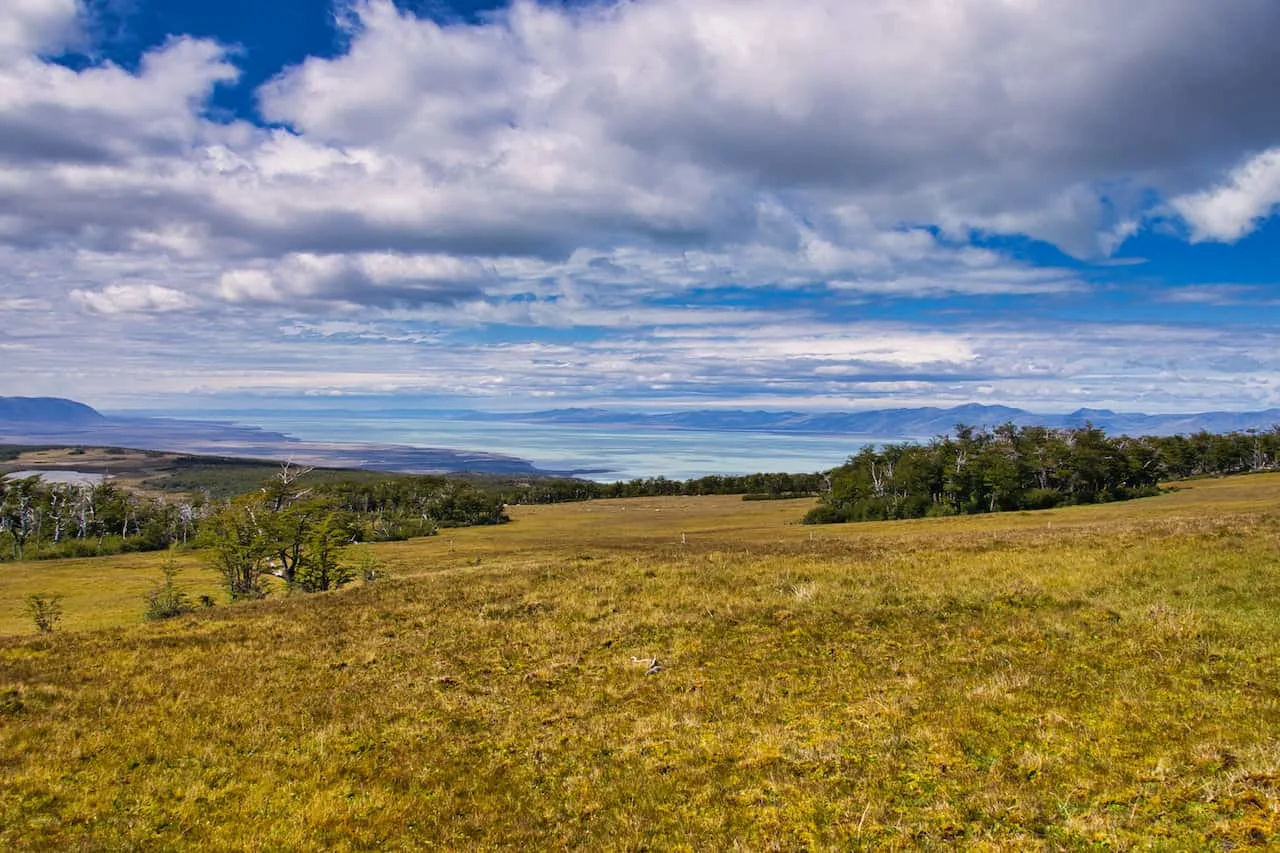

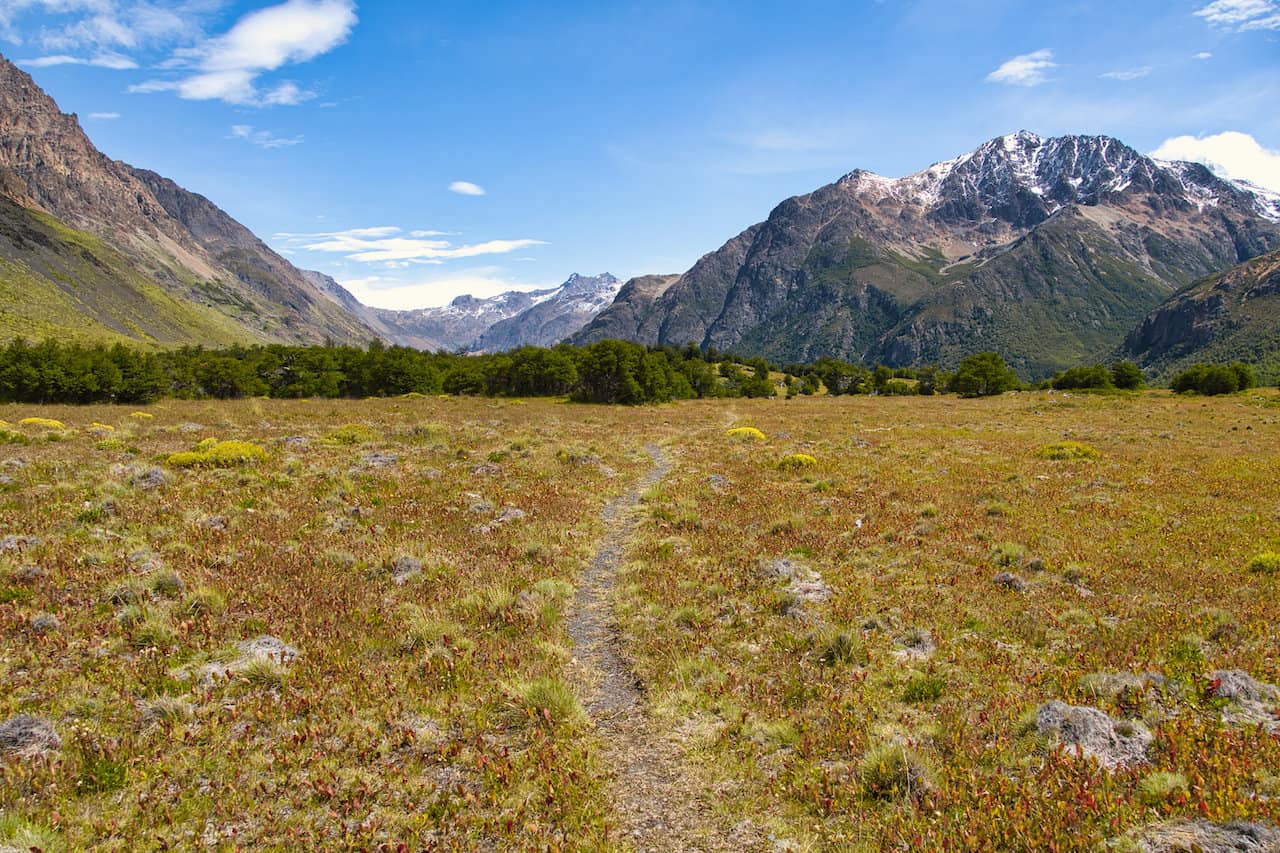
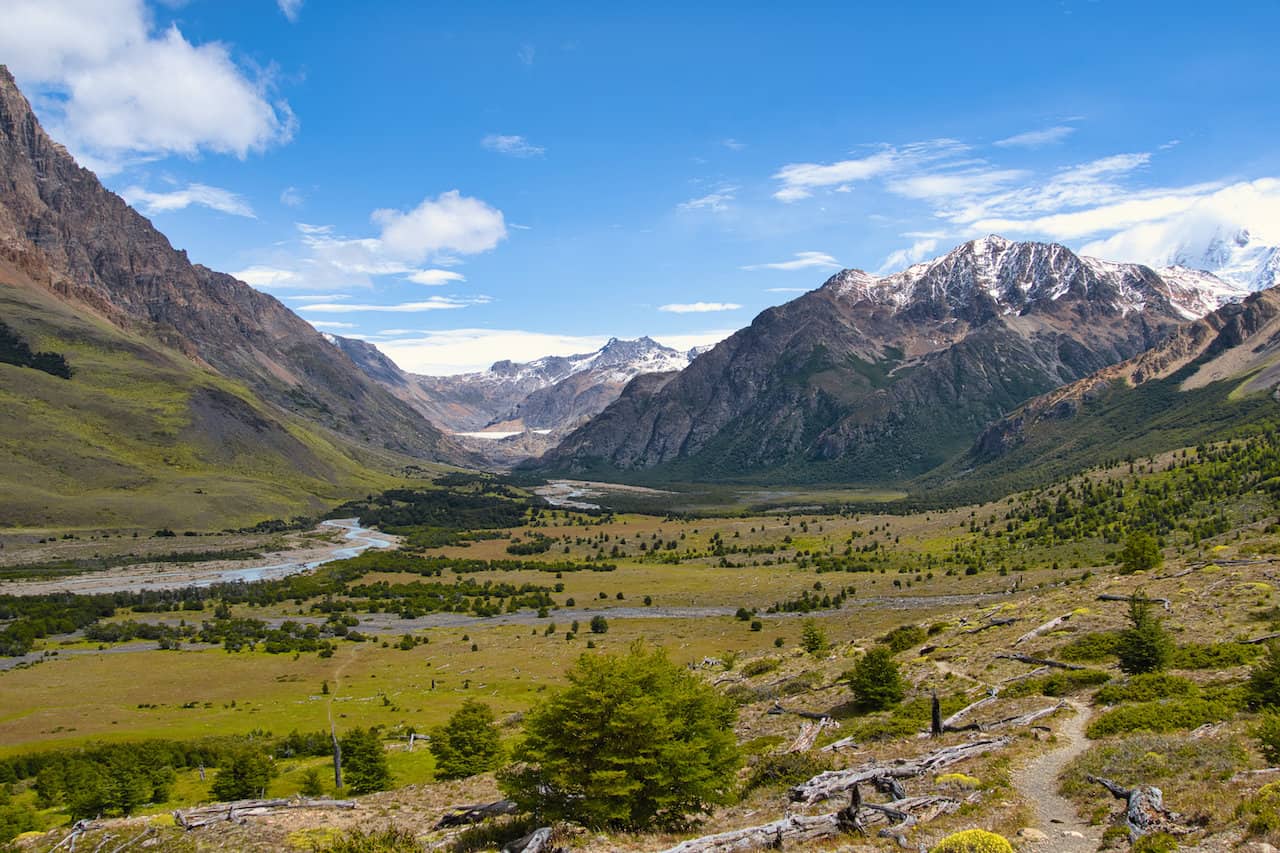
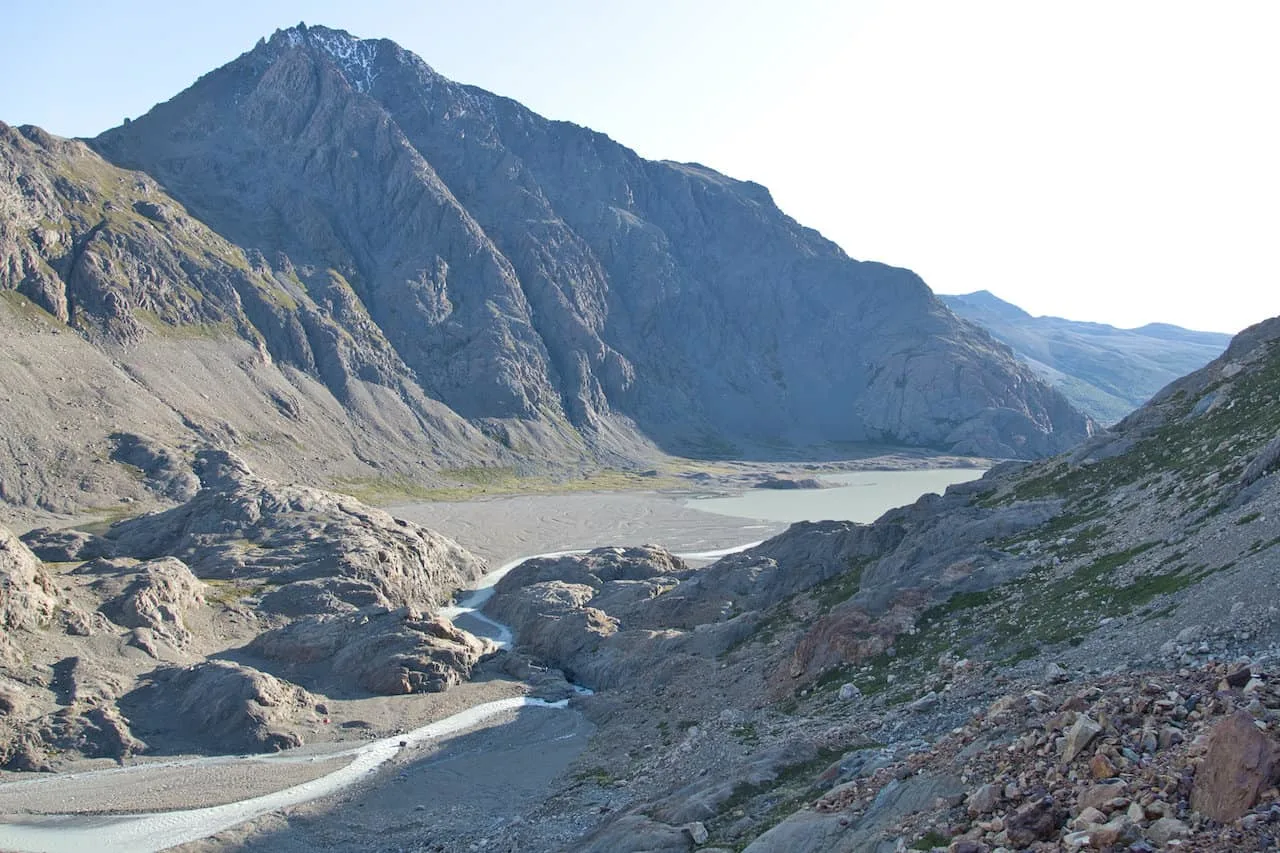
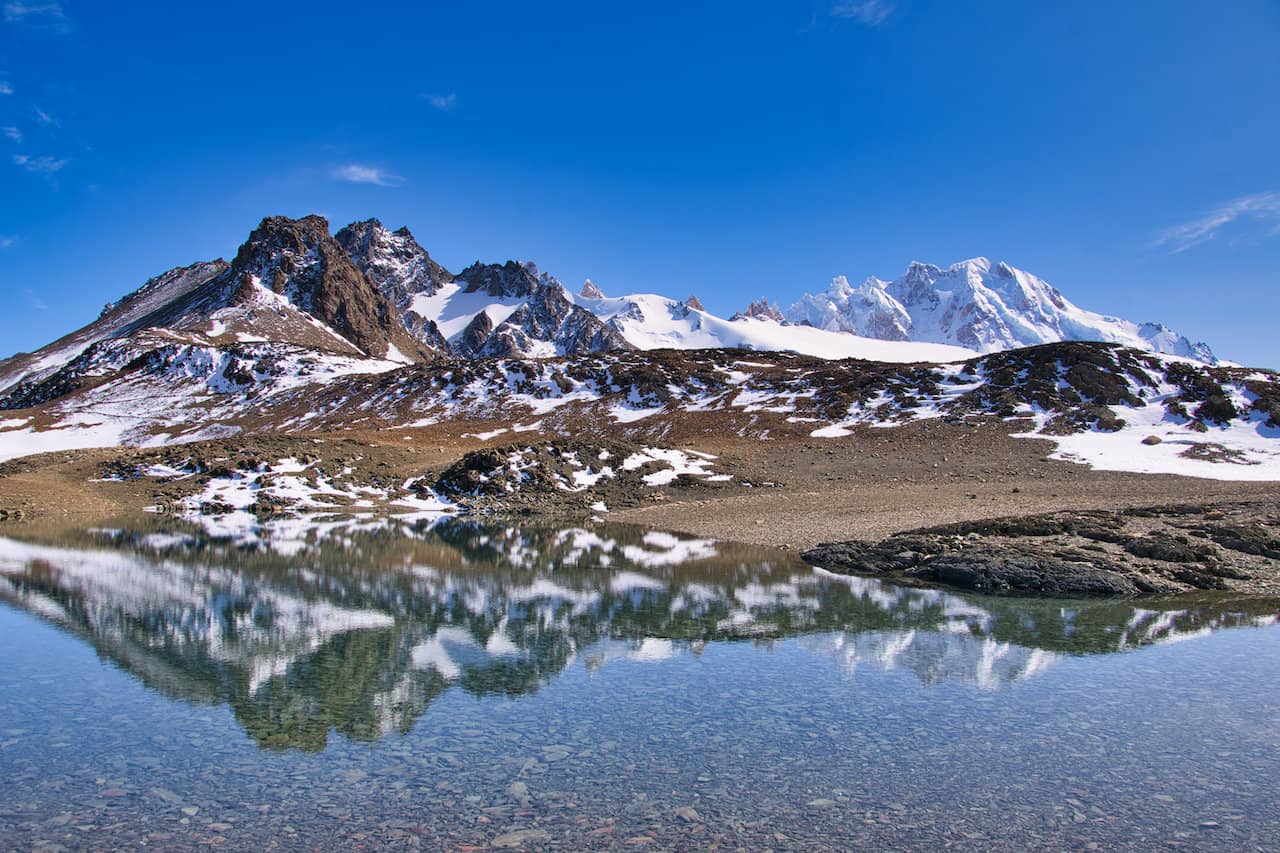
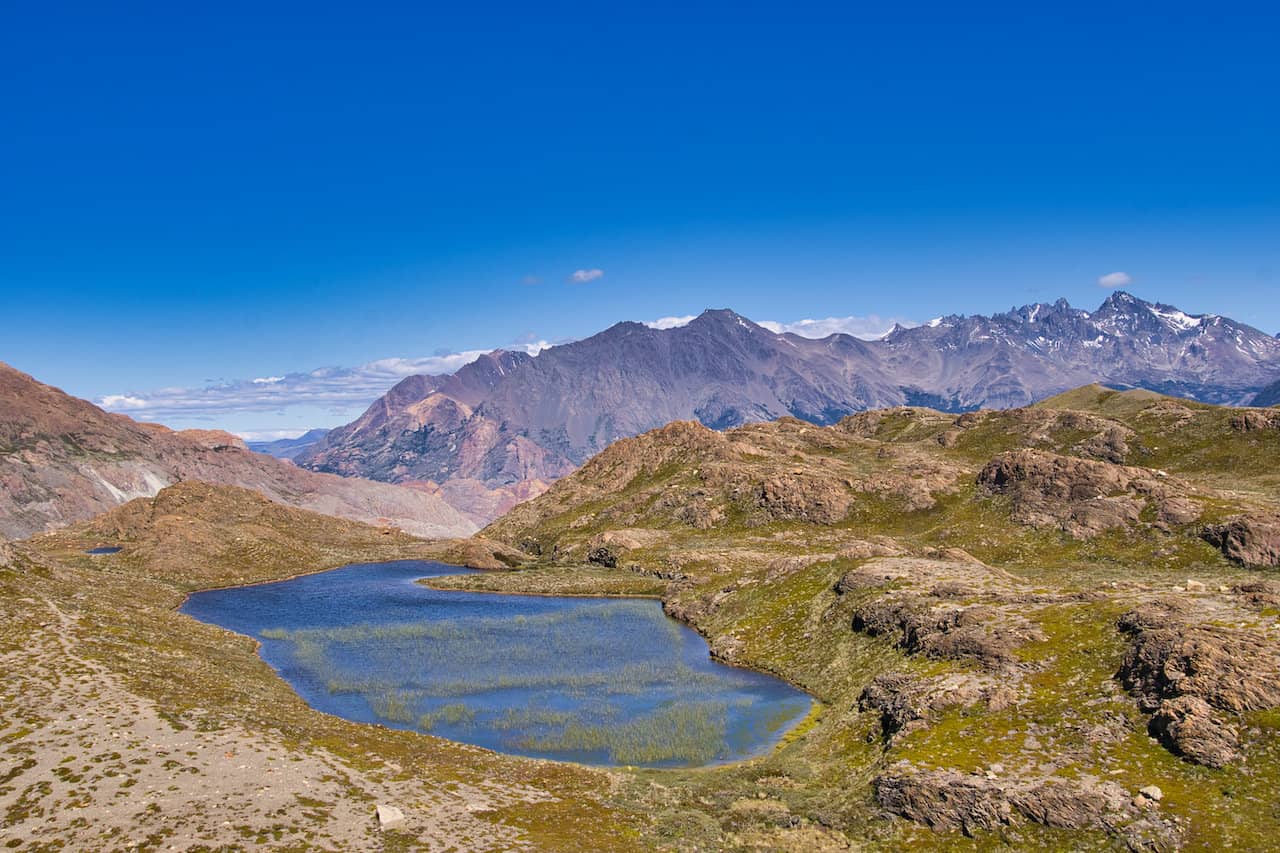
Soon enough out in front, you will have the vast Toro Valley to enjoy. For the next couple of days you will be hiking all throughout this valley. From these viewpoints though, you will get a great sense of what is yet to come on the trail.
Rivers, mountains, glaciers, lakes and more will all be in view as you slowly make your way down through the valley.
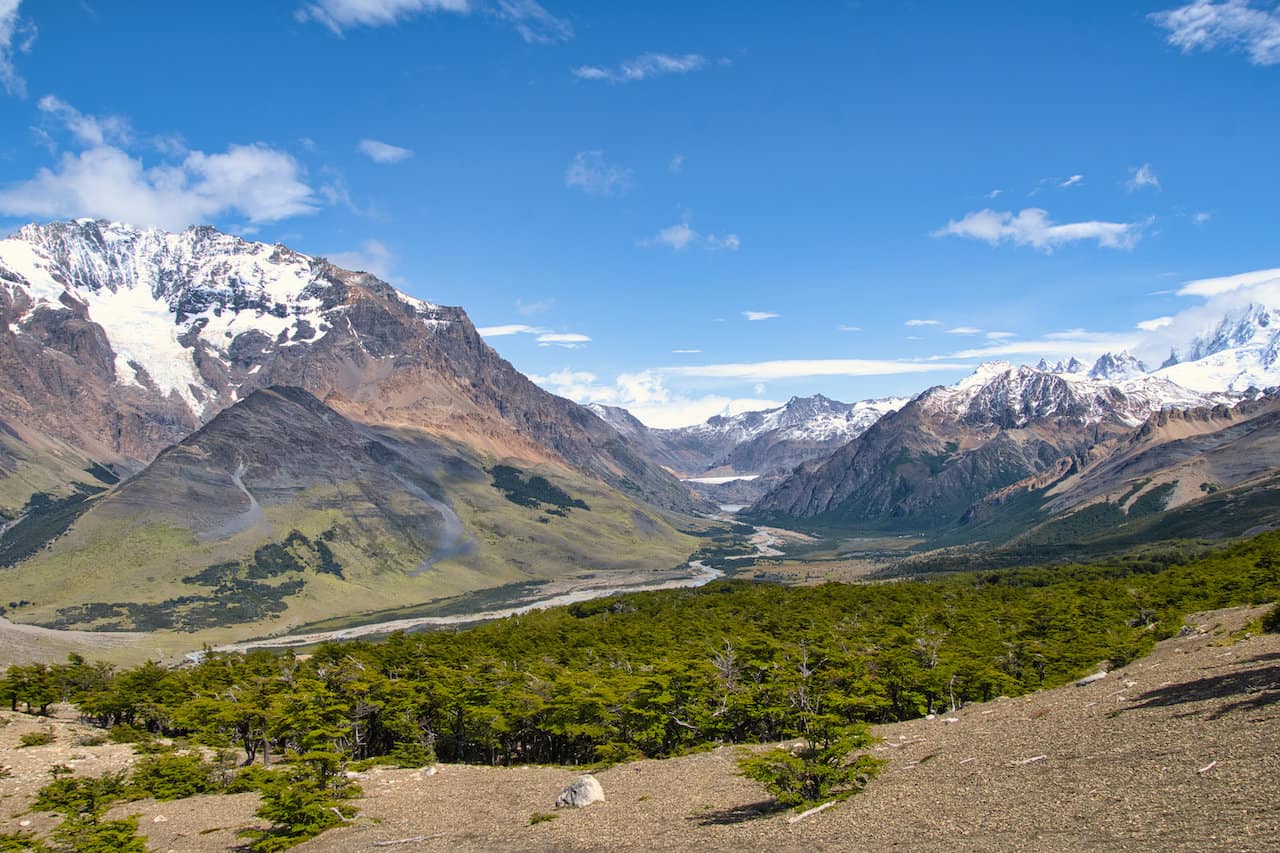


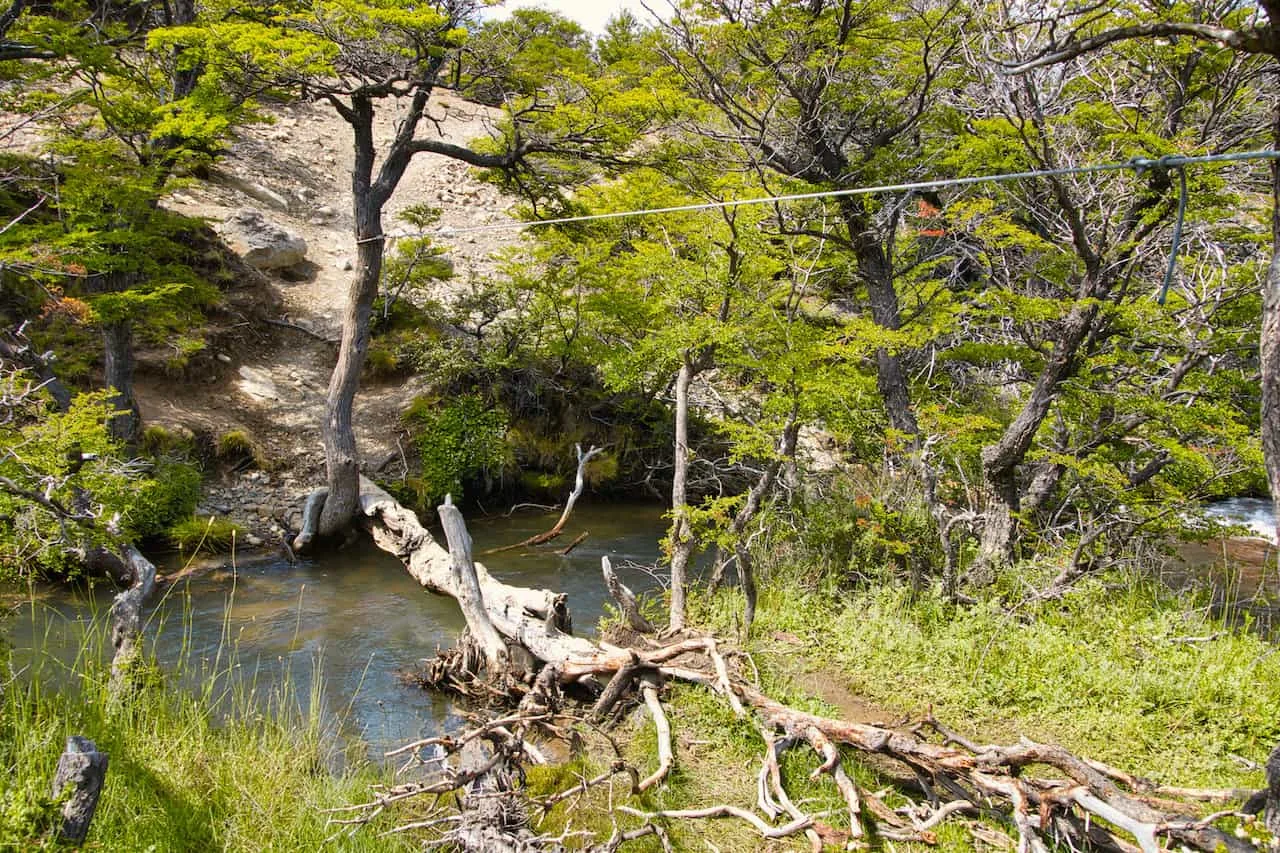
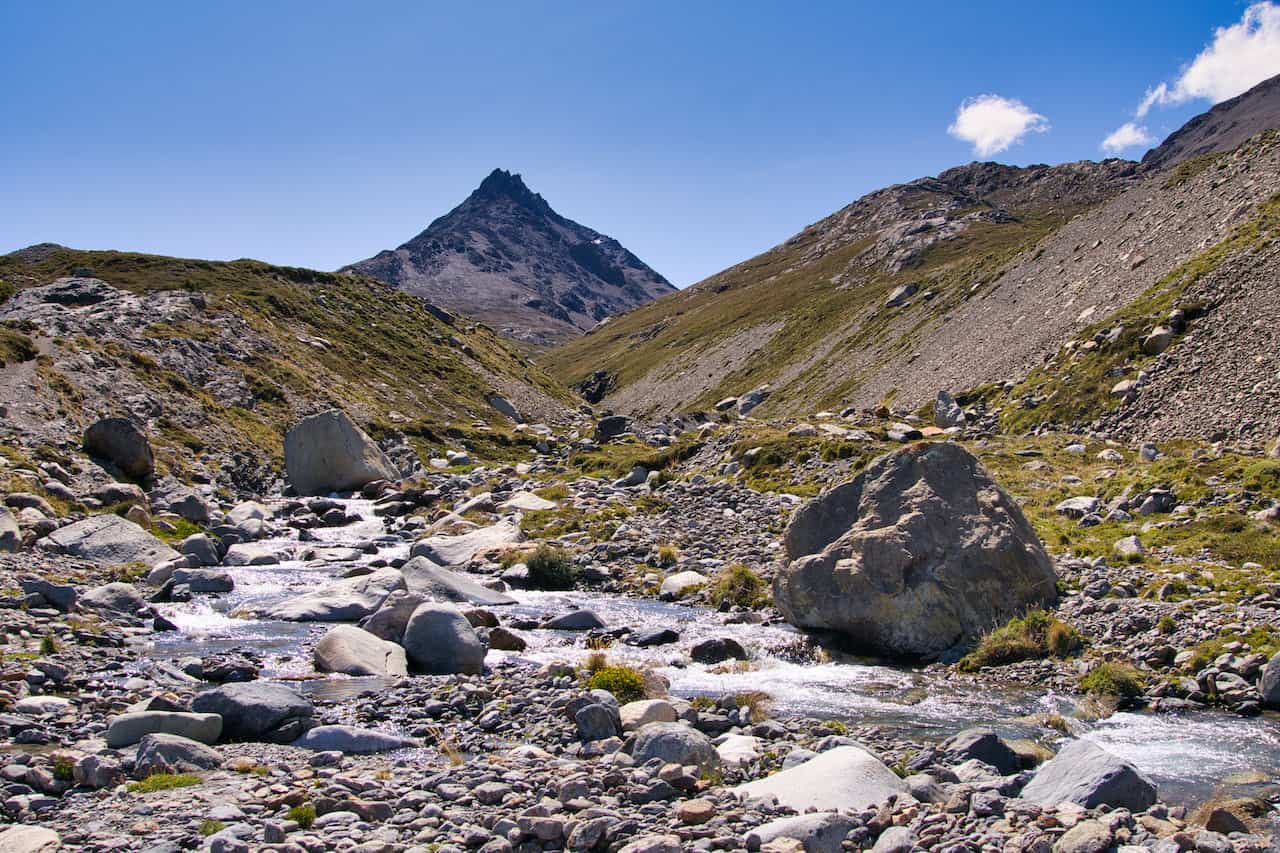
As the trail descends downwards, you will continuously have some beautiful valley views before reaching the valley floor. From there you will follow the path onwards through the fields and across some river crossings.

You can see one of those water crossings below, so just be careful as you make your way across. I have read that there could be other water crossings that require to walk across the river itself, but that was not the case when I hiked the route.

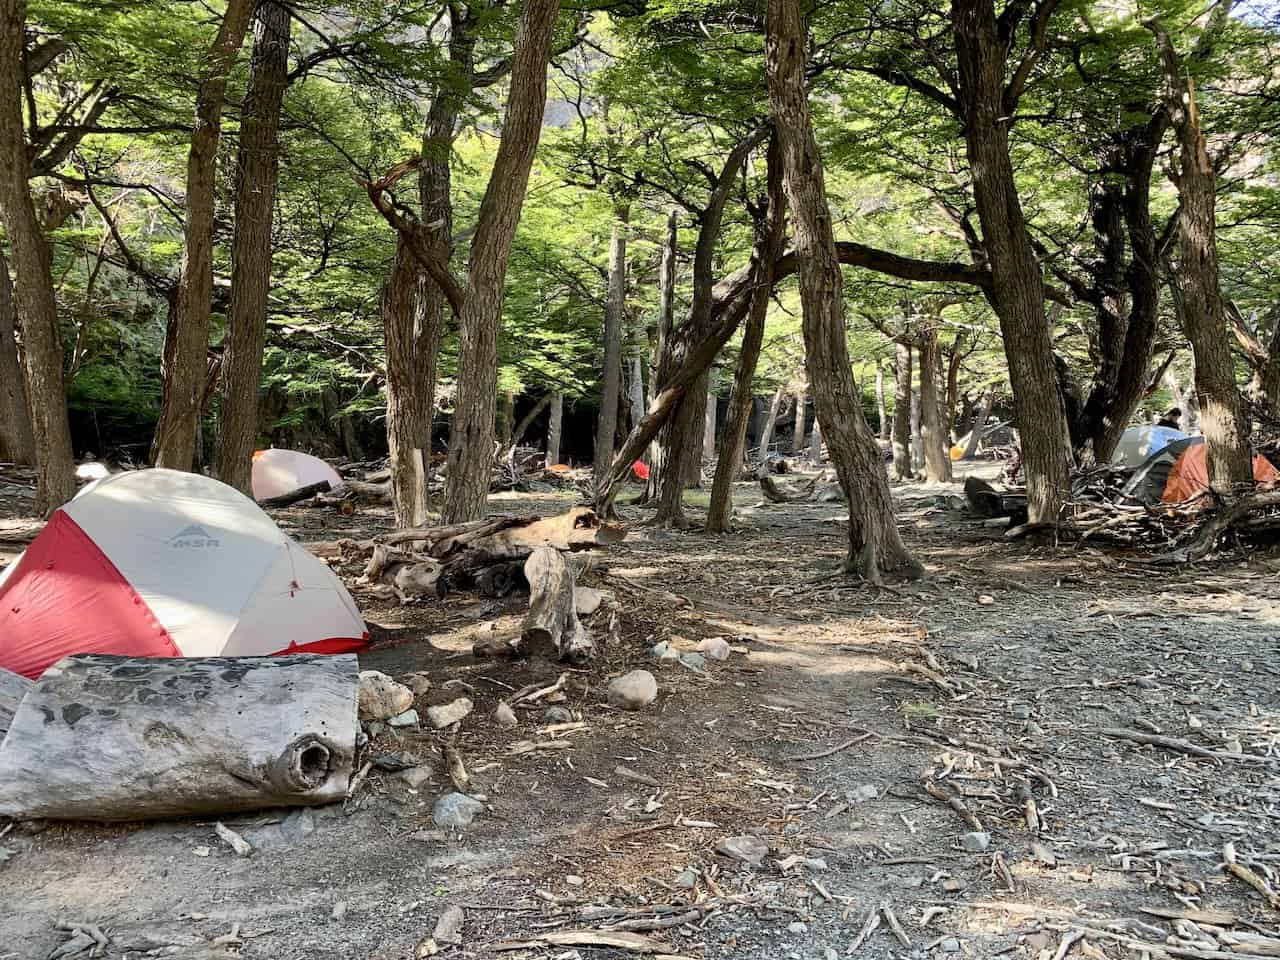
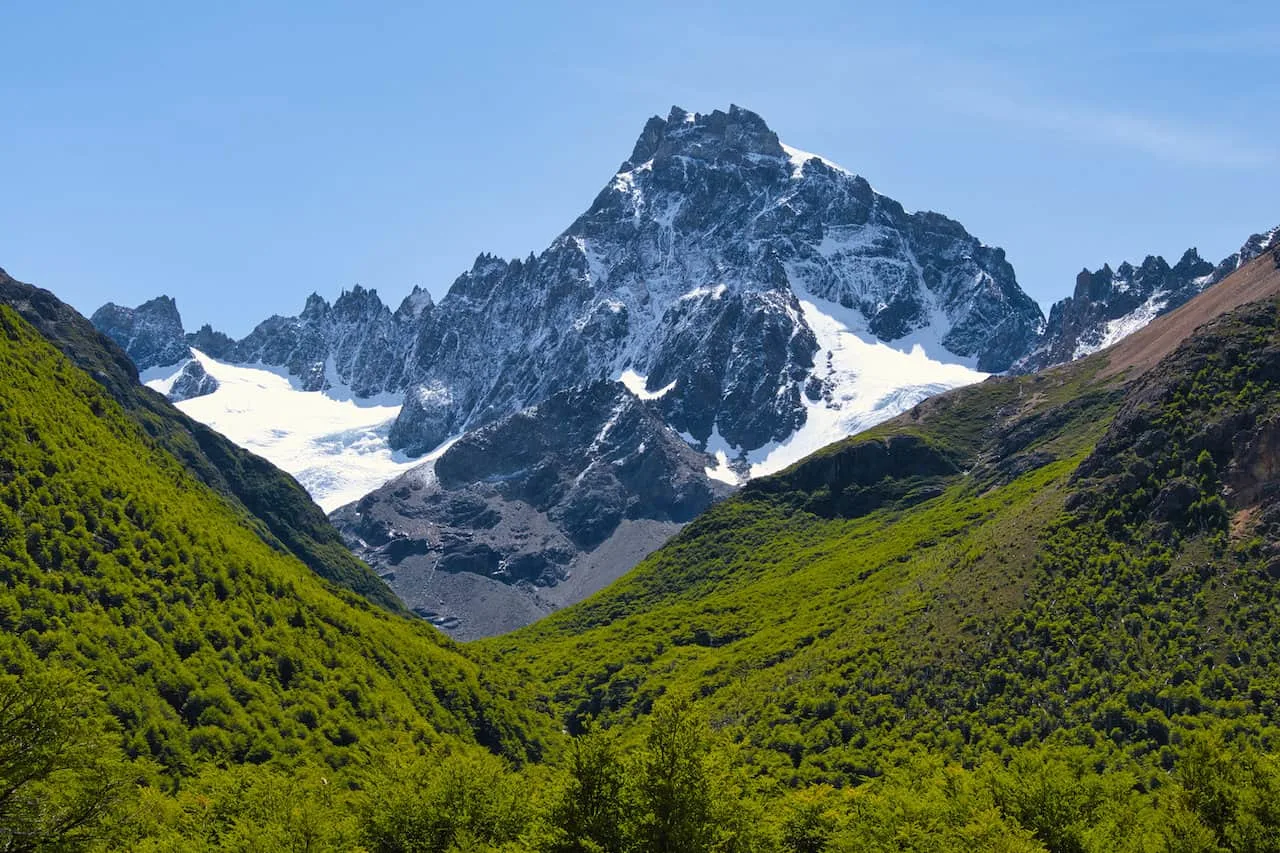
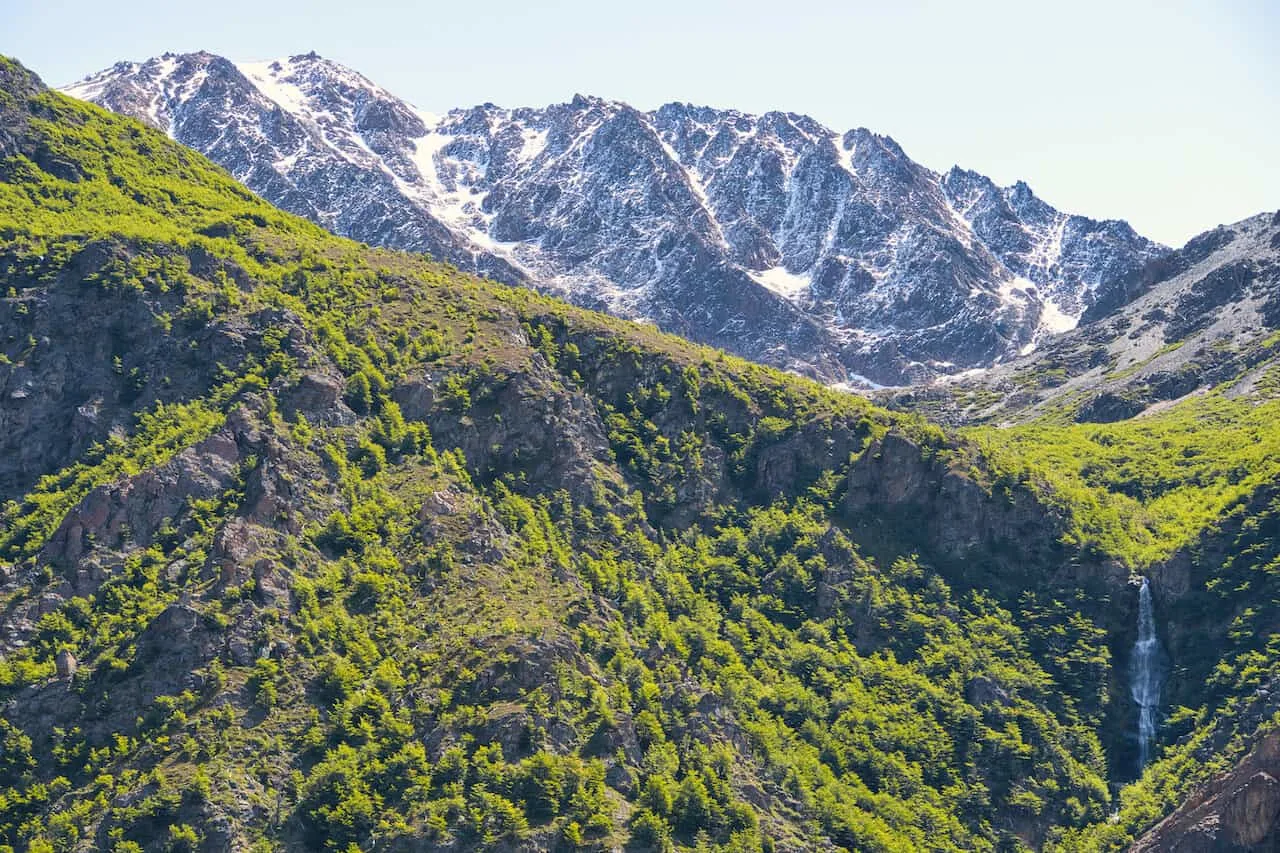
Continue to enjoy the mountain views up above as you take in the mountains, greenery, and even some waterfalls. It is then just a little bit longer until you reach the first campsite at Laguna Toro.
Find a nice campsite spot, set up your tent, and enjoy the rest of the afternoon along the river.


14) Huemul Circuit Day 2
The second day of the Huemul Circuit is one of the most memorable hiking days I have ever had and I am sure it will be the same for you.
Wake up early, have some breakfast, and pack up your tent, before beginning the hike up to Paso del Viento.
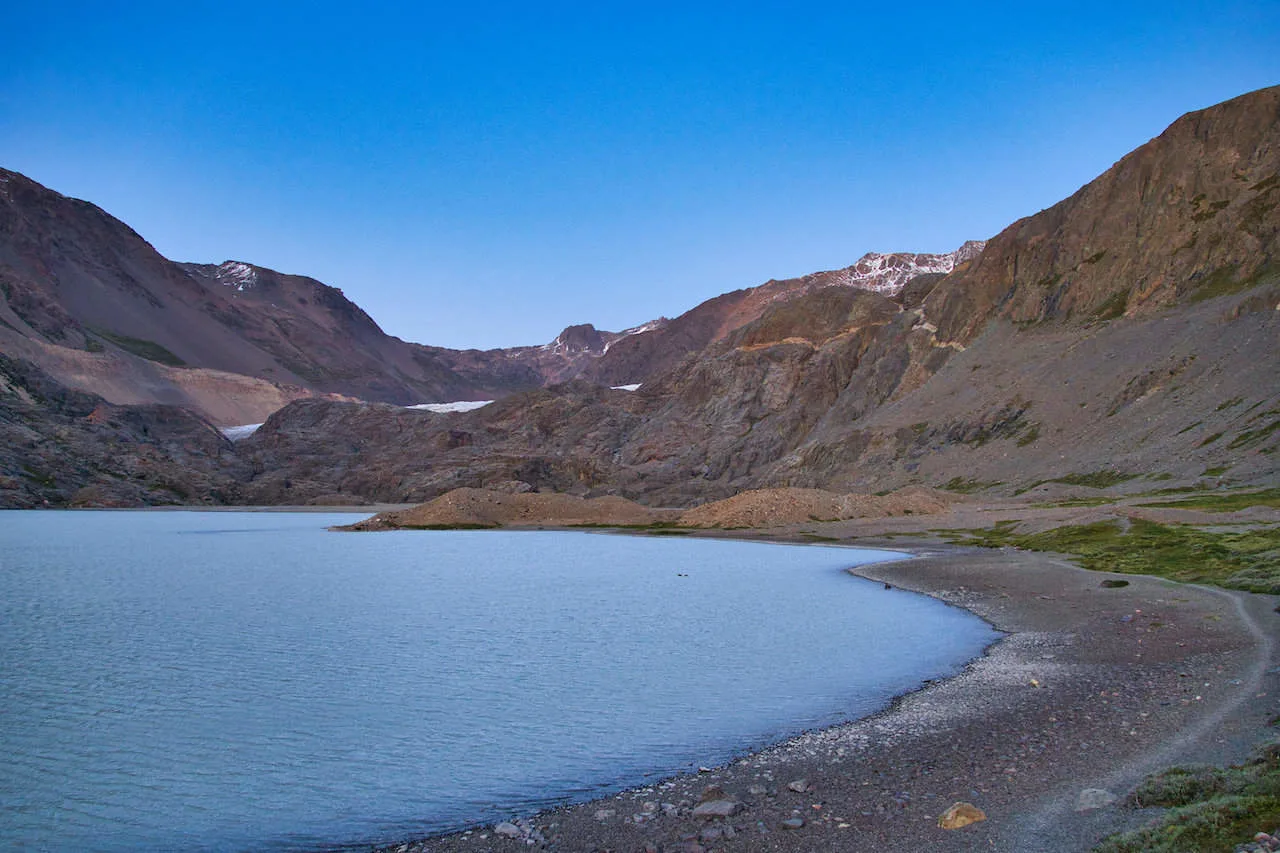
The first couple miles of the day will be quite easy as you leave the campsite and begin walking around Laguna Toro. Once you get to the other side of the lake, you will have a little bit of an ascent as you navigate up and over some rocks.

Once you get over this section, you will continue along until you reach the first Tyrolean traverse of the hike. I covered this pretty extensively earlier on, but once you reach the rope, follow the aforementioned instructions and get yourself to the other side.
This traverse is certainly the more intimidating out of the two as it is higher up and the ending point is on rocks (rather than a wooden platform like the second one).
If the traverse isn’t for you, then just head 100 feet or so further upstream, where you can find some safer spots to cross over the river by foot. Remember that you can only do so earlier on in the day due to rising river levels.

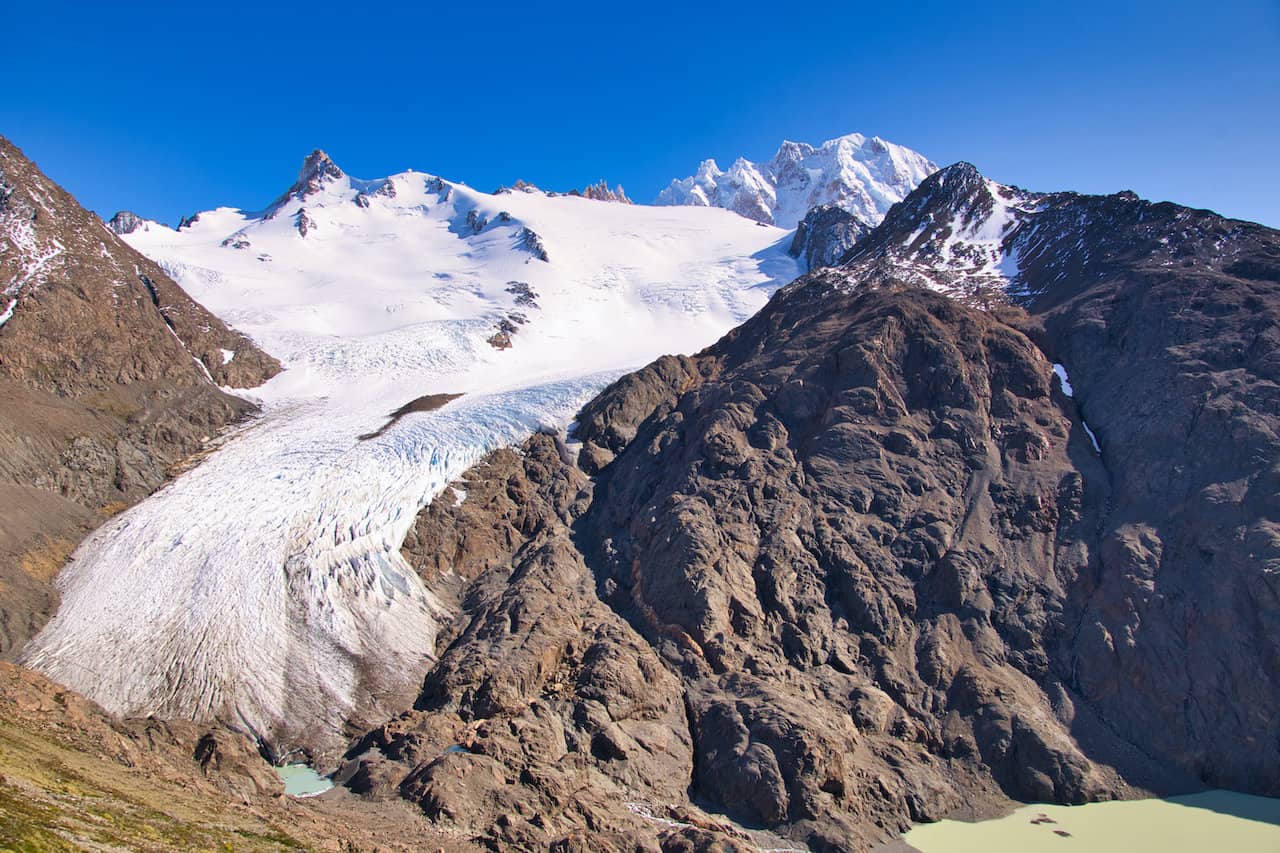
Once on the other side, you will begin traversing the side of the mountain as you slowly gain views of the glaciated landscape out in front of you. The trail will then make its way right alongside the glacier.
I want to clarify this portion of route here as it may be confusing for some.
Once you reach the glacier, you should continue to walk right alongside it. Do not dangerously ascend the mountainside to your left yet. Instead, stay low and walk alongside the glacier.
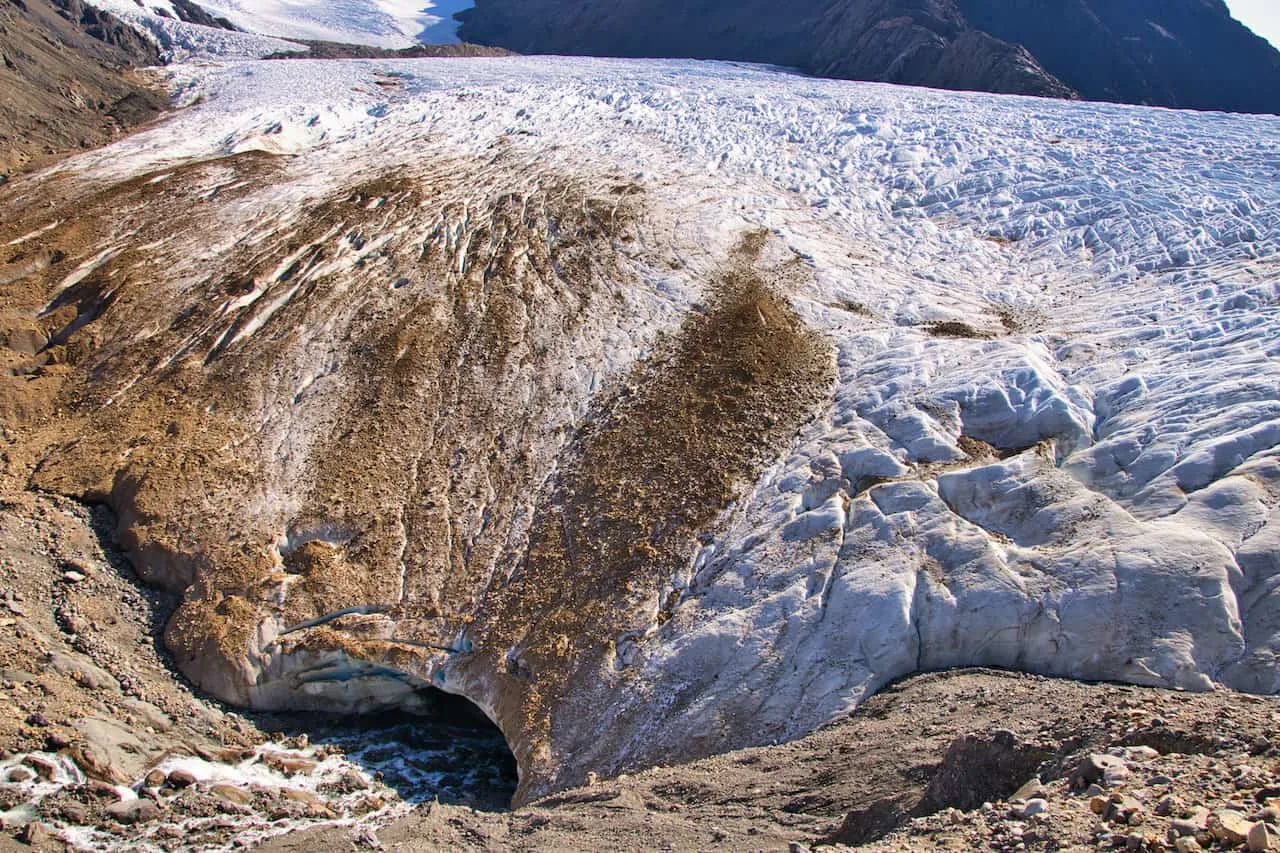
As you are hiking along the glacier, you should have the opportunity to walk on the glacier ice itself. Be extremely careful here and do not venture too far out. There are plenty of dangerous spots and you don’t want to put yourself in a compromising position.

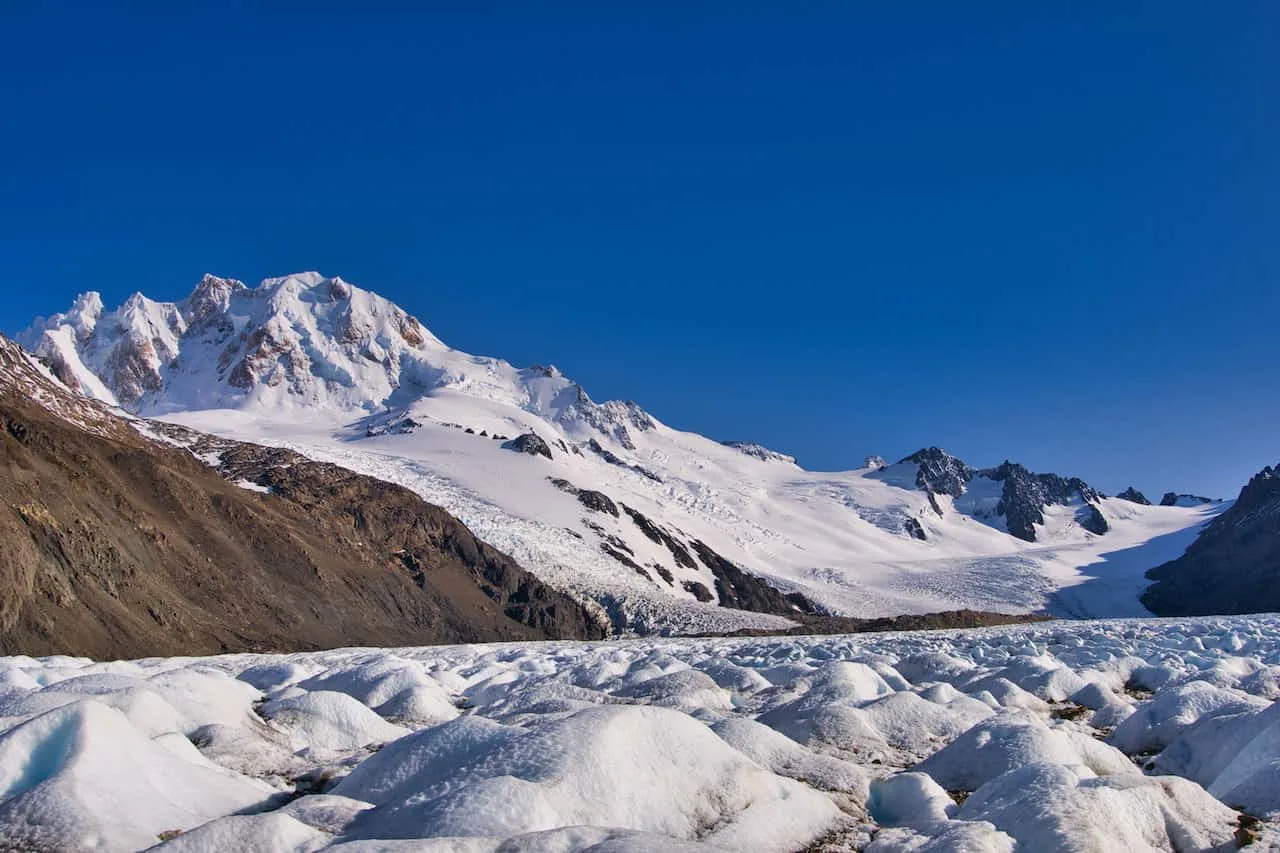

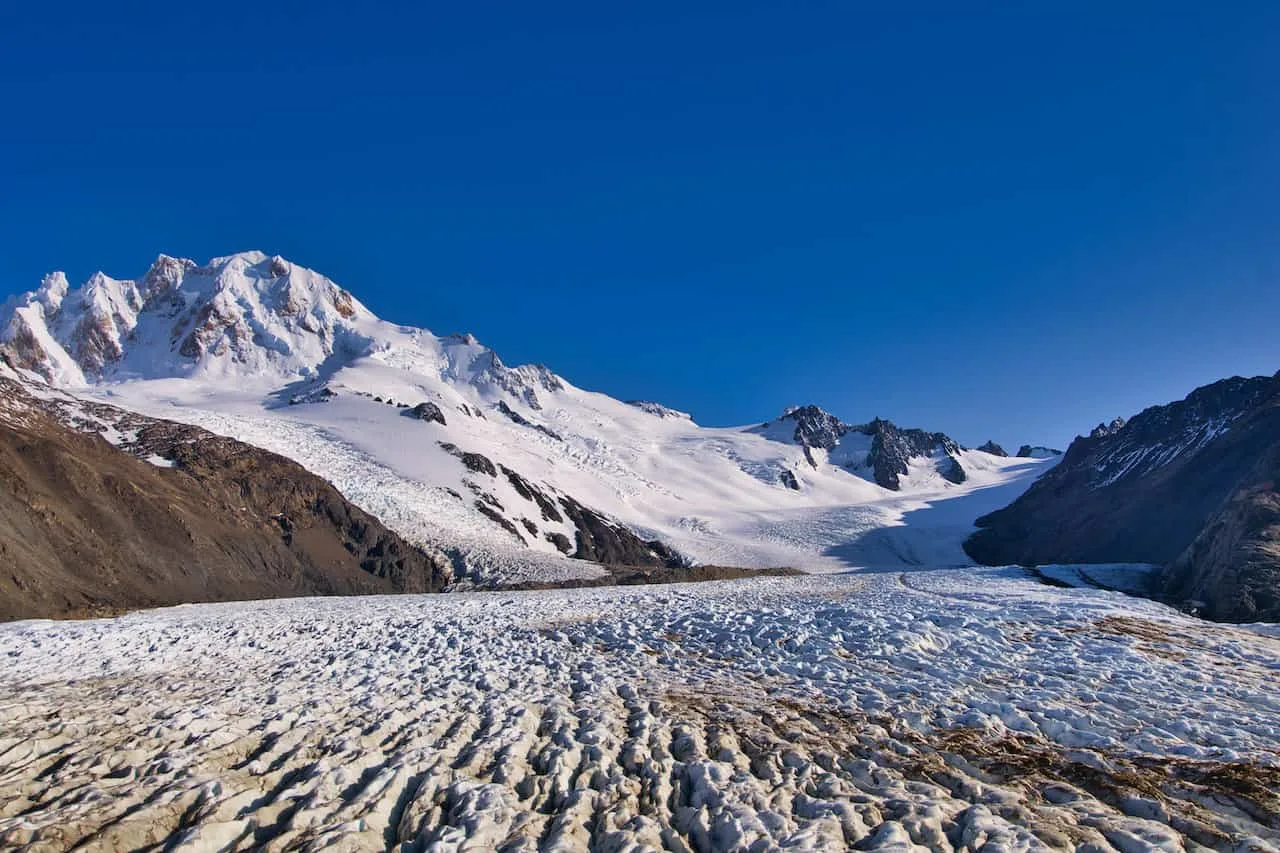
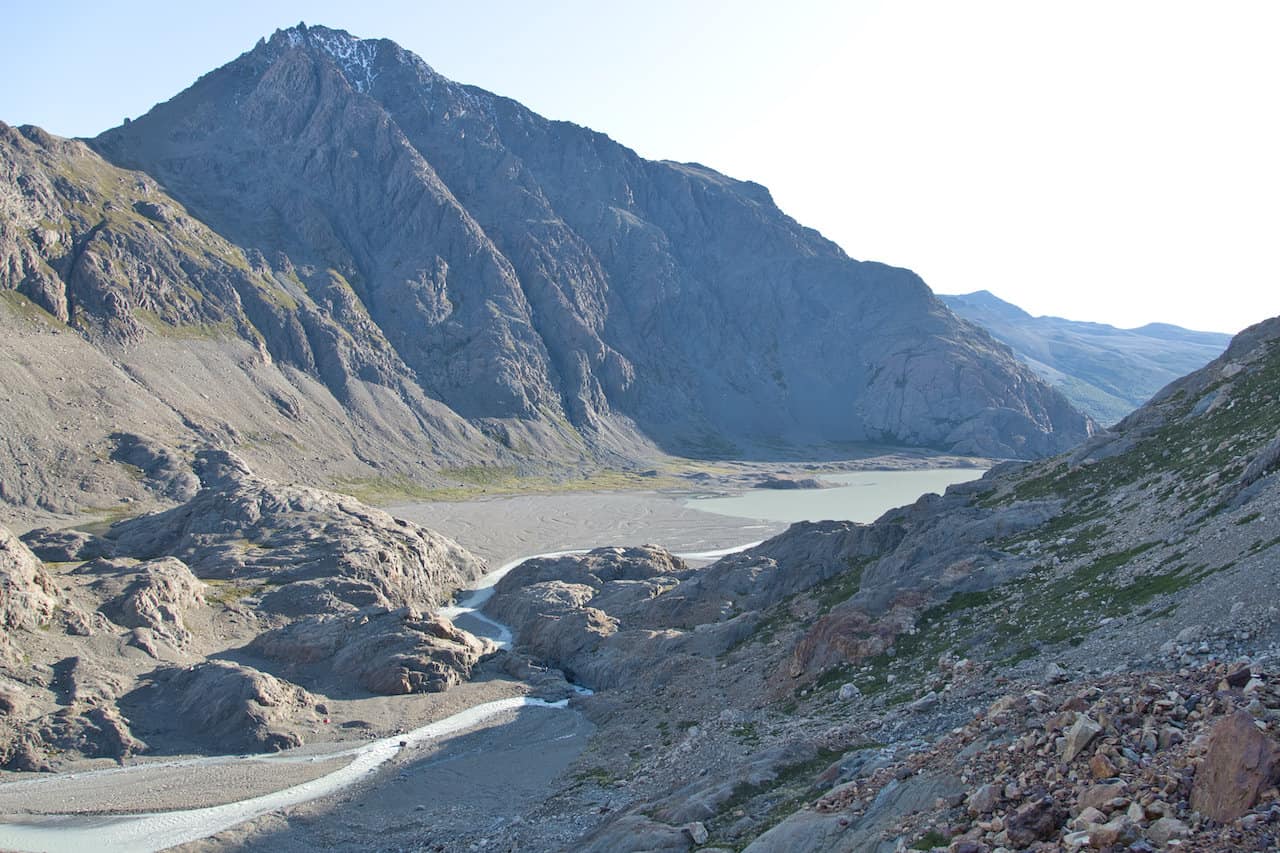
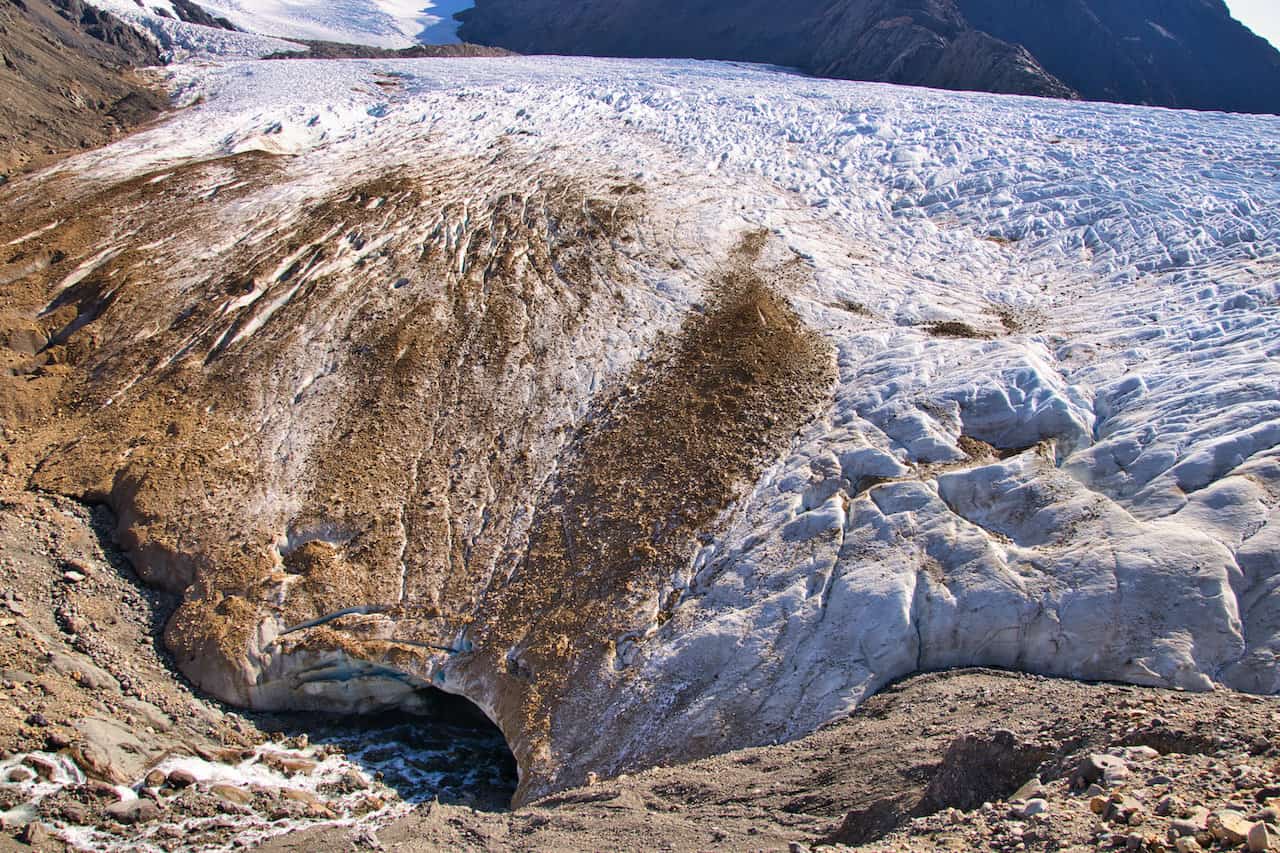
Continue to hike just alongside the glacier until you reach the junction, where you will see the glacial river making its way below the glacial ice (pictured below). Once you reach this area, you can begin to turn uphill to your left.
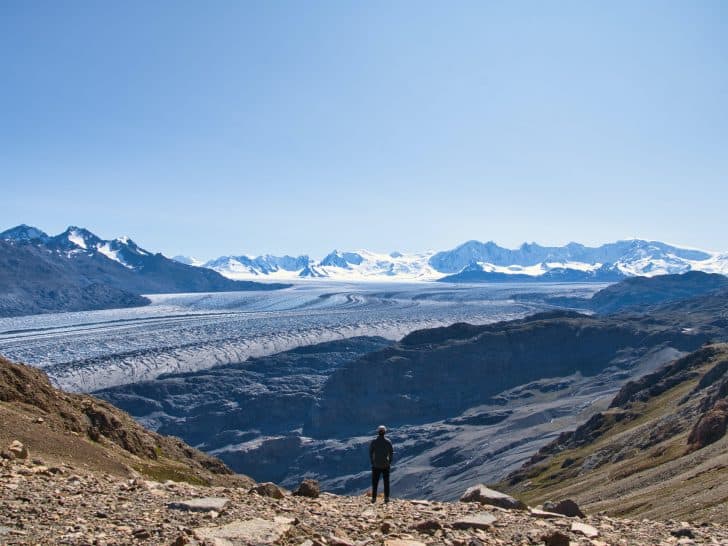
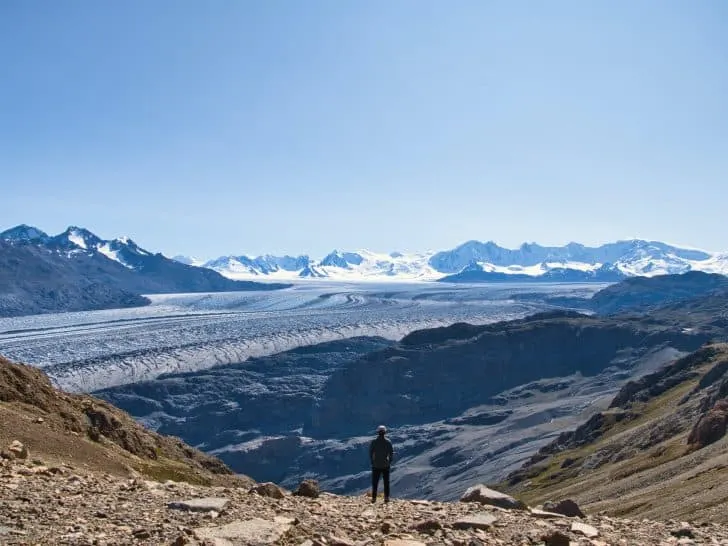
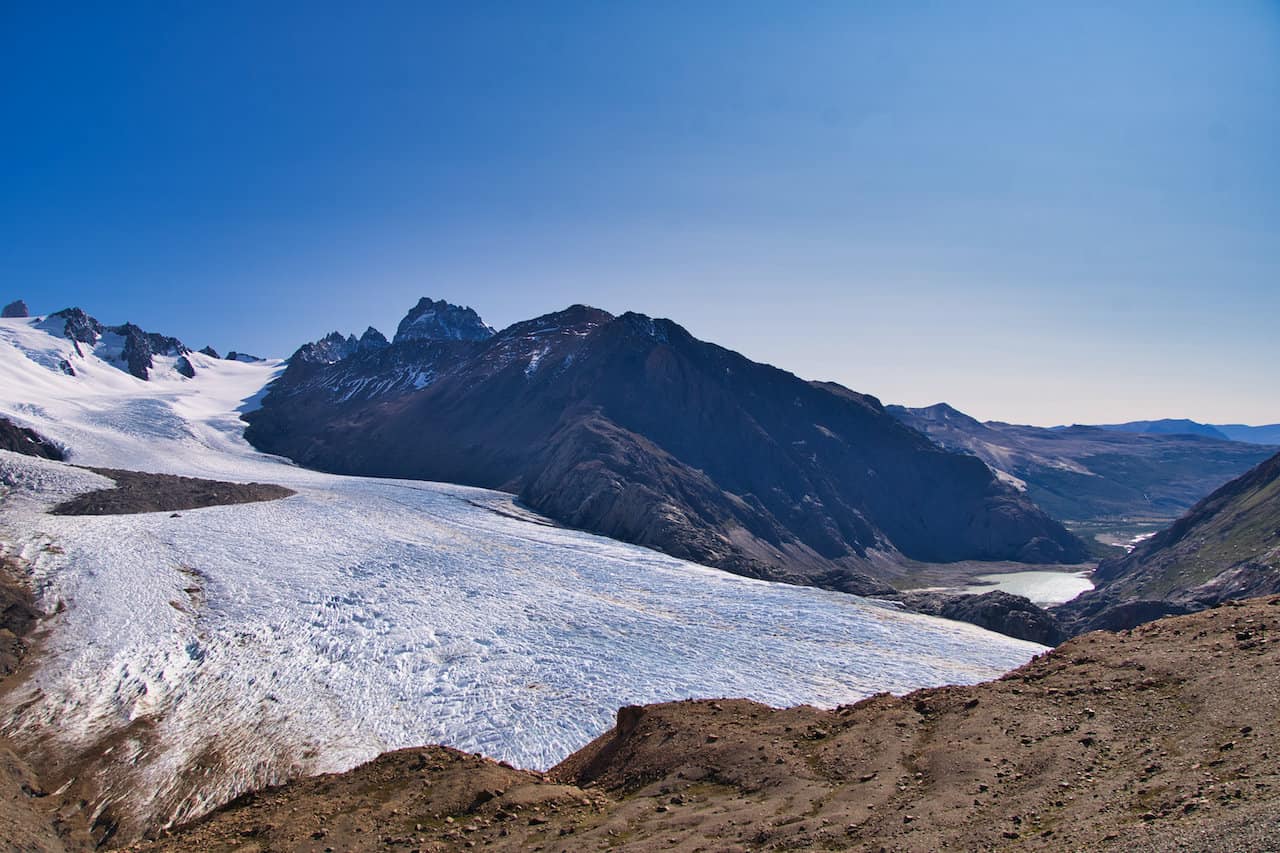
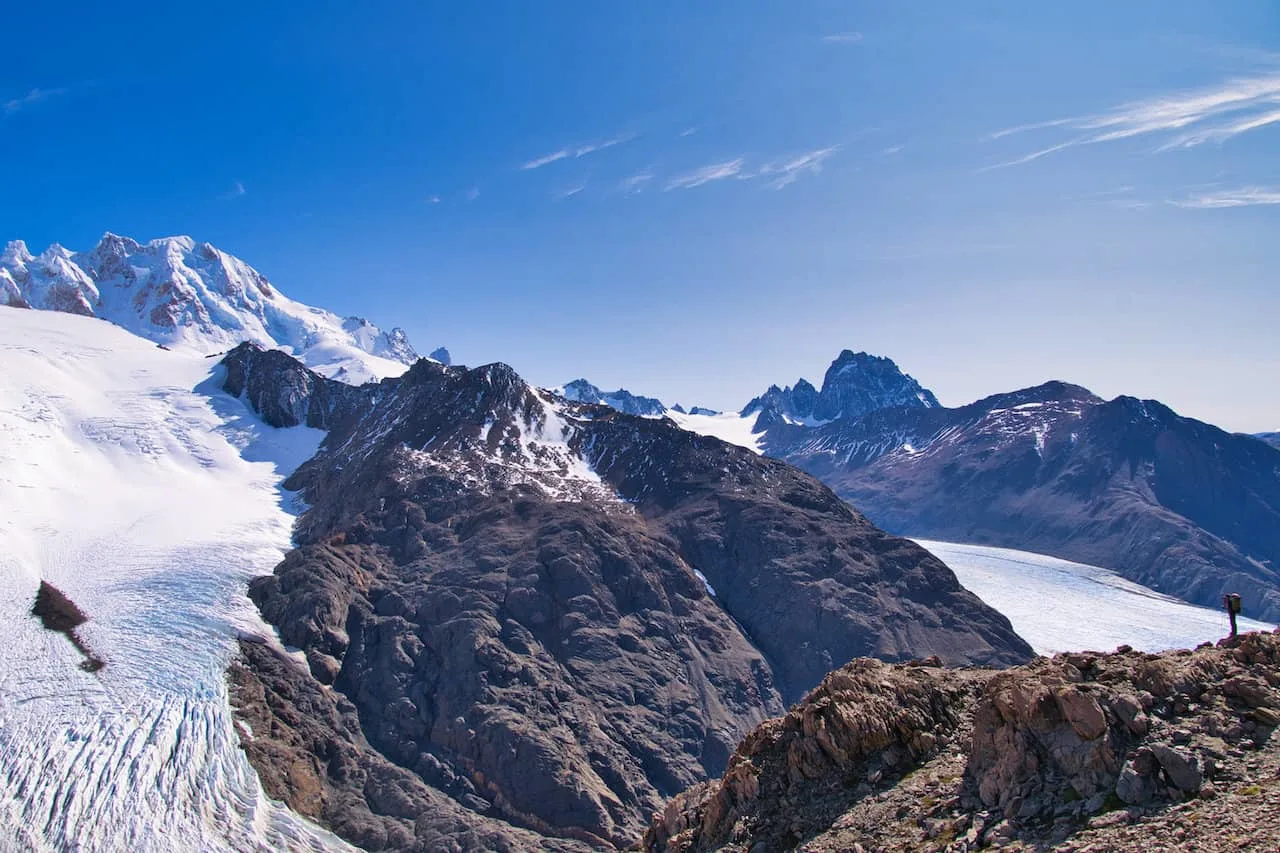
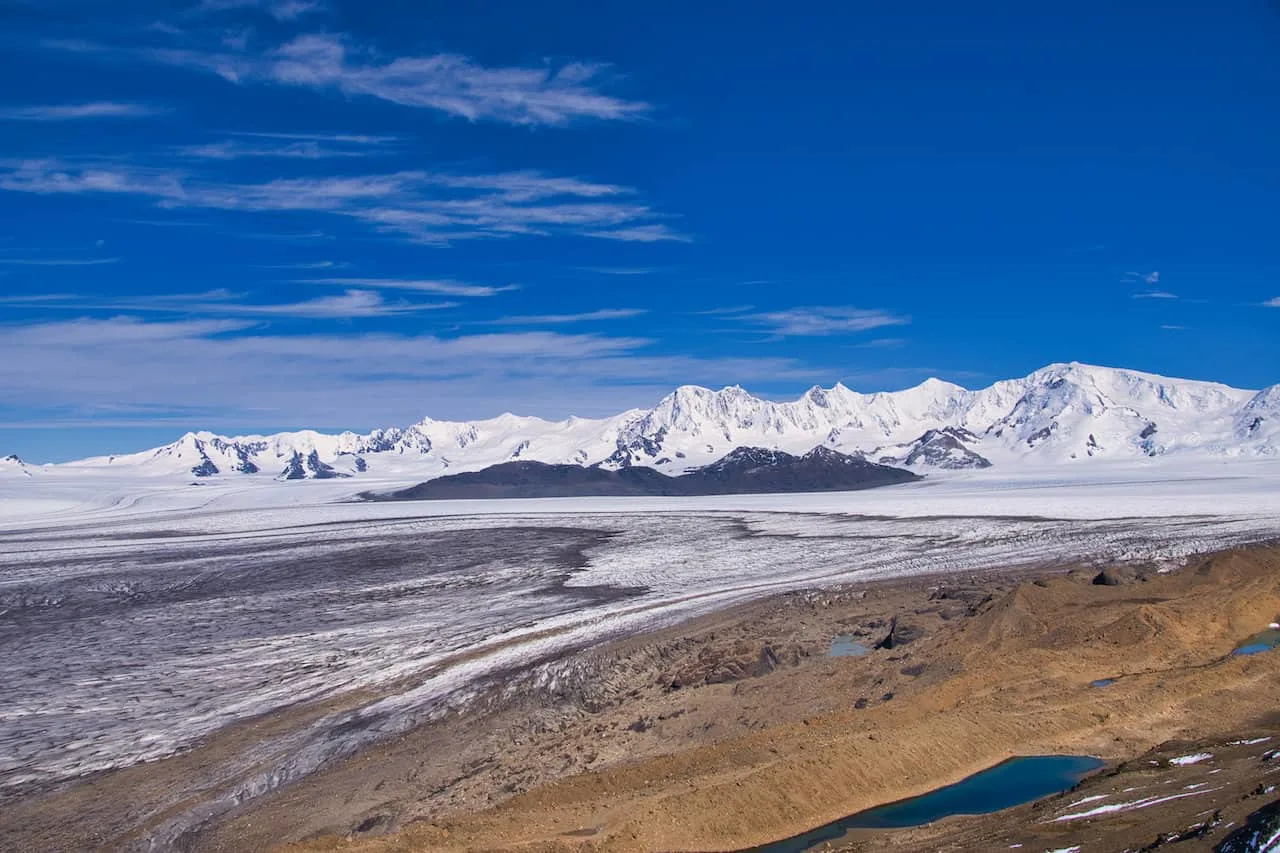
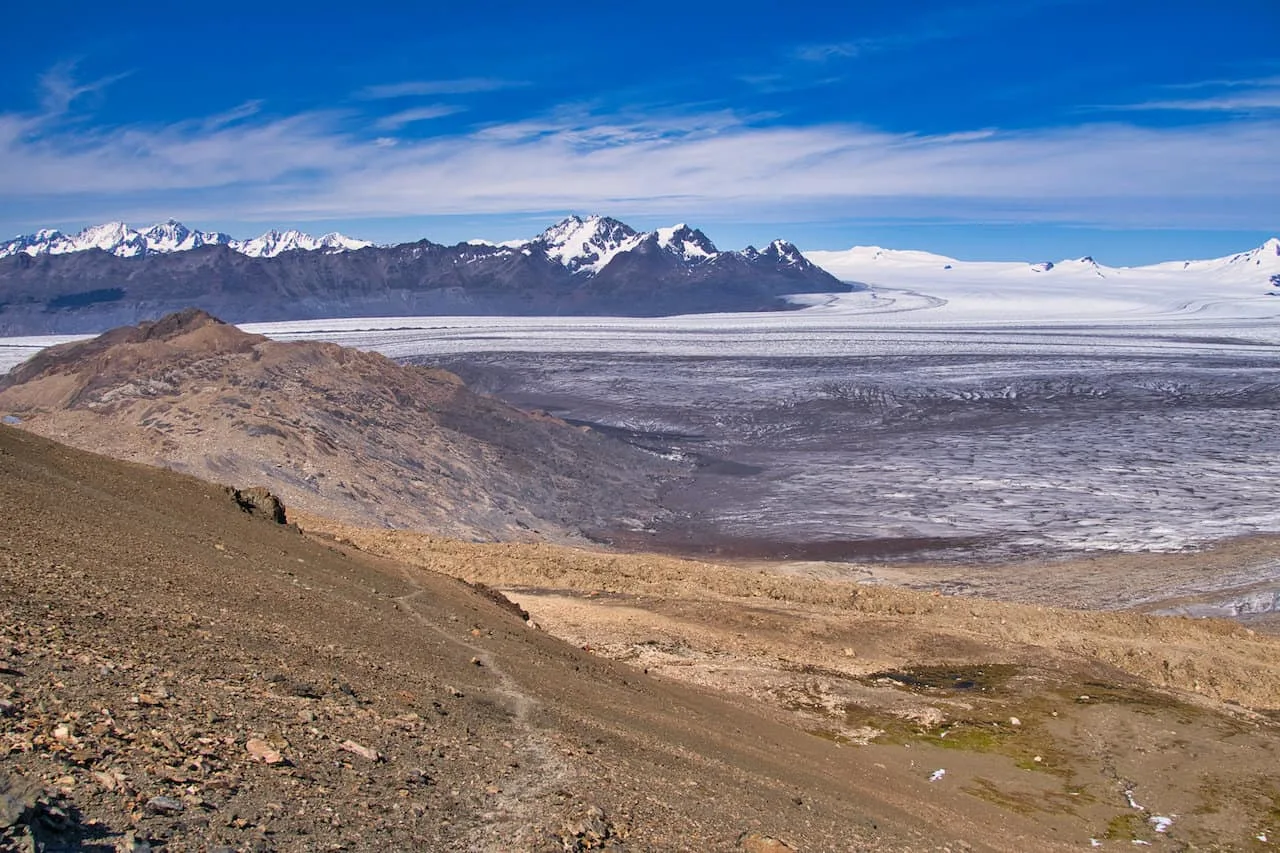
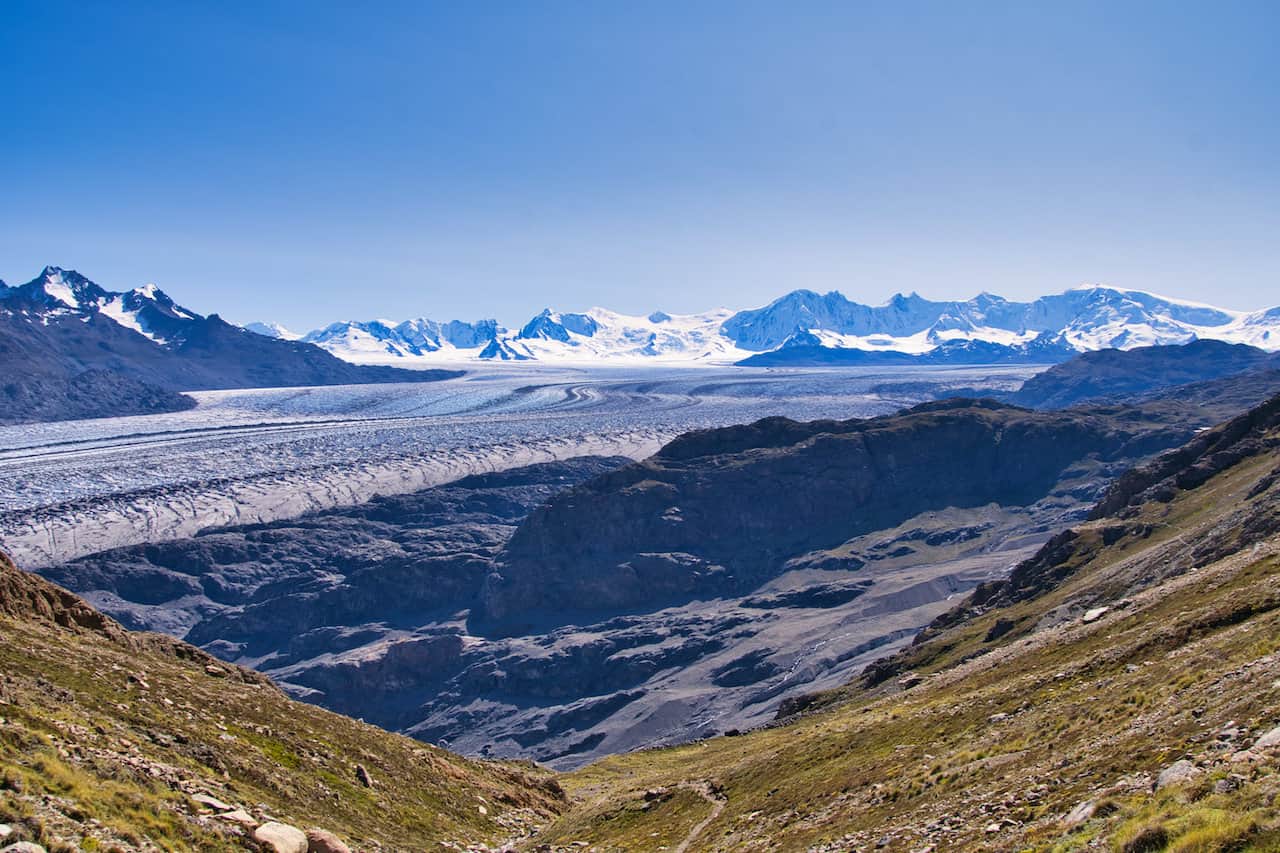
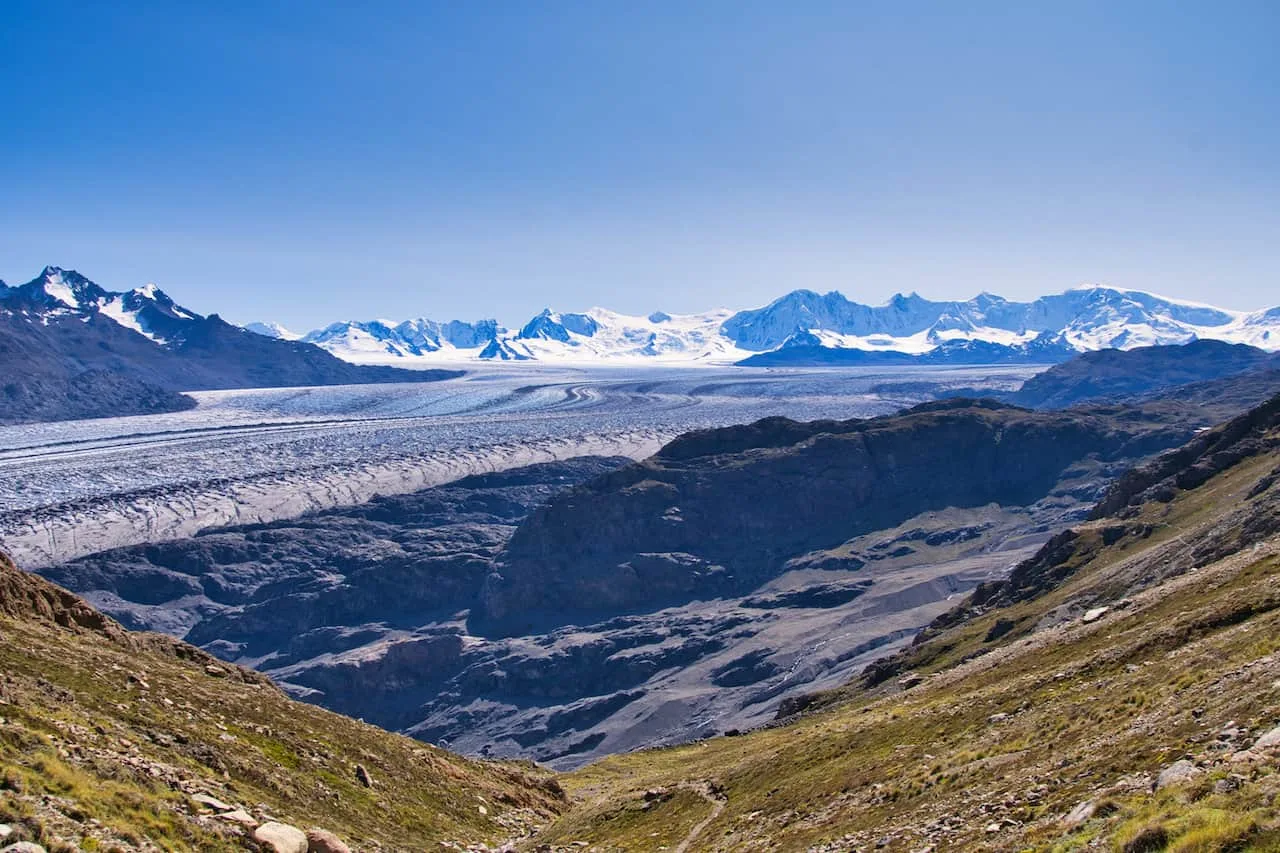
From here the uphill climb begins to Paso del Viento. Although this portion will require the most demanding ascent of the hike, it will also offer some of the best views you can ask for.
The vast glacier down below will be surrounded by mountain peaks, with rivers and lakes making up the landscape.
I recommend taking frequent breaks throughout to fully appreciate what it out in front of you. Below are several pictures from this section of the trail:


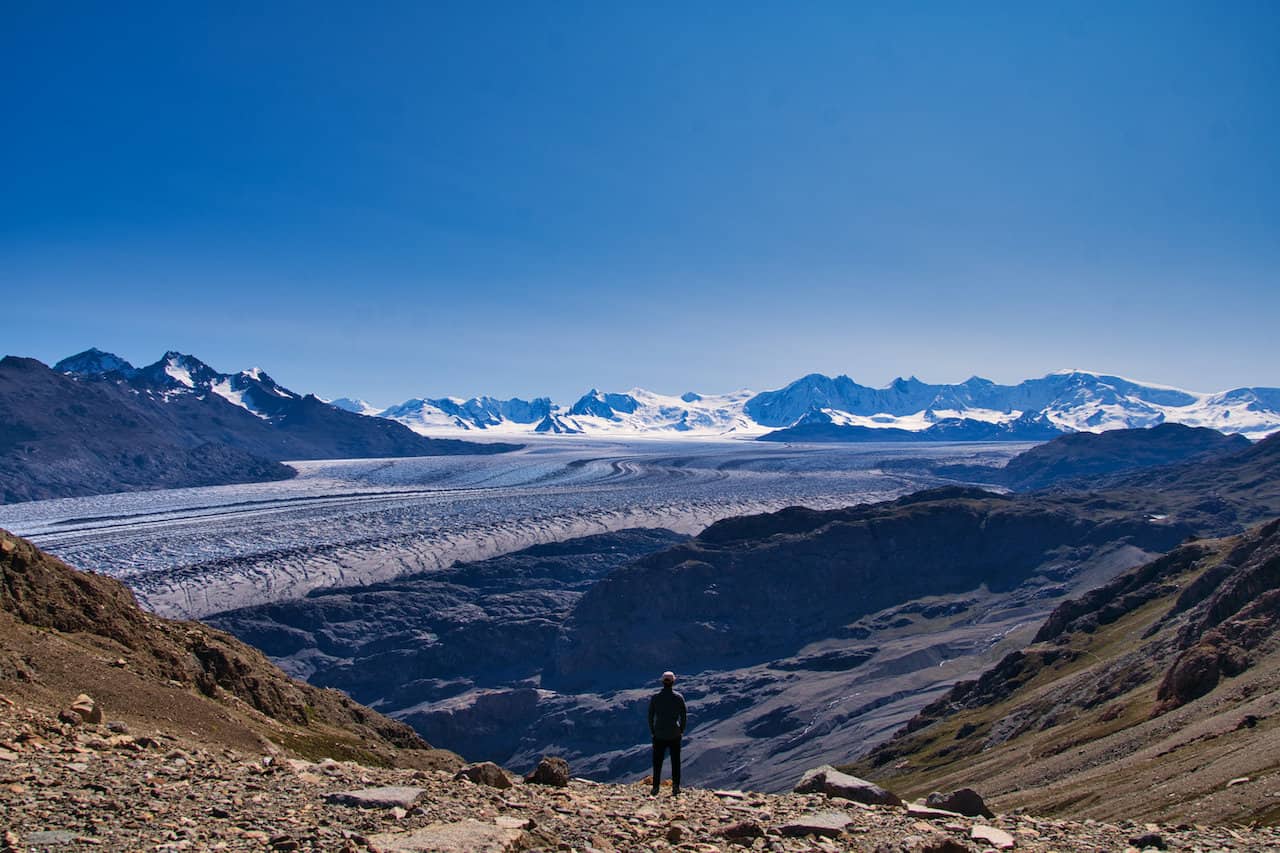
Continue the trail up to the pass as you say goodbye to some views and say hello to some new ones.
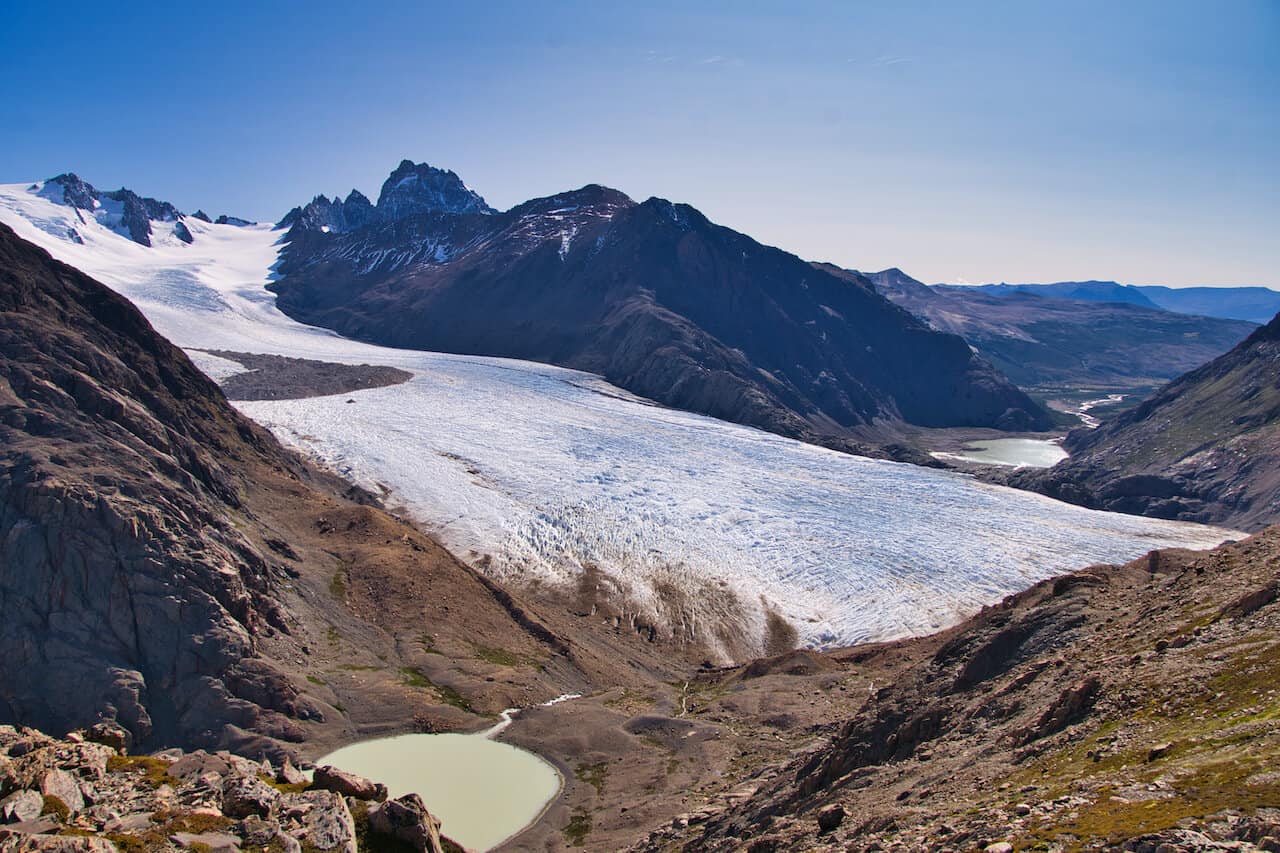
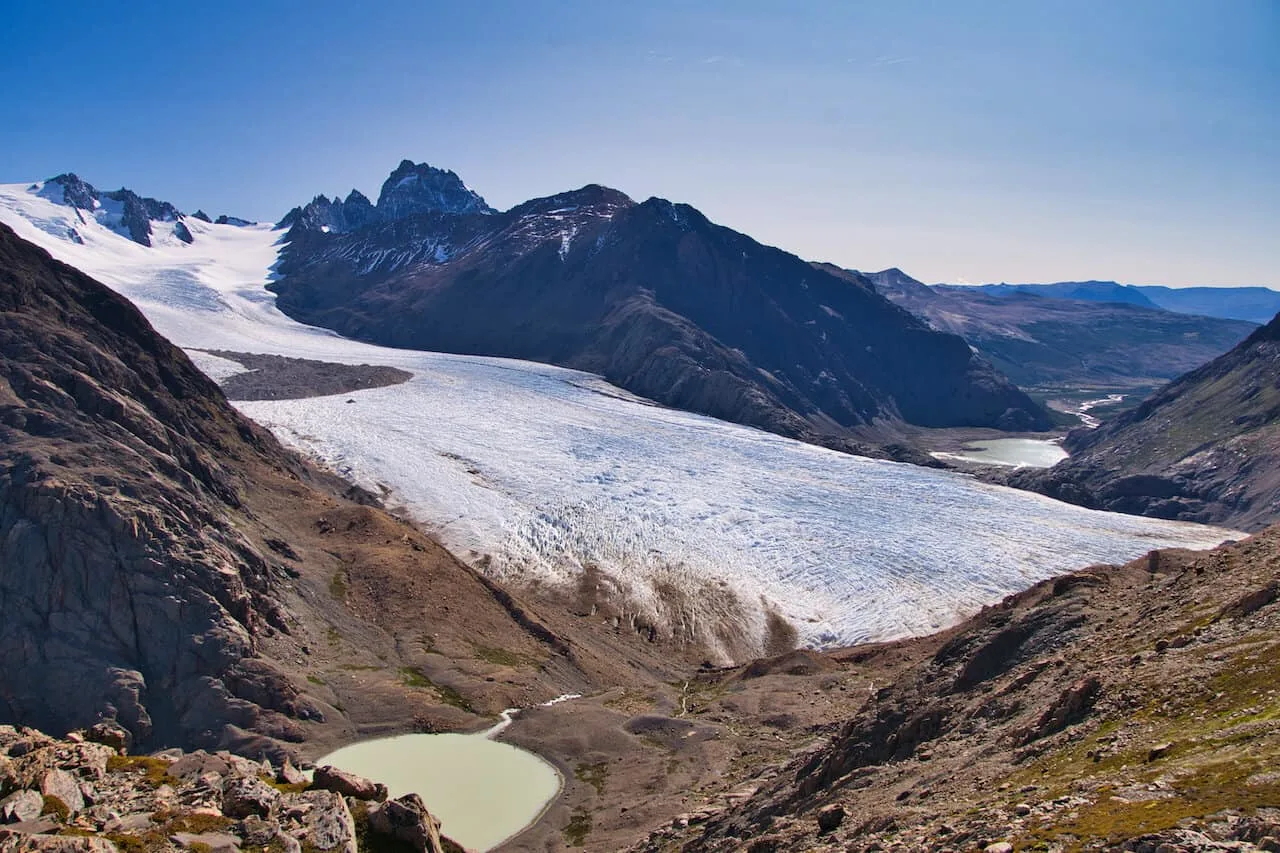
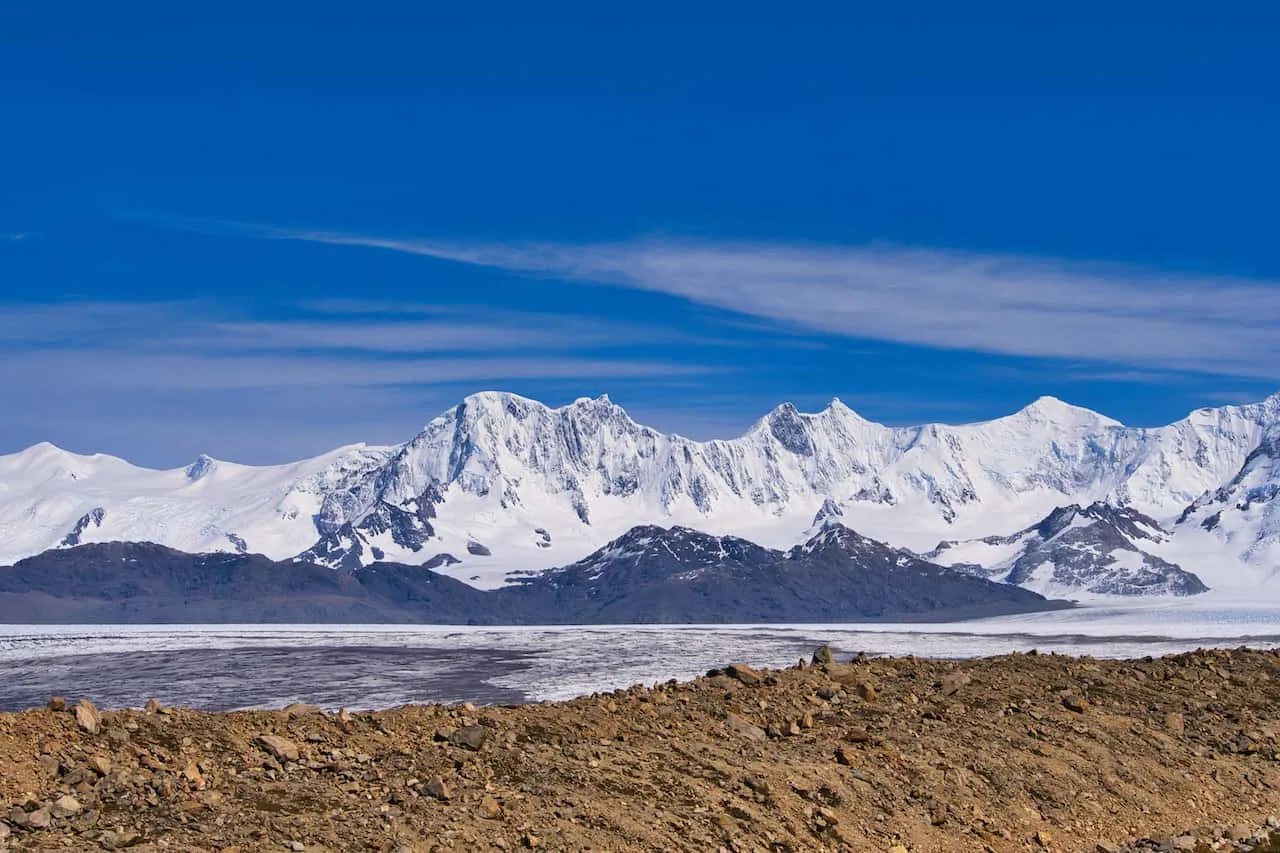
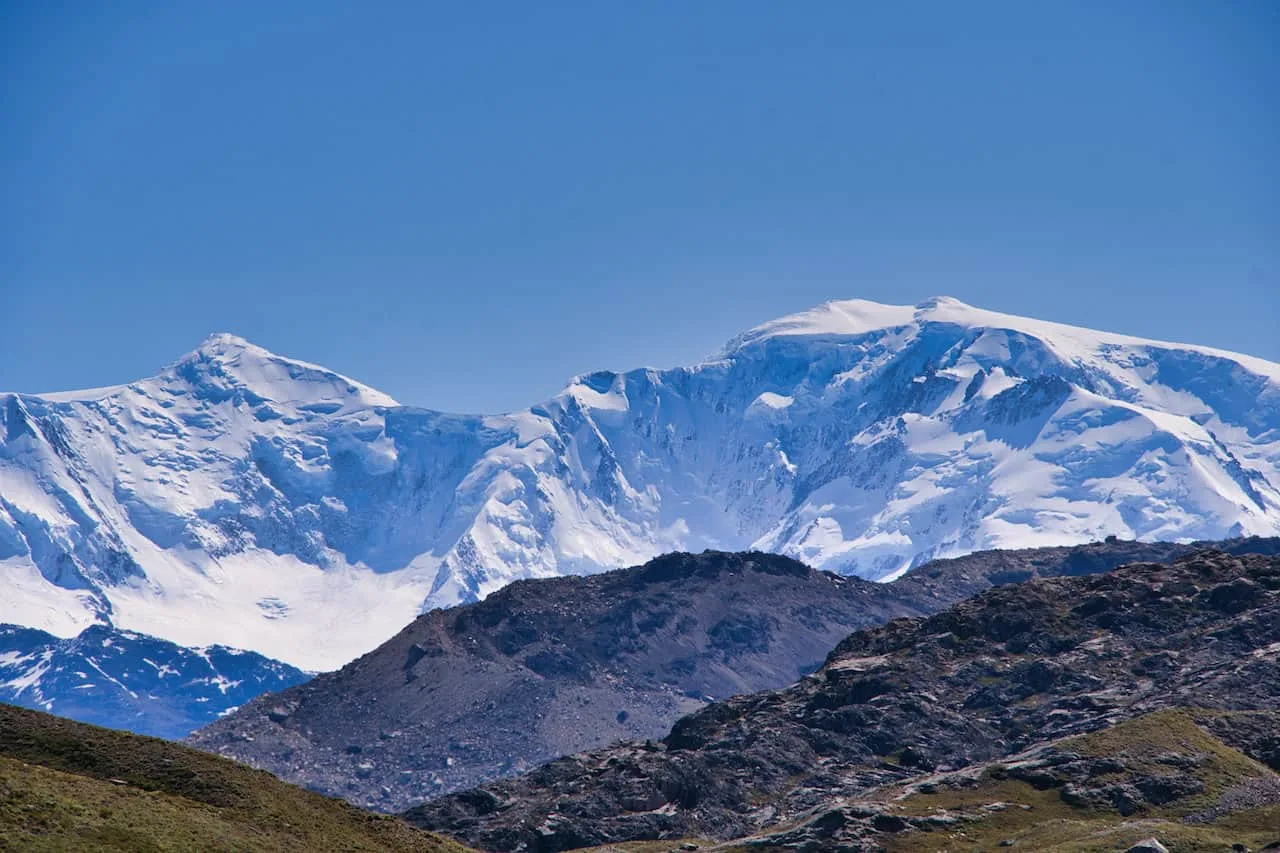
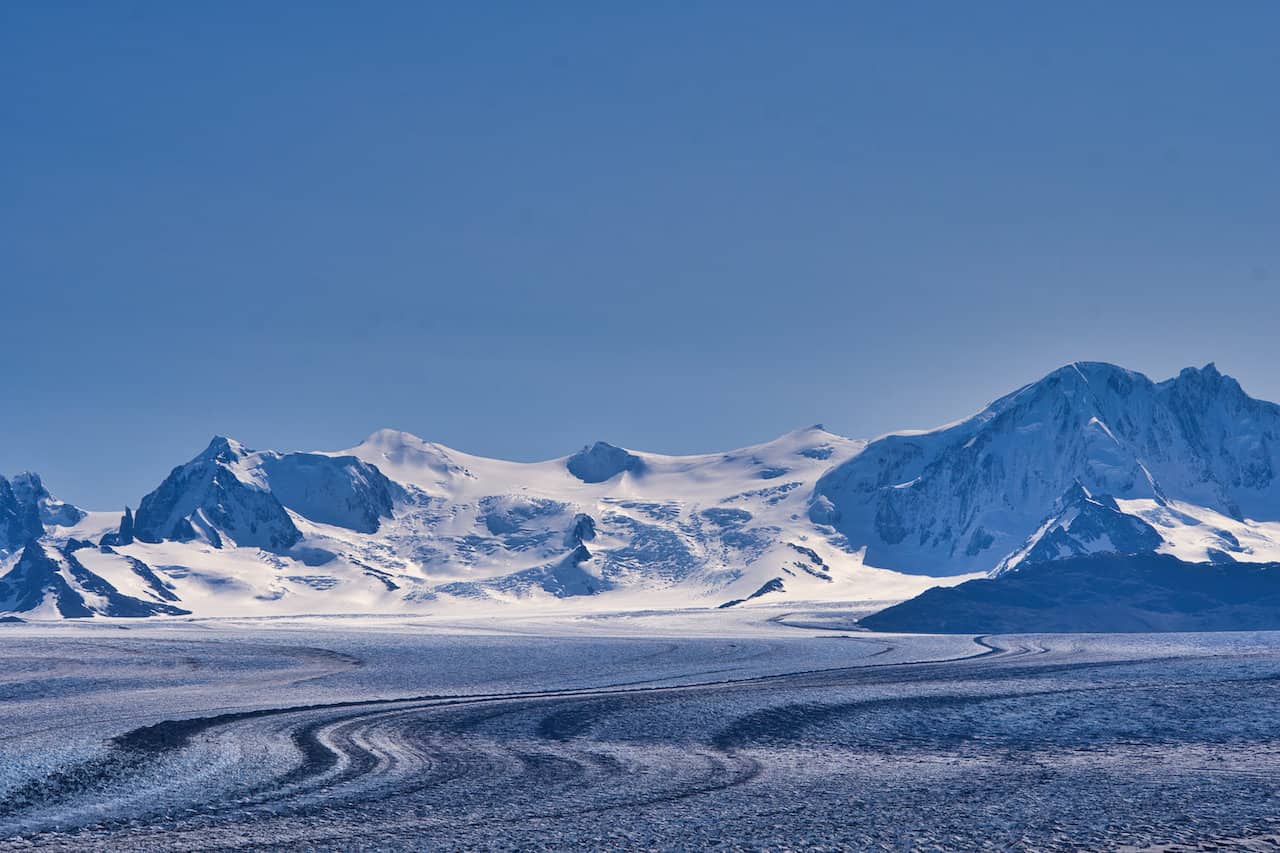
As you approach the top of the pass, you will hike pass some small lakes with the Southern Patagonian Icefields and the Viedma Glacier out in the distance.
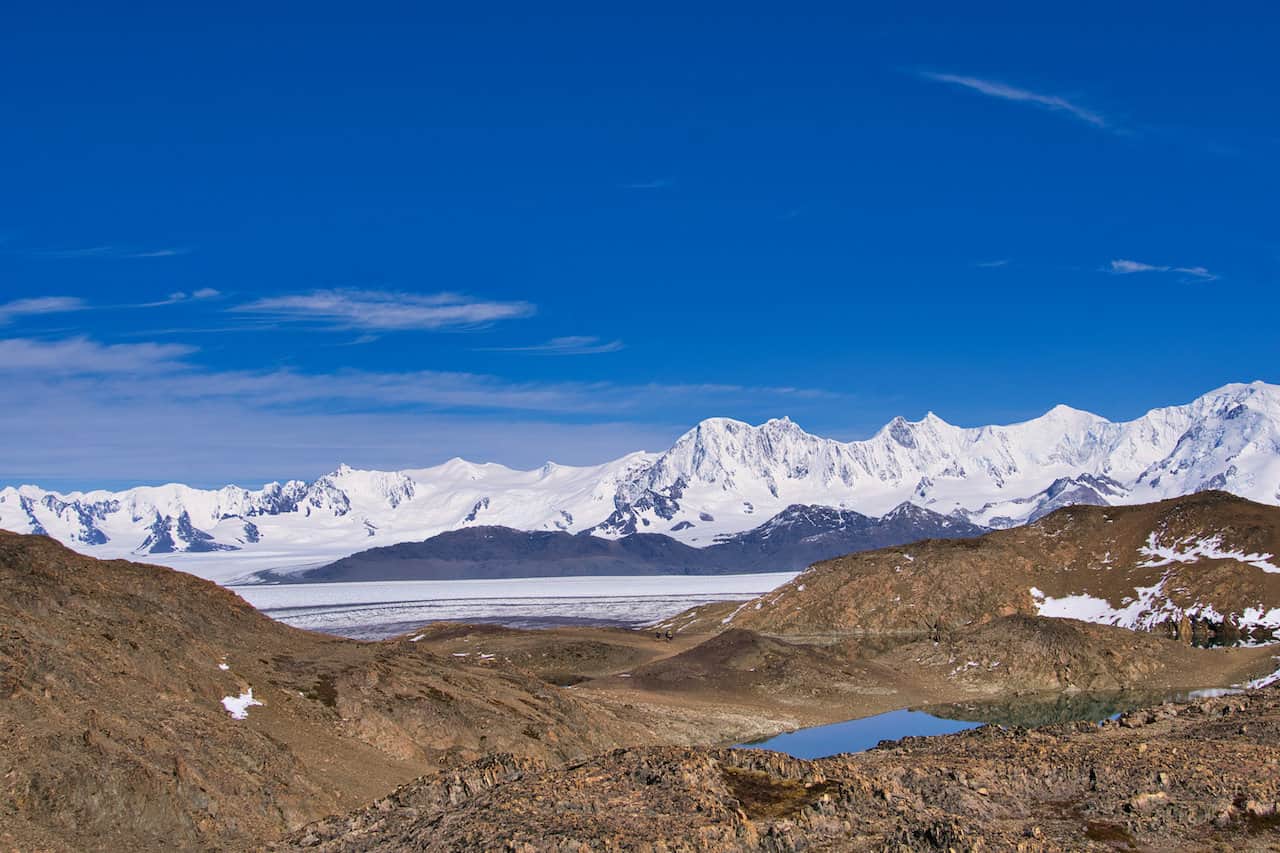
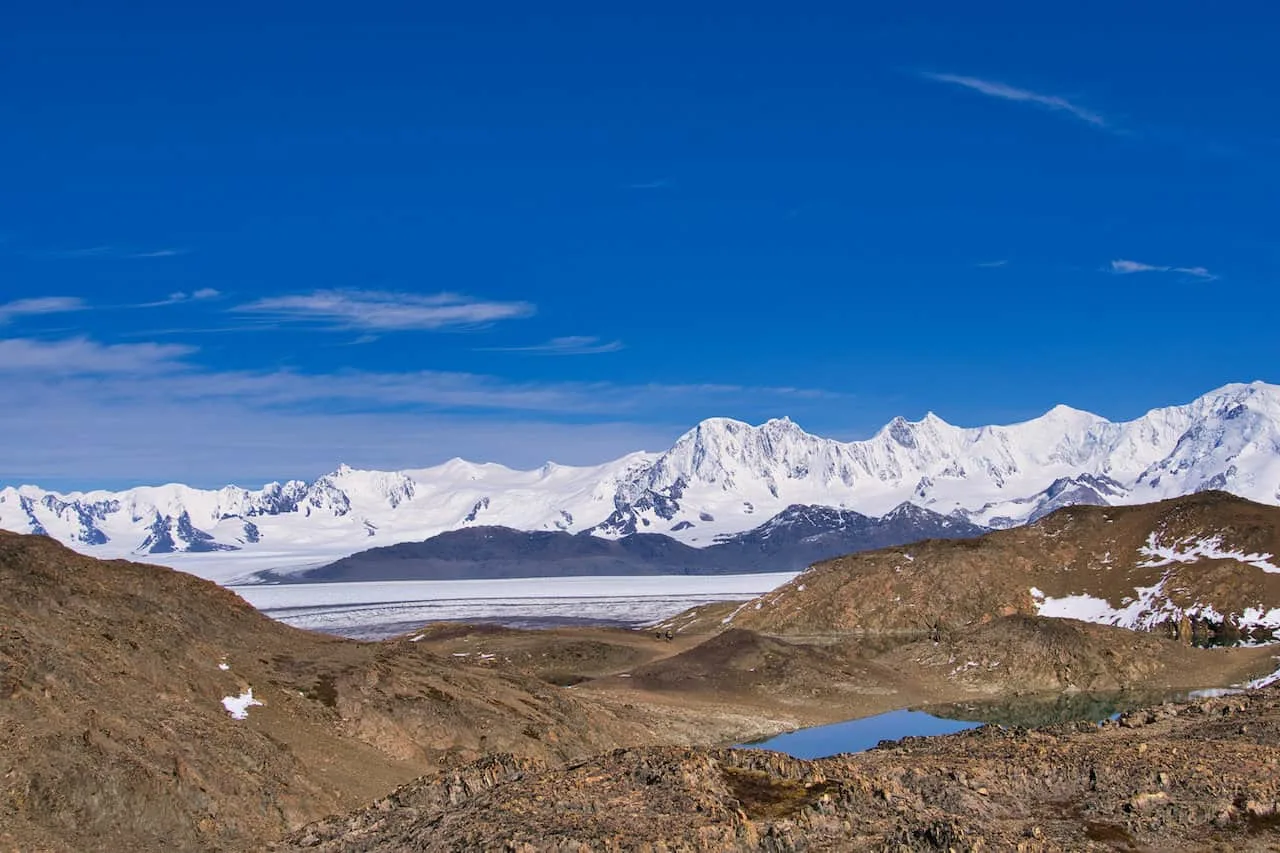


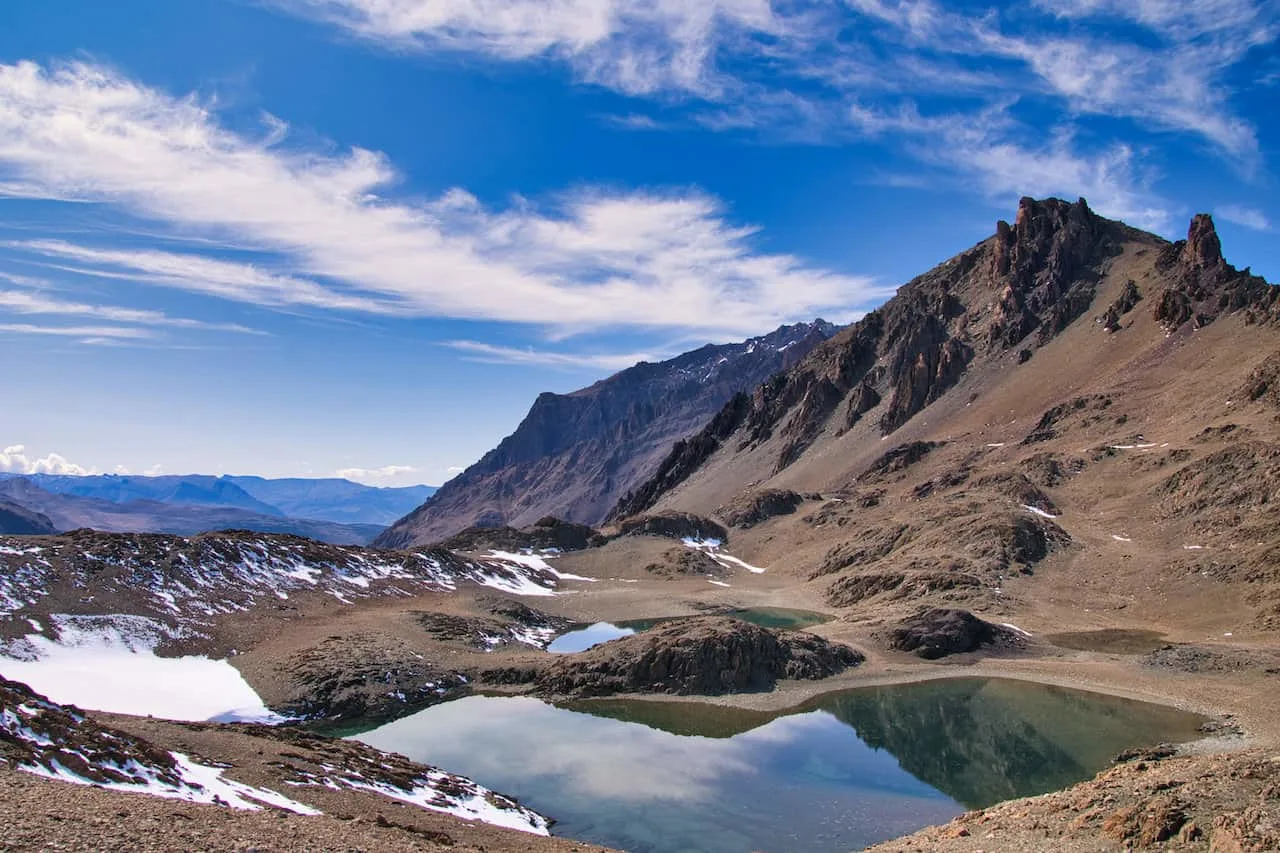
Soon enough, you will arrive at the unparalleled Paso del Viento viewpoint, where you can spend hours just enjoying everything out in front of you.
The glaciers and mountains are never ending here, and you will find yourself taking in one of the best views in Patagonia.


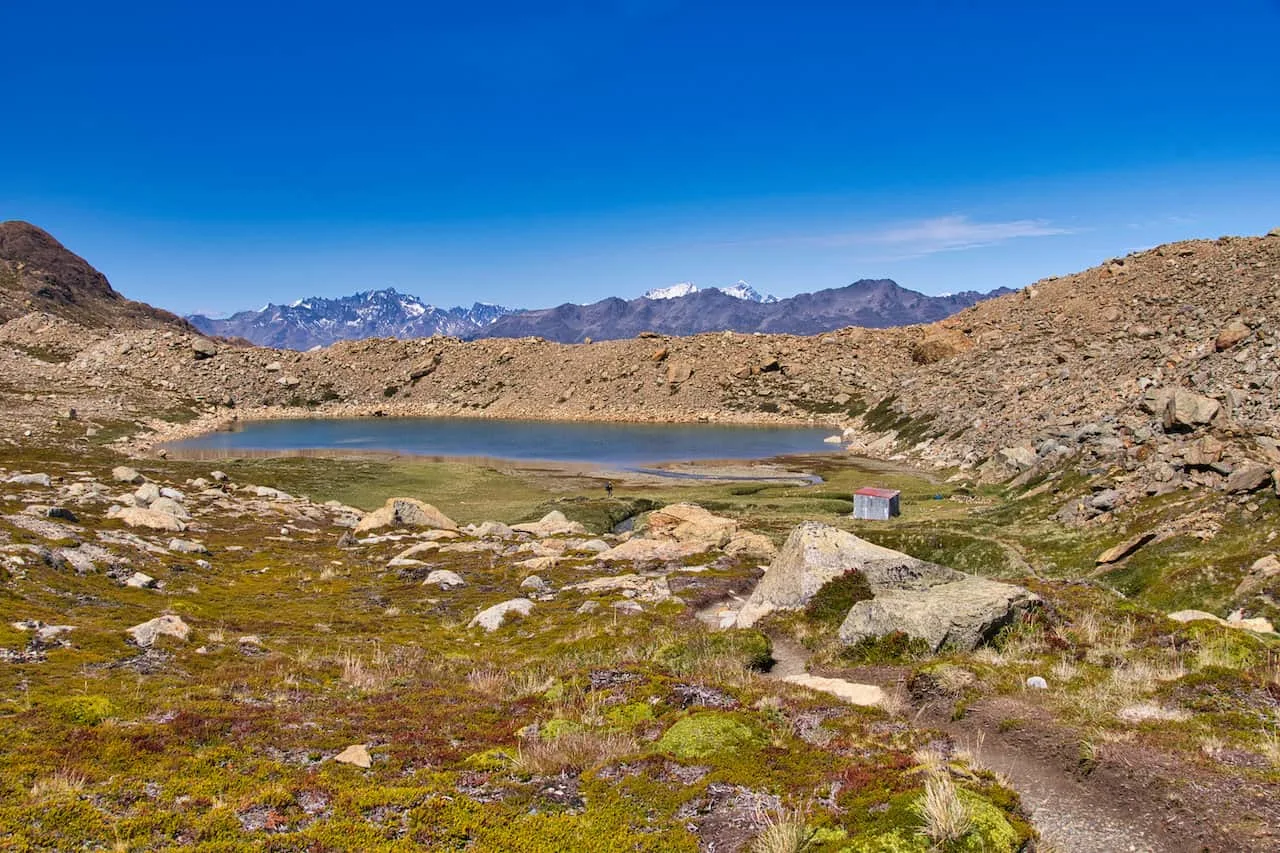
Once all set up top, begin the descent down to the Paso del Viento campsite. The trail down still will offer some great views of the glaciated landscape as you lose much of the elevation gained during the first portion of the day.

Continue down the path, following the river to the campsite. I found some of the trail here to be a bit more difficult to pick up at some points. But as long as you are walking alongside the river and follow some cairns you should be good to go.
Once you reach the campsite, find a spot along the shores to set up camp for the second night of the trek.


15) Huemul Circuit Day 3
After a non stop day of action on day 2, it is time for some more on day 3. After packing up your gear at the campsite, it is time to continue along the trail towards the second pass of the trek – Paso Huemul.
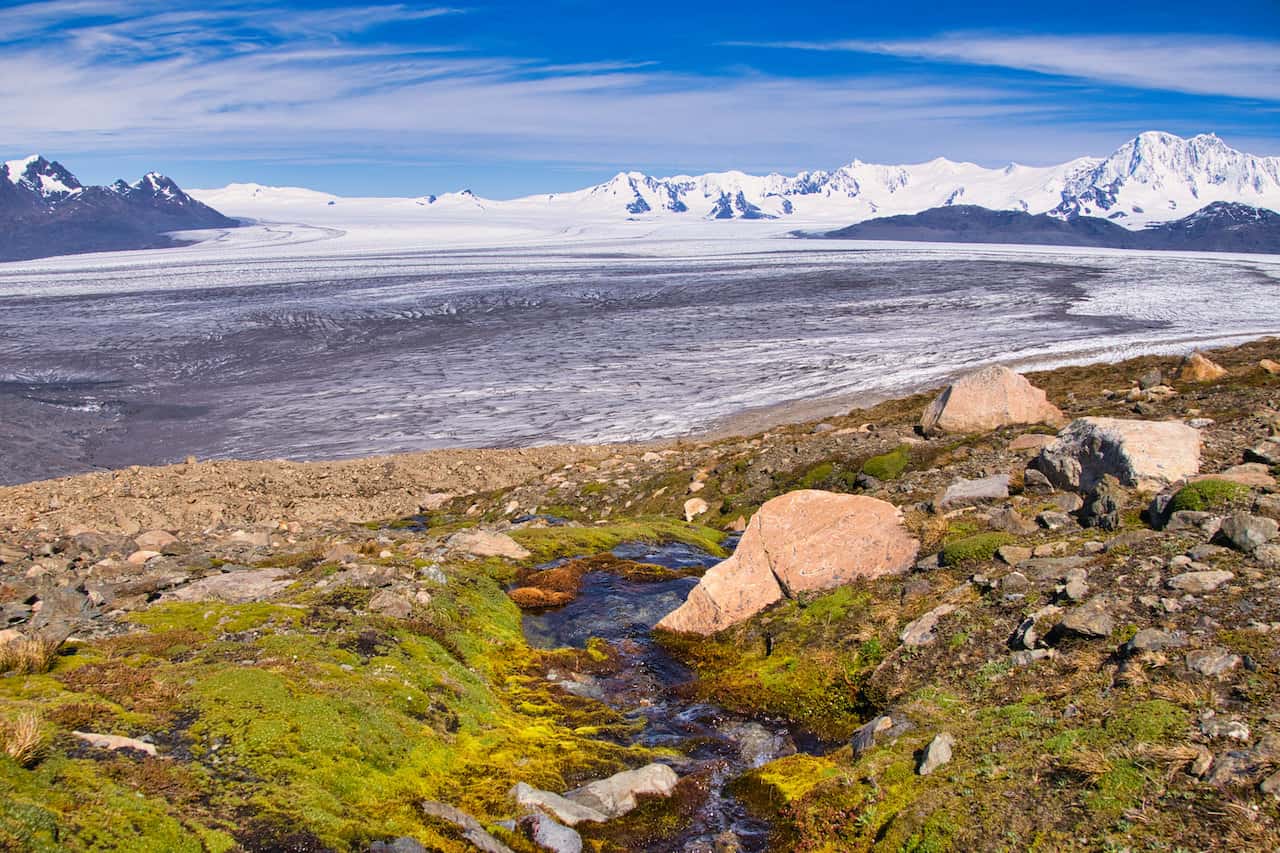
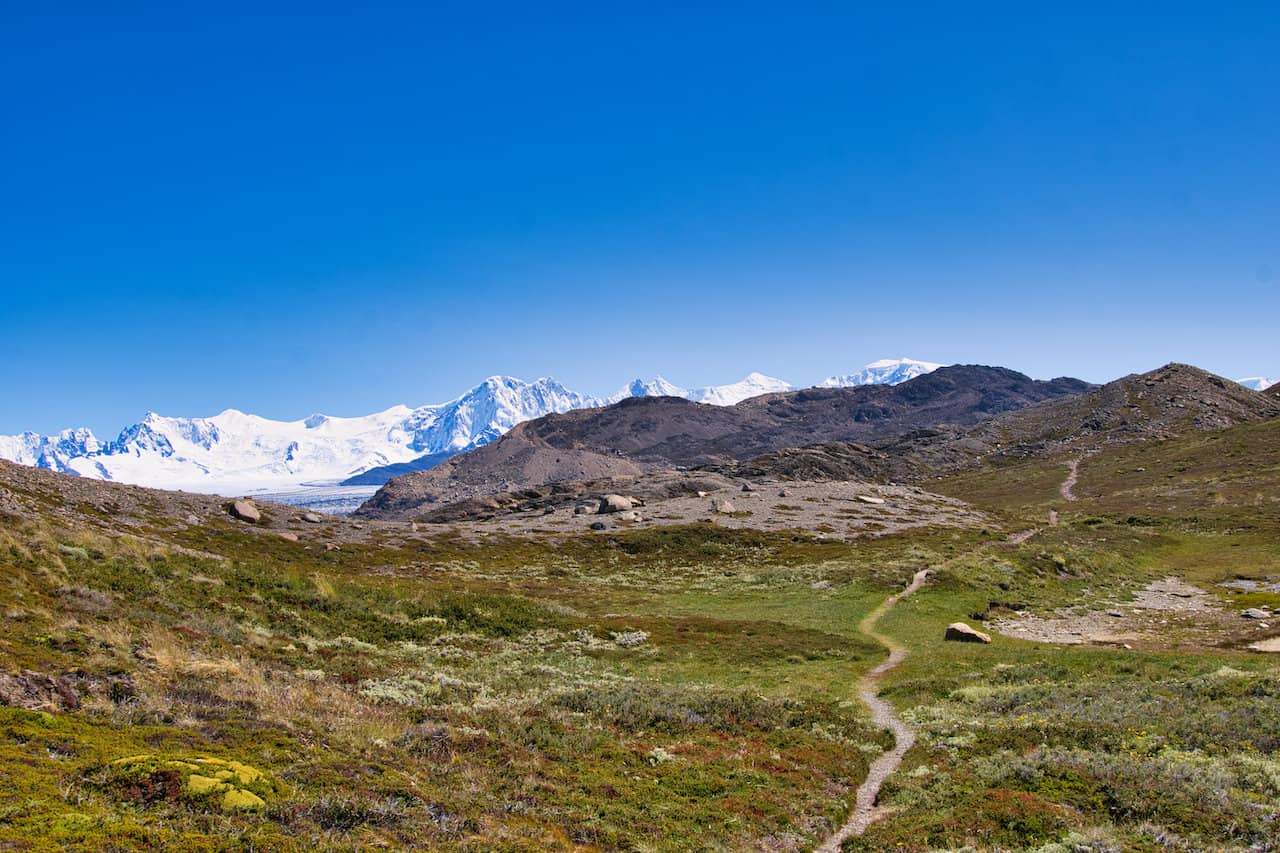
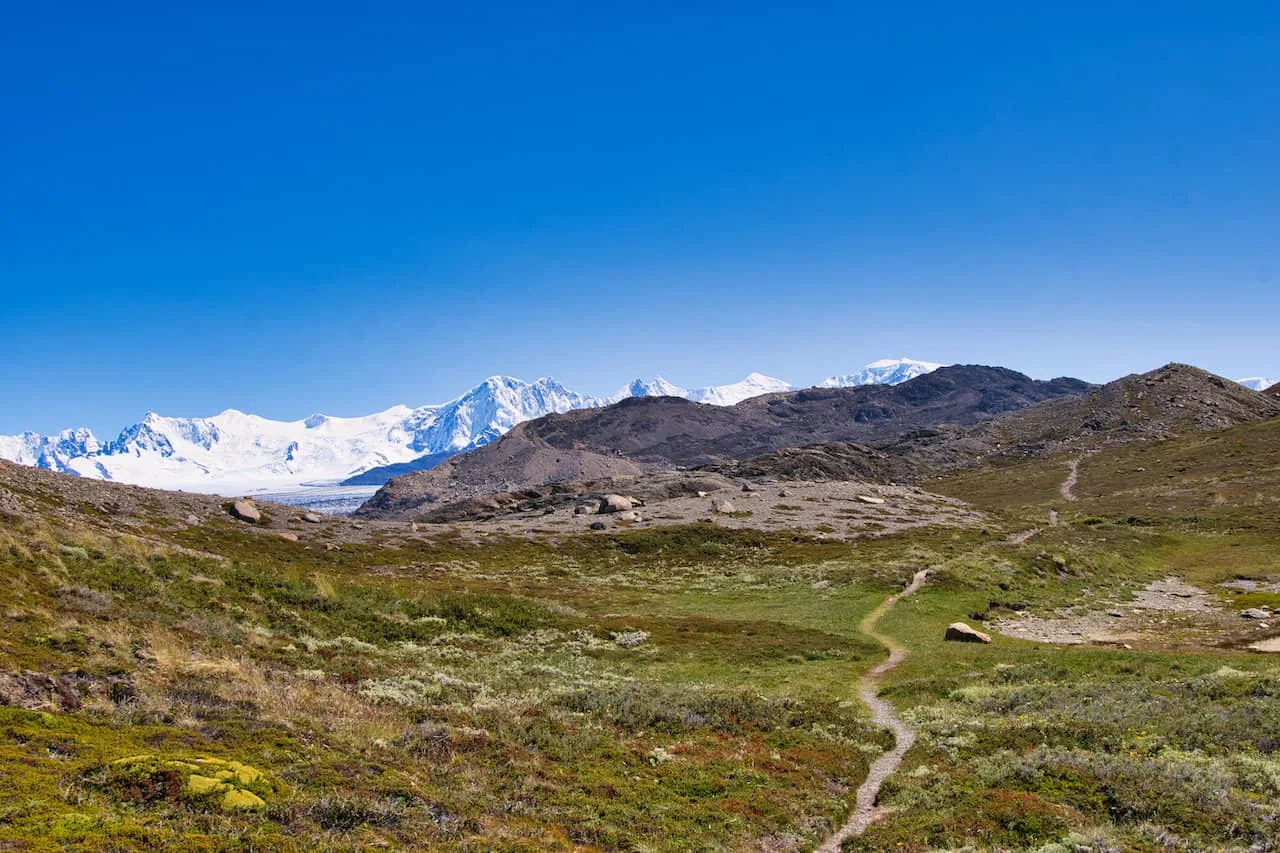
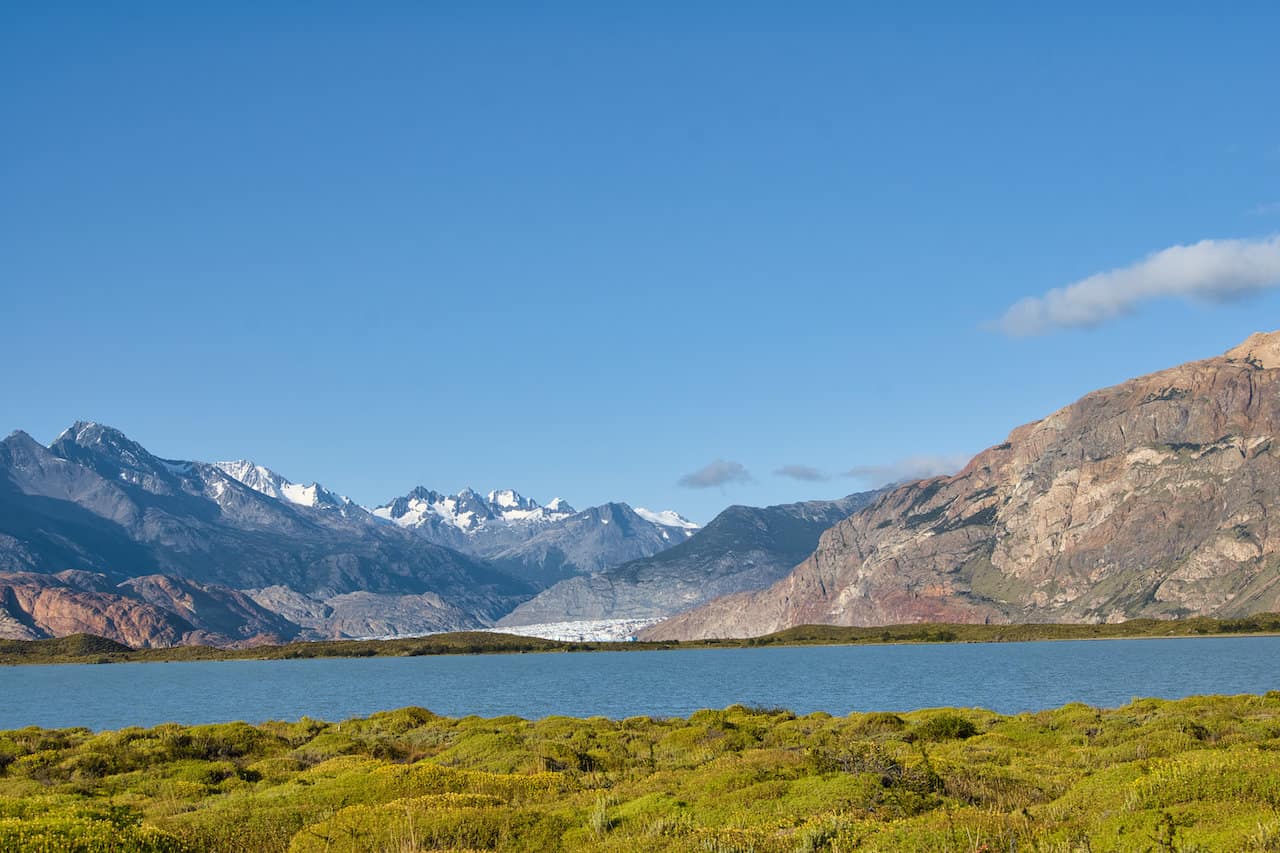
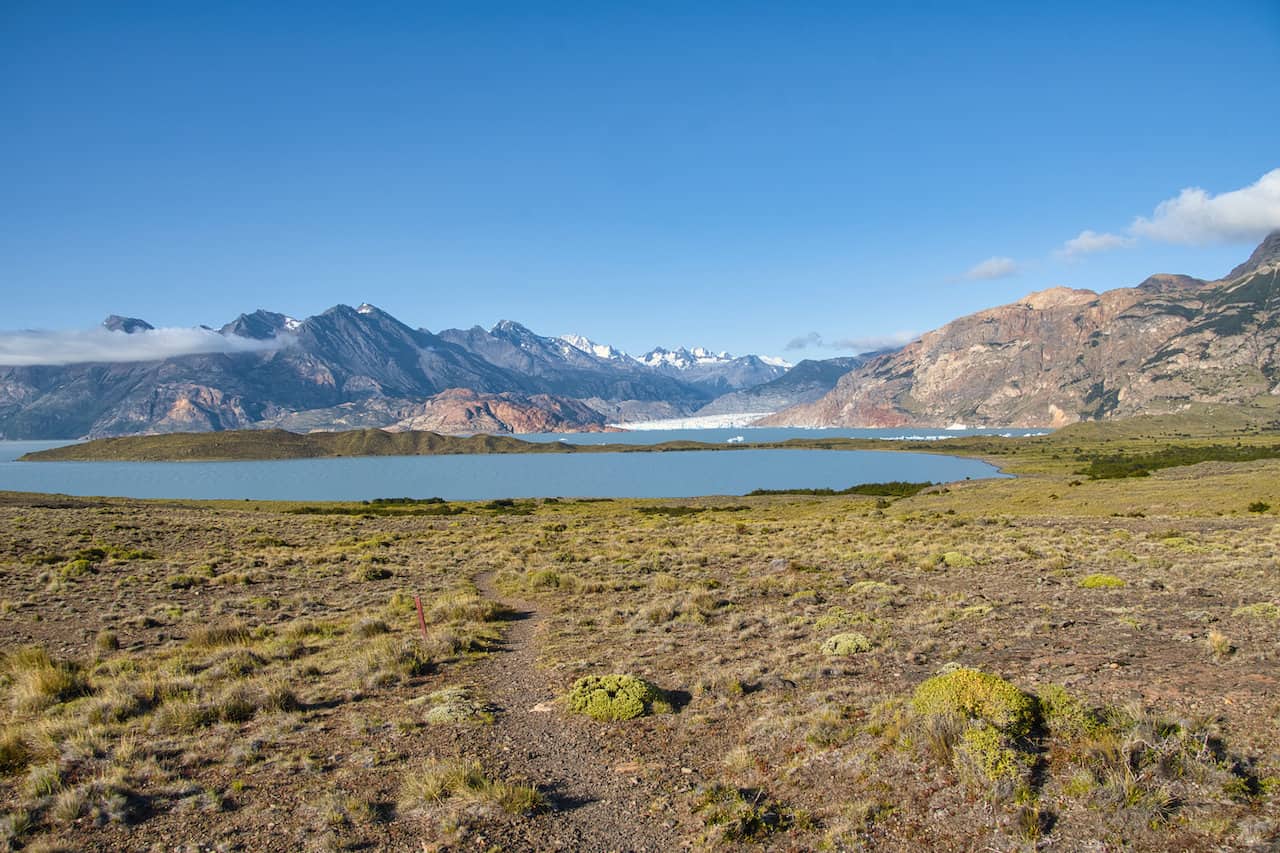
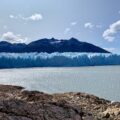
The first 5 or so miles of the trail will be hiking alongside the Viedma Glacier with additional views that come and go as you continue throughout the trail.
I found myself turning around quite often here to get more views of the ice fields way out back with more beautiful panoramas all around.
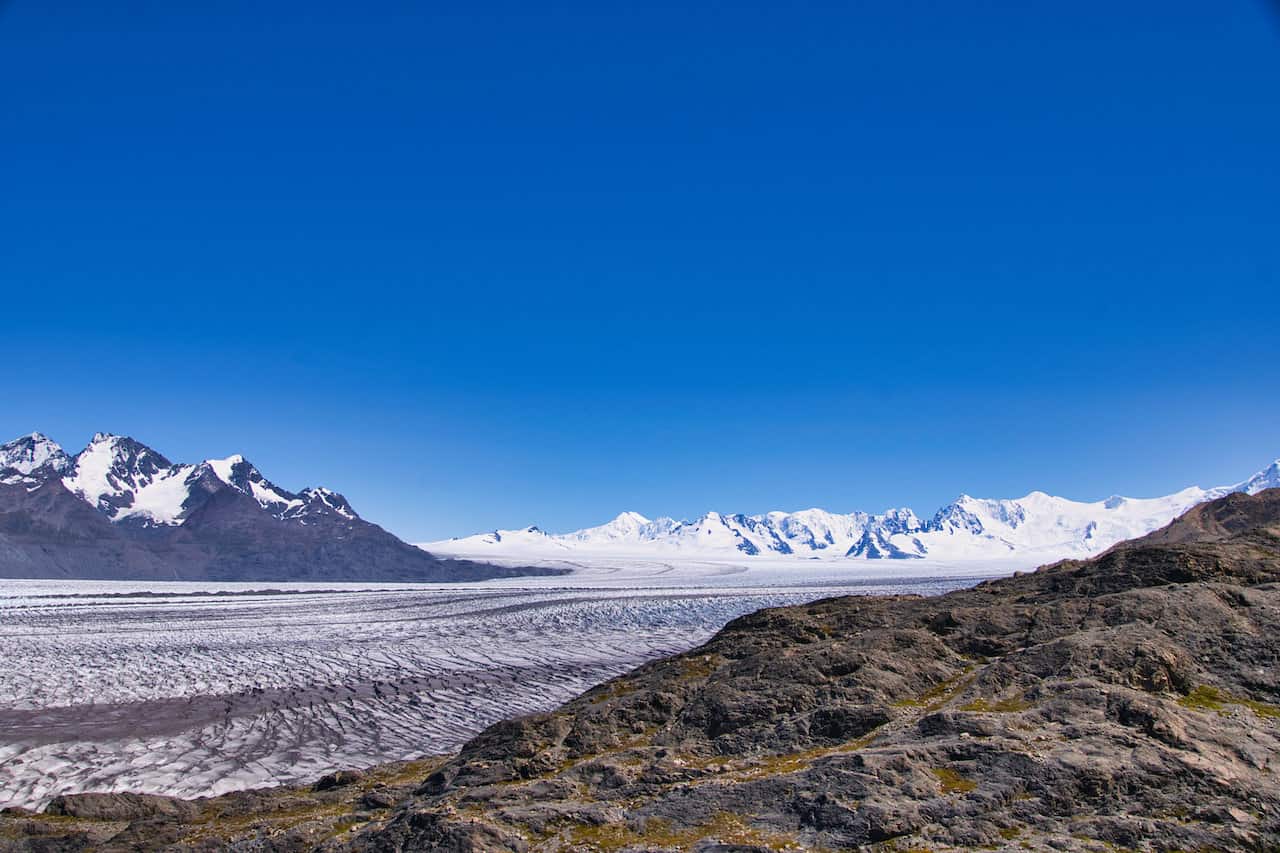


During this section you will be hiking alongside a river for various portions of the trail. This should give you ample opportunities to fill up your bottle when necessary.
At one point you will need to make your way across the river, so be careful and look out for rock cairns to direct you.

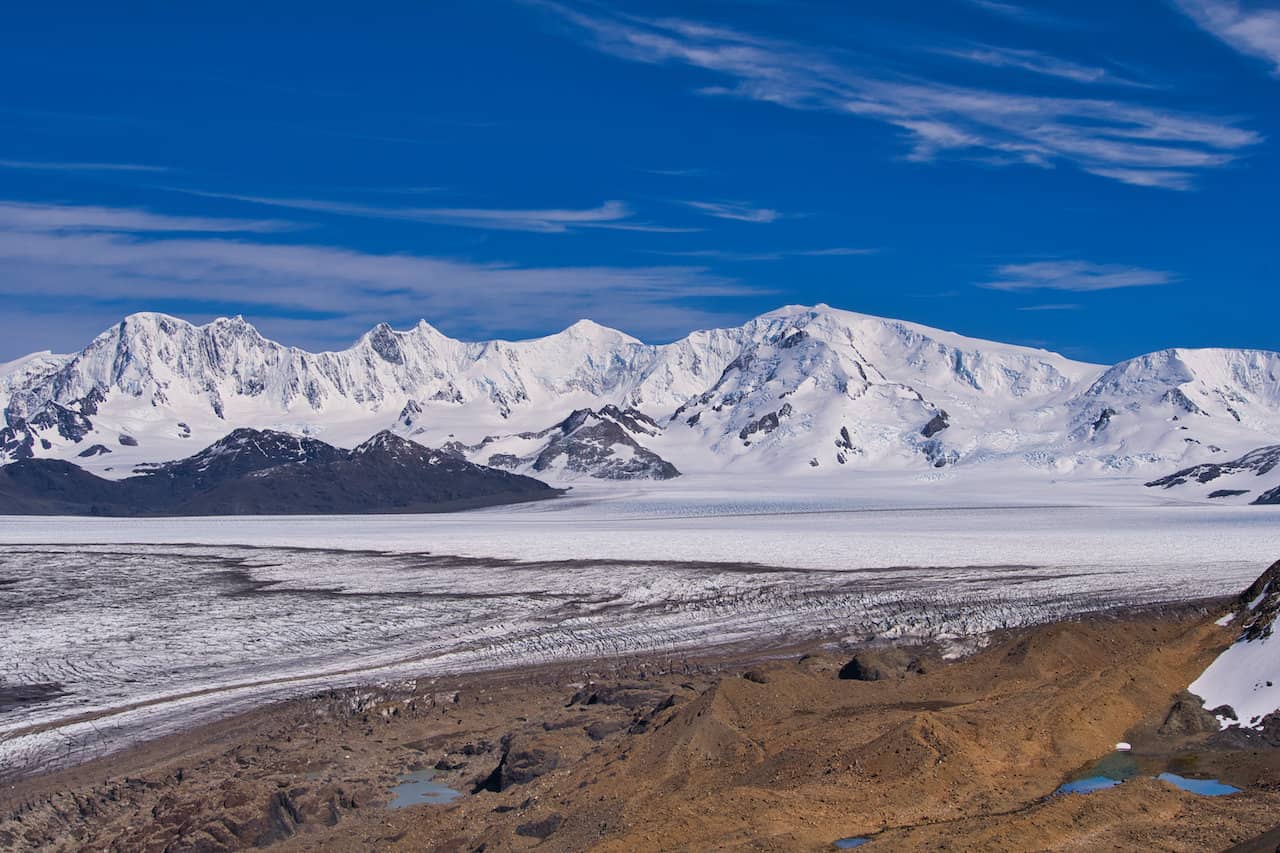
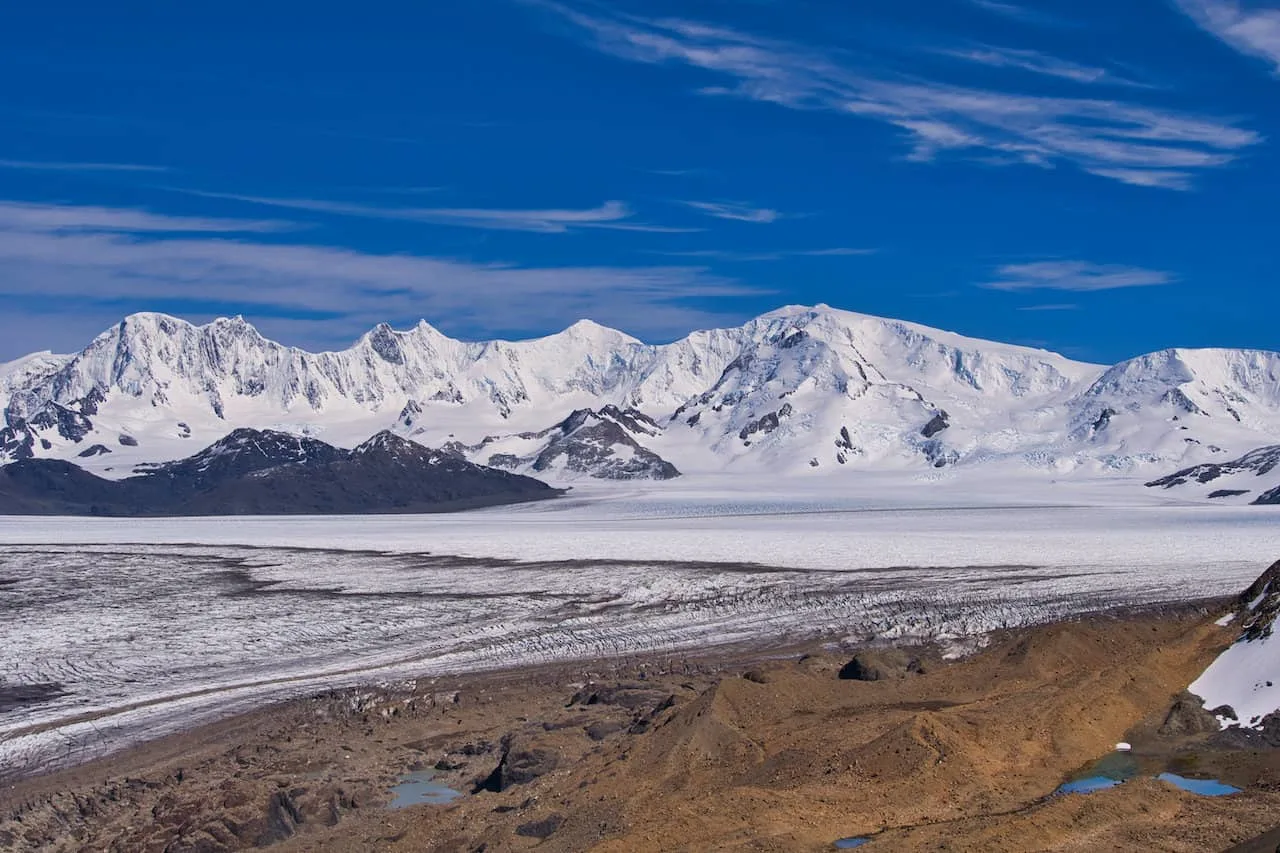
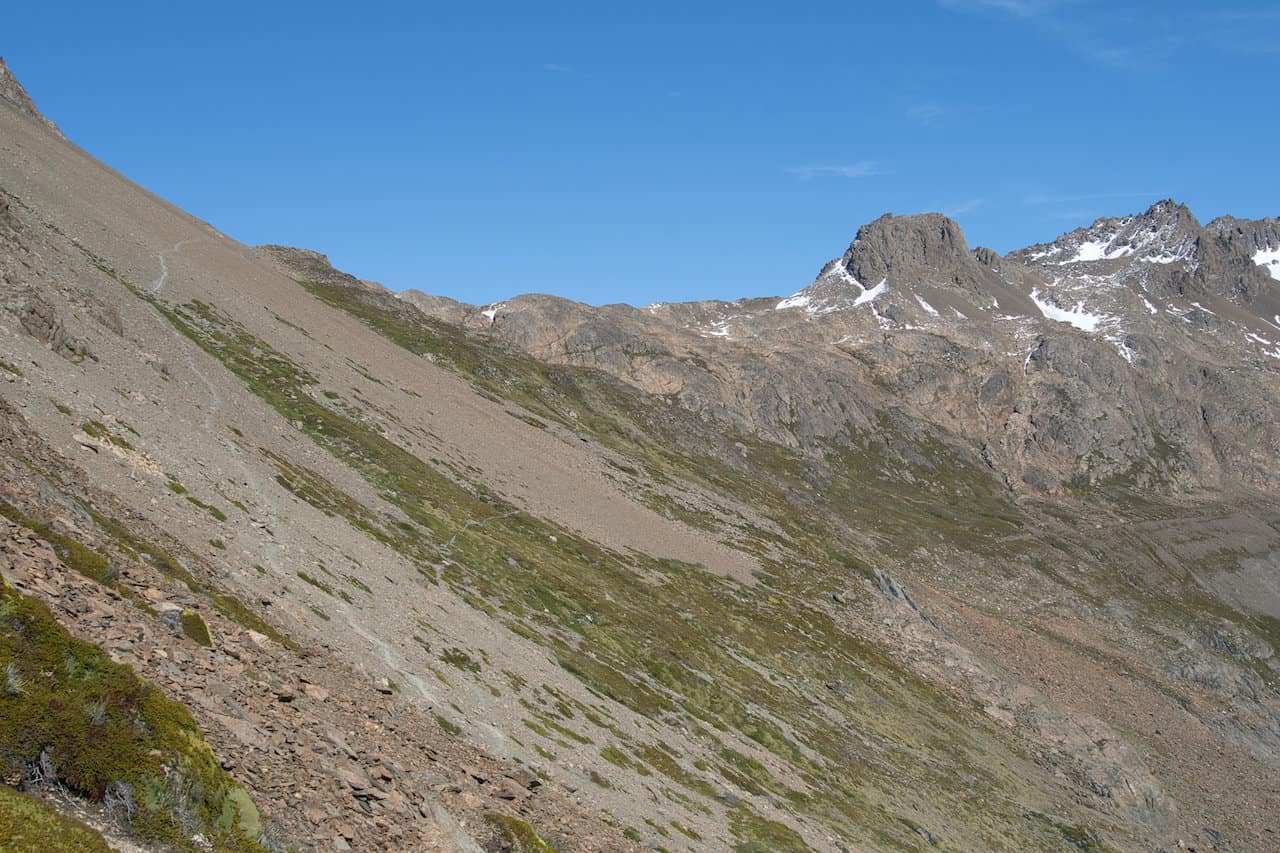
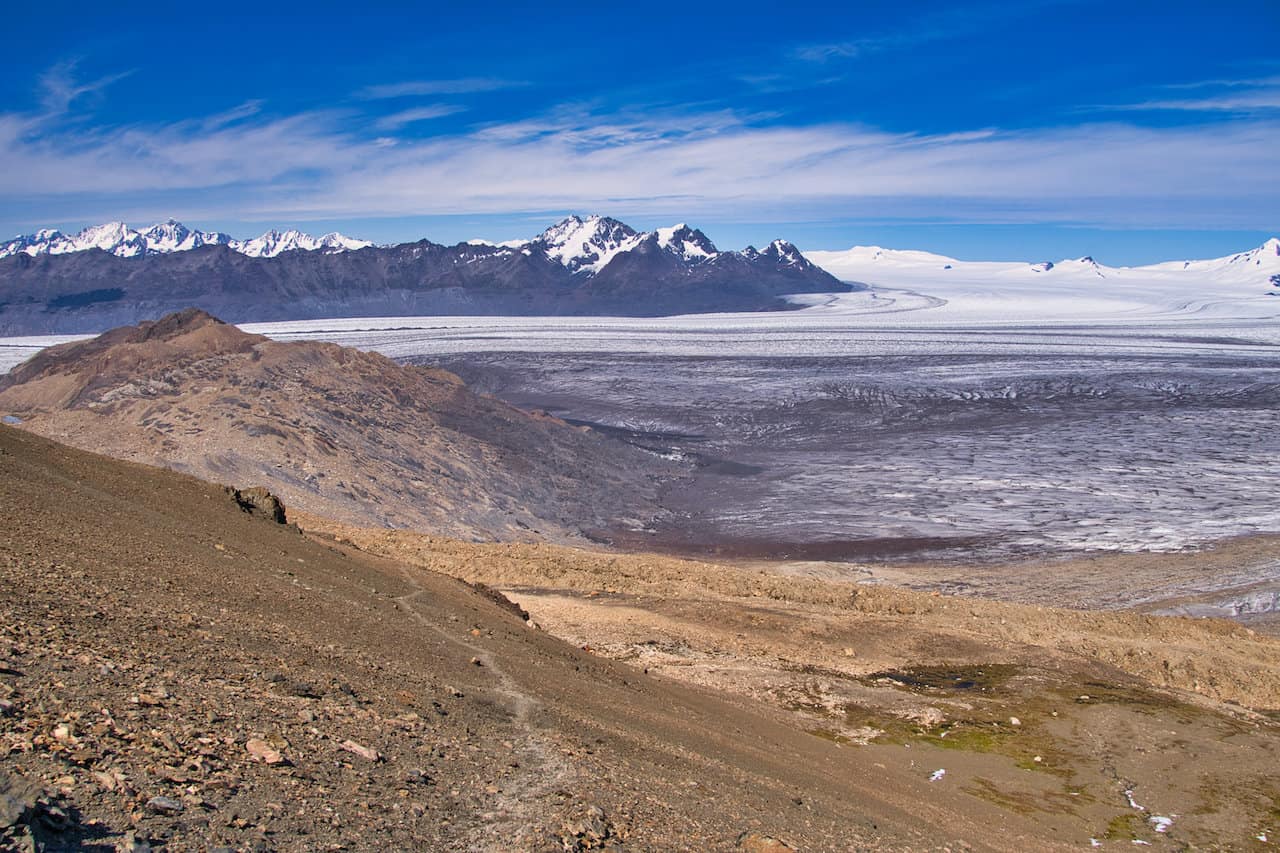
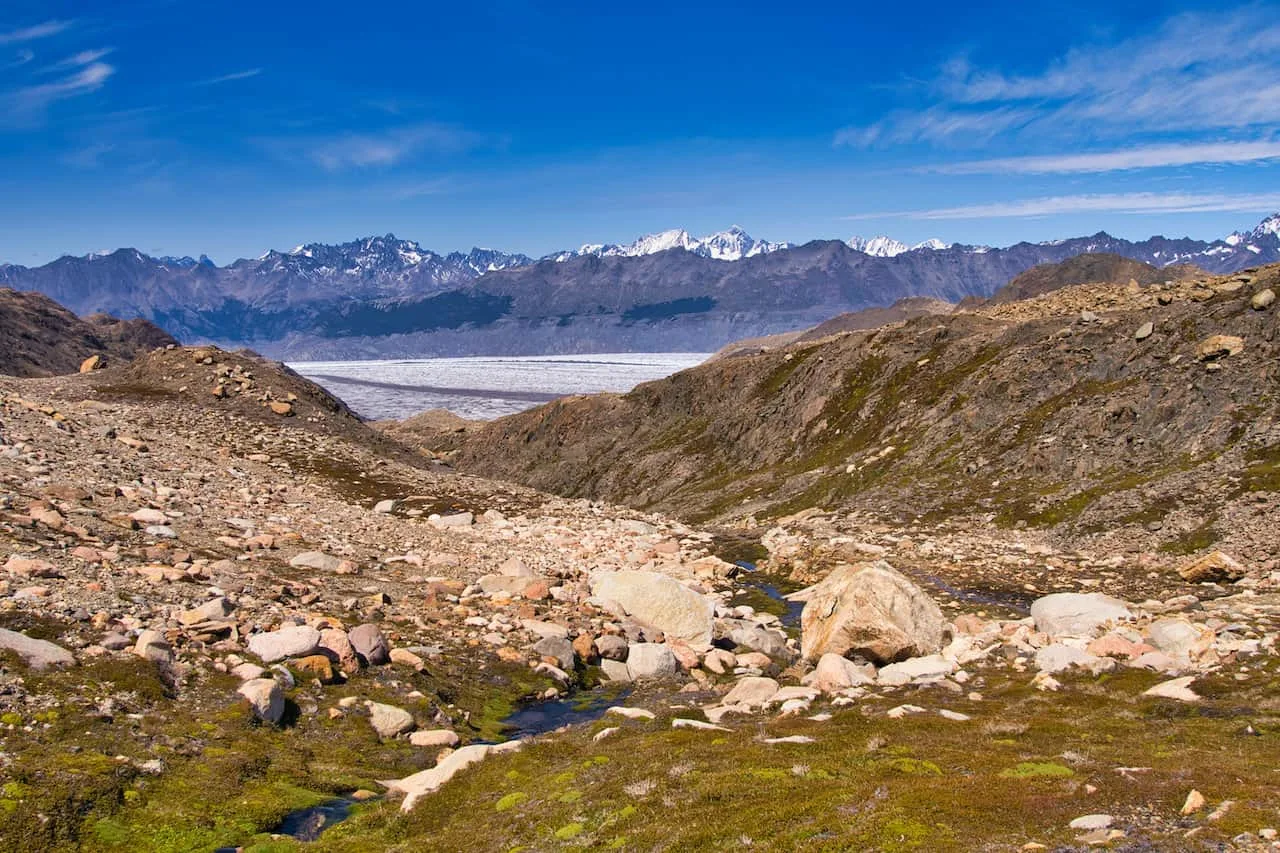
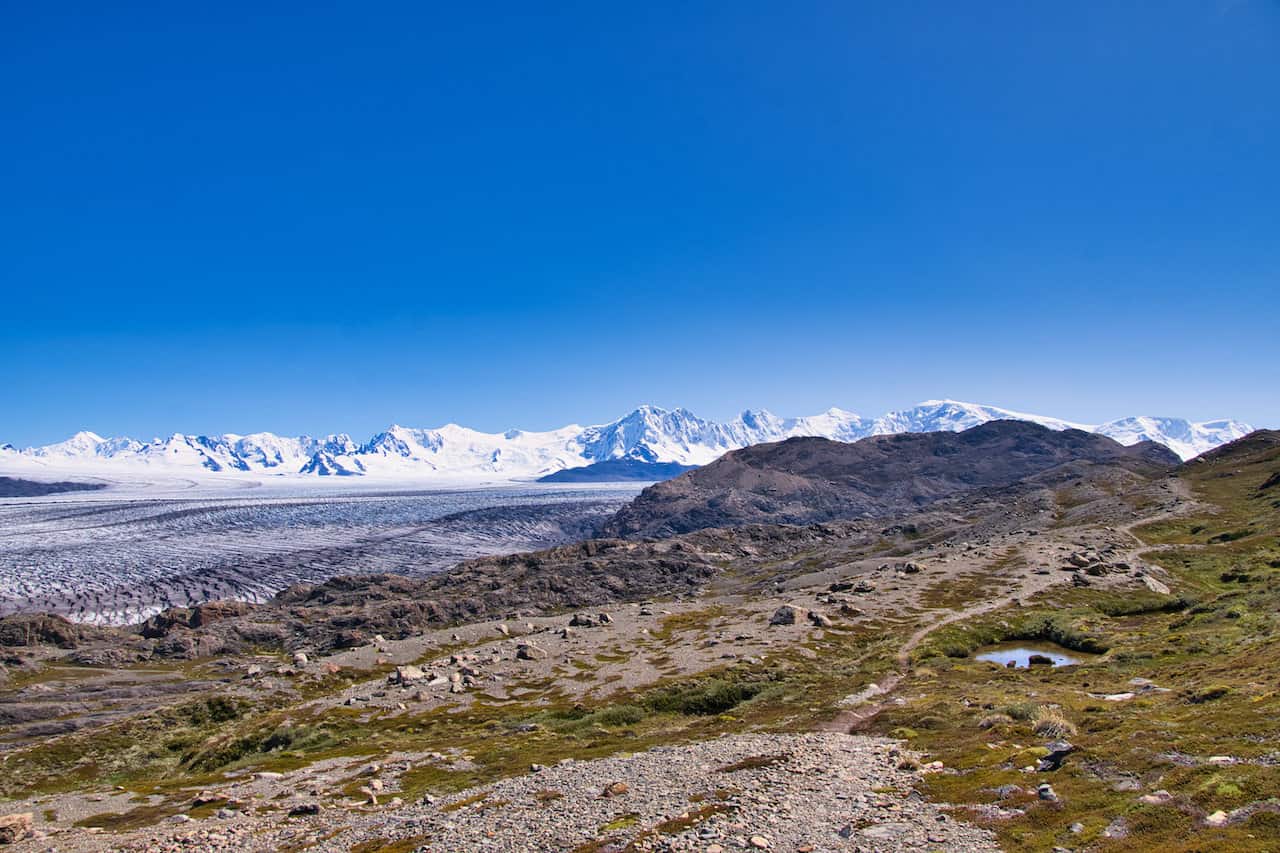
You will then slowly start gaining some elevation as you make your way up to Paso Huemul. As you get higher, the views will become vaster and you will come across the stunning Viedma Glacier all laid out in front of you.
Getting to the top of the pass will be an easier task than the previous day, but do be prepared for the elevation gain and the rocky terrain.
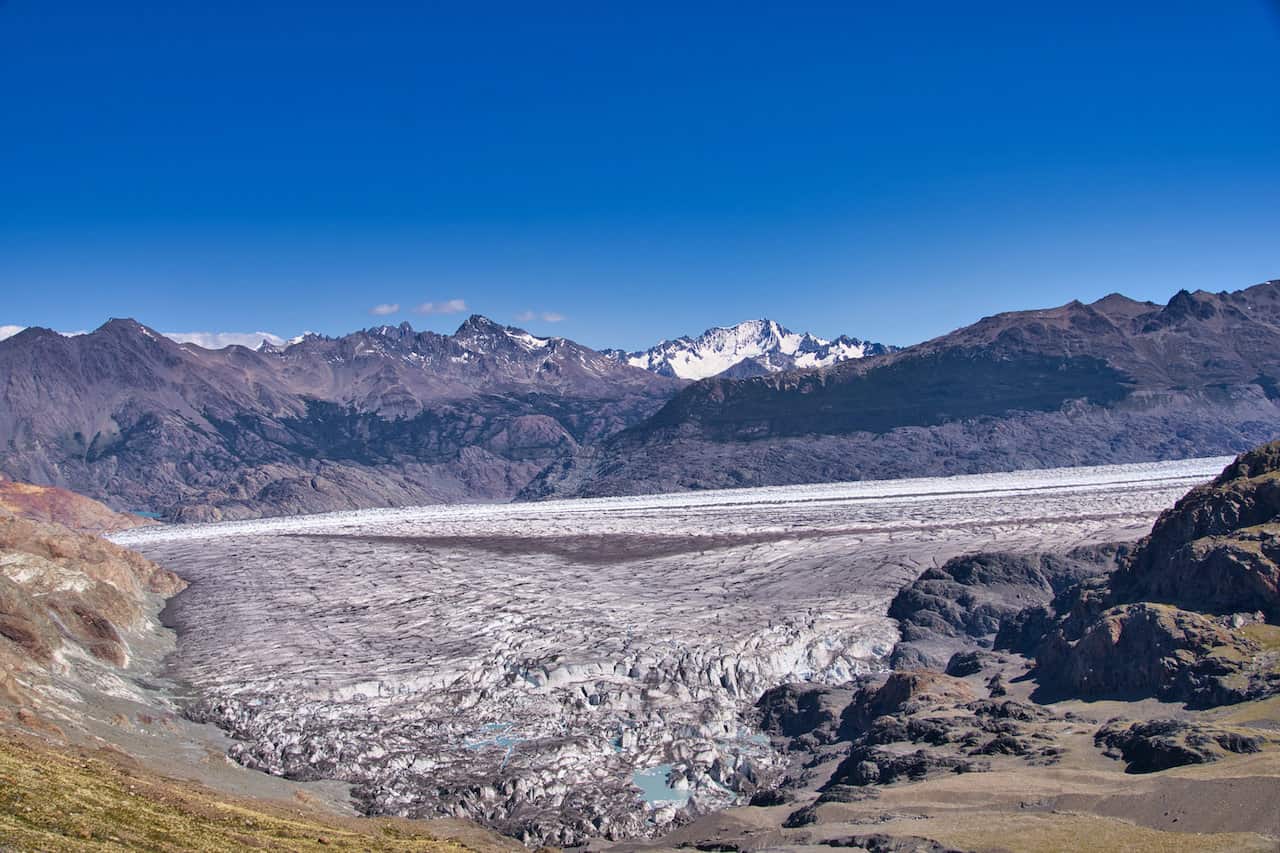

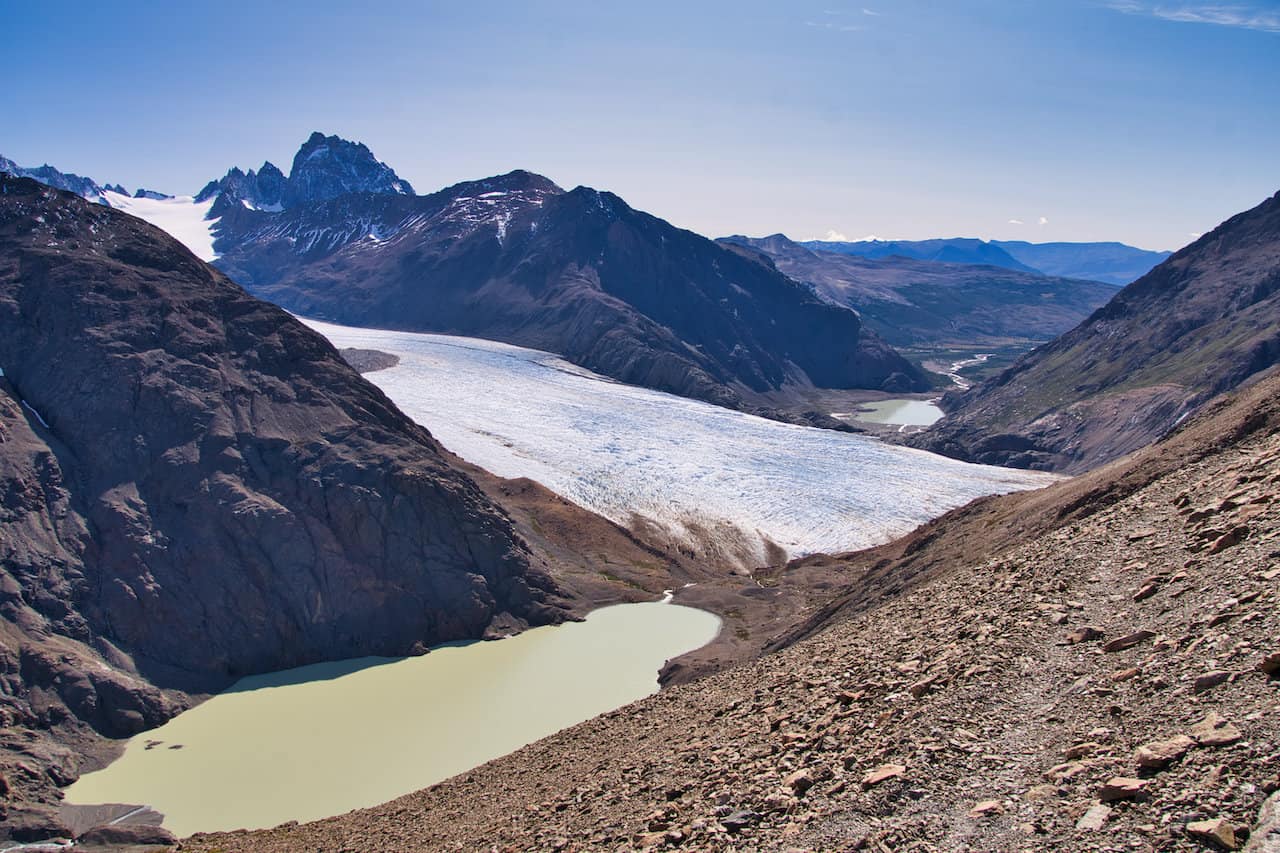
From the top of the pass, you will be welcomed to additional views of the Viedma Glacier, along with all the other various mountains in every which direction. Some may say that this view is right on par with the view from Paso del Viento (if not better!).

Now it is time to begin the perilous descent down to the final campsite. Before you start the descent, enjoy the views of Lake Viedma from the top of the pass and get your knees ready for an extremely steep hike down.

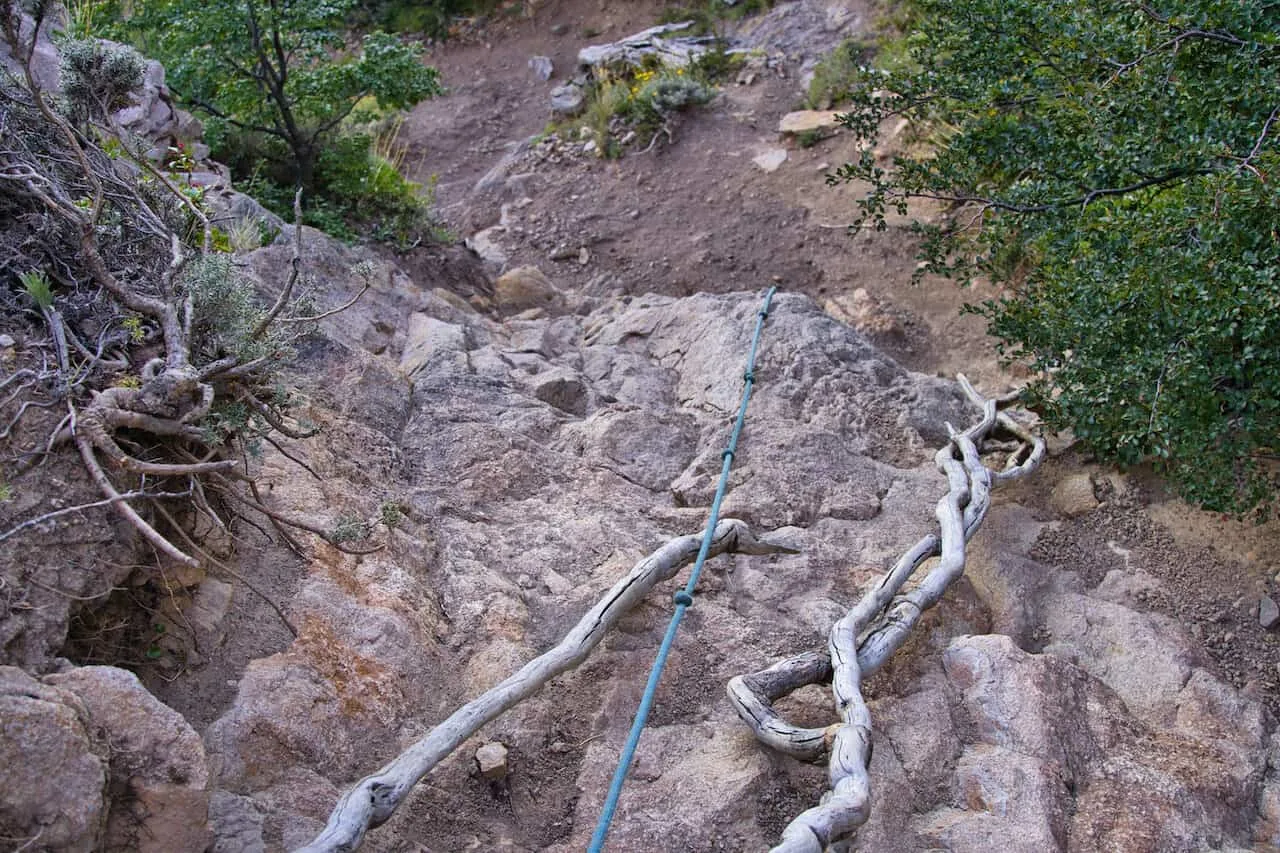
The first part of the descent isn’t too difficult but then things continue to get steeper and more dangerous. Be sure to take this portion slowly and watch each and every step along the way. It is super easy to lose your balance so proceed with caution.
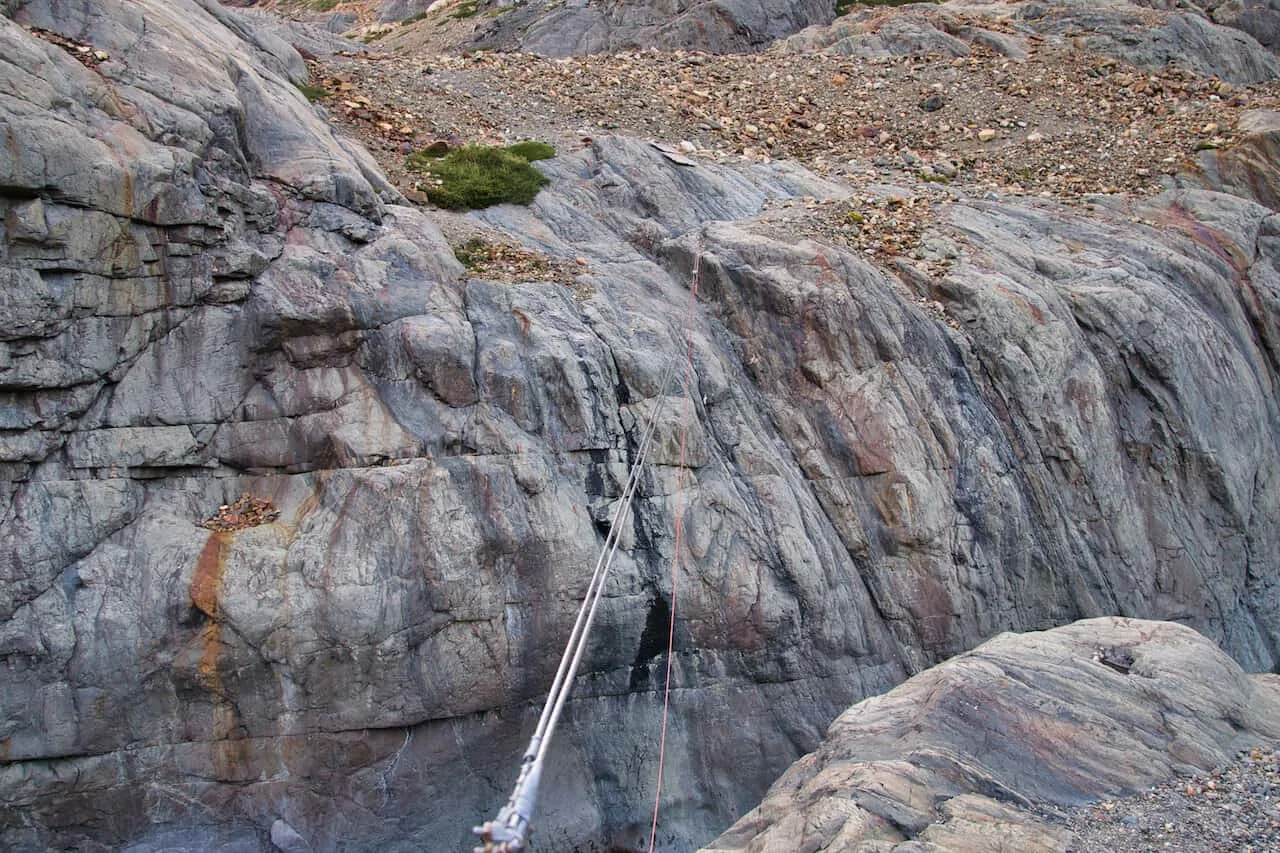
During one very steep portion of trail you will even find a helpful rope that can get you down to the next section.
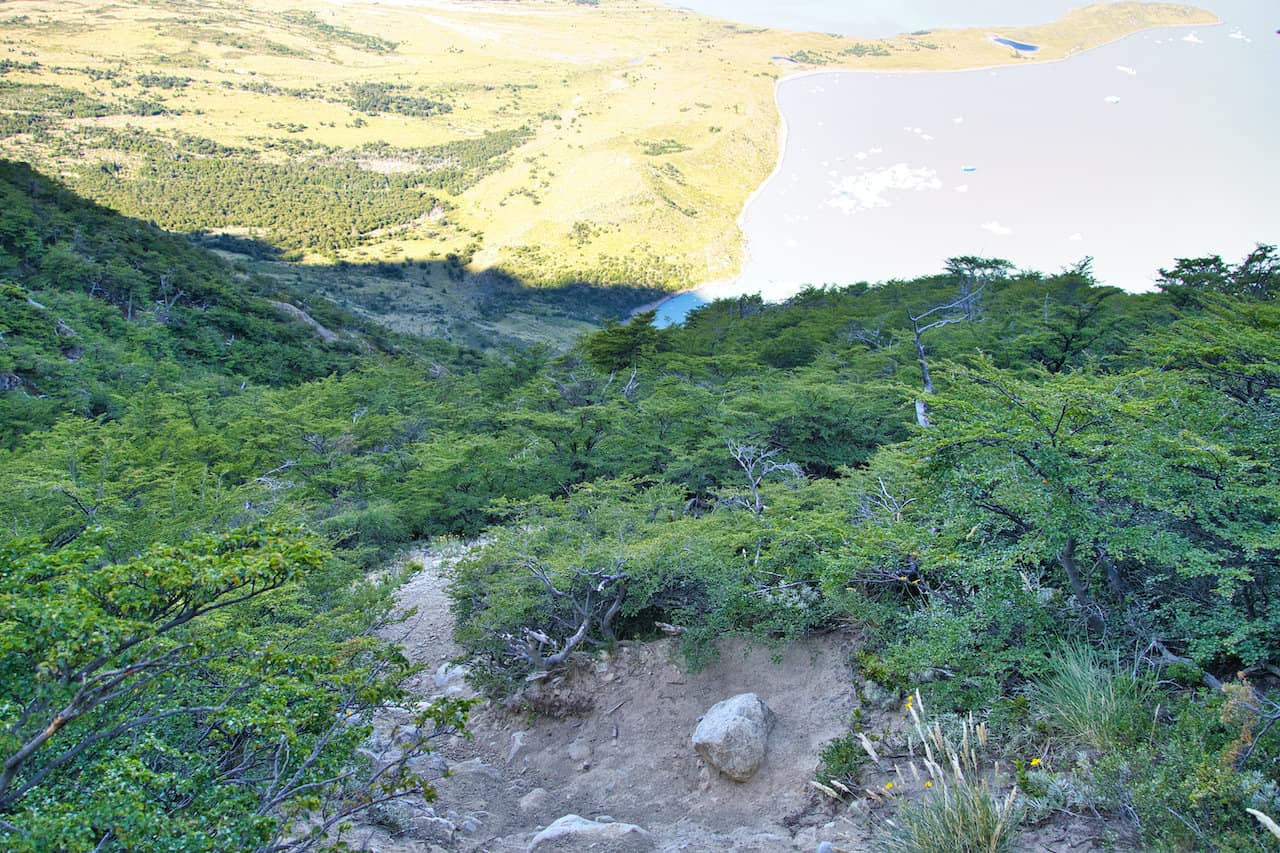


You finally will then reach the bottom, where you should be on the lookout for a small sign pointing you into the forest to the final campsite (Maps.me is helpful here as always).
Set up your tent near the lake, and maybe even go for a glacial swim before calling it a night and getting ready for the final day.
16) Huemul Circuit Day 4
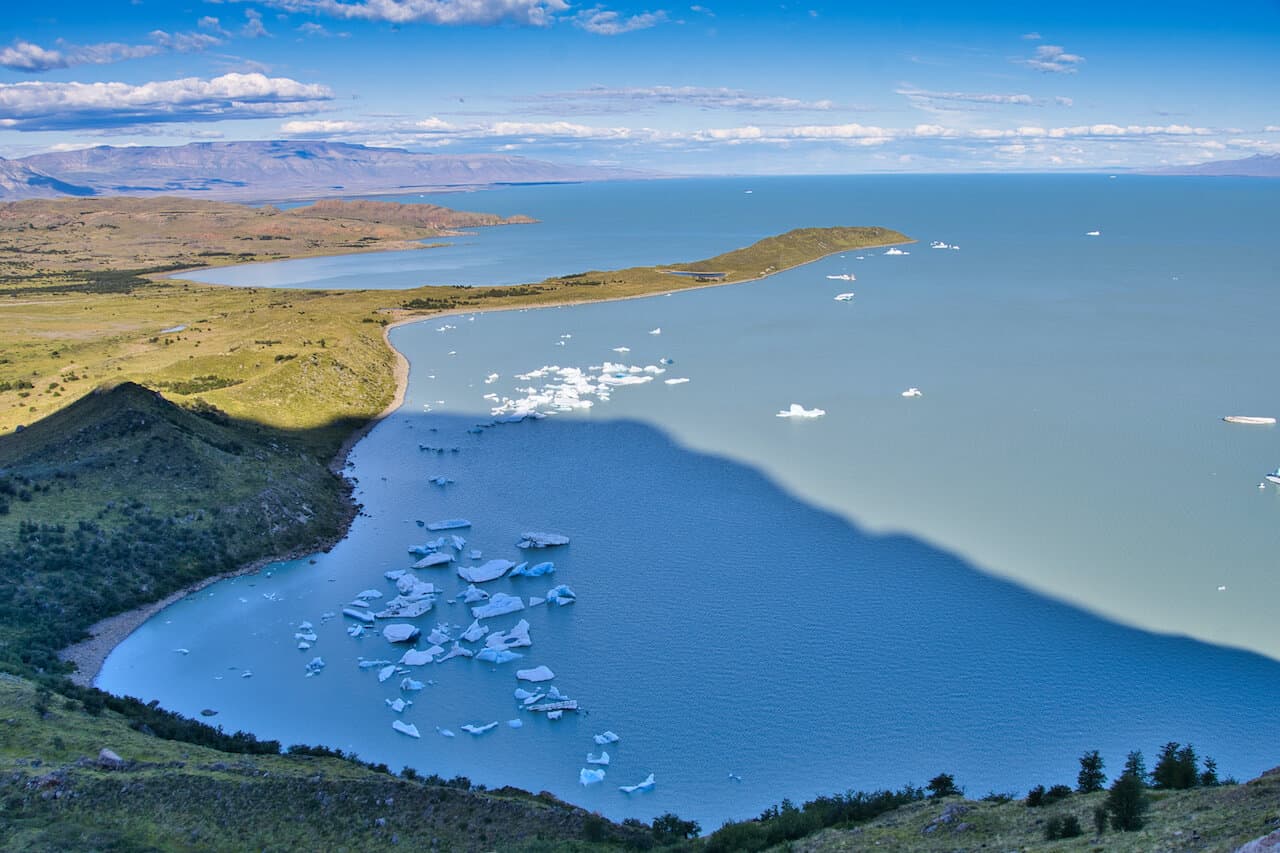
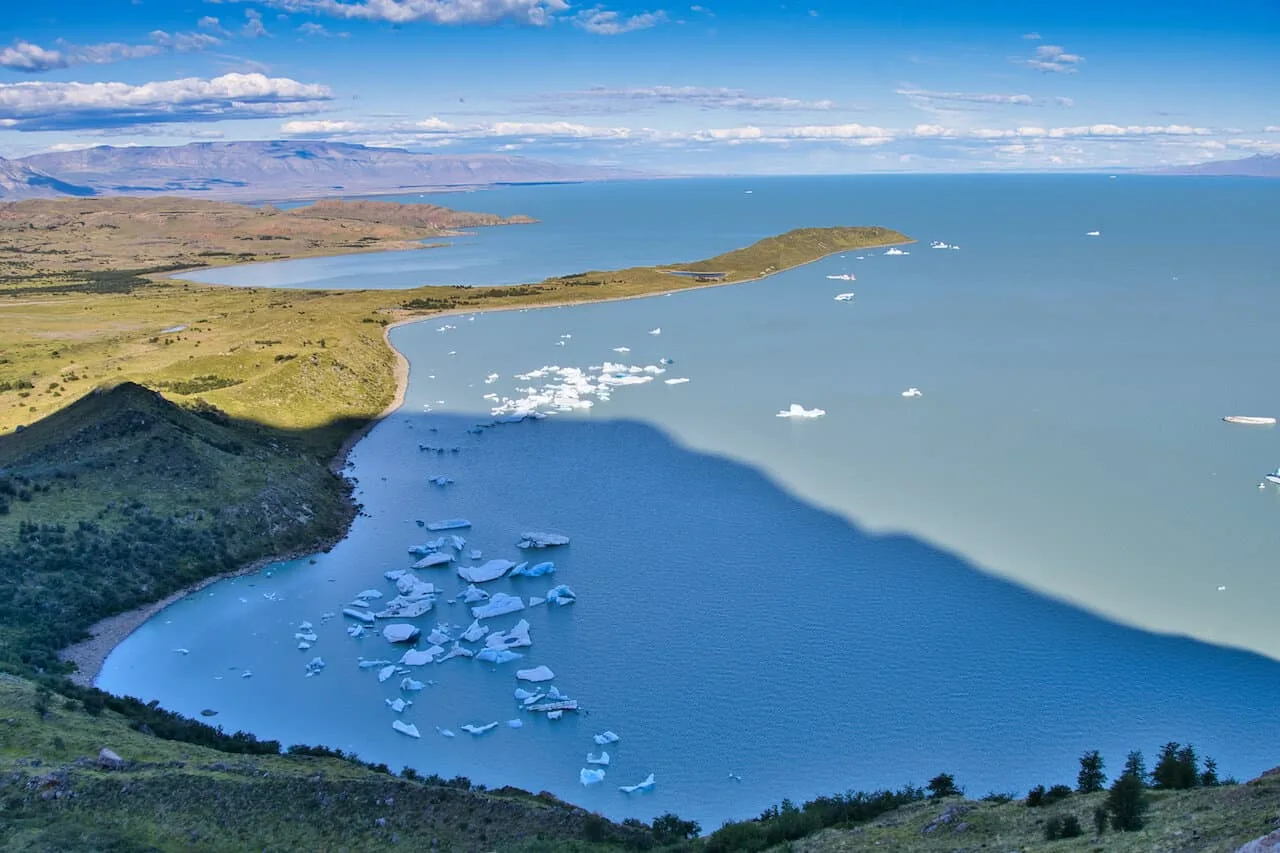
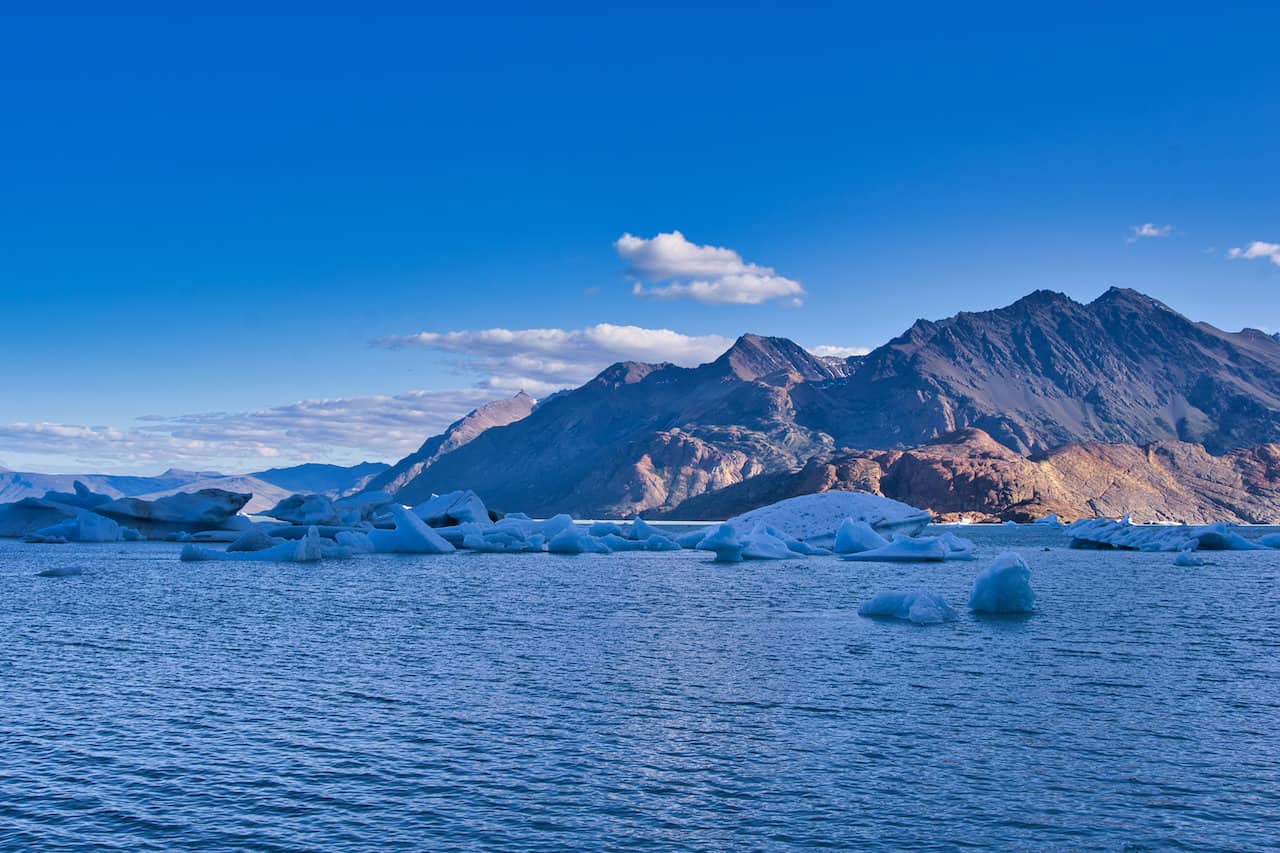
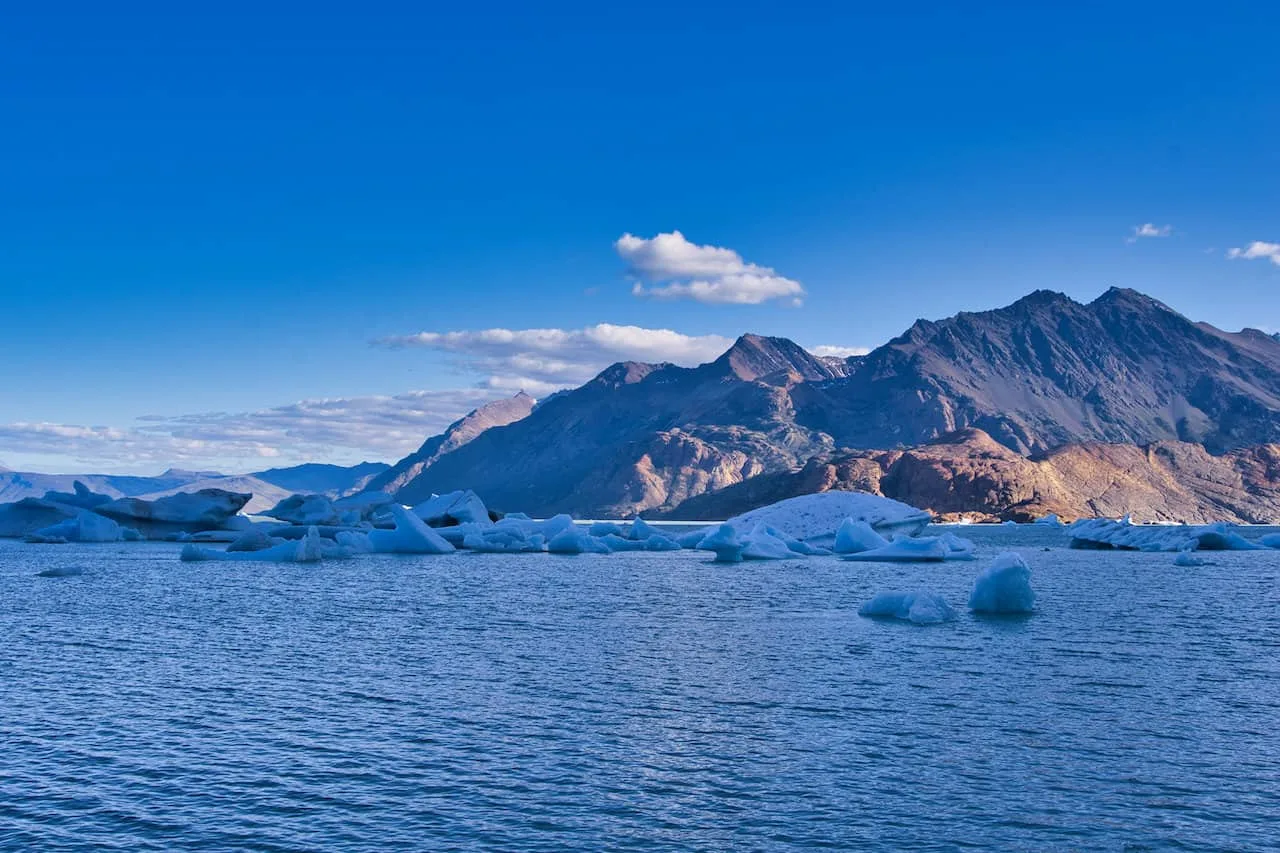
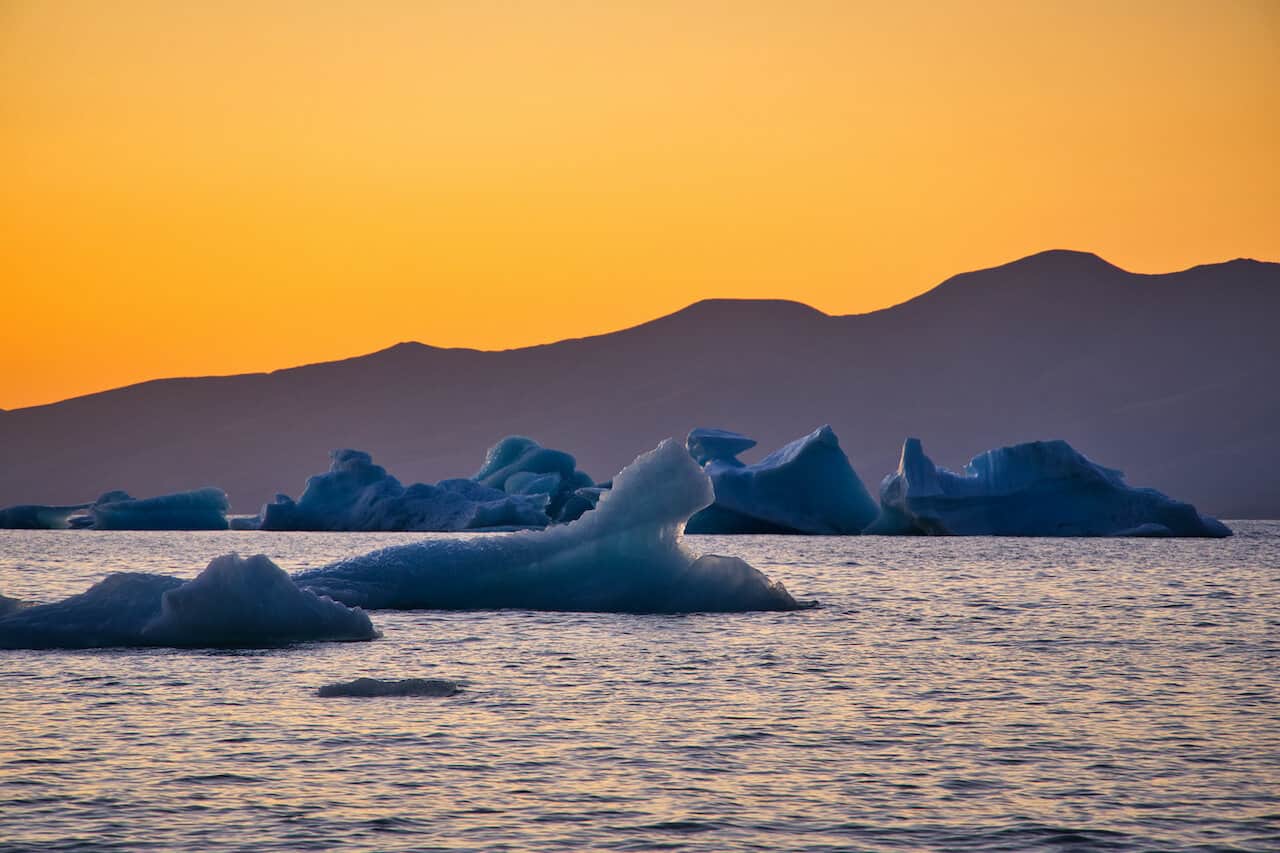
Before officially starting day 4, I would highly recommend waking up to take in sunrise. There are two options here.
You can either just enjoy a sunrise on the shores of the lake or you can head up to the viewpoint located on the hill (to the left if looking at the water – pin pointed on Maps.me).
I ended up taking in the initial sunrise by the shores as the icebergs lit up with the morning sun, and then took the quick climb up to the viewpoint to see the view from above. Below are some pictures from both locations.

After enjoying a sunrise, pack up your gear and begin the hike back to El Chalten. Although there are no mountain passes today, you should still be prepared for some elevation gain throughout the trail.
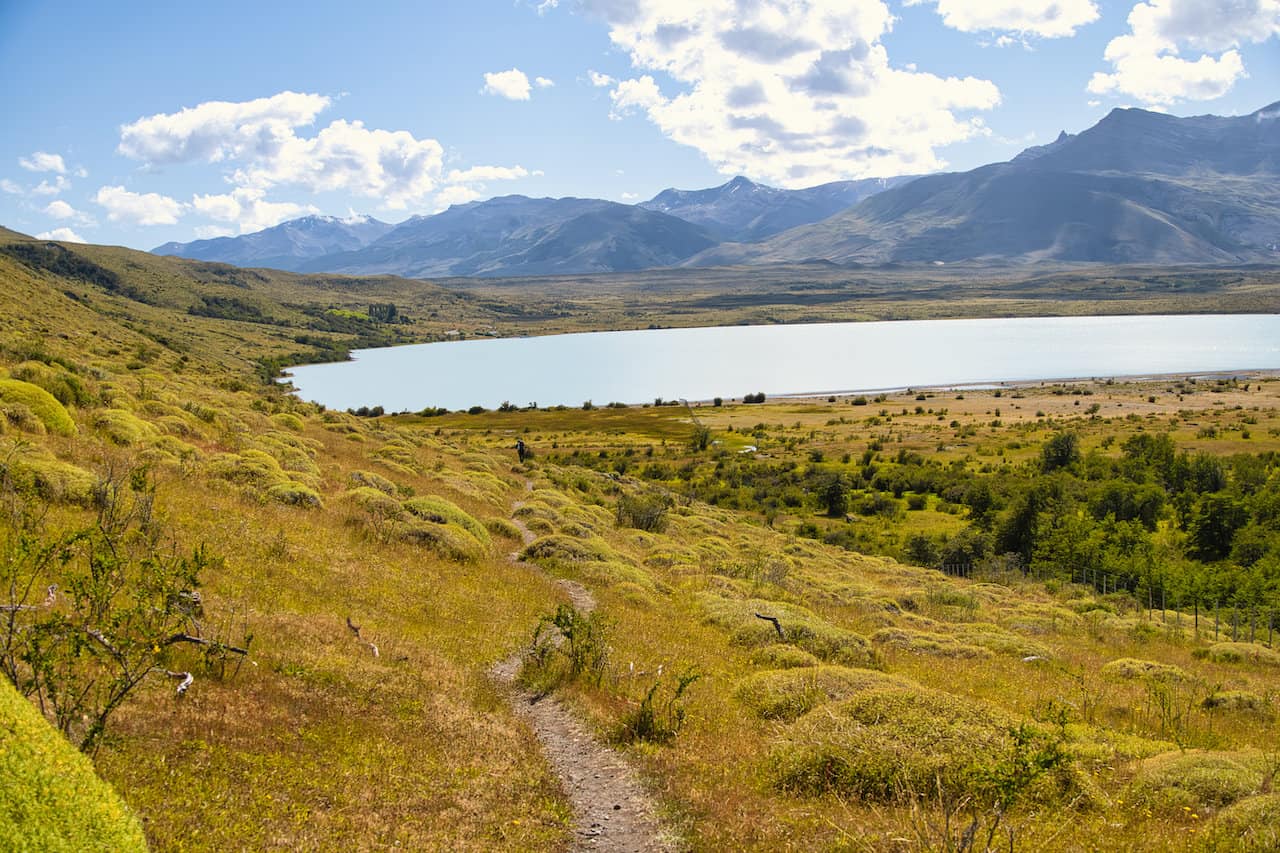
The first portion of trail takes you alongside Lago Viedma as you make your way back to El Chalten. I would recommend looking at Maps.me frequently during this first portion of trail as it can be easy to lose the path. While there are some hiking markers, they can be infrequent at times.
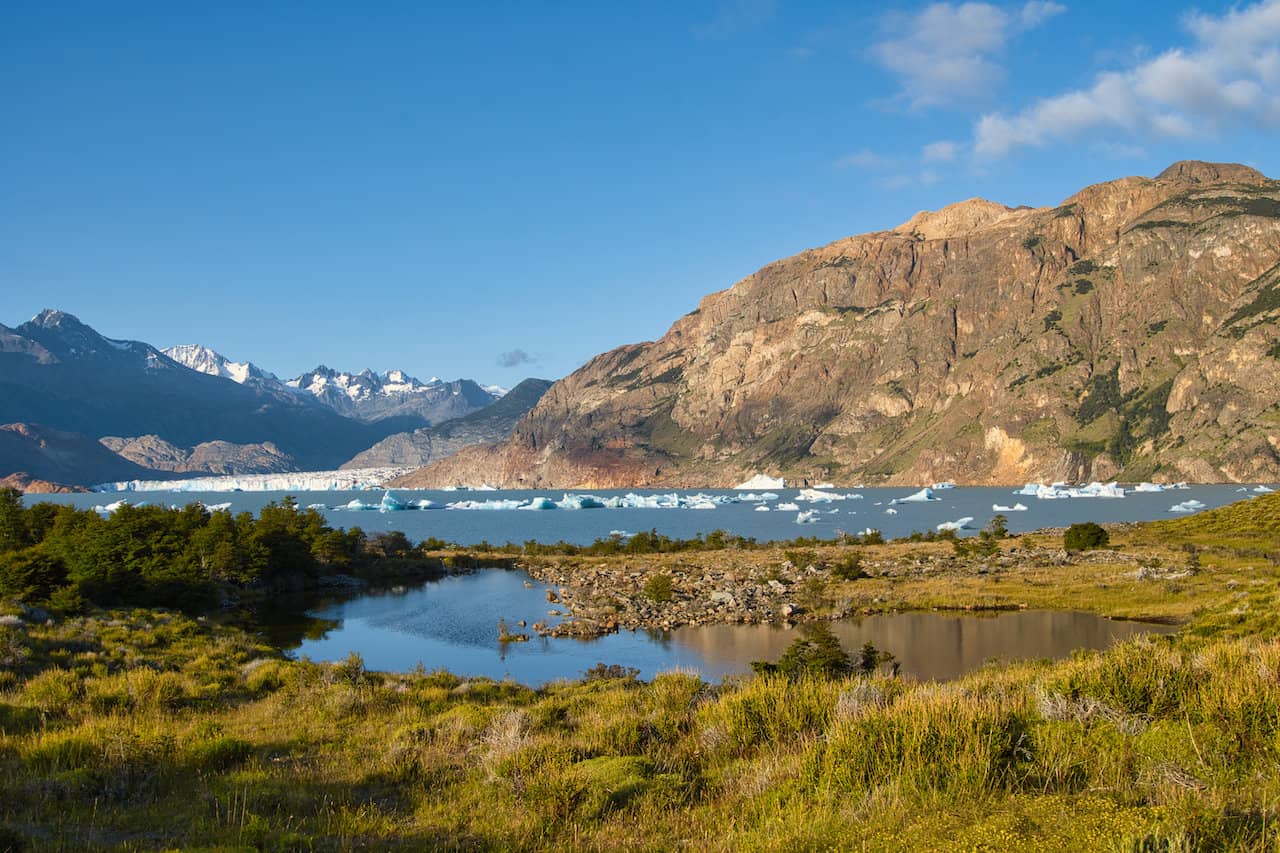
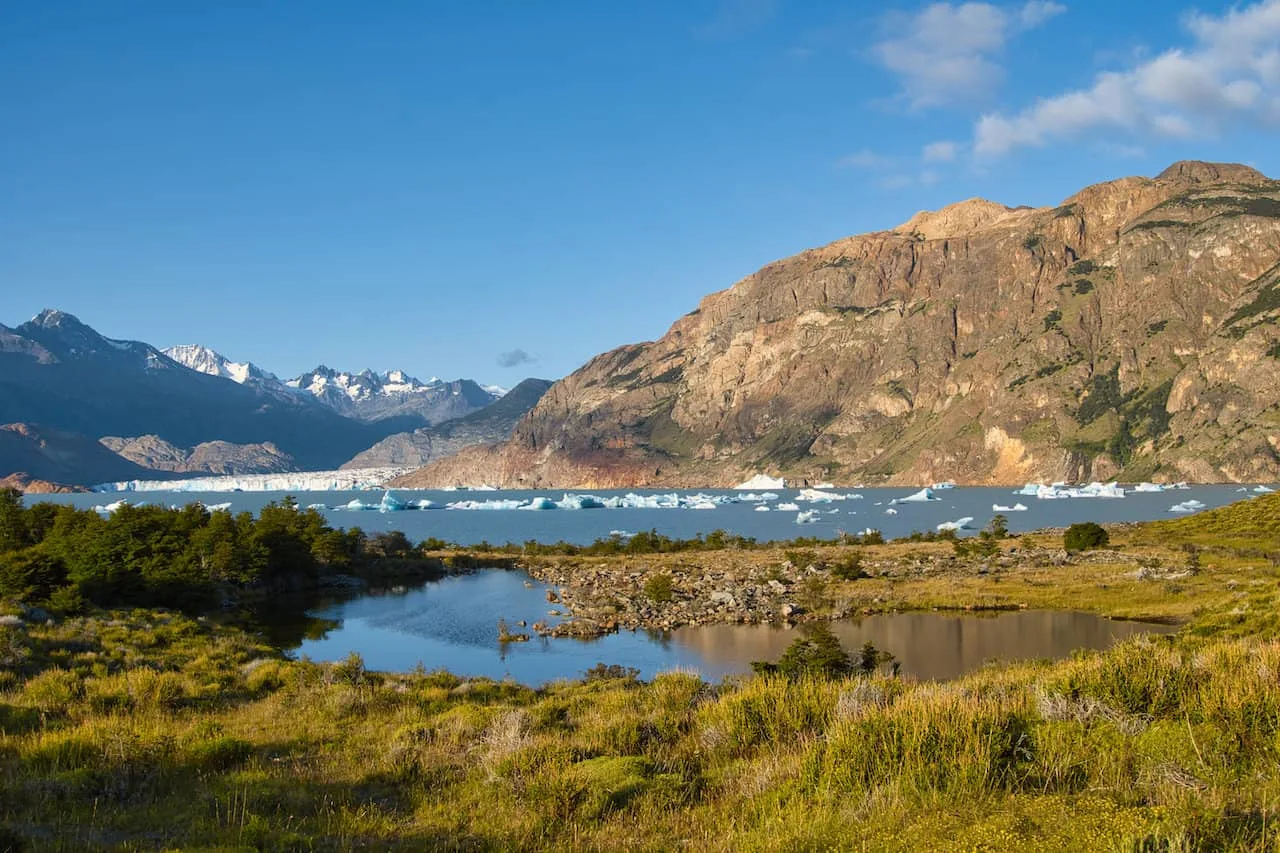
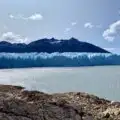
The path will eventually reach the Bahia de los Hornos. From the beach area, the path is more obvious and maintained all the way through.
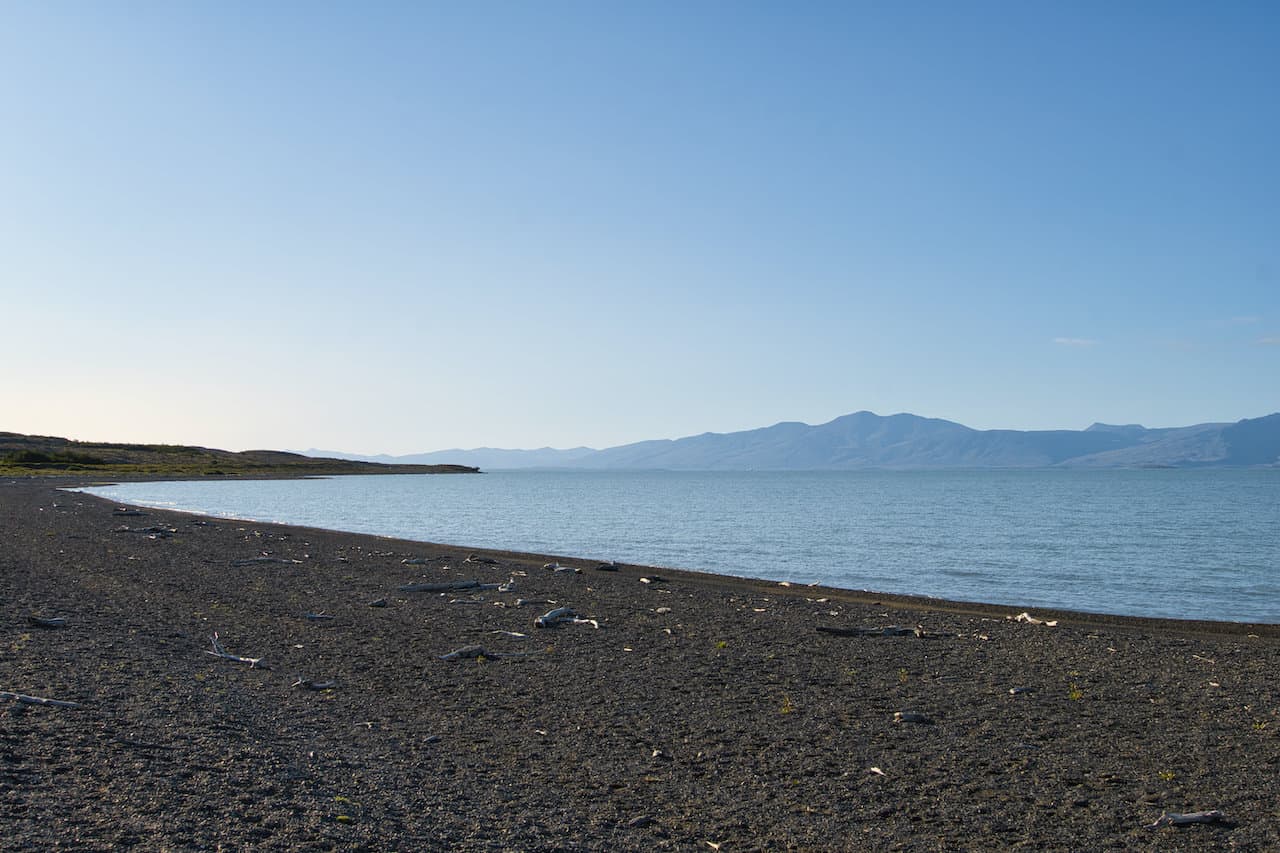
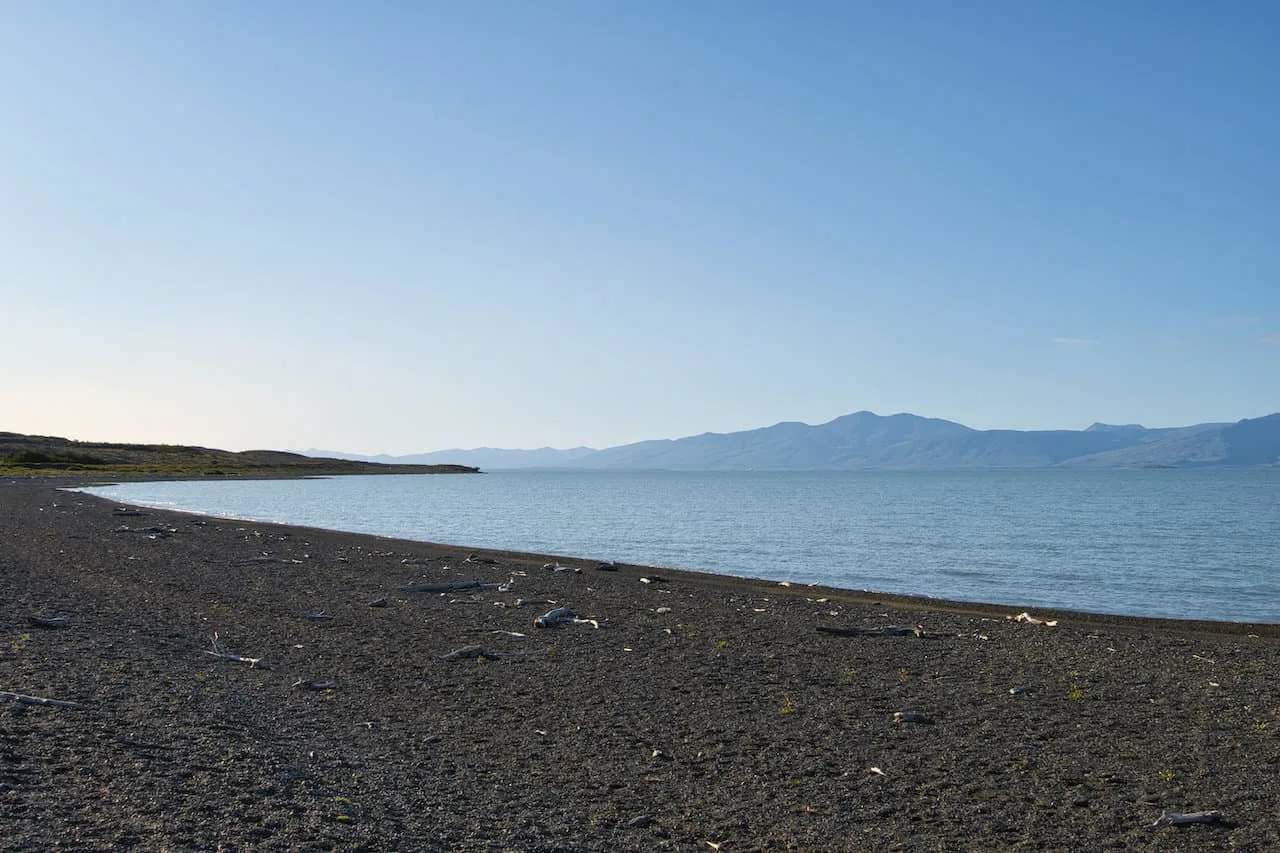
I found myself once again turning around quite frequently during this portion of trail. The views of the Viedma Glacier out back with the lake in the foreground makes for some very scenic landscapes.
Be aware that there isn’t much opportunity to fill up your water through a good chunk of the trail. So, be sure to fill up at the lake and then conserve water until you reach the river once again.
The trail will have its ups and downs as you head up and over the rolling hills. The hiking is not so difficult but it is certainly not flat.


Eventually though, the trail will even out as you walk alongside the hillside with the lake to your right hand side and El Chalten somewhere out in front of you.

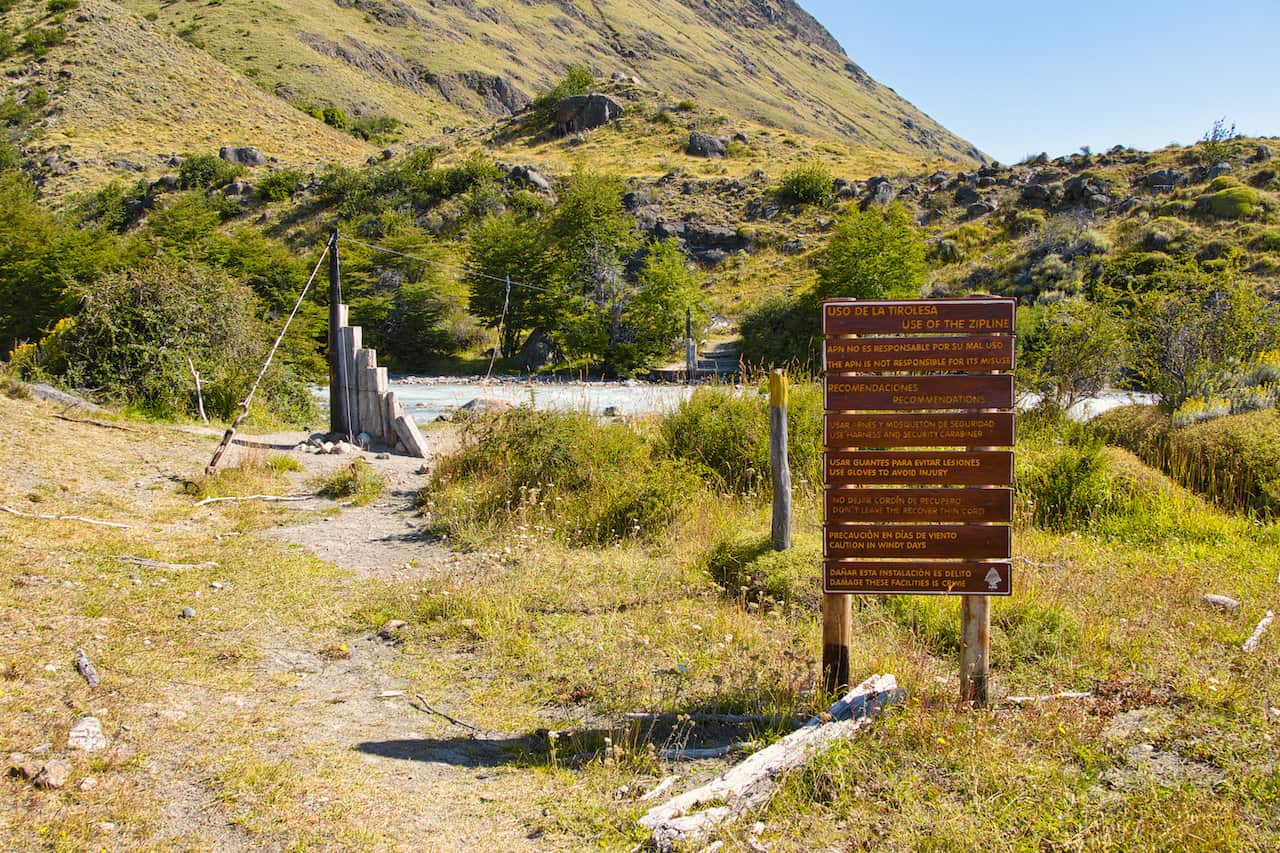
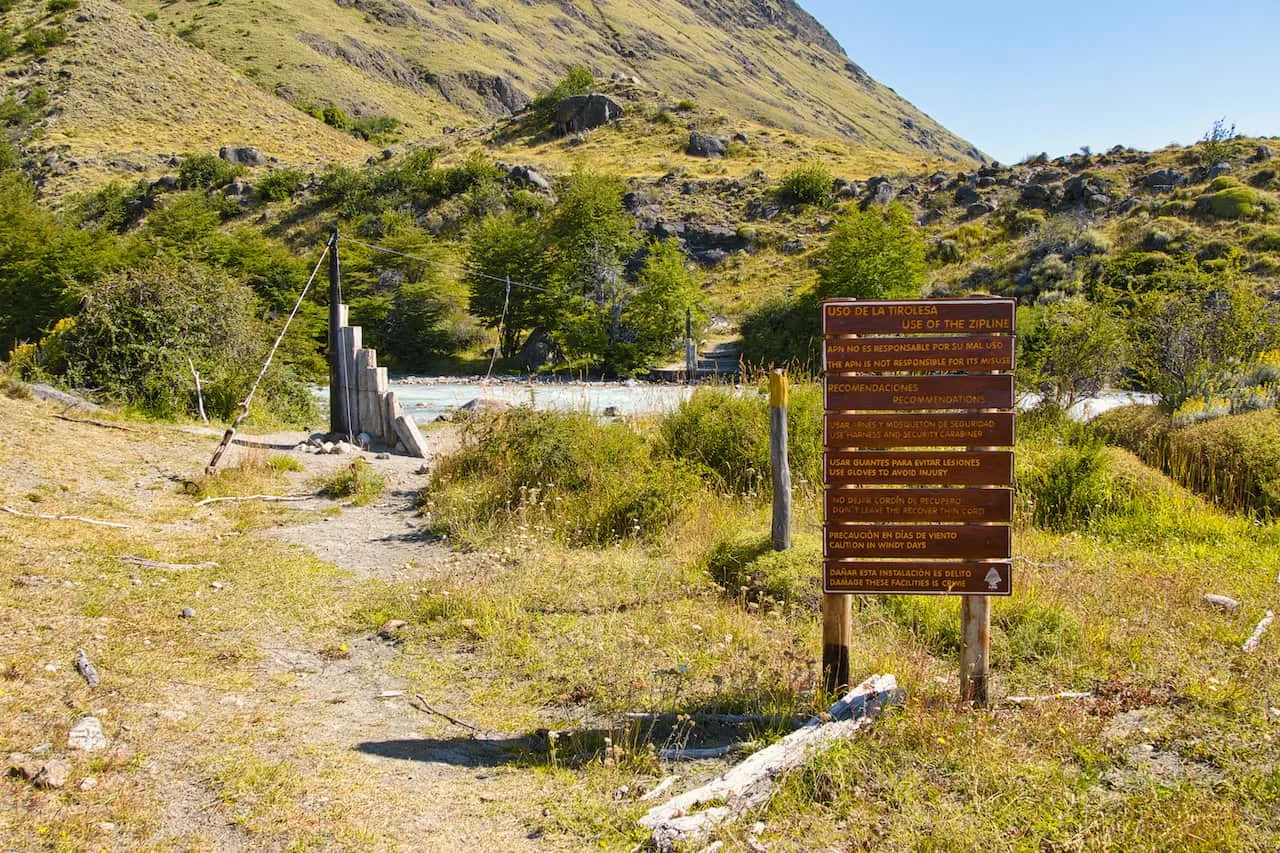
The path then makes its way down to the riverside where you will come across the second zipline of the hike. As mentioned earlier, I did not see an option to cross this river by foot (however, I have read that it is possible).
The zipline here is much less intimidating than the first one though as you have some helpful wooden columns on either side of the river. Take the same approach as the first time and make your way across the wire to the other side.
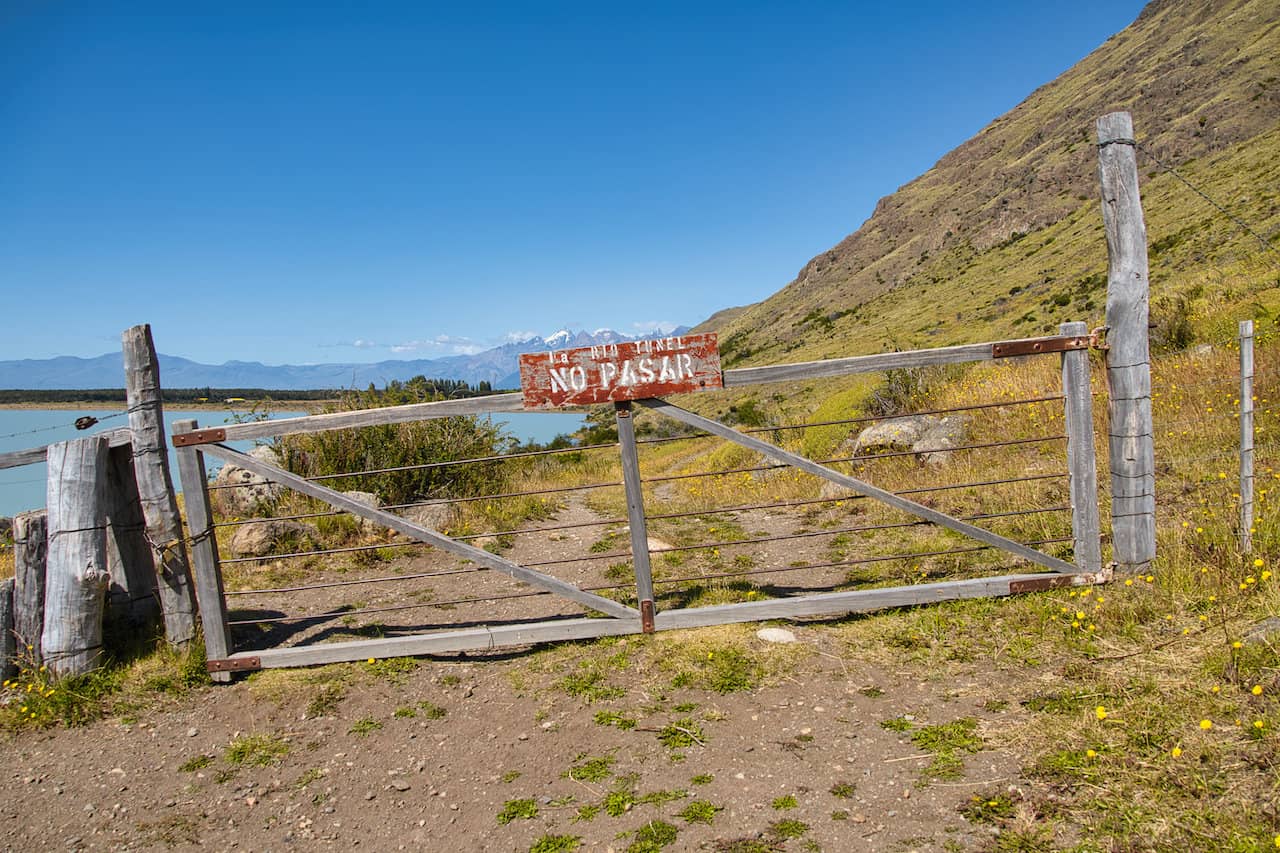
It is then the final push to the trailhead as you walk along the waterfront and eventually around the gate. Soon enough you will reach the Bahia Tunel boat terminal.
If you are lucky, you may be able to hitch a ride back to town with someone who may be visiting the lake.

If not, you can continue straight towards the La Quinta hotel. This portion of the hike has a bit of an uphill as you make your way up and through some fields. Once you reach the high point here, you will see the hotel out in distance.
You can decide to call a taxi from the hotel or you can continue along the path that connects back to the start of the trail.
Either way, your time on the Huemul Circuit has now come to an end. After 4 days and 3 nights of hiking, it is time to have a nice meal and rest up in El Chalten.

That about does it for a complete guide to the Huemul Circuit hike of El Chalten, Argentina. It is truly one of the best hikes in Patagonia and you will certainly enjoy such a memorable experience.
If you have any questions at all, feel free to add them in below. Also, don’t forget to check out the other Patagonia itineraries and guides up on the site.
Have fun out there and safe travels!


Noam Guttman
Wednesday 15th of January 2025
Hello Charles, Thank you for this very helpful post, I used it a lot for preparing for the trek, which was one of the best treks I've ever been to. 1 important update: it now costs 45,000 Argentinian pezos to enter the national park for 4 days. Payment is with a credit card only.
mc
Sunday 26th of March 2023
Thank you for writing up all the information on this circuit, it's very helpful. I have a few other questions.
1. How far in advance do you need to register for permits? Is this like other circuits, where you need to register 6-8 months in advance because it fills up instantly for the whole year? If this is a walk-up type of permit, how can you know if you'll even get a permit?
2. Are you required to stay only at the designated campsites, or is dispersed camping allowed? If it's designated campsite only, is it just for tents only or are there 'Tea Houses' like in Nepal?
3. Is early November a recommended time to do this circuit?
4. Is there any way to gauge how crowded/busy this circuit may be?
Charles
Wednesday 29th of March 2023
Hi MC - of course, glad you found it helpful. See below for some answers:
1) Registration can happen when you get there. Since most people wait for the right weather window, most people dont sign register until right before they depart. I have not heard of any sort of limitations on the number of hikers on the trail. 2) There are three designated campsite areas to set up tents. Along the trail there are no facilities besides a drop toilet at the first camp and an emergency shelter at the second. 3) November is possible to hike the circuit. It is more so recommended in the core winter months, but you can still hike in November. Feel free to double check with the visitor center. 4) It all depends on the weather windows. If there is poor weather for a longer period of time, you will have a lot more people waiting for the right day to depart. If there is a longer hikeable window, then groups may be more dispersed.
Hope that helps!
Rob
Monday 27th of February 2023
Hi Charles! (or anyone else who has done this trek recently). Great info, thanks! I plan on doing the circuit with my wife (so only 2 of us). One question: is it really required to get/buy/carry the 35-m cord/rope? Will the rangers need to see it before providing the permit? Basically, I want to know if this is an optional piece of equipment, or a "must have" (i.e., actually need it to complete the crossing). thanks!
Rob
Thursday 2nd of March 2023
@Charles, thanks Charles! OK, sounds like it would be risky to not have it. I was thinking that there might be some kind of permanent retrieval system built into it, but, I guess not! OK, thanks again for the fantastic info.
Charles
Tuesday 28th of February 2023
Hi Rob - so the 35m rope is needed to pull the pulley back to the start of the zipline. So for example, if you head across first attached to the pulley, your wife will need a way to retrieve the pulley back to the start. That is where the 35m rope comes into play. If you dont have one, then there is no way to retrieve the pulley. A couple alternatives include - hoping to use someone else's rope or the possibility that there is already a rope attached (this was the case for me at the second zipline but not the first). At the end of the day, it is "optional" and they arent going to stop you (they didnt even check for myself as I just completed an online sign up). Any other questions just let me know. Thanks!
Agata
Tuesday 7th of February 2023
Hi Charles, thank you for this extensive and helpful guide! We are planning to do the Circuit early March and debating whether to bring river crossing gear (harness etc) with us - we don't want to be stuck in El Chalten waiting for the gear to become available. Are the prices that you listed in USD or Argentinian peso? What was the approximate cost per person in USD? Cheers! Agata
Charles
Tuesday 7th of February 2023
Hi Agata - the prices on the charts are Argentinian Peso but the currency has devalued significantly so I would not look at the numbers as is. I would expect the prices to be around $7 - $10 USD per day for the river crossing gear. If you want to be certain, you can reach out directly to one of the shops listed out. I hope you have a great trek!
River Reinhardt
Thursday 2nd of February 2023
Super helpful post, thank you! My friends and I are going to Chalten in late May, and I'm wondering if this circuit is possible to do during that time or if the weather is too bad to camp outside?
Please let me know, thanks!
Charles
Saturday 4th of February 2023
Hi River - it is very hard to say what the weather will be like in May. It is known to be more unpredictable around that time but you really never know (even in peak season). There is always a chance you get the weather window but it is hard to predict. Hope you enjoy the trip!