If you are looking to put together a Patagonia itinerary, you have come to the right place.
Understandingly it can be overwhelming planning a trip to Patagonia. There are several different regions to consider, various trekking opportunities, and it’s laid across two countries!
This Patagonia itinerary overview will go through several itinerary combinations based on the duration of your trip, and what you may be most interested in. I hope by the end of reading through, you will be well on your way to enjoying Patagonia for yourself.
* Affiliate Disclosure: This post may contain affiliate links, which means I may receive a commission if you make a purchase through the links provided, at no additional cost to you. Thanks for supporting the work I put into TripTins!
To get the most out of this overview, I highly recommend reading through it from start to finish and not skipping too much. There is a lot to think about when planning a trip, and the remainder of this article walk through it all.
1) Patagonia Overview
Before jumping into any sort of itinerary, below are some important aspects to consider about Patagonia. Throughout this overview I will be diving deeper into some of these sections.
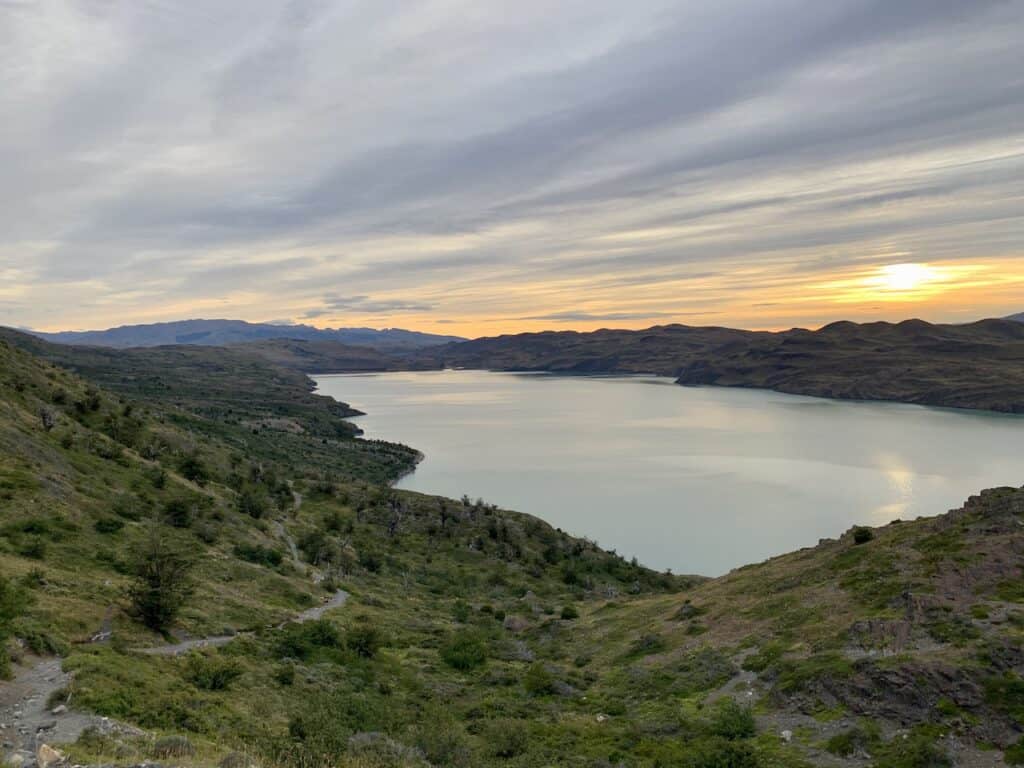
- The Patagonia region makes up 260,000 square miles of land at the southern point of Argentina and Chile. Throughout the region you will find a vast number of unique mountains, glaciers, lakes, rivers, and other mind-blowing natural landscapes.
- Due to the vast size of Patagonia, there are many regions to consider visiting during a trip. Unless you have unlimited time, there is a small chance you can visit more than 2-3 regions during a standard Patagonia itinerary. I would recommend to spend around a week (give or take) when visiting a region.
- From a transportation perspective, you may or may not need to rent a car. But this will all be based on your overall itinerary and how you are most comfortable traveling. Since busses, planes, and local transport are common in many places, it is possible to simply leverage that network of transport for certain parts of your trip.
- Since Patagonia is located in the southern hemisphere, the best time to visit will be during the region’s summer months. The high season for Patagonia runs from December to March. While you can visit outside of these times, the weather can be even more unpredictable (and cold!).
- One of the most important Patagonia travel tips I can mention, is that you must try to stay flexible during a trip. Out of anywhere I have traveled to, I found the weather in Patagonia to be the most unpredictable. Giving yourself some buffer days or the ability to move things around once you are there, can go a long way.

2) The Regions of Patagonia
One of the first things you will need to ask yourself is where do you want to visit during your trip to Patagonia. Given your interest levels, and amount of days to spare will dictate which places make most sense for an itinerary.
Torres del Paine National Park (Chile): this is the quintessential Patagonia destination, and home to the famous W and O Circuits (4-8 day trekking routes). While multi day trekking here is quite popular, hiking day trips are also possible options. The closest major town to TDP is Puerto Natales (home to an airport that connects with Santiago).
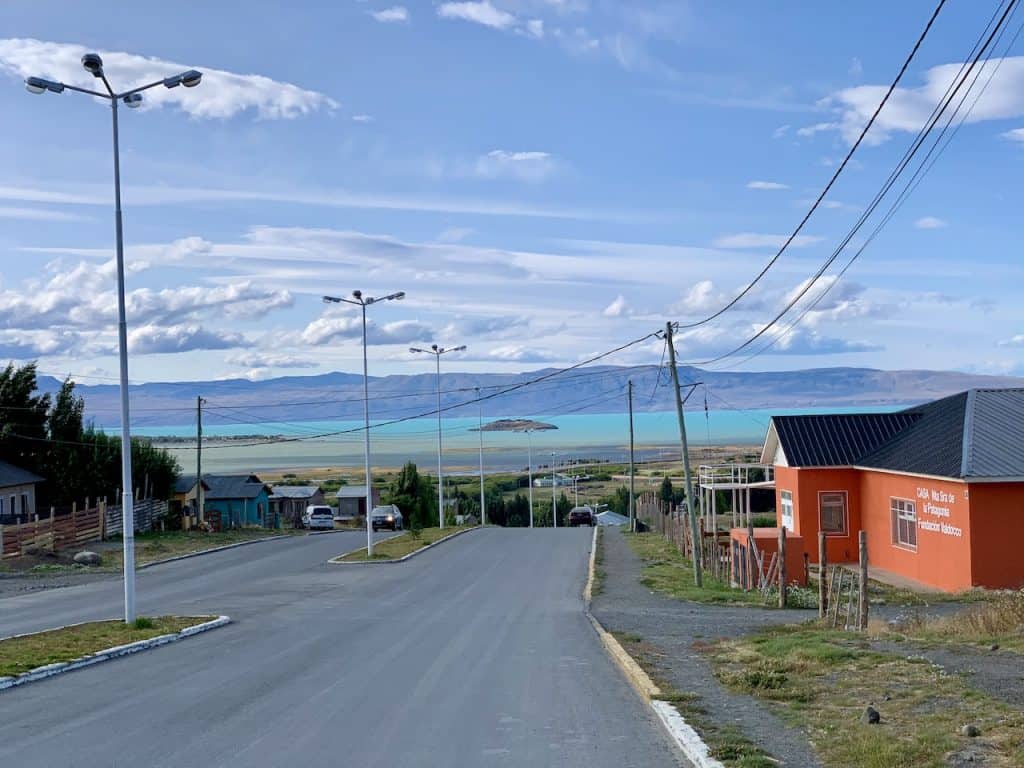
Los Glaciares National Park (Argentina): if you are looking for glaciers, you guessed it – Los Glaciares National Park is the place to be. While glaciers are a highlight (such as the famous Perito Moreno Glacier), hiking, boat trips, and other activities are possible too. The two main towns to base yourself in the region include El Calafate (has an airport that connects with Buenos Aires) and El Chalten (3-hour bus/car ride from El Calafate).
Tierra del Fuego (Argentina): translated to the “Land of Fire”, Tierra del Fuego is as far south as it gets in Patagonia. Home to Tierra del Fuego National Park and the Beagle Channel, the region is one of the best out there. Ushuaia would be the main town to stay in when visiting (as it has an airport that connects with Buenos Aires).
While I spent a month visiting the three regions mentioned above, I have yet to visit some of the more northern regions of Patagonia. These include:
Aysen (Chile): this is one of the lesser visited regions of Patagonia and lays just north of Los Glaciares. It is famous for its three distinct natural landscapes including its glaciers, rainforest, and the Steppe dry area. You can also find the southern part of the Carretera Austral running through the region.
Lake District (Chile): continuing further north are the lake districts of Chile and Argentina. The Chilean lake district is of course known for its lakes. However, there are many other highlights as well. Whether that is exploring one of the seven national parks, checking out some hot springs, or climbing a volcano, the Lake District has it all. The Carretera Austral also heads through this region going southbound.
Lake District (Argentina): just beside the Chilean district is the Argentinian district. Home to the town of Bariloche, the Lake District on this side is full of natural landscapes to explore. Whether you want to hike, bike, or kayak around, the Lake District has something to offer you.

3) Multi Day Treks
Another major consideration at play when putting together a Patagonia itinerary is if you want to take part of a multi-day trek.
You can find multi day treks all throughout Patagonia. On one hand, some of these treks are more well established and built up with refugios (mountain accommodation), while other treks require a more off the grid type of experience.
Without a doubt, the most common trek that people think about when Patagonia comes into play is the W Trek of Torres del Paine National Park.
This is a 4-5 day hike (I would recommend a 5 day), that takes you on a one way route in the shape of a “W”. Throughout the hike, there are campsites and refugios (and in this case more upscale refugios), where you can sleep each night.
If a multi-day trek is important to you, then your overall Patagonia itinerary should be worked around the trek itself. Get the trek figured out first, and then put together any other pieces around it (either before or after).
During my time in Patagonia, I took part of the O Trek, which is a longer version of the W (8 days instead of 5).
I also hiked the 4-day Huemul Circuit from El Chalten. While this is a hike where you must bring all of your own gear, it is truly one of the most beautiful experiences I have taken part of.
4) Best Time to Visit Patagonia
Now that you have a bit more insight into the various regions, the next consideration at play is when to visit Patagonia. As mentioned, the region lays in the southern hemisphere. That means that the summer period runs from December to March.
During the summer time, you can expect temperatures to be at their highest, and the overall weather to be a bit calmer. Due to this, the summer is when most tourists make their way to Patagonia. Hiking, outdoor activities, and other nature-based attractions will be at their most accessible.
If you are looking to still get some good weather but without the crowds, you may want to consider the shoulder months of October/November and April/May. The weather may not be as stable during these times but you can still get a lot out of a trip.
I would not recommend a trip between June and September (for the most part), as it gets too cold, wet, snowy, and more unpredictable. Many hikes will not be possible and some accommodations/towns can completely shut down basically.
Note: the remainder of this Patagonia itinerary overview will focus in on the three regions of Torres del Paine, Los Glaciares, and Tierra del Fuego. If you are also interested in visiting the regions located further north, feel free to combine your learnings from here with other resources.
Hiking Resources & Checklist
Before heading out for the trails, be sure to read up on some of the hiking resources up on the site. These are here to better prepare you for all types of outdoor adventure.
- Gear: Hiking Packing List
- Weather: How to Prepare for Hiking Weather
- Navigation: Hiking GPS & Navigation
- Tips: 20+ Hiking Tips & Tricks for the Trail
- Accommodation: Book Your Hotel Today
- Rental Car: Book Your Car Rental Today
5) Flying into Patagonia
Unless you are up for one long drive, odds are you will be flying into Patagonia from a major hub like Buenos Aires (Argentina) or Santiago (Chile).
Luckily, during the high season, flights are frequent to the major cities of Patagonia. This should make your connections further south easier to manage. Prior to visiting Patagonia, it is popular to spend a few days in the city capitals, before hopping on a flight to the south.
Below are the major airports to consider when flying down into Patagonia:
Torres del Paine: Puerto Natales or Punta Arenas
Puerto Natales (PNT) has direct flights from Santiago and Puerto Montt, while Punta Arenas (PUQ) has direct flights from Santiago, Puerto Montt, and a few smaller Patagonian cities
Note that Puerto Natales is just a 2-hour drive from the park’s entrance, while Punta Arenas is a 5 hour drive. I would recommend Puerto Natales if you can get those flights.
Los Glaciares: El Calafate
The El Calafate airport (FTE) is the main hub of the region. It has direct flights from Buenos Aires, Cordoba, Rosario, Bariloche, and Ushuaia (among a few others).
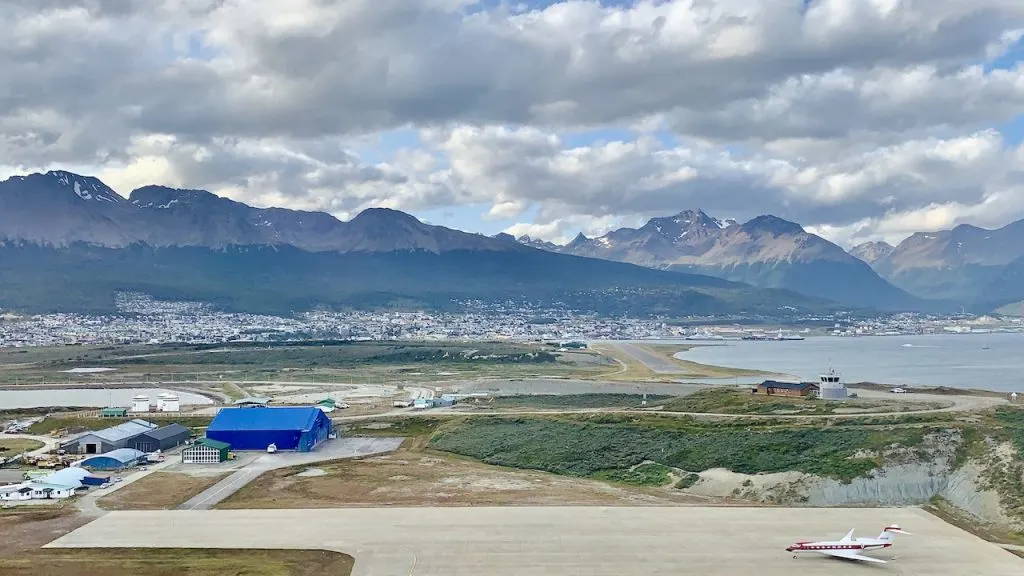
Tierra del Fuego: Ushuaia
The Ushuaia airport (USH) is the main hub of Tierra del Fuego. It has direct flights from Buenos Aires, Cordoba, and El Calafate (among a few others).
Aysen: Balmaceda
The Balmaceda airport (BBA) is the main hub of the region. It has direct flights from Santiago, Puerto Montt, Temuco, and Punta Arenas.
Chile Lakes: Puerto Montt
The Puerto Montt airport (PMC) is the main hub of the Chilean Lake district. It has direct flights from Santiago, Balmaceda, Concepcion, Puerto Natales, and Punta Arenas.
The Temuco airport (ZCO) is also an option with connections from Santiago, Balmaceda, and Punta Arenas.
Argentina Lakes: Bariloche
The San Carlos de Bariloche airport (BRC) is the main hub of the Argentinian district. It has direct flights from Buenos Aires, El Calafate, many other Argentinian cities, and even flights from Santiago and Sao Paulo.

6) Renting a Car
Once you arrive in Patagonia, you will need to choose between renting a car or simply leveraging public transport, tours, and taxis to get around.
Some people rent cars for the entirety of their trip, driving from one region to the next. Other people just rent cars in certain places, where it is much more convenient to have your own transport.
To have the most flexibility out of a trip and save valuable time, I would recommend renting a car to get you around when it makes sense (i.e. I wouldn’t recommend renting a car in Torres del Paine if you are only doing a multi-day trek).
Here are some recommendations based on the major hubs:
Torres del Paine: if you are opting for a multi day trek, a car is not necessary. However, if you are going back and forth to the National Park, I would recommend renting a car to be on your own schedule.
Los Glaciares: renting a car for the El Calafate and El Chalten portions of your trip can be a great idea. You will be able to drive yourself to the Perito Moreno Glacier and be on your own schedule, stop along the scenic road towards El Chalten, and get back to the airport. While you do not need a car in El Chalten, it can come in handy for the overall region.
Tierra del Fuego: this is another spot where car rental will be very helpful. While the hub of the region is Ushuaia, mostly everything to do is going to be a drive away. You can use shuttles and taxis to get around, but a car rental will make things much easier altogether.
If you happen to be renting a car for an entire trip between Argentina and Chile, you will need a special permit from your rental car company to cross the border.
Renting a Car: When searching for rental cars, feel free to check out Rentalcars.com for potential options. You can filter by price, car type, and much more to find the perfect car for your trip.
7) Public Transport
If not renting a car, then you will need to leverage the public transportation network of the regions. Thankfully there are busses that go between cities (like El Calafate and El Chalten), as well as to the National Parks (such as from Puerto Natales to Torres del Paine, and El Calafate to Los Glaciares).
Feel free to check out Bus-Sur for bus options around the region.
In some places, like Ushuaia, there are shuttle services that go to trailheads and the National Park. For a small fee, you should be able to get around on your own, but you will need to pay attention to the schedules.
Of course, you can also opt for tours here and there if you want to have a guide by your side for the day.

8) Accommodation Options
In the following sections I will deep dive into the several places I visited during my time in Patagonia. But before moving on, I did want to point out the top accommodation options to choose from.
For these smaller towns, the best hotels can sell out during the peak months. So, I would recommend booking your accommodation as soon as you know your dates.
Here are some options for Puerto Natales, El Calafate, El Chalten and Ushuaia:
El Chalten
El Calafate Hotels
Ushuaia Hotels
Puerto Natales Hotels

9) Patagonia Packing List
Hiking in Patagonia is all about layers and proper footwear. Since the weather can turn very quickly, you will want to be prepared for all types of conditions.
In general, I found layering to be the upmost important part of a trip. On all day hikes in Patagonia, I brought along the following layers:
- Hiking Shorts
- Hiking Pants
- Short Sleeve Shirt
- Long Sleeve Shirt / Sun Hoodie
- Mid Layer Fleece
- Puff Jacket
- Packable Rain Jacket
While layers are important so will be your footwear. You want to be sure to bring appropriate waterproof hiking shoes along with solid hiking socks as well.
Additional day hike recommendations include:
- Hiking Backpack & Rain cover
- Water Bottle & Nutrition
- Portable Charger
- Hat & Sunglasses
- Sunscreen & Bug Spray
» Be sure to check out the Hiking Packing List guide I put together that will go through all of it and more. If opting for a multi day trek the Torres del Paine Packing List will be helpful to read through.

While all the information you have read so far focuses on how to prepare for your trip and some top priorities to think about, let’s now dive into some regions.
Before going through itinerary options, these sections will lay out the various things to do and top highlights. By better understanding these, you will be able to pick & choose what is best for your trip.
Like I said at the beginning, putting together a Patagonia itinerary is all about mixing and matching the regions given the amount of time you have to spare.
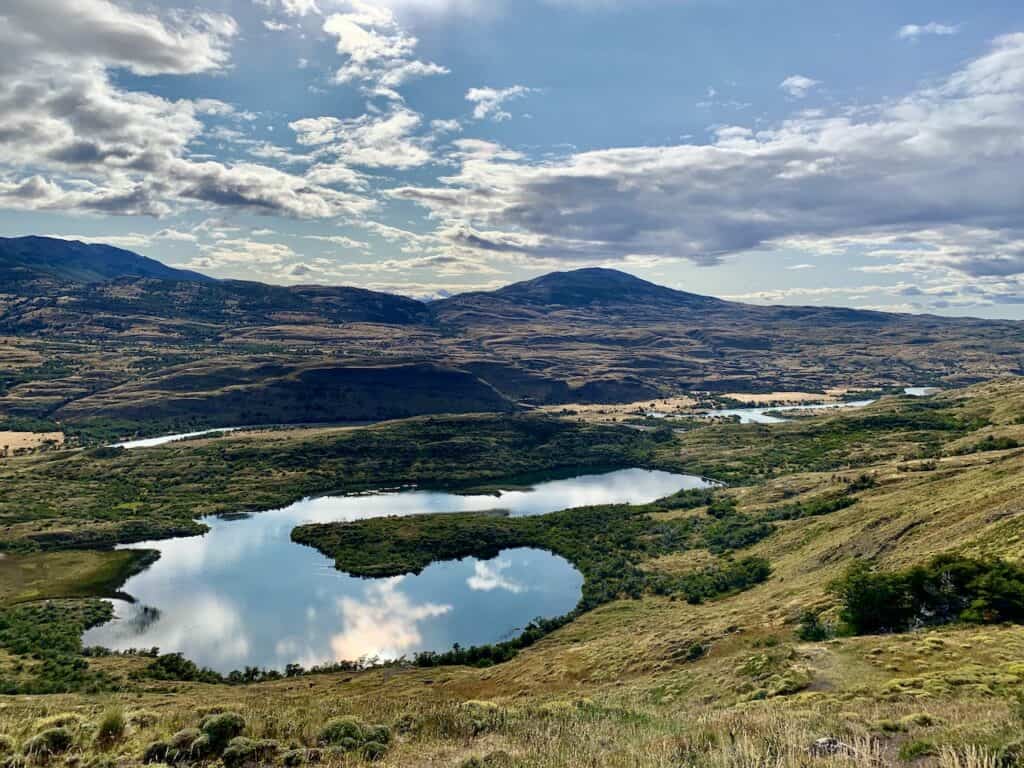
10) Torres del Paine National Park
First up let’s talk about Torres del Paine National Park. Located on the Chile side of Patagonia, Torres del Paine (or TDP for short), is one of the top highlights to consider adding onto your itinerary.
You have a few main ways to go about a visit to TDP:
- 1) Take part of the multi day W trek (5 days) or O Trek (8 days) *
- 2) Go on day trips into the National Park from Puerto Natales
- 3) Stay at a hotel in the National Park and enjoy some day trips within the park
*Note that you can also do a shorter trek in the National Park and stay at the refugios for just a couple nights. You don’t necessarily need to take part of one of the major treks to stay at the campsites/refugios.
W Trek & O Trek
The W and O take you along a well-established hiking trail around Torres del Paine. On the W, you will visit all of the main highlights of the park over 5 days, while the O also adds on 3 days on the quieter backside of the circuit.
The W can be completed in either direction (left to right or right to left), while the O can only be completed in the counter clockwise direction. Below are my recommended routes for each of the treks:
W Trek Route
- Day 1: Bus to Pudeto | Catamaran to Paine Grande | Hike to Grey
- Day 2: Hike from Grey to Glacier Grey Suspension Bridges & Back to Paine Grande
- Day 3: Hike from Paine Grande to Frances (or Cuernos) via Valle del Frances
- Day 4: Hike from Frances to Chileno (or Central or Las Torres Hotel)
- Day 5: Hike to Mirador Base de La Torres & Hike Back to Welcome Center | Van to Amarga | Bus to Puerto Natales
- W Trek Overview
O Trek Route
- Day 1: Bus to Laguna Amarga | Van to Welcome Center | Hike to Seron
- Day 2: Hike from Seron to Dickson
- Day 3: Hike from Dickson to Los Perros
- Day 4: Hike from Los Perros to Grey
- Day 5: Hike from Grey to Paine Grande
- Day 6: Hike from Paine Grande to Frances (or Italiano or Cuernos) via Valle del Frances
- Day 7: Hike from Frances to Chileno (or Central or Las Torres Hotel)
- Day 8: Hike to Mirador Base Las Torres & hike back to welcome center | Bus to Puerto Natales
- O Trek Overview

Torres del Paine Campsites
You can see I mentioned several places in the itinerary routes. These places are also known as “sectors”. At each sector you will find a campsite and refugio (besides for Los Perros, where there is only a campsite).
Here is where you will be able to sleep each night, have your meals, and relax, before taking on the next day.
Refugios can sell out quickly as those are going to be the most comfortable of options. From a campsite perspective, you can either bring all of your own gear and simply book a camping spot, or you can choose the “ready-made campsite” option.
All of these campsites also offer food options for all meals of the day. If you have the budget and don’t want to make your own food, then this is perfect for you.
Learn More: Feel free to check out the Torres del Paine campsites overview that goes over everything you need to know about them and how to go about the booking process.
Torres del Paine Highlights
Throughout the W and O treks, there are many top highlights to consider as you hike each day. Many of these highlights can also be visited as separate day hikes (either from Puerto Natales or from a hotel within the National Park).
Mirador Las Torres
The most famous of locations in Torres del Paine (and perhaps all of Patagonia) is the Mirador Las Torres viewpoint. Here is the location of the alpine lake surrounded by the three Torres Paine towers – Torre Sur, Torre Central, Torre Norte.
As a day hike, it will require an out & back 6-8 hour round trip journey from the National Park entrance.
On the other hand, if staying overnight at Chileno Refugio (as part of a multi day trek), you can head up for sunrise on a shorter overall route before ending your trek.
Learn More: Mirador Las Torres


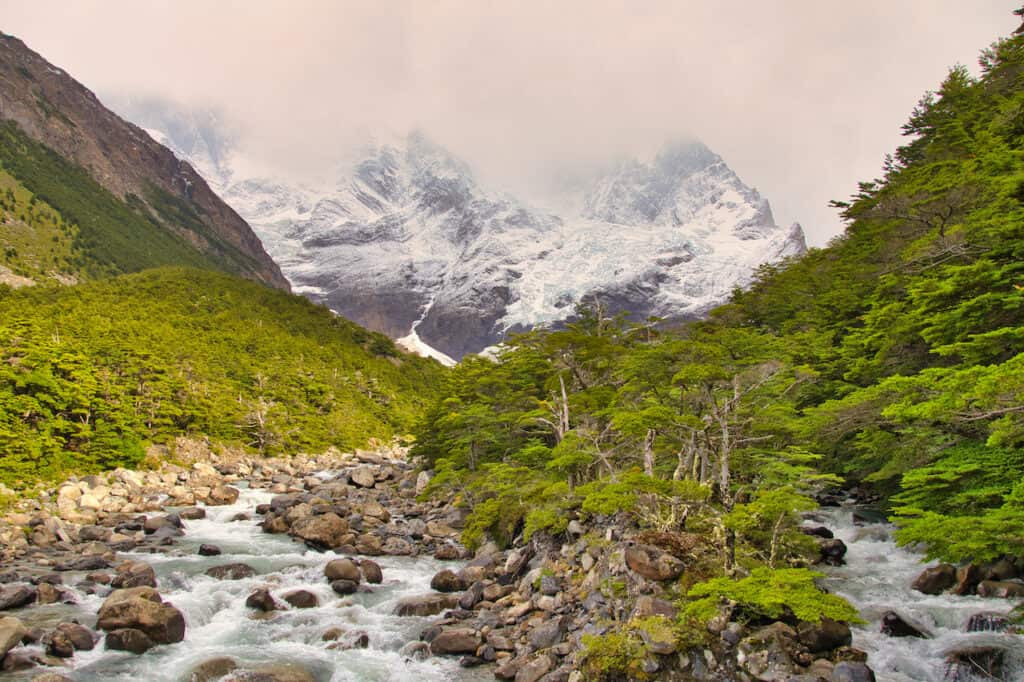
The French Valley
Another highlight located in the middle section of the “W” is the French Valley, or Valle del Frances. The valley heads up to two major viewpoint spots – Mirador Frances and Mirador Britanico, as you get surreal views of the glaciers and mountains in all directions.
On the W or O treks, this will be a longer day as you hike between Paine Grande and the Frances/Cuernos campsites.
If opting for a day hike, you will need to do so from Pudeto pier. Due to the bus and boat timings, it is tough to complete the entire thing as part of a single day hike. However, you still can make it to the first viewpoint (and get some more great hiking in along the way).
Learn More: The French Valley

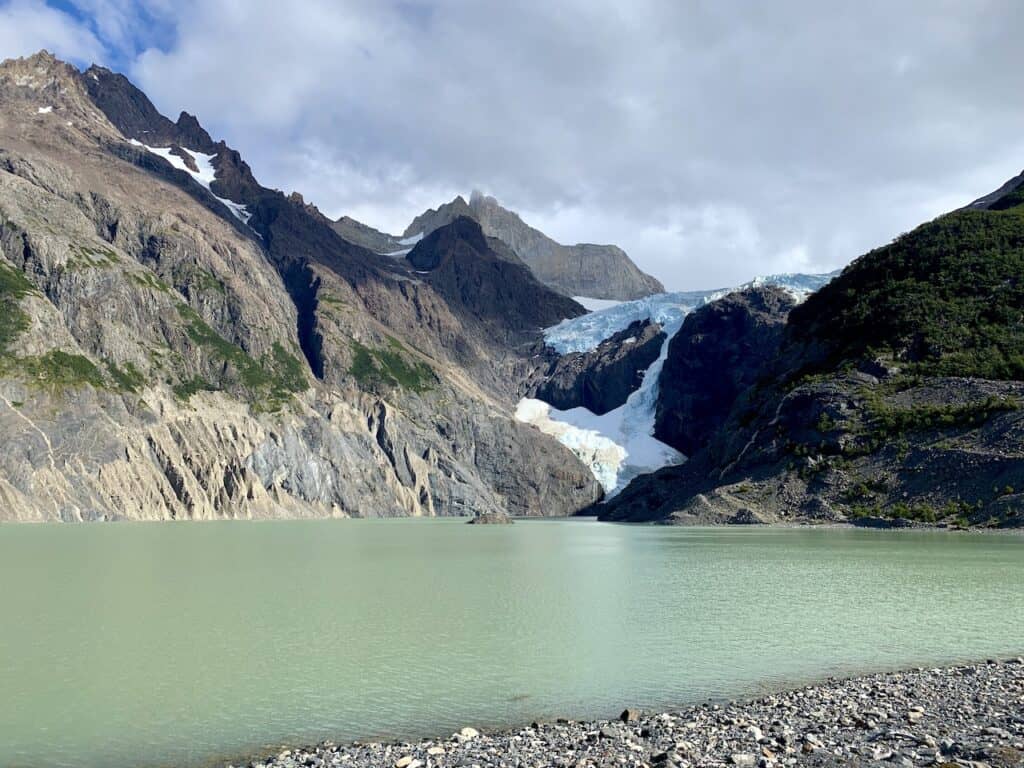
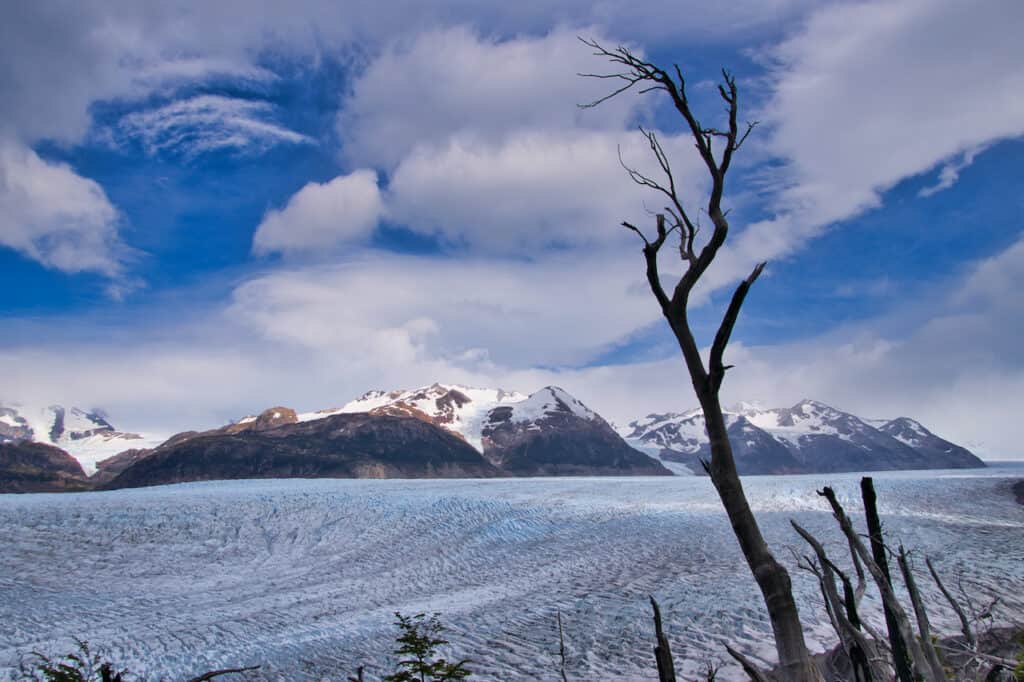
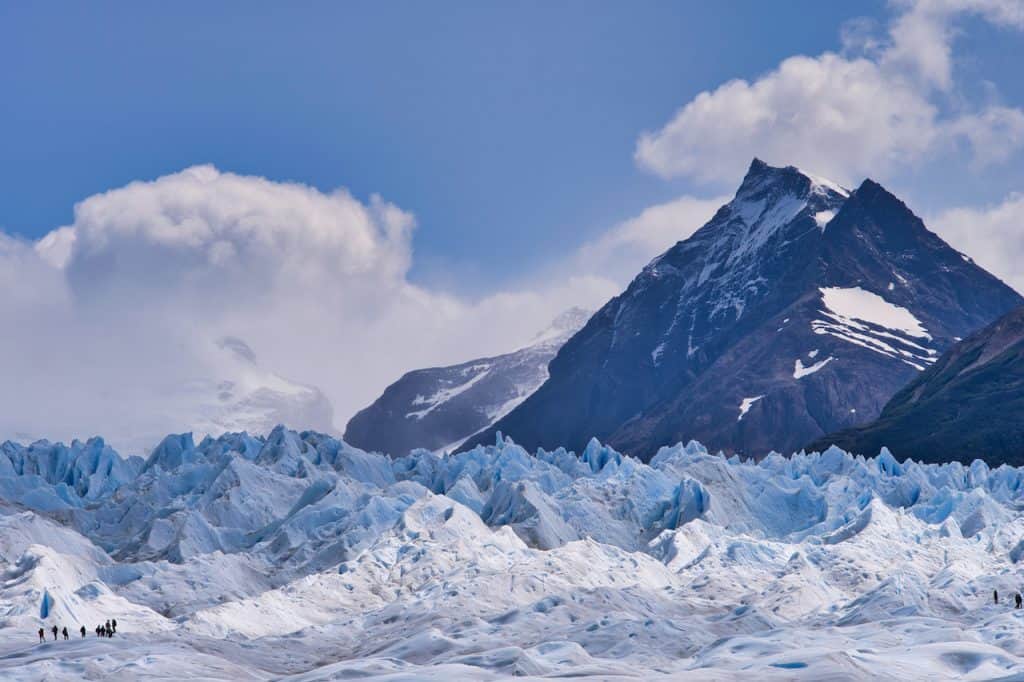
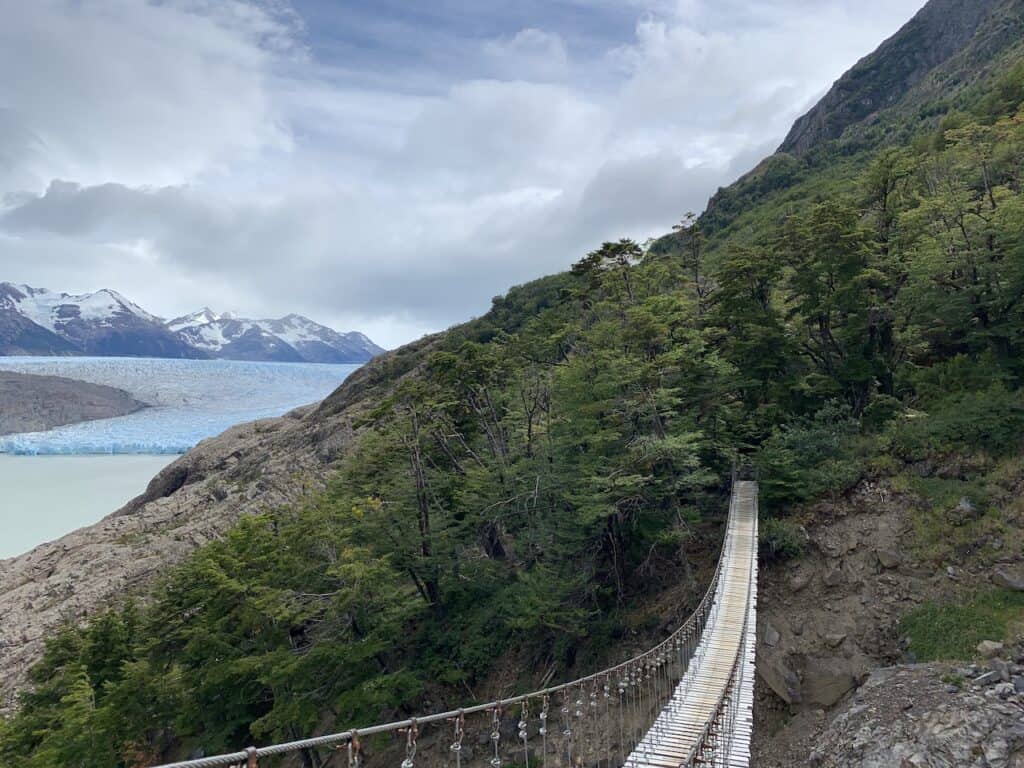
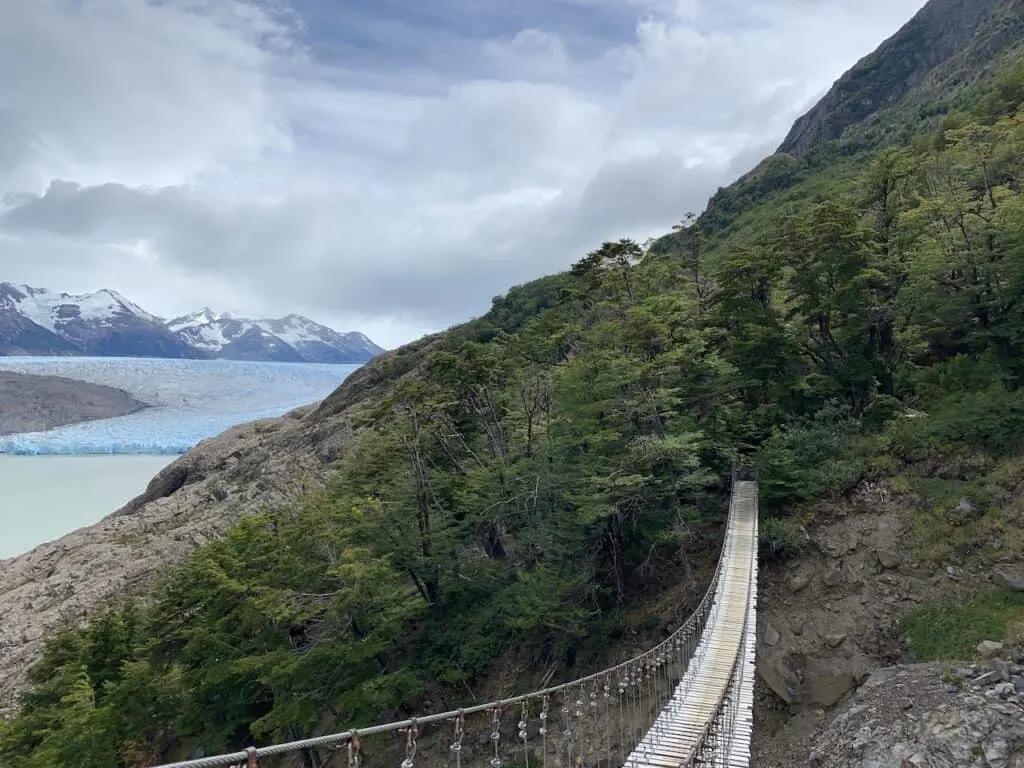
Grey Glacier
On the left side of the W is the main glacier of TDP – the Grey Glacier. During a visit to the Grey Glacier, you can hike over some suspension bridge viewpoints, view the glacier from the Lago Grey lakeside, or even take part of activities like hiking on the glacier itself or kayaking near it.
If you are not opting for a multi day trek, this is one refugio (Refugio Grey), where I would recommend staying for a night. That way you can do some short hikes around the area taking in the views, and then taking part of a kayak/glacier hike activity.
A day trip to Grey is also possible – whether that means hiking to the glacier or just taking part of an activity. You can learn about all of that and more in the Glacier Grey overview up on the site.
Learn More: Grey Glacier Torres del Paine

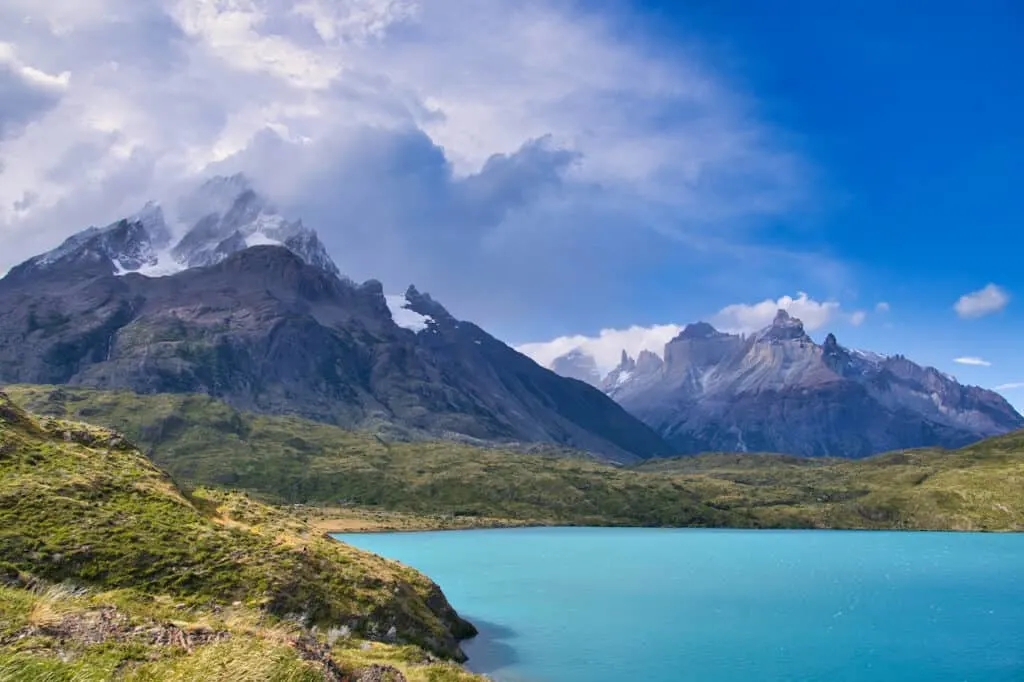
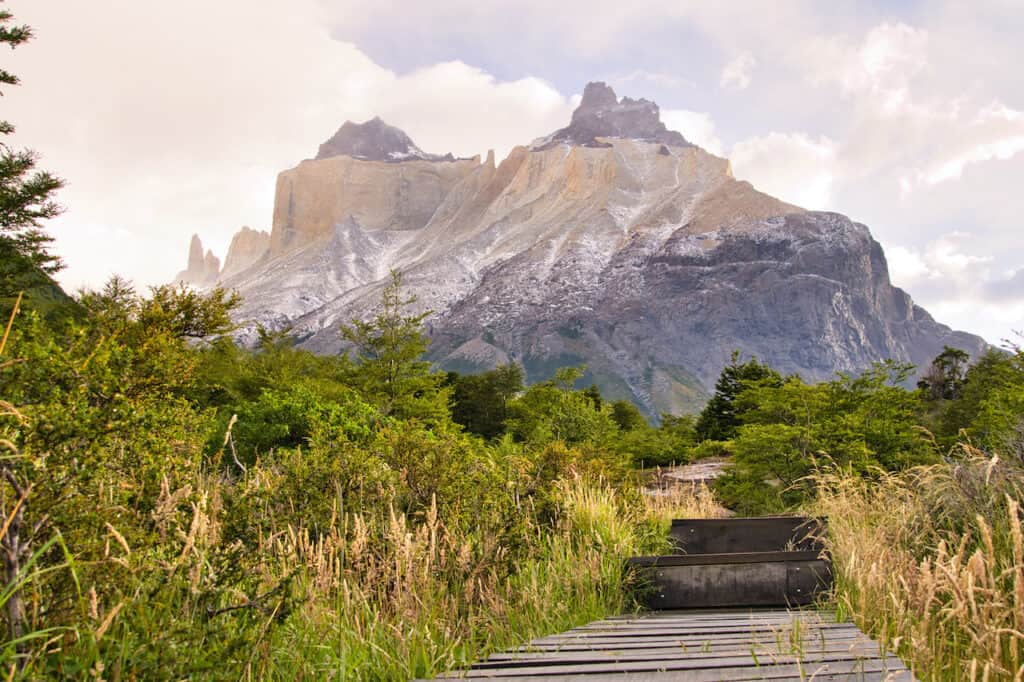
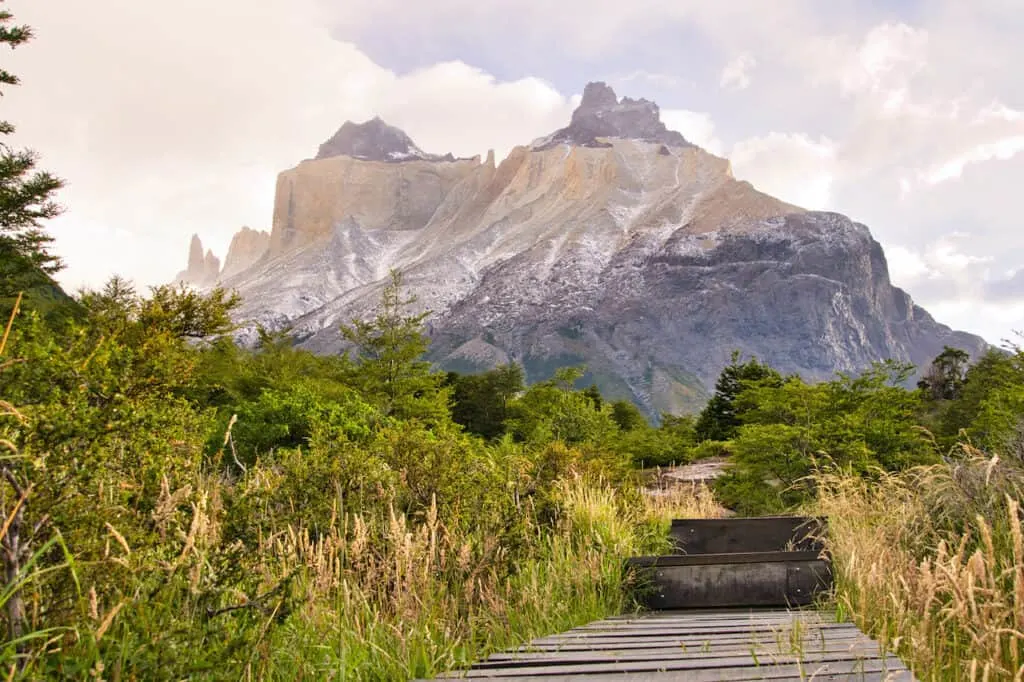
Cuernos del Paine
My personal favorite mountain peaks within Torres del Paine are the Cuernos del Paine (the Paine horns). This set of impressive and very uniquely shaped mountain peaks sit in the middle of the park.
Views of the Cuernos del Paine are fantastic from the Paine Grande campsite and as you hike from there to the French Valley. Once in the French Valley, the peaks will be directly overhead.
For those that are simply taking day trips around the park, driving to various viewpoints across the lake is another way on viewing the mountains. A car (or tour) will be needed, but the views are certainly worth it.
The O Backside
The last highlight I will mention is the backside of Torres del Paine, which is only accessible by taking part of the O trek. Within this portion of the park, you will find much fewer people around, and some more beautiful glaciers, lakes, mountains, and other highlights.
I found the backside to be very peaceful and would highly recommend it for anyone up for the 8 day hike.
By taking part, you will also get to hike up the John Gardner Pass, the highest part of the trek. From here down to the Grey campsite are just never-ending views of the glacier all the way through.

Torres del Paine Recap
So, to recap Torres del Paine, the first decision to make is whether or not you want to take part of a multi-day trek. This will take up either 5 or 8 full days depending on whether the W or O is selected.
If just taking day trips throughout Torres del Paine, I would recommend renting a car and staying within the National Park itself. That way you can avoid the back and forth 2 hour drive each day from Puerto Natales.
By renting a car, you will be able to easily get yourself to hike starting points, boat piers, viewpoints, and more throughout Torres del Paine. Take a look at the Hotel Las Torres, which is right near the main entrance.
In this case you don’t do a multi-day trek, spending around 4-5 days for the Torres del Paine region would be a good amount of time.
This will give you the chance to see several of the top highlights mentioned above, and still have some flexibility if the weather isn’t great all the way through.

11) Los Glaciares National Park | El Calafate
While El Calafate and El Chalten are in the same region, I will break them up into two sections just because of how unique each one of them is.
First up is El Calafate, which is the major hub when exploring deeper into Los Glaciares National Park. Specifically, this means the Perito Moreno Glacier.
Note: do not confuse the town Perito Moreno with the Perito Moreno Glacier. The town of Perito Moreno is not the place you want to be when visiting the glacier. El Calafate is your spot here.
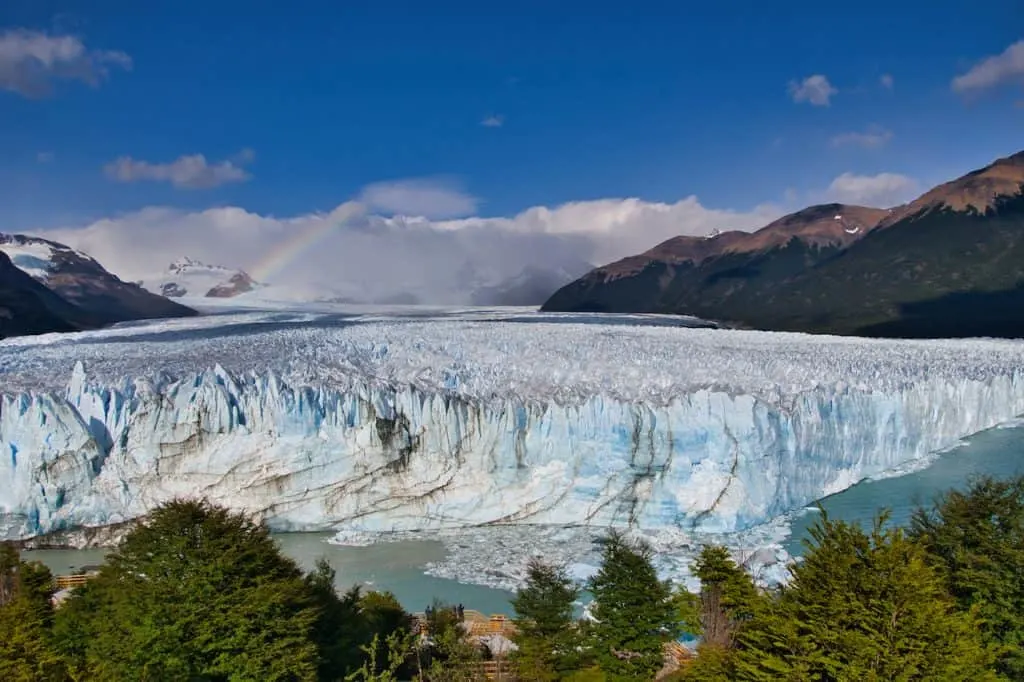
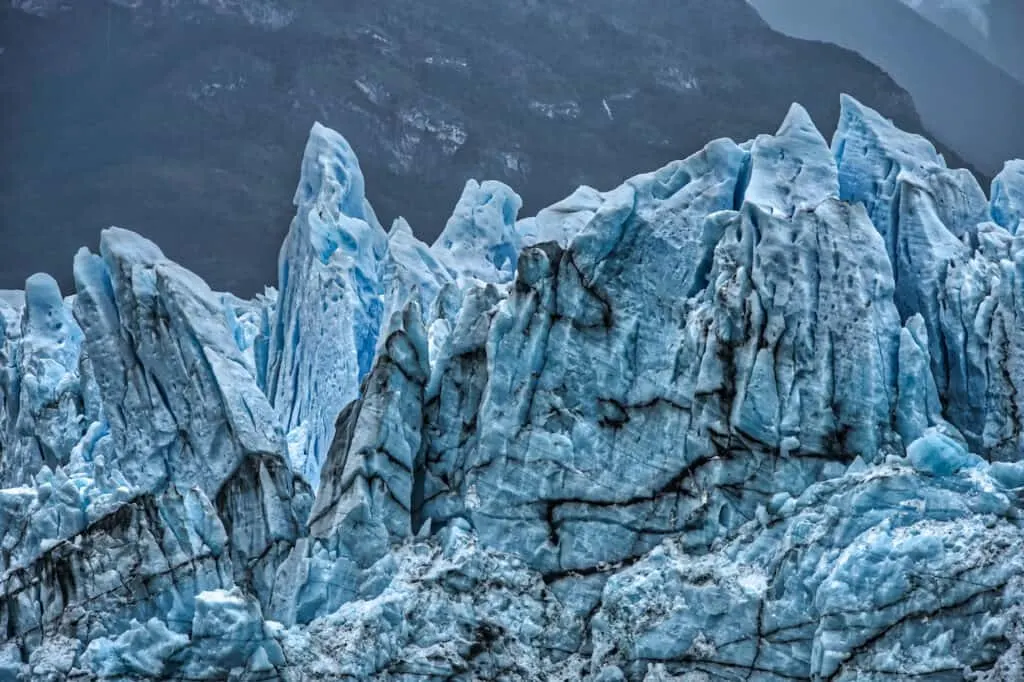
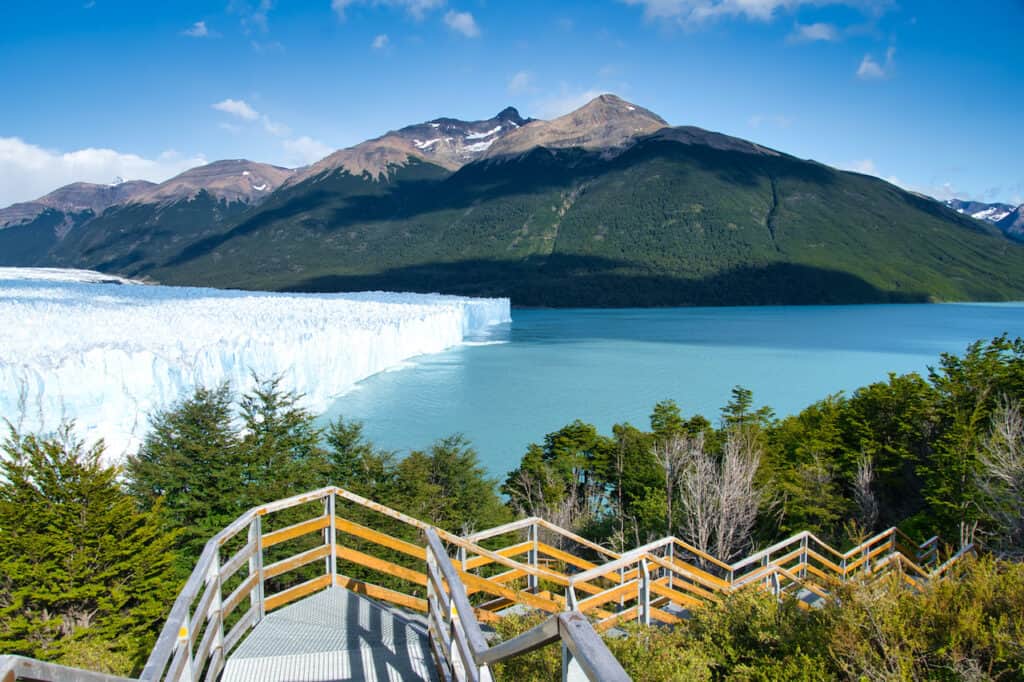
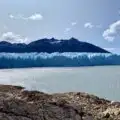
Perito Moreno Glacier
Without a doubt, the main reason people go to El Calafate is because of Perito Moreno Glacier.
When it comes to accessible glaciers in the world, Perito Moreno is high on the list. It comes in at nearly 100 square miles in size and the views are some of the best you can ask for.
From El Calafate it is a 1.5 hour drive to get to the main parking lot of Perito Moreno Glacier (as you head through the entrance of Los Glaciares National Park along the way).
A visit to the glacier can be done in a few different ways, depending on your interests. These include:
- Walking the Perito Moreno Boardwalks to get views of the glacier from various angles
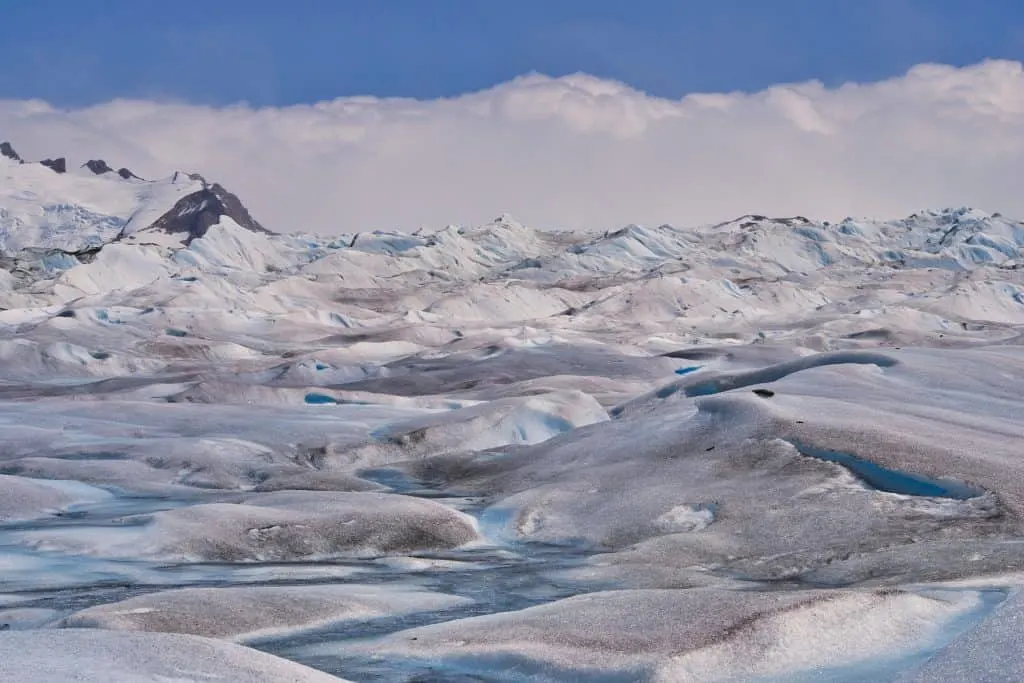
- Taking part of a glacier hiking tour on the glacier itself. This can be in the form of the shorter Minitrekking hike or the longer Big Ice hike
- Kayaking the water at the base of Perito Moreno Glacier
- Heading on a boat tour to view the glacier from the water
Complete Overview: Perito Moreno Glacier
Glacier Hike Overview: Perito Moreno Glacier Hike

I would recommend spending at least a day taking advantage of all that the Perito Moreno Glacier has to offer. During my time there, I spent one day taking part of the Big Ice glacier hike (which included 1 hour on the boardwalks), and then another morning just enjoying the boardwalks themselves.
While renting a car can be helpful if you are simply visiting the boardwalks on your own (as you can be on your schedule), there are tour offerings across the board that include round trip transport.
Take a look below for those options:
- Big Ice Glacier Hike: Big Ice Tour Booking
- Minitrekking Glacier Hike: Minitrekking Tour Booking
- Boardwalks: Perito Moreno Boardwalks Tour
- Kayaking: Perito Moreno Kayak Tour
Learn More: Check out the Perito Moreno Glacier Tours to better understand each tour option

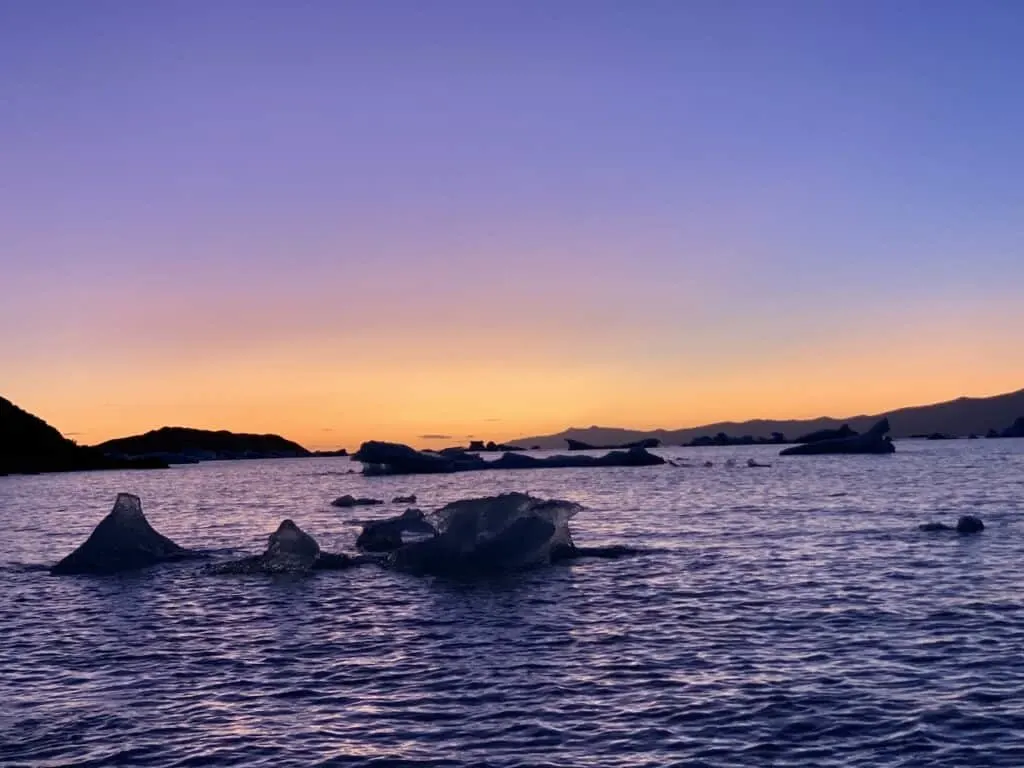
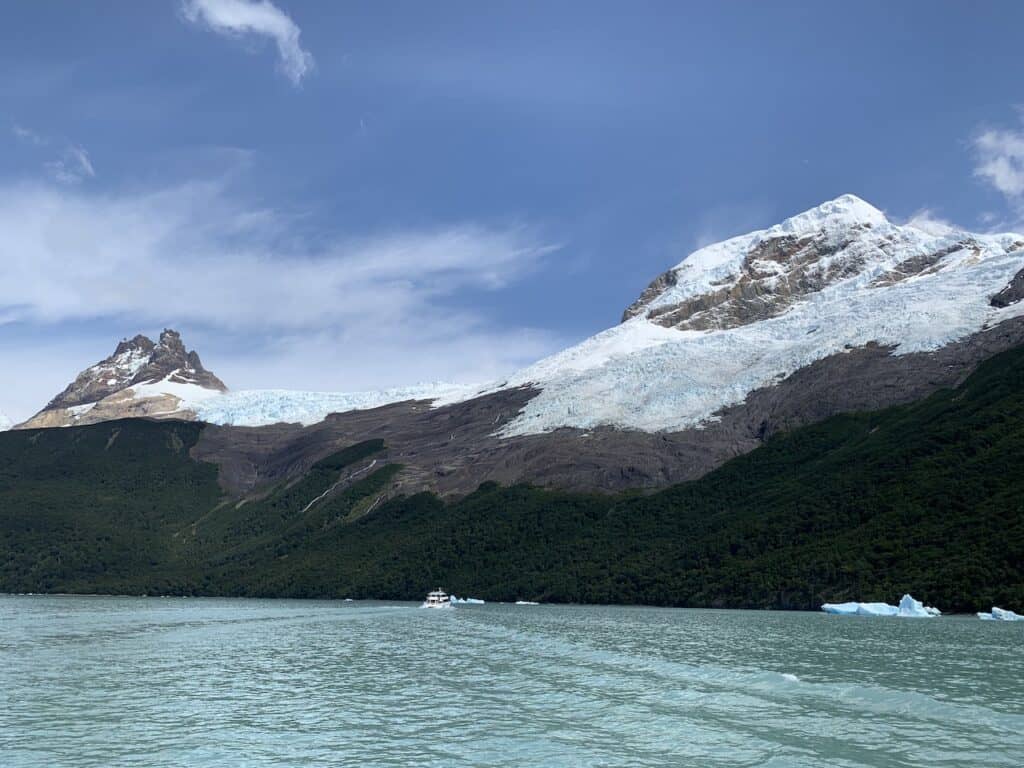
Los Glaciares Boat Trip
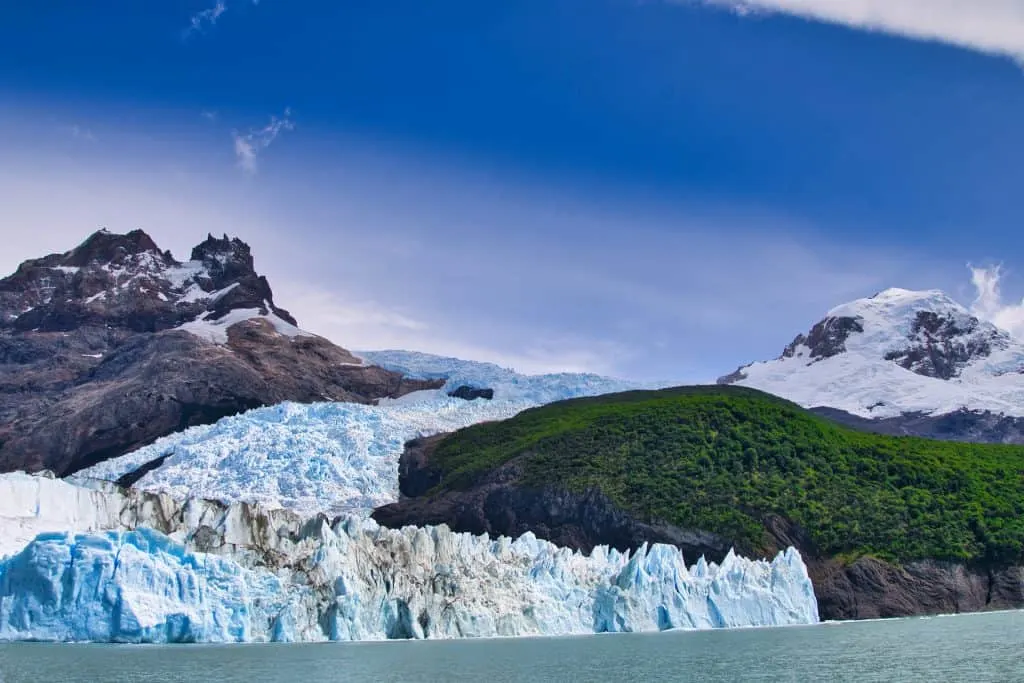
Another top highlight to consider during a trip to El Calafate is to take a boat trip further into Los Glaciares National Park. These boat trips head up various channels towards some of the best glaciers in the region.
I would recommend checking out the Todo Glaciares boat trip that visits both the Upsala Glacier and Spegazzini Glacier.
During a boat trip, you will get to see Los Glaciares in a whole new way as you cruise through the waterways with Patagonian mountains all around.
The boats head close up to glaciers, icebergs, and other highlights as you get to fully embrace the natural landscape of the National Park.
Feel free to learn more in the Todo Glaciares overview up on the site.

Cerro Frias
If you are looking for a fun half day trip out in the mountains of El Calafate, make your way to Cerro Frias.
Cerro Frias is a privately-owned mountain located just 30 minutes away from El Calafate. When booking a trip to Cerro Frias, you can choose between several different options. These include:
- 4 X 4 Tour
- Horse Riding
- Zipline
- Trekking
These tours are offered both in the morning and afternoon (as well as in the evening).
From Cerro Frias, you can take in some great views of the surrounding landscape including places like Lake Argentino, Lago Roca, and even spots further out like Torres del Paine and Fitz Roy.


El Calafate Recap
Overall, I would recommend setting aside 3 days for El Calafate. This will give you the chance to take one full day to see the Perito Moreno Glacier and another day to head on a boat trip.
The last day can be used for a weather buffer or to further explore Perito Moreno, head to Cerro Frias, or any other nearby spots from town.

12) Los Glaciares National Park | El Chalten
The second major town of Los Glaciares National Park is El Chalten. The drive between the two takes around 3.5 hours and can be completed by rental car or by bus.
Remember, El Calafate is home to the nearest airport. So, if you are flying in and want to visit El Chalten you will need to come through El Calafate first.
El Chalten is a hiking paradise of Argentinian Patagonia. Directly from the town center you have access to some of the best hiking trails that you can ask for.
While there are other highlights to enjoy such as river rafting, horseback riding, and kayaking, the hiking trails are what make this place to special.
Below are some overviews of the top trails in the area. Feel free to read through the more in-depth hiking guides along the way.
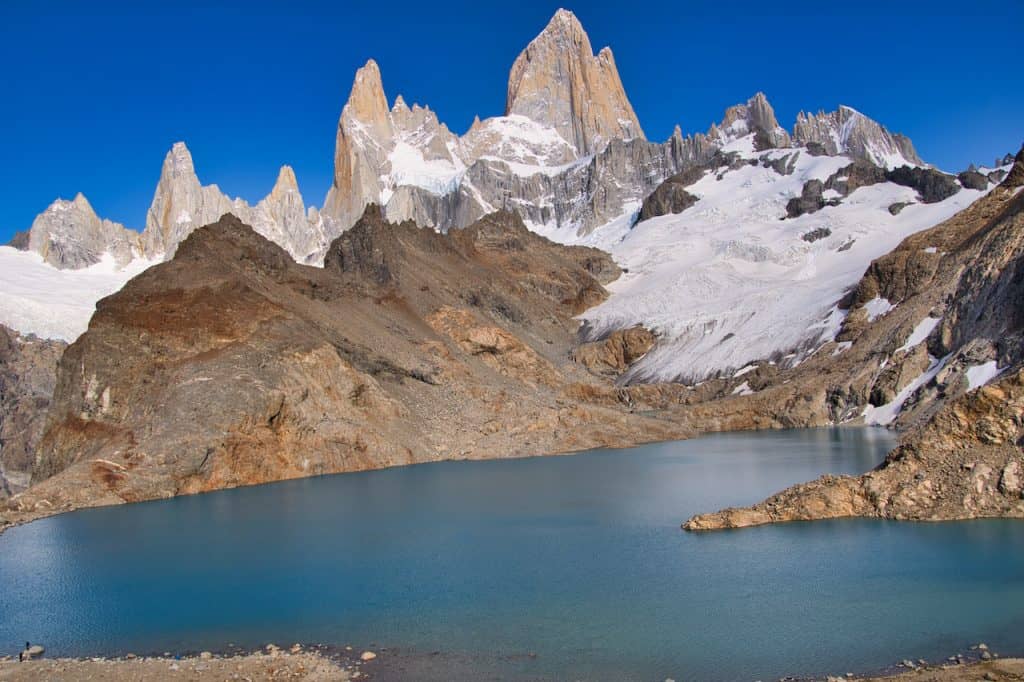
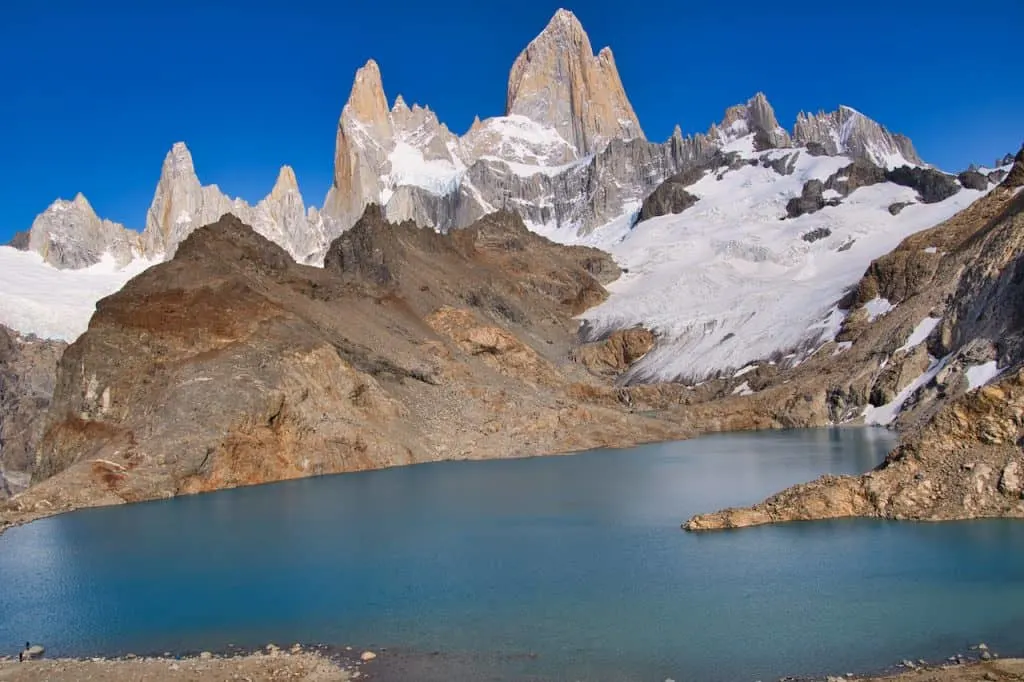
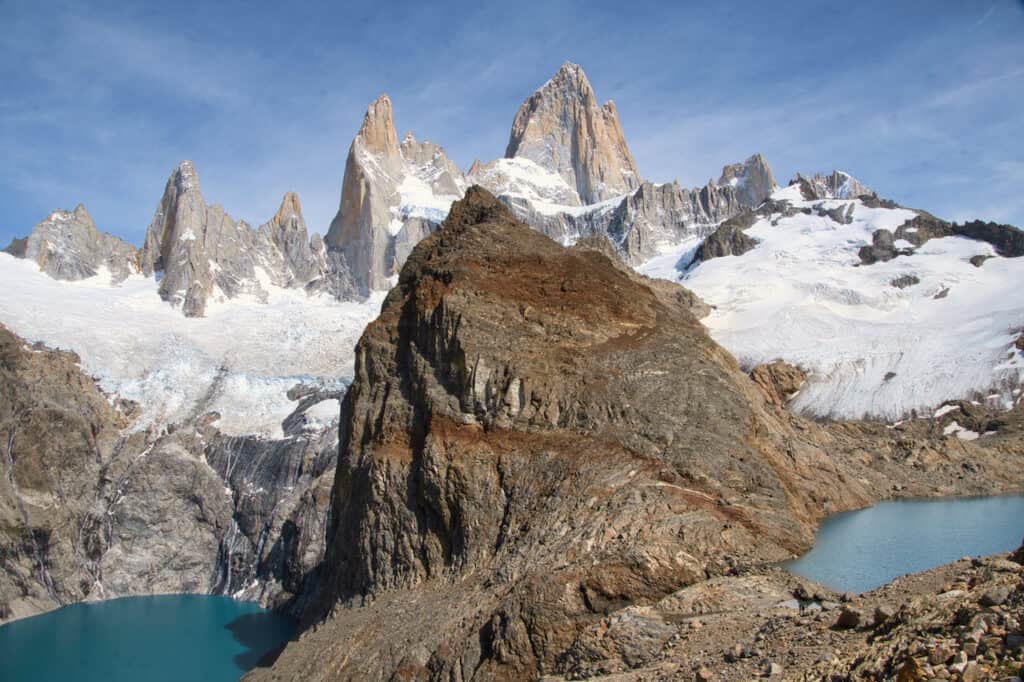
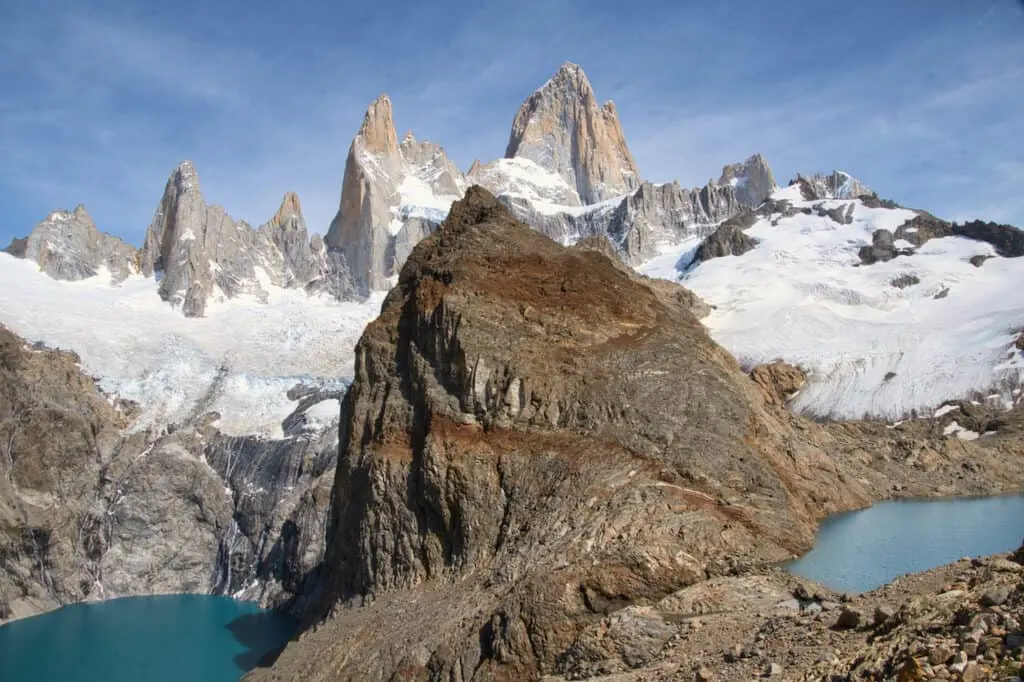
Laguna de Los Tres (Fitz Roy)
Laguna de Los Tres is the top hiking trail in the region. While a longer hike to take part of, it does not get much better than seeing the Fitz Roy mountain range out in front of you during the duration of the trail.
Once at the lake, you will be able to see the mountains from all different angles and then relax by the water before turning back around.
- Trailhead Coordinates: 49°19’17.9″S 72°53’39.6″W
- Distance: 21 km / 13 miles
- Elevation Gain: +1,103 meters / +3,620 feet
- Duration: 7-10 Hours
- Learn More: Laguna de Los Tres Hike
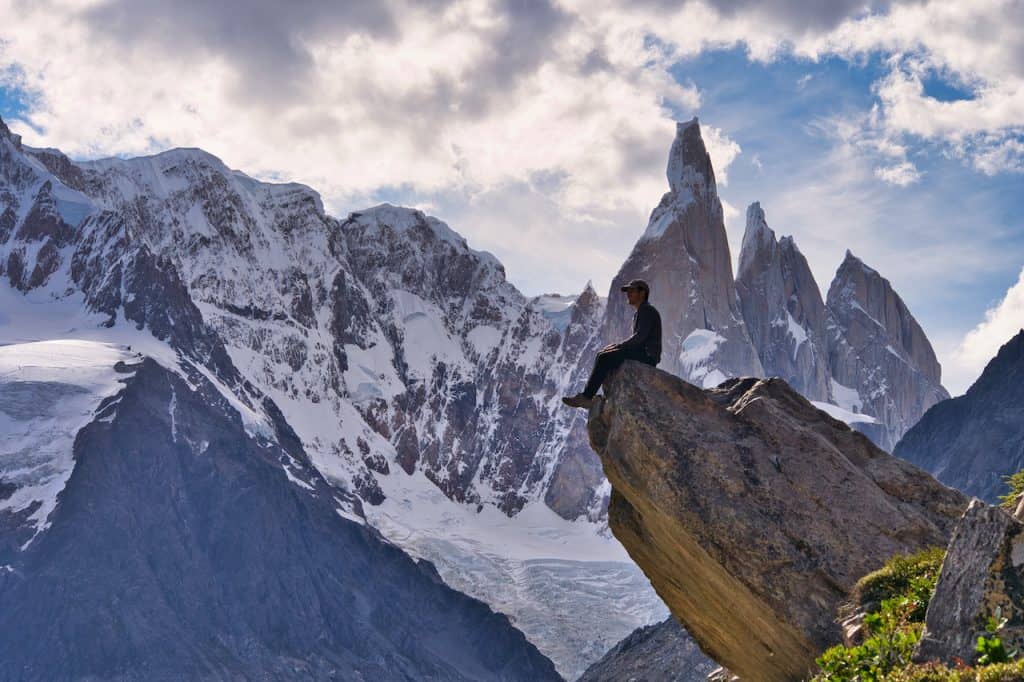
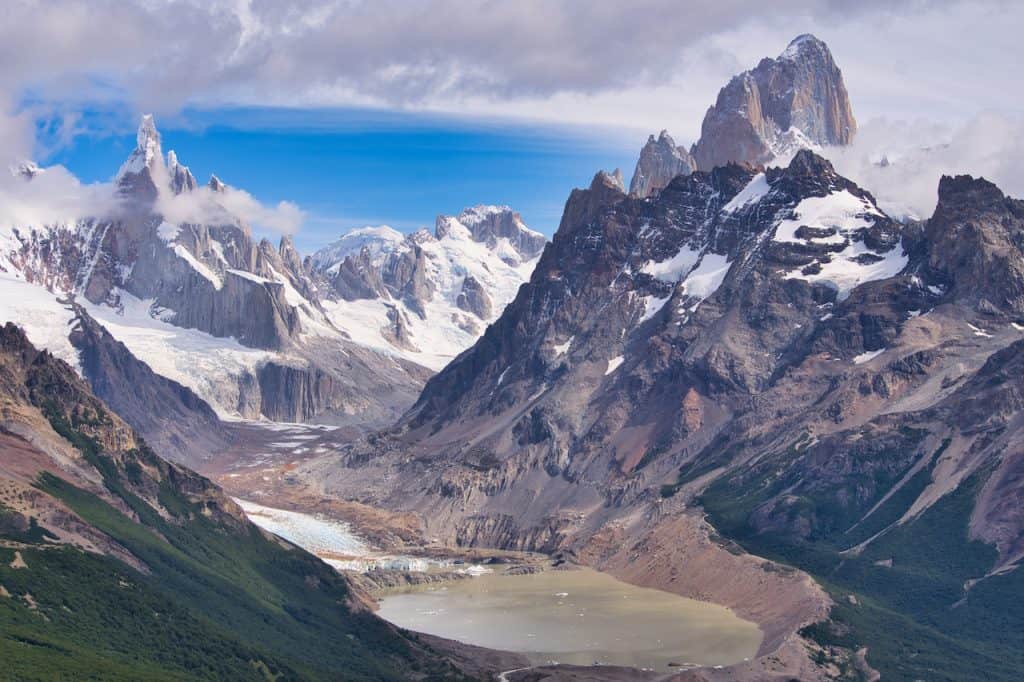
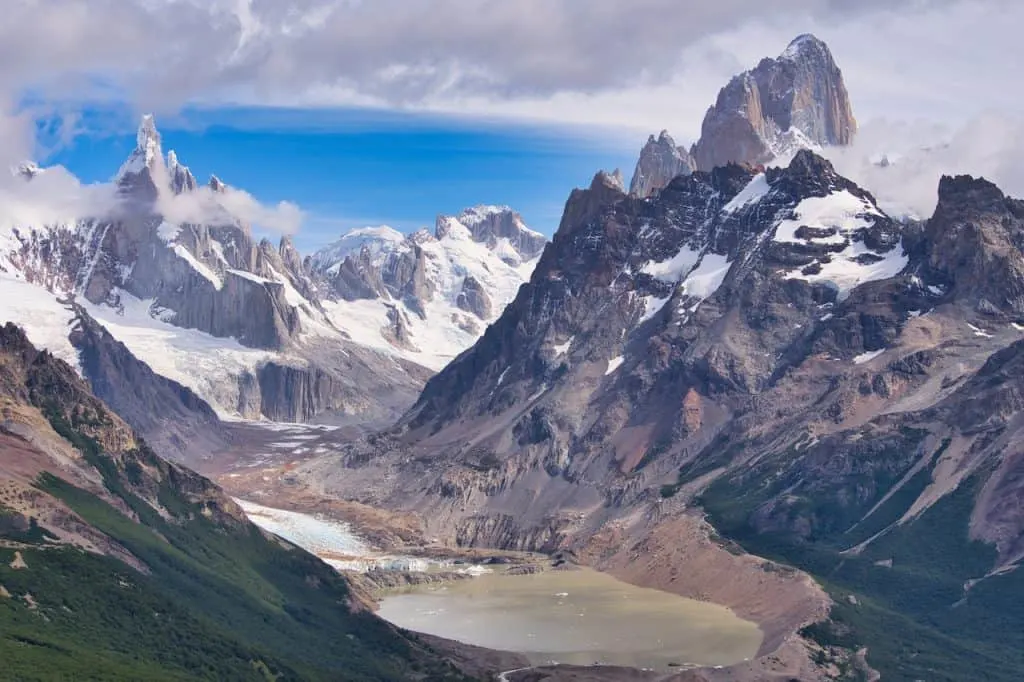
Laguna Torre (Cerro Torre)
An easier (but still beautiful) nearby hike is Laguna Torre. Instead of seeing Fitz Roy throughout the hike, this one gives you the best views of the Cerro Torre mountain range.
- Trailhead Coordinates: 49°19’52.1″S 72°53’42.8″W
- Distance: 17.7 km / 11.0 miles
- Elevation Gain: +480 meters / +1,580 feet
- Duration: 6 – 8 hours
- Learn More: Laguna Torre Hike

Loma del Pliegue Tumbado
One of the most underrated hikes in El Chalten is Loma del Pliegue Tumbado. This hike takes you high above the landscape as you get to see the mountain ranges from above.
- Trailhead Coordinates: El Chalten APN Visitor Center
- Distance: 17.1 km / 10.6 miles
- Elevation Gain: 905 meters / 2,970 feet
- Duration: 6 – 8 Hours
- Learn More: Loma del Pliegue Tumbado
Mirador de Los Condores & Mirador Las Aguilas
If you are looking for a shorter and easier hike, head up to Mirador de Los Condores and Mirador Las Aguilas. From there, you will get views of El Chalten in the foreground and the Patagonian mountains out back.
Trailhead Coordinates: APN Visitor Center
Learn More: Mirador de Los Condores & Mirador Las Aguilas
Mirador de Los Condores Only
- Hike Length: 2.6 km / 1.6 miles
- Elevation Gain: 130 meters / 425 feet
- Duration: 1 Hour
- Trail Type: Out & Back
Mirador de Los Condores & Mirador Las Aguilas
- Hike Length: 4.8 km / 3.0 miles
- Elevation Gain: 220 meters / 725 feet
- Duration: 2 Hours
- Trail Type: Loop


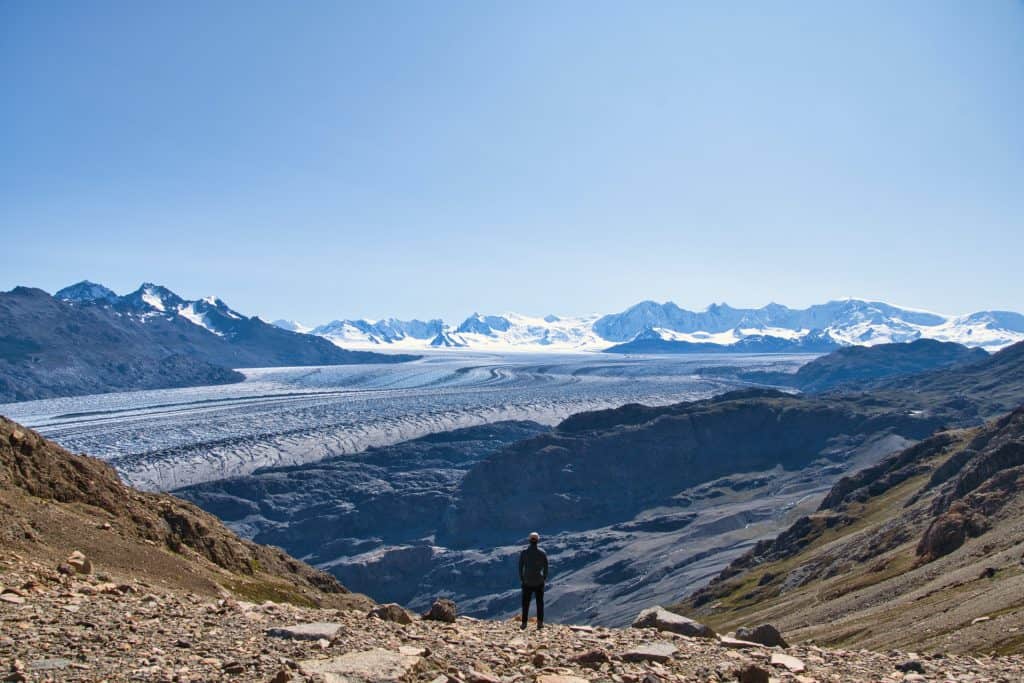
Huemul Circuit
When it comes to multi day hikes in El Chalten, the Huemul Circuit is the way to go. It includes 4 days circumnavigating the landscape with unbelievable views along the way.
- Trailhead Coordinates: APN Visitor Center
- Distance: 38.1 miles / 61.3 km
- Elevation Gain: 7,885 feet / 2,403 meters
- Duration: 4 days / 3 nights
- Learn More: Huemul Circuit
Learn More: Read some details about these trails in the El Chalten hikes guide

El Chalten Recap
With all of that said, for an everyday visitor I would recommend around 4 days in El Chalten.
This will give you enough time to hike the two most famous trails of Laguna de Los Tres and Laguna Torre. In addition, you could also then spend another day or so on one of the other trails (whether that is the shorter Mirador de Los Condores or the longer Loma del Pliegue Tombado).
Giving yourself some weather buffer days will be important too, which can be utilized with a 4 day trip. During my time in El Chalten, one day the weather was picture perfect while the next brought a snowstorm. So, you really don’t always know what you will get in El Chalten.
Now, if you want to also hike the 4 day Huemul Circuit, I would recommend setting aside closer to 10 days for El Chalten. This will give you the chance to still hike the top day trails and then fit in the 4 day trek.
It is not always a guarantee that there will be a 4 day weather window to take part of the hike, which is why I would recommend giving yourself a bit more additional time. You will need to be very flexible when it comes to adding in the Huemul Circuit, as you never know when the weather window will open up.

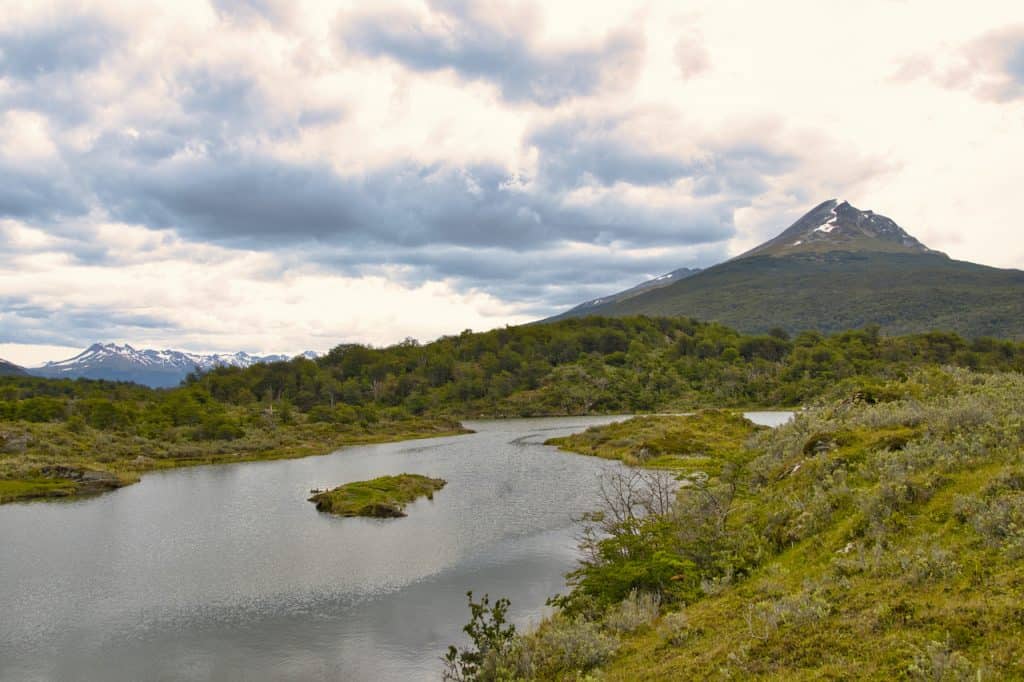
13) Tierra del Fuego
The last major region we will cover here is Tierra del Fuego, located at the “End of the World” near the town of Ushuaia.
Tierra del Fuego offers a little bit of everything for visitors. Whether that is an easy stroll by the waterside, harder hikes in Tierra del Fuego National Park, or a boat ride along the Beagle Channel. There is something for everyone when it comes to the region.
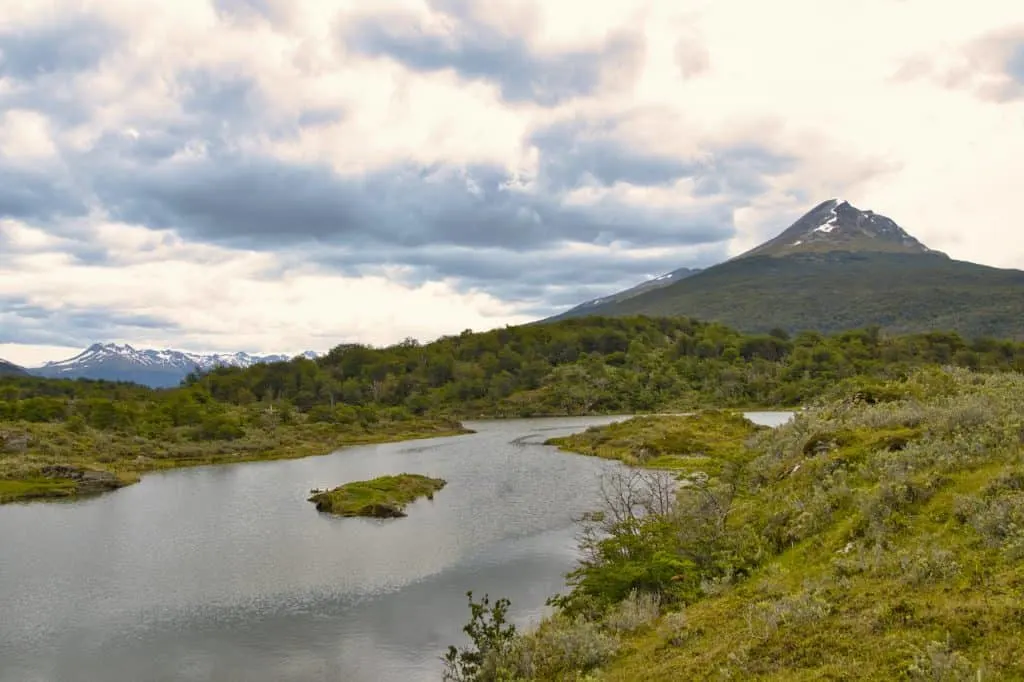
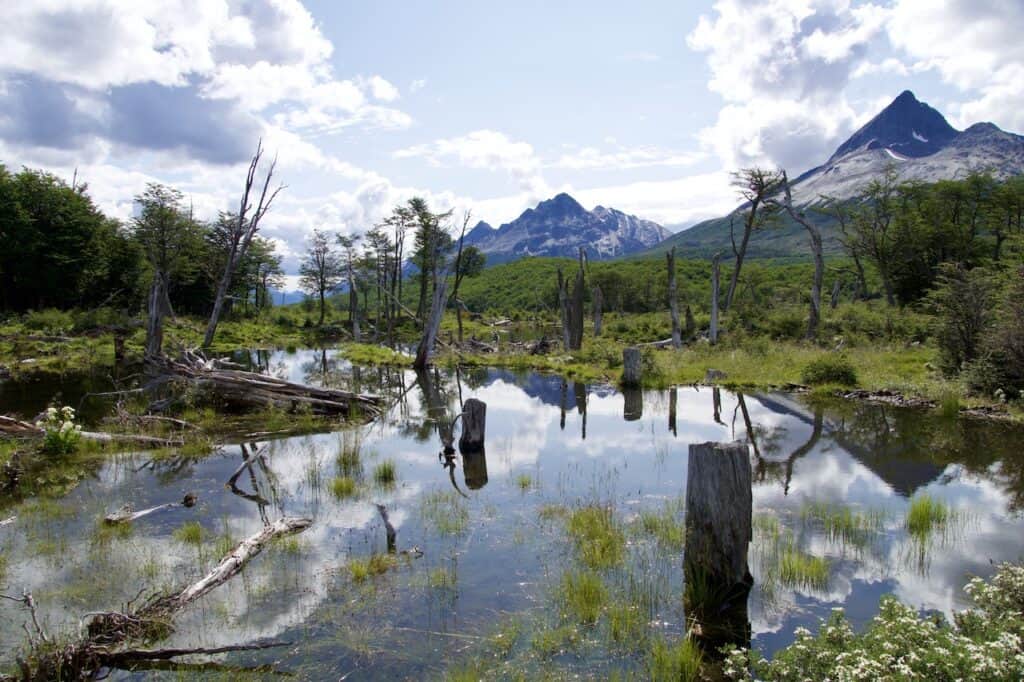
Tierra del Fuego National Park
One of the major highlights here will of course be the National Park itself. The park is located just 30 minutes away from town, where you will first pass by the entrance and then head further into the park.
Throughout the area, there are around 6 hiking trails that you can take part of in addition to the Lapataia Sector that has 6 shorter interconnecting trails. Some of these are easy hikes near the water, while others are mountain hikes higher up in elevation.
Spending a full day exploring Tierra del Fuego National Park would be my recommendation here. You not only can take part of hikes, but also just enjoy some various viewpoints of the surroundings along the way.
The major hiking trails to consider include:
- Cerro Guanaco
- Costera
- Hito XXIV
- Pampa Alta
- Cascada Rio Pipo
- Lapataia Sector
Learn More: Read some details about these trails in the Tierra del Fuego hiking guide
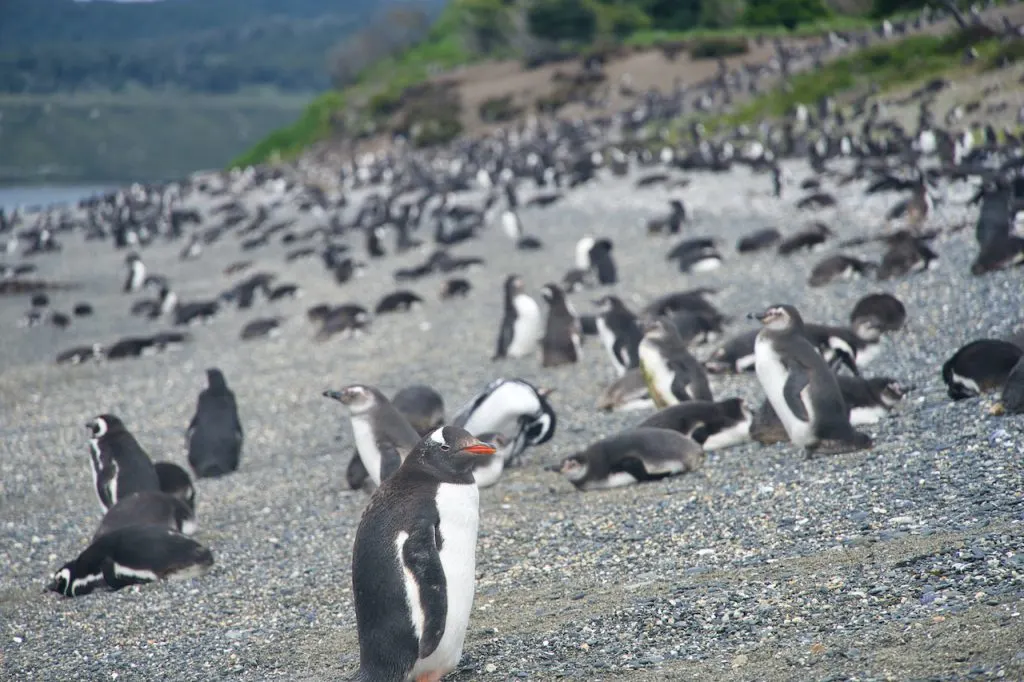
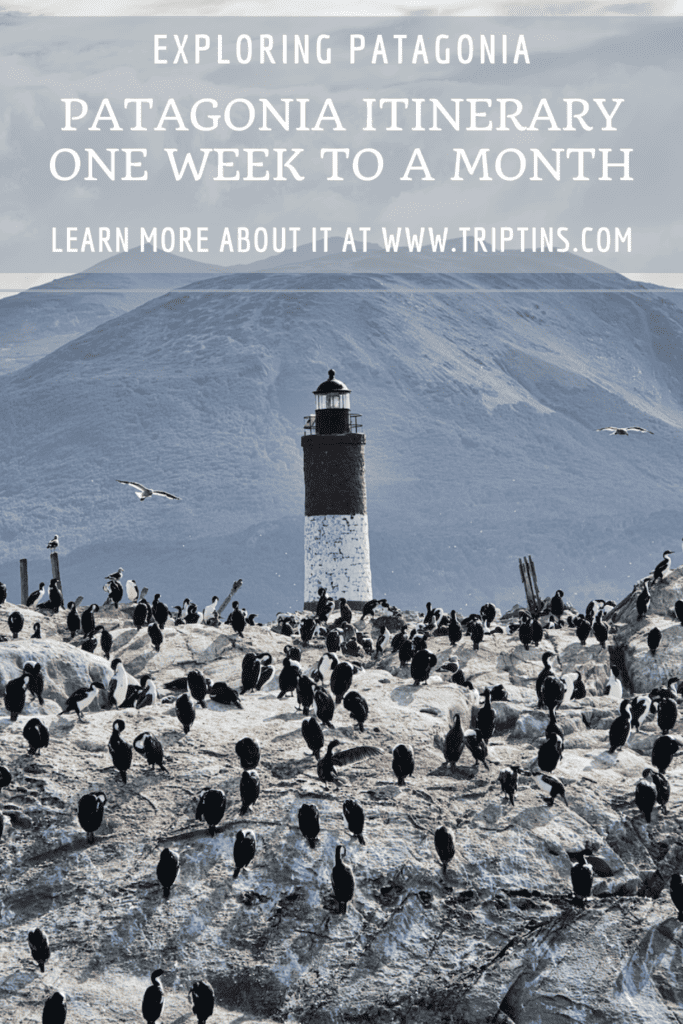
Beagle Channel & Martillo Island
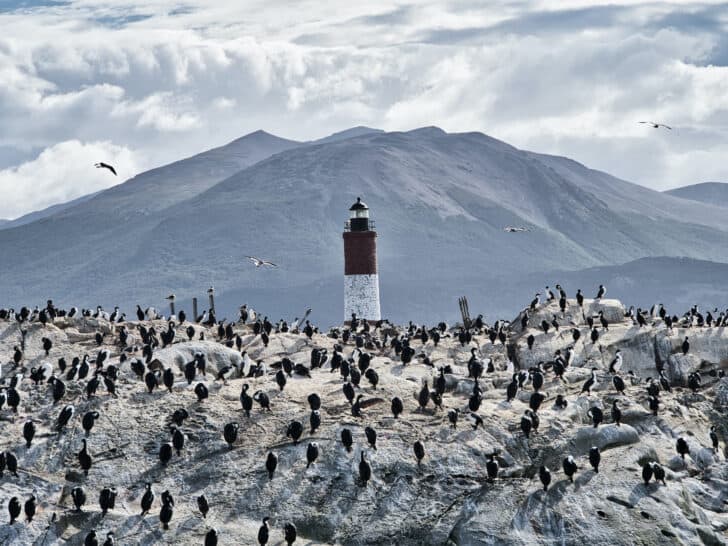
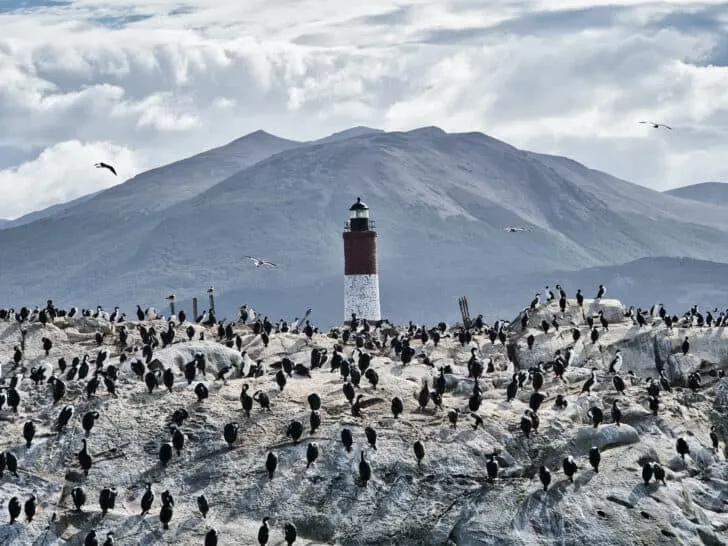
Another must do excursion during your time in Tierra del Fuego is a Beagle Channel navigation boat tour. These boat tours head through the Beagle Channel passing by wildlife, lighthouses, and beautiful landscape.
The turnaround point is Martillo Island, home to one of the largest penguin colonies in the region. While most boat tours give you the ability to view the penguins from the boat, there are certain tours that also include walking on the island itself.
I would highly recommend booking a tour that includes both the Beagle Channel Navigation and the penguin walk on Martillo Island. Getting to walk among the penguins is an experience that you will not forget.
Check out the Beagle Channel & Ushuaia Penguins overview up on the site to learn more

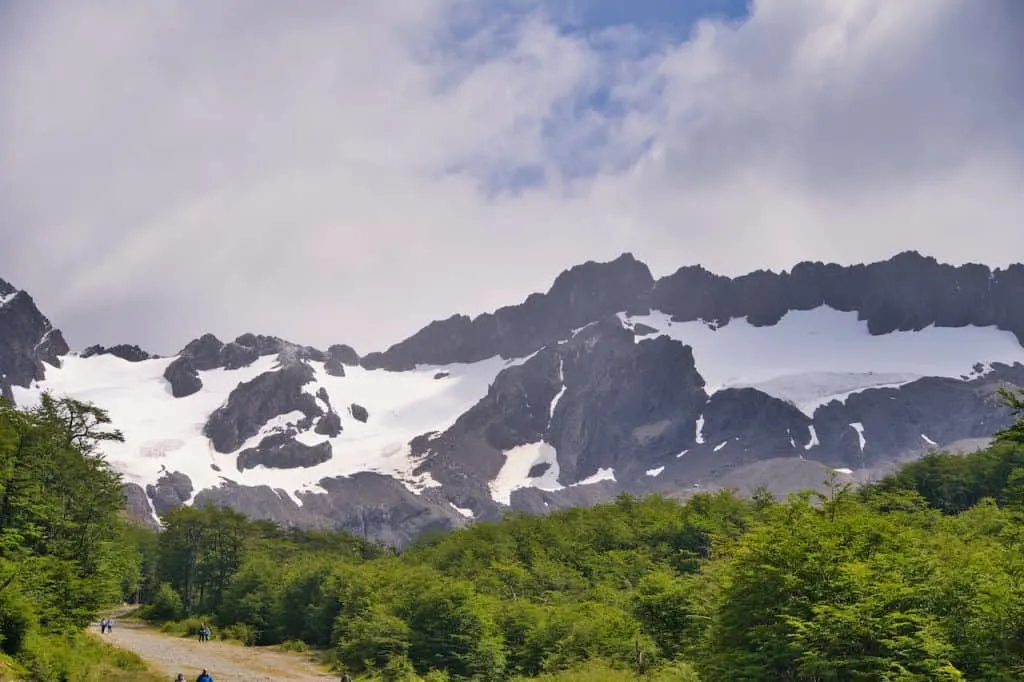
Ushuaia Hikes
While Tierra del Fuego includes many hiking options to take part of, there are other great hiking options around the region. These are all within a 20-30 drive from Ushuaia and can be reached by rental car, shuttle, tour, or taxi.
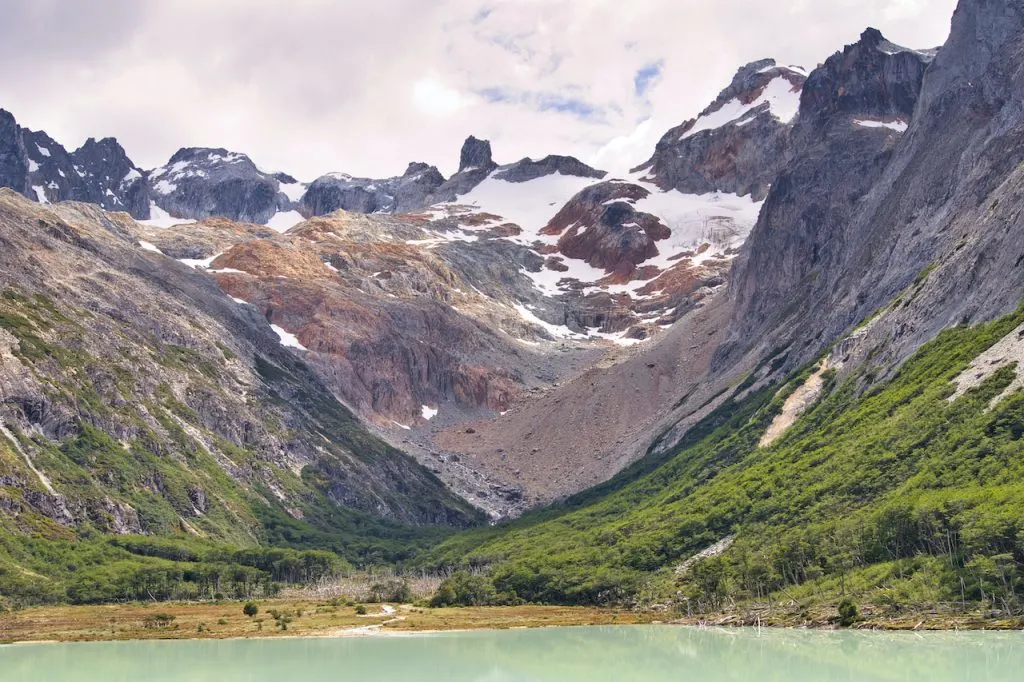
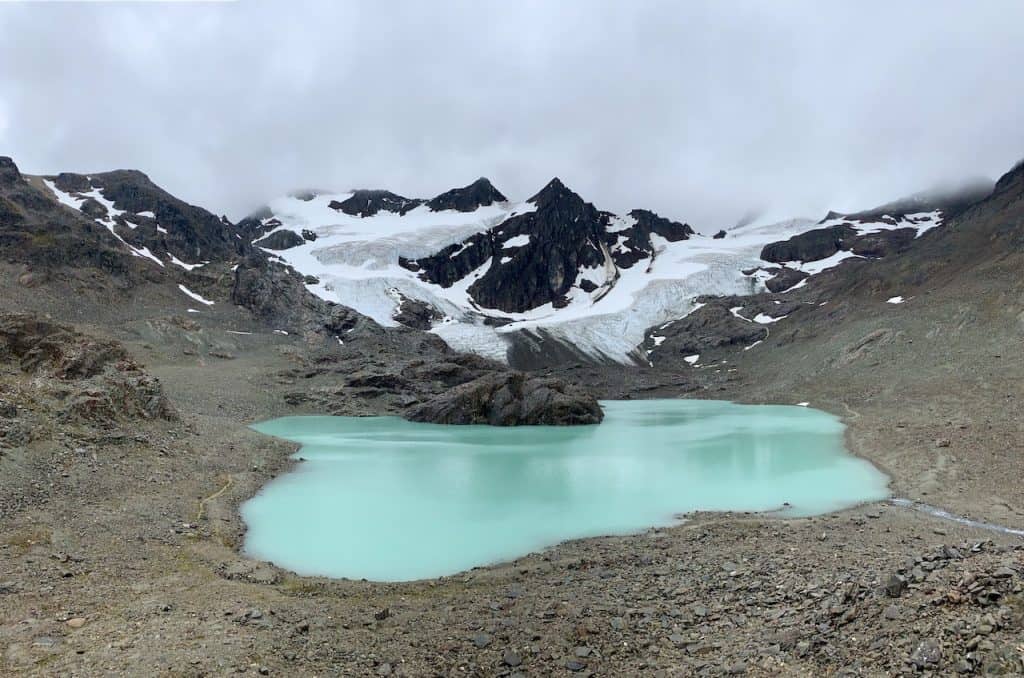
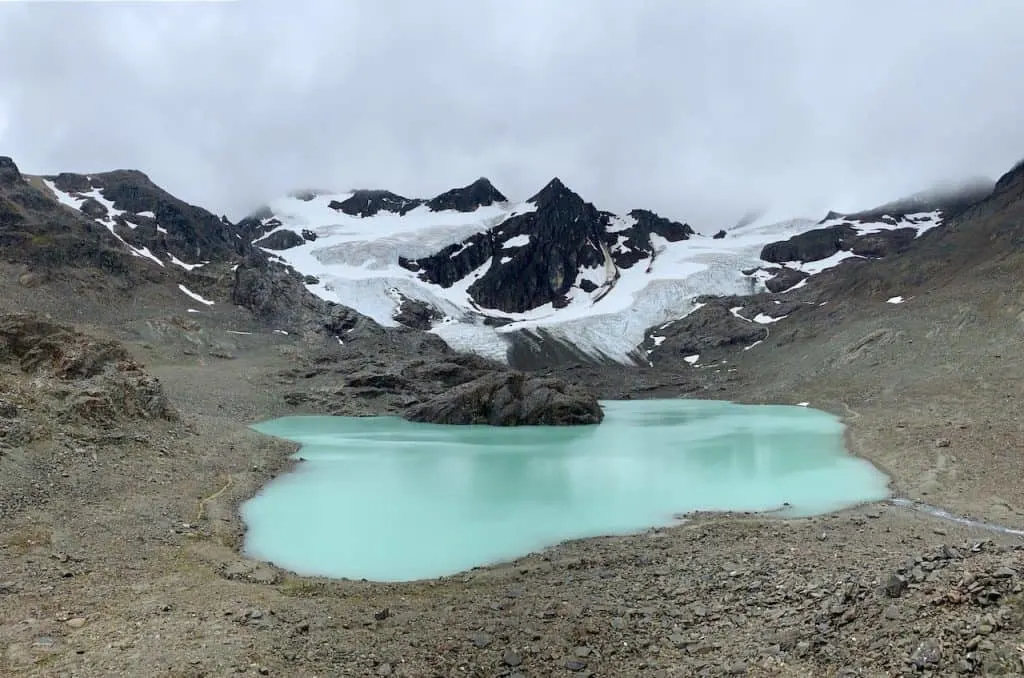
Laguna Esmeralda
The most popular hike in Ushuaia is the one that takes you to Laguna Esmeralda. While the hike can get muddy at points, the end result will have you enjoying views of one of the most scenic lakes in the region.
- Trailhead Location: 54°43’18.8″S 68°07’18.4″W
- Driving Time from Ushuaia: 20 minutes
- Trail Type: Out and back
- Hiking Distance: 5.4 miles / 8.8 km
- Elevation Gain: +700 feet / +214 meters
- Hiking Duration: 3-4 hours
- Trail Guide: Laguna Esmeralda Trail Guide
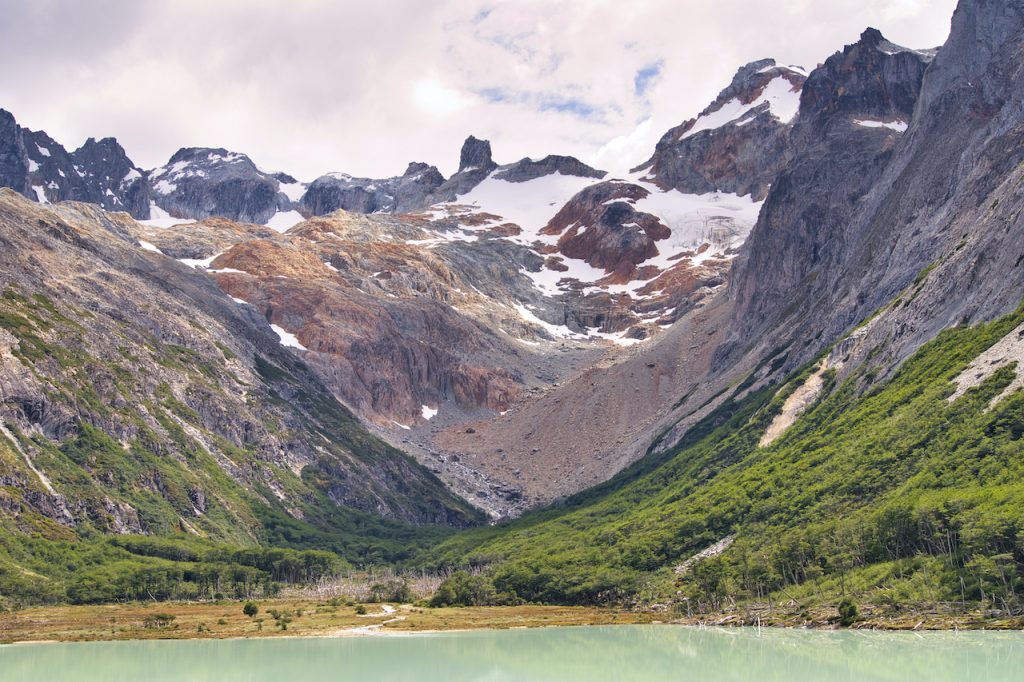
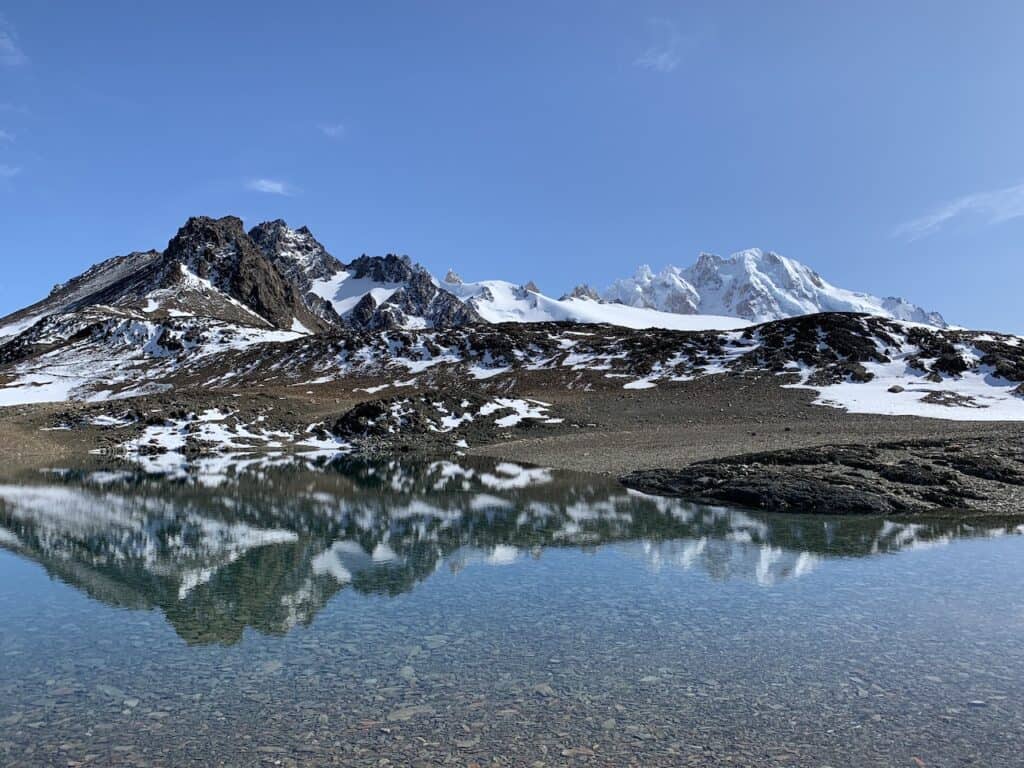
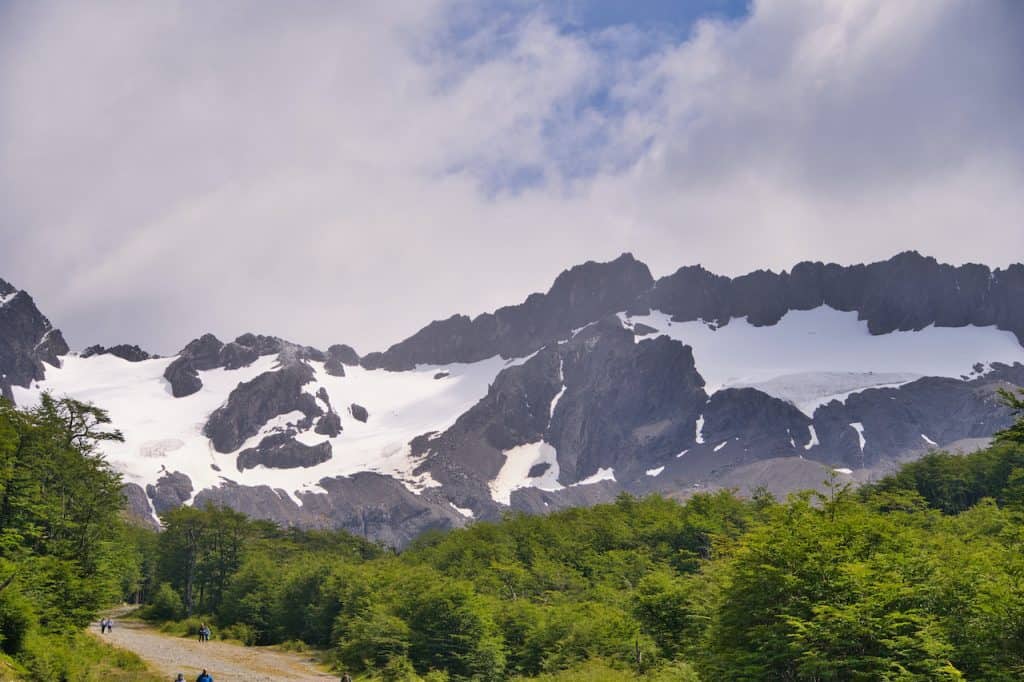
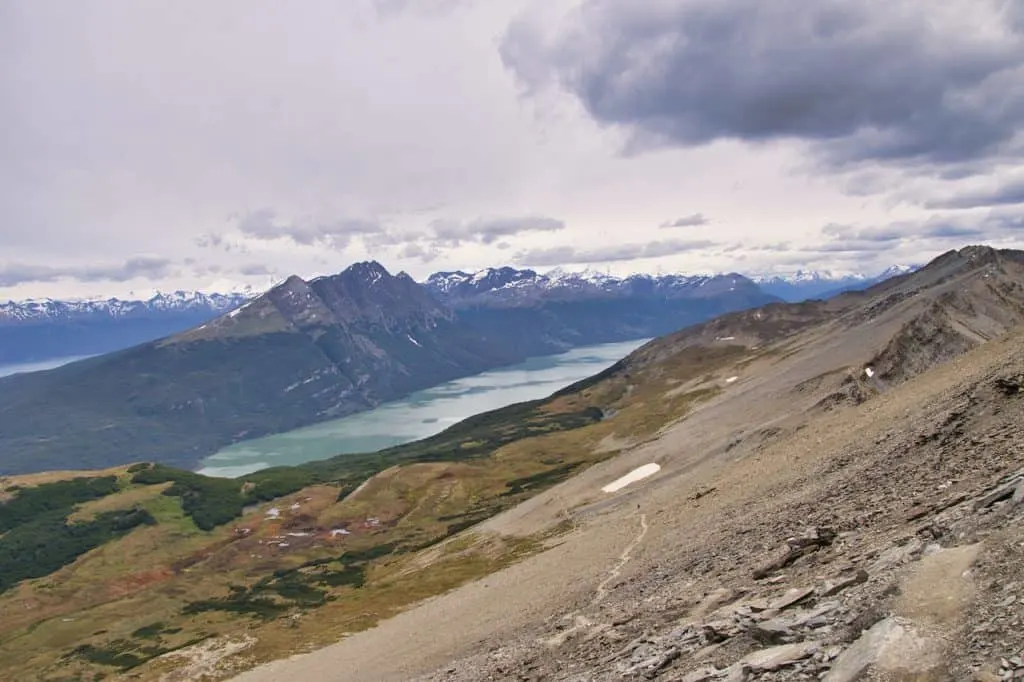
Vinciguerra Glacier
Another lake hike near Ushuaia is the Vinciguerra Glacier and Laguna de Los Tempanos. This one is different as you can head right to the mouth of a glacier overlooking the lake.
- Trailhead Location: -54.764343, -68.301304
- Driving Time from Ushuaia: 15 minutes
- Trail Type: Out and back
- Hiking Distance: 11.5 km / 7.2 miles
- Elevation Gain: +650 meters / +2,132 feet
- Hiking Duration: 4-6 hours
- Trail Guide: Vinciguerra Glacier & Laguna de Los Tempanos Trail Guide
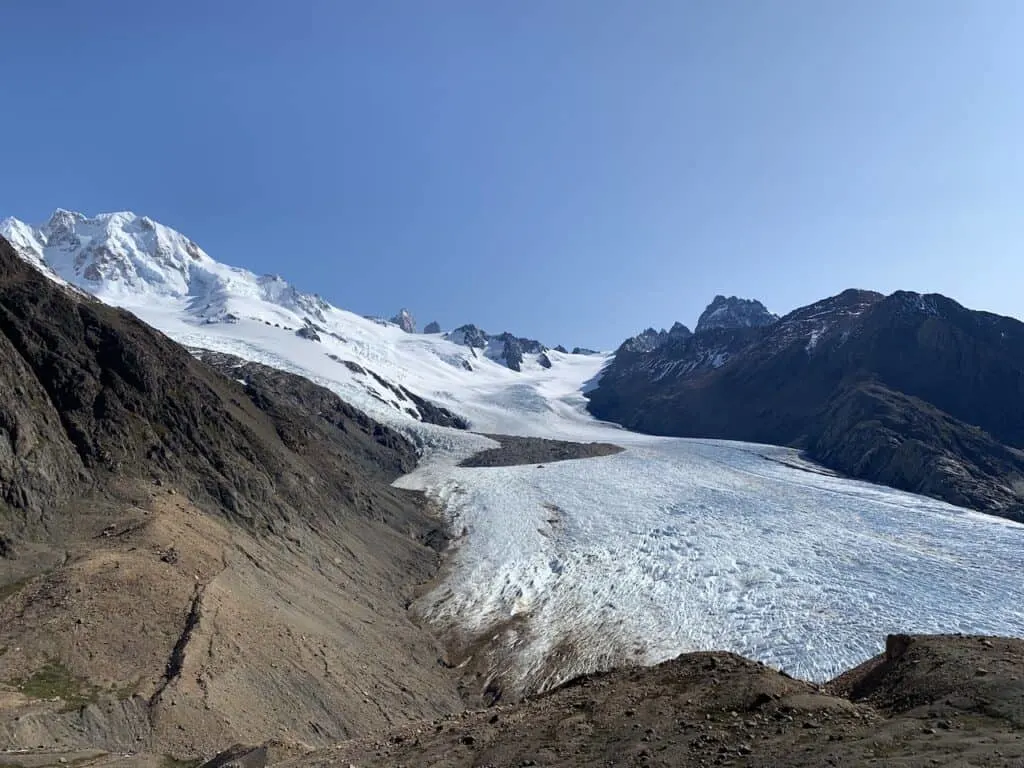
Martial Glacier
A shorter hiking trail just nearby town center is the Martial Glacier. The hike will take you right on up to the glacier itself, where views of Ushuaia will come into view as well.
- Trailhead Location: Refugio de Montana
- Driving Time from Ushuaia: 15 minutes
- Trail Type: Out and back
- Hiking Distance: 8.4 km / 5.2 miles
- Elevation Gain: +588 meters / +1,930 feet
- Hiking Duration: 3 hours
- Trail Guide: Glacier Martial Trekking Guide
Learn More: the Ushuaia hiking overview goes into more detail about all of the hikes mentioned above and what to expect out on the trail.
Tierra del Fuego Recap
When visiting Ushuaia and the Tierra del Fuego region, I would recommend spending around 4 days there. This will give you the chance to dedicate one day each to Tierra del Fuego National Park, the Beagle Channel, and one additional hike mentioned above.
The last day can be used just in case weather isn’t great or if you want to take part of another hike.
Now that you have a better idea of all of the various things to do throughout the regions of Patagonia, let talk about some potential Patagonia itinerary options. I will go over one week, 10-day, two week, one month itinerary options.
While these are some options to consider, there is plenty more mixing and matching that can take place here. As you plan the itinerary, just be sure to give yourself enough time to fully enjoy each region and take into account traveling between regions as well.
Learn More: Take a look at this Ushuaia itinerary to get a better idea on how to put together a comprehensive trip to the region.

14) One Week Patagonia Itinerary
With one week in Patagonia, you will need to stick to 1-2 places at most. While it is a shorter amount of time for Patagonia, you still can get a lot out of a week.
I have included two different options here – one for Los Glaciares National Park and one for Torres del Paine National Park.
Option 1: Los Glaciares National Park
This first option will just focus on Los Glaciares National Park, bringing you to both El Chalten and El Calafate.
- Day 1: Fly from Buenos Aires to El Calafate / Afternoon in Town
- Day 2: Perito Moreno Glacier Day
- Day 3: Los Glaciares Boat Trip / Evening to El Chalten
- Day 4: Laguna de Los Tres Hike
- Day 5: Laguna Torre Hike
- Day 6: El Chalten Buffer Day
- Day 7: Travel to El Calafate & Depart
Day 1: Fly from Buenos Aires to El Calafate / Afternoon in Town
On your first day, you can catch a flight from Buenos Aires down to El Calafate. Once you arrive at the airport, you can either rent a car for your journey or take a taxi into town.
Spend the afternoon walking around town, and even driving near the lakeside if you are up for it. Be sure to get some rest as the next several days will be packed with adventure.
Day 2: Perito Moreno Glacier Day
During your first full day in El Calafate, you can dedicate it to visiting the Perito Moreno Glacier. Whether that means taking part of the glacier hike, walking the boardwalks, or kayaking its waters.
There is plenty to keep you busy around Perito Moreno as you enjoy the natural beauty of this one of a kind glacier.
Day 3: Los Glaciares Boat Trip / Evening to El Chalten
Next up is a boat trip that will take you further into Los Glaciares National Park. Feel free to sign up for the Todo Glaciares boat tour as you navigate the waterways and visit some other glaciers in the national park.
At day’s end, you will need to make your way out to El Chalten. If you have a rental car, you should be all set on your own schedule. If not, be sure to take a later evening bus that will get you to El Chalten.
Day 4: Laguna de Los Tres Hike
Although you may come in late the night before, day 4 will be a full day of hiking. The Laguna de Los Tres hike is not to be missed as you hike up to the Fitz Roy mountain range.
The hike starts right from the end of town, so there is no need to worry about transport for the day.
Day 5: Laguna Torre Hike
Since you are in the hiking capital of the region, you may as well take advantage of it. For your second full day in El Chalten, make your way from town to Laguna Torre.
This is an easier hike than the day prior as you make your way to the lake with the Torre mountain range hovering up above.
Day 6: El Chalten Buffer Day
Spending a third day in El Chalten can never hurt. This will be used as a buffer day in case the weather doesn’t cooperate the days prior or if you want to take on another hike.
Day 7: Travel to El Calafate & Depart
After several days of exploring Los Glaciares, you will need to make your way back by car/bus to El Calafate. From there it is onto the airport, where you can catch your flight back up to Buenos Aires.
Option 2: Torres del Paine National Park
For this second option, I just had to give a way to include Torres del Paine. Spending a week in the region will be just the perfect amount of time for the W Trek.
- Day 1: Fly from Santiago to Puerto Natales
- Day 2: W Trek Day 1
- Day 3: W Trek Day 2
- Day 4: W Trek Day 3
- Day 5: W Trek Day 4
- Day 6: W Trek Day 5 / return to Puerto Natales
- Day 7: Depart Puerto Natales
Day 1: Fly from Santiago to Puerto Natales
This option is a bit easier to write out as you simply will be taking part of the W Trek during your time in Patagonia.
Your first day will entail making the flight down from Santiago to Puerto Natales. Once in town, be sure you are all set with your gear, food, and anything else for the trek.
Day 2: W Trek Day 1
The second day will be an early wake up call as you catch the earliest bus out to Torres del Paine National Park. I prefer to do the W Trek left to right as you get to end with the famous Mirador Las Torres for sunrise.
So, from a logistical perspective, you will want to take the bus to the Pudeto Pier, catch the boat to Paine Grande, and start the trek from there.
Be sure to purchase your bus tickets ahead of time or you can opt to have private transport set up for you.
Day 3-6: W Trek Day 2-5
For the next four days you can continue the W trek as you see all the various highlights along the way.
Enjoy the Grey Glacier, French Valley, Cuernos del Paine, and the Mirador Las Torres.
On the final day of the trek, you will catch a bus from the Laguna Amarga entrance back to Puerto Natales.
Day 7: Depart Puerto Natales
After successfully completing the W Trek, it is then time to depart Puerto Natales and fly back up to Santiago.
15) 10 Day Patagonia Itinerary
With 10 days in Patagonia, you can have a bit more time to spread yourself out among the regions or take part of a longer trek. These two 10 day itineraries simply build off of the 7 day itineraries mentioned above.
Option 1: Tierra del Fuego & Los Glaciares National Park
This first option will add in Tierra del Fuego with Los Glaciares National Park. This is great for those that want to explore two different regions of Patagonia within 10 days.
- Day 1: Fly from Buenos Aires to Ushuaia / Afternoon in Town
- Day 2: Tierra del Fuego National Park
- Day 3: Beagle Channel Exploration
- Day 4: Ushuaia Hiking Option / Fly to El Calafate
- Day 5: Perito Moreno Glacier Day
- Day 6: Los Glaciares Boat Trip / Evening to El Chalten
- Day 7: Laguna de Los Tres Hike
- Day 8: Laguna Torre Hike
- Day 9: El Chalten Buffer Day
- Day 10: Travel to El Calafate & Depart
Day 1: Fly from Buenos Aires to Ushuaia / Afternoon in Town
On day 1, you will want to make your way by plane to the southernmost city of Ushuaia.
You can decide to use a rental car in Ushuaia or opt for the shuttle public transport or taxi options.
Once you arrive there, feel free to spend the afternoon walking around town and by the waterside. There is a nice walking trail along the water that you can take part of, which is a great way to start the trip.
Day 2: Tierra del Fuego National Park
Day 2 will focus on Tierra del Fuego National Park. Whether you want to take part of one longer hiking trail or a couple shorter trails, there are plenty options to choose from.
Even if you are not up for hiking, there are plenty viewpoints, lakes, and short walks to consider during a day in the park.
Day 3: Beagle Channel Exploration
It is then time to head out onto the water and join a Beagle Channel navigation boat ride. Make your way all the way out to Martillo Island, where you can see some penguins!
Remember, only certain tours offer the walking with penguin option. Be sure to sign up in advance if that is something you want to do.
Day 4: Ushuaia Hiking Option / Fly to El Calafate
On day 4 you will need to make your way to El Calafate in the afternoon. Usually you will find afternoon flights around 3:00PM during the peak summer months. This means you need to be wrapped up with your day around 12:00/1:00PM.
If you have your own car, you will be able to start very early to take on a hike like Laguna Esmeralda. But you will need to start around 6:00/7:00AM depending on your overall hiking abilities.
Since shuttles don’t run until later in the morning to Laguna Esmeralda, a car rental or taxi is your only option to get an early enough head start.
If you rather take on a shorter hike and just hop in a short taxi ride, then make your way to Martial Glacier instead. You should have plenty of time to complete the hike and make it back down in time for the flight.
Day 5-10: Los Glaciares National Park
To avoid re-writing the exact itinerary again, see the 7 day itinerary (option 1) above for the breakdown of days between El Calafate and El Chalten in Los Glaciares National Park.
These next several days will take you to the Perito Moreno Glacier, on a Los Glaciares boat ride, and to El Chalten for several hikes.

Option 2: Torres del Paine O Trek
With just 7 days, you will only be able to head out on the W Trek. But with 10 days, the longer O Trek will be possible.
- Day 1: Fly from Santiago to Puerto Natales
- Day 2: O Trek Day 1
- Day 3: O Trek Day 2
- Day 4: O Trek Day 3
- Day 5: O Trek Day 4
- Day 6: O Trek Day 5
- Day 7: O Trek Day 6
- Day 8: O Trek Day 7
- Day 9: O Trek Day 8 / return to Puerto Natales
- Day 10: Depart Puerto Natales
Similar to the W trek, after arriving in Puerto Natales on day 1, get all of your gear ready for the next 8 days of hiking.
Since the O Trek can only be completed counter clockwise, I would recommend starting at the Laguna Amarga entrance and going from there. Be sure to catch that first bus out (or take private transport), and be on your way.
Days 2-9 will be filled with everything you can ask for in a multi-day trek. Torres del Paine is a special place, and by taking part of the O you will get to experience it all.

16) Two Week Patagonia Itinerary
With two weeks in Patagonia, you will have a good amount of time to really take advantage of a couple different regions. In this case I am combining Los Glaciares National Park with Torres del Paine National Park.
What this itinerary is doing, is essentially combining both the 7 day itineraries I wrote out above.
- Day 1: Fly from Buenos Aires to El Calafate / Afternoon in Town
- Day 2: Perito Moreno Glacier Day
- Day 3: Los Glaciares Boat Trip / Evening to El Chalten
- Day 4: Laguna de Los Tres Hike
- Day 5: Laguna Torre Hike
- Day 6: El Chalten Buffer Day
- Day 7: Travel to El Calafate
- Day 8: Travel to Puerto Natales
- Day 9: W Trek Day 1
- Day 10: W Trek Day 2
- Day 11: W Trek Day 3
- Day 12: W Trek Day 4
- Day 13: W Trek Day 5 / return to Puerto Natales
- Day 14: Depart Puerto Natales
Day 1-6: Los Glaciares National Park
Days 1-6 of the itinerary are identical to the 7 day Patagonia itinerary (option 1) from before. For more details, feel free to read that through.
It will take you first to El Calafate as you get to explore Perito Moreno Glacier and the other glaciers of the national park. From there it is off to El Chalten, where you can spend the next several days hiking.
Day 7: Buffer Travel Day
On day 7, you will want to make your way back to El Calafate. But since you will not be departing to the Chilean side of Patagonia until day 8, you will have additional time in El Chalten if you would like to.
I think this is a great additional buffer day to include here just in case the weather doesn’t fully cooperate during the previous few days.
It also gives you the chance to take part of other activities such as river rafting, kayaking, or horse back riding.
Once you have finished up your time in El Chalten, you can hop on the bus or drive your way to El Calafate.
Day 8: Travel to Puerto Natales
This is simply going to be a travel day between El Calafate in Argentina and Puerto Natales in Chile. The best way to go about this is by bus, as you won’t want to worry about driving a car across the border (and you won’t need a car for the W trek anyways).
The bus ride takes around 6 or so hours as you cover around 300km of road and spend time at the border crossing.
Once you finish up the bus ride, make your way to your hotel, prep your gear, and get ready for the W Trek!
Days 9-13: W Trek
For the next 5 days you will be taking on the W Trek of Torres del Paine. The first day will start with that early bus ride to the Pudeto pier, and then across the lake by boat to Paine Grande.
From there, the trek begins as you cover the front side of Torres del Paine over the next 5 days. Once wrapped up on day 5, take the bus back from the Laguna Amarga entrance to Puerto Natales.
Day 14: Depart Puerto Natales
After successfully completing the W Trek, it is then time to depart Puerto Natales and fly back up to Santiago. This will wrap up two weeks in Patagonia!

17) One Month Patagonia Itinerary
During my trip around the world, I opted to spend one month in Patagonia. During this time period, I knew I had to plan in a way to consider rest days, travel days, and weather buffer days.
While you can do more than I did in a month, it may feel too rushed or you may not give yourself enough buffer days to account for the weather.
I won’t write out detailed day by days for this itinerary, but you can read through the above itineraries, which include mostly everything seen below.
- Day 1: Flight from Buenos Aires to Ushuaia
- Day 2-6: Ushuaia / Flight to El Calafate
- Day 7-10: El Calafate / Travel to El Chalten
- Day 11-19: El Chalten
- Day 20: Travel to El Calafate
- Day 21: Travel to Puerto Natales
- Day 22-29: O Trek
- Day 30: Flight from Puerto Natales to Santiago
Within all of those days, there were around 5-6 days that were simply rest days or weather-related days where being outside wasn’t a great option.
You can see I spent around 10 days in El Chalten, and that is because I took part of the 4-day Huemul Circuit on top of the standard hikes in the region.
Overall, I do think the itinerary above is a good way to go about visiting three different regions of Patagonia while giving some time to recover along the way.
If you have any particular questions about the one-month Patagonia itinerary, feel free to write in a comment down below.

18) Patagonia Frequently Asked Questions
To wrap up, below are a few frequently asked questions when it comes to putting together a Patagonia itinerary.
How Many Days Do You Need to See Patagonia?
In general, it really depends on how many regions within Patagonia you are looking to visit. I would recommend sticking to one week per region (although some regions like Tierra del Fuego can be enjoyed with less time).
If you plan too much in a time window, you risk the ability to be flexible and it is possible you actually miss out on more than you anticipated.
As you are planning your trip, just remember to give yourself a little bit more time than needed to consider rest days, weather days, and travel days.
Is Patagonia Better in Chile or Argentina?
While the Argentina side of Patagonia may be bigger, that doesn’t necessarily mean it is better. With that said though, I have a hard time comparing the two. Both regions offer so much beautiful natural landscape to explore.
For those that want to see a bit more diversity in scenery, the Argentina side is probably the move. However, for those multi day treks, Torres del Paine in Chile is much better set up to accommodate for that type of experience.
You simply can’t go wrong here. If you enjoy your trip to Patagonia, there is always the chance to go back for more.
Is Patagonia Worth It?
To wrap up, YES (!!), Patagonia is worth it.
As much as I got frustrated with the weather at times, everything was worth it at the end. The natural landscapes of Patagonia are simply some of the most beautiful in the world.
Spending any amount of time exploring the region will be worth it in my eyes. If you are someone who appreciate the outdoors and wants to see some of the best that the world has to offer, then be sure to add Patagonia to the list!

Hope you enjoyed this Patagonia itinerary overview. If you have any questions, be sure to add them in below. Also, be sure to check out the other Patagonia itineraries and guides up on the site.
Have fun out there and safe travels!


Grace White
Monday 1st of June 2026
I've been experimenting with sourdough starters for weeks now, and this tip about hydration levels is precisely what I needed. My last loaf came out a bit too dense.