
If you are looking to take part of one of the world’s most beautiful multi day hikes, then look no further than the W Trek of Torres del Paine National Park in Chilean Patagonia.
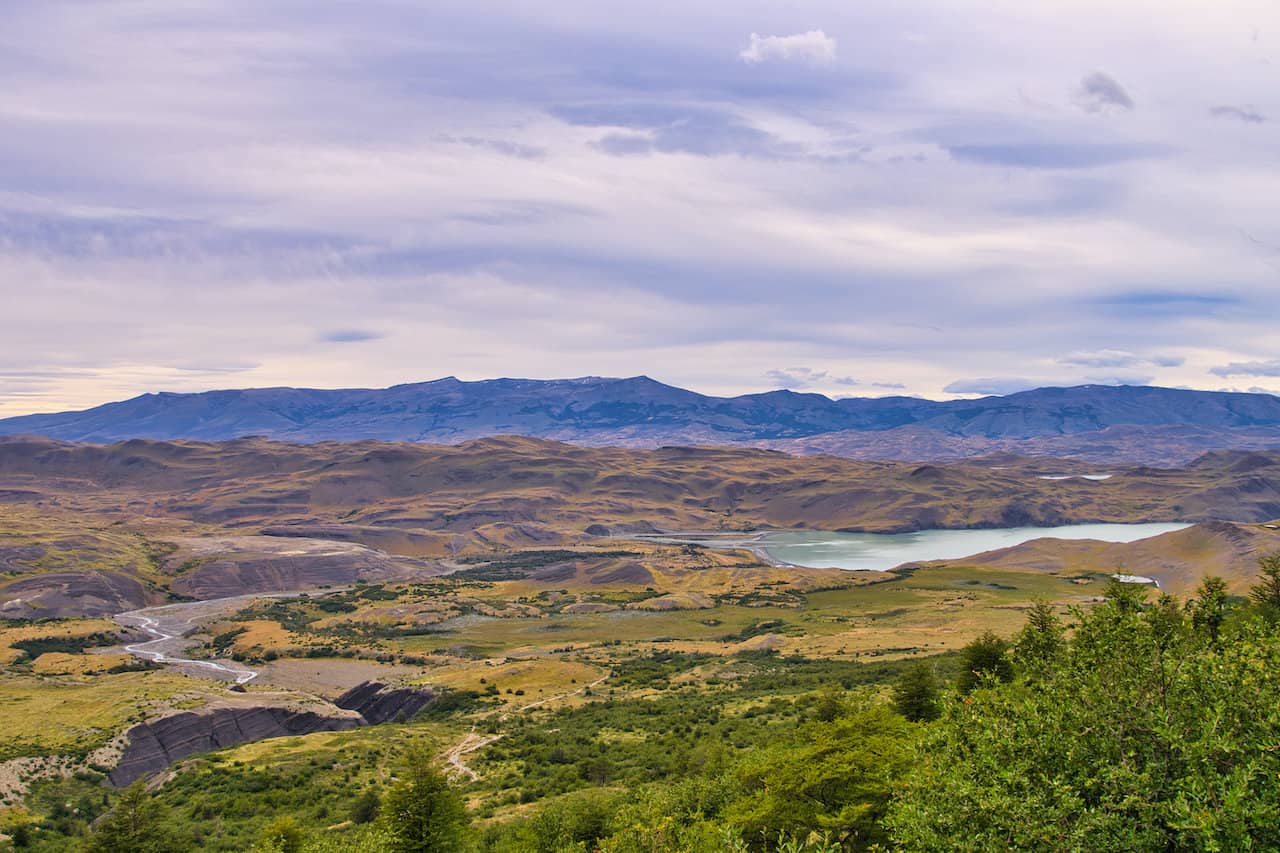
What usually is a one way 5 day trek that can be completed in either direction, the W Trek offers hikers the opportunity to admire some surreal Patagonia landscape. Whether is is rivers, lakes, mountains, valleys, or glaciers, the W Circuit will have something for you.
This guide is here to give you a complete overview of what the W Trek is all about and how to prepare yourself for your time out on the trail.
* Affiliate Disclosure: This post may contain affiliate links, which means I may receive a commission if you make a purchase through the links provided, at no additional cost to you. Thanks for supporting the work I put into TripTins!
1) What is the W Trek
Within Torres del Paine National Park, you will come across two main multi day hikes to decide between. There is the W Trek (which we will focus on in this guide), a 4-5 day one way hike, and the O Trek, an 8 day counter clockwise loop trail that also heads to the backside of the park.
The reason they are called the “W” and the “O”, is because the routes themselves are shaped like the letters W and O.
It is important to note that the O Trek includes the entirety of the W Trek. So, if you head on the O Trek, you are also completing the W Trek (in addition to a few extra days on the trail).
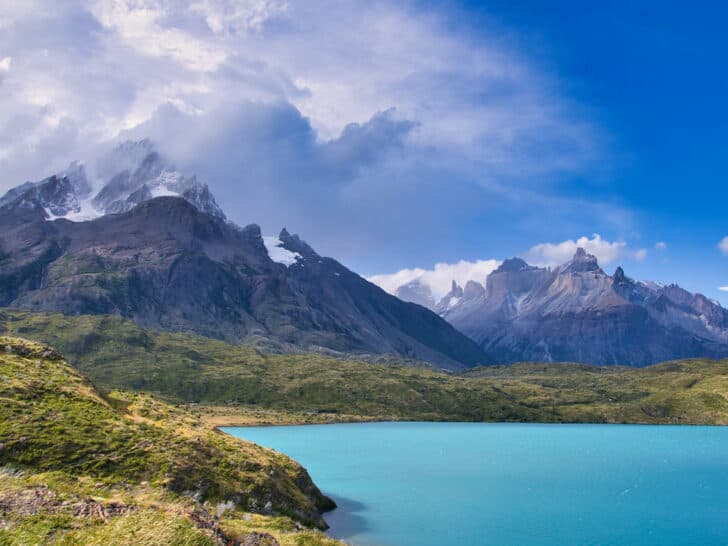
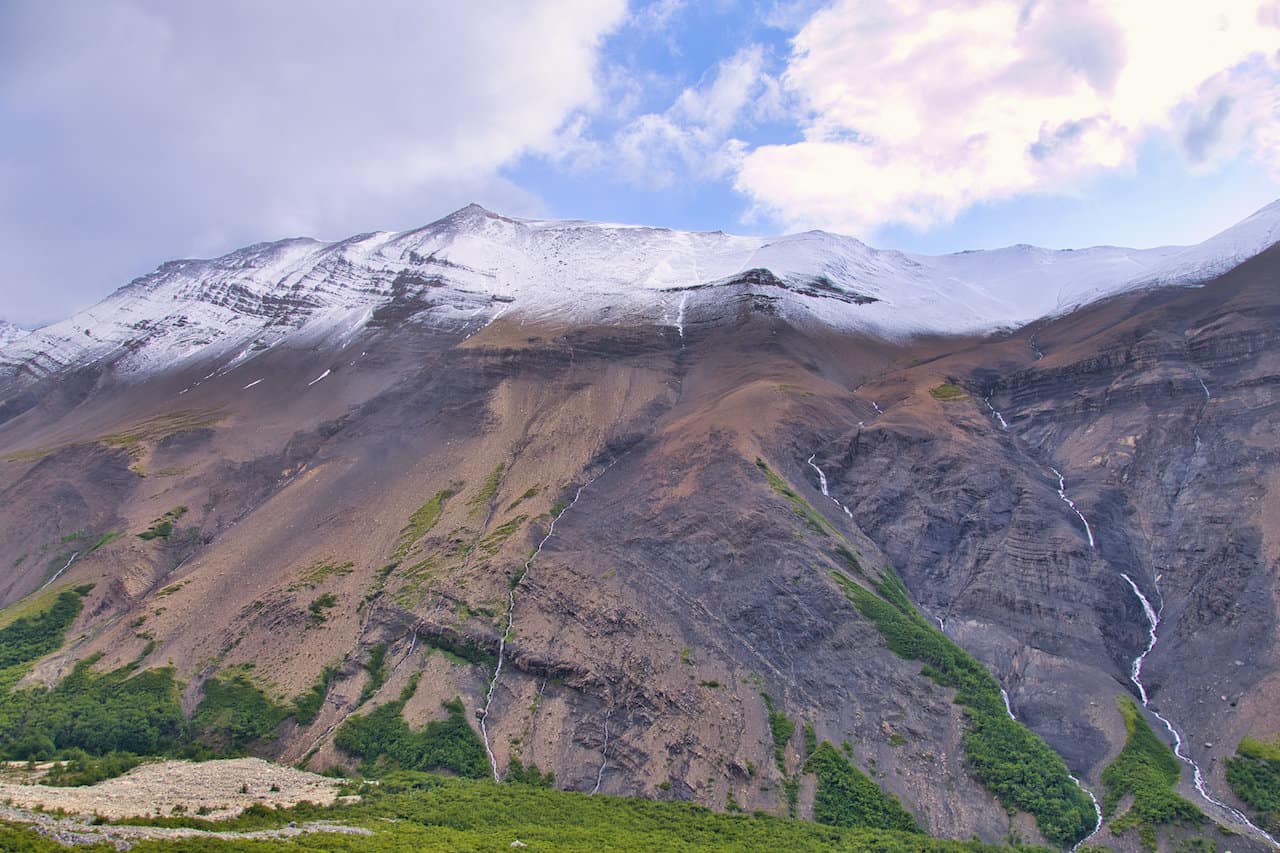
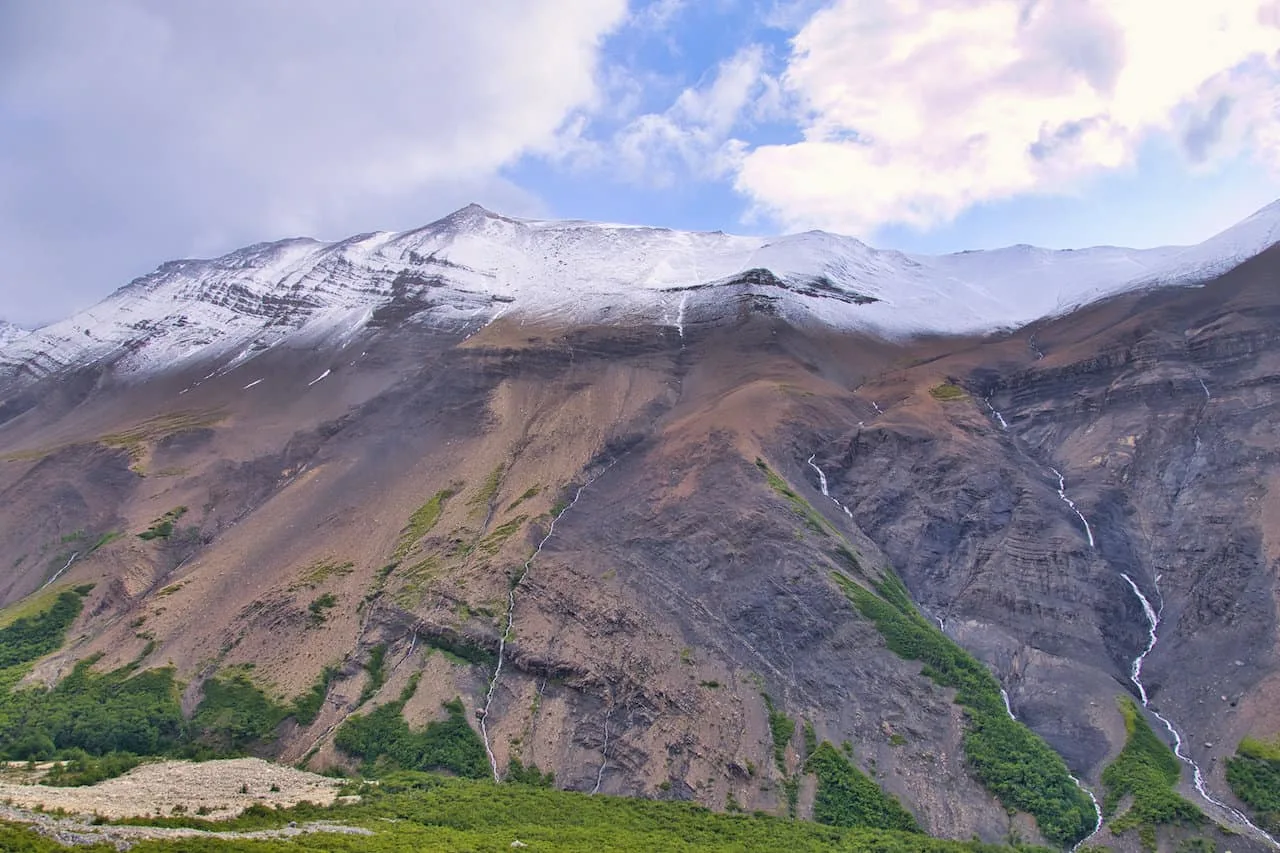
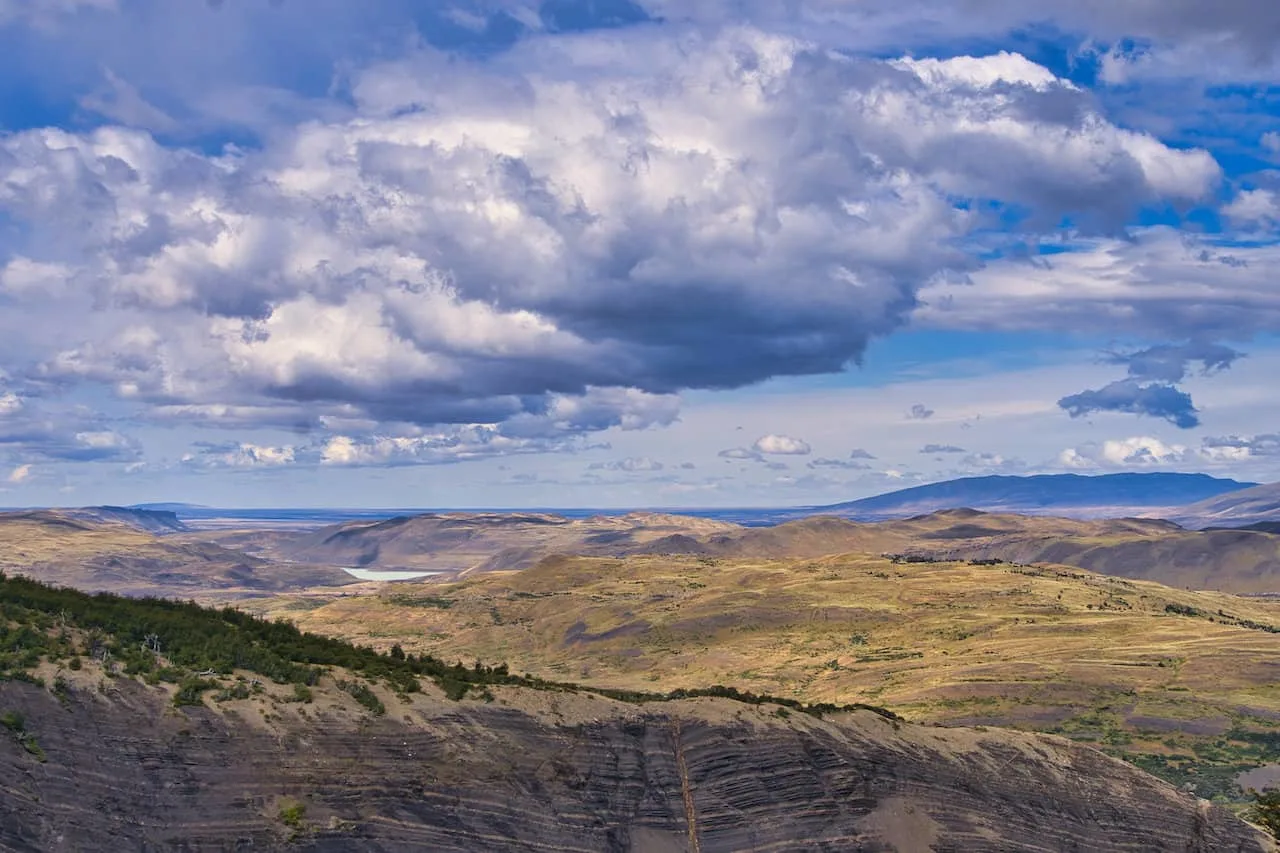
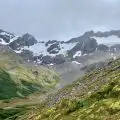
All along the W though, you will find some of the best overall landscapes that Patagonia has to offer.
Whether it is a viewpoint over the Grey Glacier, taking in the Cuernos del Paine from Paine Grande, visiting the French Valley, or seeing the famous Mirador Las Torres. The W has it all, and is sure to be one of the top trekking circuits that you will take part of in your life.
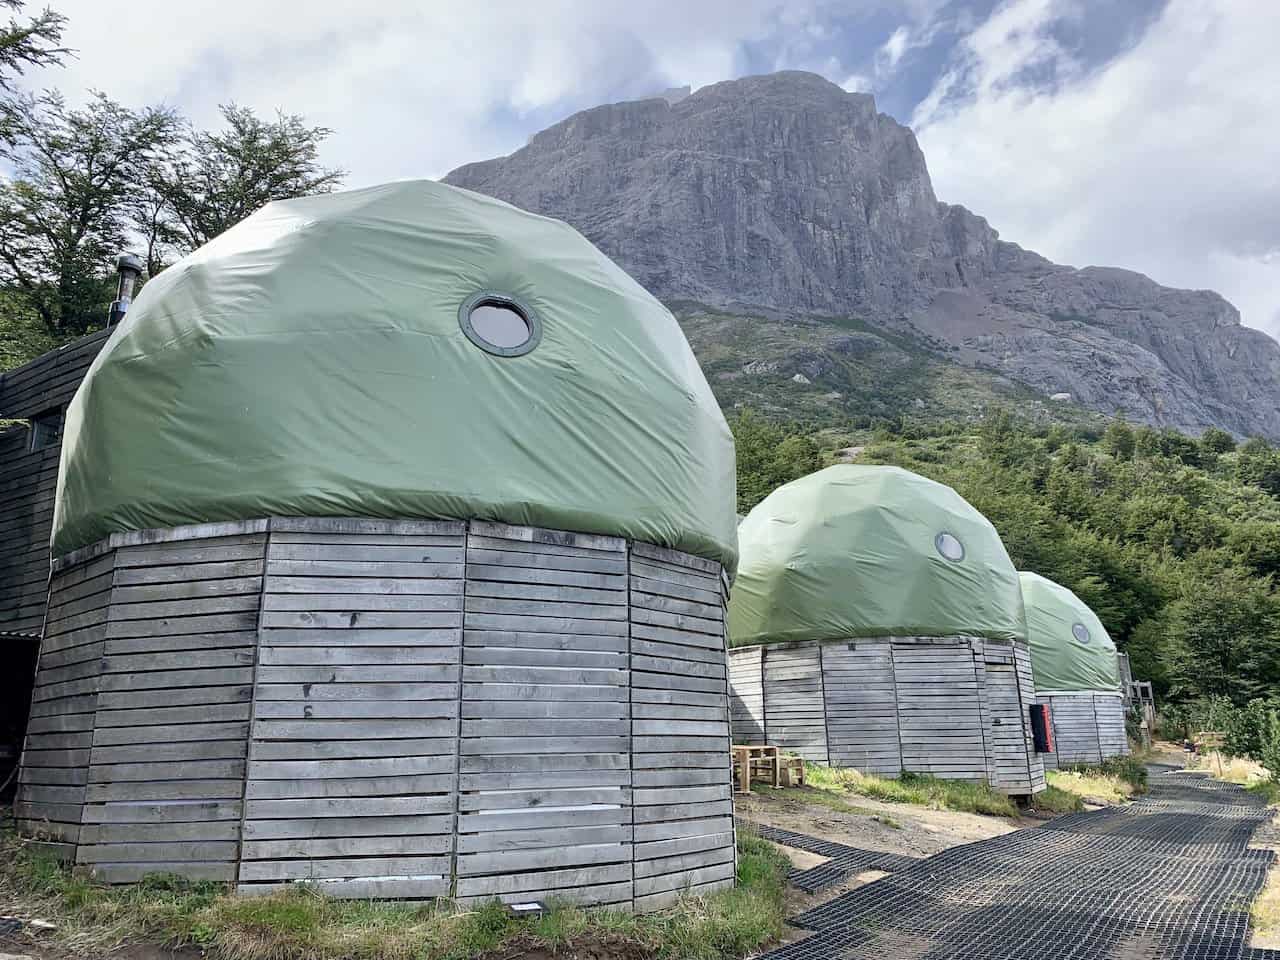
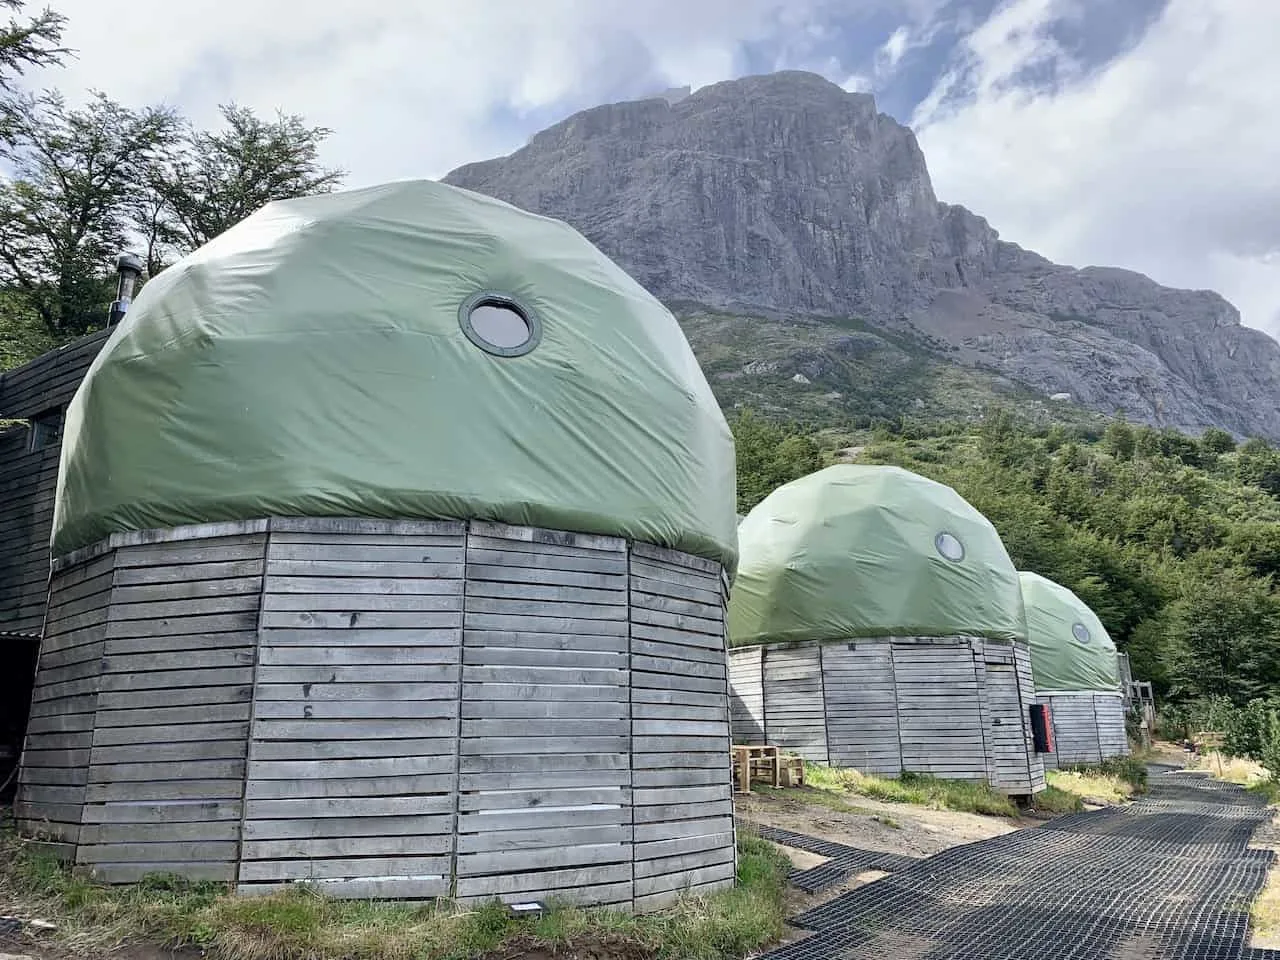
For the W Trek, you will have a few different options to consider when deciding on your hiking accommodations.
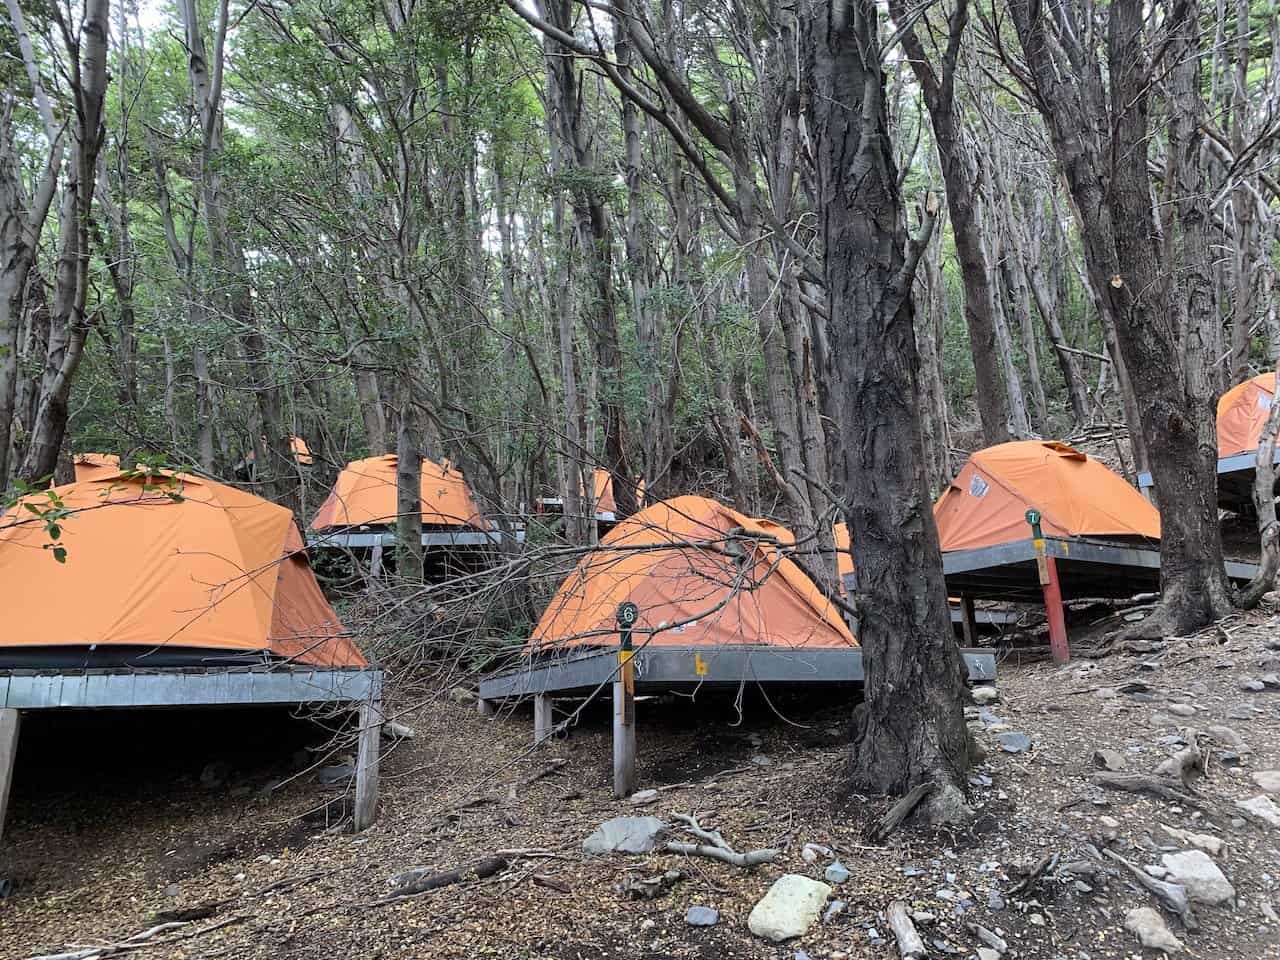
You can choose from ready-made campsites, cozy refugios, or you can bring your own camping gear and do it all on your own.
Depending on availability and what you are most interested in will help determine what your accommodation will be on a nightly basis. Many people (including myself) mix and match these options to get a little bit of everything out on the trail.
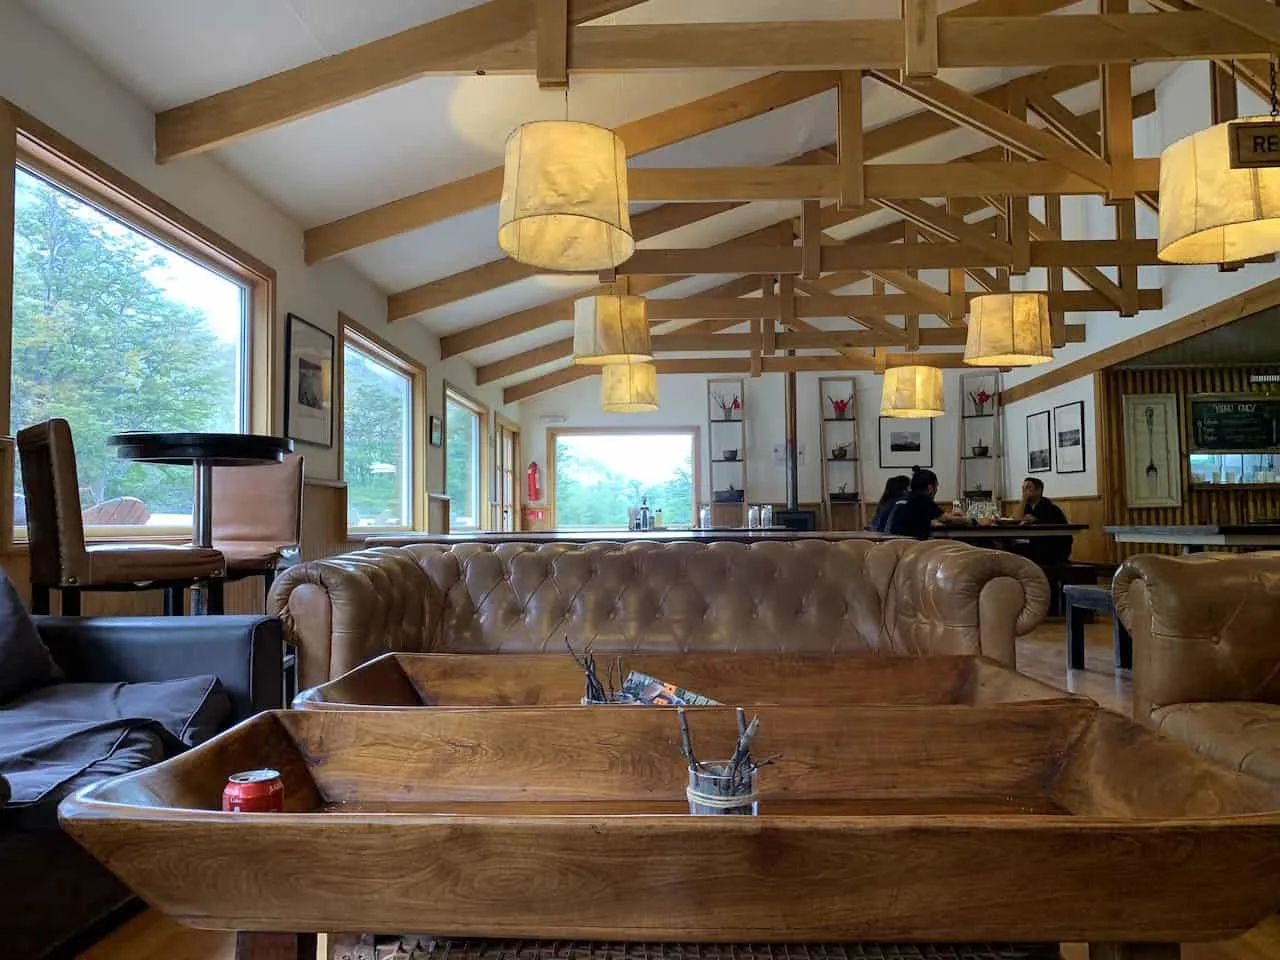
Another great part about trekking in Torres del Paine, is that you can also find breakfast, lunch and dinner served at these refugios & campsites. If you choose to take advantage of these offerings, then you won’t necessarily need to bring along too much additional food weight on the hike.
Overall, the W Trek of Torres del Paine has a vast array of options to align with trekkers’ desires.
On one hand, you can decide to go about it completely self-supported bringing along your own tent and food. While on the other hand, you can simply take advantage of the refugios/ready-made campsites & food offerings.
However you decide to take part, you are sure to enjoy this once in a lifetime type of trek.
If you are spending more time in Patagonia, be sure to check out the various hikes in El Chalten, like the multi day Huemul Circuit & the Laguna de Los Tres day hike

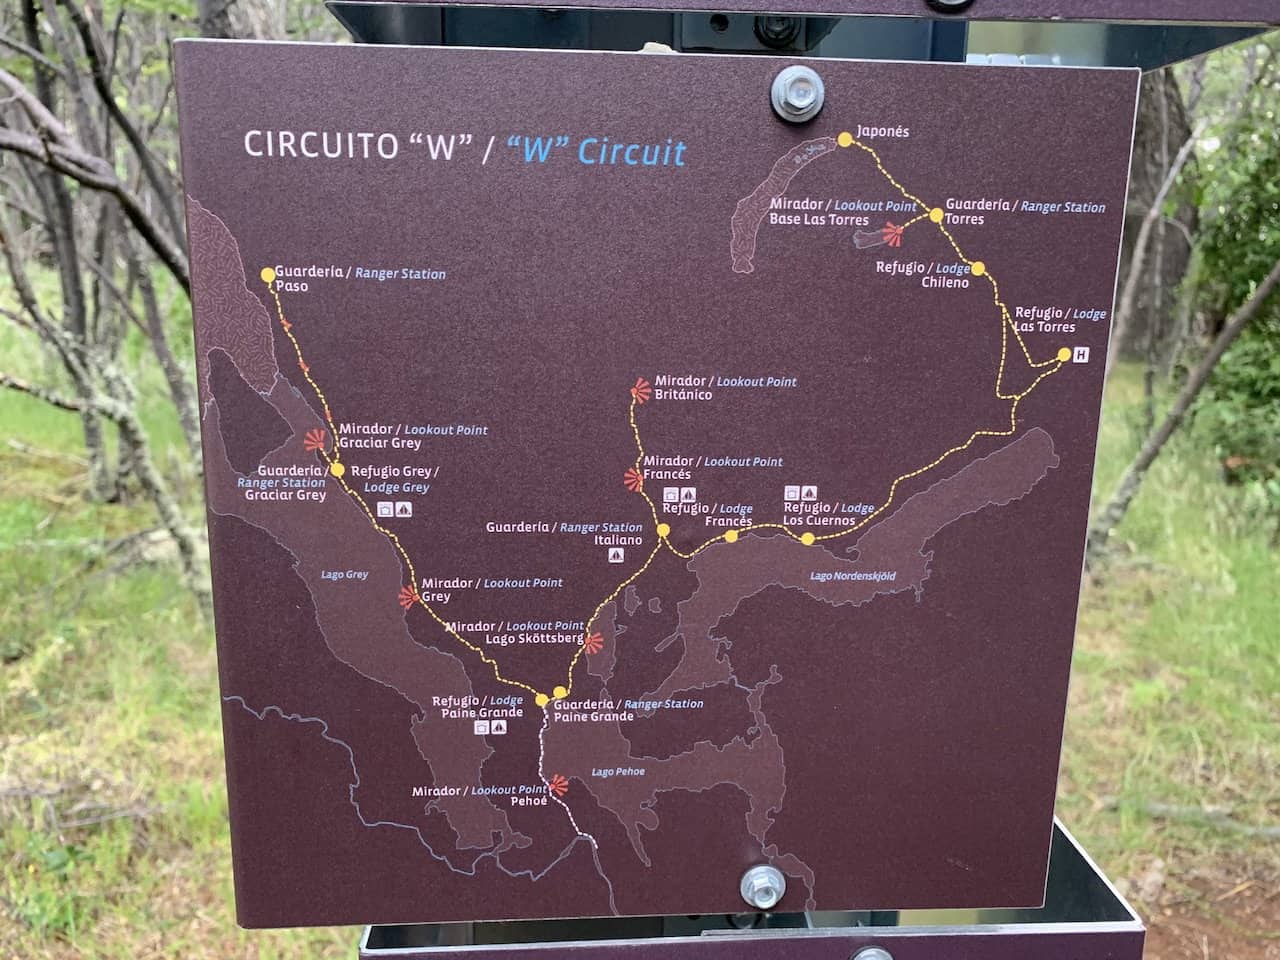
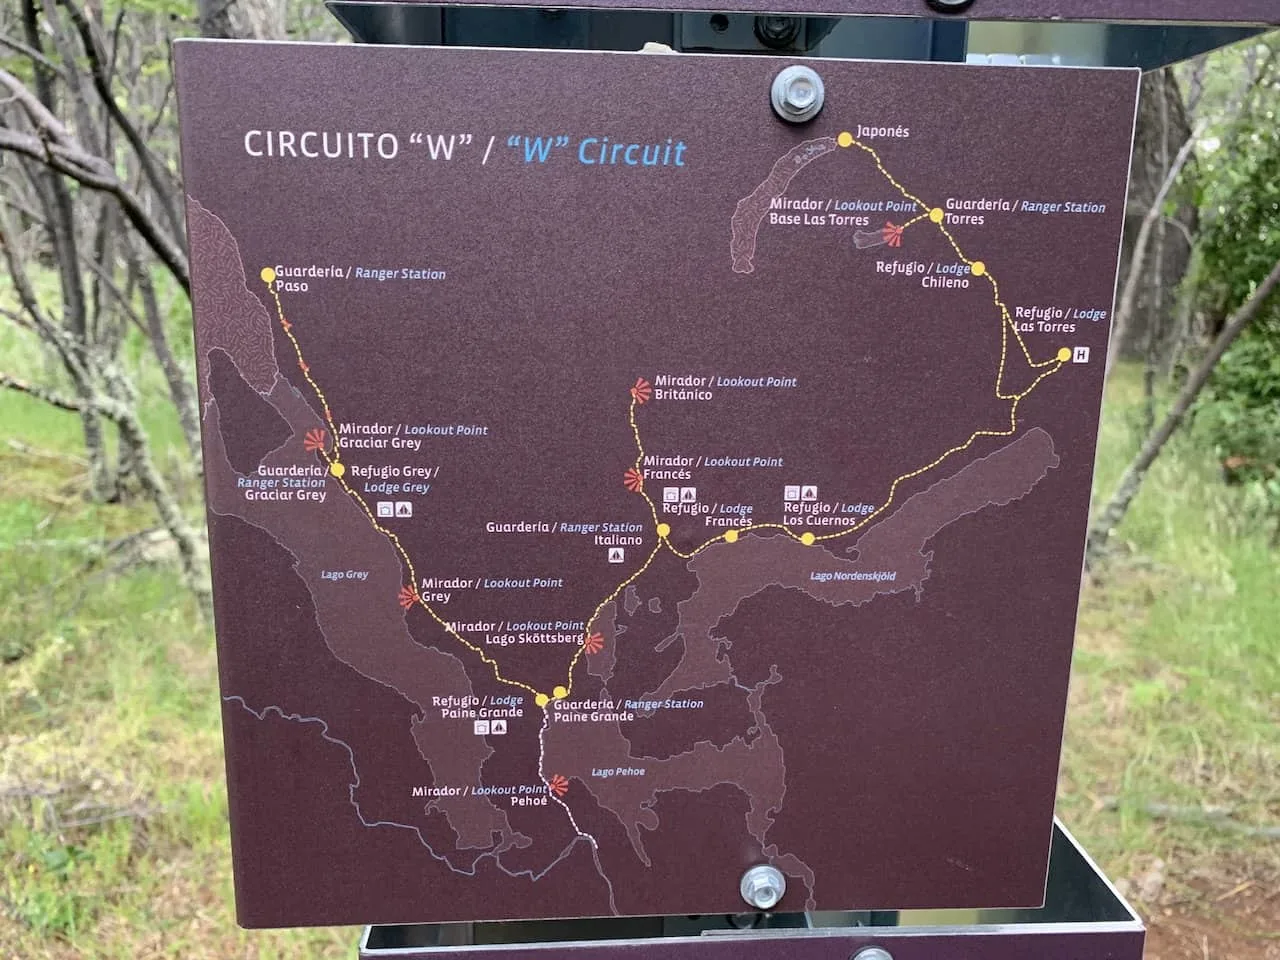
2) Hiking Map & Route
To start, lets lay out the W Trek map so you can get a better understanding of the trail itself. On the map you will find the route, campsites/refugios, and other points of interest.
Learn More: Check out this Patagonia Itinerary that can better help you put together a complete trip to the region.
3) Patagonia W Trek Itinerary
The W Trek offers the opportunity to take part of the hike in either direction – either west to east or east to west. Below I will layout both of those options and give some insight on what my recommendation would be.
In general, the standard W Trek is completed in 5 days, and that is what I will be talking through in this overview. There are ways to cut it down to 4 (or even 3) days, but you would either need to have some very long days or cut some highlights out altogether.
For the most part, you will just have one campsite/refugio (also may be called “sectors”) to choose from for each night on the route. However, there are a couple nights, where you could consider alternate campsites if one or another is sold out.
So, with that said, below is how you should plan a Patagonia W Trek itinerary:
West to East
Day 1: Bus to Pudeto | Catamaran to Paine Grande | Hike to Grey
Day 2: Hike from Grey to Glacier Grey Suspension Bridges & Back to Paine Grande
Day 3: Hike from Paine Grande to Frances (or Cuernos) via Valle del Frances
Day 4: Hike from Frances to Chileno (or Central or Las Torres Hotel)
Day 5: Hike to Mirador Base de Las Torres & Hike Back to Welcome Center | Van to Amarga | Bus to Puerto Natales
West to East
Day 1: Bus to Laguna Amarga | Van to Welcome Center | Hike to Mirador Base Las Torres | Hike to Chileno (or Central or Las Torres Hotel)
Day 2: Hike from Chileno to Frances (or Cuernos)
Day 3: Hike from Frances to Paine Grande via Valle del Frances
Day 4: Hike from Paine Grande to Grey & Hike to Glacier Grey Suspension Bridges
Day 5: Hike from Grey to Paine Grande | Catamaran to Pudeto | Bus to Puerto Natales
Which Direction to Choose?
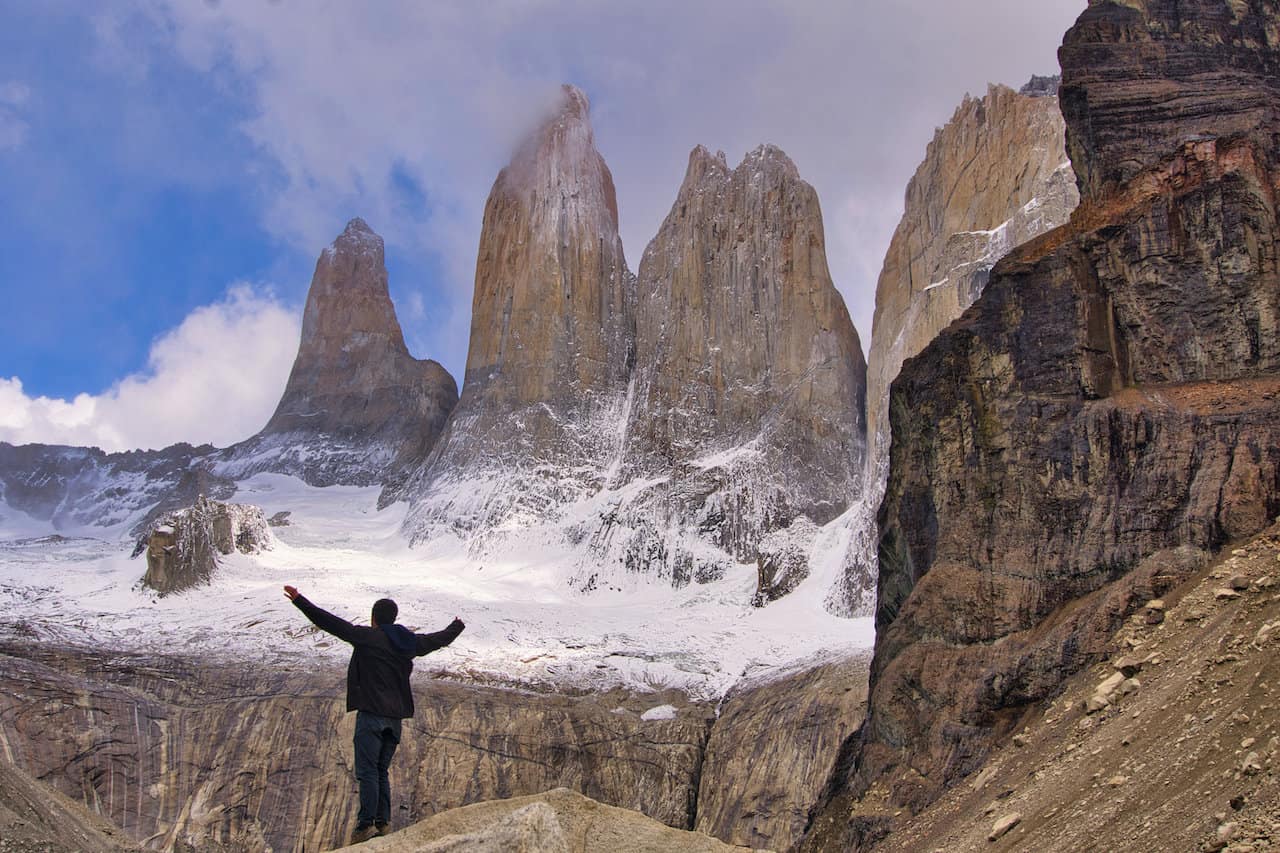
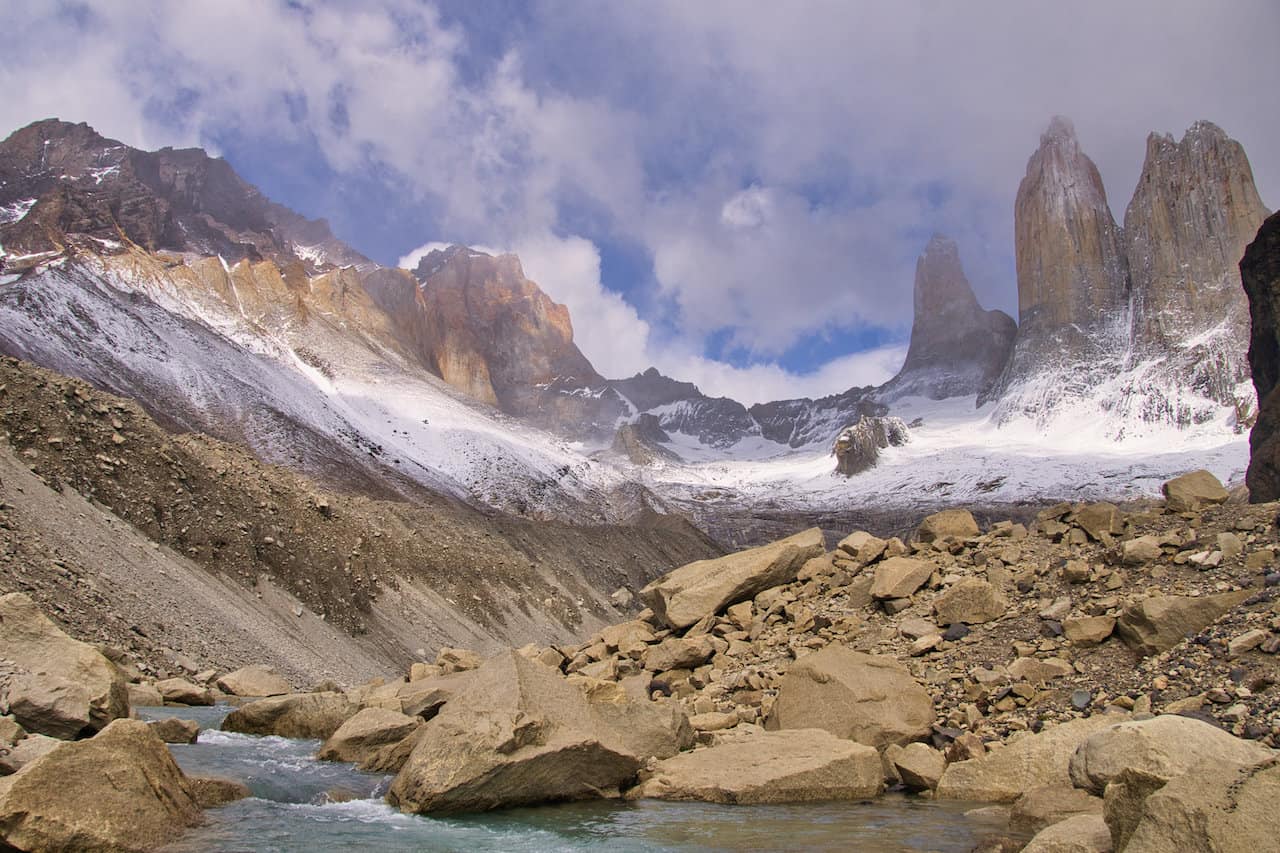
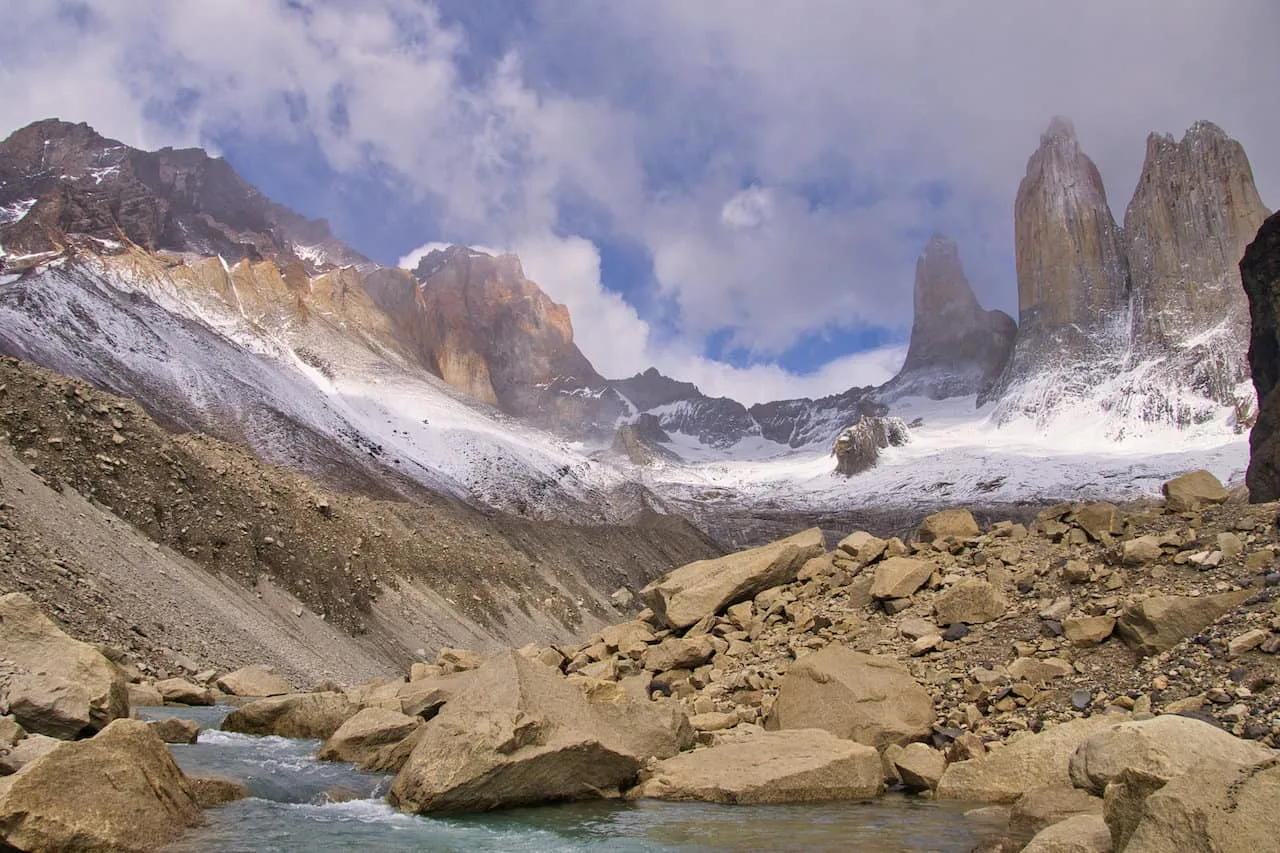
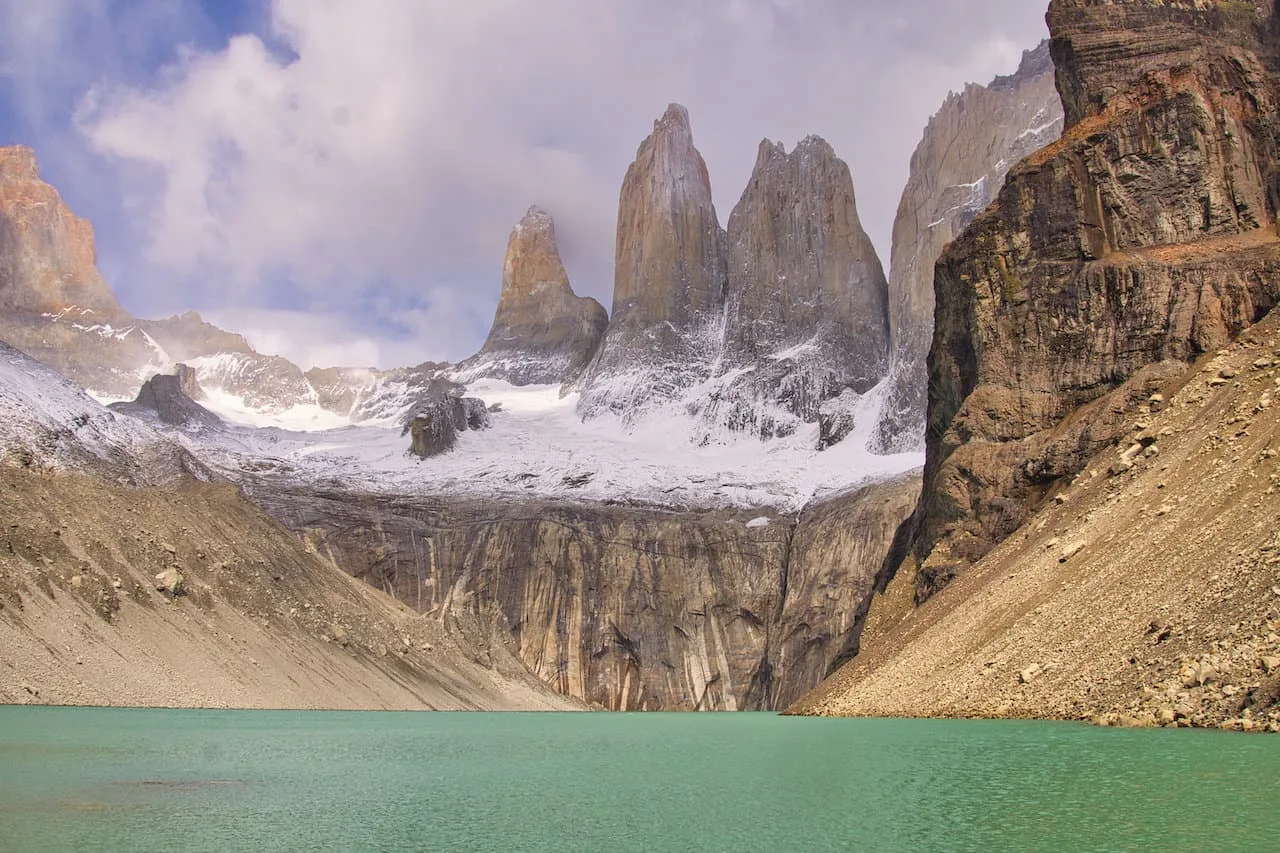
If I were to choose between these two routes, my recommendation would be to take part of the circuit from west to east. This is primarily due to some reasons regarding the famous viewpoint of Mirador Las Torres (the panorama of the three famous peaks with the lagoon in the foreground – see below!).
By taking part of the hike from east to west, the viewpoint would be your first day out on the trail (and it is going to be a long one – 9 miles & 3,500 feet of elevation gain). Personally, I would rather ease into a circuit like this and have a shorter first day (Paine Grande to Grey)
Alternatively, if you do the hike west to east, you get to save the top highlight of the trek for the final day.
This not only lets you have an easier day 1, but it also gives you the chance to hike to Mirador Las Torres for sunrise on day 5.
What better way to end the W Trek than seeing this famous view at sunrise with few other people all around. I can tell you that if you visit the viewpoint on day 1, you will more than likely have an overcrowded trail and viewpoint area (mostly due to day trekkers).
At the end of the day though, you can’t go wrong. Depending on availabilities and preference, you can make the choice that is best for you.

Hiking Resources & Checklist
Before heading out for the trails, be sure to read up on some of the hiking resources up on the site. These are here to better prepare you for all types of outdoor adventure.
- Gear: Hiking Packing List
- Weather: How to Prepare for Hiking Weather
- Navigation: Hiking GPS & Navigation
- Tips: 20+ Hiking Tips & Tricks for the Trail
- Accommodation: Book Your Hotel Today
- Rental Car: Book Your Car Rental Today
4) How Long is the Trek
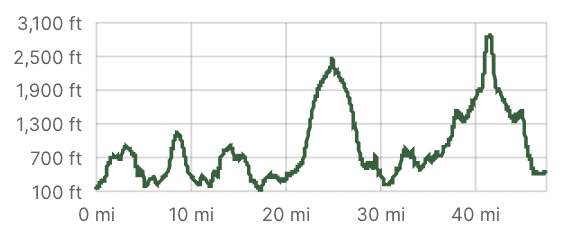
The W Trek comes in just around 47.5 miles / 76.4 km in total length over the course of 5 days. That means on average you should be comfortable with hiking 9.5 miles / 15.3 km per day.
Based on the west to east itinerary mentioned above, here is a breakdown of the mileage to expect on a daily basis:
- Day 1: Paine Grande to Grey: 6.6 miles / 10.6 km
- Day 2: Grey to Grey Suspension Bridge to Paine Grande: 10.6 miles / 17.1 km
- Day 3: Paine Grande to Frances via Valle del Frances: 12.0 miles / 19.3 km
- Day 4: Frances to Chileno: 9.6 miles / 15.4 km
- Day 5: Chileno to Mirador Base La Torres to Welcome Center: 8.6 miles / 13.8 km

5) Is the Trek Difficult
While the W Trek comes in at 5 days, 48 miles, and over 12,000 feet of elevation gain (~3,700 meters), I would not consider this a difficult hike from a technical standpoint.
The trail is easy to navigate, without many technical aspects to it (although you will find some hiking up the Valle del Frances and to Mirador Las Torres). With that said though, there are certainly some longer days out on the trail.
One of the most important questions to ask yourself when deciding about the W Trek, is whether or not you are in the physical state to be on your feet hiking for 5 days straight (some of which may be in less than ideal weather conditions with less than ideal sleeping situations).
You will also need to think about how you will take part of the trek in general. If you are carrying all your own gear and food, it will be much more difficult than if you are staying in refugios and have all meals taken care of for you.
In my opinion, if you are comfortable with being on your feet for five days and hiking around 10 miles per day, then you will find the W Trek to be quite rewarding. While there are some tougher days spread throughout, I did find the W Trek to be just a moderate trekking experience altogether.
6) Refugios & Campsites
Now that you have a better idea of what the itinerary for the W Trek will look like, let’s talk a bit more about the Torres del Paine refugios and campsites that you will find out on the trail.
While all of these refugios and campsites are located within Torres del Paine National Park, they are not all operated by the same company. Instead you will find 3 different companies operating within the National Park. These include Vertice, Las Torres (formerly Fantastico Sur), and CONAF.
Note that the nights refer to the itinerary if going west to east.
Vertice
Vertice runs 2 of the campsites on the W Circuit – Paine Grande & Grey. They also run two additional campsites on the O Circuit (Dickson and Los Perros), but you will not need to worry about those.
- Grey (night 1) -> campsites & refugio
- Paine Grande (night 2) -> campsites & refugio
Las Torres (formerly Fantastico Sur)
Las Torres runs the other 5 campsites in Torres Del Paine. For the W Trek, you will utilize them on nights 3 & 4 (choosing between a couple options for each). They also run the Seron campsite that is located on the O.
- Frances (night 3) -> campsites & refugio
- Cuernos (night 3 alternative) -> campsites, refugio, & mountain cabin
- Chileno (night 4) -> campsites & refugio
- Central (night 4 alternative) -> campsites & refugio
CONAF
CONAF runs two free campsites in TDP National Park, however these are closed for the time being and booking them has always been a bit of an issue.
While the Paso camp is not used on the W, the Italiano camp can be used on night 3. For the purpose of this guide I will not be really mentioning these as options.
- Paso (not needed for W) -> campsites only
- Italiano (night 3 alternative) -> campsites only
With all that said, you are most likely looking at booking 2 nights with Vertice (1 & 2) and 2 nights with Las Torres (3 & 4), when taking part of the W Trek.

7) Campsite & Refugio Pricing
Each one of the sectors offers various options for visitors, with some offering more or less than others. Below you can find accommodation & food options along with the relevant prices.
As you go through some of the options and prices below, do note a few important details:
Options: For those that opt for the campsites, you will essentially have two main options to consider:
- If hiking with all the appropriate gear (tent, sleeping bags, etc), you will just need to pay an individual camping site fee.
- However, if you are coming without any gear, then you will need to pay the camping site fee + the rental fee for the tent, mat and sleeping bag. Note, that you can rent these items individually if you happen to bring along one or more of them already.
Sheet Discount: Some refugios offer discounts if you don’t want sheets. Rather you would be bringing your own sleeping bag. This option may be best for those who may be camping on their own but want a night in a refugio here or there.
Booking Meals: If you want to eat at the refugios, I would recommend buying meals when you are booking. With that said, at some refugios (such as Grey), you will have the chance to buy meals a la carte. Snacks are also available at some campsites/refugios.
Meal Hours: Meals are only served during certain hours of the day. For example, don’t expect to show up at 4PM for lunch or 10PM or dinner. Each sector has their specific hours, which match up with standard hiking times.
Note that these prices are for the 2023/2024 season in USD. I will be updating this yearly to reflect the latest.
Vertice Pricing
Below are the accommodation and food options for Vertice (Grey & Paine Grande)
Accommodation
- Individual Camping Fee per Person: $11 ($13 at Paine Grande)
- Campsite Equipment Rental: Tent $40, Sleeping Bag $25, Mat $12
- Simple Bunk Bed in Shared Room: $100 (with bedding kit) | $43 without bedding ($65 at Paine Grande)
Food
- Full Board: $80
- Breakfast: $25
- Lunch / Box Lunch: $25
- Dinner: $40
Las Torres Pricing
Below are the accommodation and food options for Las Torres (Frances, Cuernos, Chileno, Central)
Accommodation
- Campsite (single/double): $56 / $70
- Campsite Equipment Rental: Tent $46 / Sleeping Bag $30 / Mat $10
- Premium Campsite (single/double): $190 / $220
- Mountain Hostel Bed (refugio): $144
- Mountain Cabin (single/double): $430 / $460 (Cuernos Sector Only)
Food
- Full Board: $100
- Breakfast: $28
- Lunch / Box Lunch: $50 / $30
- Dinner: $50

8) How To Book the Trek
Now that you have a better idea about the overall route and the refugios, campsites, & meals, let’s talk through how to book the W Trek.
The overall booking process is pretty simple as Vertice and Las Torres have online booking systems to utilize. The tougher part is making sure there is availability between the two for the exact dates you are looking for.
I would not recommend making a booking for either until you have both websites open and have confirmed that the refugios/campsites are available for the appropriate nights.
However, there now seems to be a solution to that problem:
Booking Patagonia
Recently a new site called Booking Patagonia offers the opportunity to book both Vertice & Las Torres through a single site. Prices seem to be in line with the two companies, so that may be an easier option moving forward.
I gave it a try, and the site offers a very friendly interface, where you can build your route as you go. In addition to purchasing the food and accommodation, you can also purchase bus tickets and entrance tickets to the park (more on both of those soon).
So, instead of booking through 4 separate website (Vertice, Las Torres, bus tickets, entrance tickets), you can do it all through a single site. They also have a live customer support in case you have questions or changes to your booking.


If you do want to still book directly with the providers, below is how you would go about it.
Vertice Booking
Below are the steps to go about booking with Vertice on nights 2, 3, 4, & 5.
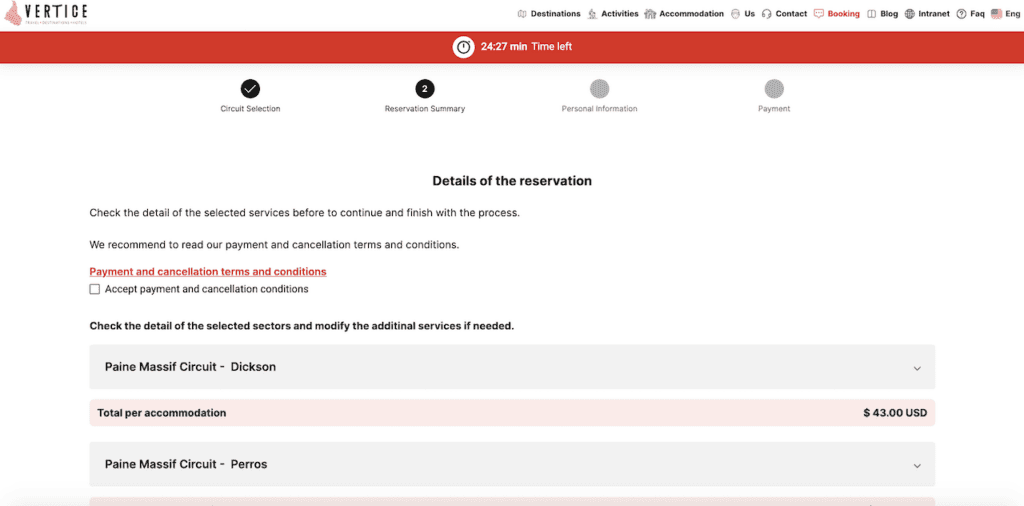
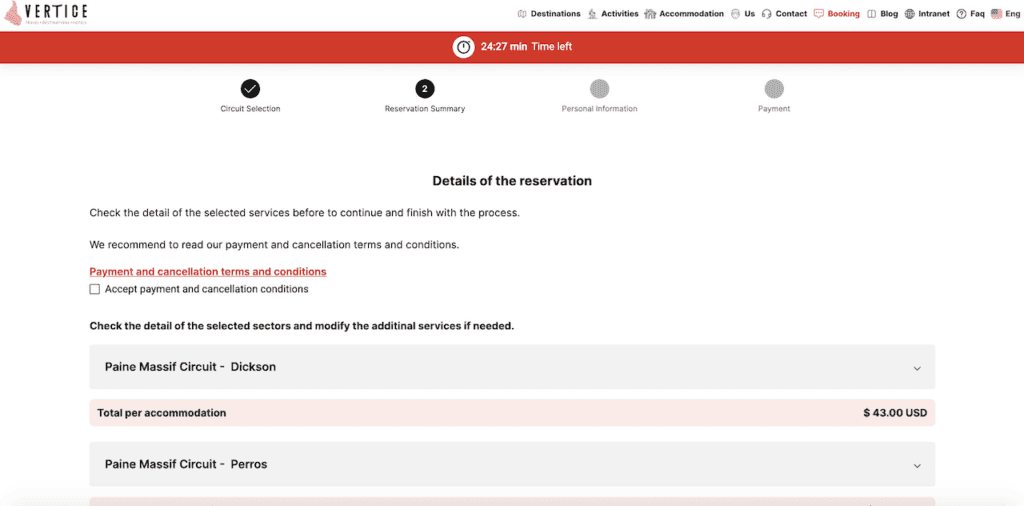
- Step 1: Go to the Vertice website
- Step 2: Choose the number of people, your nationality, & currency
- Step 3: Choose the W or O Circuit (Paine Massif)
- Step 4: Choose your starting point (Dickson or Los Perros)
- Step 5: Continue choosing your next nights
- Step 6: Once complete, click the red button “Yes, I want to choose my date”
- Step 7: Choose your starting date (the rest will fill out automatically)
- Step 8: Once you choose your accommodation and additional services (food, rental gear) for each night, click Continue. From there you will be shown your booking summary and you will have 25 minutes to then put in your personal details and pay for the reservation.
Las Torres Booking
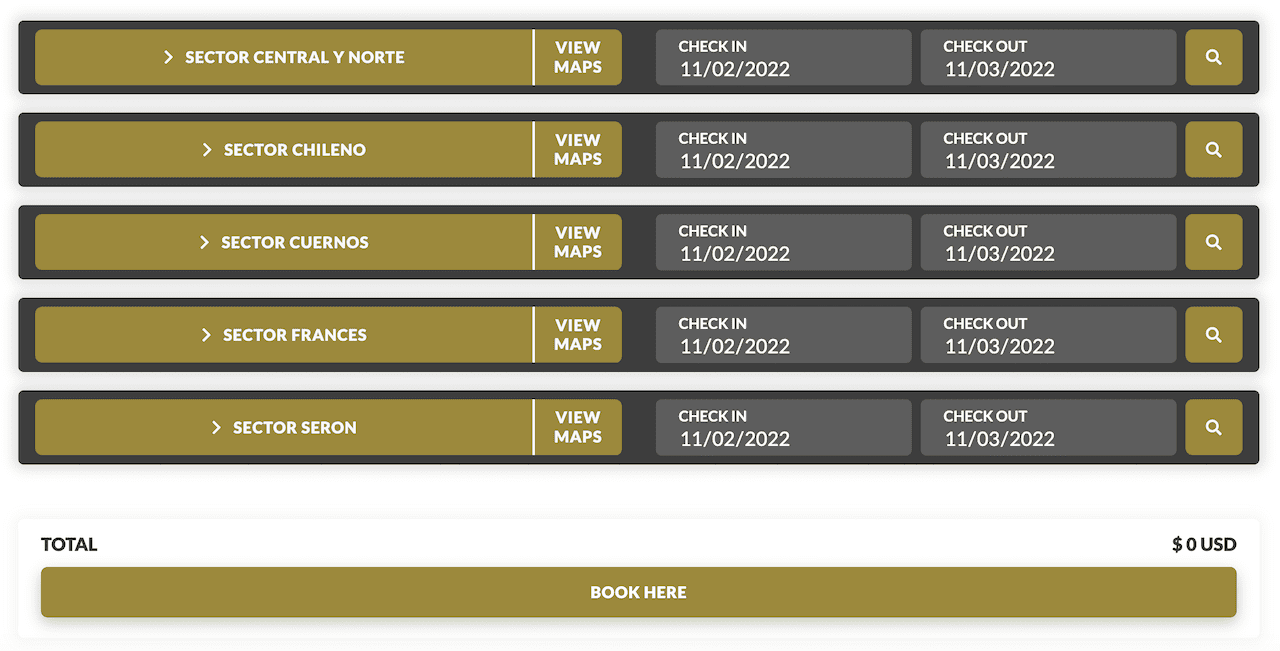
Below are the steps to go about booking with Las Torres on nights 3 & 4 (west to east).
- Step 1: Go to the Las Torres website
- Step 2: You will be taken directly to the booking page where you will find the five campsites/refugios to choose from with check in / check out dates (change these initially before continuing to the next step).
- Step 3: By clicking the magnifying glass icon on the right hand side of each sector, you will be shown booking options for that sector.
- Step 4: Choose your accommodation and food options for each of the two nights needed
- Step 5: Click the “Book Here” button, and follow the instructions to fill in your personal details & pay for the reservation.

Additional Booking Notes
All Inclusive: On the Vertice & Las Torres sites, you can also choose “W Trek”, which puts together a total package for you. This seems to be an all inclusive type of deal, where you can’t pick and choose what you want each night. Because of this, the price will be on the higher end.
Third Party Websites: You may also come across third party websites that offer W Trek packages. This companies usually buy allotments of spots at campsites/refugios and then upsell them as packages. I would say the main reason to book through a third party is if your dates are sold out through Vertice/Las Torres, but the third party company happens to have openings.
Last Minute Openings: Going off of that last note – don’t be surprised if you see any last minute openings for Torres del Paine. These third parties seem to give back any unused nights a couple weeks prior. I met several people, who were able to make reservations just days in advance due to these cancellations.
Torres Del Paine Entrance Fee
While you will need to pay for your accommodation, food, and transport to Torres Del Paine, you will also need to pay for entrance tickets.
I would recommend simply purchasing your tickets online through the official website. Scroll down to Torres Del Paine and complete the forms on the following pages to make your purchase.
Since you will be taking part of the W Trek, you will want to purchase the 3+ Day ticket at $49. Once you stay over three days, there is no additional cost per day.
9) How to Get to Torres del Paine
Getting to Torres del Paine National Park will be the next set of logistics to figure out when taking part of the W Trek. Busses, catamarans, & shuttles will all come into play when getting yourself back and forth to TDP.
Before getting to Torres del Paine itself, you first must make your way to Puerto Natales – the closest major town to the National Park. While you can make your way from other places, Puerto Natales will be the most convenient of options.
Getting to Puerto Natales
I would recommend spending one night there prior to the trek, and then one night after finishing up with the trek (depending on your overall itinerary).
Puerto Natales has its own airport (PNT), located just 10 minutes outside of the city center. Currently, the only direct flights to Puerto Natales are through Santiago and Puerto Montt.
While flying in and out of Puerto Natales is one option, you can also take a bus there from other places in Patagonia. The main two closest hub cities would be El Calafate, Argentina (3.5 hours) and Punta Arenas, Chile (3 hours).
If visiting El Calafate be sure to check out the Perito Moreno Glacier, Cerro Frias, and a Todo Glaciares Boat Tour
Once in Puerto Natales, it is time to then make the journey to the Torres del Paine National Park.
If you are looking for hotels in Puerto Natales, check out Hotel Vendaval and Vinnhaus – two highly rated & recommended hotels downtown.
On the other hand, you can also decide to stay at one of the top Torres del Paine hotels!

W Trek Starting & Ending Point
Since this is a one way hike, the starting & ending point of the W Trek will be at two different locations. This will also depend on which way you go about the circuit in general:
West to East
Starting Point: Paine Grande
Ending Point: Torres del Paine Welcome Center
East to West
Starting Point: Torres del Paine Welcome Center
Ending Point: Paine Grande
W Trek – West to East Logistics
If taking part of the W from west to east, you will be starting your hike at Paine Grande and ending your hike at the Torres del Paine Welcome Center.
Start: Puerto Natales To Paine Grande
Getting yourself from Puerto Natales to Paine Grande will involve a bus ride to Pudeto, followed by a catamaran to Paine Grande.
Step 1: Puerto Natales to Pudeto Bus
The first part of the day will entail taking an early bus ride from Puerto Natales to the Pudeto entrance of the National Park. Bus Sur runs busses throughout the season from Puerto Natales, with the earliest one at 6:45AM (be sure to always check latest schedules and to book in advance).
The bus will first stop at the Amarga park entrance, before continuing onto Pudeto. The total length of the bus ride should be just around 3 hours (arriving closer to 10:00AM).
Step 2: Pudeto to Paine Grande Catamaran
Once you arrive in Pudeto, you can then take a ~30 minute catamaran across Lake Pehoe that will drop you off right at the starting point of Paine Grande.
The first catamaran leaves at 9:00AM (not possible to make it with the bus) and the second at 10:30AM (times up perfectly with the bus). The cost is $30 USD one way and can be paid on arrival.
Note that catamaran schedules change throughout the year. Please be sure to check out Hipsur and this Torres del Paine website for latest departure times for the catamarans.
Finish: Torres del Paine Welcome Center to Puerto Natales
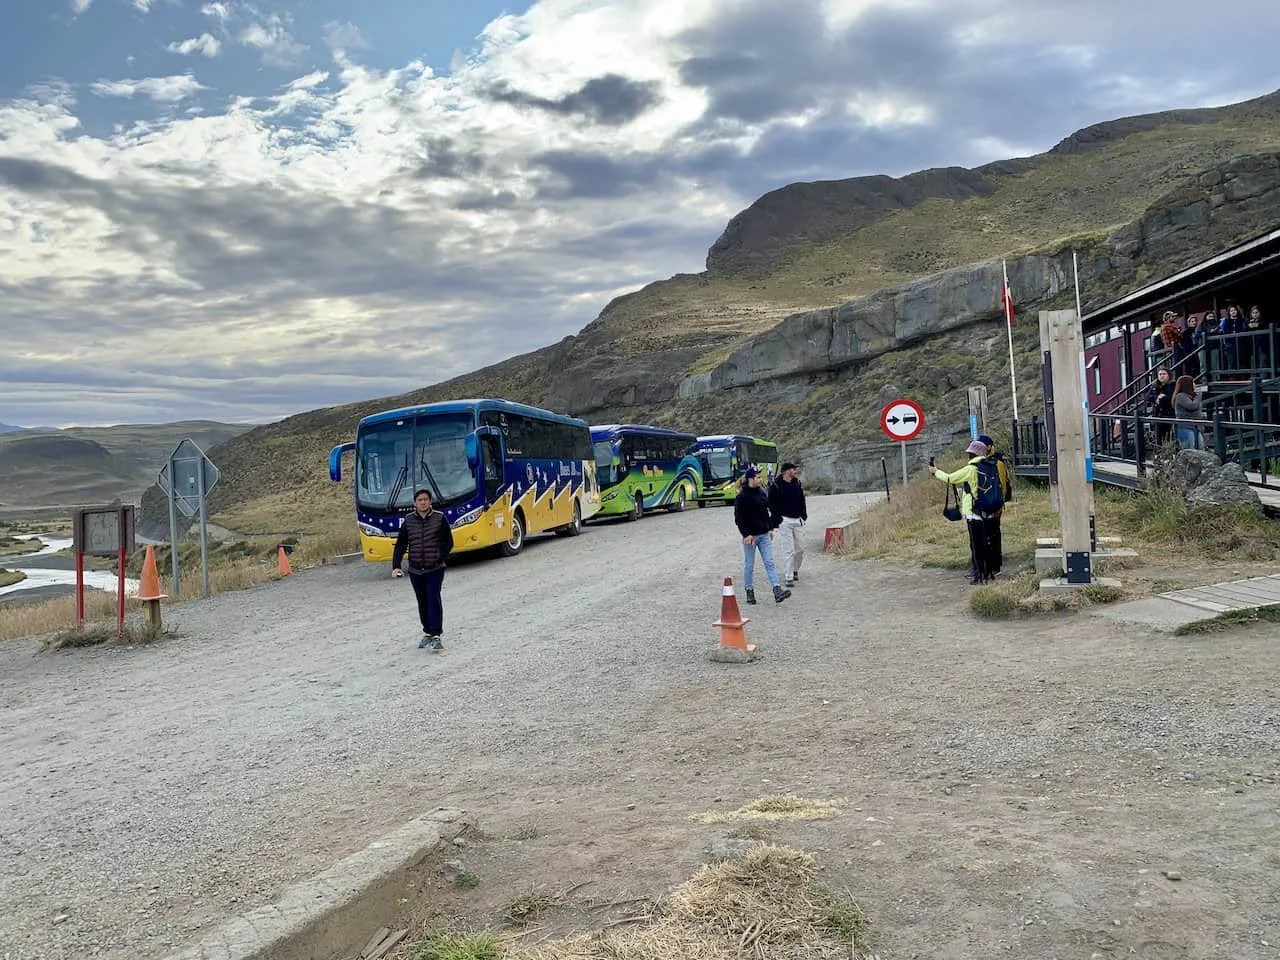
After completing the hike, you will end up at the Torres del Paine Welcome Center on the eastern side of the park. Getting back to Puerto Natales will involve a quick shuttle & then a bus ride.
Step 1: Torres del Paine Welcome Center to Amarga Shuttle
Since the busses do not pick up/drop off directly at the welcome center, you will just need to take a quick 10 minute shared van to the Amarga TDP entrance. Shuttles will be timed up with the bus schedule and cost around $5 USD.
Step 2: Amarga to Puerto Natales Bus
Just like you began the journey, you will end the journey with a bus ride back to Puerto Natales. This time though, you will be departing from Amarga. I would recommend booking a later afternoon bus (most likely 3:00PM – but be sure to check the latest schedules).
W Trek – East to West Logistics
If taking part of the W from east to west, you will be starting your hike at the Torres del Paine Welcome Center and ending your hike at Paine Grande. Logistics will be similar to above but just in the reverse direction.
Start: Puerto Natales To Torres del Paine Welcome Center
Step 1: Puerto Natales to Amarga Bus
The first part of the day will be taking an early bus ride from Puerto Natales to the Amarga entrance of the National Park (the same bus that then heads to Pudeto).
Bus Sur runs busses throughout the season from Puerto Natales, with the earliest one at 6:45AM (be sure to always check latest schedules and book in advance).
Step 2: Amarga to Torres del Paine Welcome Center Shuttle
Since the busses do not pick up/drop off directly at the welcome center, you will just need to take a quick 10 minute shared van to the TDP Welcome Center from Amarga. Shuttles will be timed up with the bus schedule and cost around $5 USD.
Finish: From Paine Grande to Puerto Natales
Step 1: Paine Grande to Pudeto Catamaran
Once you finish up your final hike on day 5, you will then make your way back to Paine Grande, and catch the catamaran to Pudeto. Catamaran schedules change throughout the year (be sure to check out schedules linked above for the latest).
However, during peak season (December to February), there are boats to Pudeto at 9:35AM, 11:05AM, 5:00PM and 6:35PM
Step 2: Pudeto to Puerto Natales Bus
The final part of your day will be taking a bus back from Pudeto to Puerto Natales. Again, please check the Bus Sur website for the latest schedules. Currently the last busses leave Pudeto between 7:00PM – 8:00PM.

10) Best Time to Hike
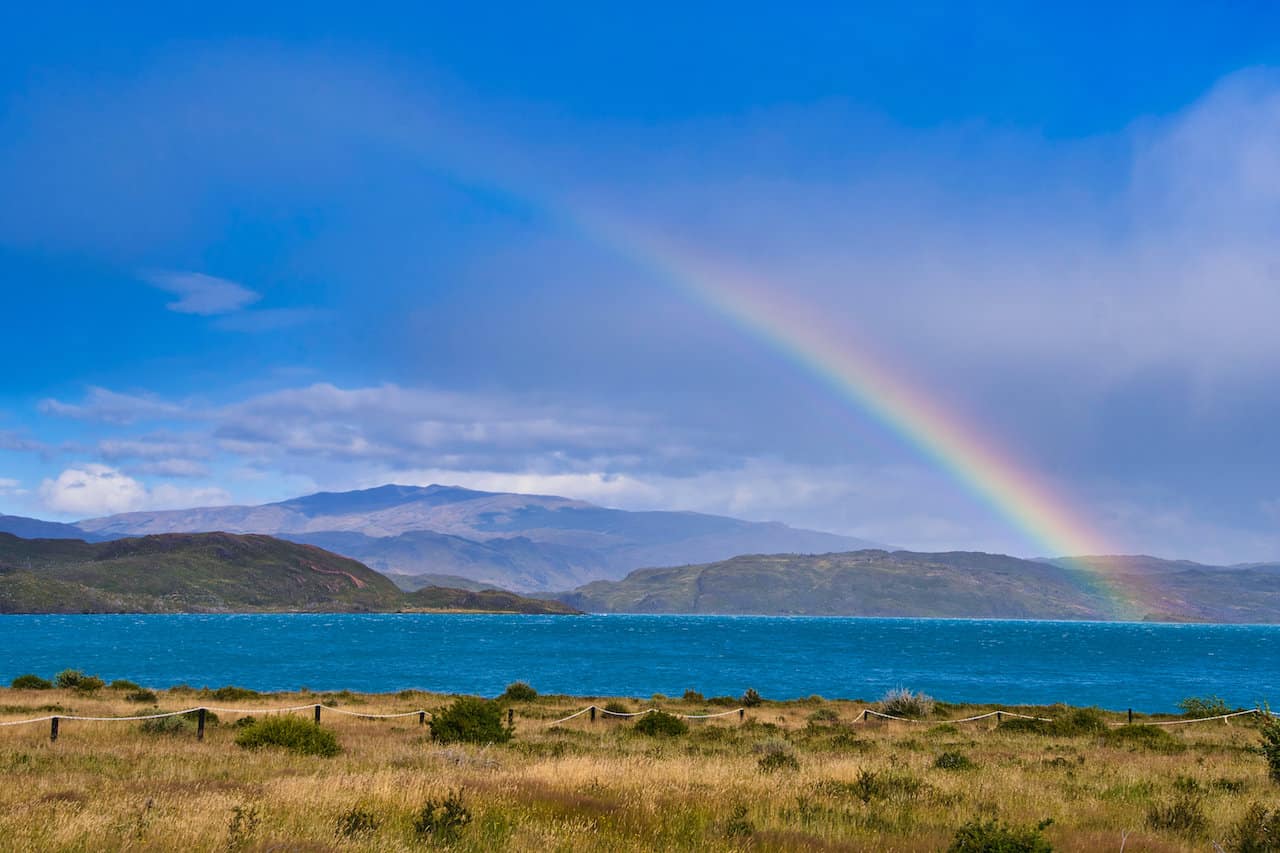
While the W Trek certainly offers some of the world’s best landscapes, it also offers some of the world’s most unpredictable weather. Hiking for 5 days in Patagonia can offer a little bit of everything from a weather standpoint – both on a day to day basis and on an hourly basis.
It is a popular saying that you will experience 4 seasons of weather in a single day. Sun, rain, wind, clouds, snow, and more will be coming and going throughout your time on the trail.
With that said though, the best time to hike the W Circuit in general will be during the summer months of the region between December and February. During this time, you have the best chance for the most stable of weather with less rain and overcast skies.
A trip during the shoulder months of November and March are also potential options for you. During this time you will have a quieter park altogether, and may be just as lucky with the weather.
This also holds true if you are visiting places like Ushuaia, home to Tierra del Fuego National Park, which has plenty of top Ushuaia hikes to choose from, and the chance to walk with penguins.
Opening Times
When it comes to the W Trek, you will only be able to complete it during the times that the refugios and campsites are open.
To simplify things, that means the W Trek is only possible between September 1 2023 and April 2024.
Below you can find the latest (I will update this each year):
- Central Sector: September 1 – April 30
- Chileno Sector: September 15 – April 30
- Frances Sector: September 1 – April 30
- Grey Sector: September 1 – April 30
- Paine Grande Sector: September 1 – April 30
- Cuernos Sector: November 1 – March 30
11) Packing List
Perhaps the most important aspect of the W Trek will be the gear that you bring along with you. Since this is 5 days out in Patagonia, you simply will need to be prepared for it all.
If you would like more detail, check out the Torres del Paine packing list I put together that deep dives into all of the below.
Below is my recommended packing list for all hikers that you can put into your hiking backpack (Hyperlite Southwest recommended)
Clothing
From a clothing perspective, you will want to bring along what is needed for five days on the trail. I am usually a bit more lightweight here as I use the same layers on a day to day basis.
Note that the weather can change quickly, so you will want to be prepared with the appropriate layers (all outlined below). Also, be sure to have moisture wicking materials for your clothing items.
- Hiking Boxers (2-3)
- Hiking Socks (2-3)
- Hiking Pants (1)
- Hiking Shorts (1)
- Long Sleeve Sun Hoodie (1)
- Short Sleeve Hiking Shirt (2)
- Puff Jacket (1)
- Hard Shell Jacket (1)
- Sleepwear
- Sunglasses
- Baseball Hat
- Quick Dry Towel
- Packing Cubes & Laundry Bag
Hiking Shoes
A hike like the W Circuit must be done with the appropriate footwear. Be sure to invest in quality hiking shoes for your time on the trail. Some of my recommended shoes include:
Electronics
Most of my electronics were used for photography and navigation purposes, so each person may be a bit different here (note you can recharge your electronics at campsites).
- iPhone & USB Cable
- Headlamp | Petzl Actik Core
- Portable Charger | Anker Portable Charger 10,000 mAH
Action Camera
- GoPro
- GoPro Stick
- Extra GoPro Batteries
Mirrorless Camera
Satellite Communicator | Garmin inReach 2 Mini
While there are many people along the trails of the W Circuit, having a satellite device like the Garmin inReach is always going to be a good idea. This small device gives you the chance to communicate with family, track your route, and call for SOS in case of emergency.
Food & Drink
Remember, you will also need to bring all food for five days out on the trail if you do not want to purchase food along the way. There are also supermarkets in Puerto Natales where you can stock up on certain items. If you want to come prepared with food that you prefer, then check out my usual food purchases below (high calorie / low weight).
Breakfast
Lunch/Snacks
- Variety of Bars including PROBAR Bars, Honey Stinger Bars, Clif Builder Protein Bars
- Fruit & Nut Mixes
Dinner
- Variety of dehydrated meals including Peak Refuel, Outdoor Herbivore, and GOOD TO-GO
Hydration
Note that you will easily be able to fill up your water bottle consistently throughout the trek. Along most of the hike you will find rivers and streams, where you can get some fresh Patagonian water.
During my time on the circuit, I just filled up directly from these without any filtration. However, if you do want to play it safe, you can get a filtered water bottle like the Katadyn BeFree water bottle. I also brought along some Liquid IV hydration packets to keep hydrated at the beginning of the day.
Cooking Gear
- Cooking Stove: Jetboil Micromo
- Spork: TiTo titanium spork
- Cooking Gas (purchase in Puerto Natales)
- Lighter
Toiletries
This last section of the packing list will be toiletries. Each person will also be different here, but below are the main items I brought along with me.
- Deodorizing Body Wipes | Alcala Bamboo Deodorizing Body Wipes
- Body Deodorant
- Toothbrush / Toothpaste
- Contact Lenses / Solution
- Travel Shampoo & Soap
- Moisturizer
- Personal Creams & Medications
- Sunscreen
- Lip Balm
- Purell
- Neosporin
- Bandaids
- Nail Clipper
- Small Mirror
- Toilet Paper
Camping Gear
Now if you plan to bring your own sleeping gear on the trek, you will need to account for those items as well. Below is a list of the hiking & camping gear essentials for your time on the trail. Note that much of these can be rented or bought in Puerto Natales if you do not have everything already.
- 3-Season Tent | Big Agnes Copper Spur HV UL
- Sleeping Bag (20 F – 40 F) | Thermarest Questar 20 ; Thermarest Hyperion 32
- Sleeping Bag Liner | Sea to Summit Liner
- Sleeping Pad | Thermarest NeoAir Xlite
- Camping Pillow | Thermarest Camping Pillow
- Hiking Poles | Black Diamond Distance Carbon FLZ Trekking Poles
12) Patagonia Travel Insurance
Considering travel insurance for the W Circuit?
World Nomads offers coverage for more than 150 adventure activities as well as emergency medical, lost luggage, trip cancellation and more (making it an option for those taking on the W Trek in Torres del Paine).
For years, World Nomads has been protecting, connecting & inspiring independent travelers, offering travel insurance & safety advice to help you travel confidently. Their mission is to support and encourage travelers to explore their boundaries.
World Nomads has simple and flexible travel insurance that has been designed by travelers for travelers. Even if you leave home without travel insurance or your policy runs out, you can buy or extend out on the road.
Get a quote for a World Nomads travel insurance policy today!
13) Torres del Paine Tips & Things to Know
I did want to layout a few helpful tips and things to know as you go about your time in Torres del Paine.
WiFi: You will find WiFi throughout the trek at most sectors that you have to pay for on an hourly basis. If you just wanted to get a weather forecast, the folks checking you in will be able to give you some insight.
Closing Times: Be very aware of closing times around the National Park for certain trails. For example, during my time there, the Britanico Mirador closed at 1:00PM and the Mirador Base Torres closed at 4:30PM. These times seem to change, so be sure to keep an eye out at the campsites and ranger stations for the latest.
Bookings: Remember, there is no open camping or entering the park for overnights without accommodations reserved. Be sure to come prepared with your bookings prior to your arrival.
Cooking: For those cooking your own food, camping stoves are allowed in authorized areas at campsites. There are no open fires allowed whatsoever.
Forecasts: If checking weather prior to and along your hike (using the WiFi), I would recommend using Windguru or Meteoblue. This can give you a better idea if certain parts of the day may be better or worse than others (although you can never really trust the weather in Patagonia).
Showers: Hot showers can be found at all campsites on the W. As I mentioned in the packing list section, be sure to bring a small quick dry towel with you.
Food: If you are bringing your own food, you do have the option to purchase some in Puerto Natales. There are supermarkets there, so that should not cause too much trouble. You will also find gear shops if you need to rent or purchase any last minute essentials for the hike.
GPS: Lastly, I would highly recommend downloading the W Trek route onto you phone for navigation purposes. Apps like AllTrails or Maps.me would work here. While the route is easy to follow, the apps also give you a heads up when you are approaching viewpoints and other highlights.

14) Hiking Checklist
In the following section I will dive into the day by overview of the W Trek. However, before doing so I did want to put together a “W Trek Checklist”. I know we covered a lot already, so this is a good spot for a quick recap.
1) West to East or East to West
One of the first decisions you will need to make is whether to go about the circuit from west to east or east to west. This may come down to accommodation availabilities or just personal choice. Since I love the idea of ending with Mirador Las Torres, west to east is my overall preference.
2) Campsite vs Refugios
When going about booking your accommodation, you will need to decide between (1) bringing all of your own camping gear, (2) sleeping at ready made campsites, or (3) staying at the refugios. Note you can always mix and match as you see fit too!
3) Purchase Meals vs Cooking
Going hand in hand with booking accommodation will be meal choice as well. Do you want to bring your own meals and cook yourself? Or do you want to purchase breakfast, lunch and dinner from the refugios? This is another place where you can mix and match to your preferences.
4) Bus Tickets
Logistically, the only transport you will need to book in advance are round trip bus tickets to Torres del Paine (in addition to getting to Puerto Natales in the first place). The catamaran and shuttle bus don’t require reservations.
5) TDP Entrance Tickets
Don’t forget to purchase Torres del Paine entrance tickets prior to arriving. They offer the 3+ day option, which can be used for the full W Trek.
6) Packing List
A packing list may change based on whether or not you bring your own camping gear and food. However, the rest of the packing list holds true. Be sure to come prepared with all the essentials, so you are ready to hit the trail when you arrive.
7) Hotels in Puerto Natales
Lastly, booking hotels in Puerto Natales will be important for before and after your trek. You can book for a night on either end (or even extend your stay if you would like).

15) W Trek Torres del Paine Day by Day
For the purposes of this day by day breakdown, I will be going about the route from west to east (starting in Paine Grande and ending at the Welcome Center). This should still be plenty helpful if you decide to go about the route in the opposite direction.
Day 1 – Paine Grande to Grey
Starting Point: Sector Paine Grande
Ending Point: Sector Grey
Distance: 6.6 miles / 10.6 km
Elevation Gain: 1,430 feet / 435 meters
Duration: 3-4 hours
After leaving Puerto Natales by bus and arriving in Pudeto, you will take a pleasant catamaran ride across Lake Pehoe to Paine Grande.
At Paine Grande you will find a refugio and campsite (which you will be staying at the following night). Once all set it is time to begin the first day of hiking. Altogether this is going to be one of the easier days out on the trail, and a great way to ease into the hiking experience.
From the starting point, the trail will ascend for the first half of the hike. This is where most of the elevation gain for the day will come into play. As you continue up, you will have the massive Cerro Paine Grande hovering up above with other mountains filling out the landscape.
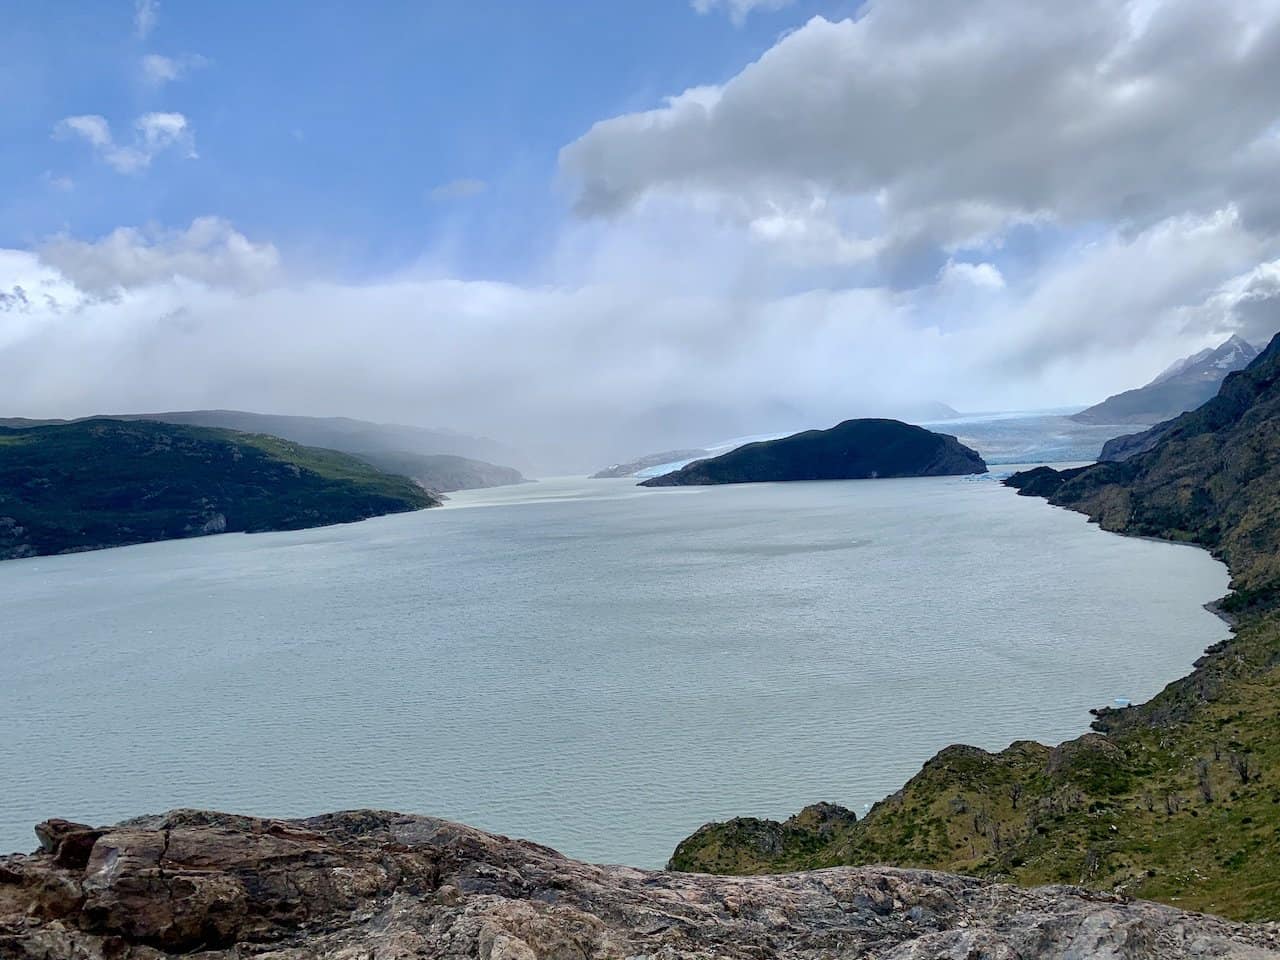
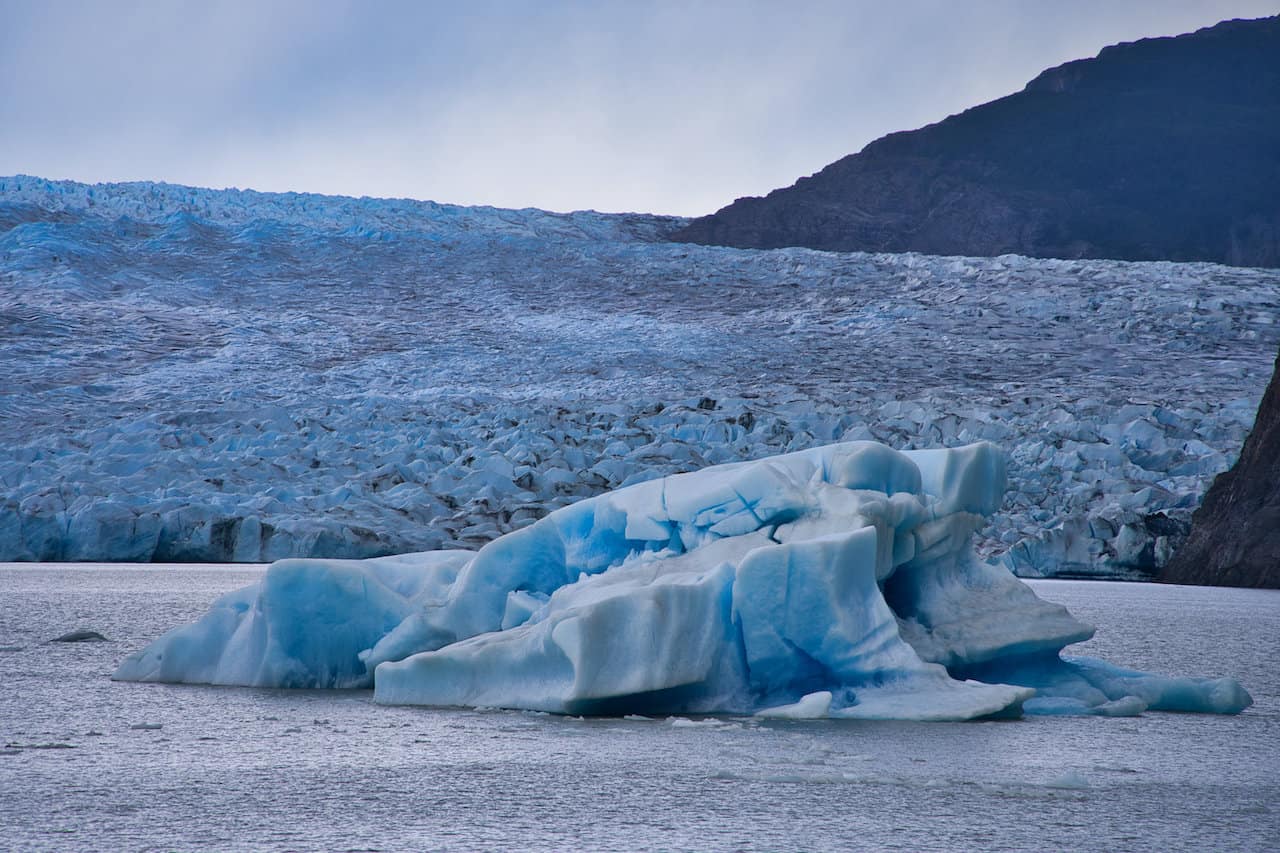
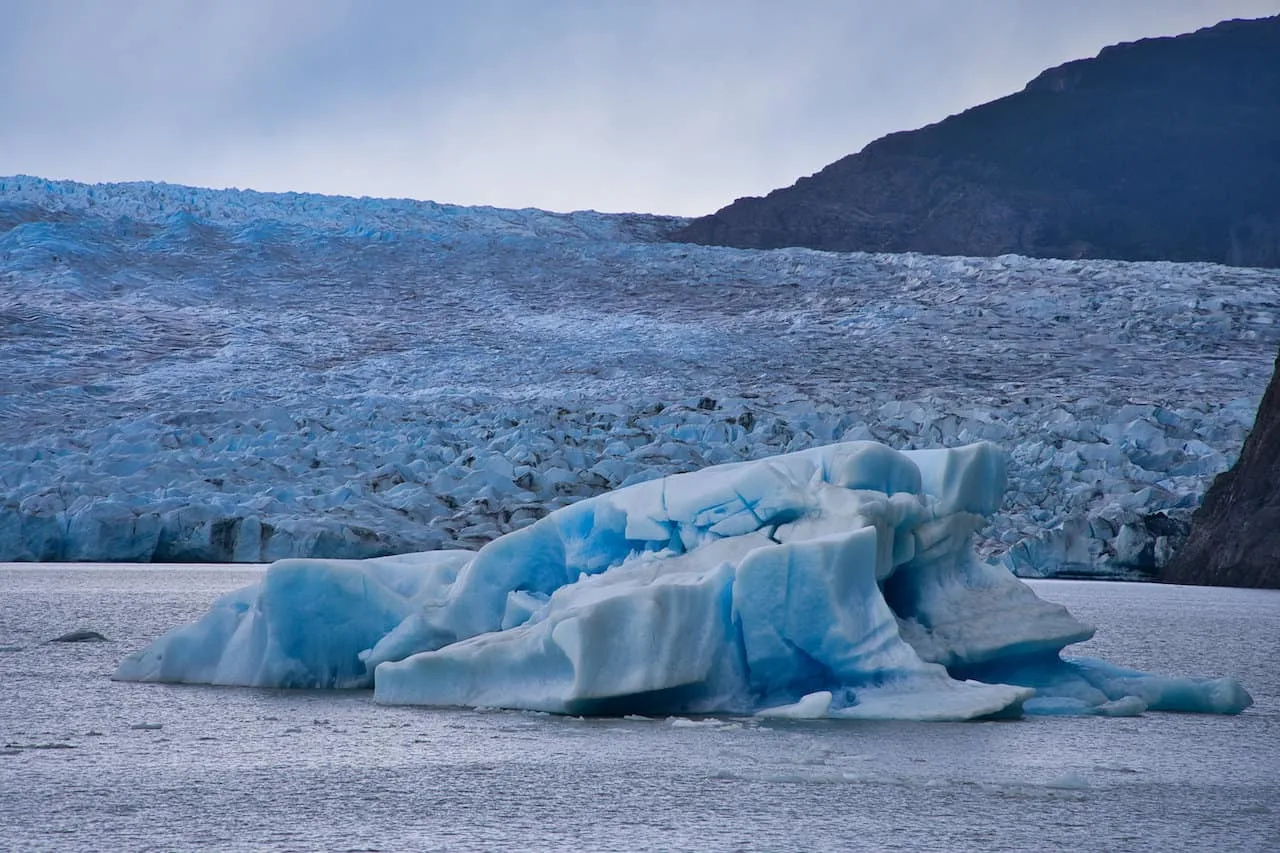
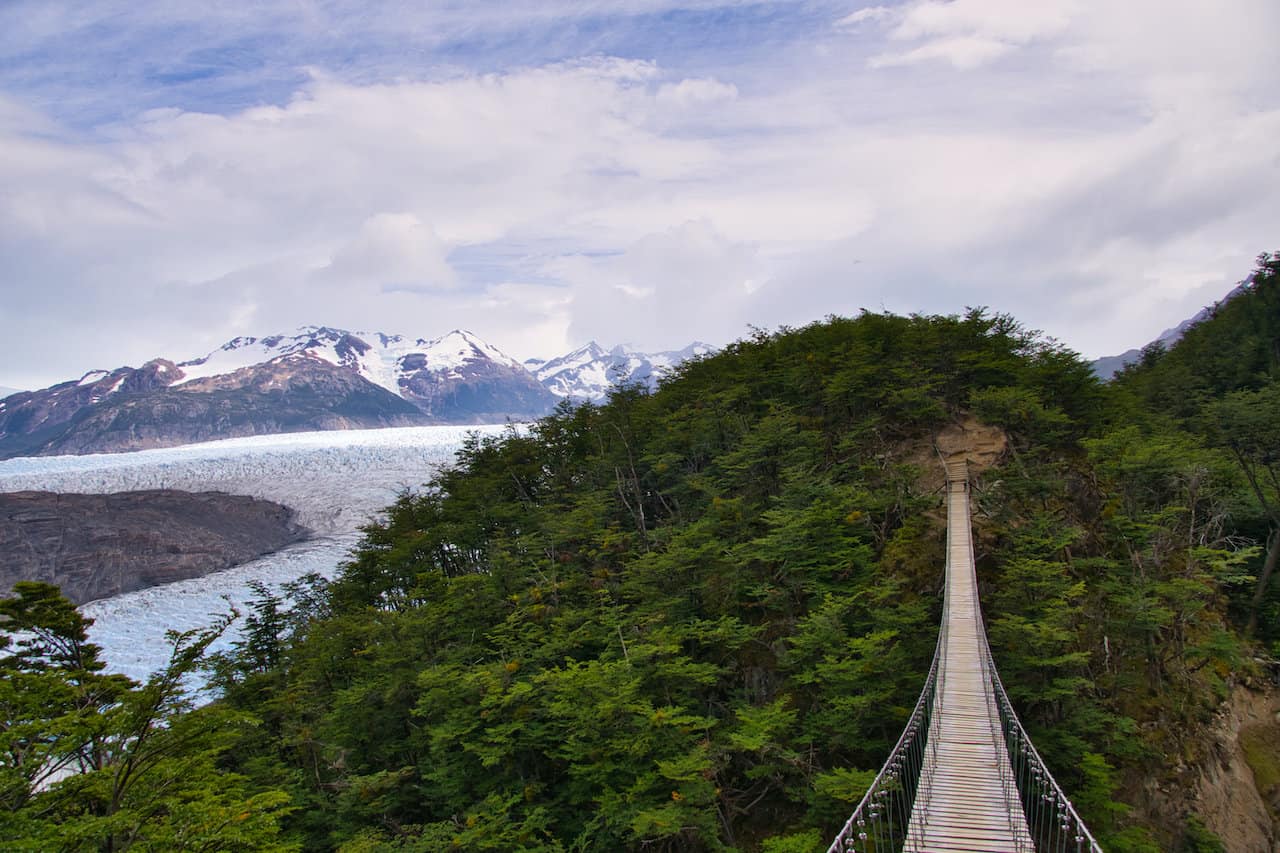
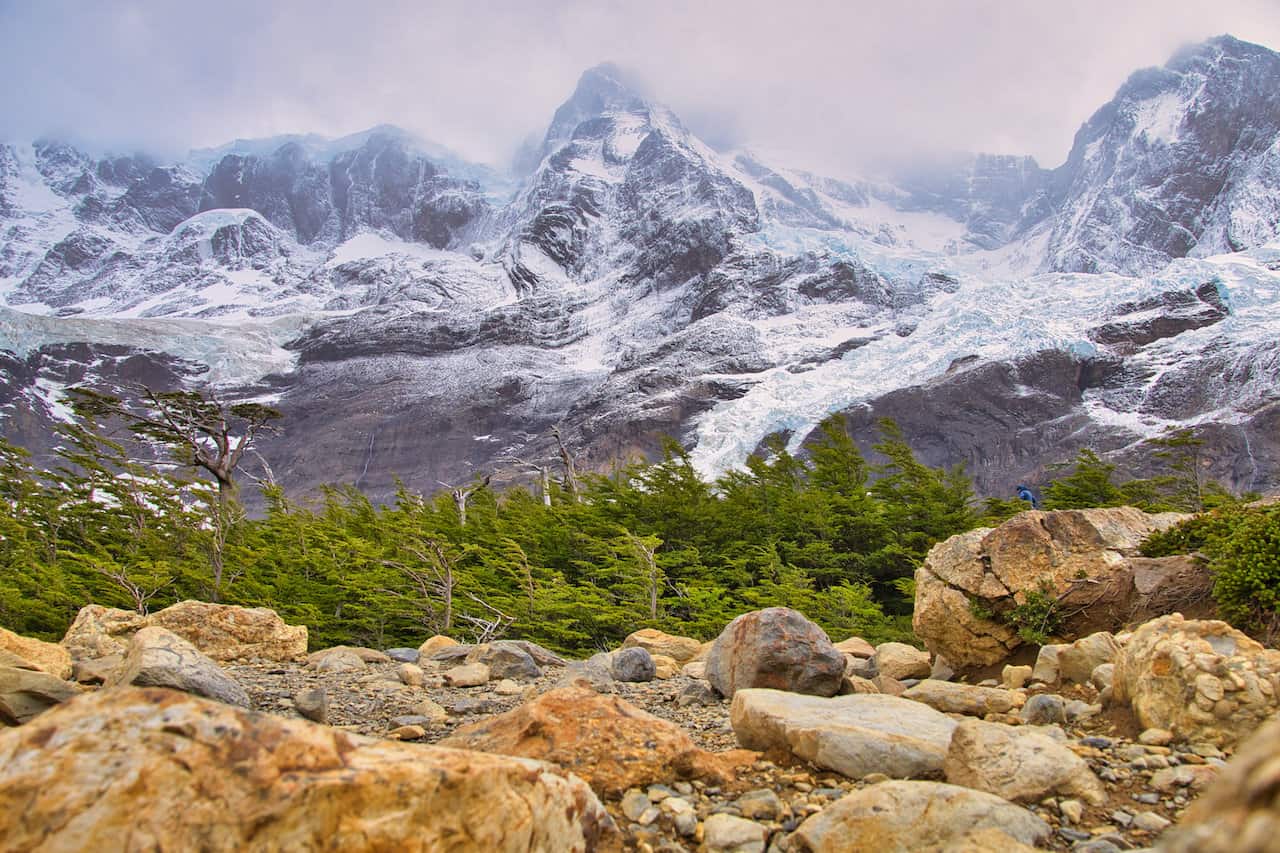
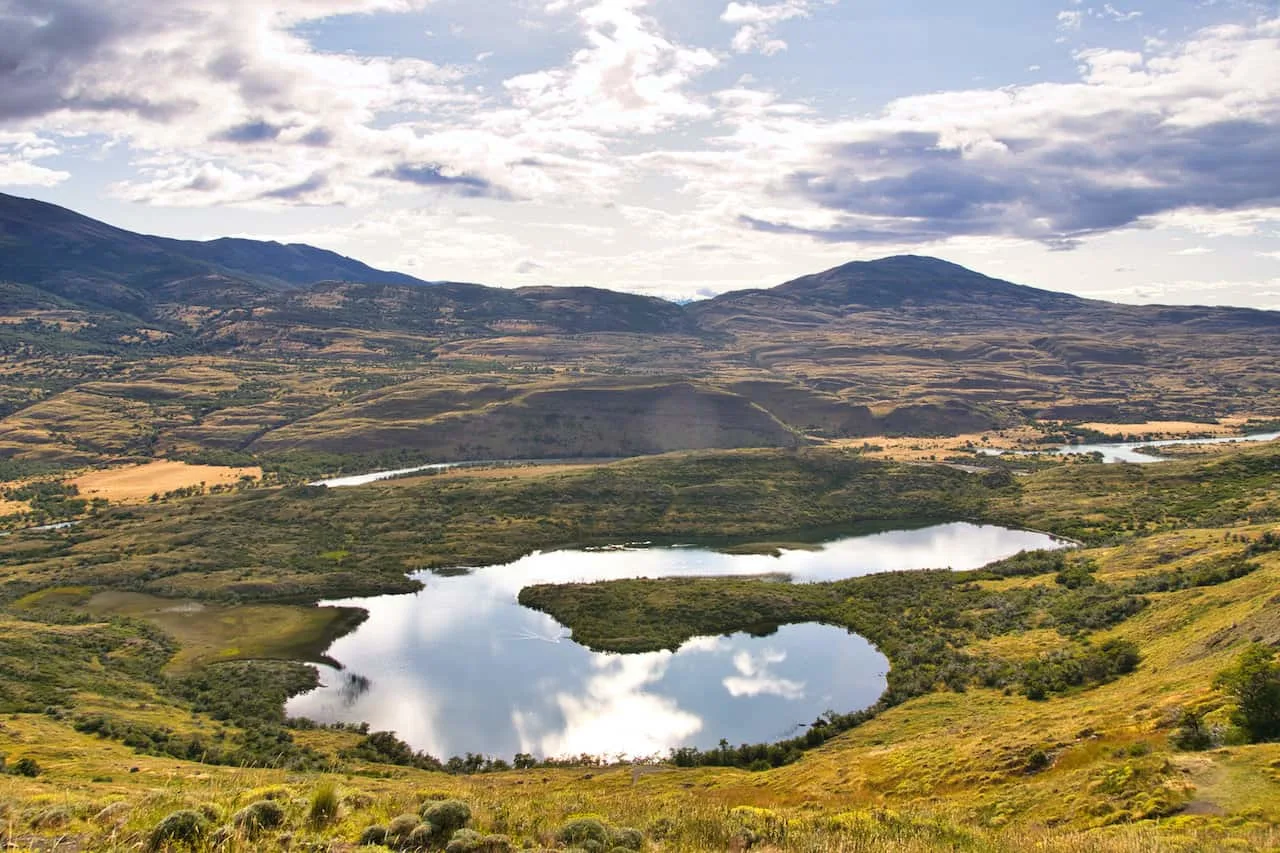
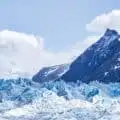
You will soon reach a small lake – Laguna Los Patos, before the views start to get better and better out in front of you. One of the highlights of the W Trek is the Grey Glacier, which feeds Lago Grey.
The glacier will start coming into views and throughout much of the hike, you will now be able to enjoy the views from a far. There will be an “official” lookout point as well, but overall you won’t be disappointed with what the first day entails.
Soon enough, you will reach the high point for the day and then descend further down towards the first campsite. Continue to enjoy those views before easing right into the Grey campsite and refugio.

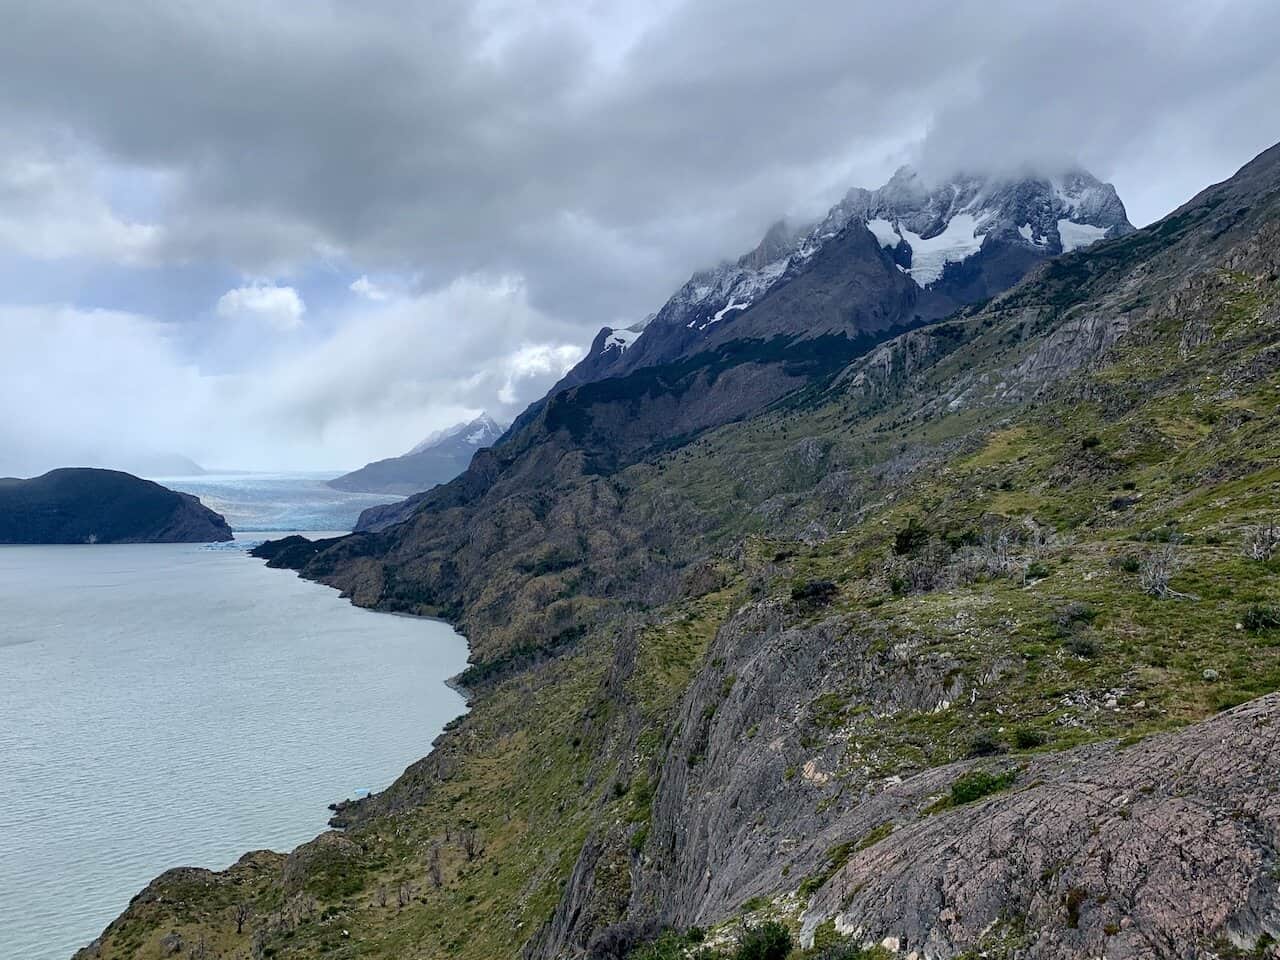


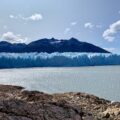
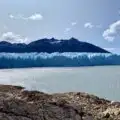
After checking in and getting all settled, I would recommend taking a late afternoon walk to the Mirador Grey.
This lookout point is located just nearby the campsite and gives you a great view of the glacier with large icebergs floating in the lake right besides you.
Once all done there, enjoy your first night on the W Trek, before getting ready for day 2.
Day 2 – Grey to Grey Glacier Suspension Bridges to Paine Grande
Starting Point: Sector Grey
Highlight: Grey Glacier Suspension Bridges & Lookouts
Ending Point: Sector Paine Grande
Distance: 10.6 miles / 17.1 km
Elevation Gain: 2,400 feet / 730 meters
Duration: 6-7 hours
On day two of the W Trek, you will get to head further along the Grey Glacier and take in some views, before turning back around to Paine Grande. You can really split this day into two main parts.
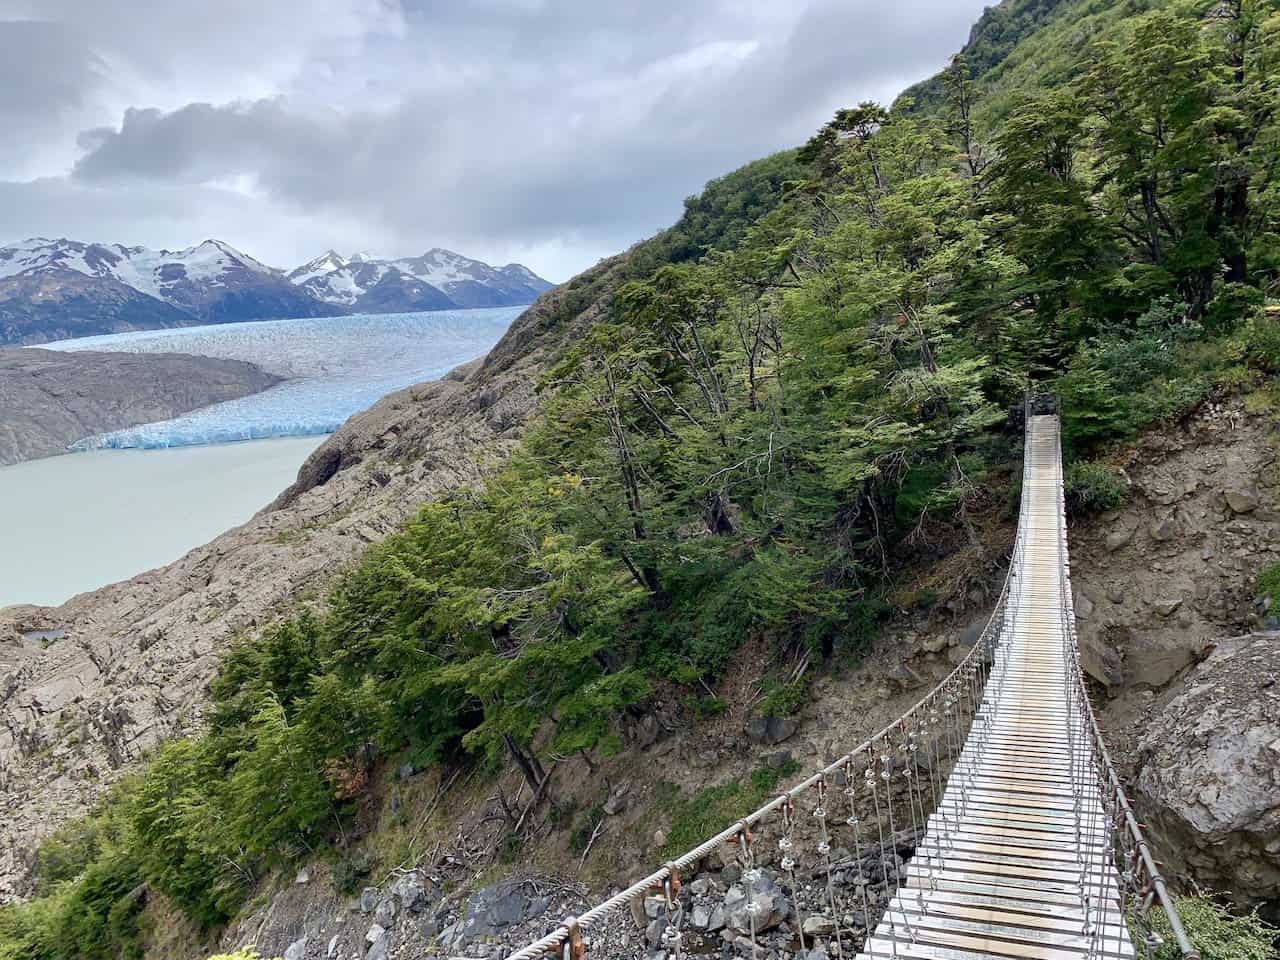
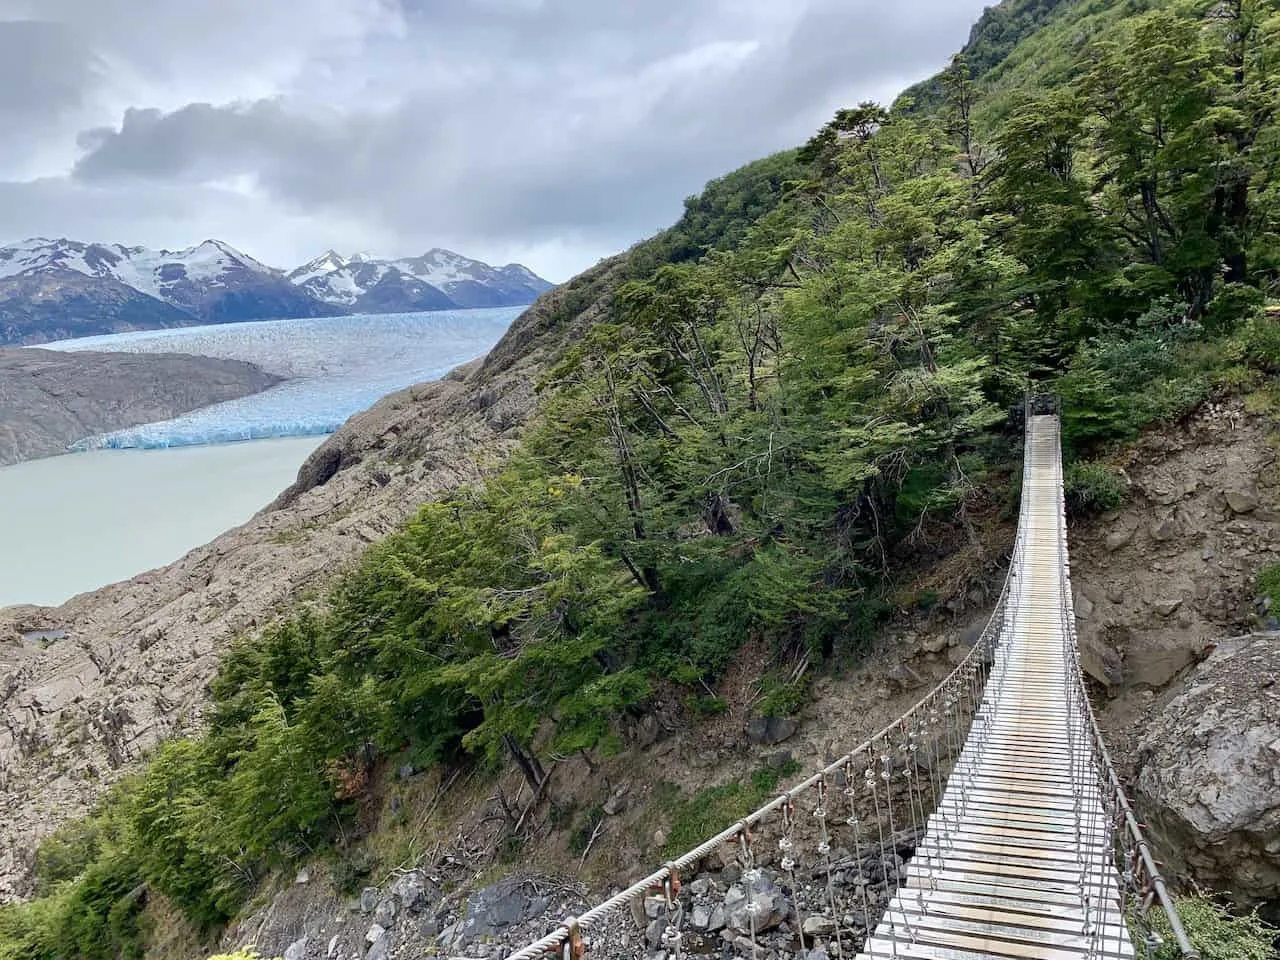
For the first portion of your day, you can leave you bags behind and just take a day pack. This hike will entail an out & back route heading to some more viewpoints and a couple famous suspension bridges overlooking the Grey Glacier.
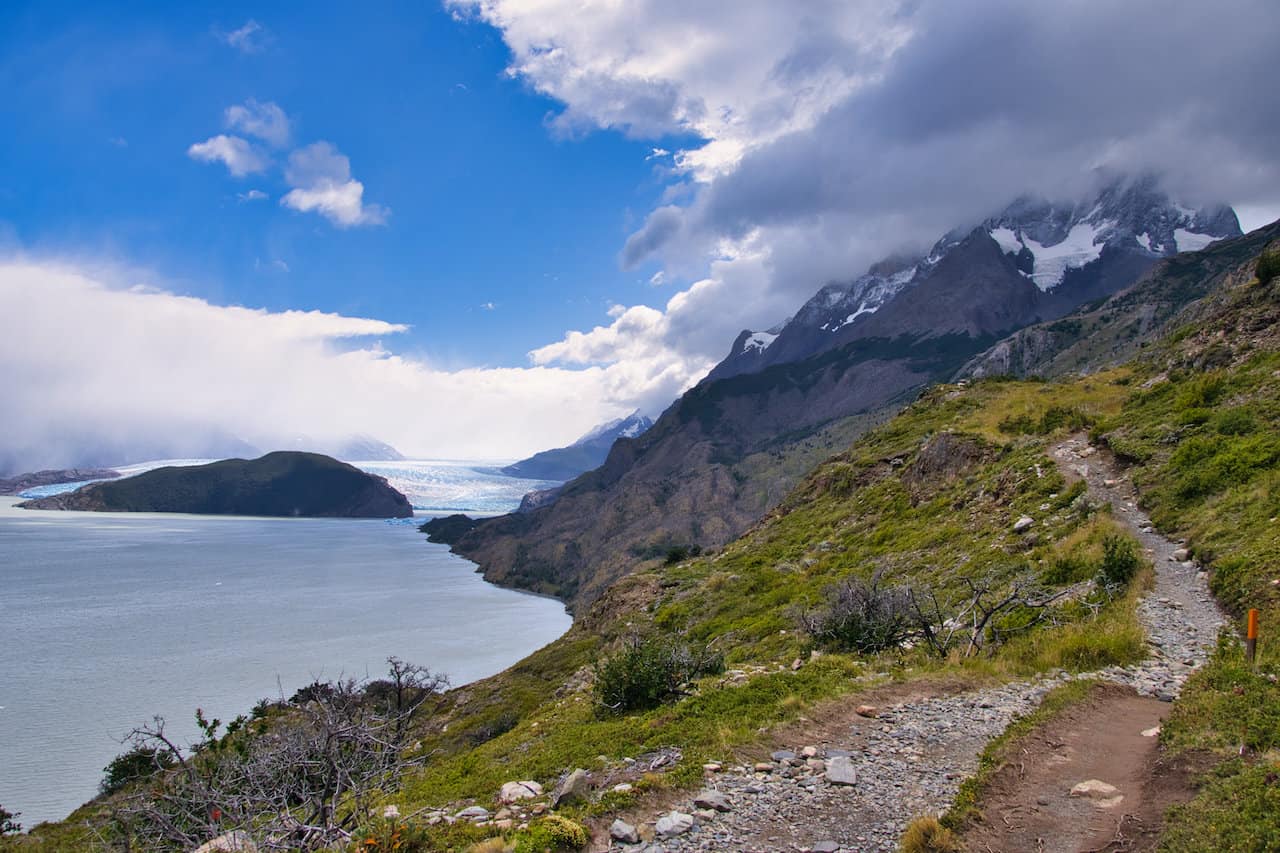
Most people opt to head to what is known as the second suspension bridge – a 2 mile (4 mile round trip) uphill hike from the Grey campsite. Throughout this out and back trail, you will get continuous beautiful views of the glacier out in front of you, and eventually right beside you.
While you can head even further up the trail past this second suspension bridge, remember that you will need to make it all the way back to Paine Grande at day’s end. Due to this, many just opt for this second suspension bridge lookout.
If you do have the energy and fitness to get it done, feel free to continue all the way up to the Paso campsite (4 mile one way / 8 mile round trip).

Once back at the Grey campsite, it is time for the second portion of the day. You can pack up your bags, and retrace the same route from the prior day to Paine Grande.
Similarly, you will leave the campsite, gain elevation and take in some views (with many views behind you now). After reaching the high point, you will descend down into Paine Grande after a successful day out on the trail.
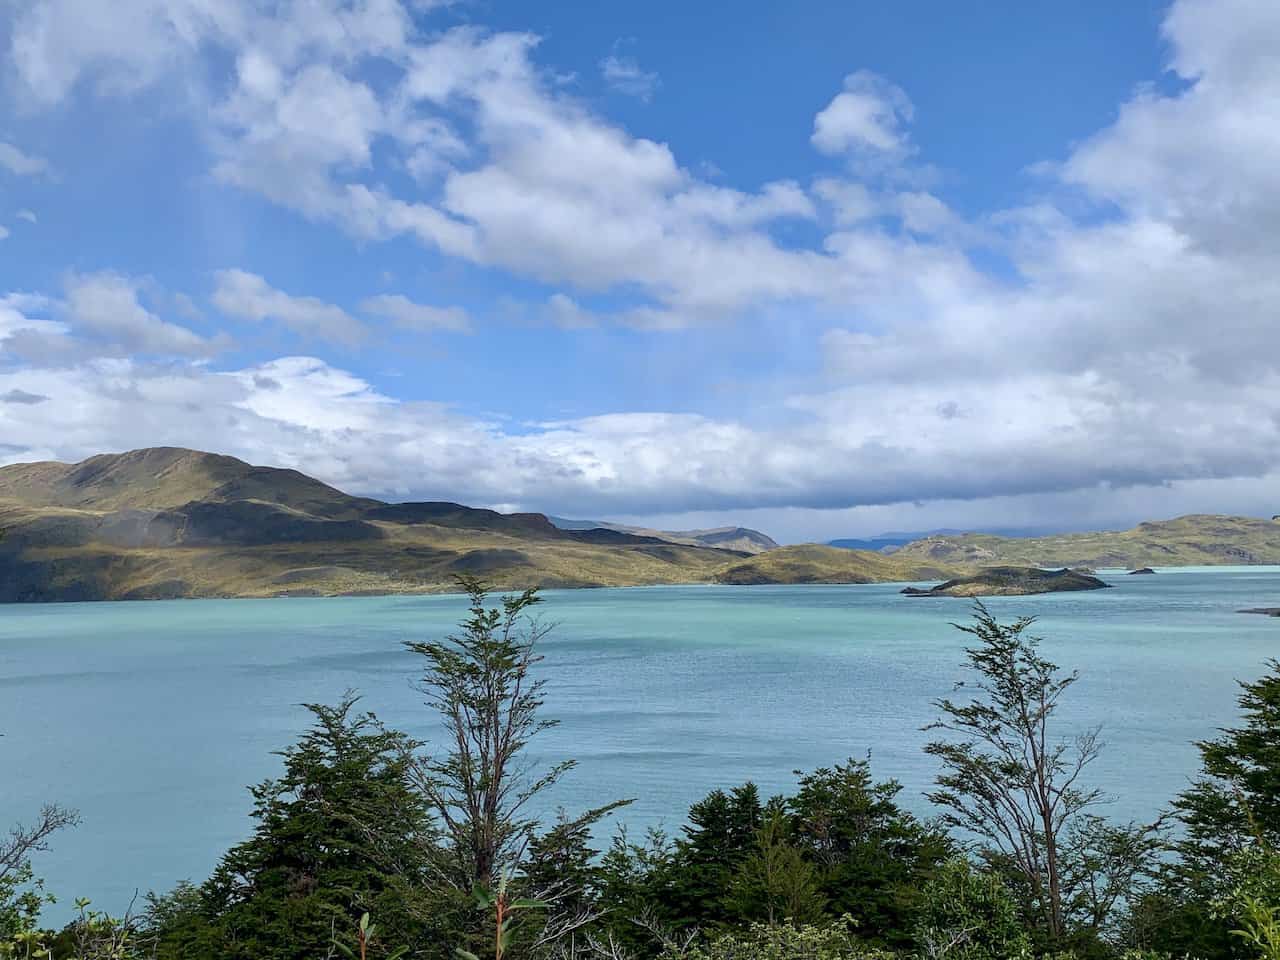
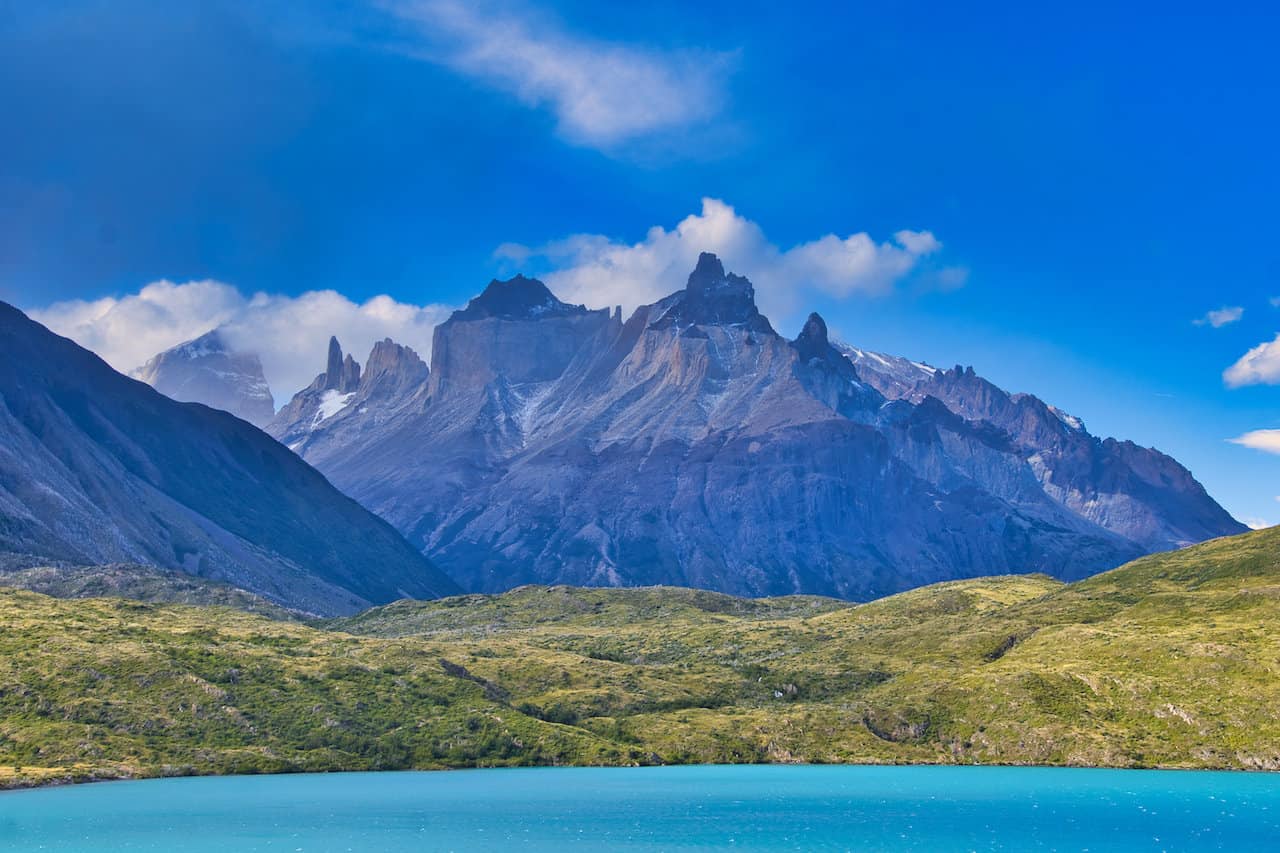
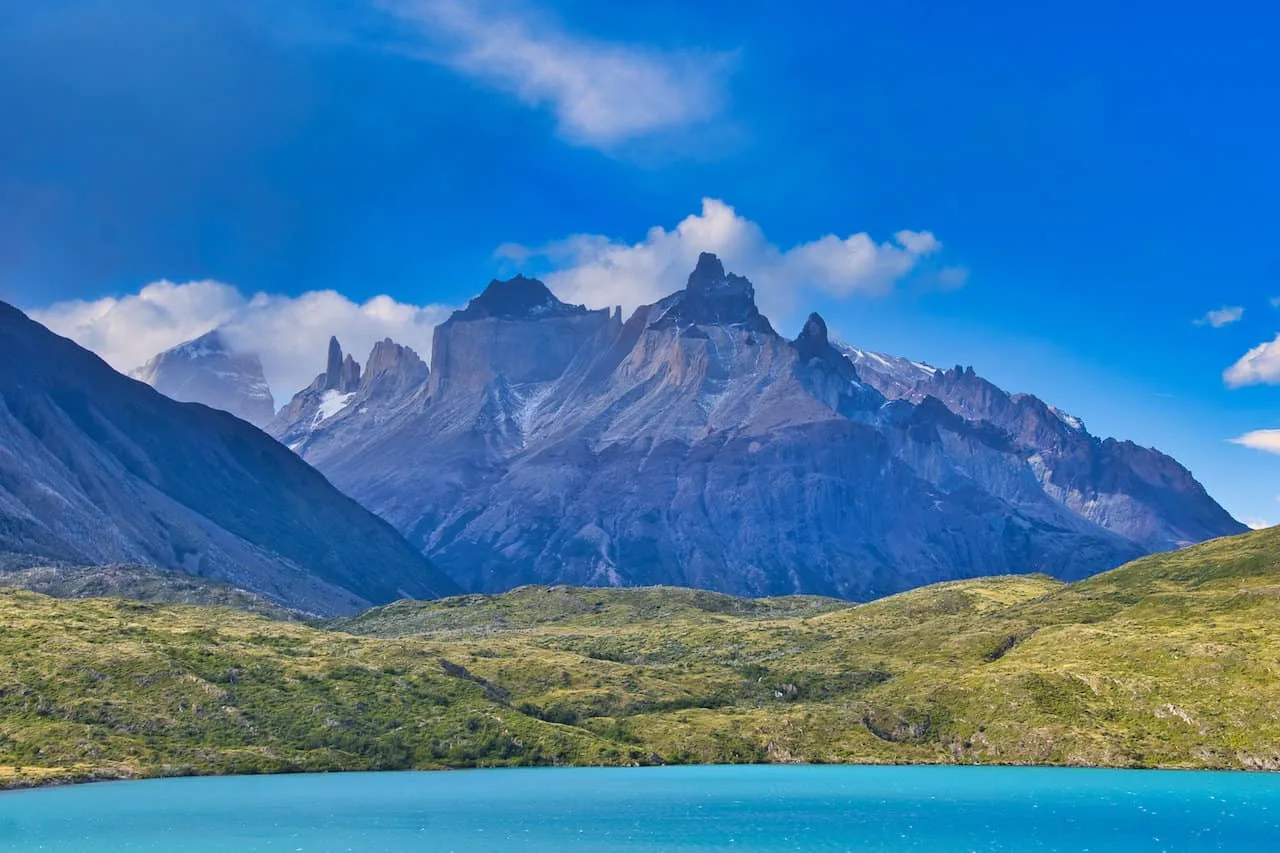
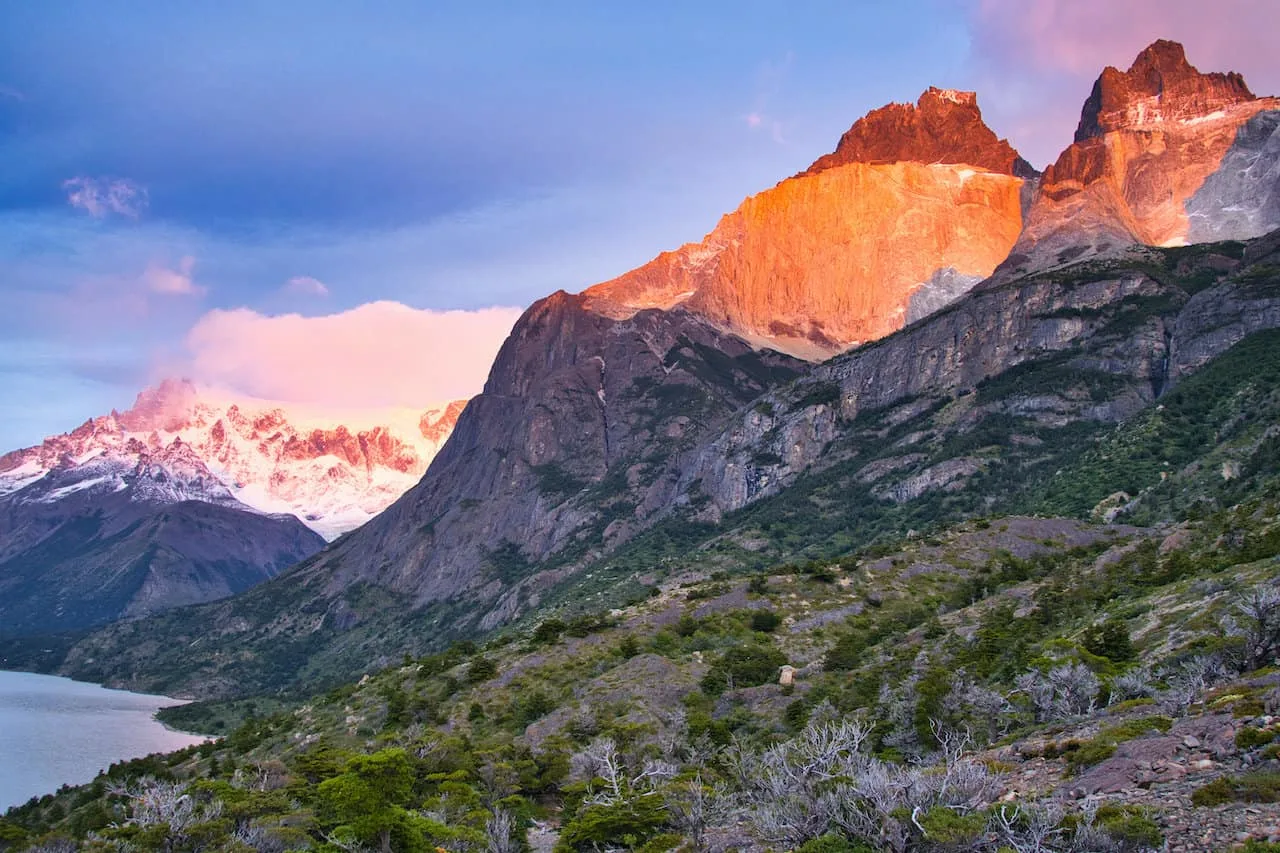
While it would be a pretty long day already, there is more to explore if you have it in you. Feel free to walk the pathway along Lake Pehoe, where you can get some surreal views of the lake, Cuernos del Paine, and Cerro Paine Grande all in one shot.
Be sure to then get a good night’s rest since day 3 is going to be a big one!
Day 3 – Paine Grande to Frances via Valle del Frances
Starting Point: Sector Paine Grande
Highlight: Valle del Frances (French Valley)
Ending Point: Sector Frances
Distance: 12.0 miles / 19.3 km
Elevation Gain: 2,995 feet / 913 meters
Duration: 8 hours
Up next on the W Trek of Torres del Paine is the hike from Paine Grande to Frances. Along the way though you will have the chance to head up the Valle del Frances (French Valley). During this day you will be completing the “middle line of the W”.
This is also one of those nights where you have more than one accommodation option to choose from – either Sector Frances or Sector Cuernos (another 2 miles further).
Most of the first portion of the day will entail hiking through the surrounding greenery with the Cuernos del Paine out in the distance. Your aim is to hike to the base of the mountainside before exploring the Valle del Frances.


You will pass by some beautiful lake views as you slowly get closer and closer the valley itself. Once you reach the valley turnoff, you can head up to the two viewpoints – Mirador Frances and Mirador Britanico.
Now, you do not need to go to both viewpoints, but they are both well worth the effort if you have it in you.
The hike through the valley will be one of the more technical parts of the W Trek. Instead of a nice easy pathway all the way through, the tail can get rockier and steeper at times. Be sure to just consistently watch your step along the way through.
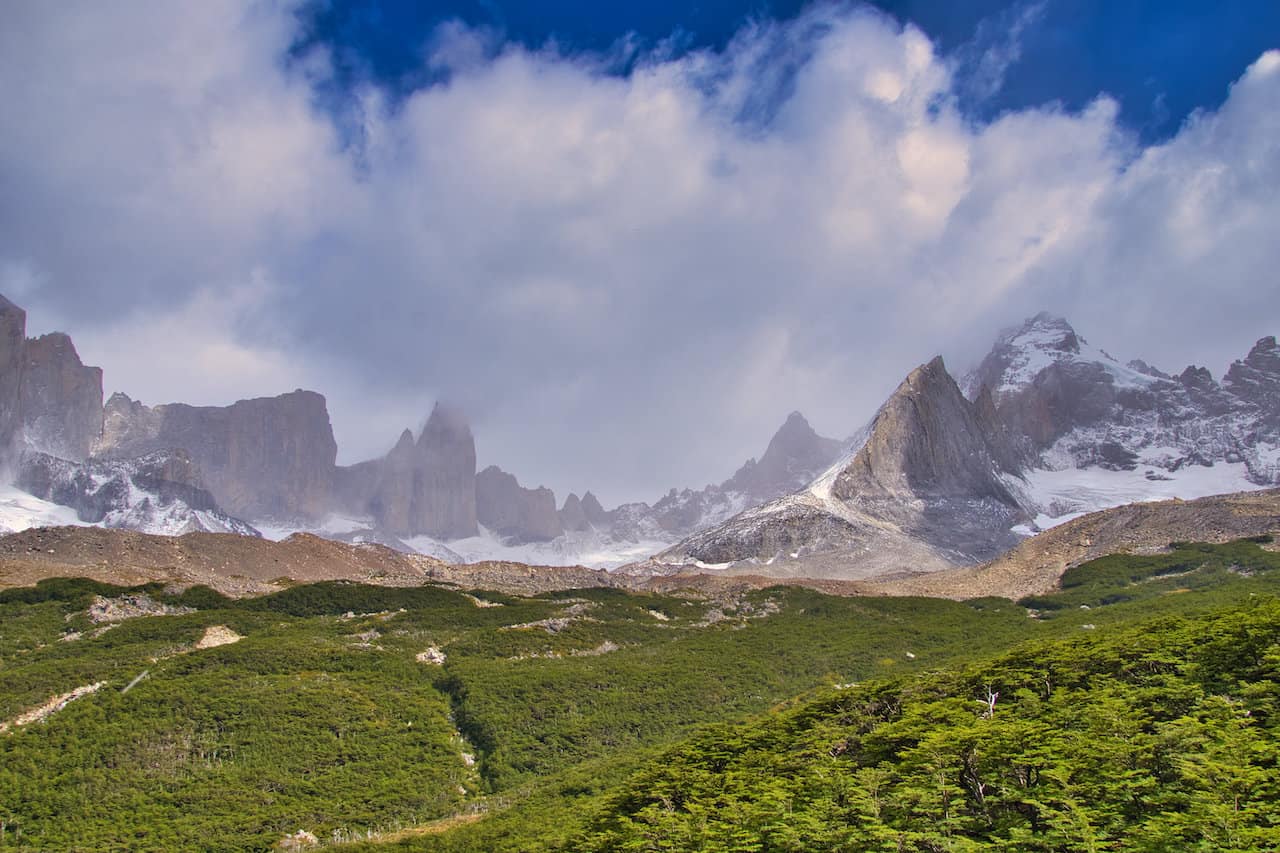
The first viewpoint of Mirador Frances will offer views of Cerro Paine Grande and the Frances Glacier. Further up the valley, you will find Mirador Britanico.
Here you have views of a whole array of Torres del Paine mountains out in front, as well as the Cuernos del Paine up above.
Once you have enjoyed one or both viewpoints, it is then back down the same way you came, until you reach the Valle del Frances turnoff.
It is then another 20 minutes walk until you reach the Frances sector (or another hour or so if you opt for the Cuernos sector).


Day 4 – Frances to Chileno
Starting Point: Sector Frances
Ending Point: Sector Chileno
Distance: 9.6 miles / 15.4 km
Elevation Gain: 2,810 feet / 856 meters
Duration: 5 hours
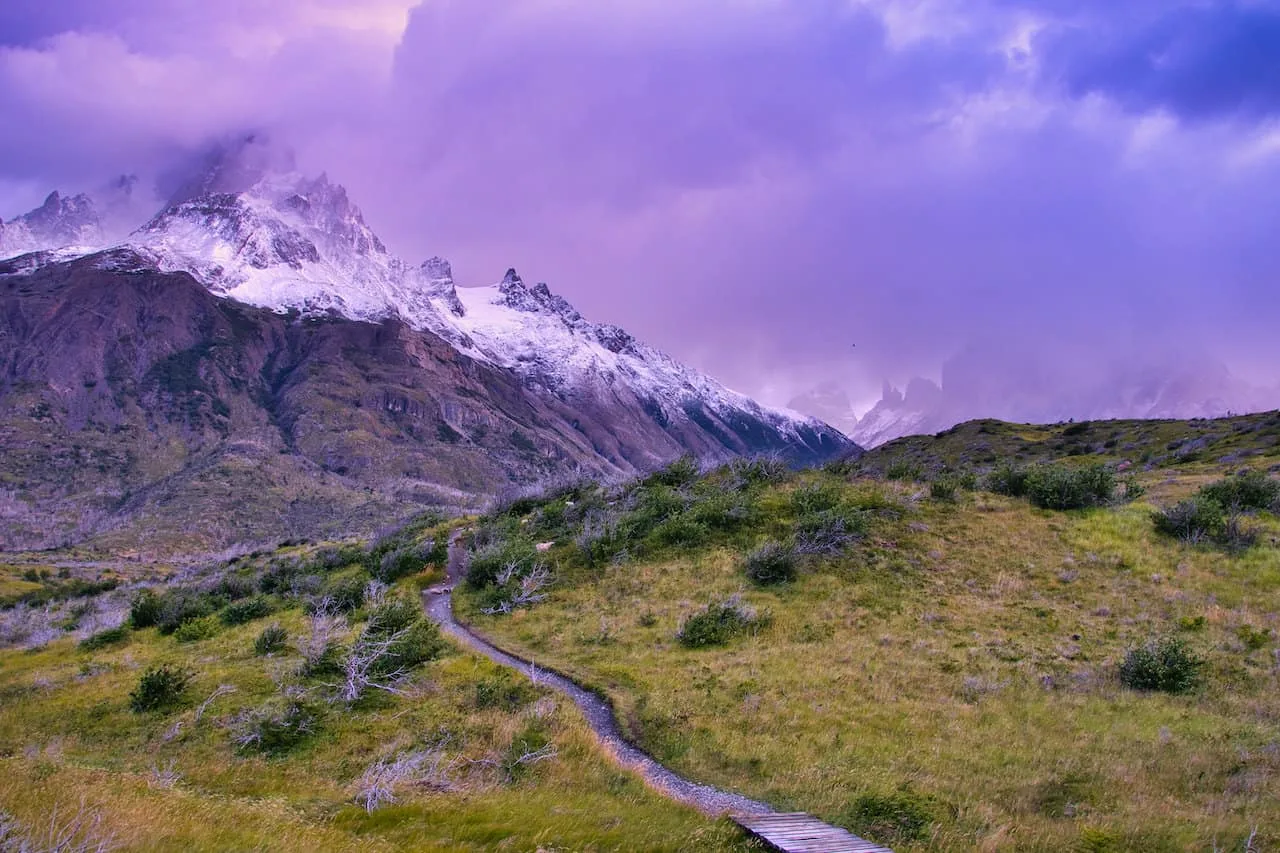
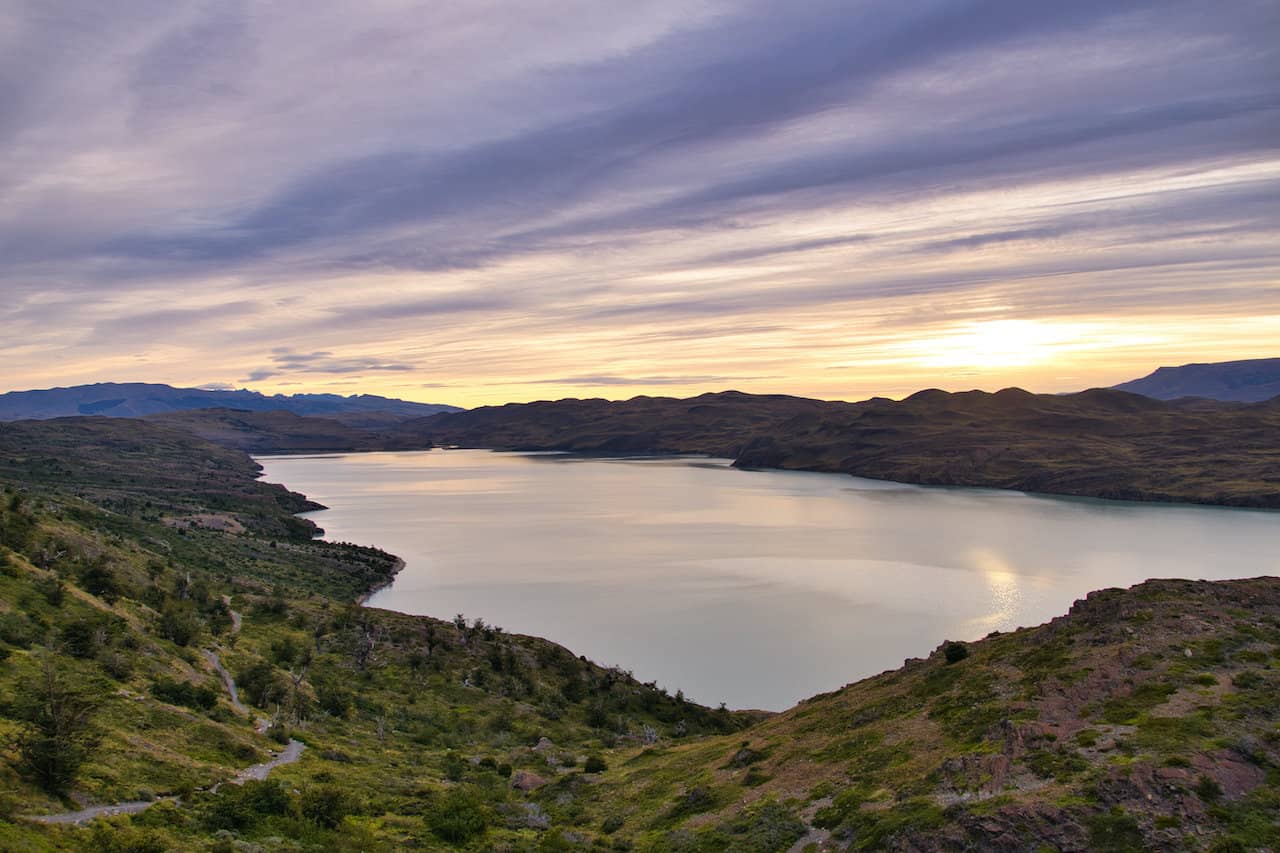
On the fourth day of the W Trek, the circuit takes you from Frances to Sector Chileno. This will be a beautiful route as you get to walk right alongside the Nordenskjöld Lake for much of the day.
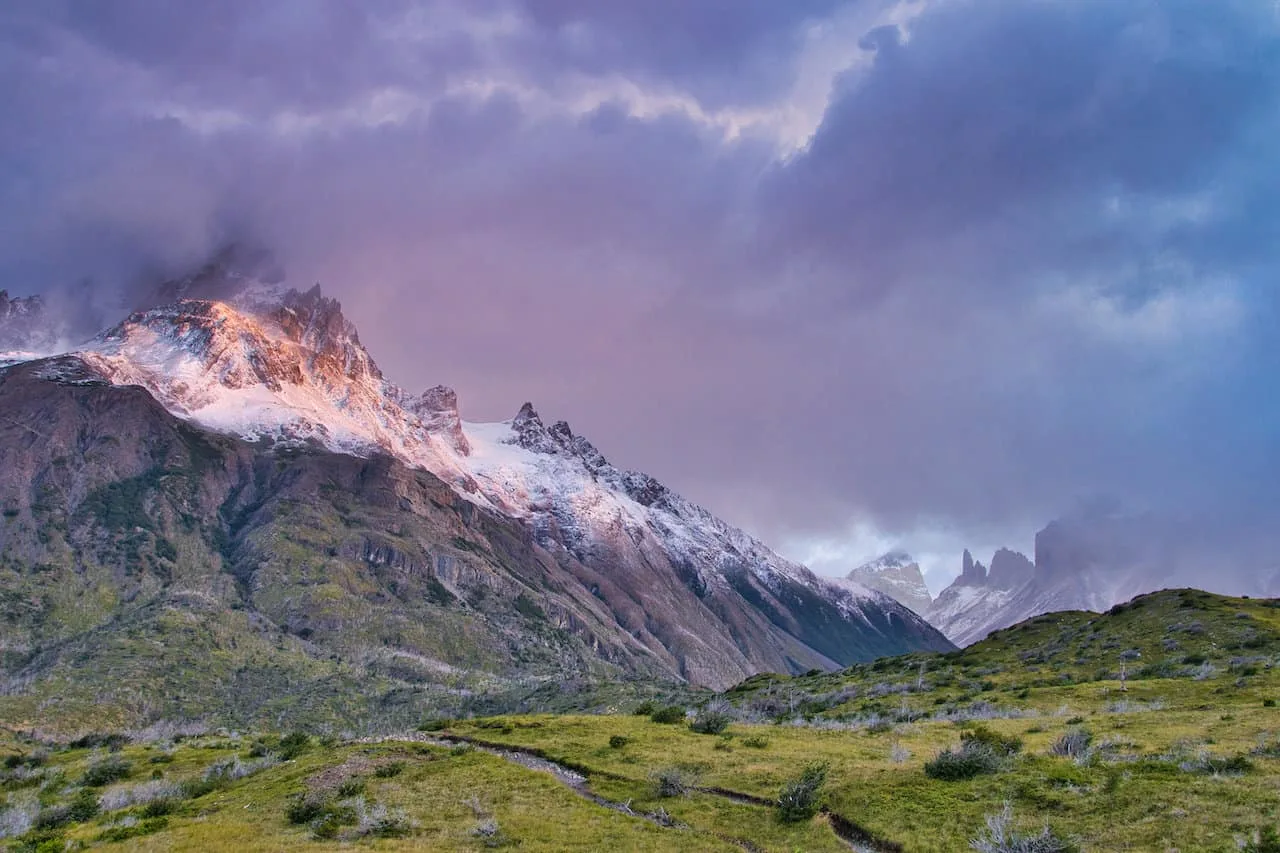
I ended up waking up early and I opted to just get started hiking around sunrise. This in turn led me to experience some beautiful colors lighting up Torres del Paine. If you have it in you for one (or more) days of the trek, I would recommend a sunrise at some point.
After walking along and above the lake, there is an intersection. To the right is a trail that heads towards the Welcome Center, and to the left is Sector Chileno. Take that left hand turn, and start hiking through the Ascencio Valley.


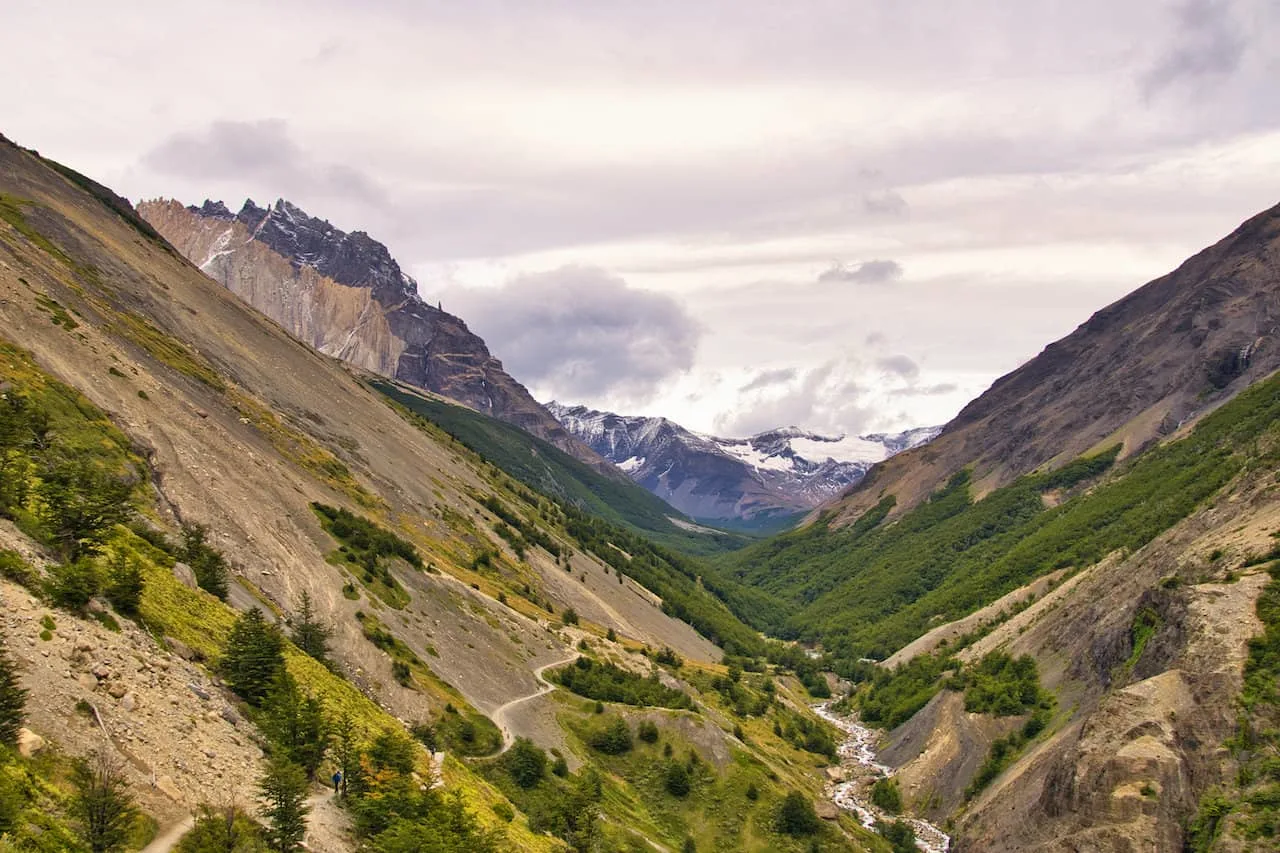
From here you will begin the hike up the valley along the pathway etched into the hillside. Down below will be the winding Ascencio River and further in the distance will be more alpine peaks.
After hiking above the river, the trail descends towards Chileno, where you can check in and get ready for the final day of the hike.
This is another day in which you can choose to opt for alternate accommodation. However, I would highly recommend going with Chileno for your first choice. If it is sold out, then you could end up going with Sector Central or even the Hotel Las Torres.

Day 5 – Chileno to Mirador Las Torres to TDP Welcome Center
Starting Point: Sector Chileno
Highlight: Mirador Las Torres
Ending Point: TDP Welcome Center
Distance: 8.6 miles / 13.8 km
Elevation Gain: 2,665 feet / 82 meters
Duration: 5 hours
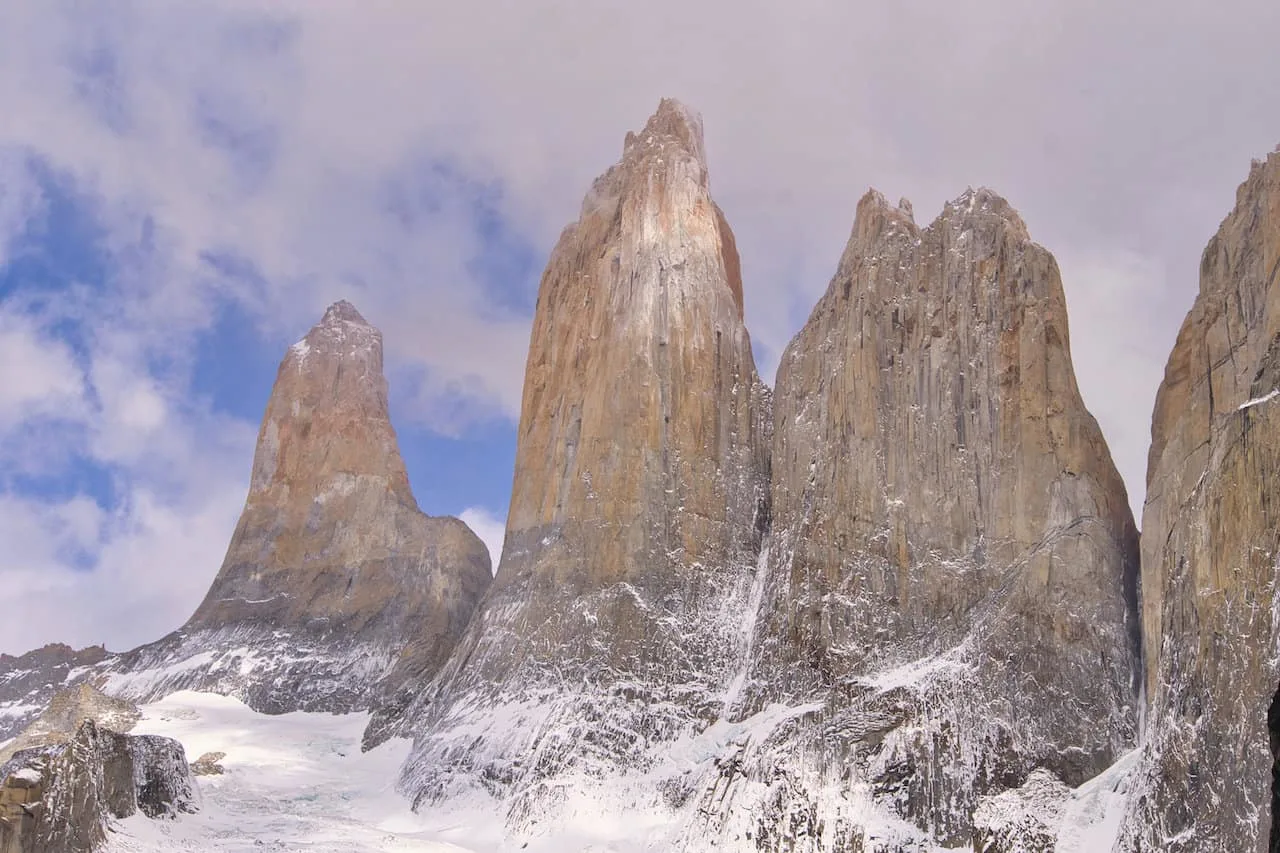
It is now time for the final day of the W Trek as you make your way from Chileno to the famed Mirador Las Torres viewpoint (one of the best hikes in Torres del Paine).
At the viewpoint you will have a beautiful turquoise lake in the foreground with the three granite peaks of Torre Sur, Torre Central, and Torre Norte hovering up above.
Most people opt for a sunrise at the lake. This means you will need to wake up in the middle of the night and hike in the dark.
During my times in the park, it was pouring rain when I woke up. While some people did opt to hike in the wet darkness, most people waited it out a couple of hours. I am sure glad that I did because, the weather ending up clearing and the remainder of the morning was a memorable one.
Taking part of a sunrise hike though at Mirador Las Torres is still in my eyes one of the best overall highlights of the W Trek. I would highly recommend it if you are up for the early wake up.

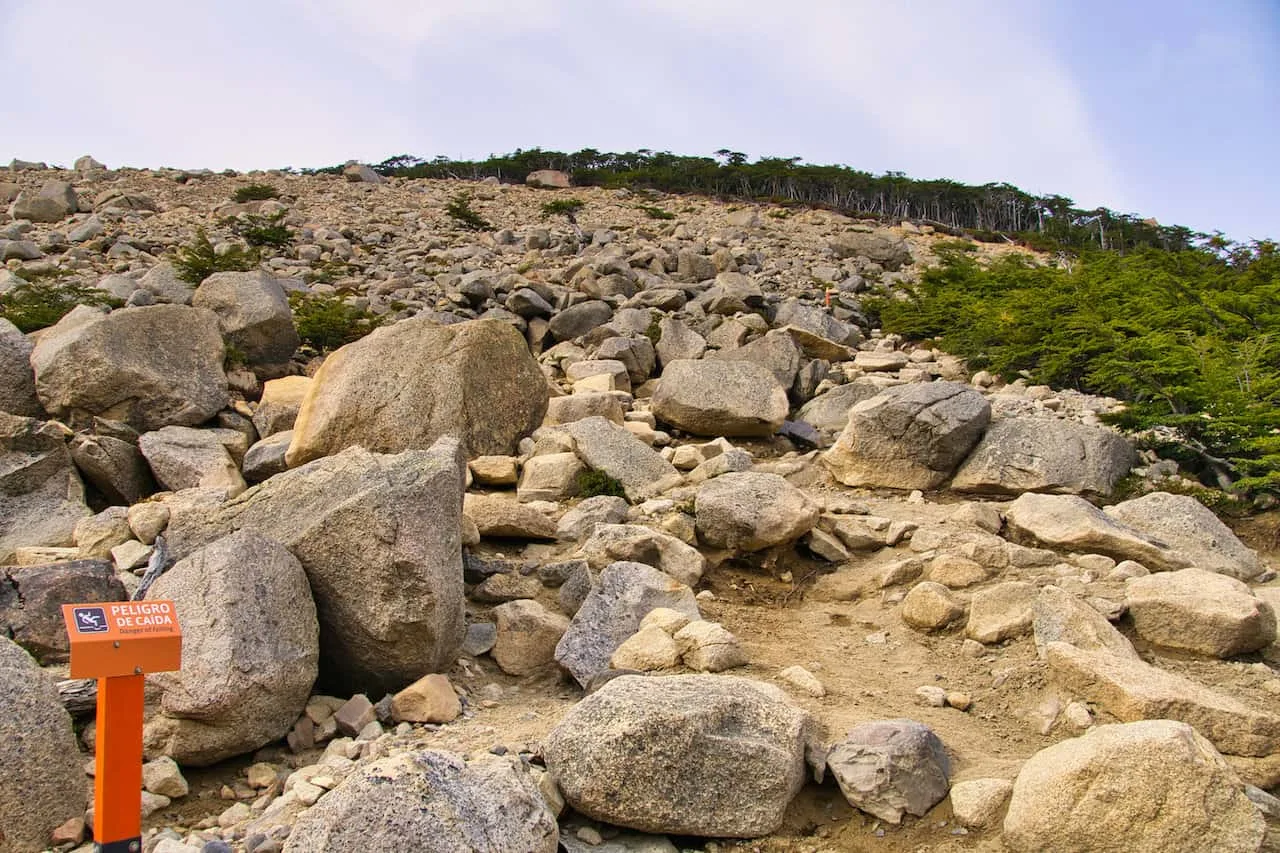
This is also going to be one of the more technical days out on the trail, as there is a good portion of the hike that is on uneven, rocky, and steep terrain.
You will first make your way through the forest portion as you continue to gain elevation. Once out of the forest, the tougher section begins as you head up the rocky and steep hillside to get to the lake itself.
As you arrive at the lake, you can expect some surreal views of your surroundings (on a clear day at least).


Be sure to remember throughout this day that you will need to catch a bus out later in the afternoon. Pay attention to your timing, so you can get back to Chileno and to the Welcome Center in time.
After enjoying the views though, make your way back down to Chileno, where you can pack up your belongings. It is then retracing your steps along the river and out of the valley, where you can then follow the path to the Torres del Paine Welcome Center.
Once there, hop in one of the shared shuttle vans to the Amarga park entrance, where you can then get onto your bus back to Puerto Natales.
All said and done, while there are some logistics to a hike like this, the W Trek will be well worth the planning and effort.

16) Torres del Paine W Trek Cost
From a cost perspective, the W Trek of Torres del Paine can cover a wide array of budgets.
On one side, you have the chance to bring all your own gear and food, and simply just pay for campsites (and transport). On the other end, you have refugio rooms and full board to choose from.
Obviously, the budgets for these two trips can be vastly different. And while those are the two ends of the spectrum, many people fall right in between (mix between campsites/refugios & bringing some food but not all).
From a high level perspective, below is what you should expect the Torres del Paine W Circuit to cost from a few different standpoints (note all currency in USD).
Low Cost Option
- Accommodation: bring all of you own gear = ~$130 (campsite fees)
- Food: bring all of you own food = ~$75 (can vary greatly based on food choice)
High Cost Option
- Accommodation: refugios only = ~$500
- Food: full board = ~$360
Mid Cost Option
During my time out on the trail, I brought most of my food with me, and ending up buying a couple meals along the way (not guaranteed everywhere). For accommodations, I split up my time between refugios and ready made campsites.
You can expect this to fall right in between the low and high cost options.
In addition to the food and accommodation, your other cost considerations should be:
• Puerto Natales Hotel (before/after): varies
• Round Trip Bus Tickets: ~$25
• Pudeto Catamaran: $30
• Laguna Amarga Van: $5
• Torres Del Paine Entrance Tickets: $49
17) Self Guided vs Guided
Many people ask can you do the W Trek without a guide? The answer to that question is certainly yes. In general, I would imagine most people who hike the W Trek do so unguided.
For the vast majority of the hike, the trail is obvious with trail markers sprinkled throughout. Getting from campsite to campsite should not be an issue given the trail (and having a navigation app just in case).
I would say a guided W Trek can be valuable for those with less hiking experience.
If you are someone who has just not completed multi day hikes and are not comfortable doing something like this on your own, then a guide can be very valuable to help lead the way (and help you out with some tips).
In general, if you are not one of those people, then a self guided hike is going to be more than doable. This also gives you the chance to be on your own schedule, and not worry as much about the larger group.
18) W vs O Trek Patagonia
While the W Trek is certainly a bucket list worthy type of hike, you may be asking yourself whether you should do the O Trek instead.
At the end of the day, this will just be based on the amount of time you have and whether or not you actually want to hike for an additional three days.
Remember, the W is part of the O. So if you complete the O, you are completing the W. With the O Circuit you get to hike the backside of Torres del Paine during your extra three days in the park. This section is much quieter than the W side of the park.
From a duration perspective, you will need just 5 days to complete the W (or maybe even less) but 8 days to complete the O.
You will need to ask yourself whether you even want to hike for 8 days in a row. That can be a lot of hiking for most people. Since the W may be hiked in as few as 4 days, some people may be more than happy with that amount of hiking.
Another consideration in general will be your overall fitness. While the O Trek is 70+ miles, the W Trek is just about 45 miles. So, that is another 25+ miles your body will need to make its way through (including the toughest part of Torres del Paine up the John Gardner Pass).
Lastly, you will also want to take your budget into consideration. By doing the W, you are sure to save on accommodation and food within the park. While on the O, you are going to spend more based on the longer duration.
While those are just some of the main questions to ask yourself, if you can answer those, you should have a better sense of which option is best for you.
Learn more about Torres del Paine O Trek to get a better idea of what it is all about.

I hope you enjoyed this extensive overview about the W Trek of Torres del Paine National Park in Patagonia. If you do happen to have any additional questions or concerns, feel free to add them in below.
Also, be sure to check out the other Patagonia itineraries and guides up on the site. Have fun out there and safe travels!


Kirsten
Saturday 25th of March 2023
Great write up, this is really helpful! Any idea if bookings are open for 2023/2024 season or when to expect them to open? I'm looking at booking for December 2023 and none of the websites work for any of those dates, but I dont think it would be completely full already. How far in advance would you recommend booking?
Charles
Monday 27th of March 2023
Hi Kirsten - I would guess bookings will open up soon (in the next month or two). The current season is almost at its end and I am guessing they will have the bookings open soon enough. December can be quite busy depending on if you are heading for holiday season. If that is the case I would honestly advise to book as soon as you are able to. Any other question feel free to reach out.