
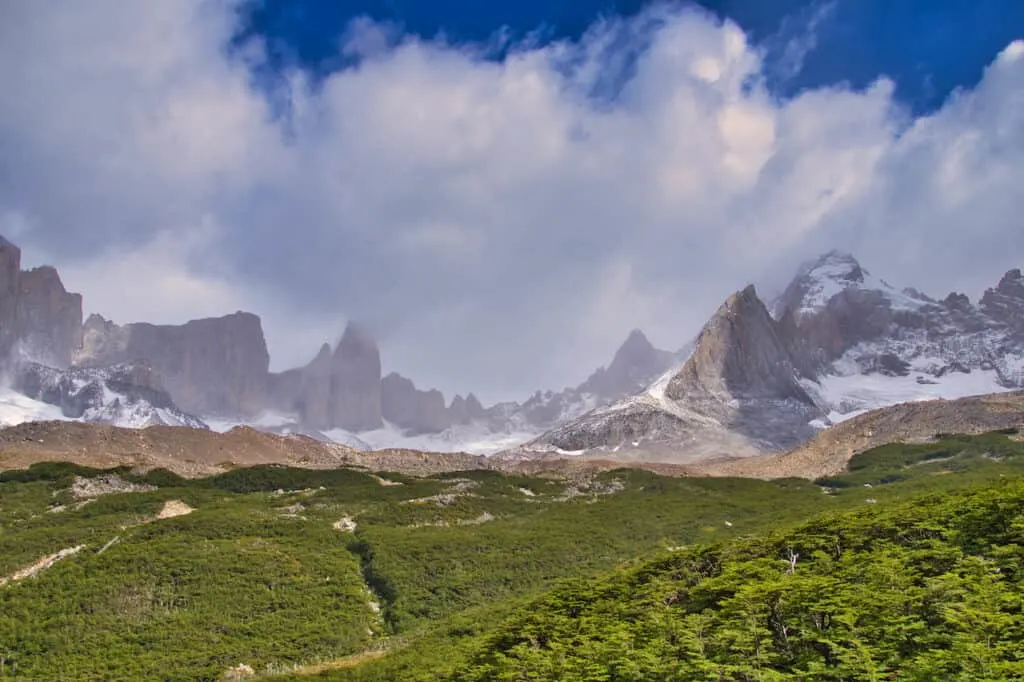
If you are visiting Torres del Paine National Park, odds are you are looking to take part in a handful of hiking opportunities.
All throughout the park you will come across viewpoints, lakes, waterfalls, mountains, glaciers, rivers, and so much more scenic landscape.
This overview is here to talk through the best Torres del Paine hikes out there. From easy day hikes to longer multi day treks, read on to learn all about them and more.
* Affiliate Disclosure: This post may contain affiliate links, which means I may receive a commission if you make a purchase through the links provided, at no additional cost to you. Thanks for supporting the work I put into TripTins!
1) Torres del Paine Hiking Map
To start out, I thought it would be most helpful to visualize all of the hikes on a single map. This way you can get a better sense of where everything is located.
In addition, it will give you an understanding of trailheads, bus stops, boat ports, and other helpful logistical information.
Throughout the remainder of this overview, feel free to scroll back up and refer to the map.
Note: the longer W and O Treks are included in a separate second screenshot, just so the map does not get too overcrowded.
2) Logistical Resources & Tips
As you go about reading about the various hikes, you may see that there are some logistics involved to get to trailheads. Below are some helpful tips & links when it comes to Torres del Paine.
Bus Sur Schedule: busses from/to Puerto Natales leave a few times a day to 5 bus stops within the National Park (Amarga, Pudeto, Pehoe, Administracion, and Hotel Lago Grey). At these bus stops you may find trailheads and catamaran ports. Note that there are other busses you may be able to book as well such as Maria Jose, Fernandez, and Pacheco.
Pudeto to Paine Grande Catamaran: this catamaran goes from the Pudeto bus stop across Lago Pehoe to Paine Grande. From Paine Grande, there are several day hikes (and multi day hikes) to take part of.
Hotel Lago Grey to Refugio Grey Catamaran: there is also a catamaran that goes back and forth from Hotel Lago Grey to Refugio Grey. This is great for those that want to take part of day hikes around Refugio Grey or enjoy a glacier hike/kayaking experience.
Logistical Tip: when leveraging these public transport options, you must be aware of the various schedules and timings. Bus, boat, and hiking times all come into play. Be sure to understand the schedules and how your overall day will line up.
Schedules: bus & boat schedules can change based on the time of year (and on a year to year basis). Always stay up to date by checking out the links provided.
Rental Car: for some hikes it may only be possible to get there by rental car (or at least make it more convenient. Feel free to check out Rentalcars.com for a variety of options to consider.
Guide: in general, hiring a guide is not needed for most (if not all) hikes in Torres del Paine. If you are more comfortable with someone by your side, and to help with logistics, then joining a guided tour could be good for you.


Learn More: Join any of these hikes as part of a longer Patagonia itinerary around the region
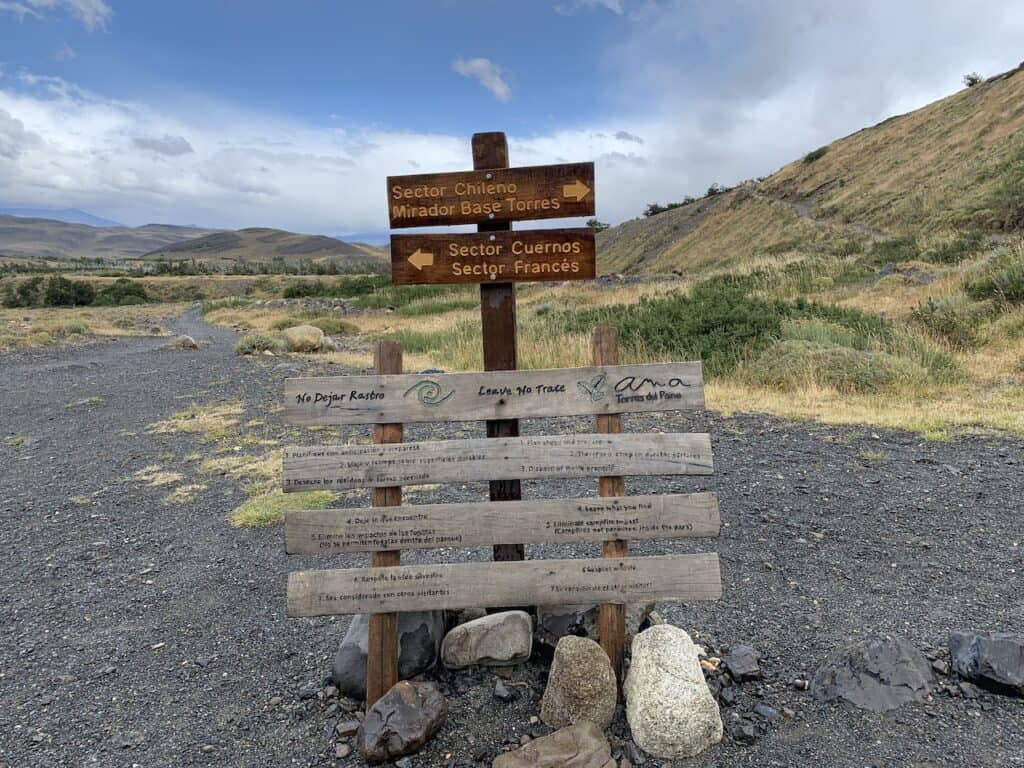
3) Torres del Paine Day Hikes (Main Section)
The first three hiking opportunities I will go over include hikes that are part of what is considered the “main” area of Torres del Paine. Here is where the longer O and W Treks are located.
These day hikes will take on daily sections of the longer trek, as you get to experience the area without committing to overnights within the park.
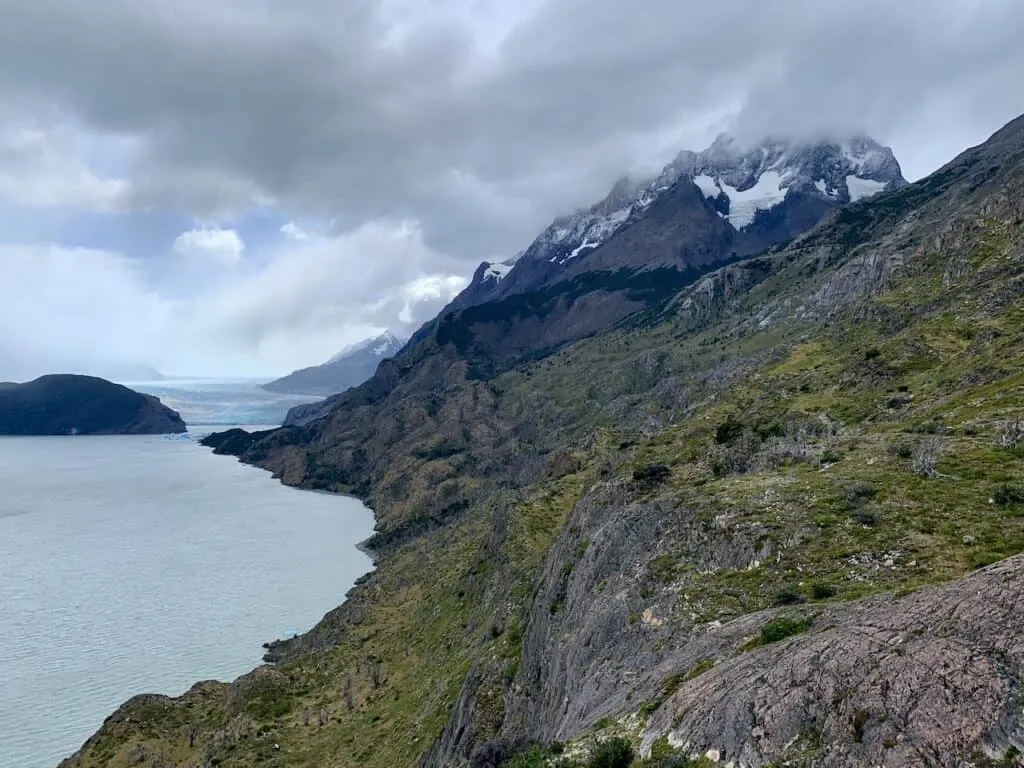
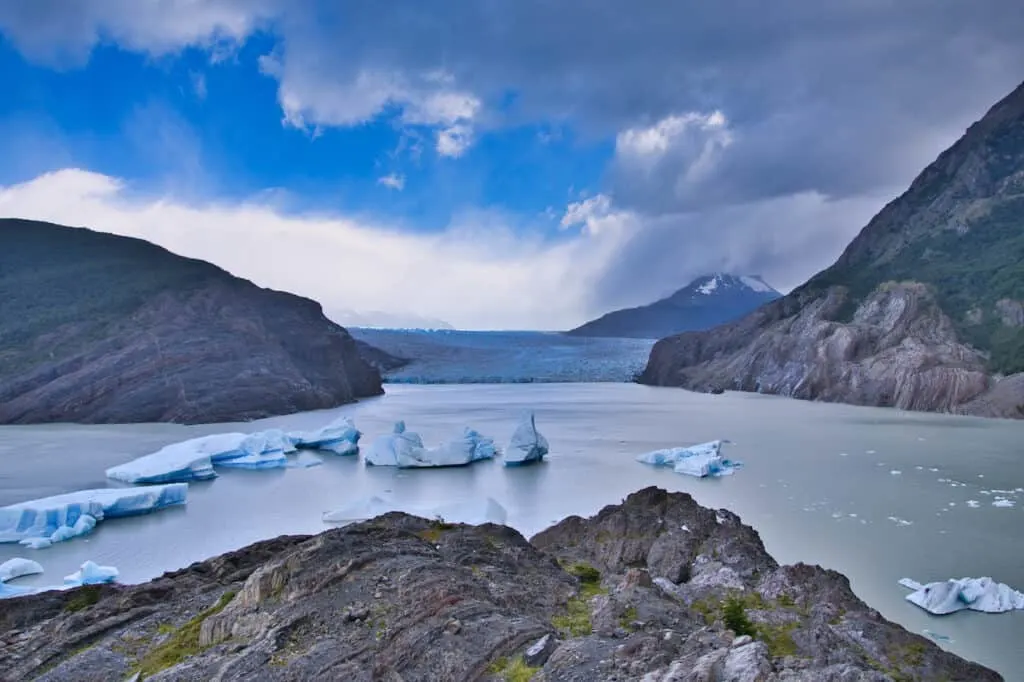
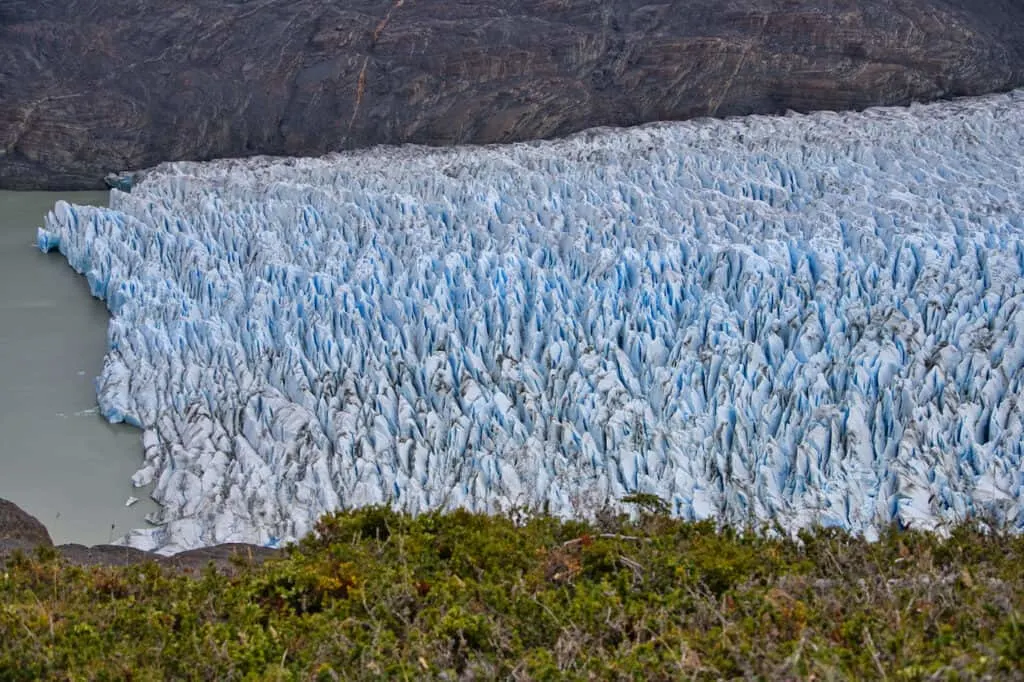
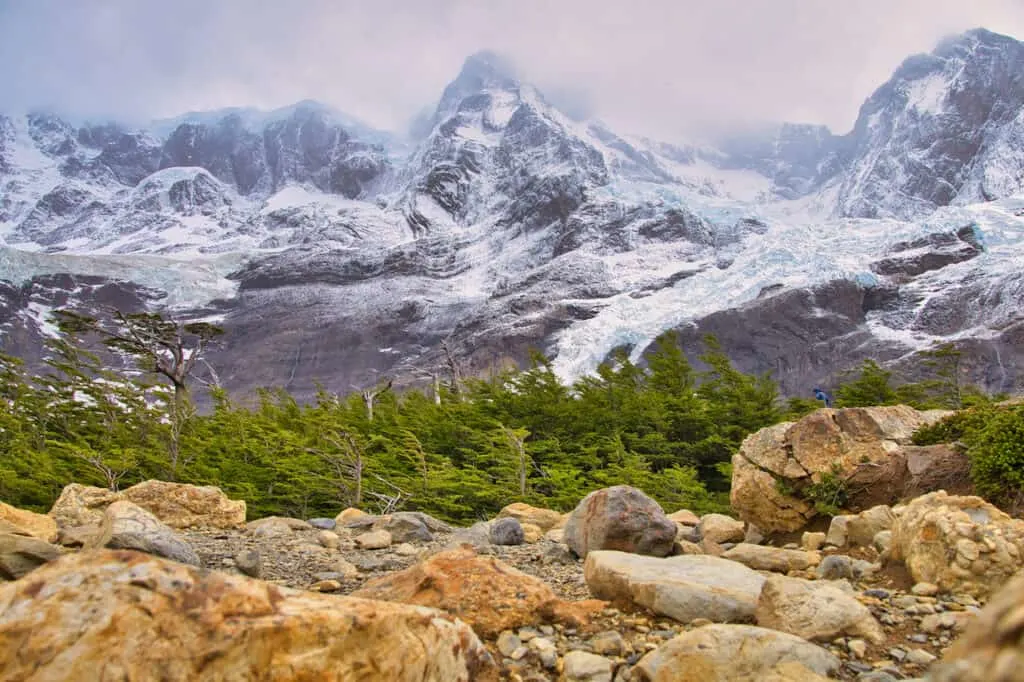
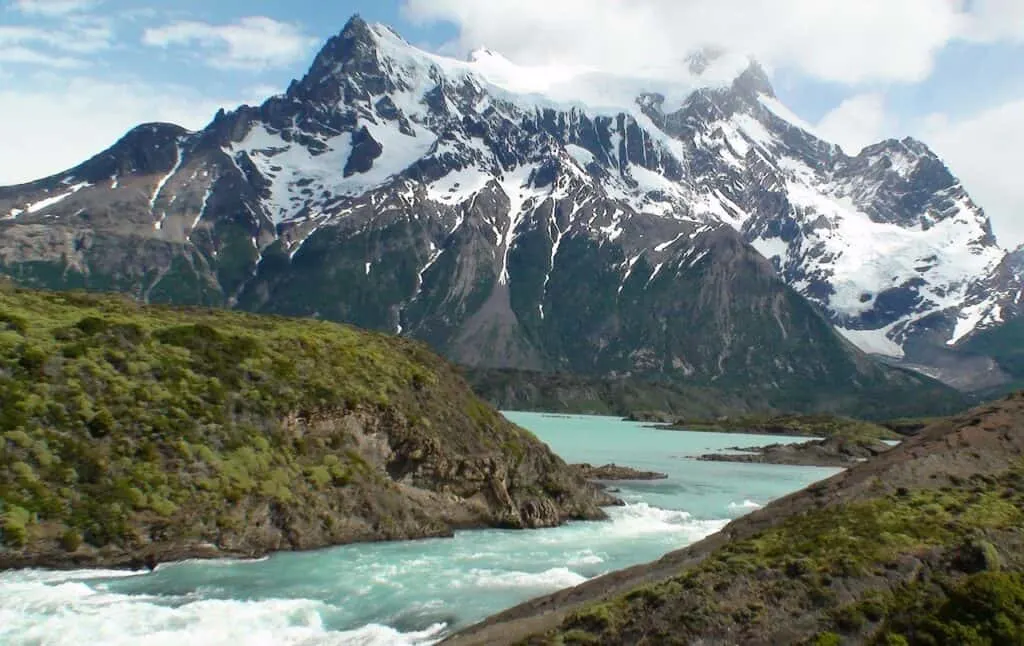
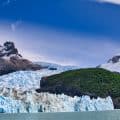
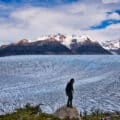
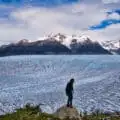
Grey Glacier
The most famous glacier in Torres del Paine is Grey Glacier, located on the western side of the park. If you are looking to take part of a day hike to view the glacier, there are a few main ways to go about it.
These first three hikes include:
- Paine Grande to Refugio Grey
- Grey Suspension Bridges
- Grey Glacier Ice Trek
Paine Grande to Refugio Grey Day Hike
One of the more popular options is to head across Lago Pehoe by catamaran from Pudeto and start the hike at Paine Grande.
From Paine Grande, it is a 7-mile hike to Refugio Grey. Around the halfway point, there are fantastic views that come into play as you see the glacier from afar. Many people opt to just enjoy the views from here before turning around and heading back to Paine Grande to catch the boat across the lake.
However, for those that want to see the glacier up close, it is also possible to continue the hike further right to Refugio Grey. Once at the refugio, there is a short walking trail that takes you down to the Lago Grey lakeside, where you will get those glacier views right out in front of you.
After wrapping up your time by the lake, you will need to retrace your steps all the way back to Paine Grande over the course of 7 miles. New views will come into play as you enjoy the scenery in the opposite direction, before arriving at the Paine Grande catamaran. Hop back on and head across the lake back to Pudeto.
Hike Details
- Starting & Ending Point: Paine Grande
- Mid-Point: Refugio Grey
- Distance: 14.0 miles / 22.5 km
- Elevation Gain: 2,400 feet / 730 meters
Logistics
- Step 1: Bus or Drive to Pudeto
- Step 2: Catamaran to Paine Grande
- Step 3: Round Trip Hike
- Step 4: Catamaran to Pudeto
- Step 5: Bus or Drive to Puerto Natales/Hotel
Shorter 7 Mile Hike Option: For the shorter hike to just see the glacier from afar, the hike will be just 7 miles round trip (3.5 miles each way)


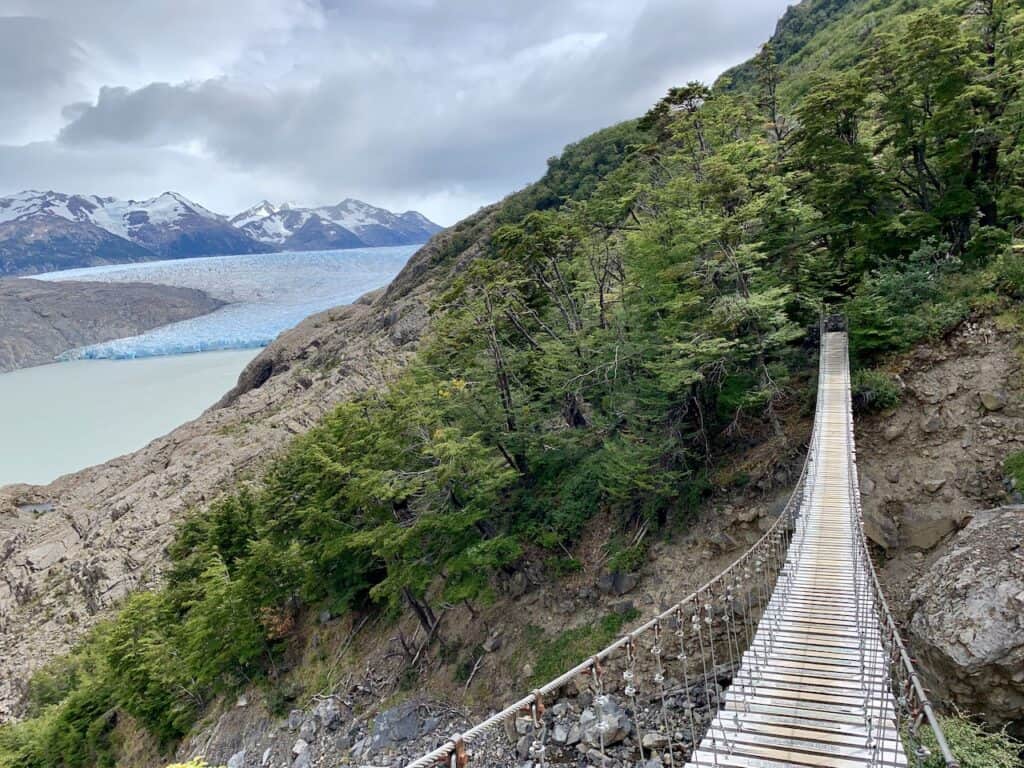
Glacier Grey Suspension Bridges Hike
Now, for those that want to enjoy a shorter hiking experience with views overlooking the glacier from the side, then the famous suspension bridges are for you.
Instead of taking a catamaran and hiking to Refugio Grey, you simply can take a catamaran directly to Refugio Grey. These catamarans leave from Hotel Lago Grey, and will drop you off at the refugio.
By saving the time hiking to the refugio, you will have a better chance to hike to the suspension bridges. From the boat drop off point, it is up along the trail to one, two or all three bridges. From these bridges, you will get a whole new perspective of the glacier.
Depending on how far you go will dictate the hiking time. In general, here are the one way distances from Refugio Grey to each one of the suspension bridges:
- First Suspension Bridge: 1.3 miles
- Second Suspension Bridge: 2.1 miles
- Third Suspension Bridge: 3.1 miles
*There is a nice additional viewpoint 10 minutes past 2nd bridge
Once all done with the views & suspension bridges, it is back to Refugio Grey, where you will catch a catamaran back to Hotel Lago Grey.
Hike Details
- Starting & Ending Point: Refugio Grey
- Mid-Point: One of the Suspension Bridges
- Distance: Minimum 2.6 miles / 4.2 km | Maximum 6.2 miles / 10.0 km
- Elevation Gain: Minimum 300 feet / 90 meters | Maximum 1,600 feet / 490 meters
Logistics
- Step 1: Bus or Drive to Hotel Lago Grey
- Step 2: Catamaran to Refugio Grey
- Step 3: Round Trip Hike
- Step 4: Catamaran to Hotel Lago Grey
- Step 5: Bus or Drive to Puerto Natales/Hotel


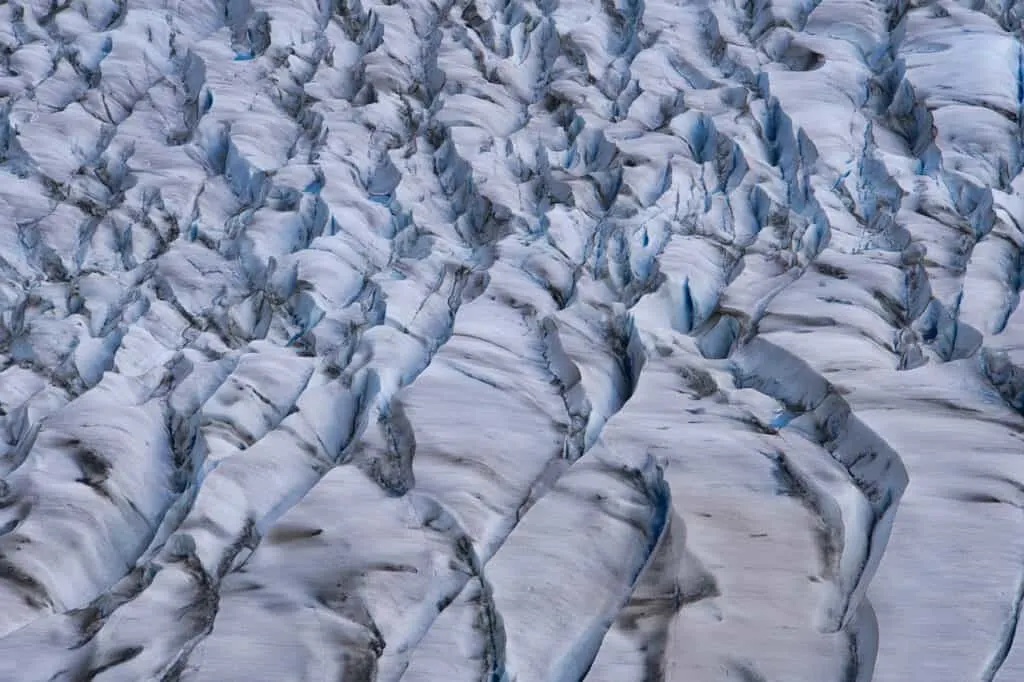
Grey Ice Trek
Now, while hiking to see views of the glacier is one thing, there is also the opportunity to hike on the glacier too. This however, is only possible as part of a guided glacier hike trek with Bigfoot Patagonia.
Bigfoot runs the glacier hikes & kayaking tours from the lakeside near Refugio Grey. You will want to sign up in advance in order to take part of these very unique offerings.
The glacier hike tours run daily at 8:00AM and 2:30PM during the season, and lasts 5 hours altogether. This includes boat transfer from Refugio Grey, hiking on a nearby island, getting to the glacier, and then 2.5 hours on the ice itself.
From a logistical standpoint, you will need to take the round trip catamaran to Hotel Lago Grey. Be sure to confirm the latest schedules, but the last catamaran back to Hotel Lago Grey departs at 8:00PM.
W Trek & O Trek Note: a glacier hike can also be added to an overall itinerary if taking part of the longer multi day W or O Treks.

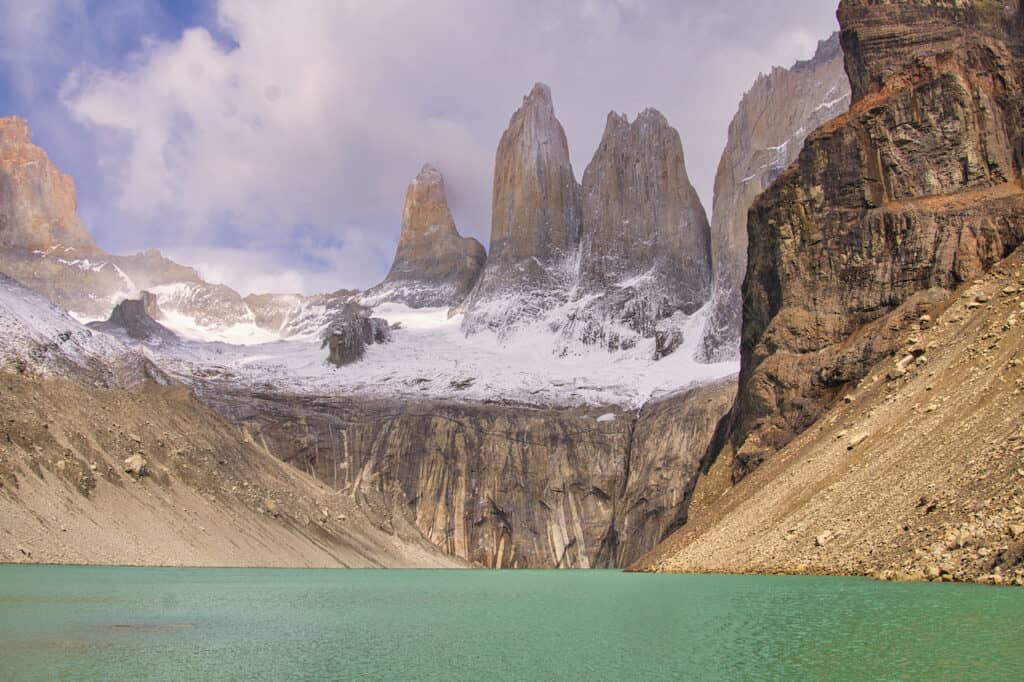
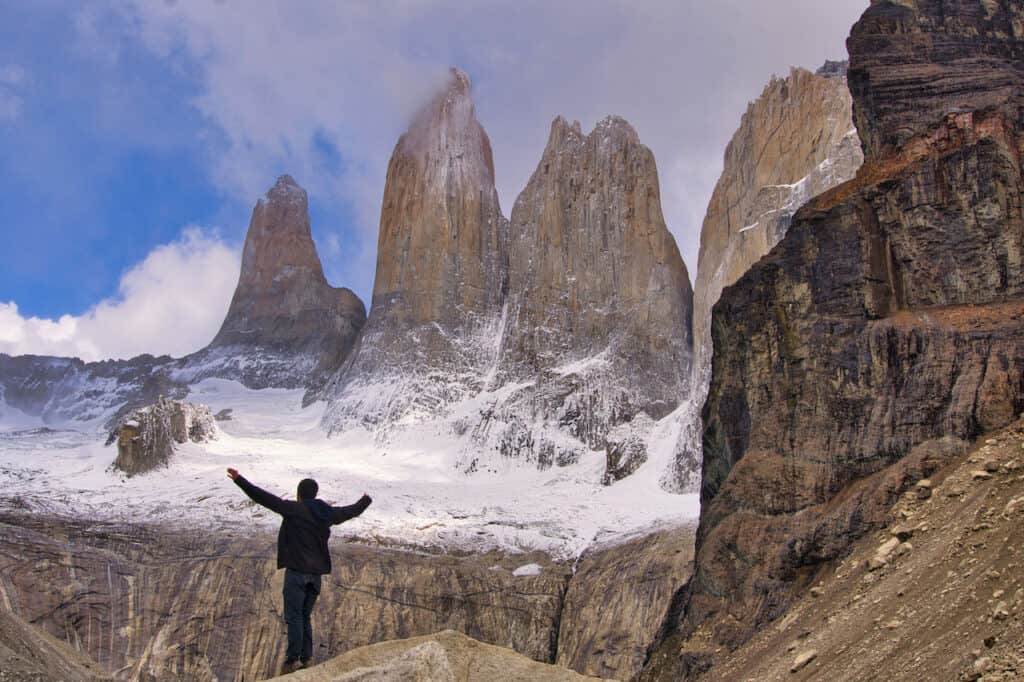
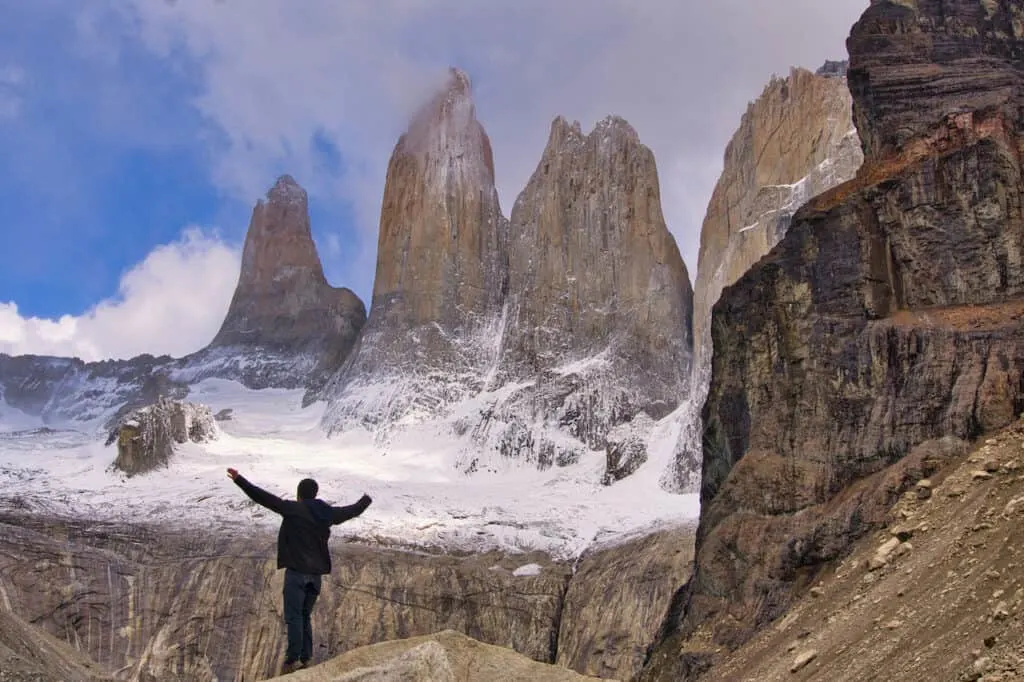
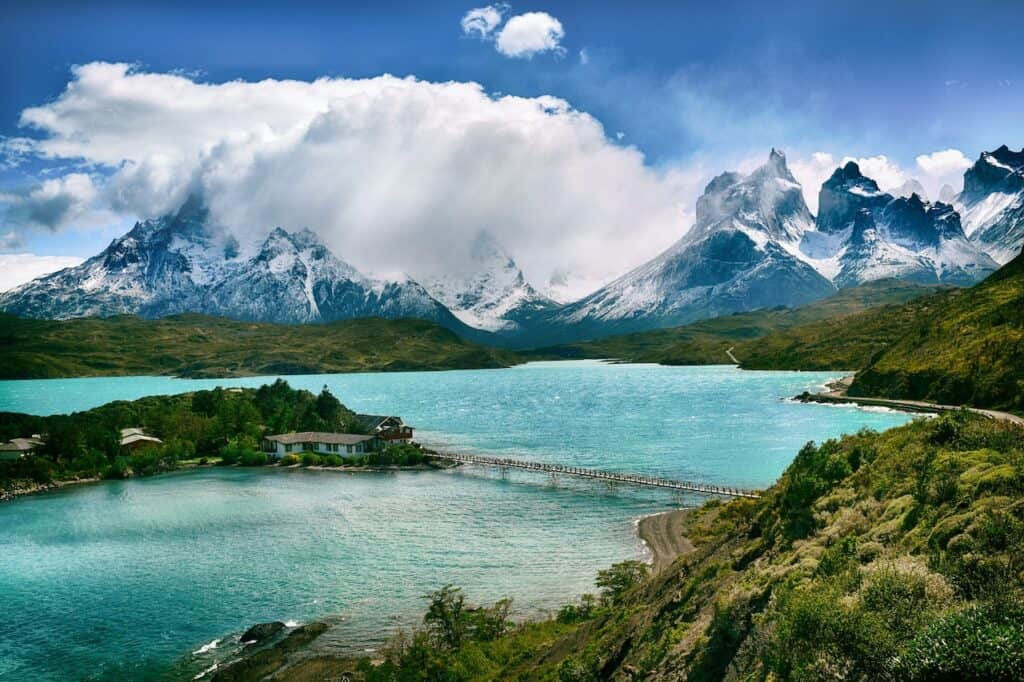
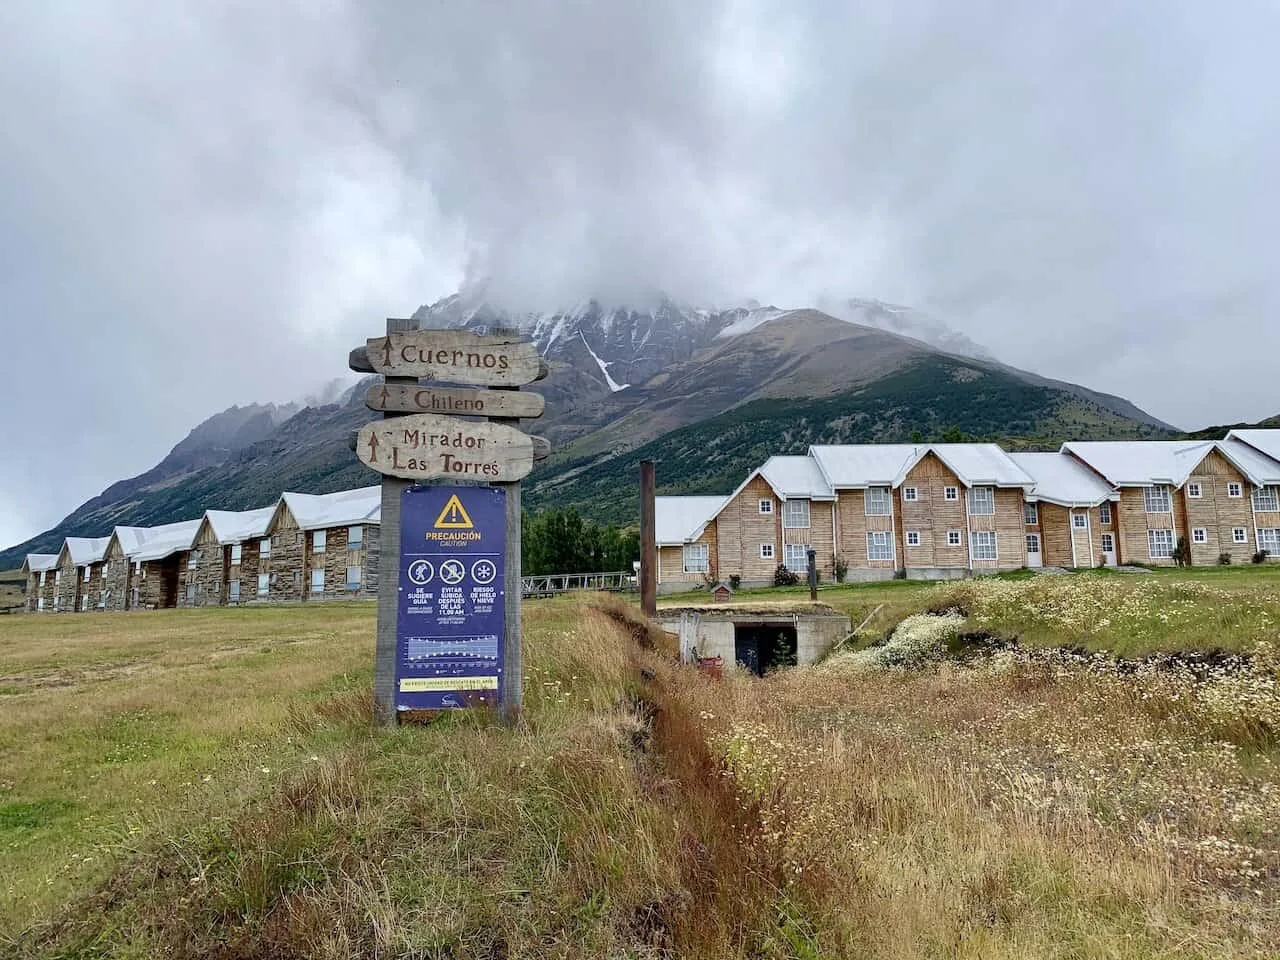
Mirador Base Las Torres
When it comes to iconic locations in not only Torres del Paine, but all of Patagonia, the Mirador Base Las Torres is near the top of the list.
At the viewpoint, you will get that famous view of the three granite towers standing tall with the lake down below. People travel from all around the world for just this view, so you are bound to enjoy what it offers.
While many visit this viewpoint as part of the longer multi day W and O Treks, it is also very possible to take part of it as a day hike.
The trail starts at the Torres del Paine Welcome Center, next door to Hotel Las Torres. Getting there can either be done by car, or by bus. If traveling by bus, you will need to get off at Laguna Amarga, before taking a quick 5 minute shared van to the center.
Once at the welcome center, it is a 5.5 mile hike up the valley and towards Mirador Base Las Torres.
The trail heads up into the Rio Ascensio Valley, as you get some beautiful views in either direction. You will then descend down towards the river, where the Chileno refugio and campsite is located.
After resting up, the trail begins to gain elevation through the forest before opening up for the final push. Here is where the elevation gain and terrain begin to pick up as you make the ascent to the lake itself.
Feel free to roam all around the area, take in various views, and just sit back & enjoy what is out in front of you. It is then right back out in the same direction you came to finish up the hike.

Hike Details
- Starting & Ending Point: Hotel Las Torres
- Mid-Point: Mirador Base Las Torres
- Distance: 11.0 miles / 17.7 km
- Elevation Gain: 3,120 feet / 950 meters
Logistics
- Step 1: Bus/Van or Drive to Hotel Las Torres
- Step 2: Round Trip Hike
- Step 3: Van/Bus or Drive to Puerto Natales/Hotel
Learn More: Check out the Mirador Las Torres Hike overview for more details
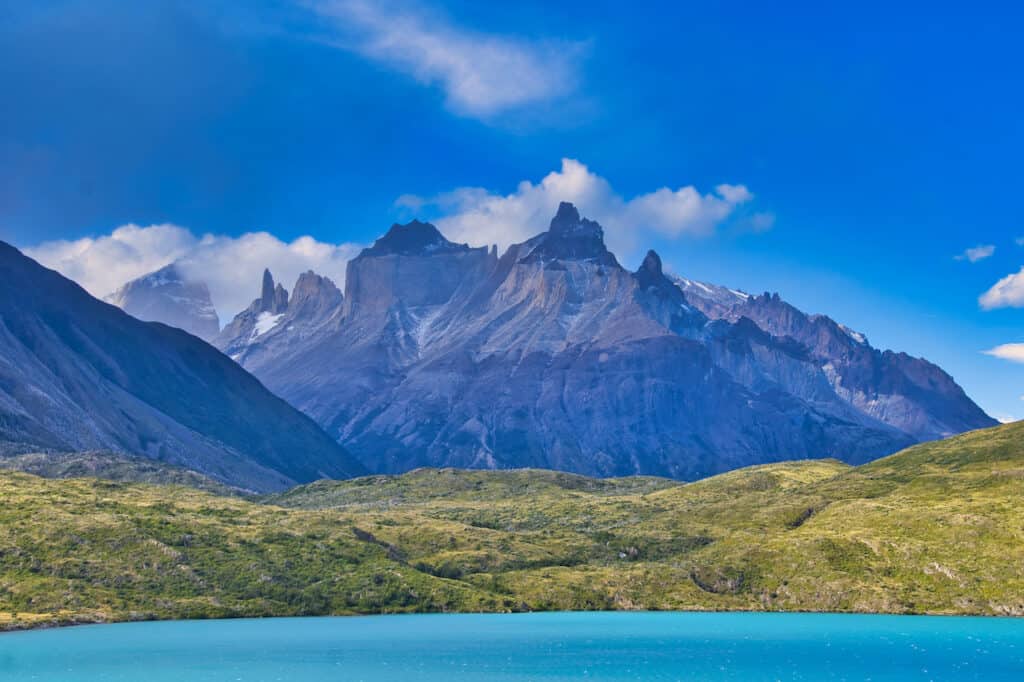
French Valley (Mirador Frances & Britanico)
Located in the middle of the “W” is the French Valley (Valle del Frances). The valley is packed with views of the surrounding mountains, glaciers, and rivers, and makes for one of the top locations to visit in Torres del Paine.
Now getting to the French Valley will entail a similar logistical effort as Grey Glacier. Since the out & back hike starts at Paine Grande, you first must take a catamaran across Lago Pehoe from Pudeto.
Once there, head eastbound towards the famous Cuernos del Paine. This mountain range is one of the most photogenic in the park. During a hike to the French Valley, much of the first portion of the trail will have views overlooking the mountains.
In addition, some beautiful lake views will be off to your right hand side before reaching the valley turn off point. Now, depending on your timing will dictate how far up the valley you can go.
Since you will need to catch the catamaran (and potentially bus) back, your pace will be of the upmost importance.
There are two viewpoints up the valley. The first one is at Mirador Frances and the second one is a couple miles further up at Mirador Britanico. If the timing works out you can head all the way to the end. If not, simply turn back around when you see fit.
Either way it ends up, the views approaching and around the valley are some of the best you can ask for. So, just soak it all in, before retracing your steps back to Paine Grande and onto the catamaran.


Hike Details
- Starting & Ending Point: Paine Grande
- Mid-Point: Mirador Frances or Britancio
- Distance: 11.5 miles / 18.5 km or 15.6 miles / 25.1 km
- Elevation Gain: 2,175 feet / 663 meters or 3,250 feet / 990 meters
Logistics
- Step 1: Bus or Drive to Pudeto
- Step 2: Catamaran to Paine Grande
- Step 3: Round Trip Hike
- Step 4: Catamaran to Pudeto
- Step 5: Bus or Drive to Puerto Natales/Hotel
Learn More: Check out the French Valley Hike overview for more details
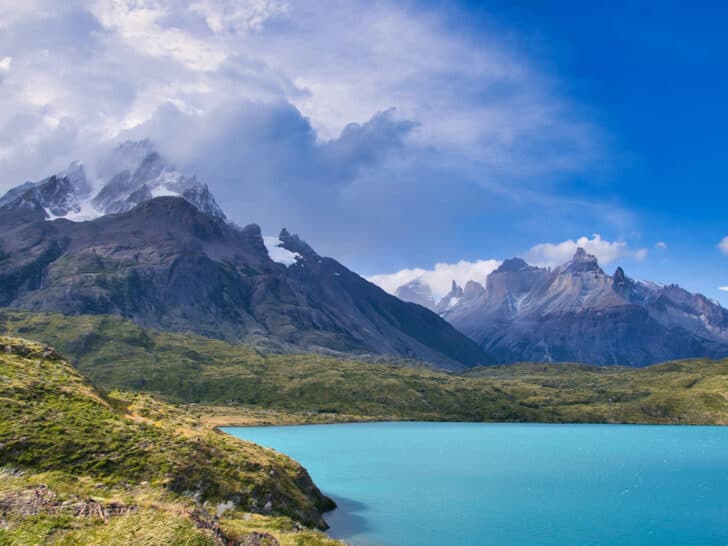
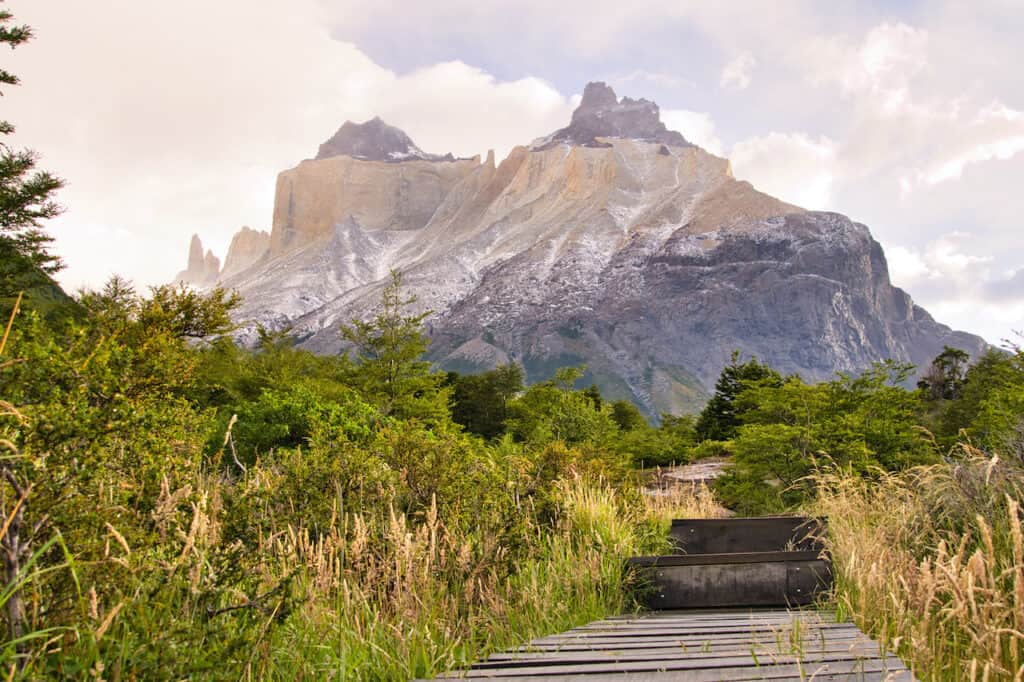
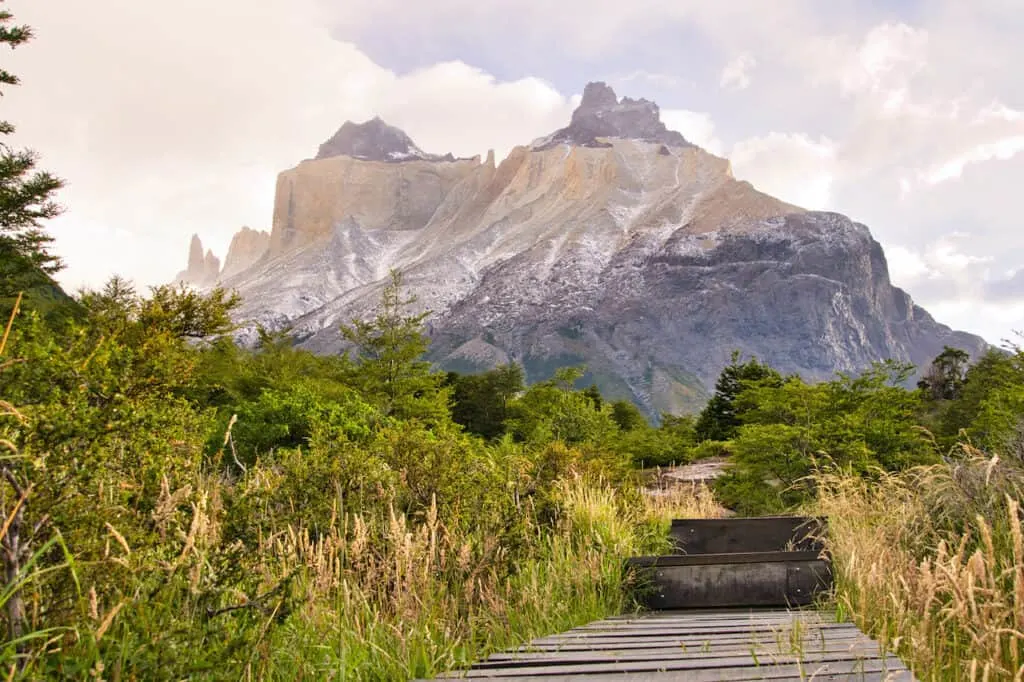
Mirador Lago Pehoe
To finish up this section, is the Mirador Lago Pehoe hike. The trail is going to be on the easier side as you get to take in some great views of Lago Pehoe, along with the Cuernos del Paine mountains out back.
Similar to some of the other hikes, the first part of the day will entail a catamaran ride from Pudeto to Paine Grande. Now, instead of heading north to Grey or east to Frances, you can also head south.
There is a trail from the refugio that makes its way all along the western side of Lago Pehoe. Throughout the hike, lake and mountain views will be continuous as you hug the lakeside and continue southbound.
After passing by the majority of the western bank, the trail gains some elevation towards a viewpoint spot. From here you will get some more elevated views of the lake, with the Torres del Paine mountains out back.
Once all wrapped up, continue back to Paine Grande. While the trail itself will be the same, now you will have the mountains out in front of you as you finish up the hike.
Feel free to hang out at the refugio, grab some food & drinks, and then hop on the catamaran back out to Pudeto.
Hike Details
- Starting & Ending Point: Paine Grande
- Mid-Point: Mirador Lago Pehoe
- Distance: 4.5 miles / 7.2 km
- Elevation Gain: 600 feet / 180 meters
Logistics
- Step 1: Bus or Drive to Pudeto
- Step 2: Catamaran to Paine Grande
- Step 3: Round Trip Hike
- Step 4: Catamaran to Pudeto
- Step 5: Bus or Drive to Puerto Natales/Hotel

4) Easy Torres del Paine Day Hikes
This section of the hiking list will focus on shorter & easier trails that are located in the southern end of the National Park, across the lakes. None of these are connected to the W or O Treks, and are more suited towards day hikers in general.
Having your own car will be needed for some of these. However, most can be visited if coming in by bus.
Mirador Salto Grande
One of the easiest hikes in Torres del Paine National Park is the trail that heads up to the Salto Grande waterfall. This is known to be the top waterfall to visit in the area, and a short hiking trail will take you right to it.
It is just 0.5 miles from the trailhead to the waterfall (1 mile round trip). Due to this, many people opt to extend the hike to include the Cuernos Lookout (more on that next).
The trailhead can be reached by rental car or by bus to the Pudeto stop. From the bus stop, it is just 5 minutes by foot to the start of the hike.
Overall, it is an easy & well marked trail as you make the 10 minute walk to the waterfall viewpoint. From there you will get to see the flowing water make its way down from Lake Nordenskjold through the Paine River, and into Lago Pehoe.
As you turn that corner, looking northbound, views of the Torres del Paine mountain ranges will come into view. If you are up for it, continue onwards to complete the longer trail.
One way or another, you will then turn back around and take the same trail to the trailhead.
Hike Details
- Starting & Ending Point: Pudeto Catamaran (5 minutes by foot)
- Mid-Point: Salto Grande
- Distance: 1.0 miles / 1.6 km
- Elevation Gain: 130 feet / 40 meters
Logistics
- Step 1: Bus or Drive to Pudeto
- Step 2: Round Trip Hike
- Step 3: Bus or Drive to Puerto Natales/Hotel

Cuernos Lookout
If you are looking for “the” easy day hike in Torres del Paine, then the Cuernos Lookout is the one to go for. Not only does it include the aforementioned Salto Grande, but it also has some of the most beautiful views looking across Lake Nordenskjold.
Getting to the starting point can either be done by driving a rental car right to the trailhead lot, or you can take the bus to Pudeto. The bus stop is just a 5 or so minute walk away from the trailhead.
Once at the trailhead, the hike will take you the half a mile to the Salto Grande viewpoint. From there, the trail heads northbound along Lake Nordenskjold. It is a relatively flat trail all the way through, making it perfect for most people out there.
It is another 1.5 miles from the waterfall to the viewpoint area. Along the way you will be welcomed to some of the best panoramas in the park.
Out in front of you will be the lake in the foreground and the Cuernos del Paine out in the back. Several other mountains that make up the wider range will also be in view, as you get to take it all in.
You can spend some time just hanging out by the end of the trail before doubling back the 2 miles to the parking lot.
Hike Details
- Starting & Ending Point: Pudeto Catamaran (5 minutes by foot)
- Mid-Point: Cuernos Lookout
- Distance: 4.0 miles / 6.4 km
- Elevation Gain: 600 feet / 180 meters
Logistics
- Step 1: Bus or Drive to Pudeto
- Step 2: Round Trip Hike
- Step 3: Bus or Drive to Puerto Natales/Hotel

Condor Lookout
For another short but sweet vantage point, the Condor Lookout is a top day hike to consider adding to the list.
This lookout area is set further back the Cuernos Lookout, so you will get a more wide angle view of Torres del Paine from afar. The hike begins right next to the Camping Pehoe bus stop, making it easy to get there by public transport (or by rental car).
From the trailhead, it is then 0.75 mile hike uphill gaining around 700 feet of elevation. This means that you should expect a more difficult incline compared to some of the other shorter day hikes on the list.
But with the incline, you will get to take in the views! From the Condor Lookout viewpoint, Lago Pehoe will be down out in front of you, along with the Torres del Paine mountain ranges hovering out back.
Coming down, you can either head back the same way you came, or you can make it more of a loop trail. This would entail taking the secondary trail to Hosteria Pehoe, and then walking along the road back to Camping Pehoe.
Hike Details
- Starting & Ending Point: Camping Pehoe
- Mid-Point: Condor Lookout
- Distance: 1.5 miles / 2.4 km
- Elevation Gain: 700 feet / 215 meters
Logistics
- Step 1: Bus or Drive to Camping Pehoe
- Step 2: Round Trip Hike
- Step 3: Bus or Drive to Puerto Natales/Hotel

Laguna Azul Trail
One of the lesser visited areas of Torres del Paine is the eastern side. Here is where the Laguna Azul is located. Getting to Laguna Azul will only be possible by rental car as the busses don’t make their way to that side of the park.
You can drive right on up to the Laguna Azul camping area, where there is a trail that heads around the northern side of the lake.
The highlight of the hike is that views of the famous three Torres towers will be out in front of you during the duration of the trail. It offers a fantastic vantage point that few other hikes in the area do.
While you can decide to turnaround at any point you would like, many head up to an elevated camping area before turning back to the parking lot.
If you follow that route, the round trip comes in at 6 miles, with minimal elevation gain along the way.
Hike Details
- Starting & Ending Point: Laguna Azul Camping
- Mid-Point: Laguna Azul View/Camp
- Distance: 6.0 miles / 9.6 km
- Elevation Gain: 700 feet / 215 meters
Logistics
- Step 1: Drive to Laguna Azul Camping
- Step 2: Round Trip Hike
- Step 3: Drive to Puerto Natales/Hotel

Mirador Ferrier
While most of the hikes in this section are considered easy, this final one will be a bit tougher.
The Ferrier Lookout hike takes you high up the mountainside as you get to take in views of Lago Grey, the Torres del Paine mountains, and even Grey Glacier itself.
Since this is a major viewpoint type of trail, expect to gain some elevation along the way. As you can see from the hiking metrics below, it will be no easy task to get up there. The trail includes +2,000 feet of elevation gain in just under 2 miles of uphill climbing.
But once you reach the top, you will be welcomed to some of the best views you can ask for. Just be careful on the way down as it is steep and can be slippery after it rains.
You can reach the start by driving right to the trailhead or taking a bus to Hotel Lago Grey. The hotel is about a 15 minute walk from the official trailhead, so do consider that as you calculate your overall hiking time.
Hike Details
- Starting & Ending Point: Hotel Lago Grey (15 minute walk past)
- Mid-Point: Mirador Ferrier
- Distance: 3.5 miles / 5.6 km
- Elevation Gain: 2,000 feet / 610 meters
Logistics
- Step 1: Bus or Drive to Hotel Lago Grey
- Step 2: Round Trip Hike
- Step 3: Bus or Drive to Puerto Natales/Hotel


5) Multi Day Hikes
To finish up this list of Torres del Paine hikes, let’s go over the famous W Trek and O Trek of the National Park.
In general, these two hikes cover a vast majority of terrain within Torres del Paine. The W trek is usually done as a 5 day hike, while the O as an 8 day hike.
The trek names (W and O), represent the shape of the overall route. The O Trek also includes all of the W, in addition to the “backside” of Torres del Paine.
W Trek
Below is what a standard W Trek entails starting in the west and heading towards the east (you can also do it in the opposite direction).
- Day 1: Bus to Pudeto | Catamaran to Paine Grande | Hike to Grey
- Day 2: Hike from Grey to Glacier Grey Suspension Bridges & Back to Paine Grande
- Day 3: Hike from Paine Grande to Frances (or Cuernos) via Valle del Frances
- Day 4: Hike from Frances to Chileno (or Central or Las Torres Hotel)
- Day 5: Hike to Mirador Base de Las Torres & Hike Back to Welcome Center | Van to Amarga | Bus to Puerto Natales
The trek starts off with a catamaran ride from Pudeto to Paine Grande, where you will then begin the trek up towards the Grey area of Torres del Paine. After a couple days of exploring the western side of the park, it is then heading eastbound to the Valle del Frances.
Taking in views of the Cuernos del Paine, and then seeing the panoramas from Mirador Frances and Britanico will be top highlights along the way.
From Valle del Frances, the trail continues eastbound to Chileno, before ending with a sunrise at the famous Mirador Las Torres.
Finishing up the hike will entail trekking back out to the Torres del Paine Welcome Center and then onwards to Amarga to catch the bus out of the National Park.


Hike Details
- Starting Point: Paine Grande
- Ending Point: Torres del Paine Welcome Center
- Distance: 47.5 miles / 76.4 km
- Elevation Gain: 12,000 feet / 3,700 meters
Logistics
- Step 1: Bus to Pudeto
- Step 2: Catamaran to Paine Grande
- Step 3: W Trek
- Step 4: Bus from Amarga to Puerto Natales/Hotel
Learn More: Check out the W Trek overview for more details
O Trek
For those that are up for a longer trekking experience, the O will include a few additional days exploring the northern side of Torres del Paine. This is usually done as an 8 day hike, starting and ending at the Torres del Paine Welcome Center. The route will look something like this:
- Day 1: Bus to Laguna Amarga | Van to Welcome Center | Hike to Seron
- Day 2: Hike from Seron to Dickson
- Day 3: Hike from Dickson to Los Perros
- Day 4: Hike from Los Perros to Grey
- Day 5: Hike from Grey to Paine Grande
- Day 6: Hike from Paine Grande to Frances (or Italiano or Cuernos) via Valle del Frances
- Day 7: Hike from Frances to Chileno (or Central or Las Torres Hotel)
- Day 8: Hike to Mirador Base Las Torres & hike back to welcome center | Bus to Puerto Natales
Since the O can only be done counter clockwise, the easiest way to go about it is to start off heading from the welcome center to Seron. It is then a few days in the backside of the park, as you get to see landscape that most people aren’t exposed to.
From Seron, it is off to Dickson, and then to Los Perros. The trail then ascends to the highest point at the John Gardner Pass, before meeting up with the W Trek.
Head down along Grey Glacier, walk across the suspension bridges and arrive at the refugio. It is then similar to the W Trek mentioned above.
From Grey, you then then go to Paine Grande followed by the Valle del Frances. It is then towards Chileno, where you will finish up with Mirador Las Torres. End the trail right back where you started for a complete Torres del Paine experience.

Hike Details
- Starting & Ending Point: Torres del Paine Welcome Center
- Distance: 72 miles / 116 km
- Elevation Gain: 17,000 feet / 5,200 meters
Logistics
- Step 1: Bus to Amarga / Van to Welcome Center
- Step 2: O Trek
- Step 3: Van to Amarga / Bus from Amarga to Puerto Natales/Hotel
Learn More: Check out the O Trek overview for more details
6) Entrance Tickets
In order to take part of the hikes in Torres del Paine, you must purchase tickets. These can be done through the official national parks website.
When going through the process, you will have the option to choose between an “up to 3 day” ticket for $35 USD or a 3+ day ticket that costs $49 USD.
If you do not purchase ahead of time, then doing so at the entrances of the park is also a possibility. This however may take up time, so it is best to come prepared with your tickets in advance.
7) Weather & Time of Year
One of the most important considerations when hiking in Patagonia will be the weather. For those that are not aware already, the Patagonian weather can be quite crazy. Not only on a day to day basis, but also on an hour to hour basis.
At one moment it may be nice and sunny, while the next moment it may be overcast and snowing. You really can get all four seasons in one day while in Patagonia.
You may also come across very windy conditions from time to time. I have heard accounts of wind gusts reaching 60 MPH / 100 KPH around the park, so be prepared!
If you are doing a day hike, you should have more flexibility in picking a day that looks best on the forecast. The last thing you want is to arrive at a viewpoint and it all be covered in thick low lying clouds.
For weather forecasts, the locals seem to favor Windguru (linked to the Mirador Las Torres). Be on the lookout for days that have little/no precipitation and low lying clouds. While forecasts are never going to be perfect, they are the best way to understand what the weather may entail.
The main season to hike in Torres del Paine is between December and March (along with the shoulder months as potential options too).
The weather is at the warmest during these times of year with a lower chance of snow & whiteout conditions. In addition, you will find that bus schedules, catamarans, and other logistical aspects will not run during the offseason.
Hiking Resources & Checklist
Before heading out for the trails, be sure to read up on some of the hiking resources up on the site. These are here to better prepare you for all types of outdoor adventure.
- Gear: Hiking Packing List
- Weather: How to Prepare for Hiking Weather
- Navigation: Hiking GPS & Navigation
- Tips: 20+ Hiking Tips & Tricks for the Trail
- Accommodation: Book Your Hotel Today
- Rental Car: Book Your Car Rental Today
8) Packing List
As you can tell, hiking in Patagonia, especially in Torres del Paine National Park, can bring all sorts of weather. Due to this, you will need to come fully prepared with the appropriate hiking gear. Spending 6-8+ hours out in the mountains can have you layering up (or down) in all sorts of ways.
Below are my recommendations on what a Torres del Paine day hike packing list should look like:
In general, I found layering to be the upmost important part of a trip. On a hike out in the park, I would recommend the following layers:
- Hiking Shorts
- Hiking Pants
- Short Sleeve Shirt
- Long Sleeve Shirt / Sun Hoodie
- Mid Layer Fleece
- Puff Jacket
- Packable Rain Jacket (Columbia Watertight II)
- Hiking Shoes (Recommendation: Keen Targhee)
- Hiking Socks (Darn Tough)
Additional day hike recommendations include:
- Hiking Backpack (Osprey Talon 22) & Rain cover (Joy Walker Cover)
- Water Bottle (CamelBak Chute) & Nutrition
- Portable Charger (Anker PowerCore 5000mAh)
- Hat & Sunglasses
- Sunscreen & Bug Spray
- Action Camera – GoPro Hero
Be sure to check out the Torres Del Paine Packing List guide I put together that will go through all of it and more
9) Where to Stay
During your time visiting Torres del Paine, you most likely will be staying in Puerto Natales at one point or another.
While you can visit the park from the Argentinian towns of El Calafate and El Chalten, I would recommend staying directly in Puerto Natales. This way you can more easily explore the park and not be subject to just a single day trip from Argentina.
Puerto Natales is a town built for the thousands of tourists who want to visit Torres del Paine. You will find plenty of gear shops, restaurants, and hotels all throughout town.
Below would be a few of my highly rated and recommended options when it comes to hotels in Puerto Natales:
Now, a more ideal option would be to stay within Torres del Paine National Park itself. This way you can literally wake up and be right in front of the park’s beauty. There are several great options to consider including:
- Hotel Las Torres: located right near the welcome center, with easy access to Mirador Las Torres & nearby trails.
- Ecocamp Patagonia: a glamping experience next door to Hotel Las Torres, for a more luxurious camping option
- Hotel Lago Grey: located on Lago Grey with views out towards TDP, and easy access to the catamaran
- Rio Serrano: situated a bit more south is Rio Serrano, right next Lago del Toro. Amazing views of the Cuernos del Paine are just outside the window.
Note: if staying at a hotel in the park, it will likely be most beneficial if you had your own rental car to get around to different trailheads & viewpoints and be on your own schedule. Check out the rest of the best Torres del Paine hotels for your visit!

That wraps up an overview to the best hikes in Torres del Paine. If you have any questions or comments, be sure to add them down below.
Also, feel free to check out some of the other Patagonia itineraries and guides up on the site.
El Calafate: You can visit Perito Moreno Glacier, take a boat ride in Los Glaciares National Park, and explore Cerro Frias
El Chalten: Visit the hiking capital of Argentina and enjoy Laguna de Los Tres, Laguna Torre, and the rest of the top El Chalten hikes
Ushuaia: Head to the end of the world, where you can walk with penguins, hike through Tierra del Fuego, and see Laguna Esmeralda
Have fun out there and safe travels!


explodingbrands.de
Friday 29th of August 2025
Fantastic read! 👏 I really appreciate how clearly you explained the topic—your writing not only shows expertise but also makes the subject approachable for a wide audience. It’s rare to come across content that feels both insightful and practical at the same time. At explodingbrands.de we run a growing directory site in Germany that features businesses from many different categories. That’s why I truly value articles like yours, because they highlight how knowledge and visibility can create stronger connections between people, services, and opportunities.Keep up the great work—I’ll definitely be checking back for more of your insights! 🚀
https://meinestadtkleinanzeigen.de/
Tuesday 26th of August 2025
This is such a valuable article! 👏 I really like how you’ve managed to explain the topic in a clear and practical way—it feels authentic and easy to relate to. Reading it gave me some new perspectives that I can actually apply. I’m especially interested in content like this because at meinestadtkleinanzeigen.de we’re running a classifieds and directory platform in Germany that connects people with services, businesses, and opportunities across many categories. Insights like yours remind me how powerful it is when knowledge and connections come together. Thanks for sharing—looking forward to more of your work! 🚀
Temp Mail
Saturday 2nd of August 2025
Your writing is not only informative but also incredibly inspiring. You have a knack for sparking curiosity and encouraging critical thinking. Thank you for being such a positive influence!