
Whether you are taking a day hike in Torres del Paine National Park or heading out on one of the classic multi day treks like the O & W Circuits, trekking to Mirador Las Torres is a must.
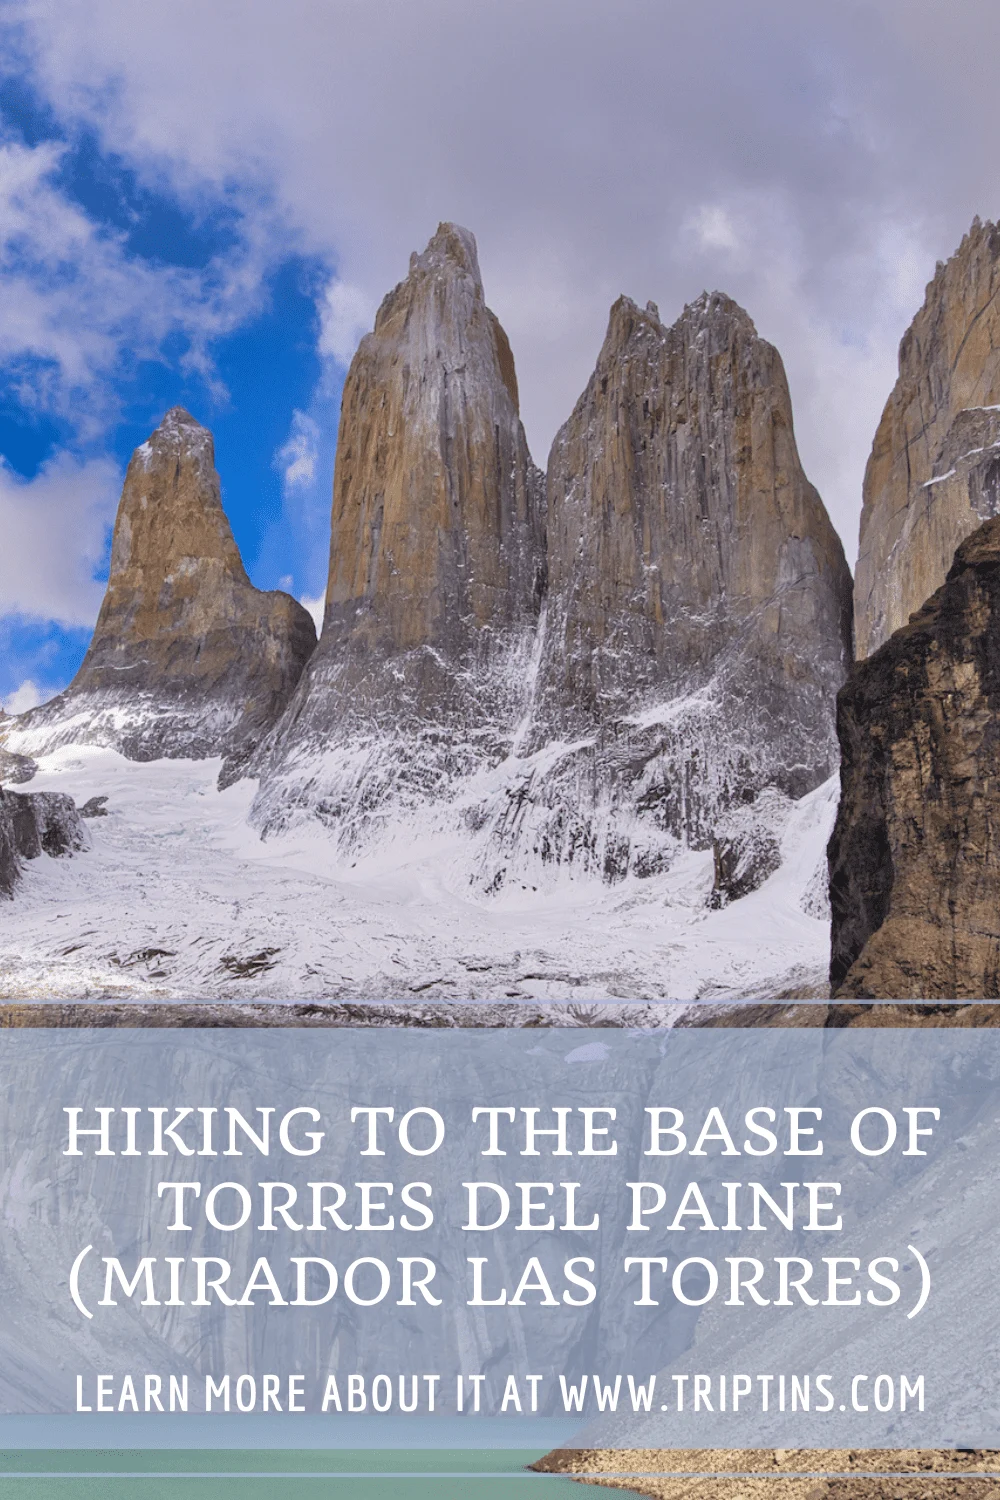
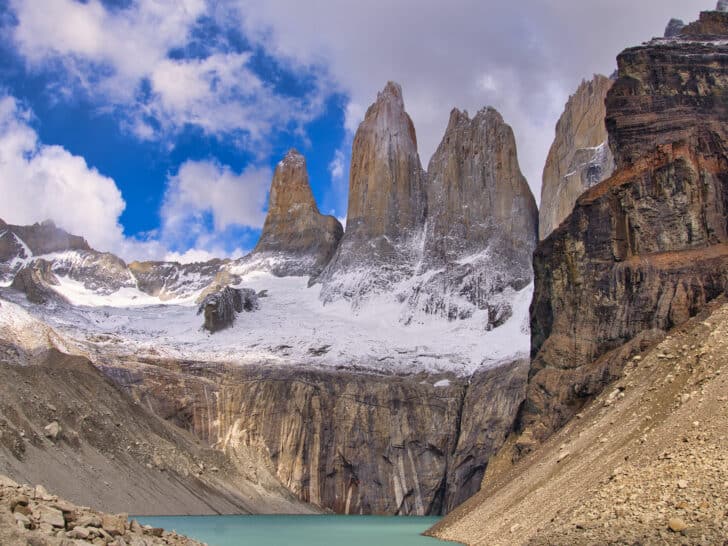
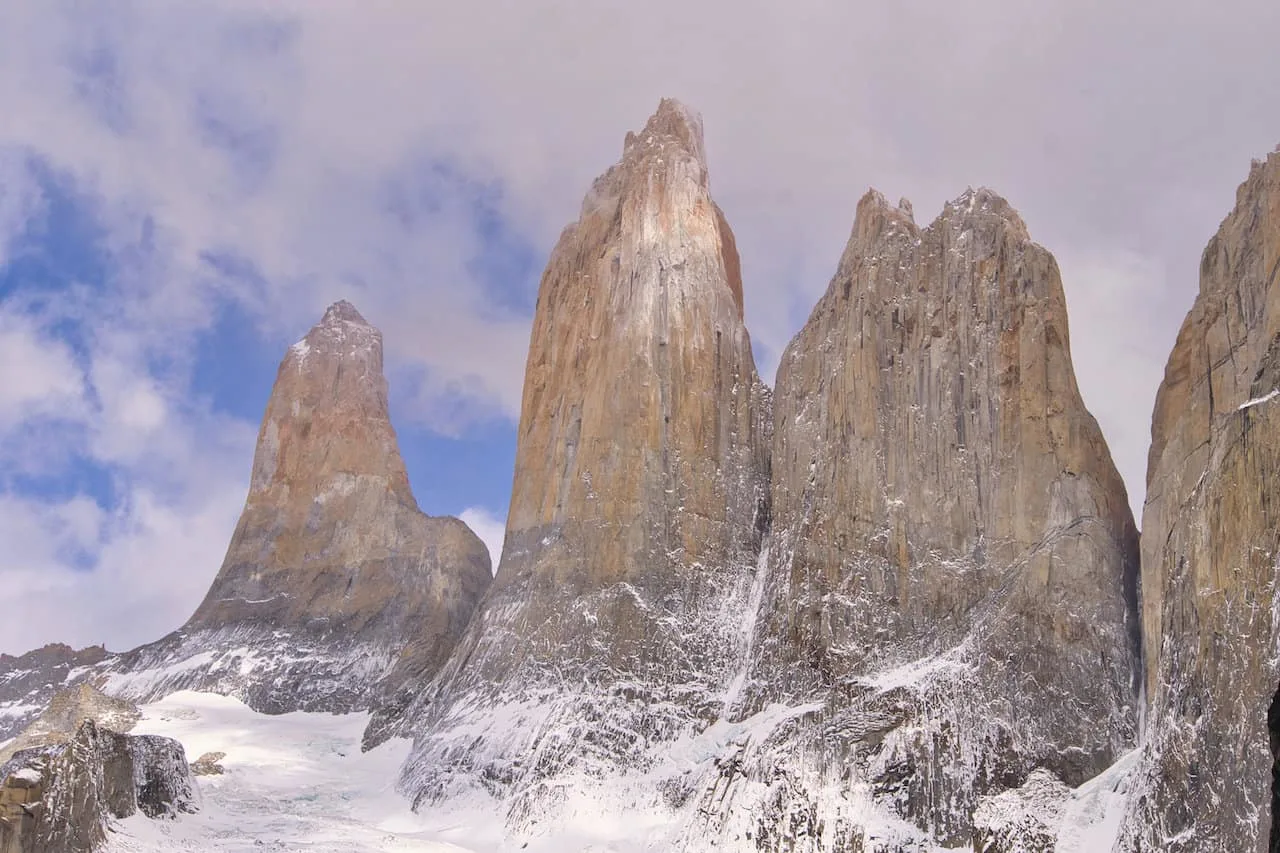
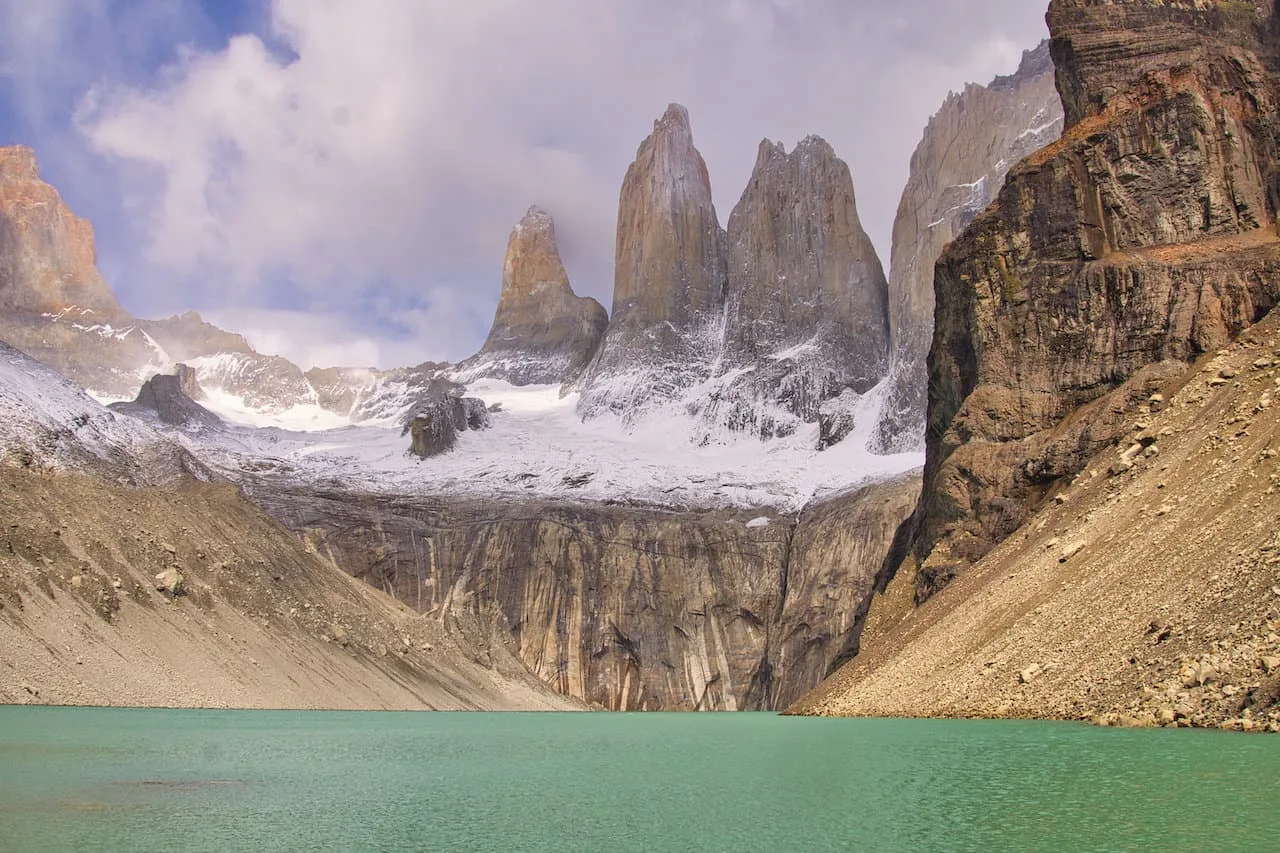
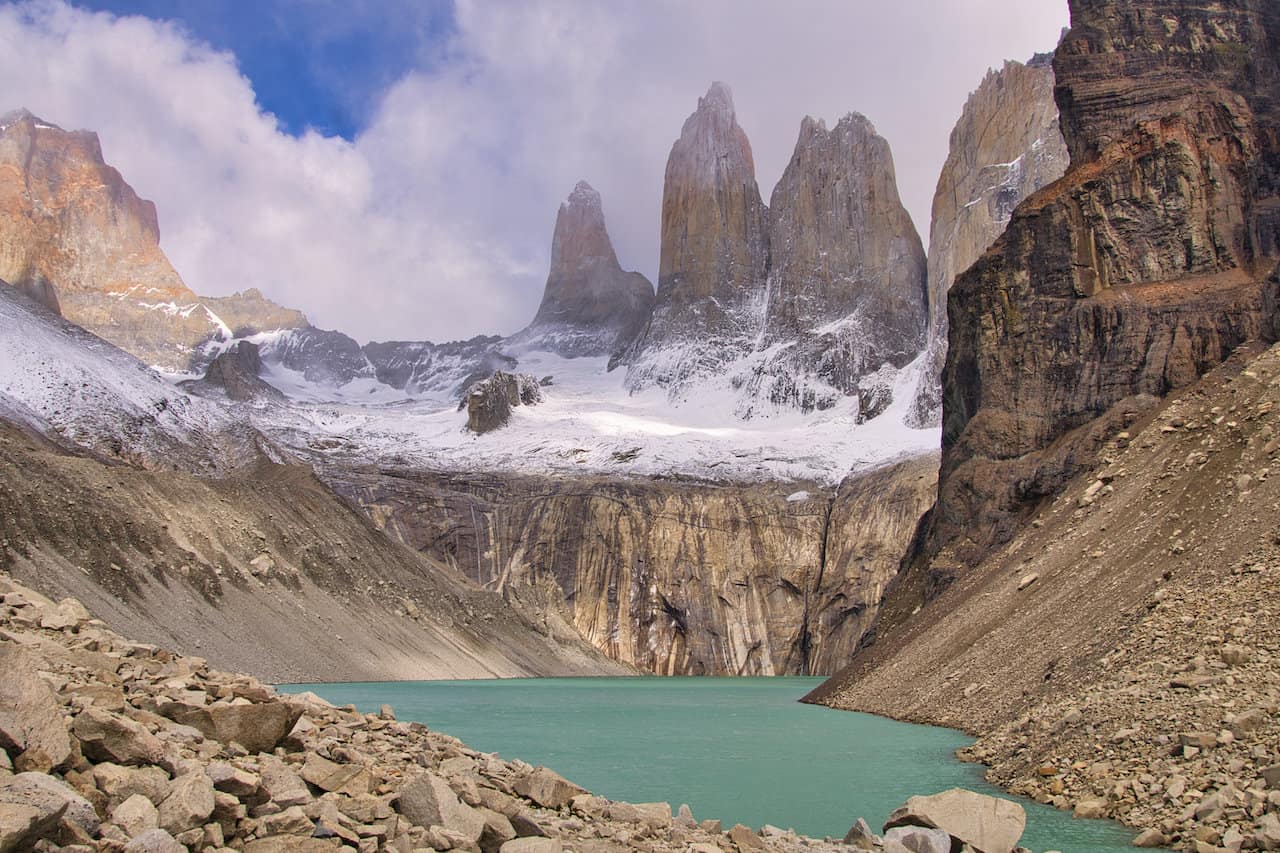
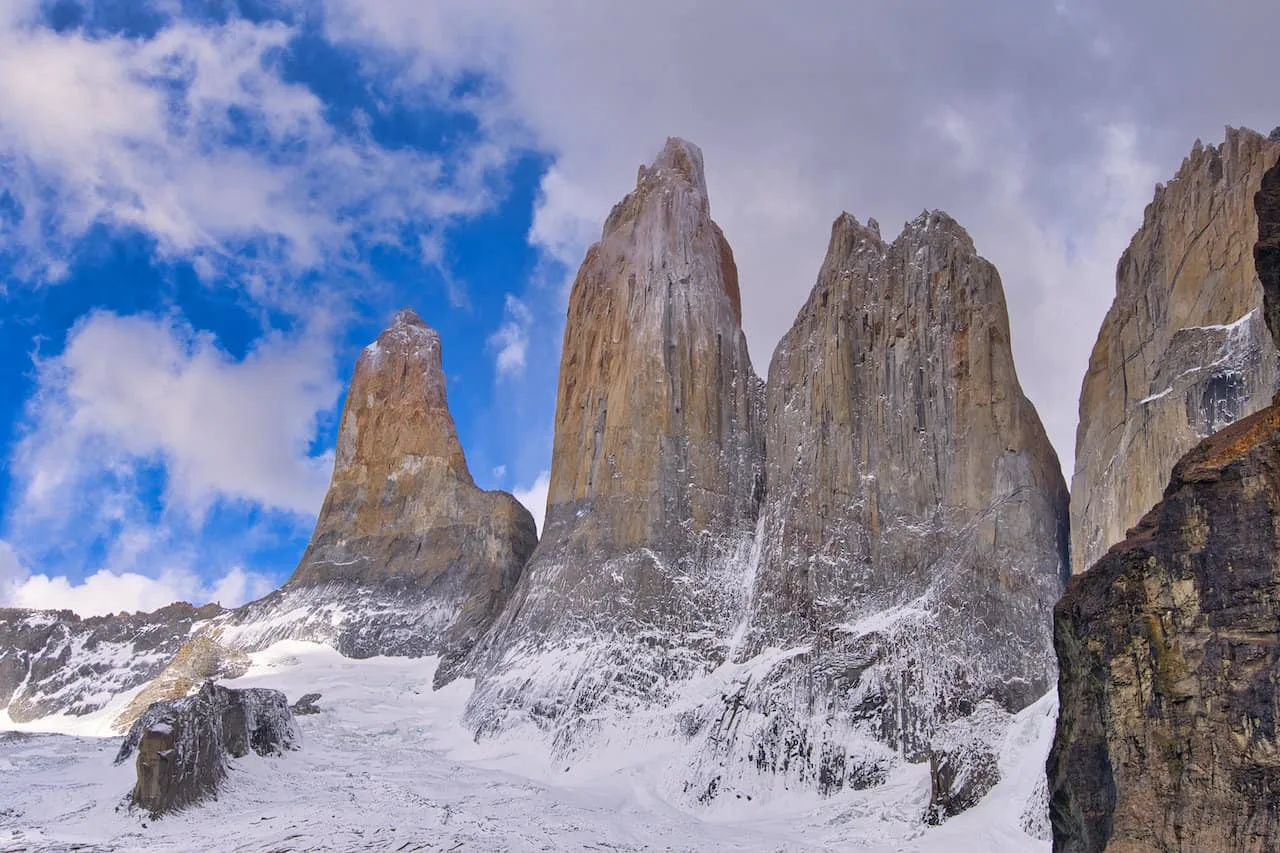
At the Mirador Las Torres, you will arrive at a lake at the base of the three famous mountains – Torre Sur, Torre Central, and Torre Norte. When it comes to iconic landmarks in the hiking world, this Patagonian viewpoint is near the top of the list.
Read on to learn all about the Mirador Las Torres hike and how to go about the trail for yourself.
* Affiliate Disclosure: This post may contain affiliate links, which means I may receive a commission if you make a purchase through the links provided, at no additional cost to you. Thanks for supporting the work I put into TripTins!
1) Background & Overview
The Mirador Las Torres hike (also known as Mirador de Las Torres or Mirador Base de Las Torres), is the most popular viewpoint in Torres del Paine.
Mirador Las Torres translates to “The Towers Viewpoint”. The towers of course represent the famous three granite peaks.
Not only is it popular because it is a beautiful spot, but also because it can be done as a day hike (instead of needing to do a longer multi day circuit).
Below are some helpful round trip stats about the Mirador Las Torres trail to give you a better idea of what the hike entails.
Note that these statistics reflect a day hike. I will also touch upon in the following section how the viewpoint usually gets added onto the longer O and W Circuits.
- Mirador Las Torres Trailhead: Hotel Las Torres
- Mid Point: Mirador Las Torres
- Length: 11 miles / 17.7 km
- Elevation Gain: 3,120 feet / 950 meters
- Mirador Las Torres Elevation: 2,800 feet / 853 meters
- Duration: 6-8 hours
- Trail Type: Out & Back
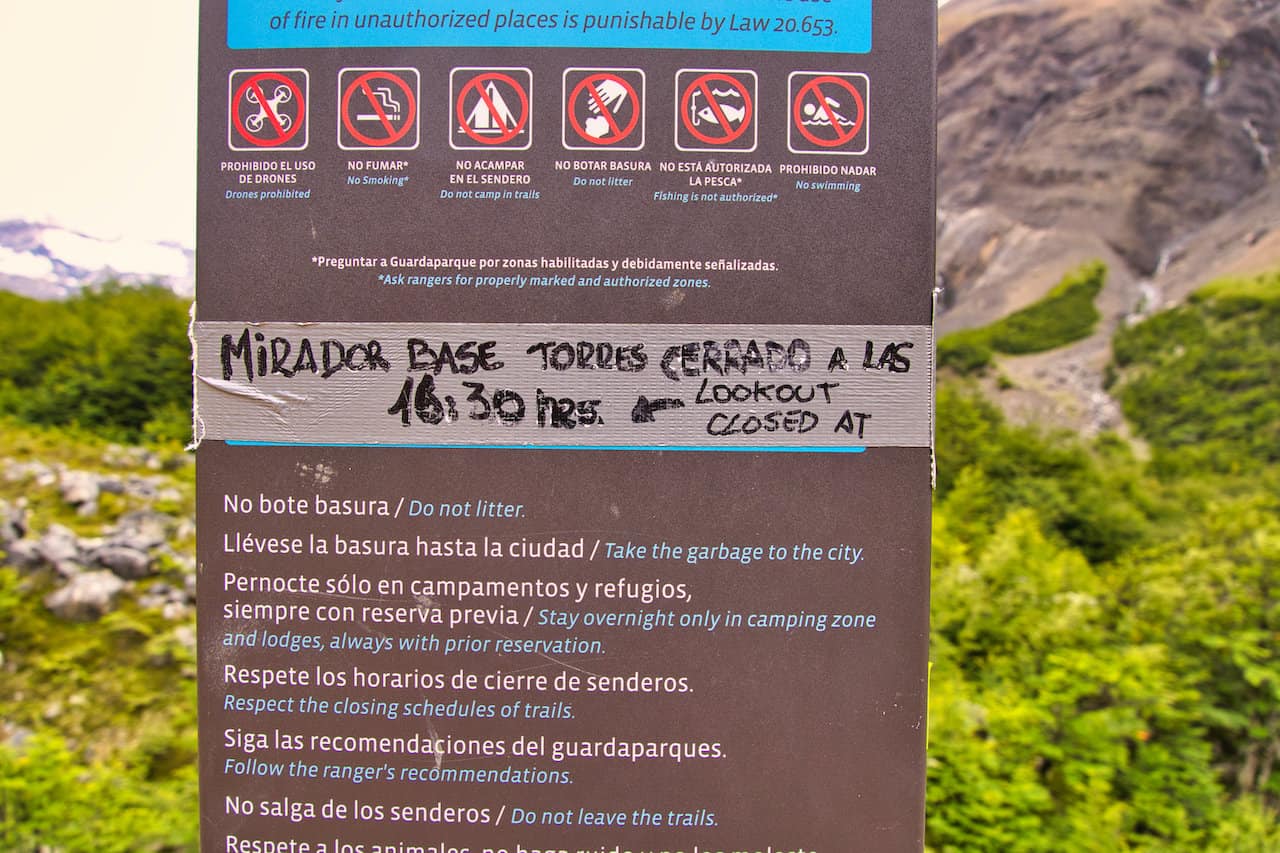
- Closing Time: Trail from Chileno closes at 3:00PM; Viewpoint closes at 4:30PM
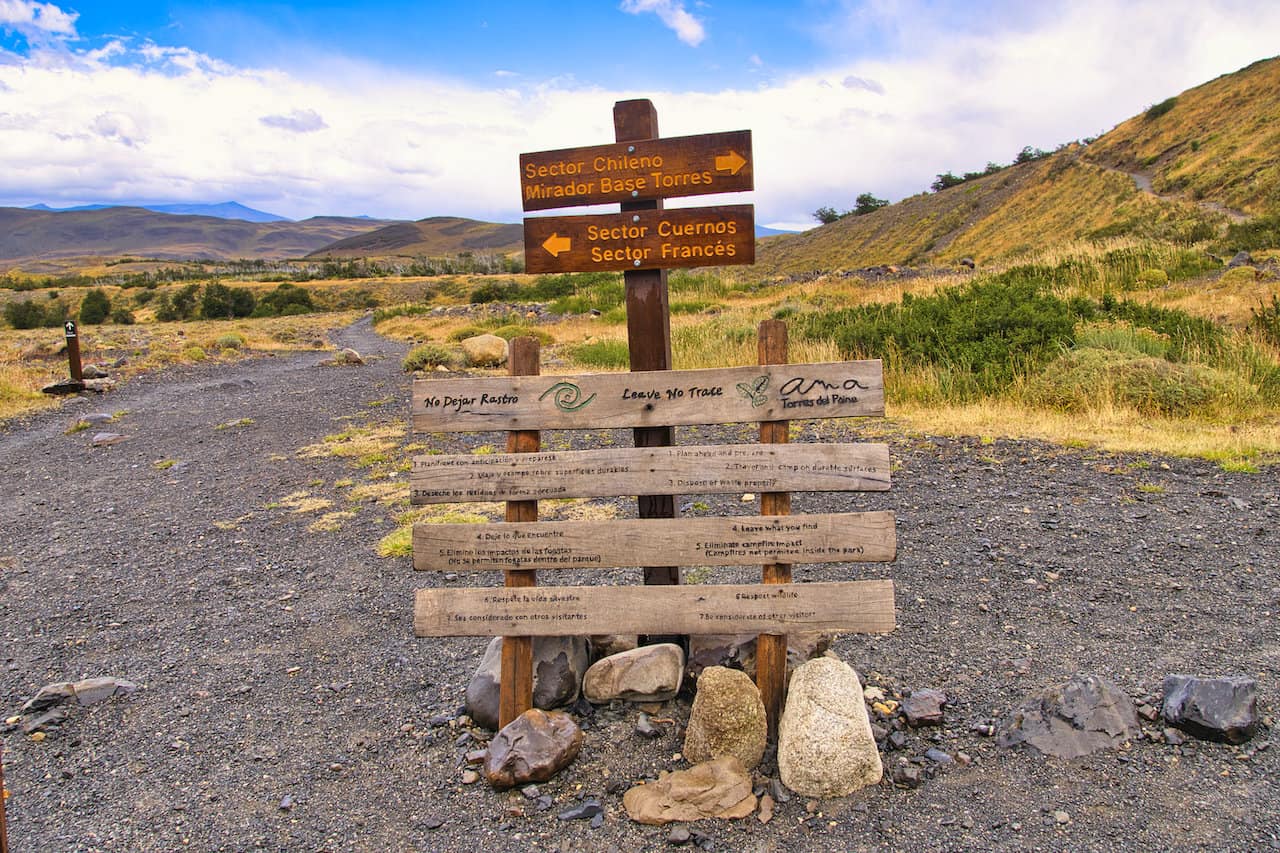
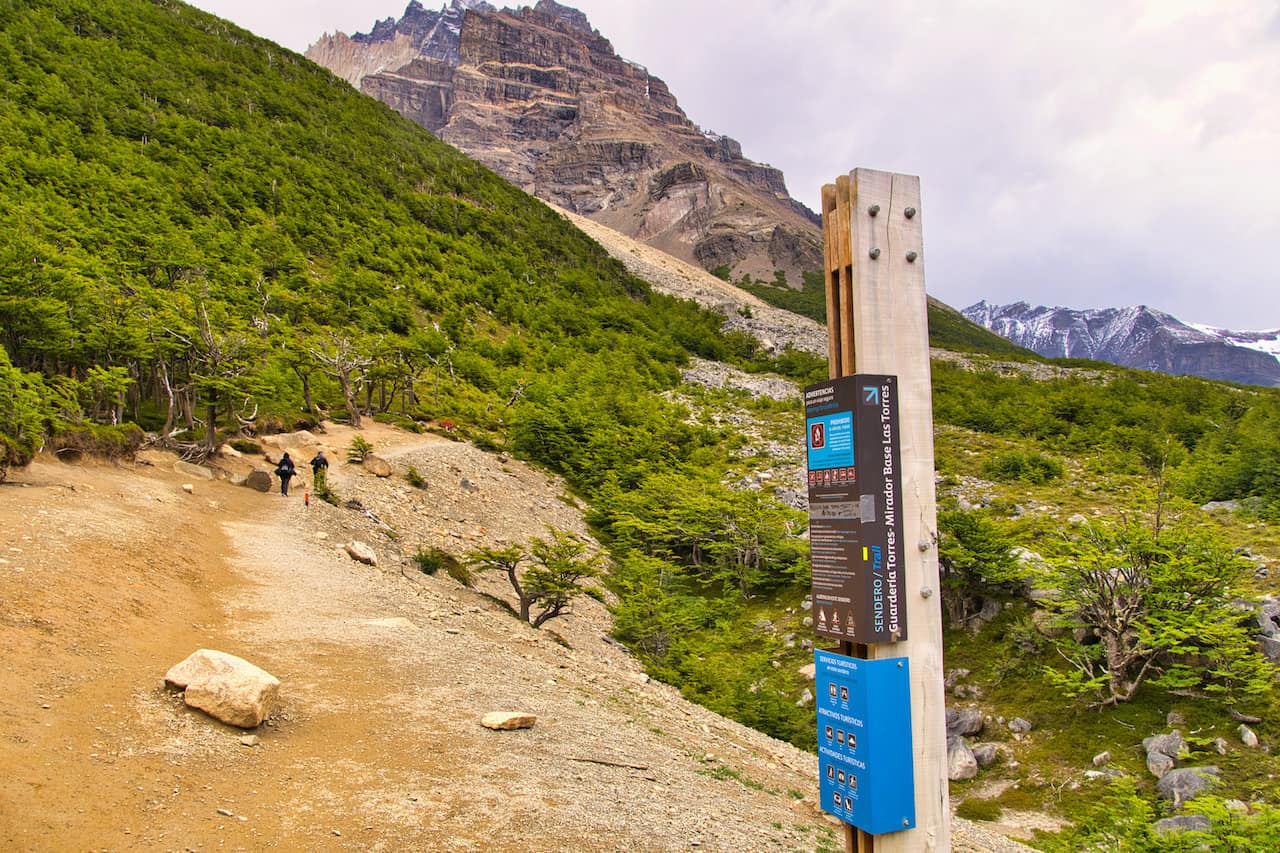
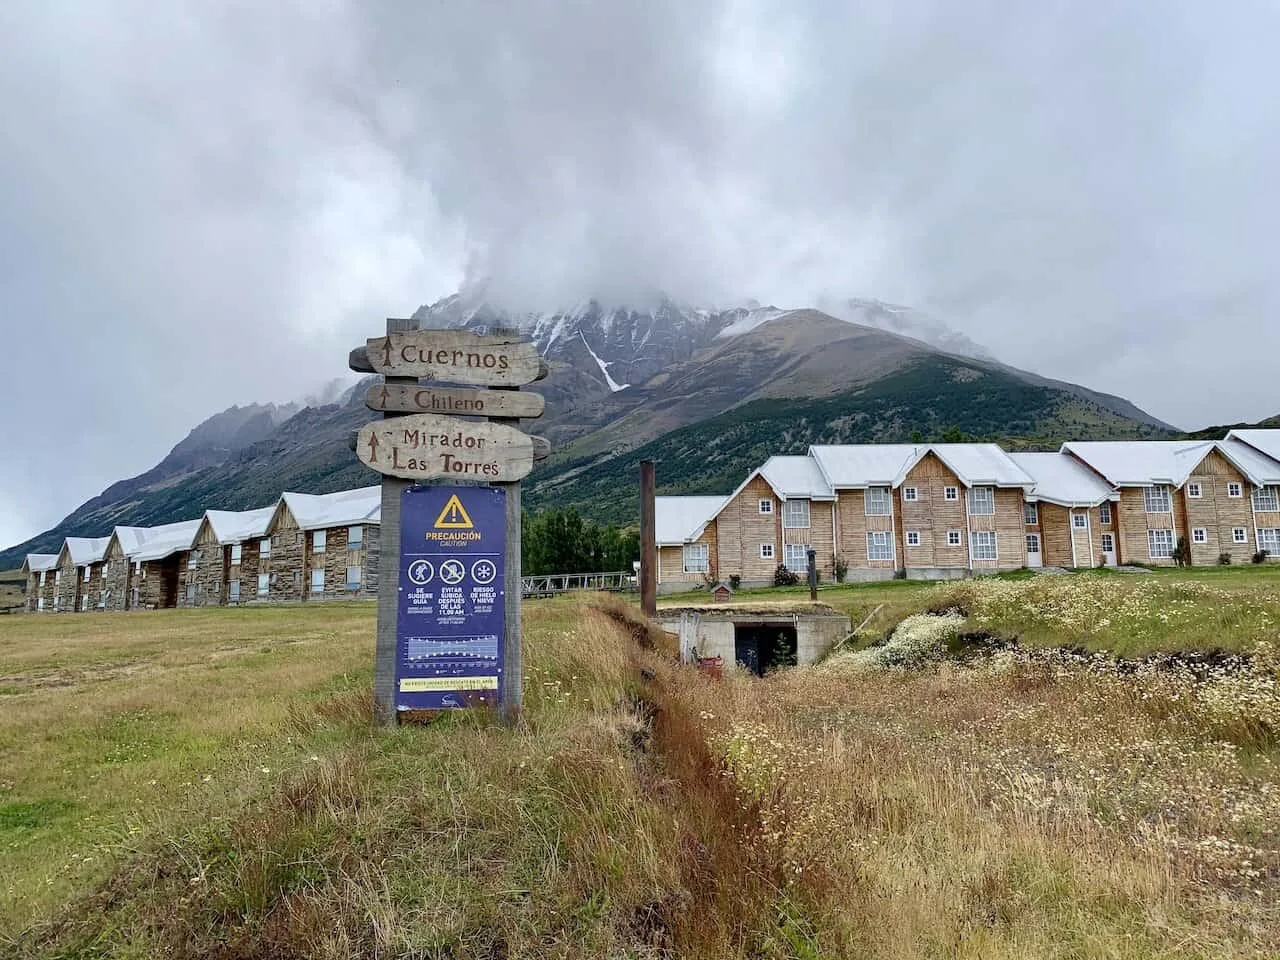
From the Hotel Las Torres, you will follow the signs pointing out to the Mirador Base de Las Torres. The route is well marked all the way through, and it will take you along the Ascencio River & Valley up to the viewpoint.
Along the way you will come across one of the main Torres del Paine campsites (Chileno), where you can take a break before continuing with the hike.
Once you reach the viewpoint, enjoy some time by the lake before turning back around and following the same path out back towards the starting point.
Torres del Paine Entrance Fee
Note that there is an entrance fee for Torres del Paine that should be purchased ahead of time online. If taking part of a day hike, the “up to 3 day” ticket is $35 USD. A 3+ day ticket costs $49 USD.

2) Day Hike vs W & O Circuits
As mentioned, there are a couple main ways to go about the hike up to the Mirador Base de Las Torres.
Mirador Base Torres Day Hike
The simplest of ways is to just make this a day hike – an out and back trail from Hotel Las Torres. If you opt for a day hike, you will need to make your way by bus, tour, or rental car from Puerto Natales (most likely) to the National Park.
I will dive into these logistics in the following section of this trail overview.
W Circuit or O Circuit
While a day hike is one way to go about, taking part of a multi day hike around Torres del Paine is another way to do so.
The W Circuit is a 4-5 day hike that takes you towards some of the top highlights that the National Park has to offer (including Mirador Las Torres as well as Valle del Frances & Grey Glacier).
On the other hand, the O Circuit is an 8 day hike that includes all of the W, in addition to exploring the “backside” of Torres del Paine.
The W trek can be done in either direction as a one-way route, while the O can only be done as a counter clockwise loop trail.
W Circuit
If taking part of the W Circuit, you will be visiting the Mirador Las Torres either on your first day or last day of the trek. This will depend on which direction you end up taking.
Going east to west, the Mirador Las Torres will be your first day out on the trail. By doing so, the hike will look very similar to the day hike. You will begin at the starting point, visit the viewpoint and then stay your first night at either the Chileno or Central campsite.
Going west to east, the Mirador Las Torres will be your last day out on the trail. Ideally the night before you are staying at the Chileno campsite, so you can hike the trail for sunrise. Once all complete, you will head back to Chileno, pack up your stuff, and make your way back to the welcome center.
Learn more about the W Circuit and everything that it entails.
O Circuit
The O Circuit will be somewhat similar, however most people who opt for the O end their trek at the Torres del Paine viewpoint. This means that you will be hiking to the Mirador Las Torres on day 8.
Similar to above, the night prior you can stay at the Chileno campsite before taking a sunrise hike to the viewpoint. It is then back down to the starting point to end a successful 8-day adventure.
Learn more about the O Circuit and everything that it entails.


3) How Do I Get to Mirador Las Torres
However you decide to go about the hike, the logistics to get to Torres del Paine will essentially be the same.
Below are some of the various ways to get yourself to Torres del Paine National Park and take part of the day hike up to Mirador Las Torres.
Puerto Natales Bus
One of the most popular options is to simply take a bus from Puerto Natales to Torres del Paine. There are two main steps to consider here:
Step #1: Puerto Natales to Laguna Amarga
The first step in the process will be getting yourself from Puerto Natales to the Laguna Amarga park entrance.
Unless you are going for an expensive two hour taxi, most people opt for an early ~7:00AM morning bus ride with Bus-Sur (check the site for the latest schedules). One way tickets are very affordable, around $10-$12 USD.
The bus will make 5 stops, however, the first stop is Laguna Amarga. So, for those doing the Mirador Las Torres hike (or O/W Treks), you can simply get off here and be on your way.
Note: if taking part of the W Trek going west to east, then you will get off at a further stop called Pudeto
Step #2 Laguna Amarga to Torres del Paine Welcome Center
Now, since the bus does not go to the welcome center, you will have one more logistical aspect of the day. Once off at Laguna Amarga, you can hop into a waiting van that will take you the rest of the distance.
These vans are run by Hotel Las Torres (as well as some independent third parties), and charge ~$5 per person. You will find yourself squeezed in with a bunch of random people, but the ride takes less than 10 minutes altogether.
Be sure to check out the latest bus schedules on Bus Sur (currently the earliest bus is at 6:45AM/7:00AM and the return busses at 3:00PM and 7:45PM).

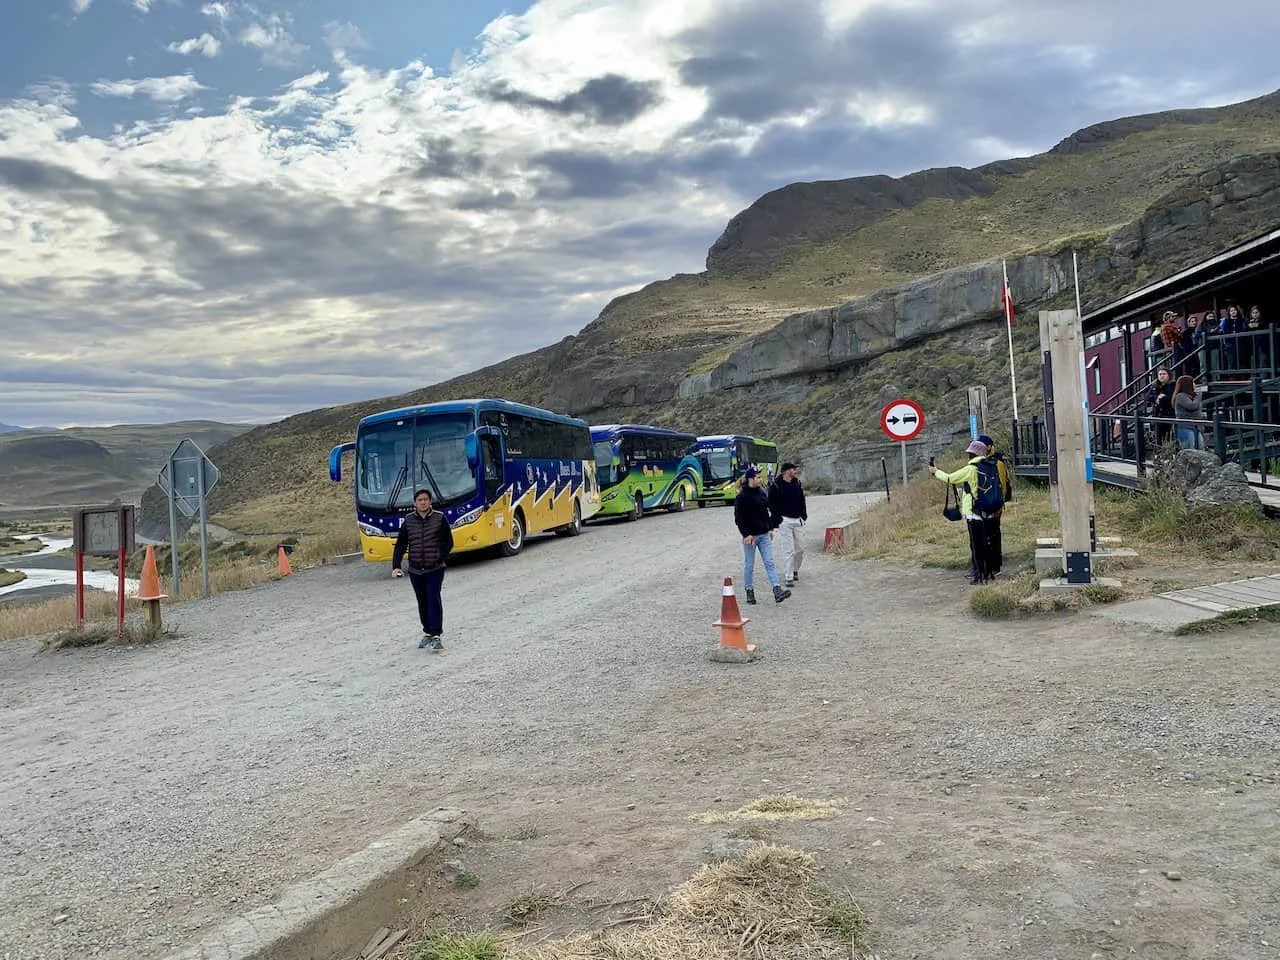
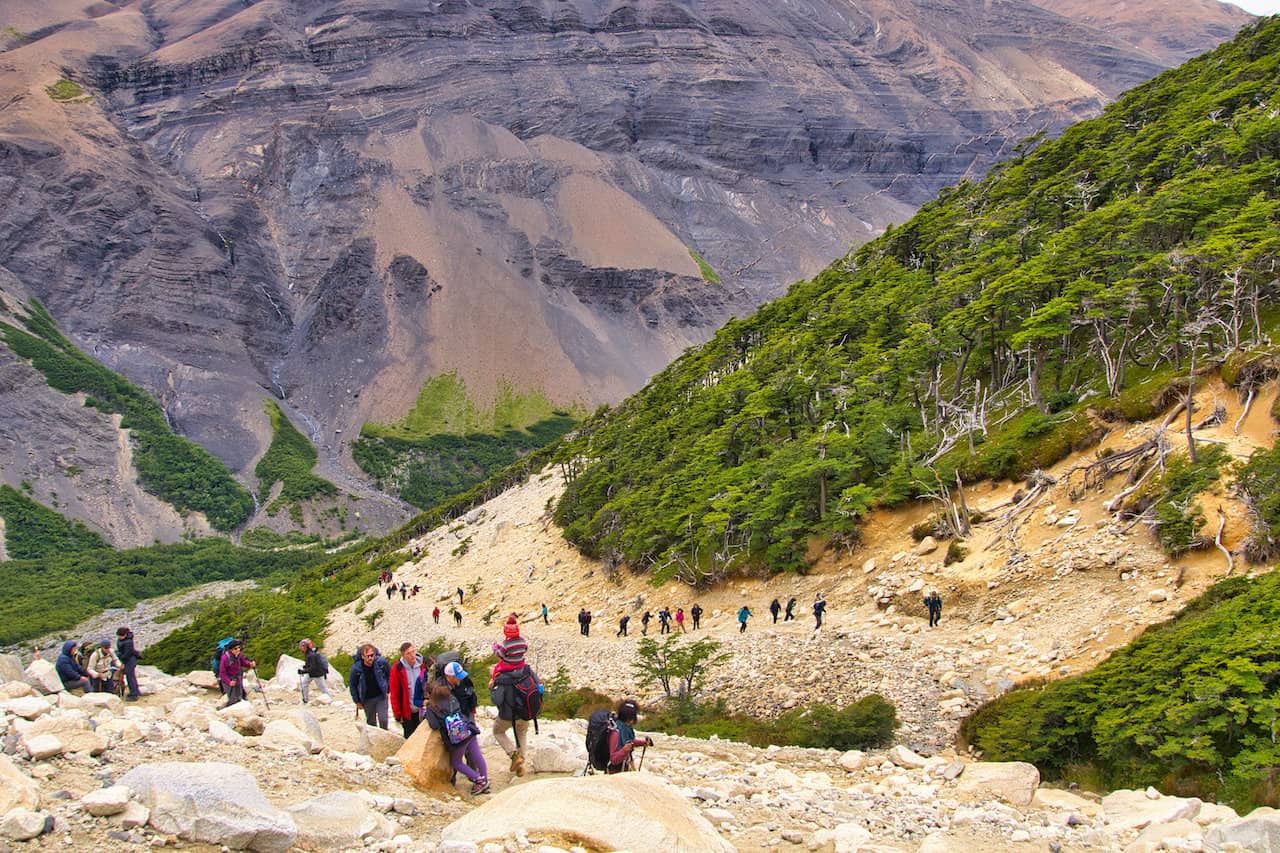
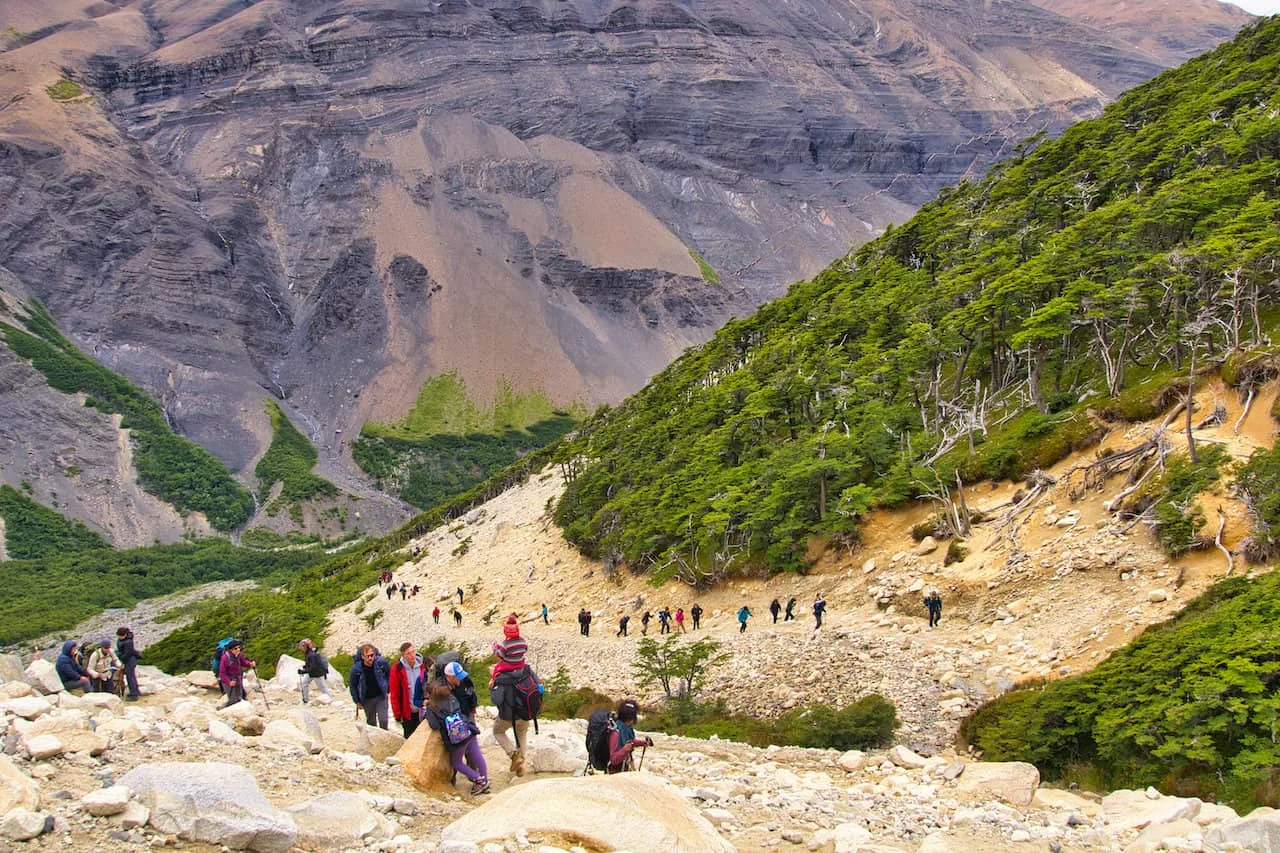
The downside of taking a bus is that many of the busses leave at the same time from Puerto Natales (around 7:00AM). Once the busses arrive, many people will begin the hike up the Mirador Las Torres at the same time.
This in turn can lead to a congested trail (and lake area). The photo below shows the crowds arriving as I am heading down the trail.
You can avoid this though by staying one night in the National Park by the trailhead.
This can be done by staying right at the Hotel Las Torres (one of the top Torres del Paine hotels) or at the Central campsite/refugio (or even the Chileno campsite/refugio further along the trail). So, instead of taking an early bus, you can take a later bus the day prior to the hike.
Rental Car
Now if you rent your own car, then you can go about the hike on your own schedule. Instead of leaving Puerto Natales at 7:00AM, you can leave an hour earlier and get a head start on the crowds.
Feel free to look at Rentalcars.com for renting a car during your time in Patagonia. You will be able to see a whole variety of options and choose the best car for your trip.
Renting a car also gives you a chance to road trip along to other places in Patagonia like Tierra del Fuego National Park, Perito Moreno Glacier, and other top highlights (such as Laguna de Los Tres).
Guided Tour
Lastly, you could also make your way on the hike with a guide. This way you will have all transport taken care of for you in addition to having a helpful guide by your side during the hike.
There will be no need to worry about getting to the bus station or traveling between Amarga and Hotel Las Torres. You will simply be picked up early in the morning and be driven directly to the starting point.
Below are two great options to choose from if looking for a guided tour:

4) Weather & Forecasts
One of the most important considerations when hiking in Patagonia will be the weather. For those that are not aware already, the Patagonian weather can be quite crazy. Not only on a day to day basis, but also on an hour to hour basis.
At one moment it may be nice and sunny, while the next moment it may be overcast and snowing. You really can get all four seasons in one day while in Patagonia.
You may also come across a lot of wind at times (one part of this hike is called the Windy Pass). I have heard accounts of wind gusts reaching 60 MPH / 100 KPH near the viewpoint, so do be prepared!
If you are doing this as a day hike, you should have more flexibility in picking a day that looks best on the forecast. The last thing you want is to arrive at the viewpoint and it all be covered in thick low lying clouds.
For weather forecasts, the locals seem to favor Windguru (linked to the Mirador La Torres). Be on the lookout for days that have little/no precipitation and low lying clouds. While forecasts are never going to be perfect, they are the best way to understand what the weather may entail.
Hiking Resources & Checklist
Before heading out for the trails, be sure to read up on some of the hiking resources up on the site. These are here to better prepare you for all types of outdoor adventure.
- Gear: Hiking Packing List
- Weather: How to Prepare for Hiking Weather
- Navigation: Hiking GPS & Navigation
- Tips: 20+ Hiking Tips & Tricks for the Trail
- Accommodation: Book Your Hotel Today
- Rental Car: Book Your Car Rental Today
5) Mirador Las Torres Hike
Now it is time to give you a high level overview of what to expect along the trail up to the Mirador Las Torres.
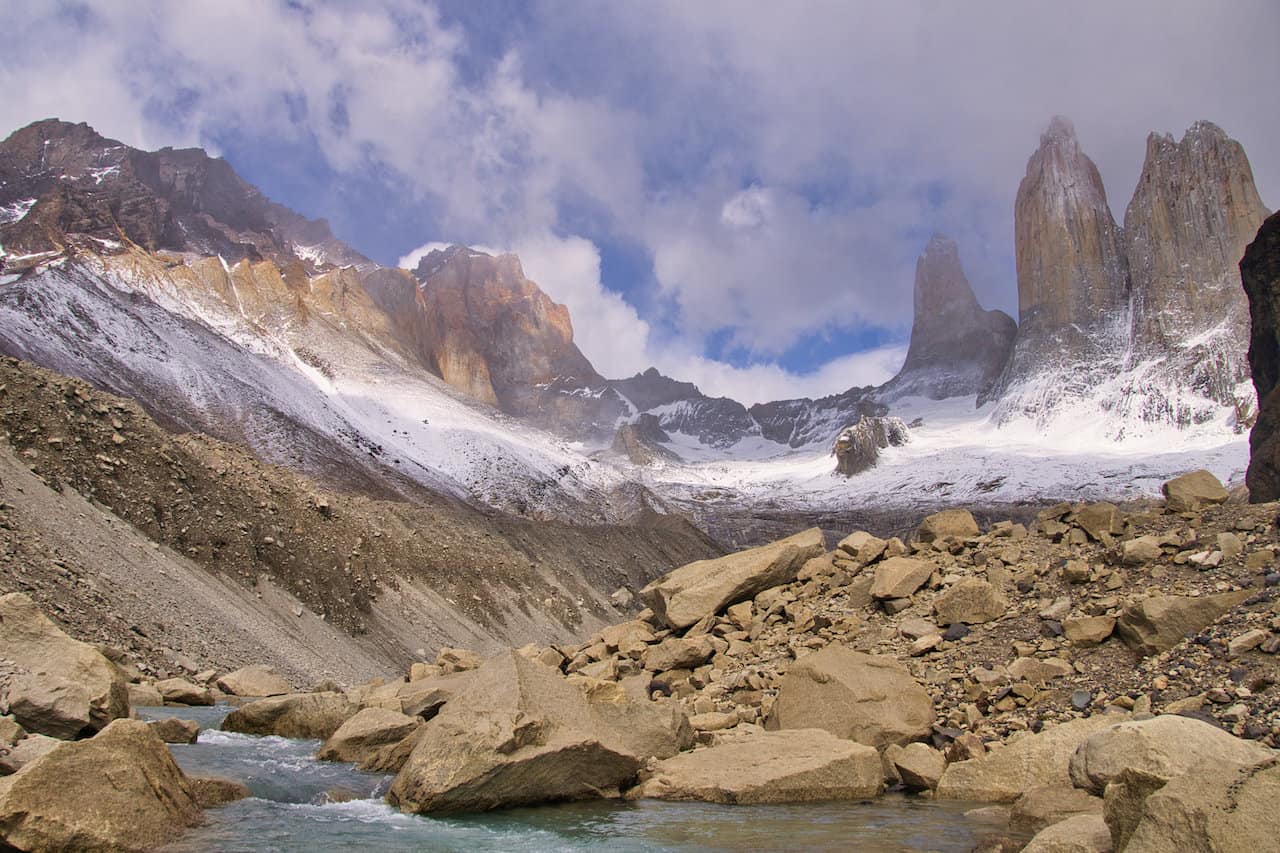
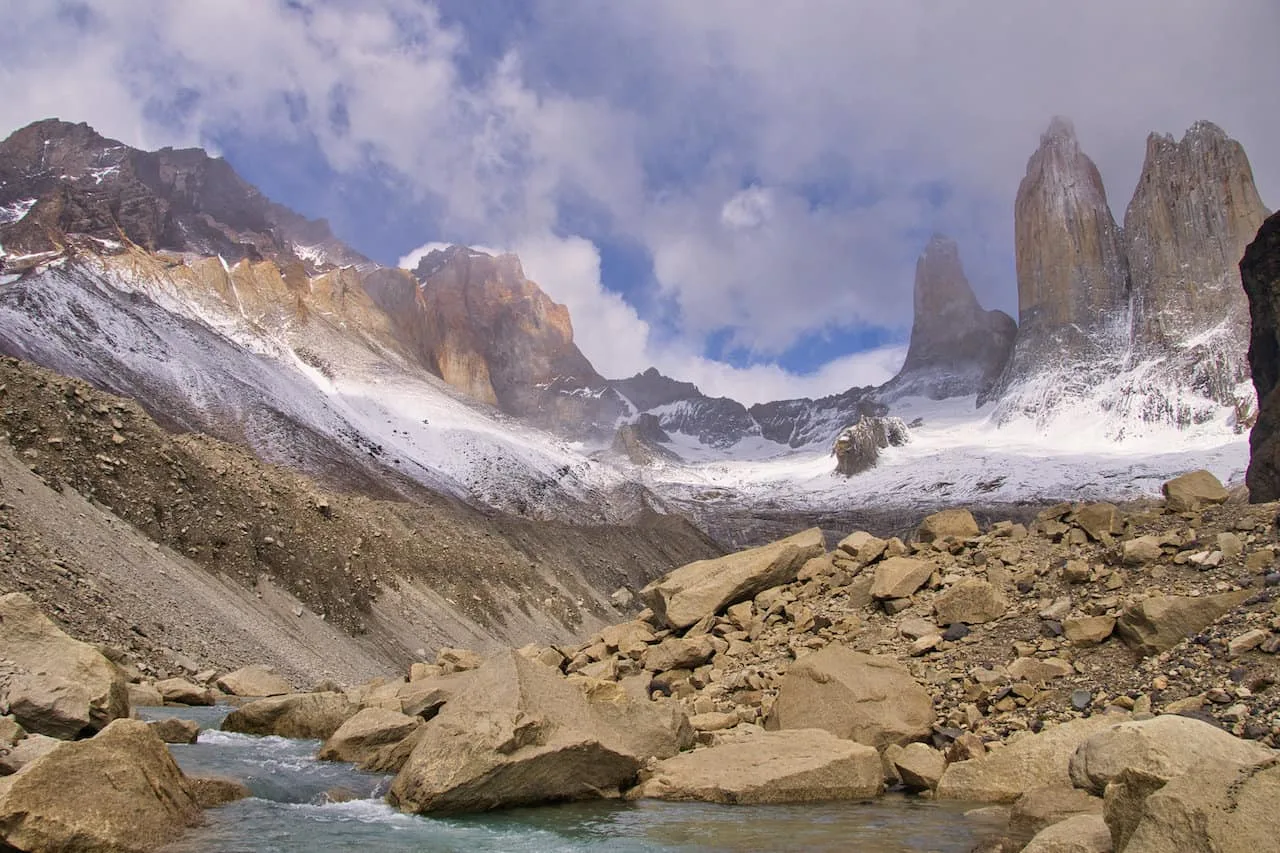
I will break up the hike up the viewpoint into three main sections. First you have the trail from Hotel Las Torres to the Chileno campsite/refugio.
Next up is the route from Chileno through the forest and above the tree line. And the last section takes you from the tree line up to the lake and viewpoint.
Hotel Las Torres to Chileno Campsite (2.8 miles)
Once you have made it to Hotel Las Torres (a 15 minute walk from the Torres del Paine Welcome Center), it is time to begin the hike out to Mirador Las Torres.
This first portion of trail will take you from the hotel to the Chileno campsite/refugio over the course of 2.8 miles. Out of the 3,000+ feet of elevation gain that can be found throughout the hike, this portion includes just around +1,000 feet of elevation gain.
Soon after leaving Hotel Las Torres, you will come across a short suspension bridge that heads over a river. Here is where crowds can build up a bit at the beginning of the hike since only two people can cross at a time.
Once over the bridge, you should be able to enjoy more spread out crowds throughout the trail.

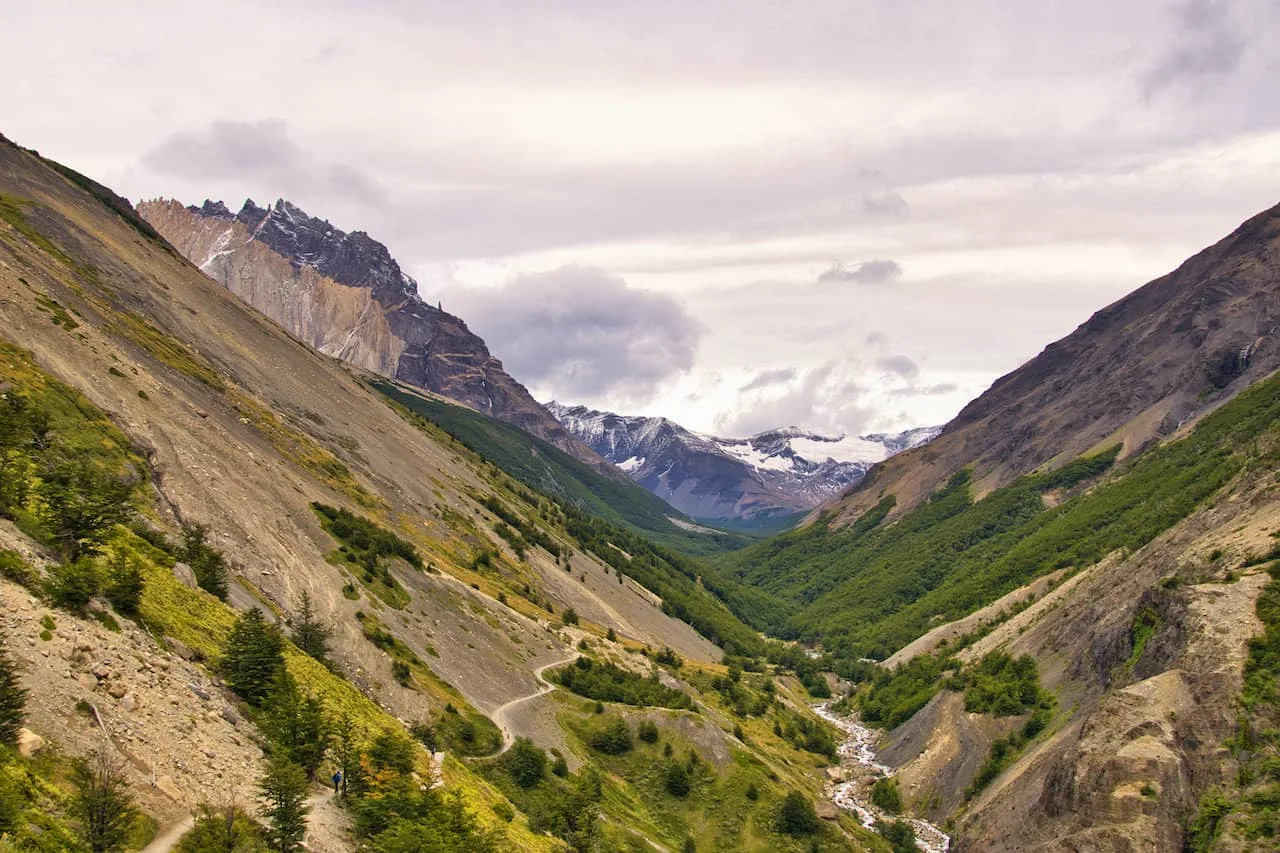
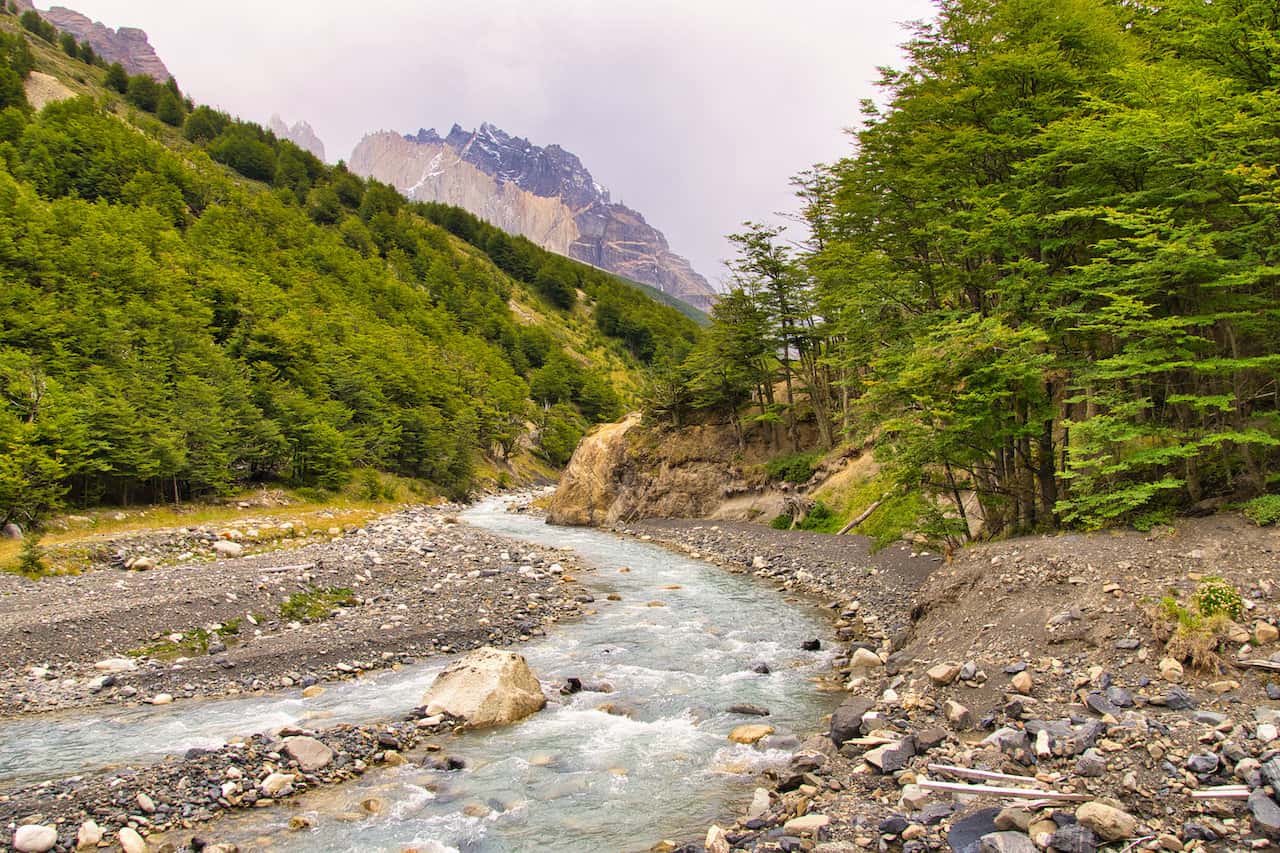
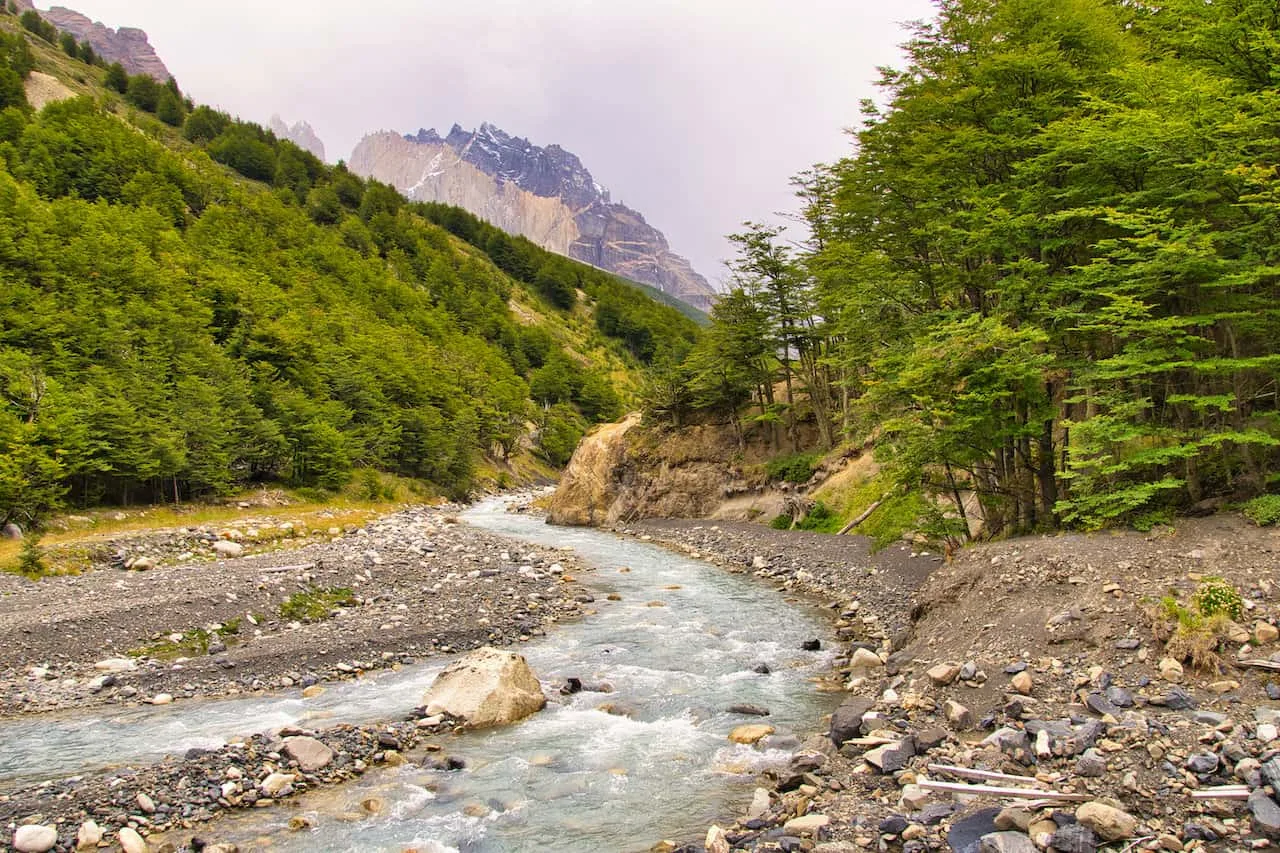
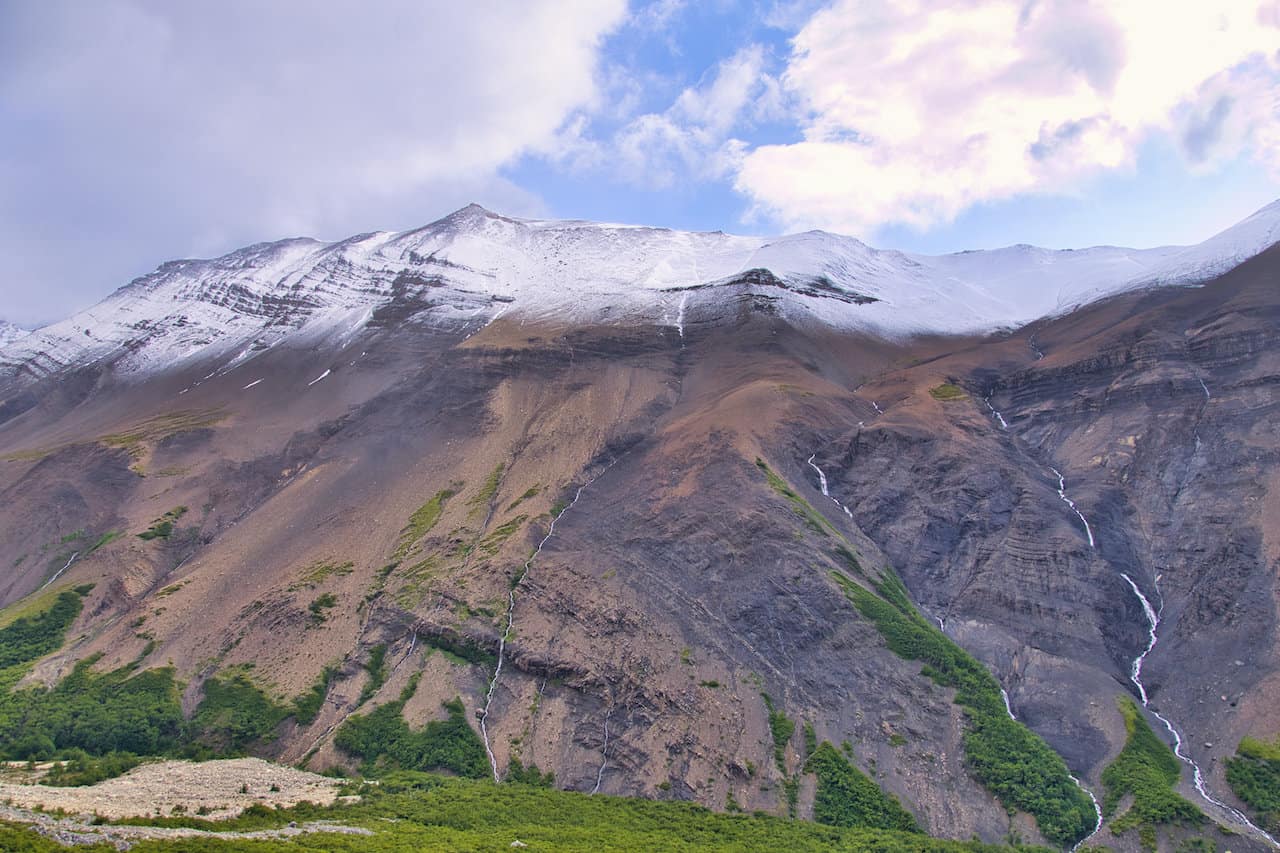
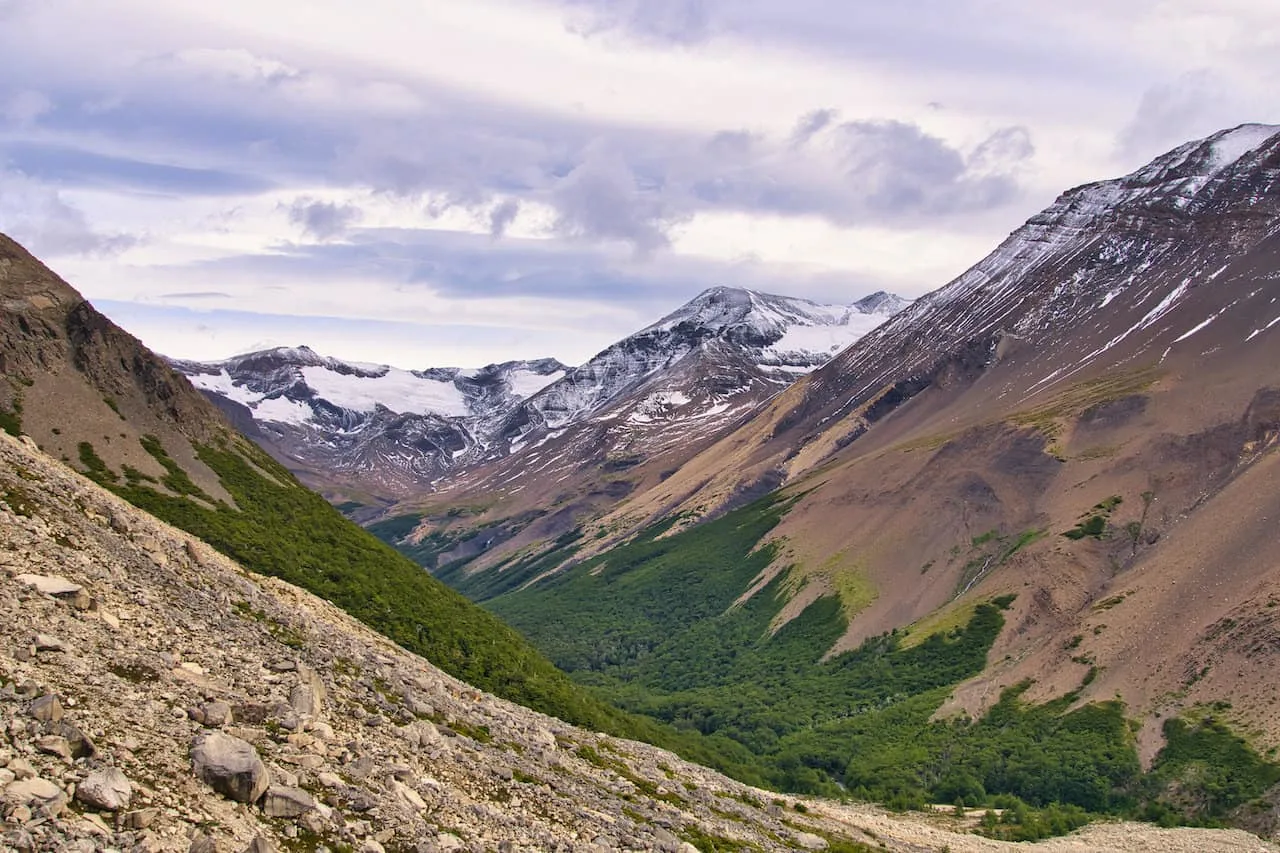
After crossing over the Rio Ascencio, the trail will make a right hand turn up the Ascencio Valley. You will slowly gain some elevation along the side of the valley walls as you get higher and higher above the river itself.
Be sure to look out behind you, as you get some views of some lakes out in the distance, surrounded by some more beautiful landscape.


The trail then continues along the valley wall as you soon will come across the Windy Pass. Hopefully for you, it’s not too windy, and you can get to enjoy those views along the way.
You will then begin to lose some elevation as the trail heads down closer to the river, before crossing over it, and arriving at the Chileno campsite/refugio.
Once at the campsite, you can take a rest break, fill up your water, and use the restrooms, before continuing on the second portion of the trail.

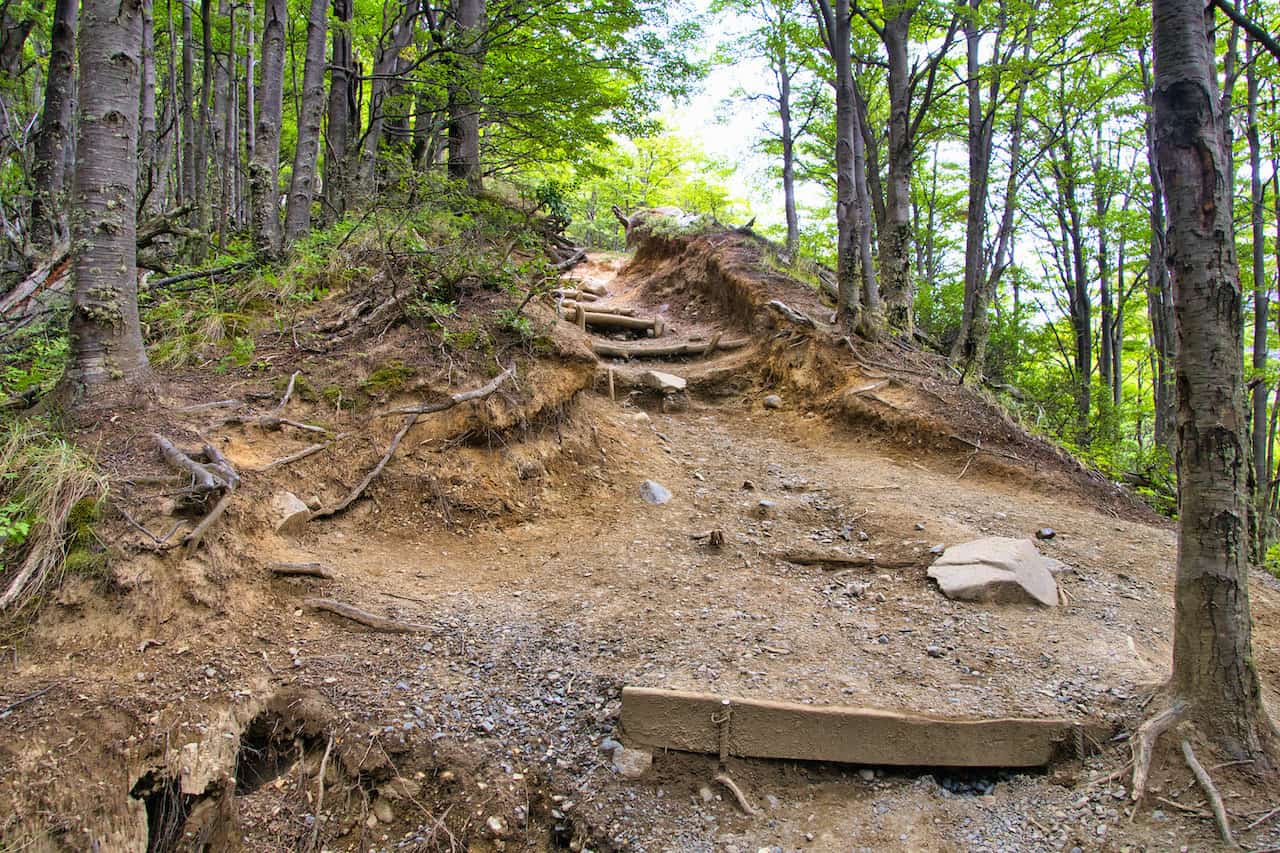
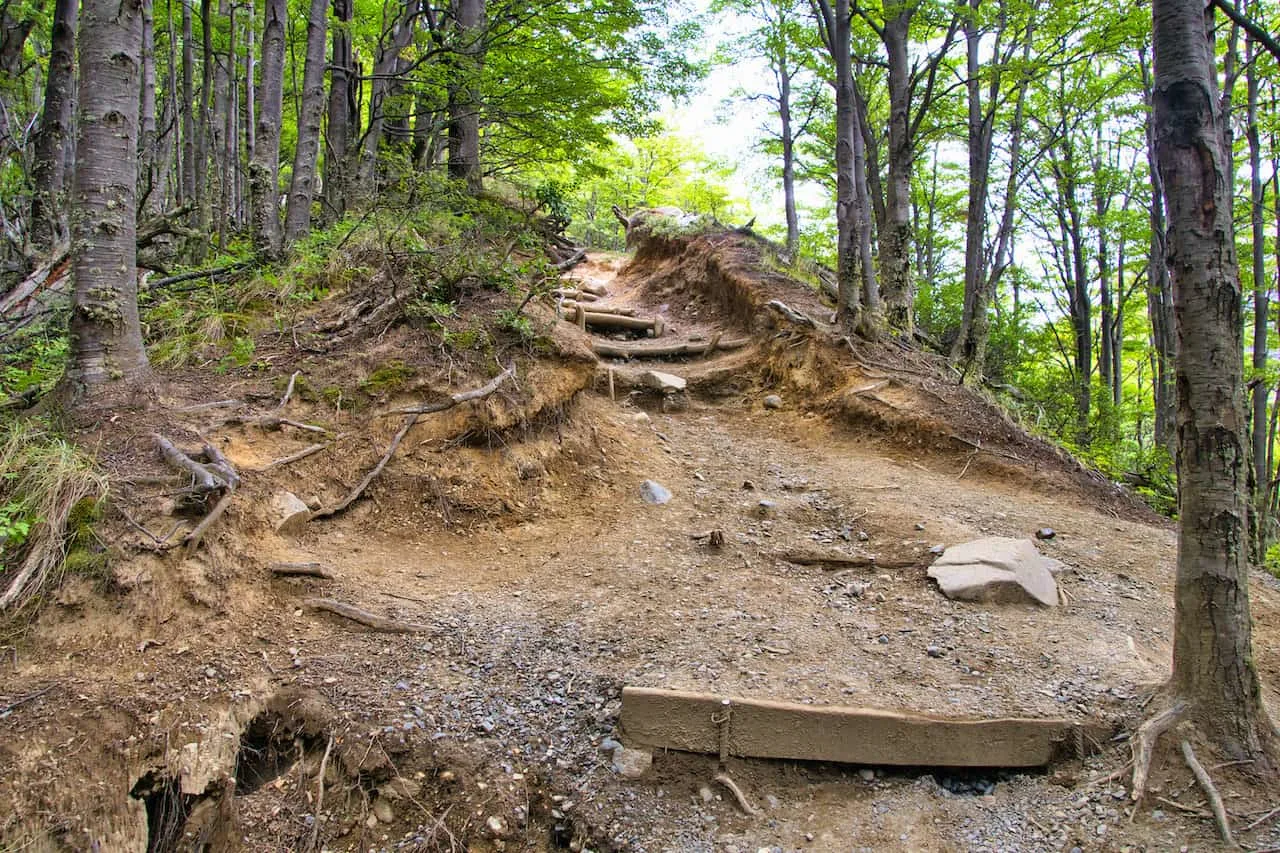
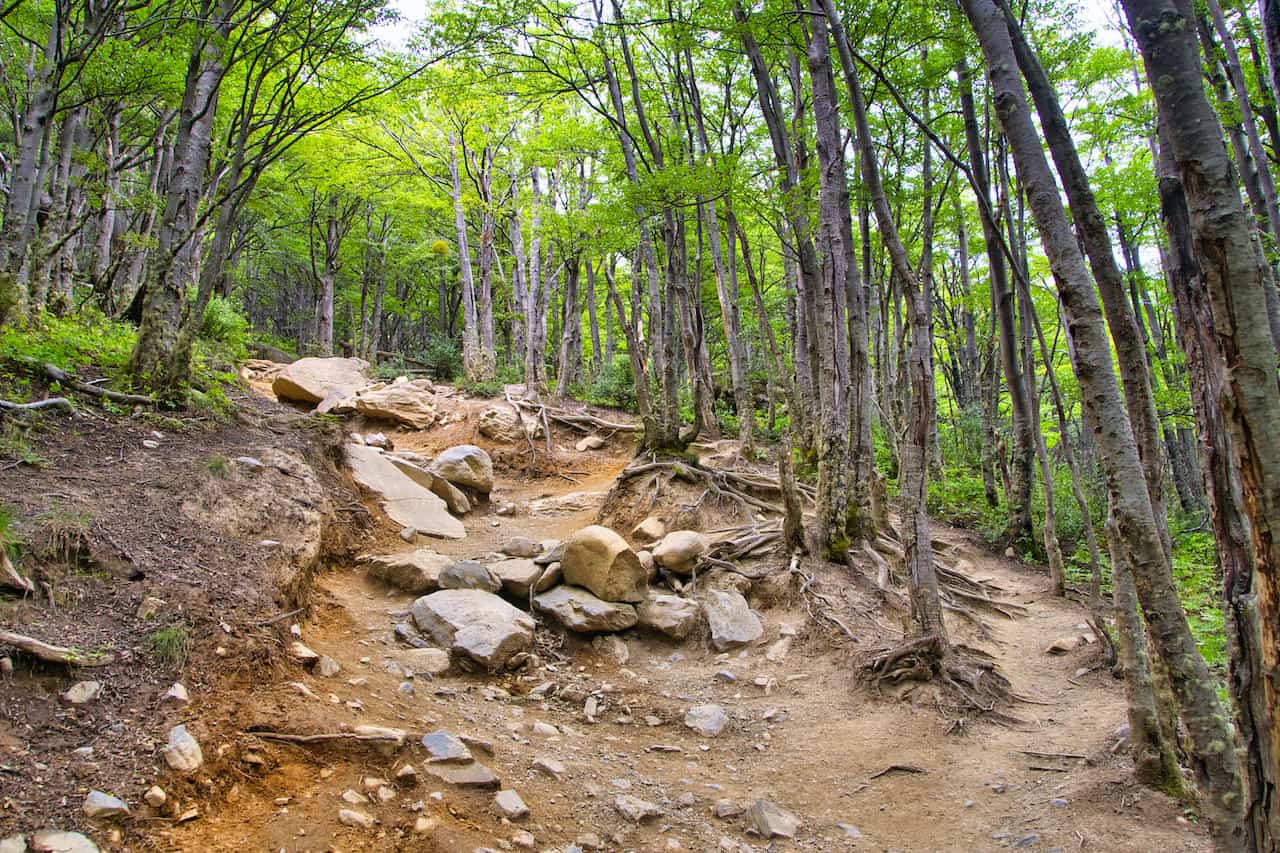
Chileno Campsite to Tree Line (1.7 miles)
From the Chileno campsite, you will begin the 700 foot ascent through the forest over the course of the next 1.7 miles.
As noted at the beginning of the article, you are not allowed to leave Chileno to the viewpoint after 3:00PM. This time may change, so be on the lookout. If heading out early, this shouldn’t be a concern.
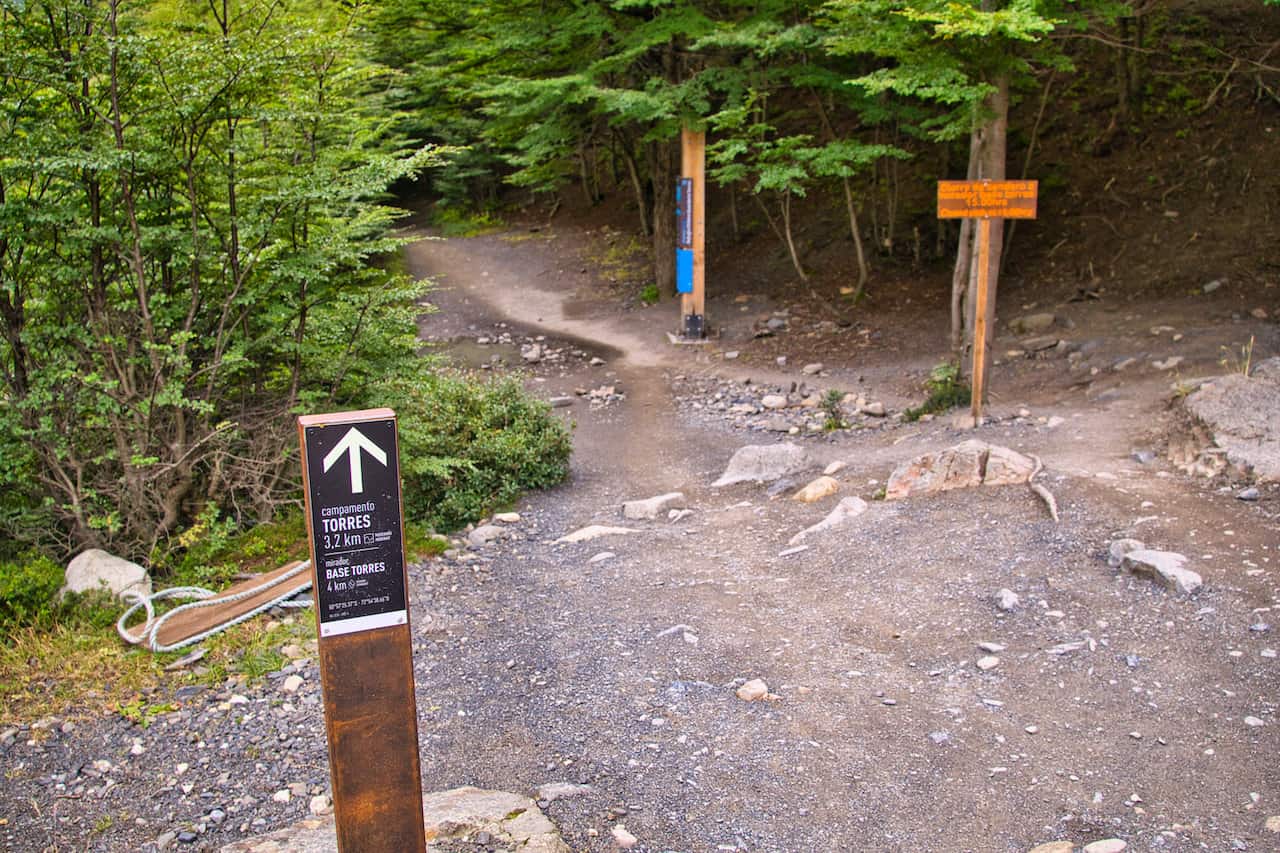
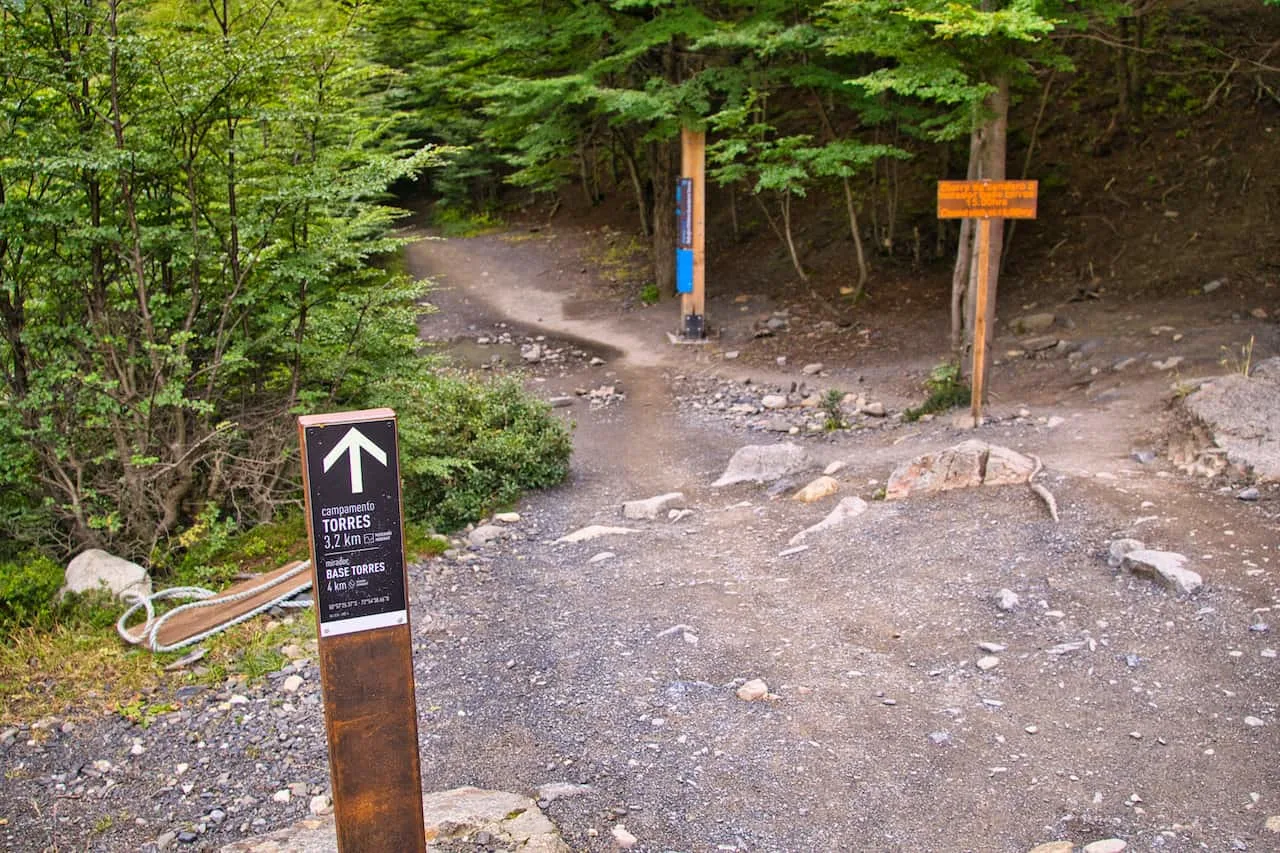
The forest portion of the hike is not the most exciting but it does give you a change of pace. The trail gains a bit of elevation as you follow along some wooden staircases and the dirt path.
After around an hour of hiking, the forest portion of trail ends as you then begin the final ascent to the viewpoint. You will pass by a closed down campsite here (but it does have restrooms for those that need).


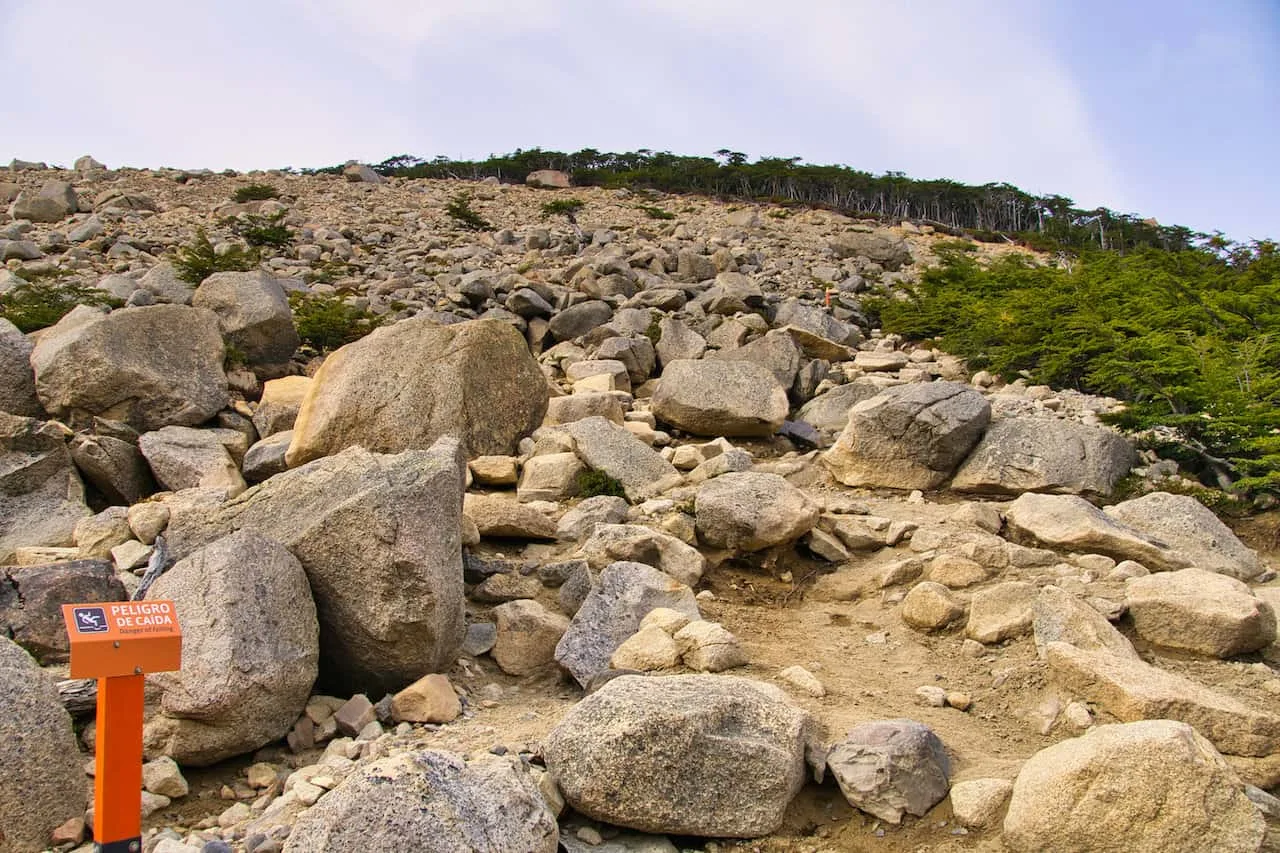
Tree Line to Mirador Las Torres (1 mile)
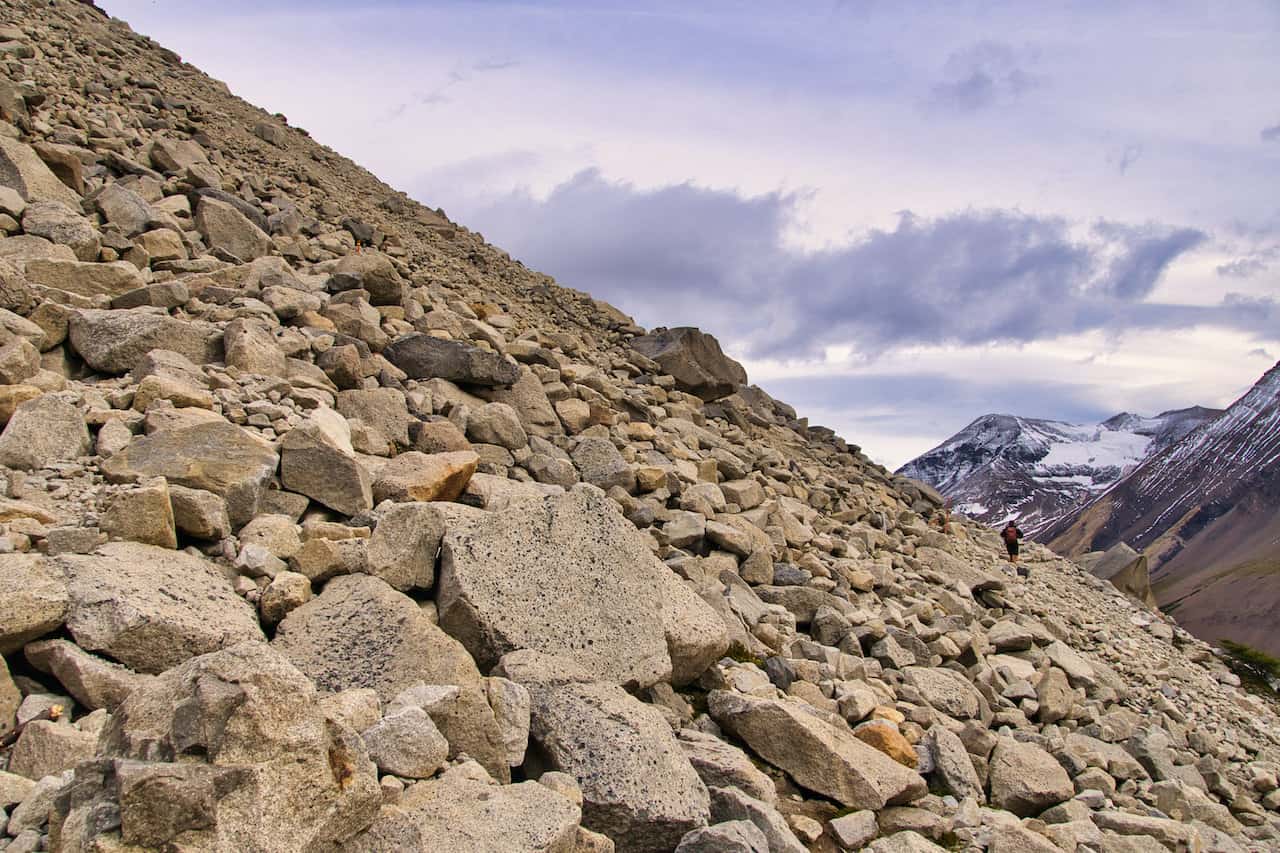
While this last portion of trail up to Mirador Las Torres is just around one mile, it is going to be the toughest part of the day.
The final climb entails just around +1,000 feet of elevation gain over some pretty uneven and technical terrain. During this portion of trail, you will want to continuously watch your step and be careful as you make your way up.
It can get even more dangerous if the wind speed picks up along this area. You will be more exposed to the conditions, and the uneven terrain will only make it more difficult.
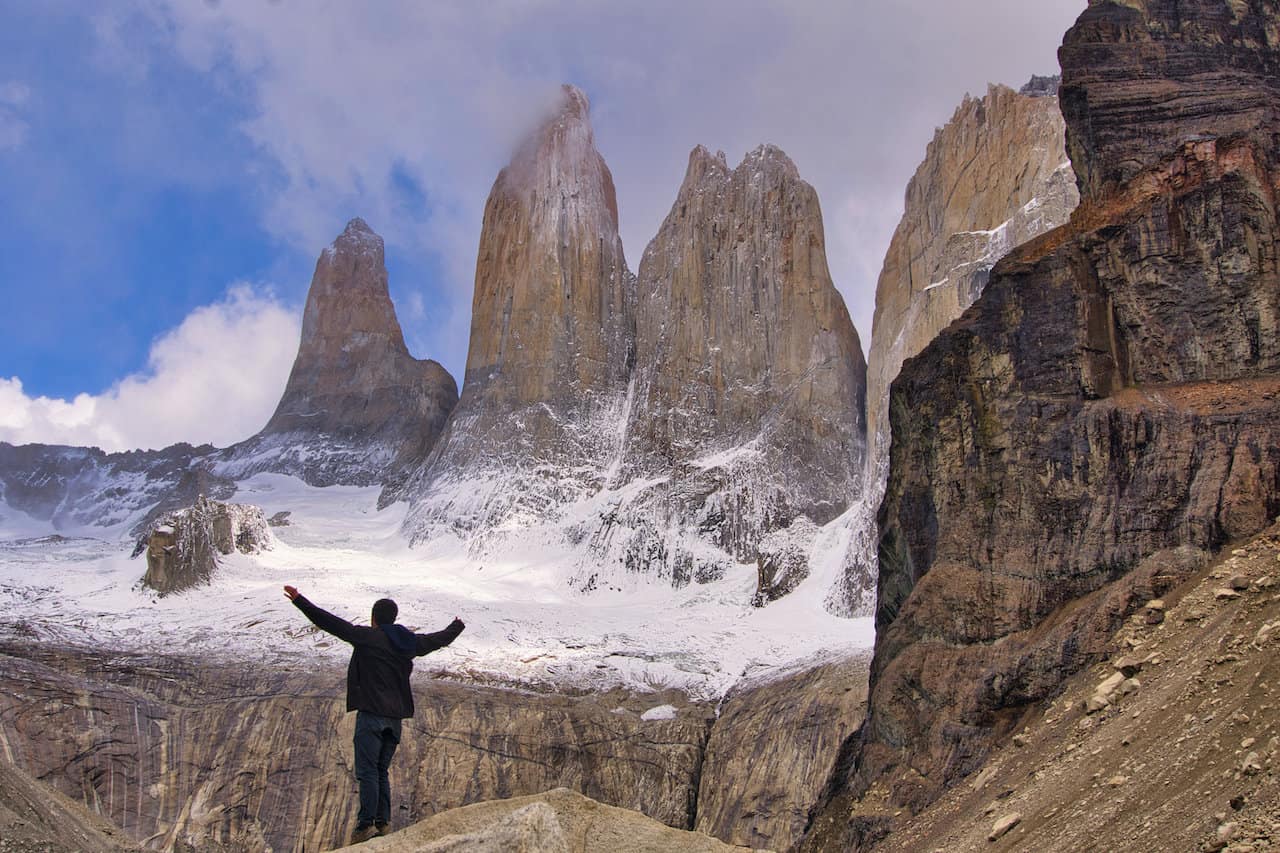
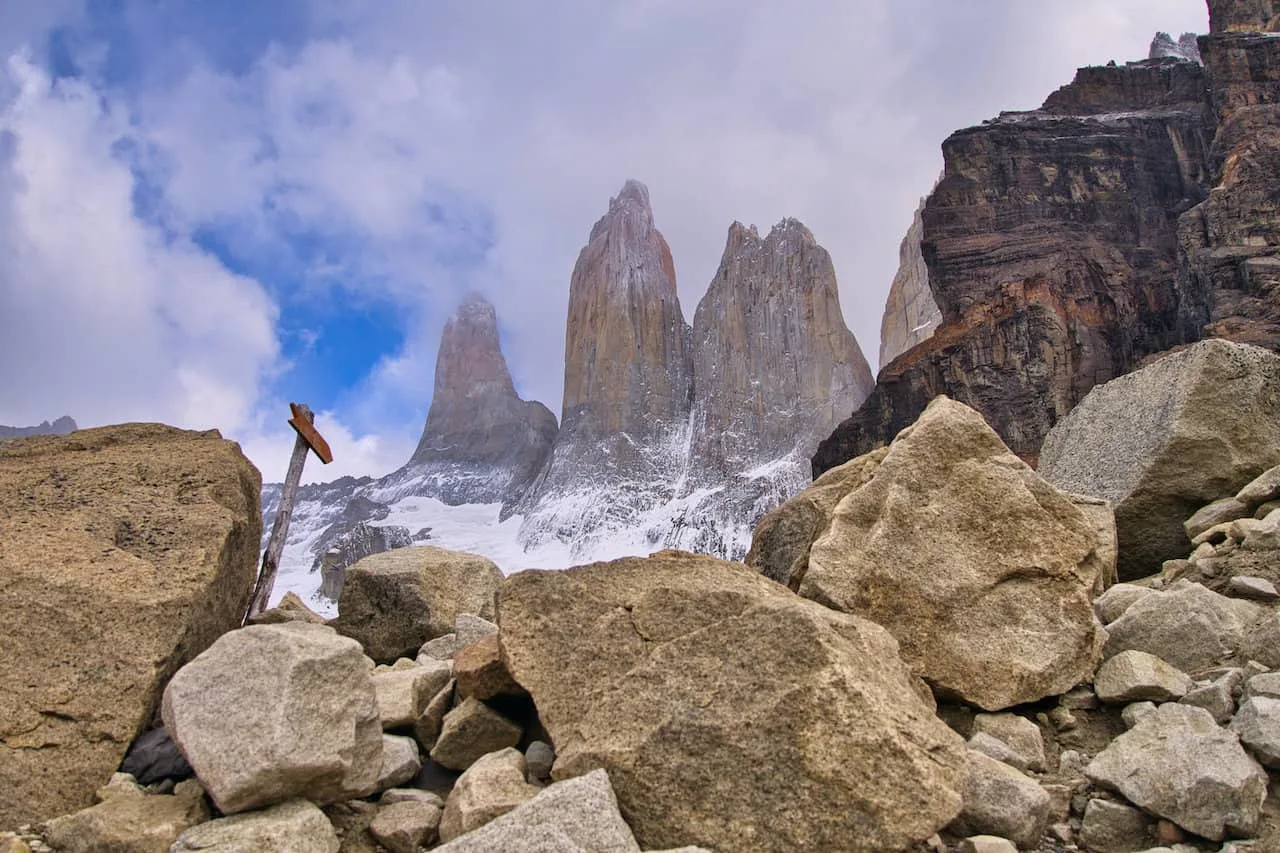
As you make the final rocky ascent, you soon will see the tops of the three granite towers come into view. Slowly but surely, more and more of the towers will be out in front of you. Soon enough, the turquoise lake will be down below with the towers hovering up above.


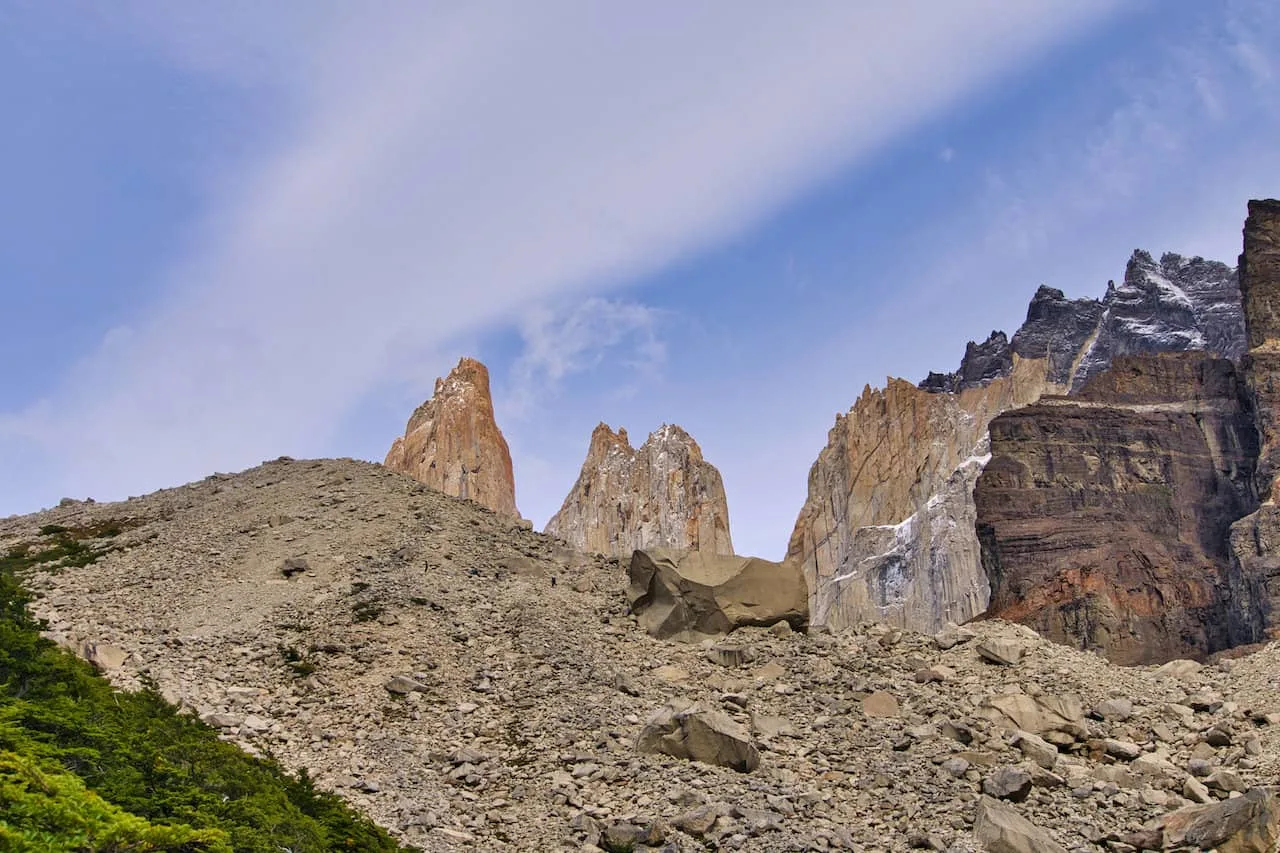
Mirador Las Torres
Once you arrive at the Mirador Las Torres, it is then time to just sit back and enjoy the view. You will be able to enjoy various viewpoints along the hillside and right nearby the lake as well.
There are plenty of areas to find a spot for yourself, and spend some time relaxing by the lake.
After enough time by the lake, it is then time to head back out to the start of the trail. Be careful as you make your way down the rocky descent. Not only due to the terrain but also due to the amount of people who may be coming up.
Once you reach the forest area, it should be an easier descent down to Chileno, where you can take a quick break before continuing along. From Chileno to the hotel, there will be some ups and downs along the way. You can continue to enjoy the views as you slowly retrace your footsteps and end a successful day out on the trail.


6) Sunrise Opportunity
One of the main reasons for staying overnight in Torres del Paine prior to the hike, is to be able to see the Mirador Las Torres at sunrise.
During my time on the trail, I was taking part of the O Circuit, and was staying overnight at the Chileno campsite.
The goal was to head up to the viewpoint in time for sunrise, but unfortunately it was pouring rain when I woke up in the middle of the night. The rain subsided and I began to hike soon after the sun came up.
So, while I was not able to take in a sunrise, I still was able to beat the crowds and have the entire viewpoint area basically empty by the time I arrived there.
You can take part of a sunrise experience if staying overnight in Chileno (or even Central and Hotel Las Torres).

7) Hike Difficulty
Without a doubt, the Mirador Las Torres hike is going to be a hard day hike to take part of. The hike is 11 miles round trip with 3,000+ feet of elevation gain.
When you consider the technical terrain over the final section of the hike coupled with the uncertain weather conditions, this is going to be difficult.
Now, if you are a very qualified hiker with plenty of similar hiking experience, then you will probably find this to be a moderate trail altogether.
For the average hiker out there though, I do imagine this is going to be on the more difficult side. While it is the most popular viewpoint in Torres del Paine, do not underestimate what the trail entails.
Take your time, enjoy the views, and watch your step along the way. Believe me when I say it will be worth it! At least on a clear day…
8) Patagonia Packing List
As you can tell, hiking in Patagonia, especially in Torres del Paine National Park, can bring all sorts of weather. Due to this, you will need to come fully prepared with the appropriate hiking gear. Spending 6-8+ hours out in the mountains can have you layering up (or down) in all sorts of ways.
Below are my recommendations on what a Torres del Paine day hike packing list should look like:
In general, I found layering to be the upmost important part of a trip. On a hike to the Mirador Las Torres, I would recommend the following layers:
→ Hiking Shorts
→ Hiking Pants
→ Short Sleeve Shirt
→ Long Sleeve Shirt / Sun Hoodie
→ Mid Layer Fleece
→ Puff Jacket (not always needed)
→ Packable Rain Jacket (Columbia Watertight II)
→ Hiking Shoes (Recommendation: Keen Targhee)
→ Hiking Socks (Darn Tough)
Additional day hike recommendations include:
→ Hiking Backpack (Osprey Talon 22) & Rain cover (Joy Walker Cover)
→ Water Bottle (CamelBak Chute) & Nutrition
→ Portable Charger (Anker PowerCore 5000mAh)
→ Hat & Sunglasses
→ Sunscreen & Bug Spray
→ Action Camera – GoPro Hero
» Be sure to check out the Torres Del Paine Packing List guide I put together that will go through all of it and more
9) Puerto Natales Hotels
During your time visiting Torres del Paine, you most likely will be staying in Puerto Natales at one point or another.
While you can visit the park from the Argentinian towns of El Calafate and El Chalten, I would recommend staying directly in Puerto Natales. This way you can more easily explore the park and not be subject to just a single day trip from Argentina.
Puerto Natales is a town built for the thousands of tourists who want to visit Torres del Paine. You will find plenty of gear shops, restaurants, and hotels all throughout town.
Below would be a few of my highly rated and recommended options when it comes to hotels in Puerto Natales:
Of course, you can also stay at Hotel Las Torres, right at the trailhead of the hike.

That about wraps up a guide to the Mirador Base de Las Torres hike of Torres del Paine, Patagonia. If you have any questions or comments, be sure to add them in below.
Also, don’t forget to check out some of the other Patagonia itineraries and guides up on the site (like the day hike up the French Valley or some other top hikes in Torres del Paine).
Have fun out there and safe travels!