
Heading to Indonesia and looking to get some volcano climbing in? Look no further than the great Mount Rinjani.
Located on the island of Lombok, Rinjani stands at 3,726 meters / 12,224 feet tall and makes for one exhilarating climb.
This Mount Rinjani trekking guide will go over what to expect on the climb and how to go about planning a trip there. So, get ready for what is sure to be one of the best hikes of your life!
* Affiliate Disclosure: This post may contain affiliate links, which means I may receive a commission if you make a purchase through the links provided, at no additional cost to you. Thanks for supporting the work I put into TripTins!
1) Rinjani Trekking Routes
To start, I want to lay out the various Rinjani trekking routes to choose from. Depending on your preference, hiking ability, and time availability will better help pick the right route for you.
Note: several years ago there was a very damaging earthquake on Lombok, which closed many trekking routes. All routes should be open now but please double check with tour operators to get the latest information.
When it comes to Rinjani hiking options, there are several to consider. Below are the main hiking tours that you can decide to join:
Rinjani Summit Hike (2 Day / 1 Night)
- Day 1: Sembalun to Sembalun Crater Rim (Overnight: Sembalun Crater Rim)
- Day 2: Sembalun Crater Rim to Rinjani Summit; back down to Sembalun Crater Rim and then down to Sembalun
The quickest way to reach the summit is to do a 2 day / 1 night option from Sembalun. This route takes you to the Sembalun Crater Rim for the night before heading up to the summit of day 2.
Once at the summit you would head all the way back down to Sembalun to end the trek.
Rinjani Summit Hike (3 Day / 2 Night)
- Day 1: Sembalun to Sembalun Crater Rim (Overnight: Sembalun Crater Rim)
- Day 2: Sembalun Crater Rim to Rinjani Summit; back down to Sembalun Crater Rim; down to Crater Lake; up to Senaru Crater Rim (Overnight: Senaru Crater Rim)
- Day 3: Senaru Crater Rim to Senaru
This is the normal route for those that want to go to the summit. On day 1 you start from the town of Sembalun and head on up to the Sembalun Crater Rim, where you enjoy sunset and stay overnight.
On day 2 you hike up to the summit for sunrise before returning to camp and then heading down into the crater lake.
Once you enjoy lunch at the lake, you would head up to the Senaru Crater Rim, where you will stay the night. On day 3 you will head down to Senaru to end your trek.
Rinjani Summit Hike (4 Day / 3 Night)
- Day 1: Sembalun to Sembalun Crater Rim (Overnight: Sembalun Crater Rim)
- Day 2: Sembalun Crater Rim to Rinjani Summit; back down to Sembalun Crater Rim; down to Crater Lake (Overnight: Crater Lake)
- Day 3: Crater Lake to Senaru Crater Rim (Overnight Senaru Crater Rim)
- Day 4: Senaru Crater Rim to Senaru
For those that want to split up the days a bit more, there is also a 4 day option.
Essentially days 1 and 4 are identical to days 1 and 3 of the 3 Day / 2 Night hike. However, on day 2 you will head up to the summit for sunrise and then head down to the crater lake, where you will stay the night.
On day 3 you will enjoy the lake and then hike up to the Senaru Crater Rim, where you will spend night 3. And finally, on day 4 you will head back down to Senaru.
Senaru Crater Rim Hike (2 Day / 1 Night)
- Day 1: Senaru to Senaru Crater Rim (Overnight: Senaru Crater Rim)
- Day 2: Senaru Crater Rim to Senaru
This hike starts in the town of Senaru on day 1 as you climb all the way to the Senaru Crater Rim. You will enjoy a sunset on the crater rim, sleep overnight, enjoy a sunrise, and then head down to Senaru on day 2.
Note that there is no summit with this option!
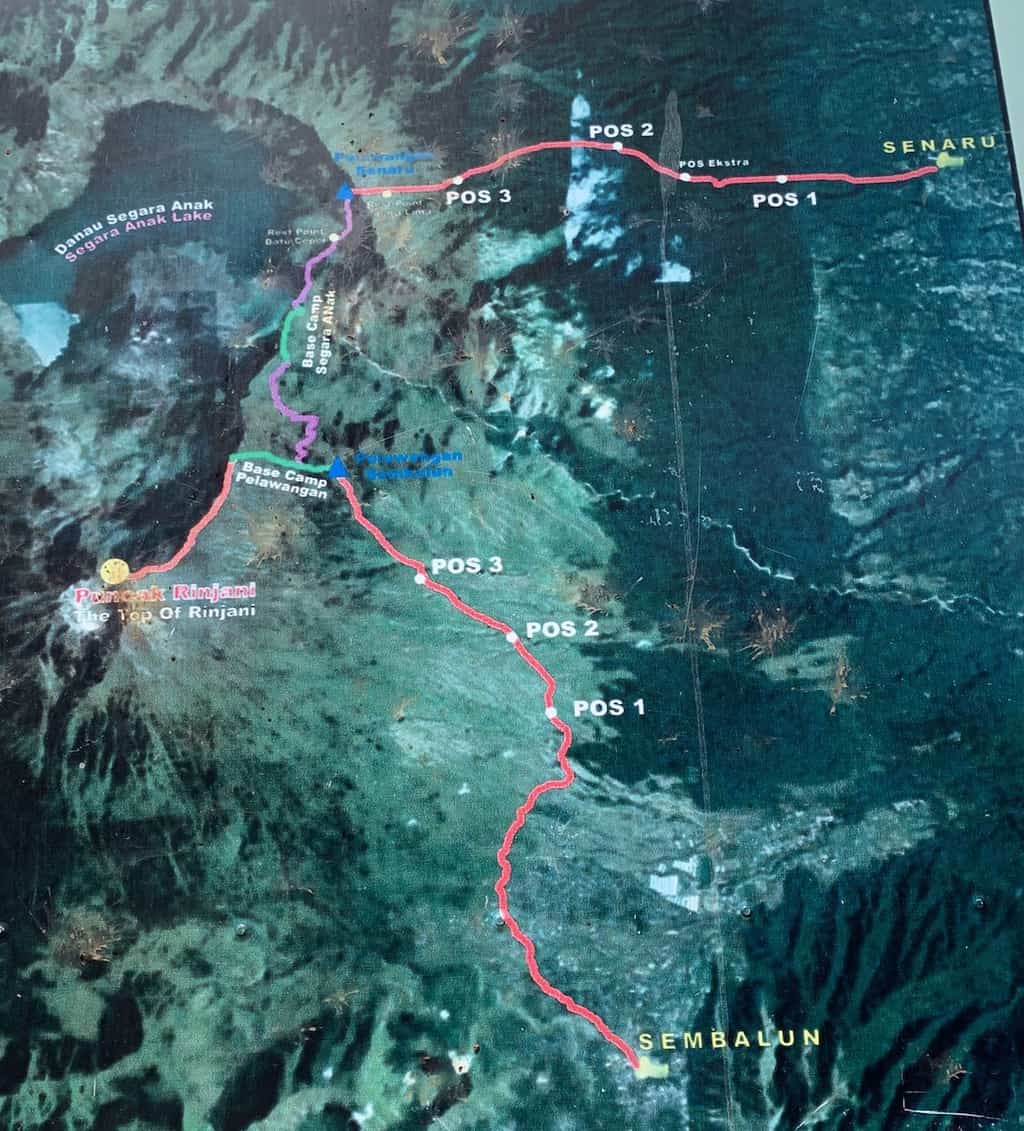
2) Mount Rinjani Map
Below is a map of the Mount Rinjani trekking options from Senaru and Sembalun. You can see the two blue triangles, which would be camping spots on the Sembalum and Senaru crater rims.
Feel free to also check out the interactive Google Maps a few section down that shows the route.

3) Quick Rinjani Facts
» All routes up Rinjani are closed from January 1 to March 31 due to the rainy season and to recover its ecosystem. Climbing reopens in April but be sure to double check with trekking companies before setting your plans in stone.
» There is a 150 person limit to leave from each Senaru and Sembalun per day in order to deal with any overcrowding issues at the campsites and during the trek.
» You cannot hike Mount Rinjani on your own. You must be with a certified guide during your trek. I will speak more about one of the top trekking companies to choose from later on.
» Hiking Rinjani in the dry season (May to October) will give you the greatest chance of having clear weather on top of the mountain and safe conditions when trekking up it.
» You will want to stay one night close to the entrance of the hike. Usually your guide companies will set this up for you and have you stay in Sembalun or Senaru, so it gives you one less thing to worry about.
» There are no accommodations on the mountain. Instead you will be sleeping in tents set up by your guides and porters.
» Bring enough battery power for your electronics. The last thing you want is to not have enough battery for your camera or phone and lose out on the chance to get those beautiful pictures in.
4) Where is Rinjani
Mount Rinjani is located on the island of Lombok in Indonesia. On the northern end of the island is where the mountain is located.
Below on the map I have pinpointed down Sembalun, Senaru, the hiking route, camping sites, and summit.
You have a couple main ways to reach Lombok depending on where you are coming from – by plane or by boat. Below is some quick info about each of those options.
Plane
If you are coming from farther out on Indonesia, there are plenty of flights that will fly into Lombok’s main airport – LOP.
Not only can you fly in from other places in Indonesia like Bali, Jakarta, Surabaya, and Labuan Bajo but LOP is also an international airport. You can find flights from places like Perth, Singapore, and Kuala Lumpur, that will get you right onto Lombok.
From the Lombok airport, it is a bit of a drive to Sembalun & Senaru (where trekking companies may put you up for the night) – around 3 hours or so.
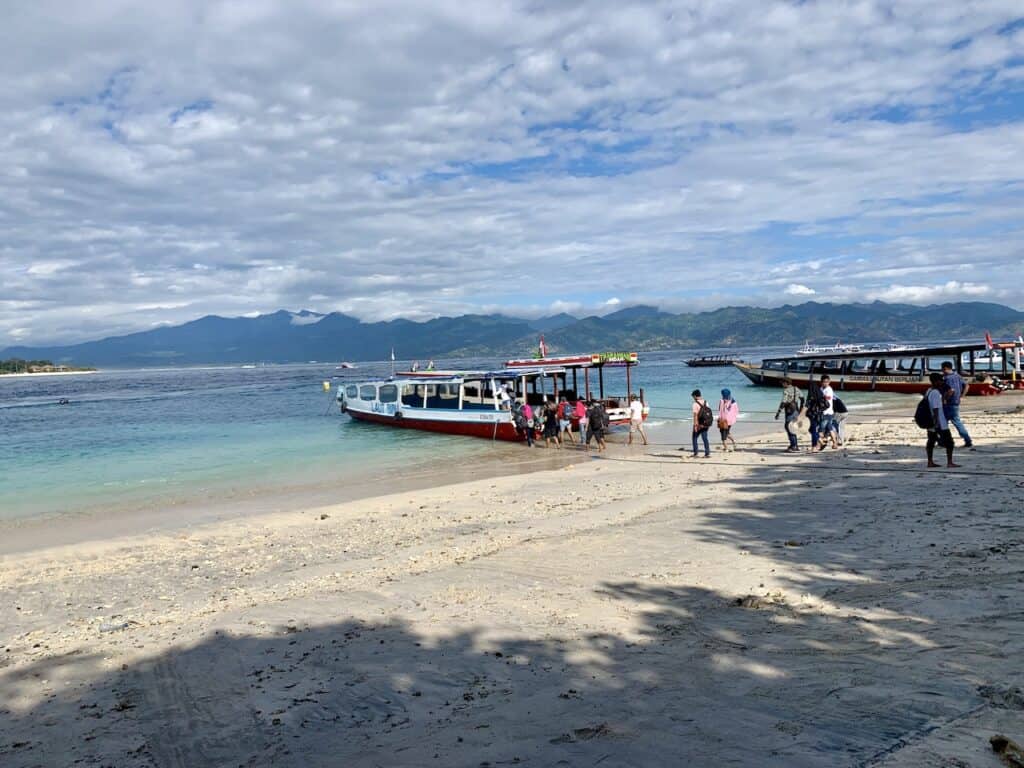
Boat
Your other option here is to head on over to Lombok by ferry. If doing so you will most likely be starting in Bali, the Nusa Islands (Penida, Lembongan, Ceningan), or the Gili Islands (Trawangan, Air, or Meno).
Learn More: Nusa Penida Itinerary & Gili Trawangan Travel Guide
Not every one of the smaller islands will have direct routes but you can easily take a quick ferry (e.g. from Meno to Trawangan) and get to Lombok from there.
You can take a look at the various ferry schedules and search the particular route that you are looking for.
Either way, if you are flying in or boating in, the trekking company you signed up with should offer the option to pick you right up from the airport, dock, or your hotel. Many companies actually include transportation in their all-in cost.

5) Mount Rinjani Weather
Like I mentioned before, hiking Mount Rinjani in the dry season will give you the greatest chance for optimal weather conditions.
So, the May to October time period is going to be your best bet here.
Not only will you be avoiding hiking up in more muddy conditions but you also will have a much better chance to not be clouded over on the summit.
Having the views of both the crater down below and also Lombok, the Gili Islands, and even Bali out in the distance is one of the best experiences you can ask for.
Mountain weather can always be a bit tricky though and nothing is ever guaranteed. To look at the latest forecasts, head on over to Meteoblue.com, which will give you a better idea of what to expect on a day to day and hourly basis.

6) What to Bring
Since this is a 1-3 night overnight trek, you will want to prepare accordingly. Below is a packing list with some essentials to bring along with you that will have you all set for the climb.
It is up to you if you want to wear the same clothes during the days or bring another pair to change into for your next 1-2 days of hiking.
Hiking Packing List
In general when it comes to hiking, there are a few main aspects to consider. These includes clothing layers, hiking shoes, hydration & fuel, electronics, and other essentials.
Below in a breakdown of some of the top items, but be sure to check out the Hiking Packing List for a more comprehensive view.
Clothing Layers
Layering is going to be a top consideration when hiking. You will want to be prepared for all sorts of weather so you can be comfortable in different situations. Some items may include:
→ Hiking Shorts
→ Hiking Pants
→ Short Sleeve Shirt
→ Long Sleeve Shirt / Sun Hoodie
→ Mid Layer Fleece
→ Puff Jacket (not always needed)
→ Packable Rain Jacket (Columbia Watertight II)Note that your layers should be made of moisture wicking material as they are breathable and quick drying.
Footwear
Having appropriate footwear will also be very important. You will want to have shoes with the necessary grip and support to keep you safe on the trail.
→ Hiking Shoes (Keen Targhee)
→ Hiking Socks (Darn Tough)Other Essentials
Whether it is hiking gear, electronics, or just some miscellaneous items, here are some other essentials to bring along on hikes.
→ Hiking Backpack (Osprey Talon 22) & Rain Cover (Joy Walker Cover)
→ Hiking Poles (Black Diamond Trekking Poles)
→ Water Bottle (CamelBak Chute or Katadyn Filter Bottle)
→ Portable Charger (Anker PowerCore 5000mAh)
→ Action Camera (GoPro Hero)
→ Energy Bars & Snacks
→ Hat & Sunglasses
→ Sunscreen & Bug Spray
In addition to the standard list above, you will also want to consider some overnight items as well. These include comfortable sleepwear such as a sweatshirt & pants, toiletry items, as well as a headlamp.
Note that the trekking company you sign up for will supply many items that you will need. These include:
- Camping Tent
- Sleeping Bag
- All Meals
- Water
- Some Snacks

7) Rinjani Trekking Tour Cost
Trekking up Rinjani will be one of the more expensive activities that you will take part of in Indonesia but I will say it is 100% worth it if you want to enjoy some of the best views in the country.
This will vary by tour company but for a 2-3 day summit trek, prepare to pay between $200 and $300 USD.
While it is a bit pricey, the cost usually includes a bunch of different things:
- Transport before and after the trek, from/to the airport/boat pier/hotel on Lombok
- Hotel for the night prior to the climb
- All Meals (breakfast, lunch and dinner)
- Water & Snacks
- Sleeping Tent and Sleeping Bag
- Guided Tour with Porters up and down Rinjani
- Rinjani Entrance Fees
- Trekking Insurance
Always be sure to ask your trekking company what is and what is not included in the price of the hike!
Let’s now get into the trek itself. Below you will find a more detailed account of what the trail is like with some pictures to guide you along the way.
With whichever option you choose, you should plan to arrive in Lombok the day before the hike.
As mentioned you will be picked up from wherever you are staying or flying/boating into and will be driven to a hotel near the starting point.
Once you arrive at the hotel, grab some dinner and pack your essentials in a backpack. Your other luggage will be held at the hotel and you can pick it back up at the end of the hike.
Set your alarm early and get some rest before the trekking begins!
8) Rinjani Senaru Crater Rim Hike 2 Day / 1 Night
I will first go over a standard 2 day hike that only goes to the crater rim (with no summit). This is usually best for those that want to enjoy the natural beauty without overdoing the physical activity.
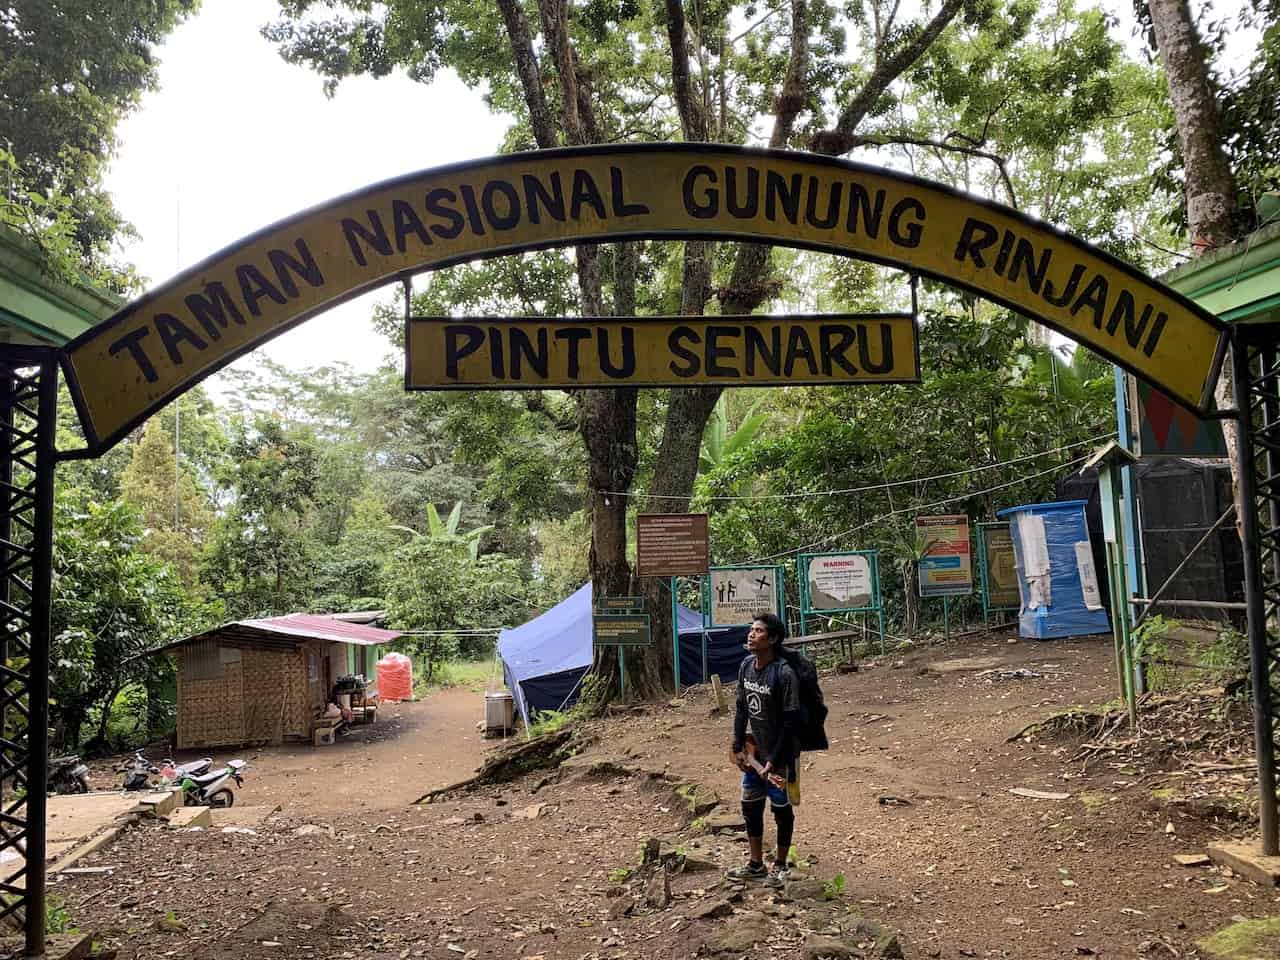
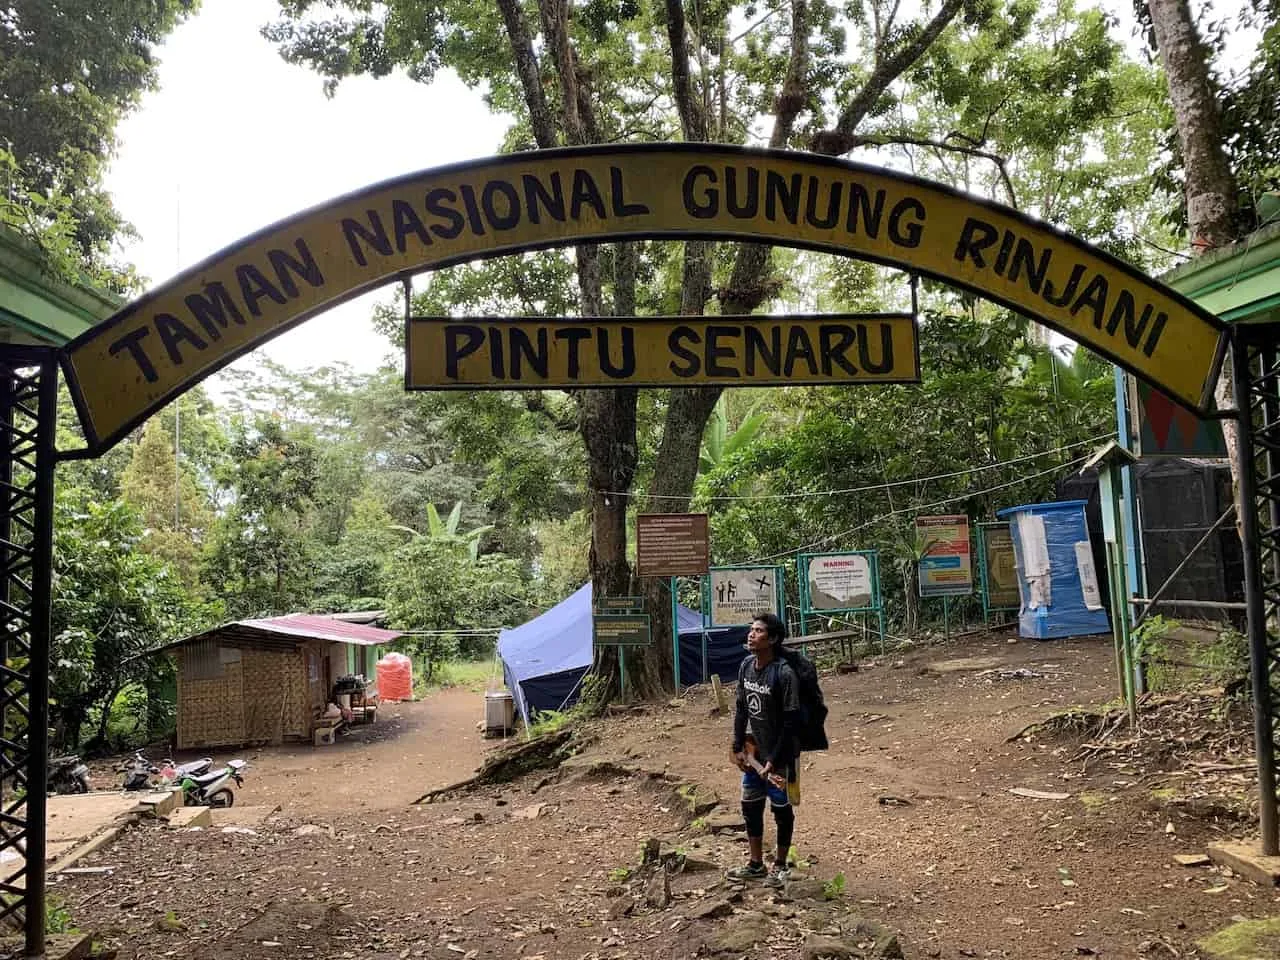
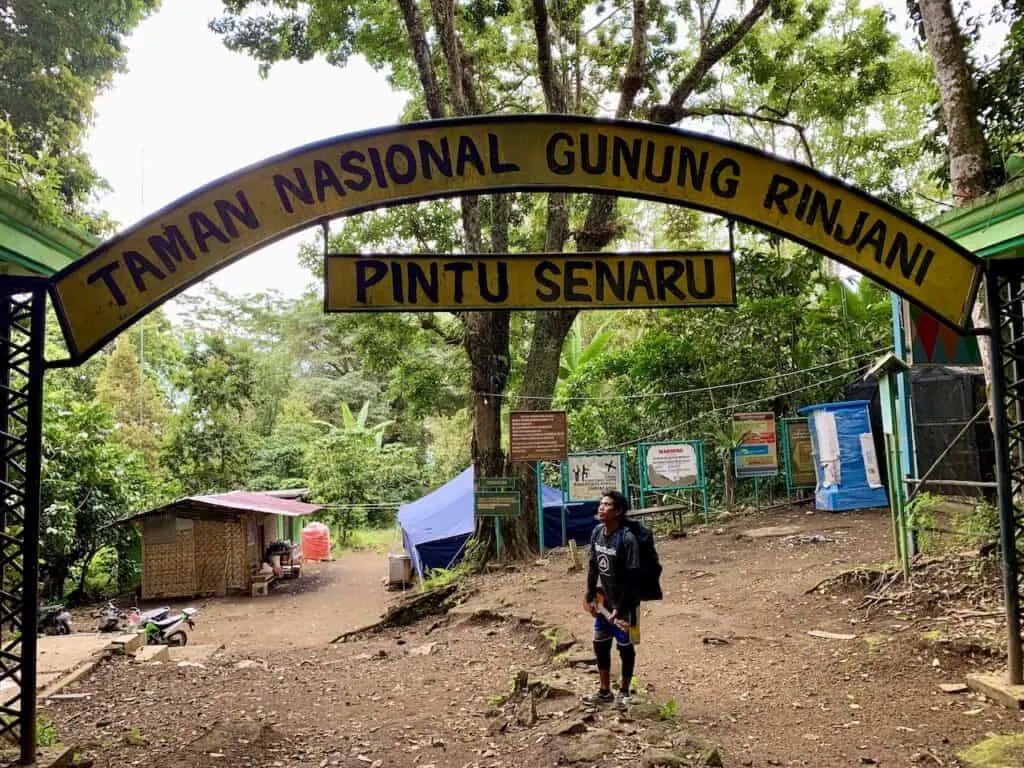
- Starting Point: Senaru
- Day 1: Up from Senaru to Crater Rim
- Night 1: Overnight on Senaru Crater Rim
- Day 2: Down from Crater Rim to Senaru
- Elevation Gain: 601 Meters to 2,641 Meters (+2,040 Meters) / 1,972 Feet to 8,665 Feet (+6,693 Feet)
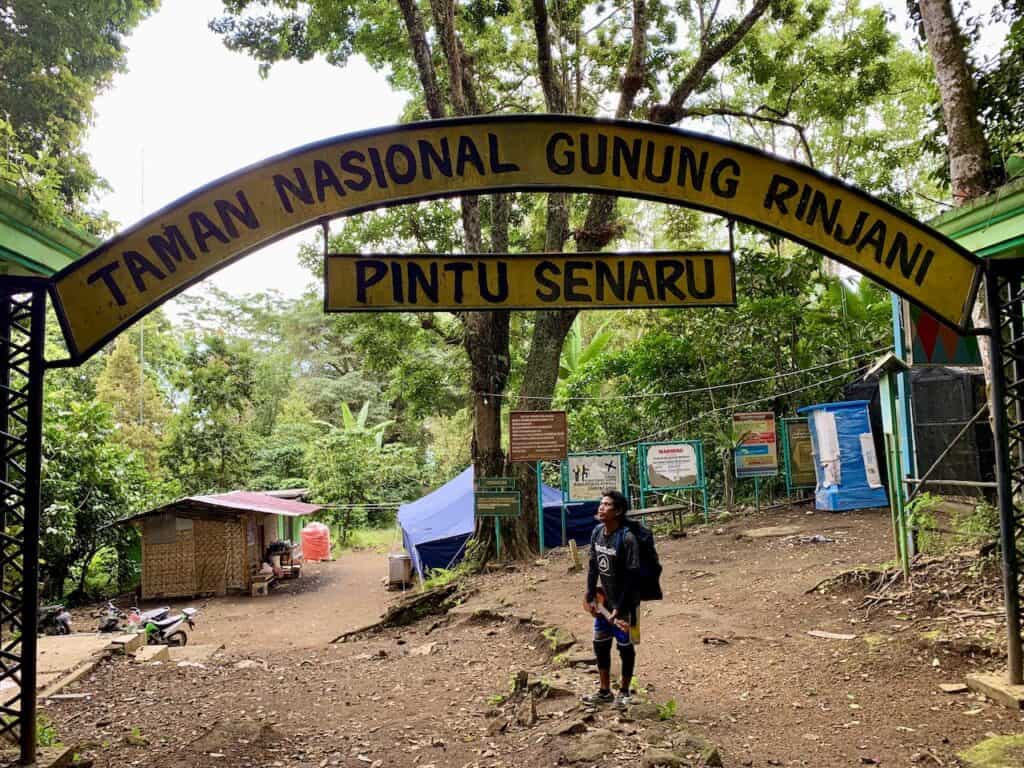
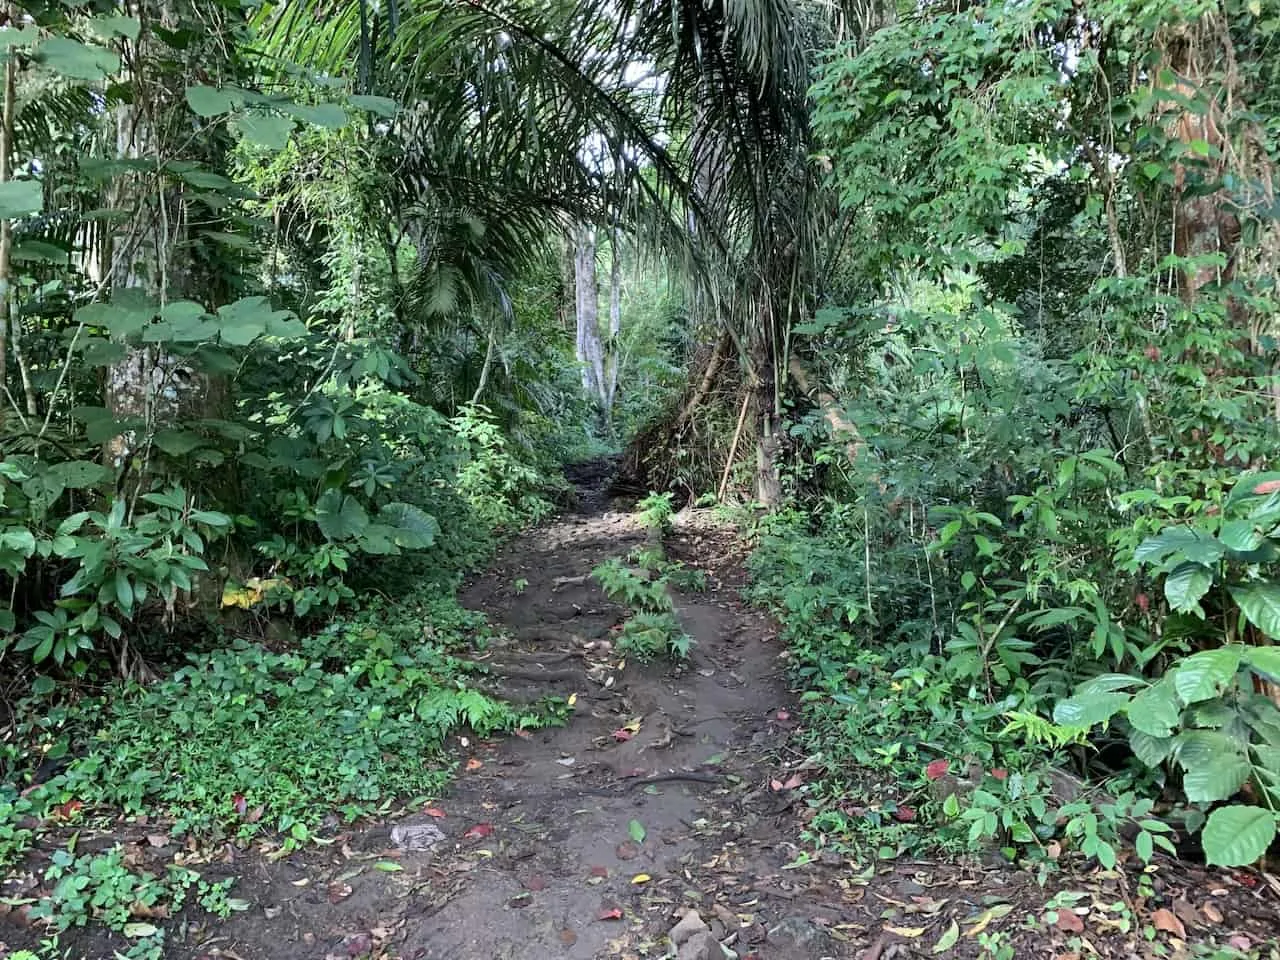
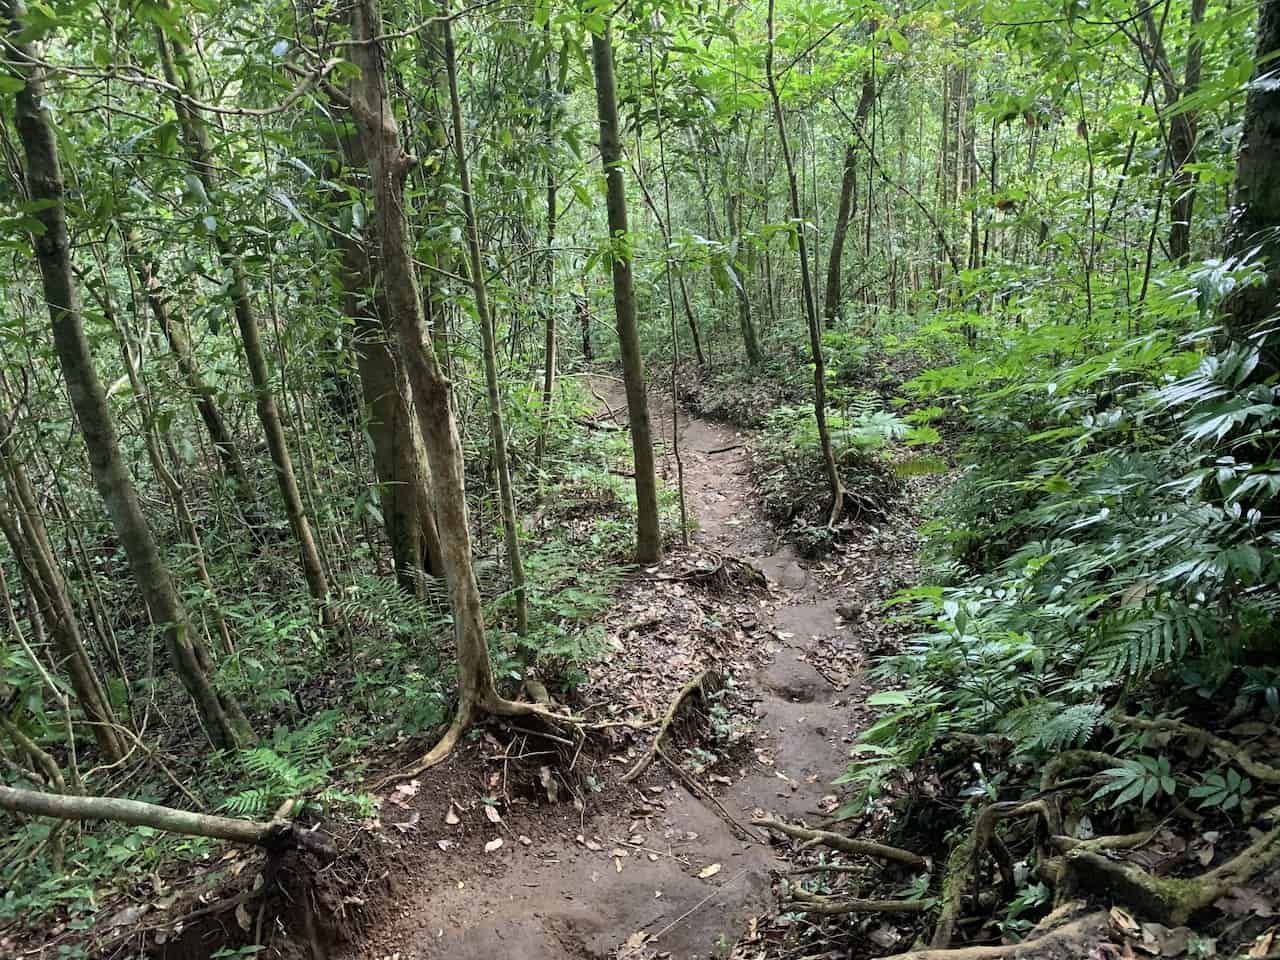
On the first day of the Senaru Crater Rim hike, you will begin down in Senaru and start the slow ascent all the way to the rim. This is going to be a full day ascent arriving sometime in the late afternoon.
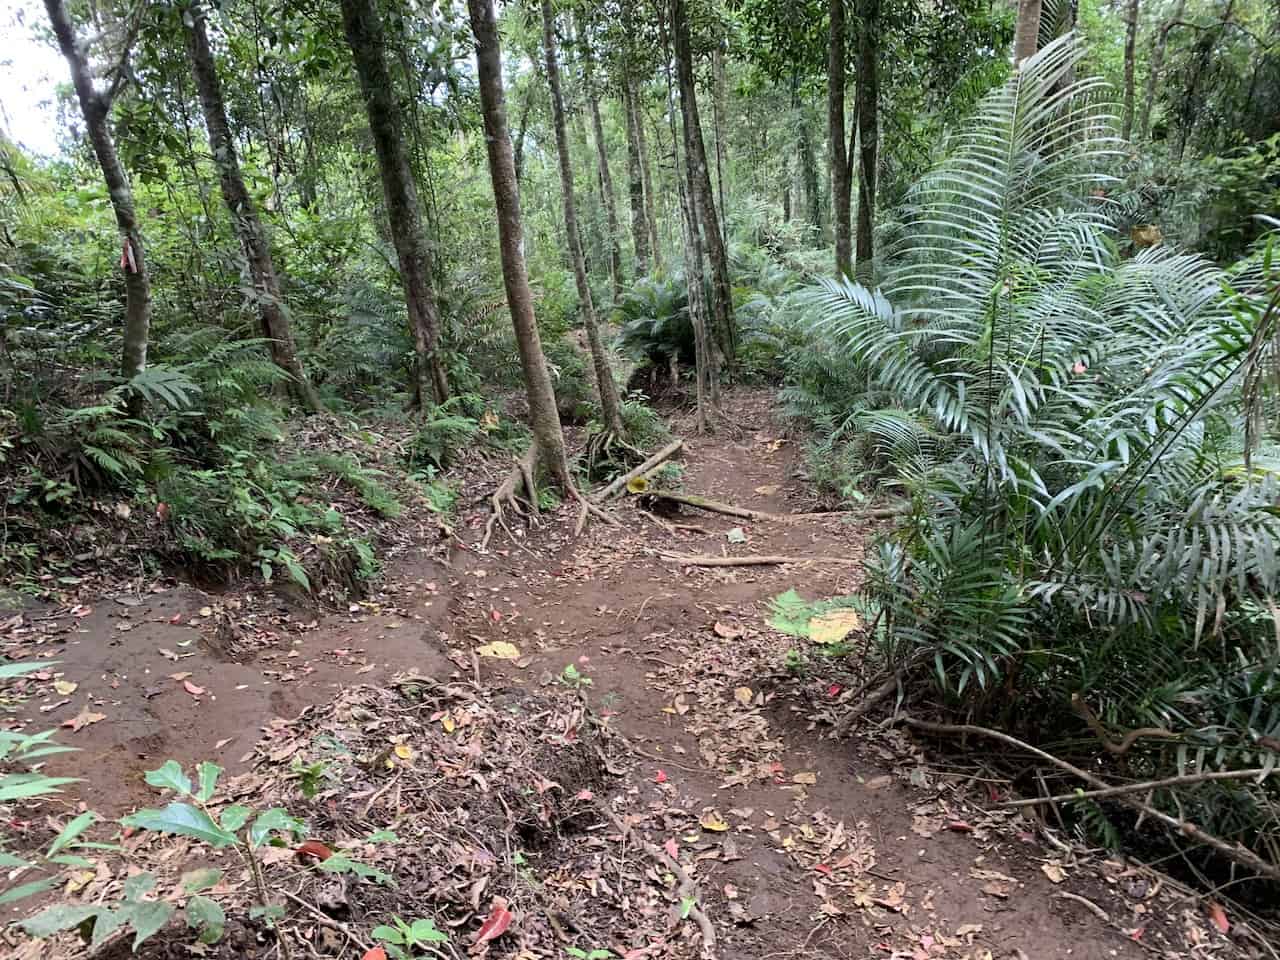
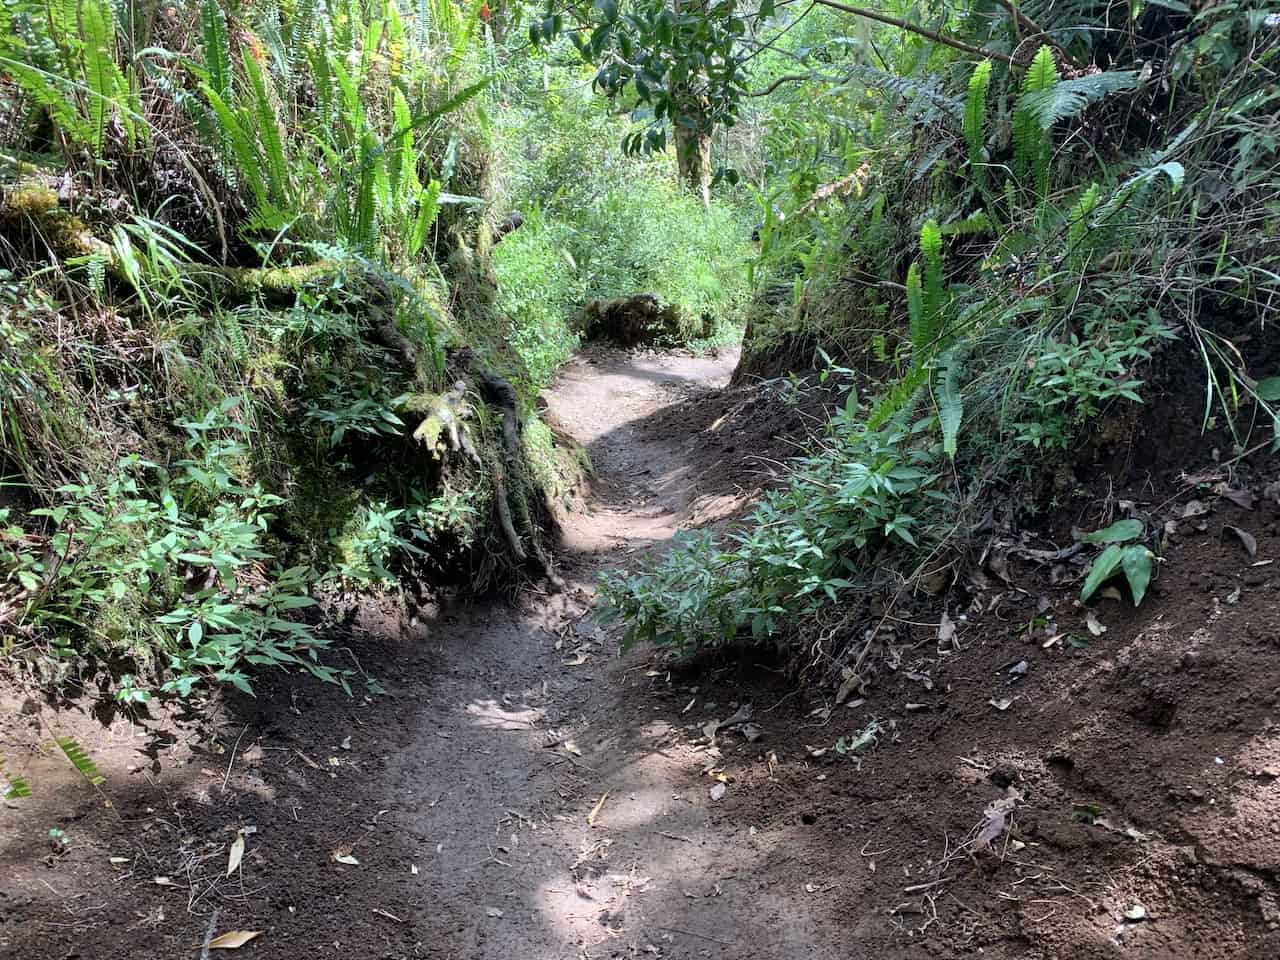
Most of the ascent will be done within the forest and trees that make up the vast part of the volcano. Because of this, you should not expect many views during the duration of the trail.
Instead you will be walking through nature and the massive trees that will surround you.
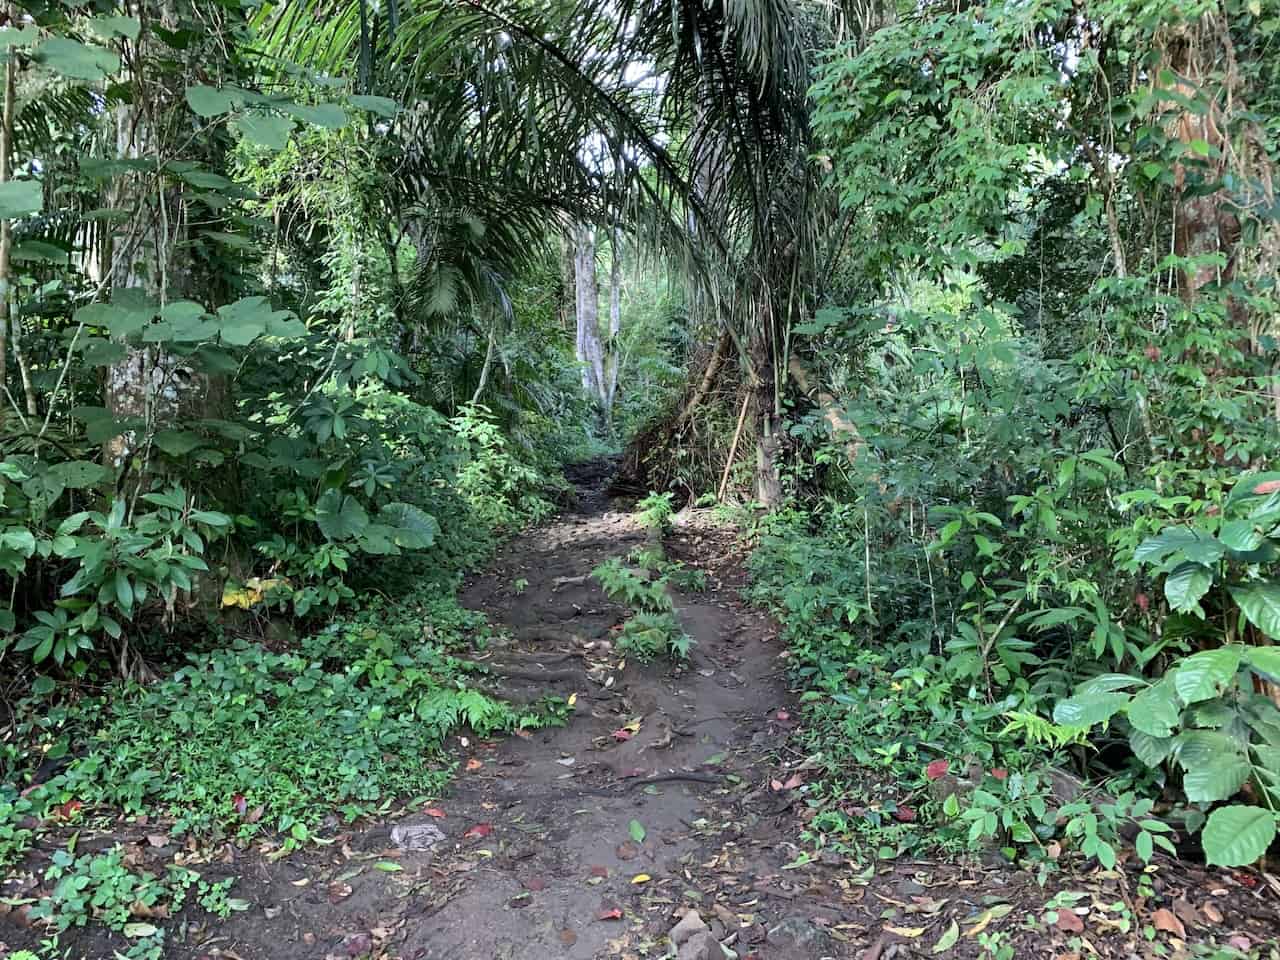

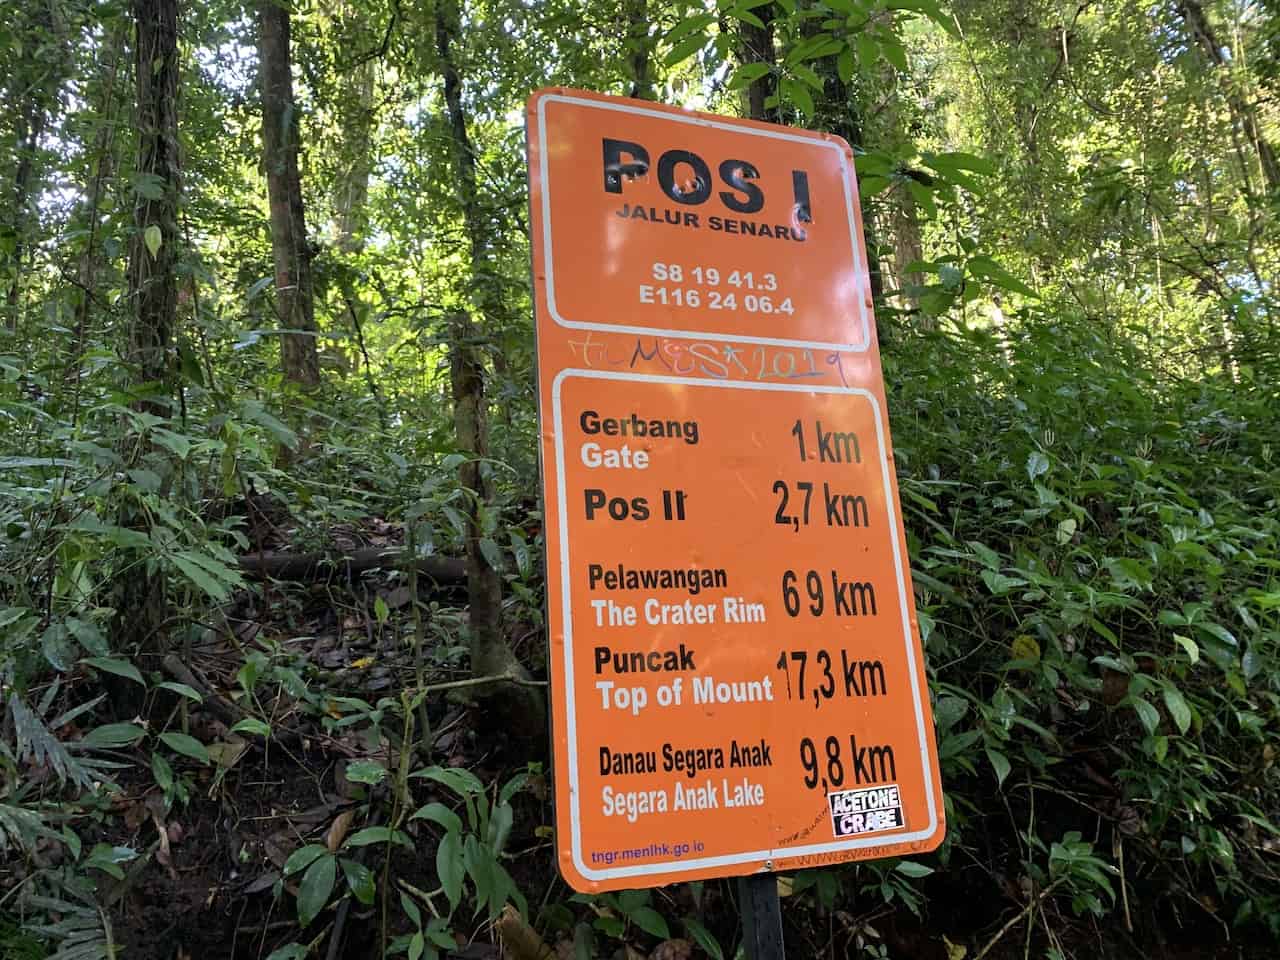
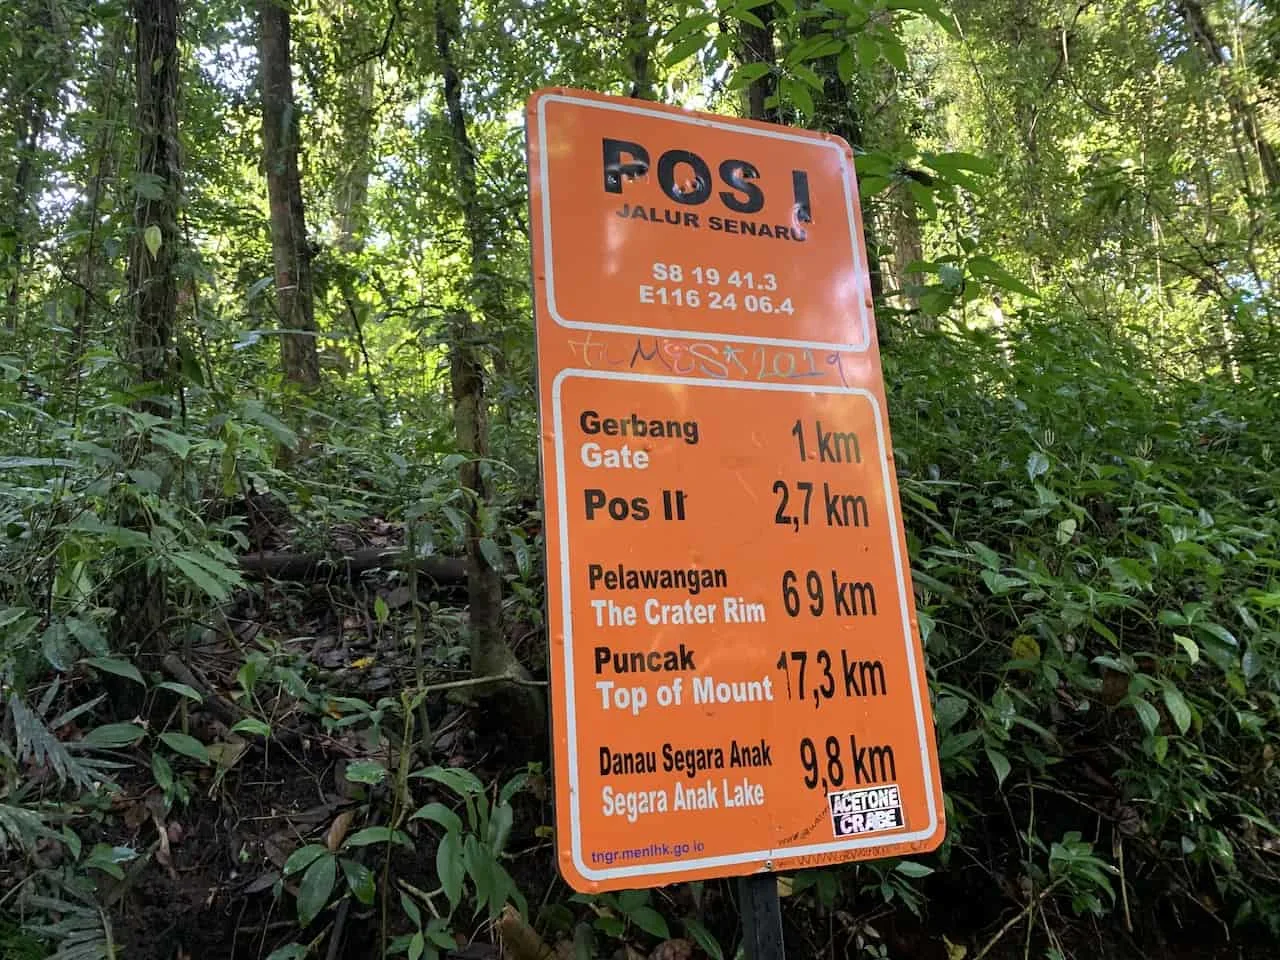
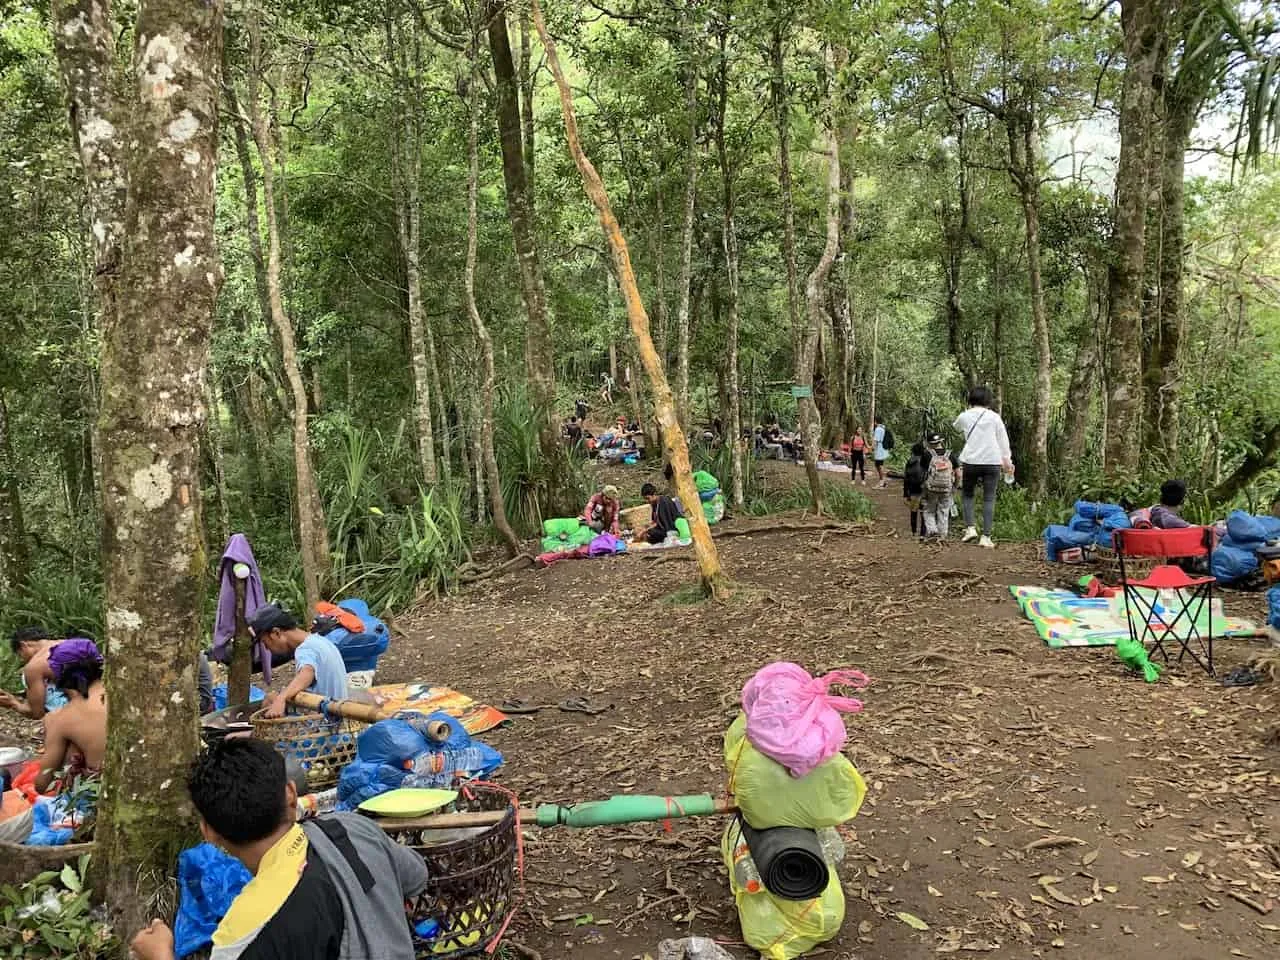
As you make your way up you will make numerous stops at different places marked as “Pos” – aka Pos 1, Pos 2, Pos Extra, Pos 3, Pos 4.
These are simply points on the trail where you will take a rest with the group and rehydrate / refuel for the remainder of the hike up.
Once you reach Pos 2, you will enjoy a nice lunch prepared by your porters and you will probably will be joined by several monkeys as well looking for some food.

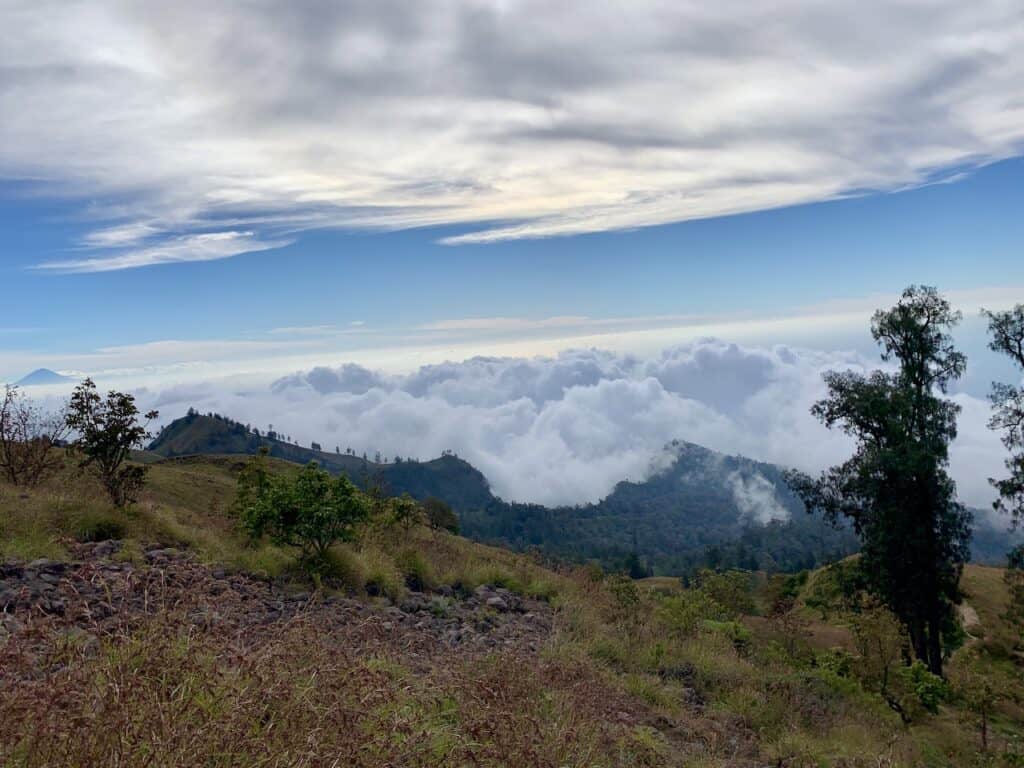
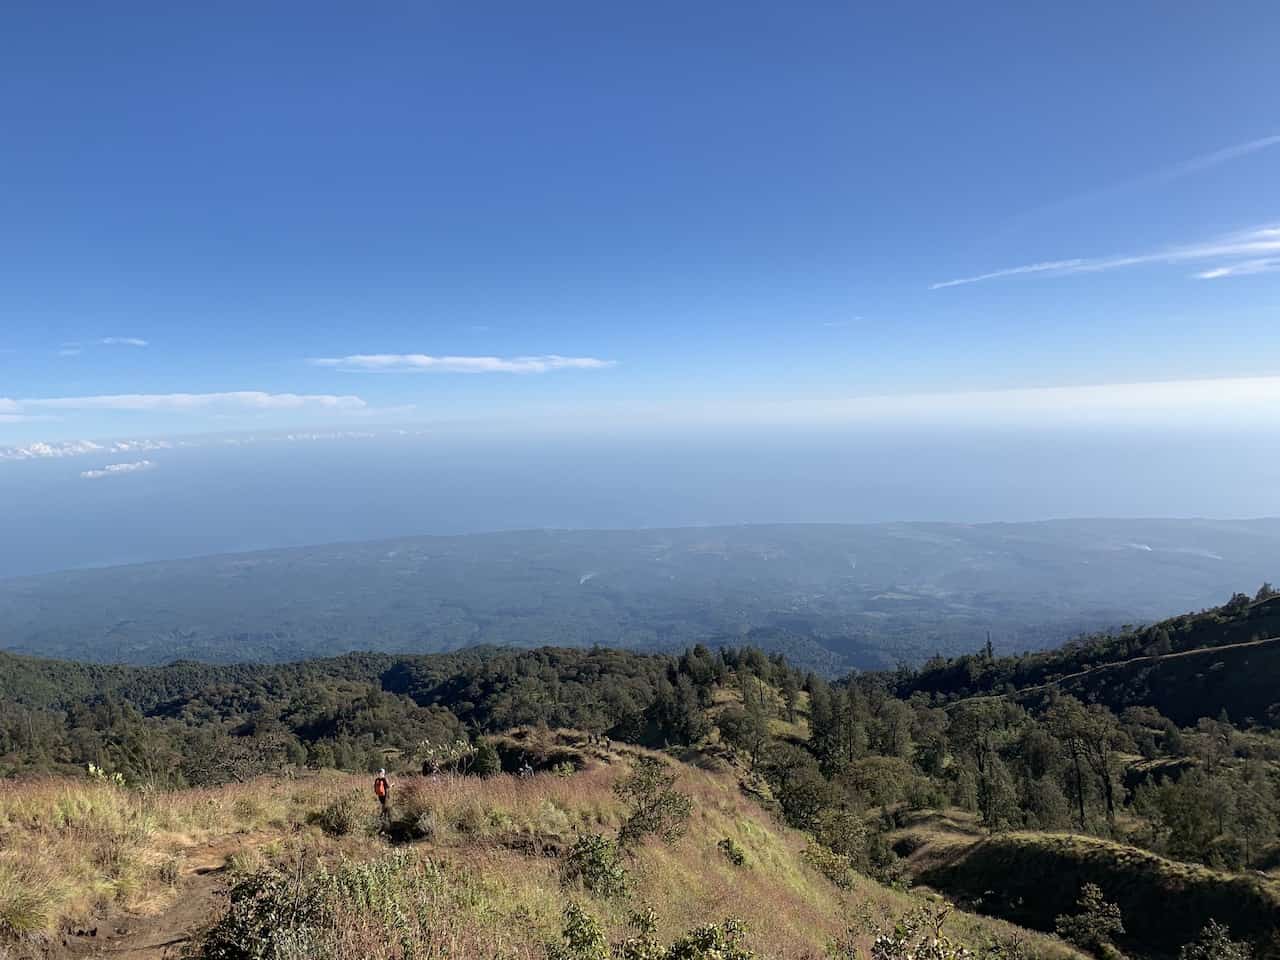
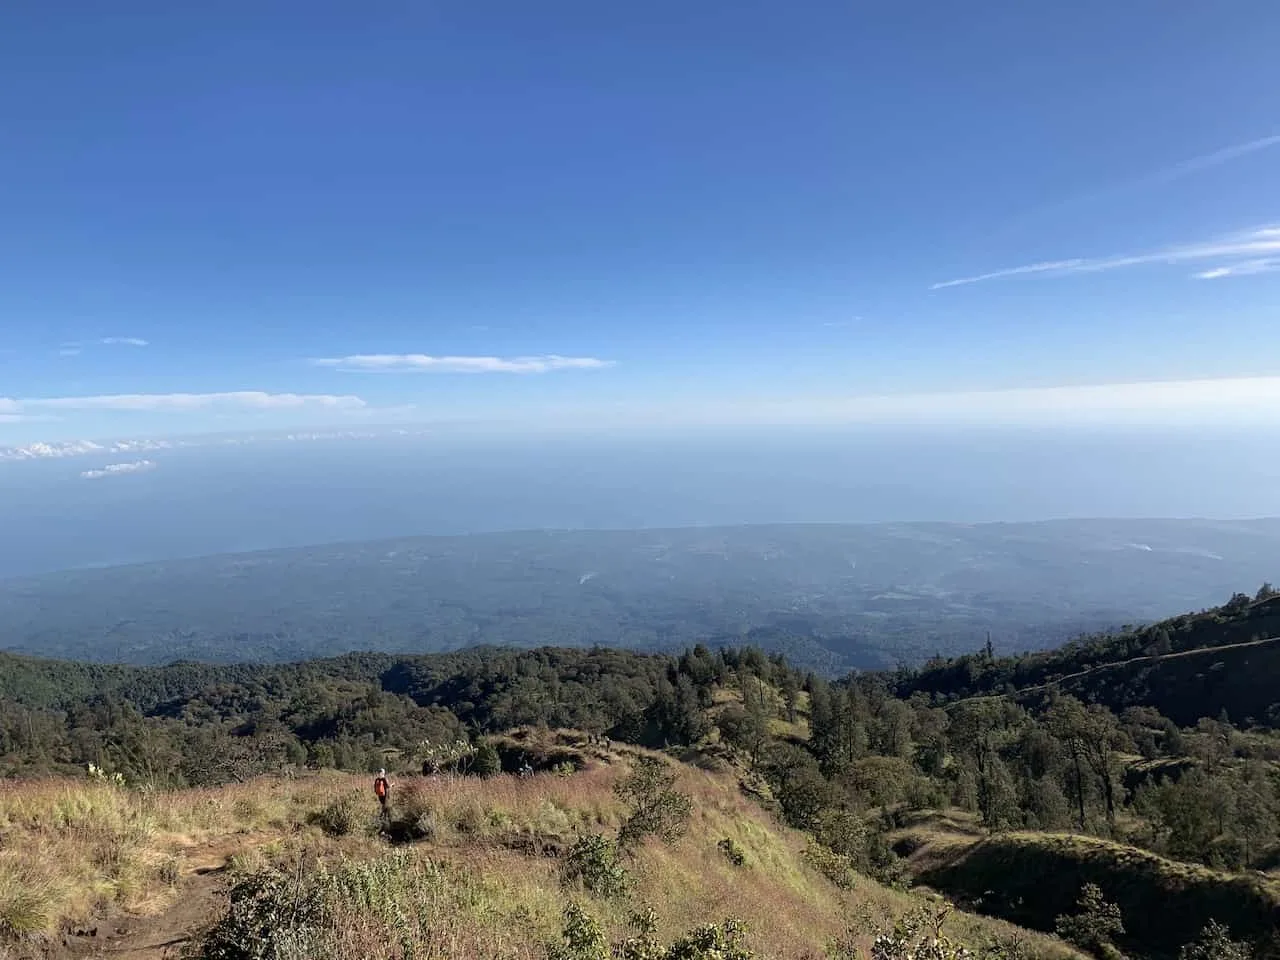
At some point though, those trees will disappear and you will begin to take in those vast landscape views. As you continue to climb, the views will just get better and better.

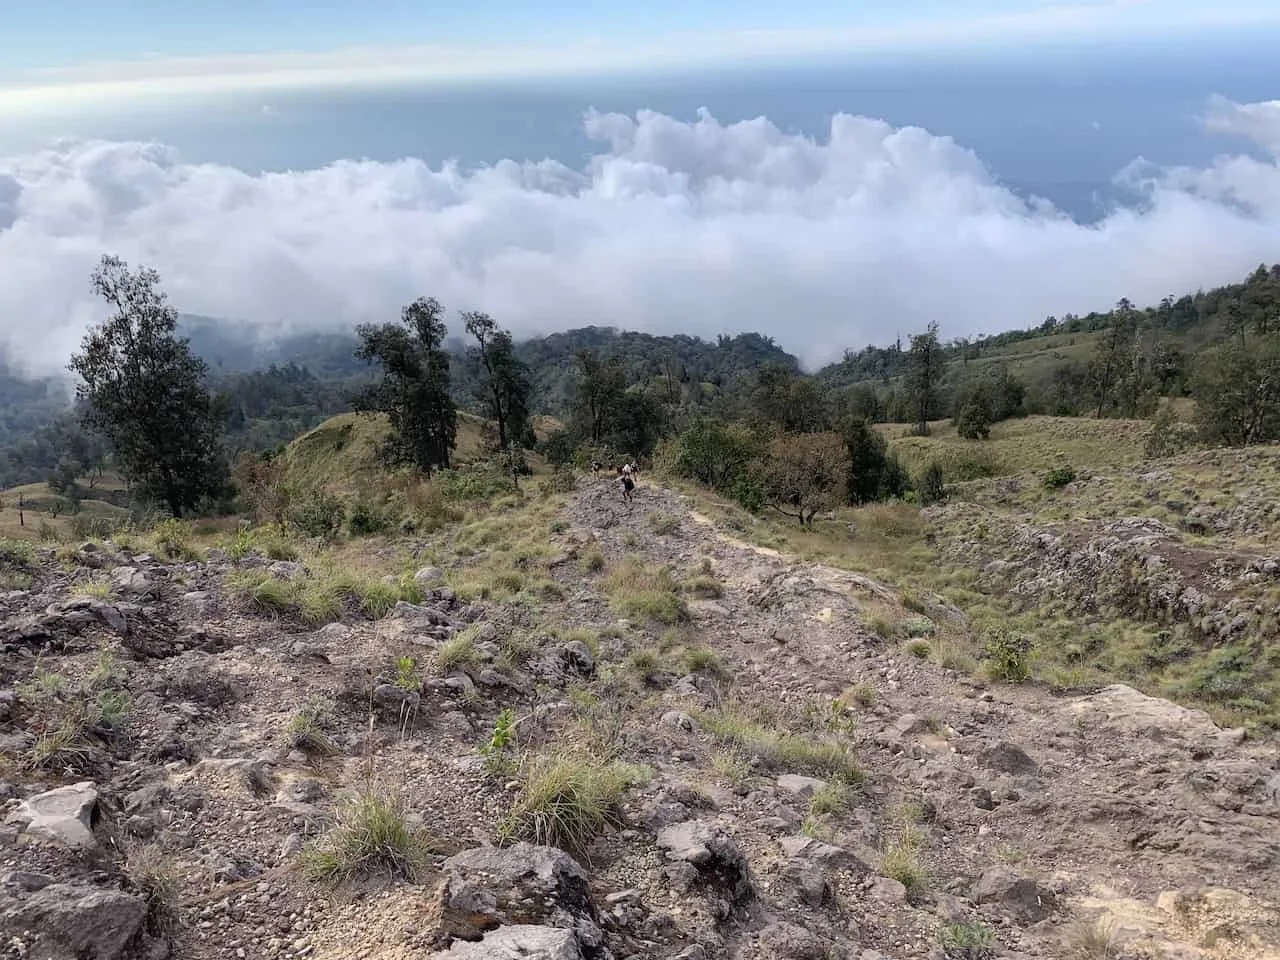
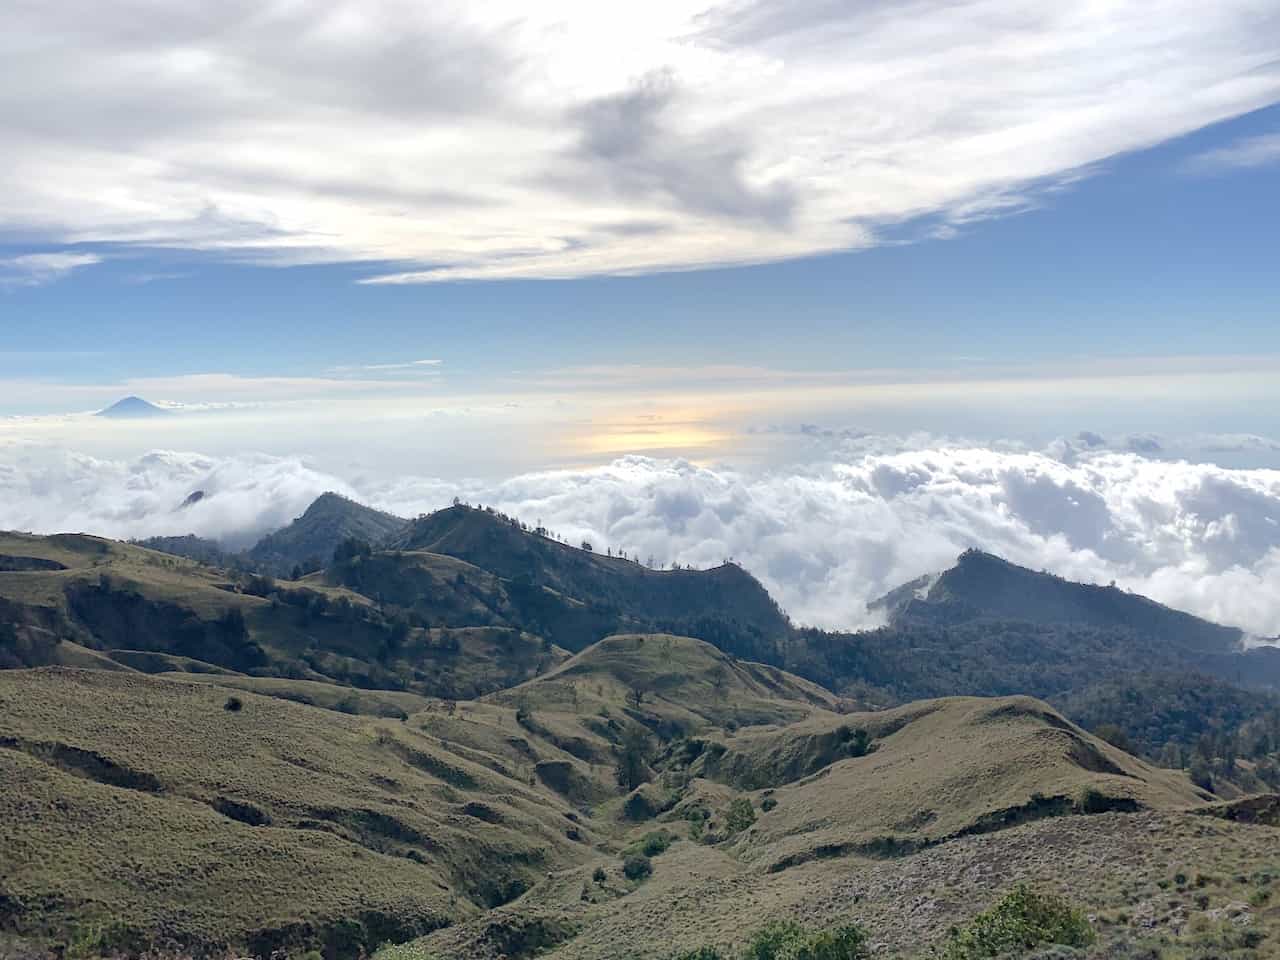
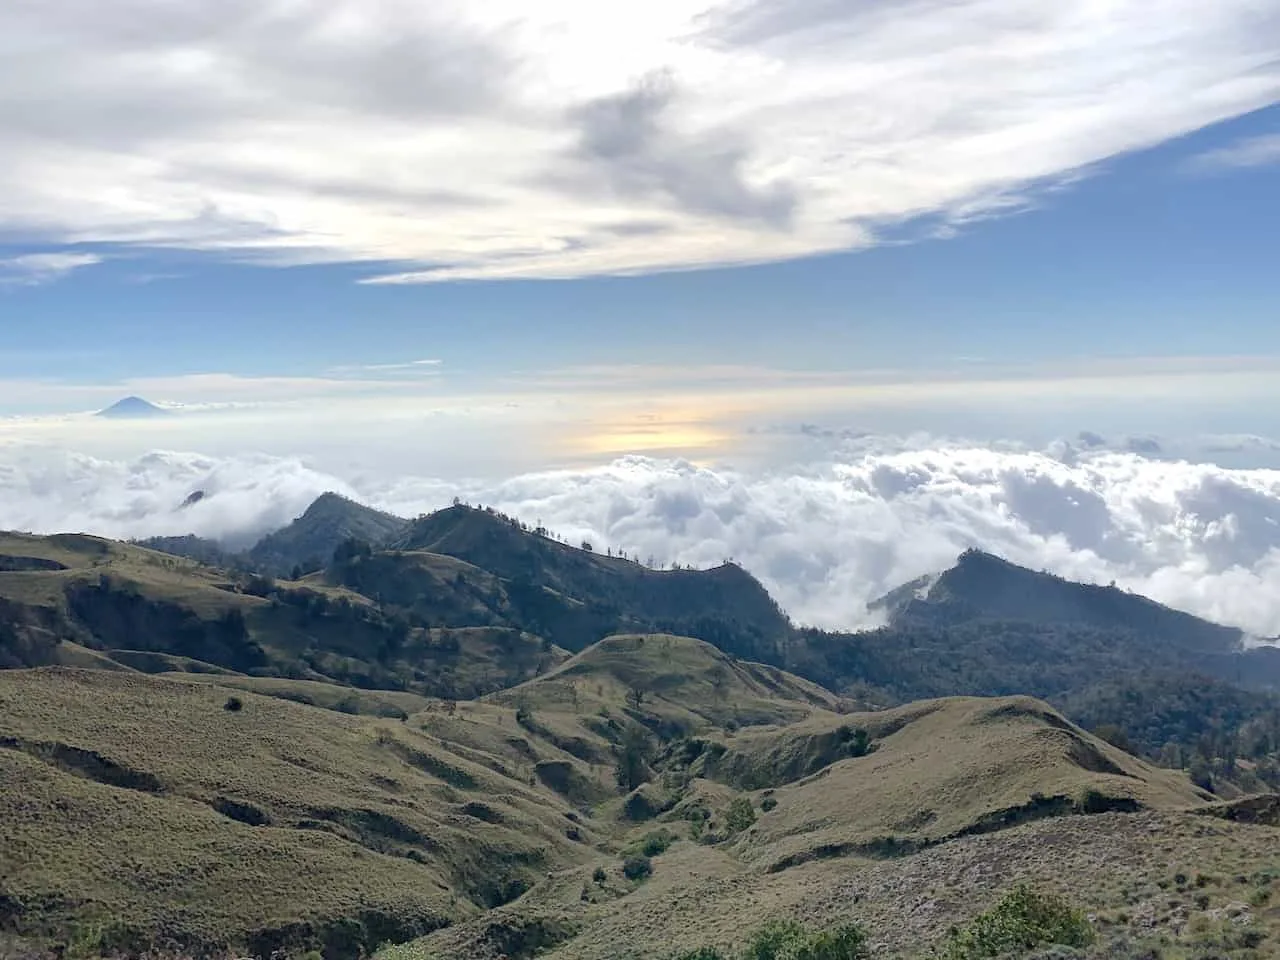
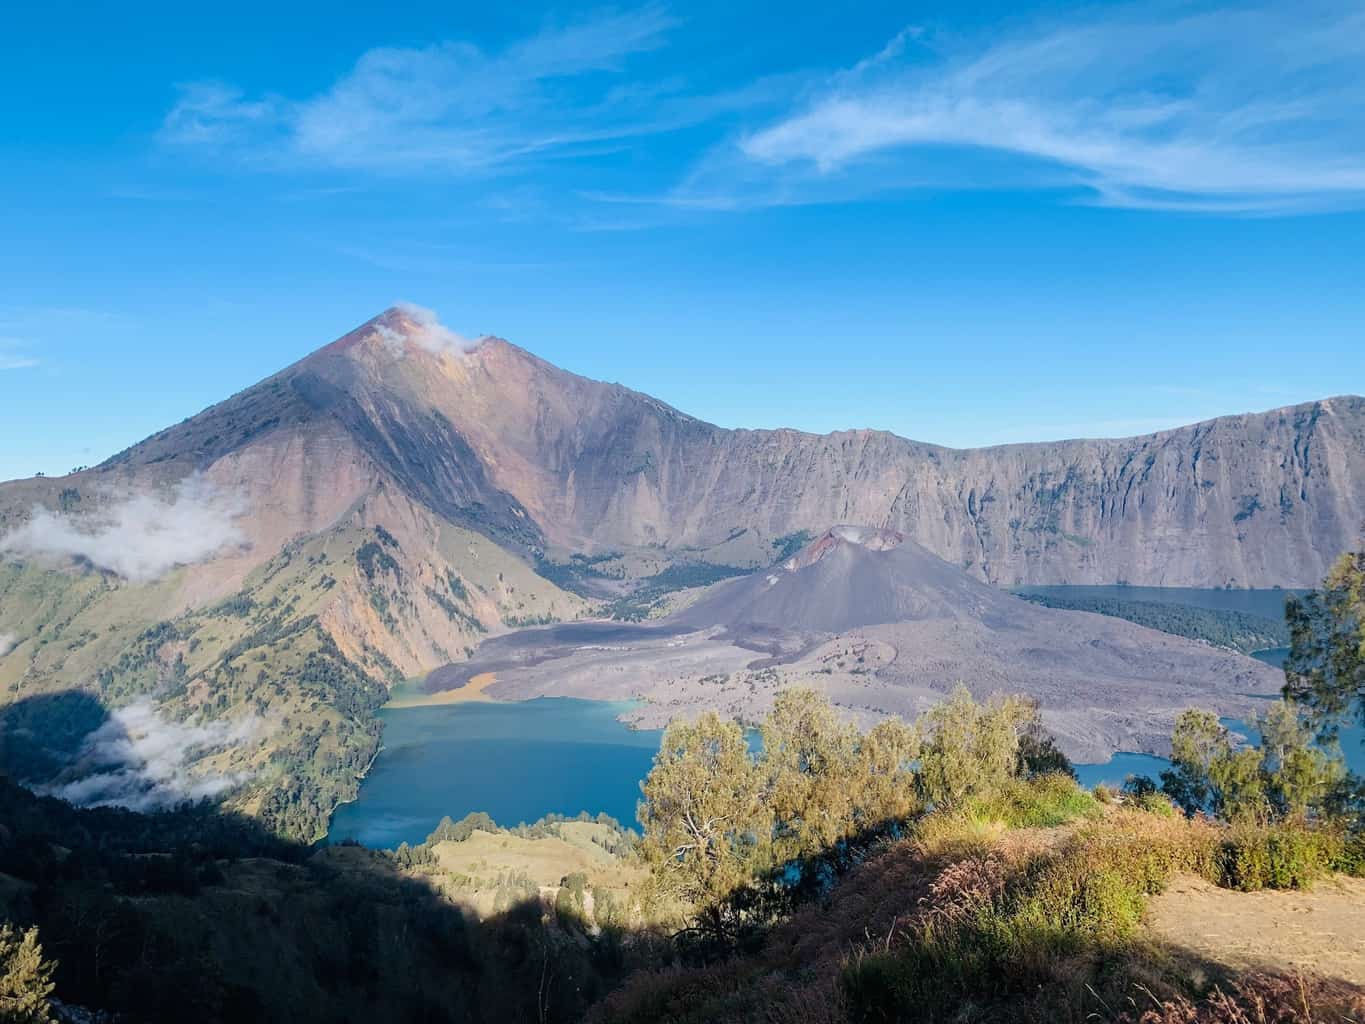
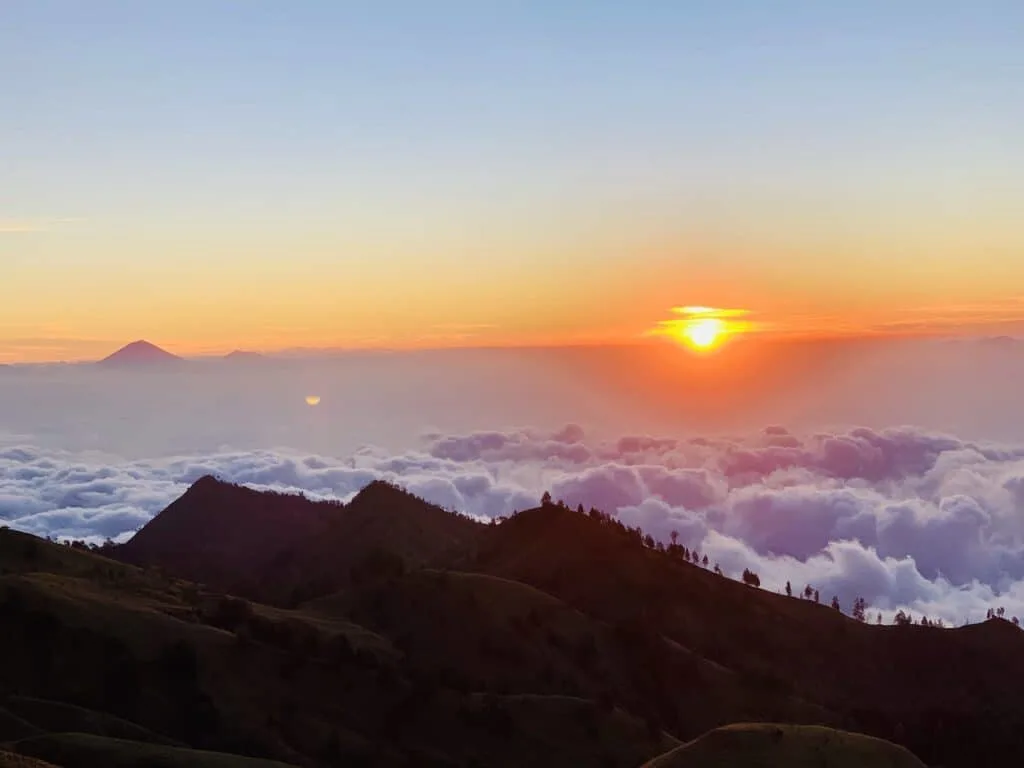
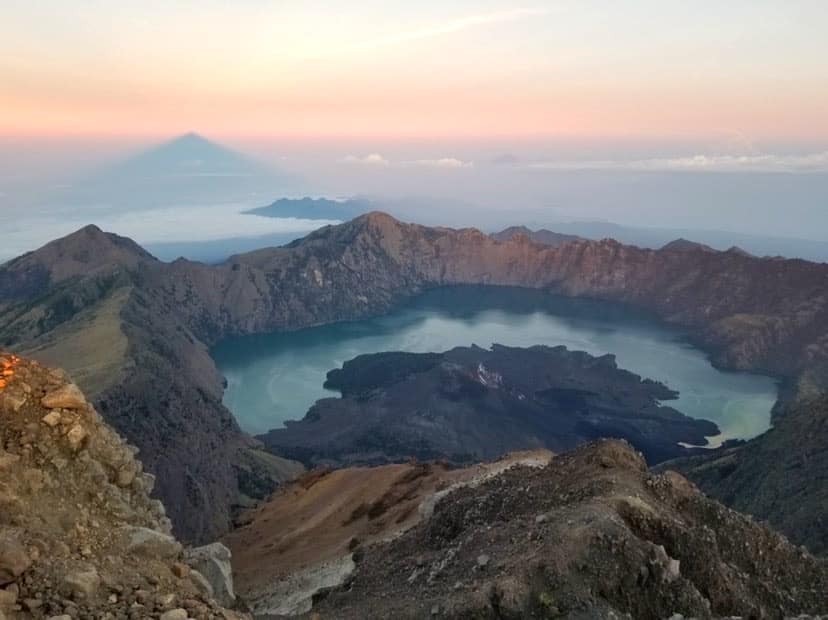
Soon enough though the crater rim will be approaching. The guides do a pretty good job of pacing the group to arrive at the crater rim with plenty of time to spare for sunset. We spent a good 2 hours up by the crater, enjoying the view, and waiting for the sun to finally set.
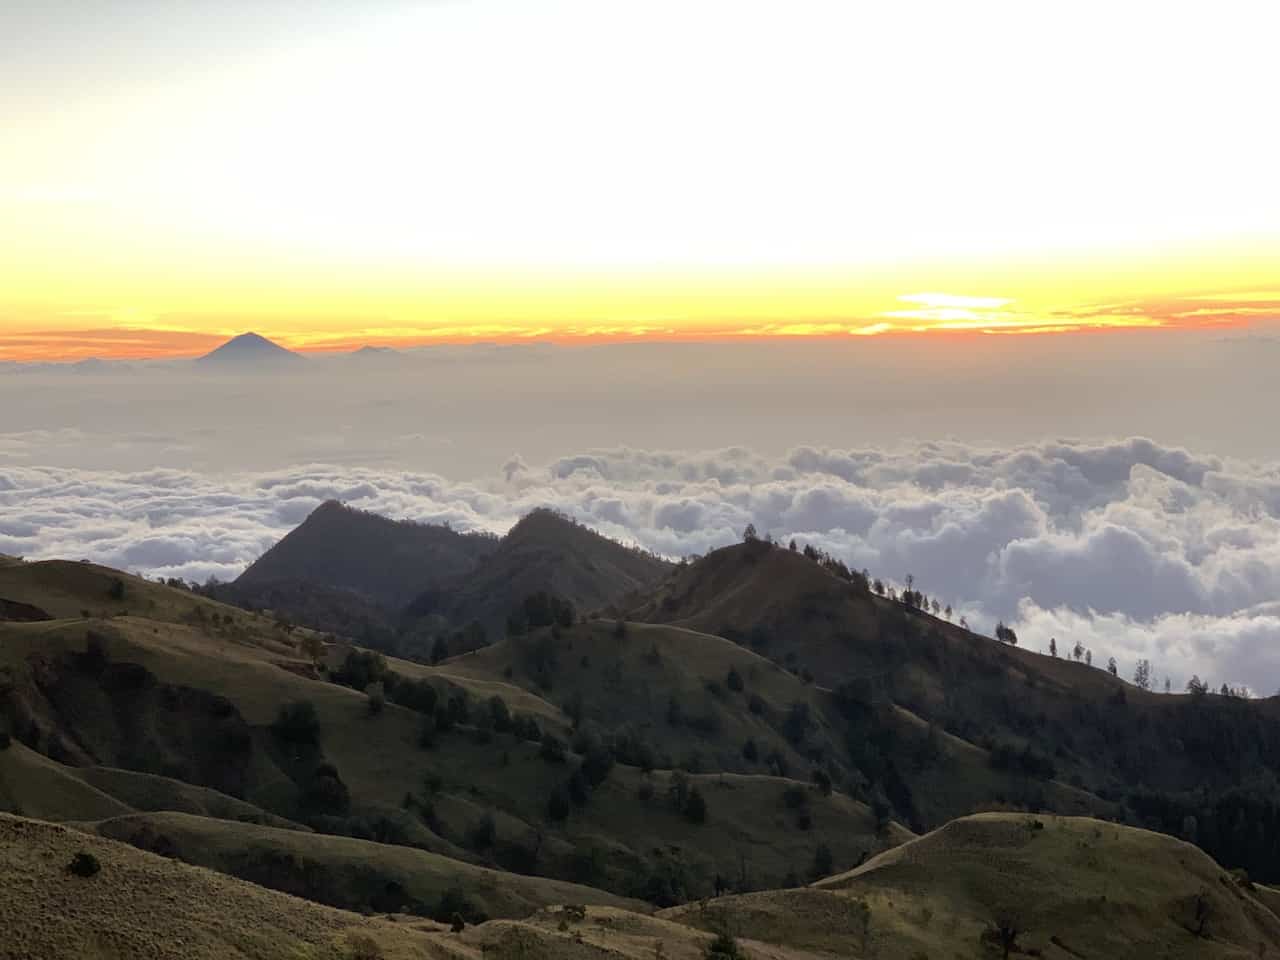
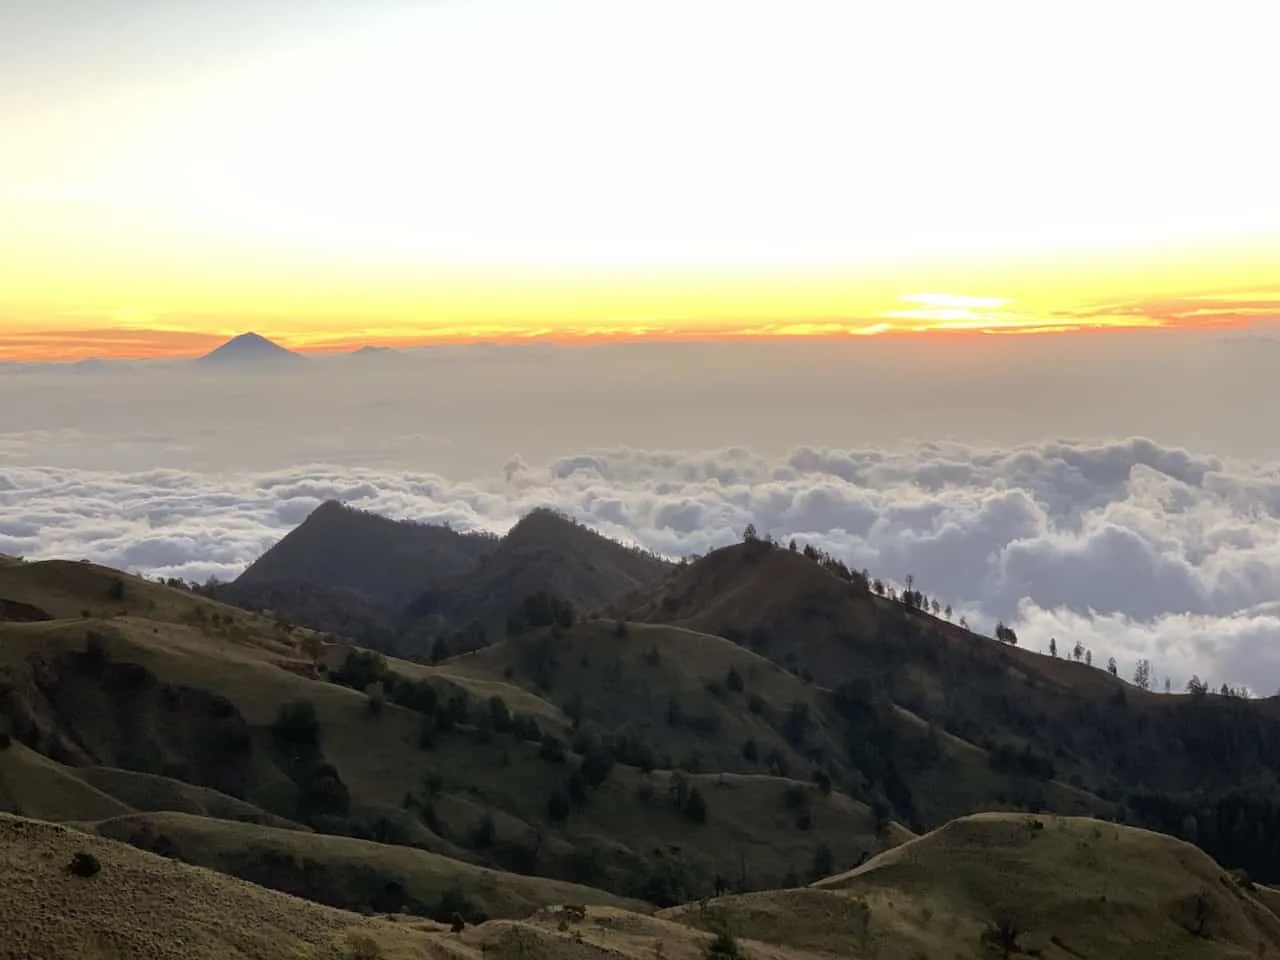
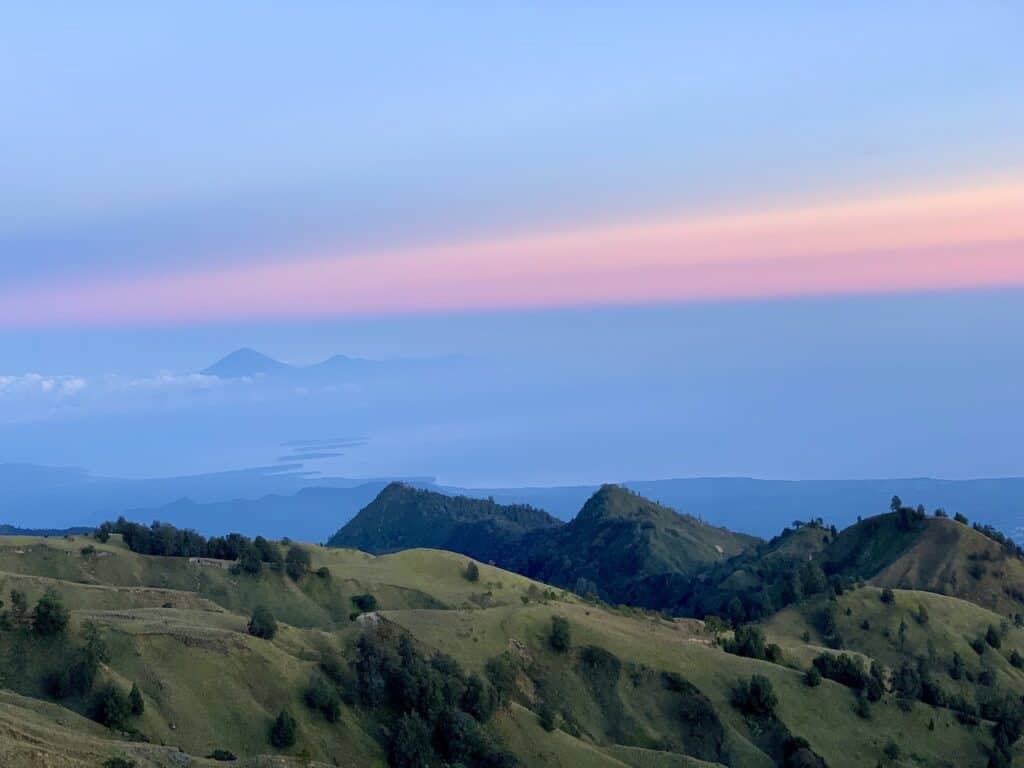
On one side of the crater you will see Lombok, the Gili Islands, and Bali (and Mt Agung) out in the distance.
During my time on the mountain, the sunset had a cloud base as you can see in the pictures below, but for sunrise all was clear out in the distance.
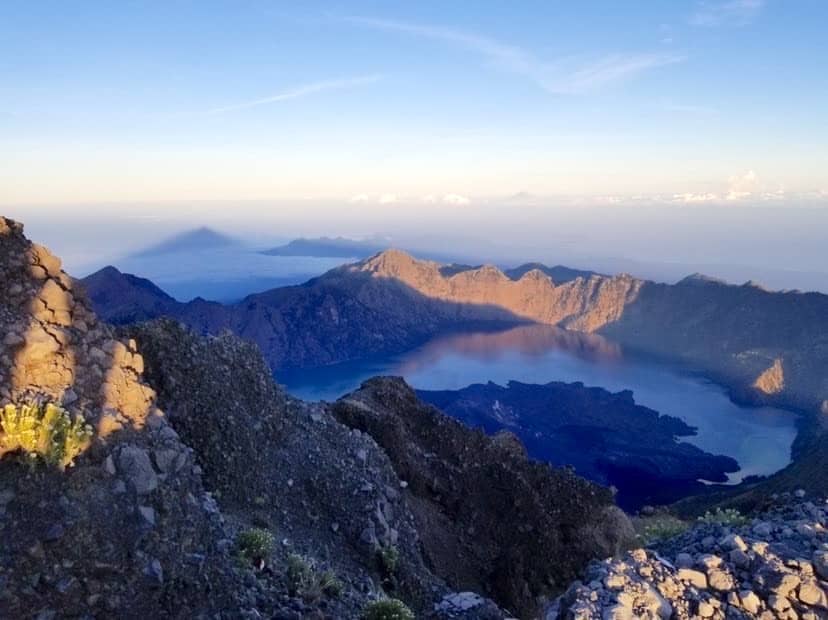
On the other side you will see the Rinjani crater lake with the smaller volcano within the lake and the Rinjani summit out behind it.

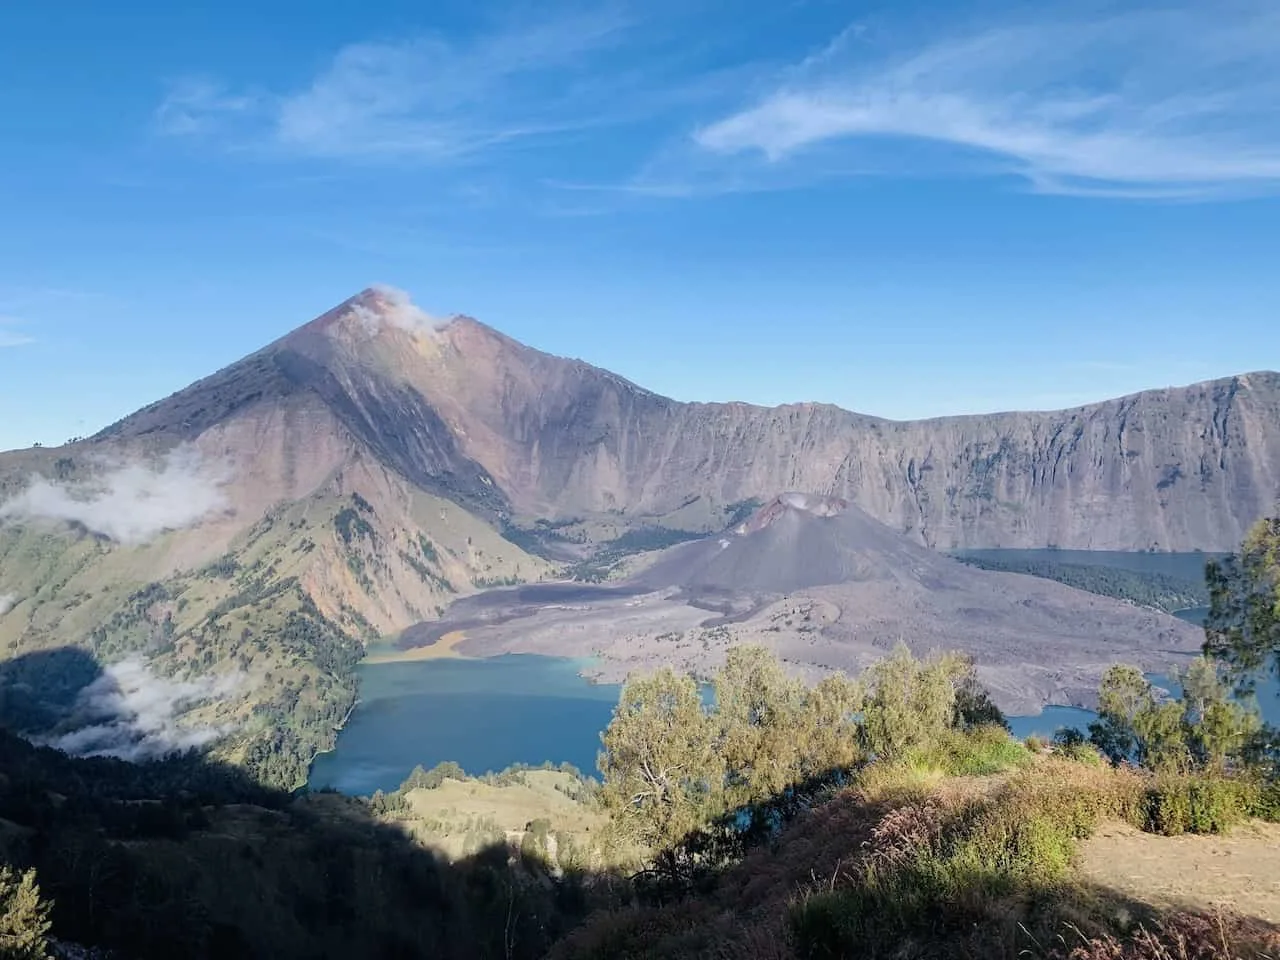
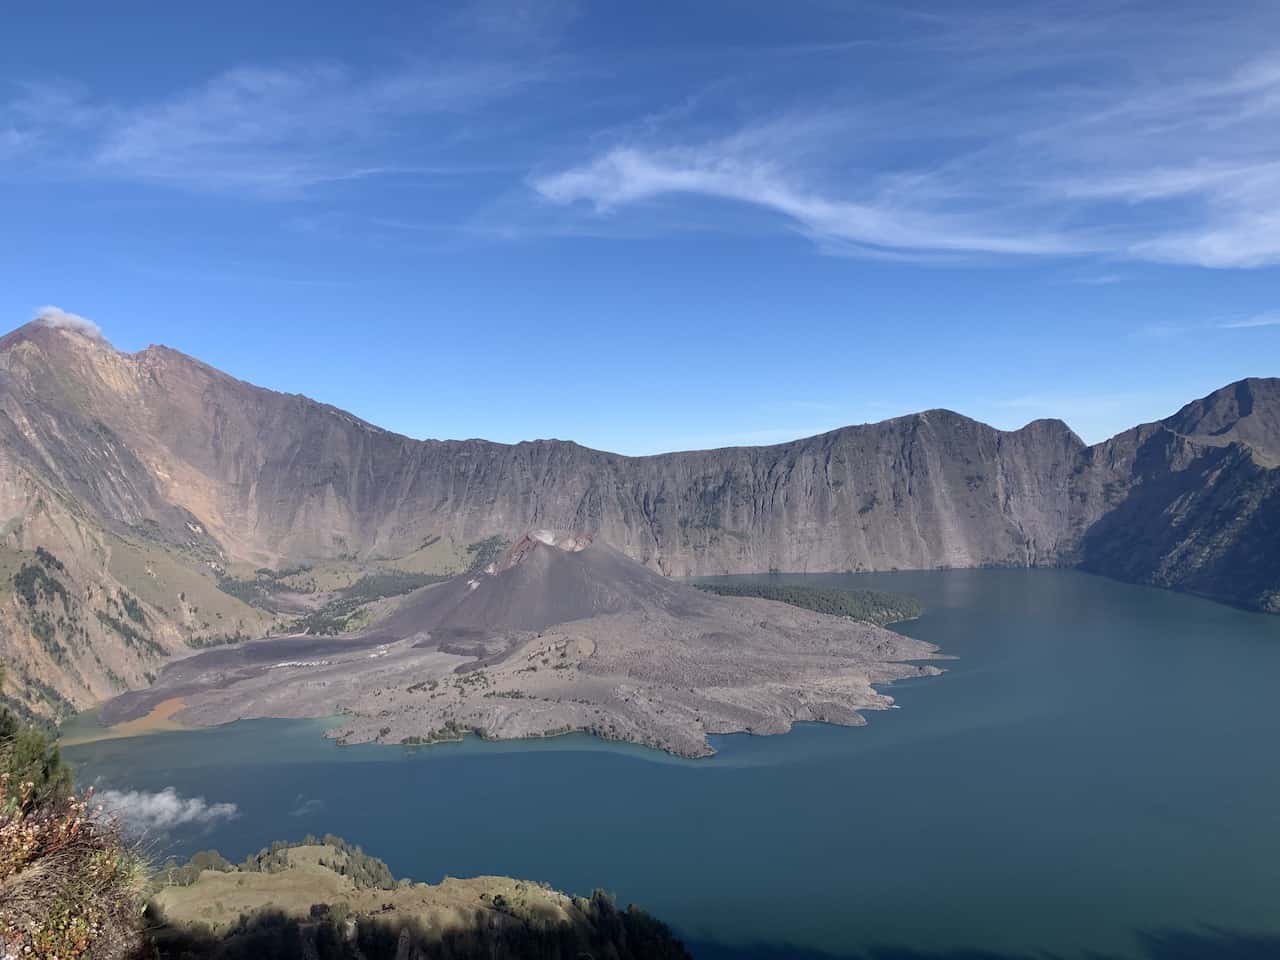
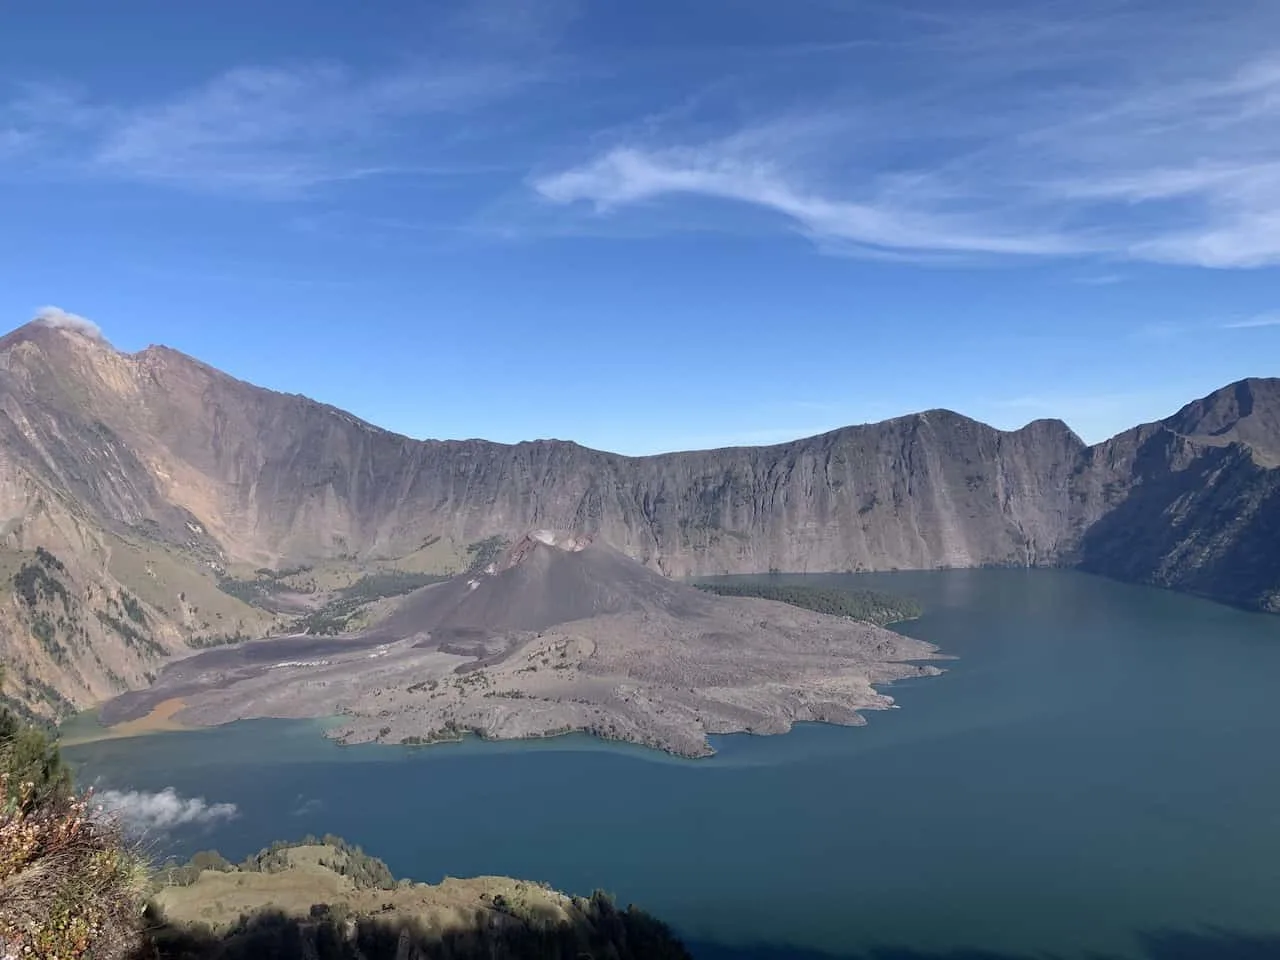
Altogether it was truly one of the best viewpoints you can ask for, even though you may not be on the summit itself.
After enjoying sunset, it is time to head to your tents that will be set up for you and enjoy some dinner before calling it a night.
» Check out these Sunset Photography Tips to help you get some beautiful shots in from the crater rim!
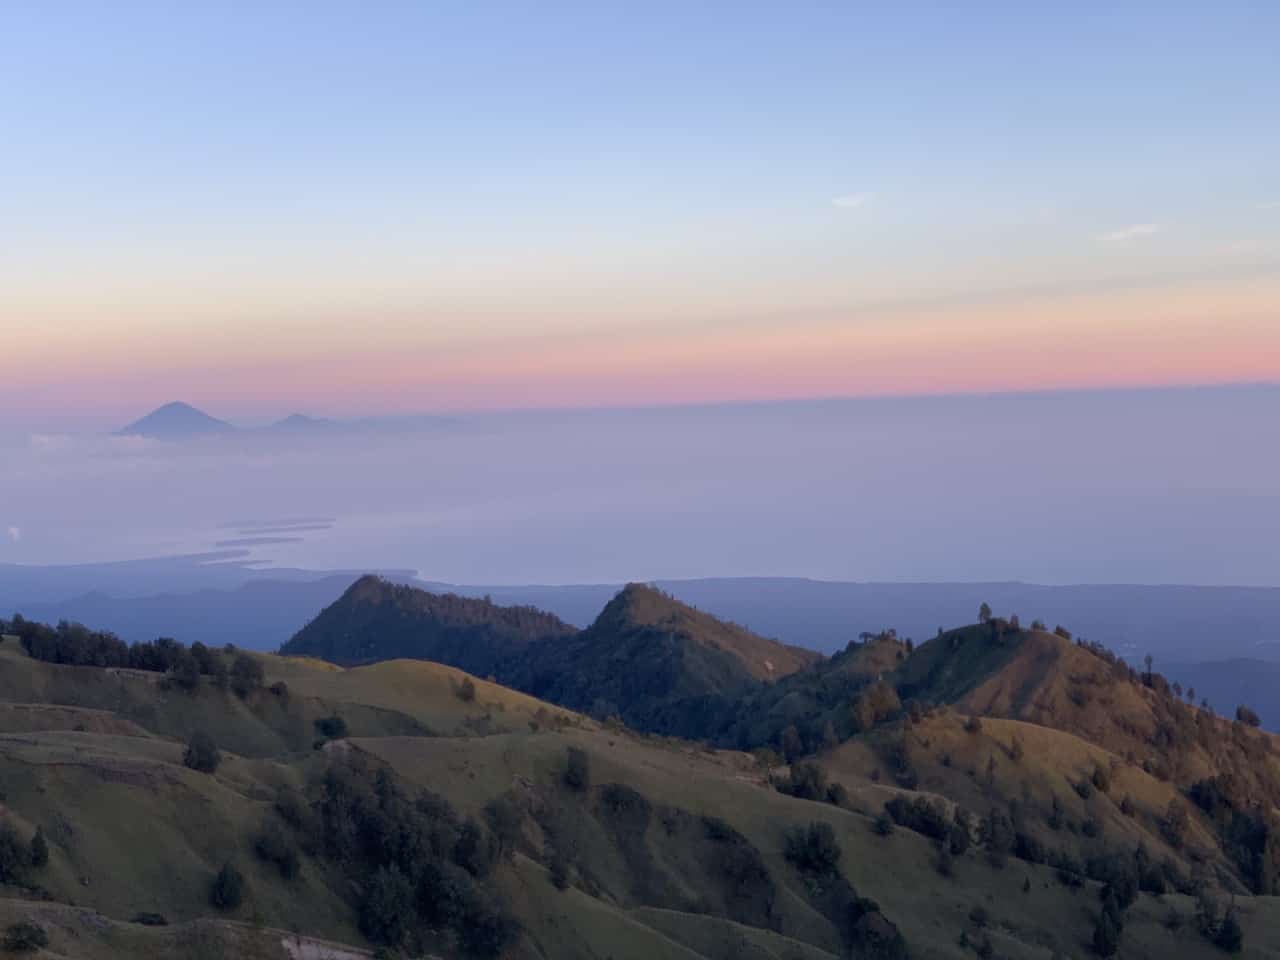
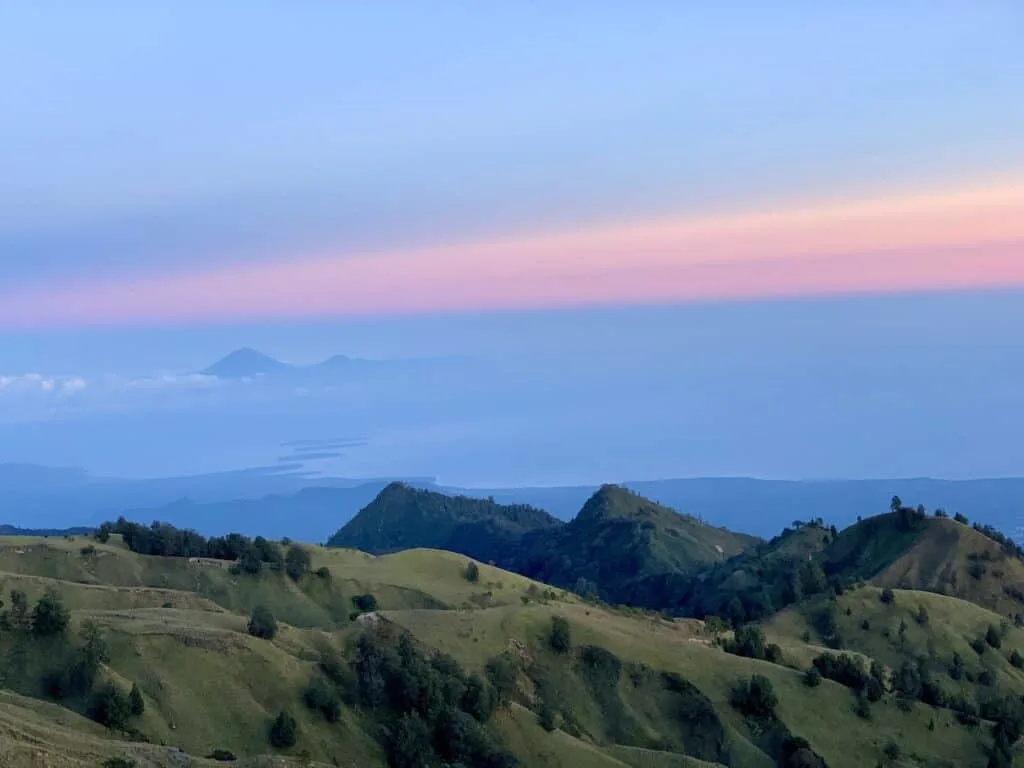
On day 2, wake up early to head back to the crater rim to enjoy a beautiful sunrise.
While the previous day’s sunset actually had a cloud base, the sunrise was clear as can be. That is when we got to see the Gili Islands and the Bali Sea.


Once sunrise is fully enjoyed and you eat some breakfast, it is time to head all the way back down to the base of the hike in Senaru, the same way you came up.
The hike down will be a bit quicker, somewhere around 6 hours or so as you wont need to take as breaks and you will be going downhill instead of up. At some point lunch will be served before taking part of the last portion of the trail.
Once you reach the base, you will be picked up by a driver, who will take you back to the hotel to grab your stuff and you will then be taken to your next destination.


9) Rinjani Summit Hike 2 Day / 1 Night
Next up is another 2 day hike, but in this case heading all the way up to the summit from Sembalun and back down.
- Starting Point: Sembalun
- Day 1: Up to Sembalun Crater Rim
- Night 1: Overnight at Sembalun Crater Rim
- Day 2: Sunrise to Rinjani Summit, back down to Sembalun Crater Rim, down to Sembalun
- Elevation Gain: 1,156 Meters to 3,726 Meters (+2,570 Meters) / 3,793 Feet to 12,224 Feet (+8,431 Feet)
Essentially day 1 will be spent heading up to a different side of the crater rim from Sembalun instead of Senaru.
This portion of the trail will be similar to the Senaru side though as most of the hike will be done through the forest as you break at various “Pos” stops along the way.
You will enjoy a sunset on day 1 from the Sembalun Crater Rim before waking up VERY early on day 2 to make that summit push.
At some point in the middle of the night you will wake up, get those hiking boots on, turn on the flashlight and begin the ascent towards the summit.
It is an additional 1,000+ meters / 3,000+ feet up to the summit and will take the better portion of 3 hours to complete.
Once up there though, you will be at the second highest point in all of Indonesia and the views will be unbelievable. Not only will you be able to see the crater lake from above, but you will also get 360 degree views of all of Lombok.
After enjoying the sunrise on the summit it is time to head back down to camp to relax for a bit before continuing all the way back down to Sembalun to end your trek.


10) Rinjani Summit Hike 3 Day / 2 Night
If you are trying to see more of the Rinjani area, then I would highly suggest the 3 day route that begins in Sembalun but ends in Senaru.
- Starting Point: Sembalun
- Day 1: Up to Sembalun Crater Rim
- Night 1: Overnight at Sembalun Crater Rim
- Day 2: Sunrise to Rinjani Summit, down to Crater Lake, up to Senaru Crater Rim
- Night 2: Overnight on Senaru Crater Rim
- Day 3: Down from Crater Rim to Senaru
Day 1 will be the same as the 2 day / 1 night summit trek as you head off from Sembalun and go up to the Sembalun Crater Rim, where you will enjoy a sunset.
On day 2 you will head up to the summit for sunrise and then back down to the Sembalun Crater Rim to relax for a bit.
Here is where things would change a bit. Instead of ending the trip back down in Sembalun, you will head down to the Crater Lake itself.
Once you enjoy the crater lake for a bit, you will trek up to the opposite Senaru Crater Rim, where you will stay overnight. Day 3 will have you trekking from the Senaru Crater Rim down to Senaru to end your trek.
Note: the 4 day / 3 night option just adds a night at the bottom of the crater lake before heading up to the Senaru Crater Rim
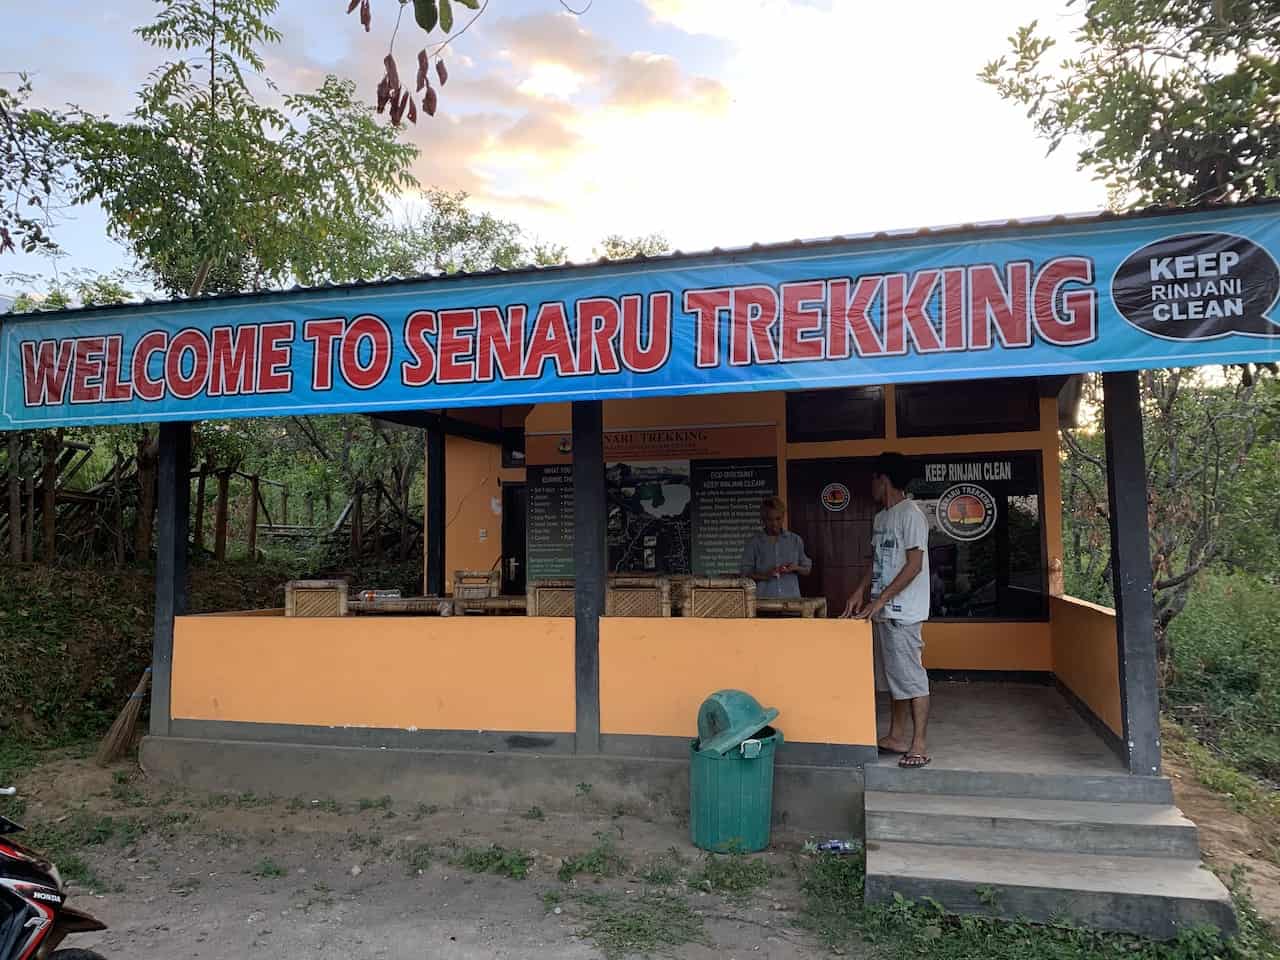
11) Mount Rinjani Trekking Company
There is only one company that I can truly vouch for here and it is called Senaru Trekking.
The owner is one of the most helpful people when it comes to getting you ready for the trip and taking care of any questions you may have.
From pickup to drop-off everything went flawlessly and Senaru Trekking really knows what they are doing. The guides and porters went above and beyond and it was great getting to know them a bit better throughout the trek.
What I also really love about Senaru Trekking is that they truly care about the mountain and keeping it clean.
So much so that they actually offer you back 5% of your trip cost if you come back down the mountain with a bag of trash.
Overall, my time with Senaru Trekking was one of the best experiences I could ask for and if you are headed over to Rinjani, I would highly recommend joining them for the trek.
If you wanted to check out some other potential tour options for Mount Rinjani, below are some of the highest rated ones available:
- 2 Day / 1 Night Rinjani Summit Hike
- 3 Day / 2 Night Rinjani Summit Hike
- 2 Day / 1 Night Rinjani Crater Rim Hike

I know this was quite the long article, but I did want to give a fully detailed guide of what to expect on the mountain and lay out the different trekking options.
If you have any questions at all, please feel free to send them my way in the comments below.
Also be sure to check out the other Indonesia itineraries and guides up on the site for any more help planning your trip!
If you enjoyed this you are sure to be interested in some other Indonesia highlights including:
Java: Goa Jomblang | Yogyakarta Temples | Tumpak Sewu | Goa Tetes | Mount Bromo | Kawah Ijen
Bali: Aling Aling Waterfall | Sekumpul Waterfall
And don’t forget to head out to Komodo National Park, where you can head out to Padar Island!


John
Friday 29th of July 2022
Why do some travelers say you don’t need a guide/porter and you can do it without one? And some say you need one? Is it requires by the law there ?
bahri
Wednesday 5th of July 2023
@John hello, You are correct
James
Wednesday 26th of April 2023
@Charles, Hello necessary guide as in compulsory? or it is just recommended to have one
Charles
Sunday 31st of July 2022
Hi John - I can't speak for those travelers who say you don't need a guide/porter. But from my understanding a guide and porter are necessary. You can reach out to some local companies to get a better idea but from my understanding a guide/porter is necessary (and makes the climb much more feasible too).