
This overview will go over everything you need to know when it comes to the Tongariro Alpine Crossing in the North Island of New Zealand.
When it comes to day hikes around the world I have a hard time believing that there are too many others out there that are better than this one. From stunning scenery to volcanic landscapes to geothermal activity, the Tongariro Alpine Crossing has it all and much more.
I put together this article to walk you through absolutely everything you need to know when taking part of this epic trail. From transportation options to weather forecasts to the hike itself, you will get to learn the ins & outs of how to get yourself ready for the trail.
So, enjoy the overview and most definitely enjoy hiking the Tongariro Alpine Crossing!
* Affiliate Disclosure: This post may contain affiliate links, which means I may receive a commission if you make a purchase through the links provided, at no additional cost to you. Thanks for supporting the work I put into TripTins!
1) What is the Tongariro Alpine Crossing
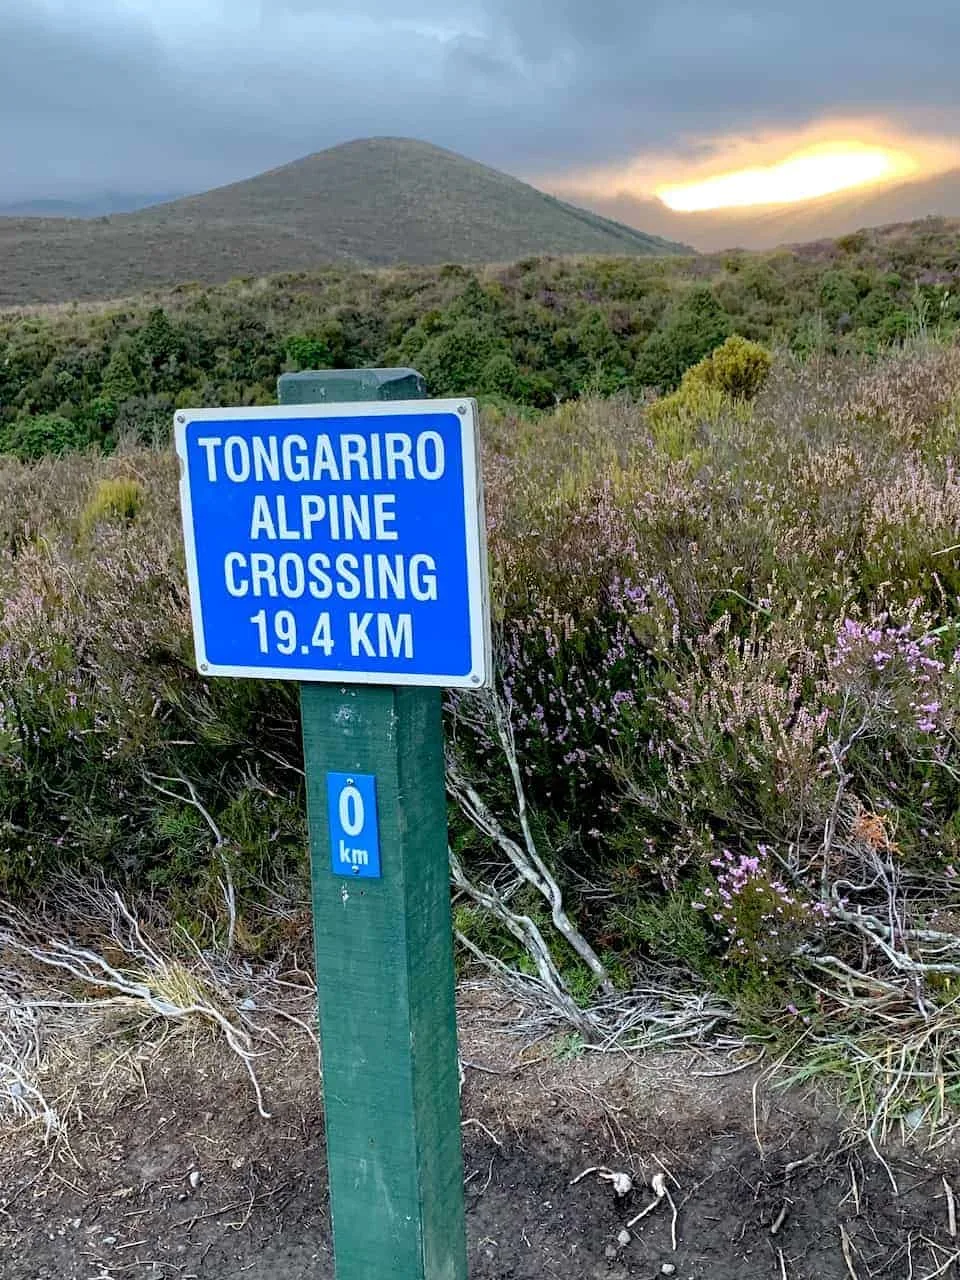
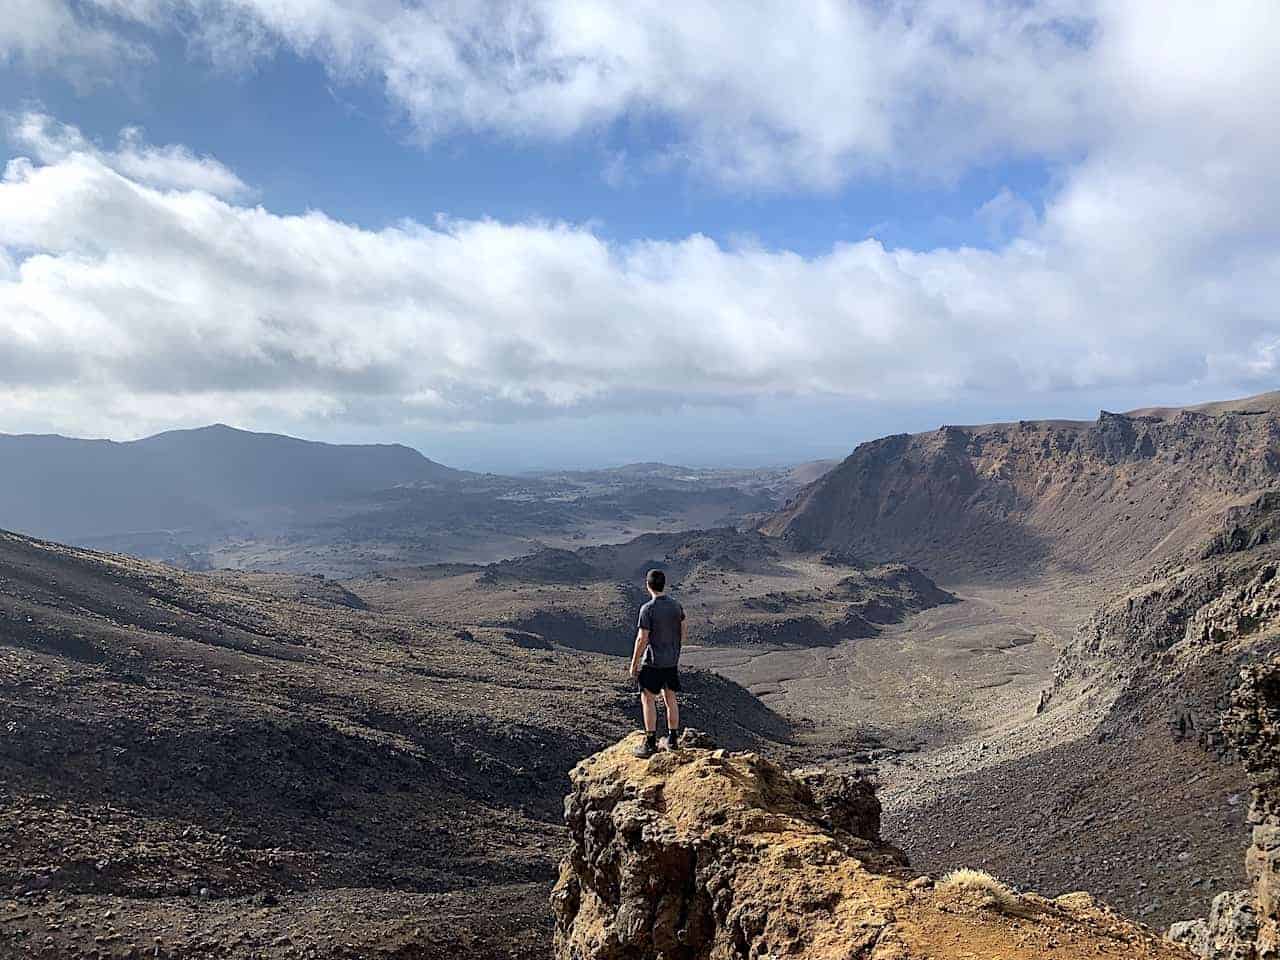
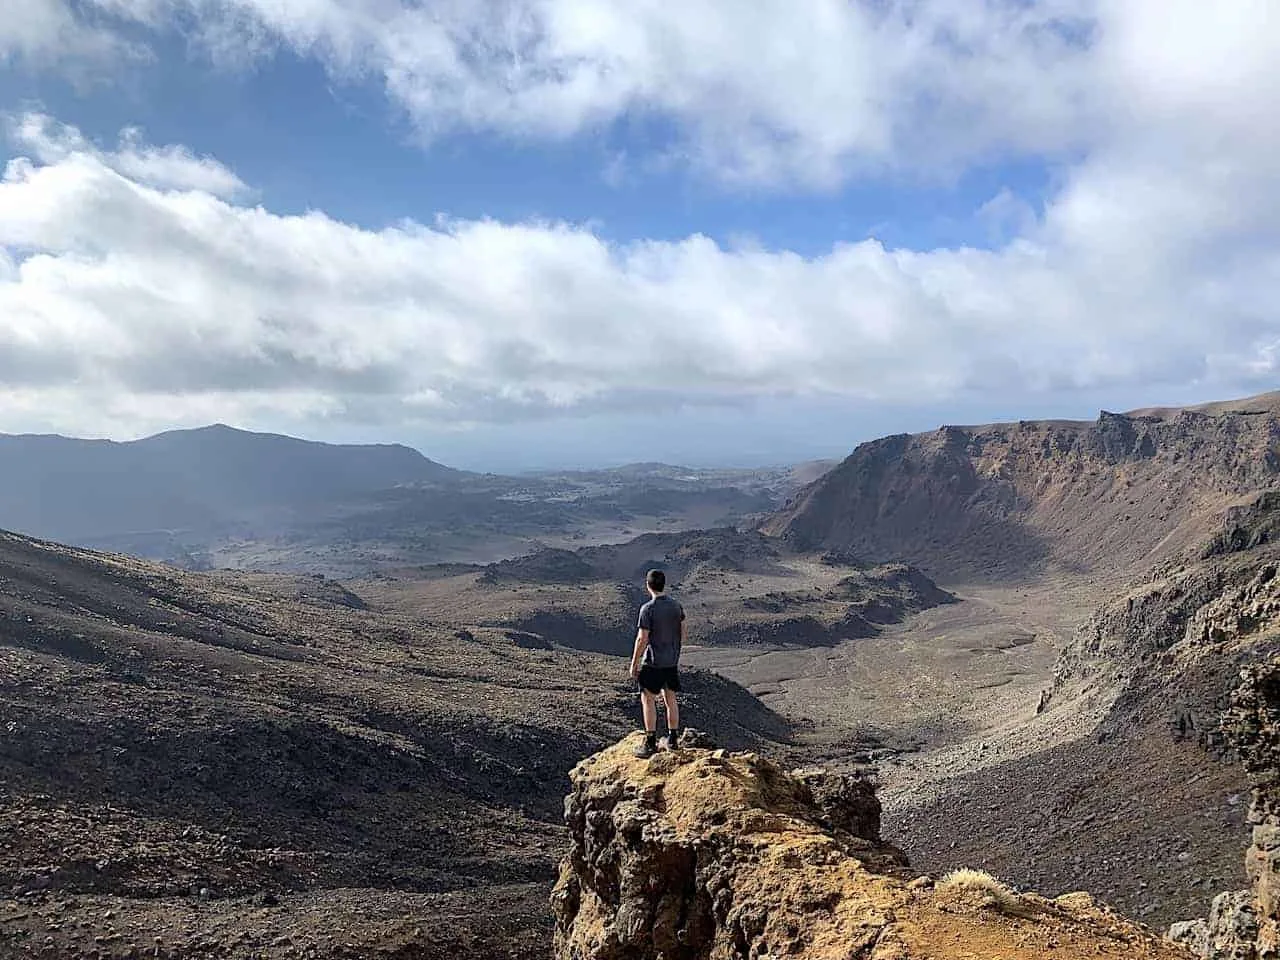
Widely regarded as one of the best day hikes in the world, the Tongariro Alpine Crossing is a 19.4 km / 12.1 mile hike through the Tongariro National Park on New Zealand’s North Island.
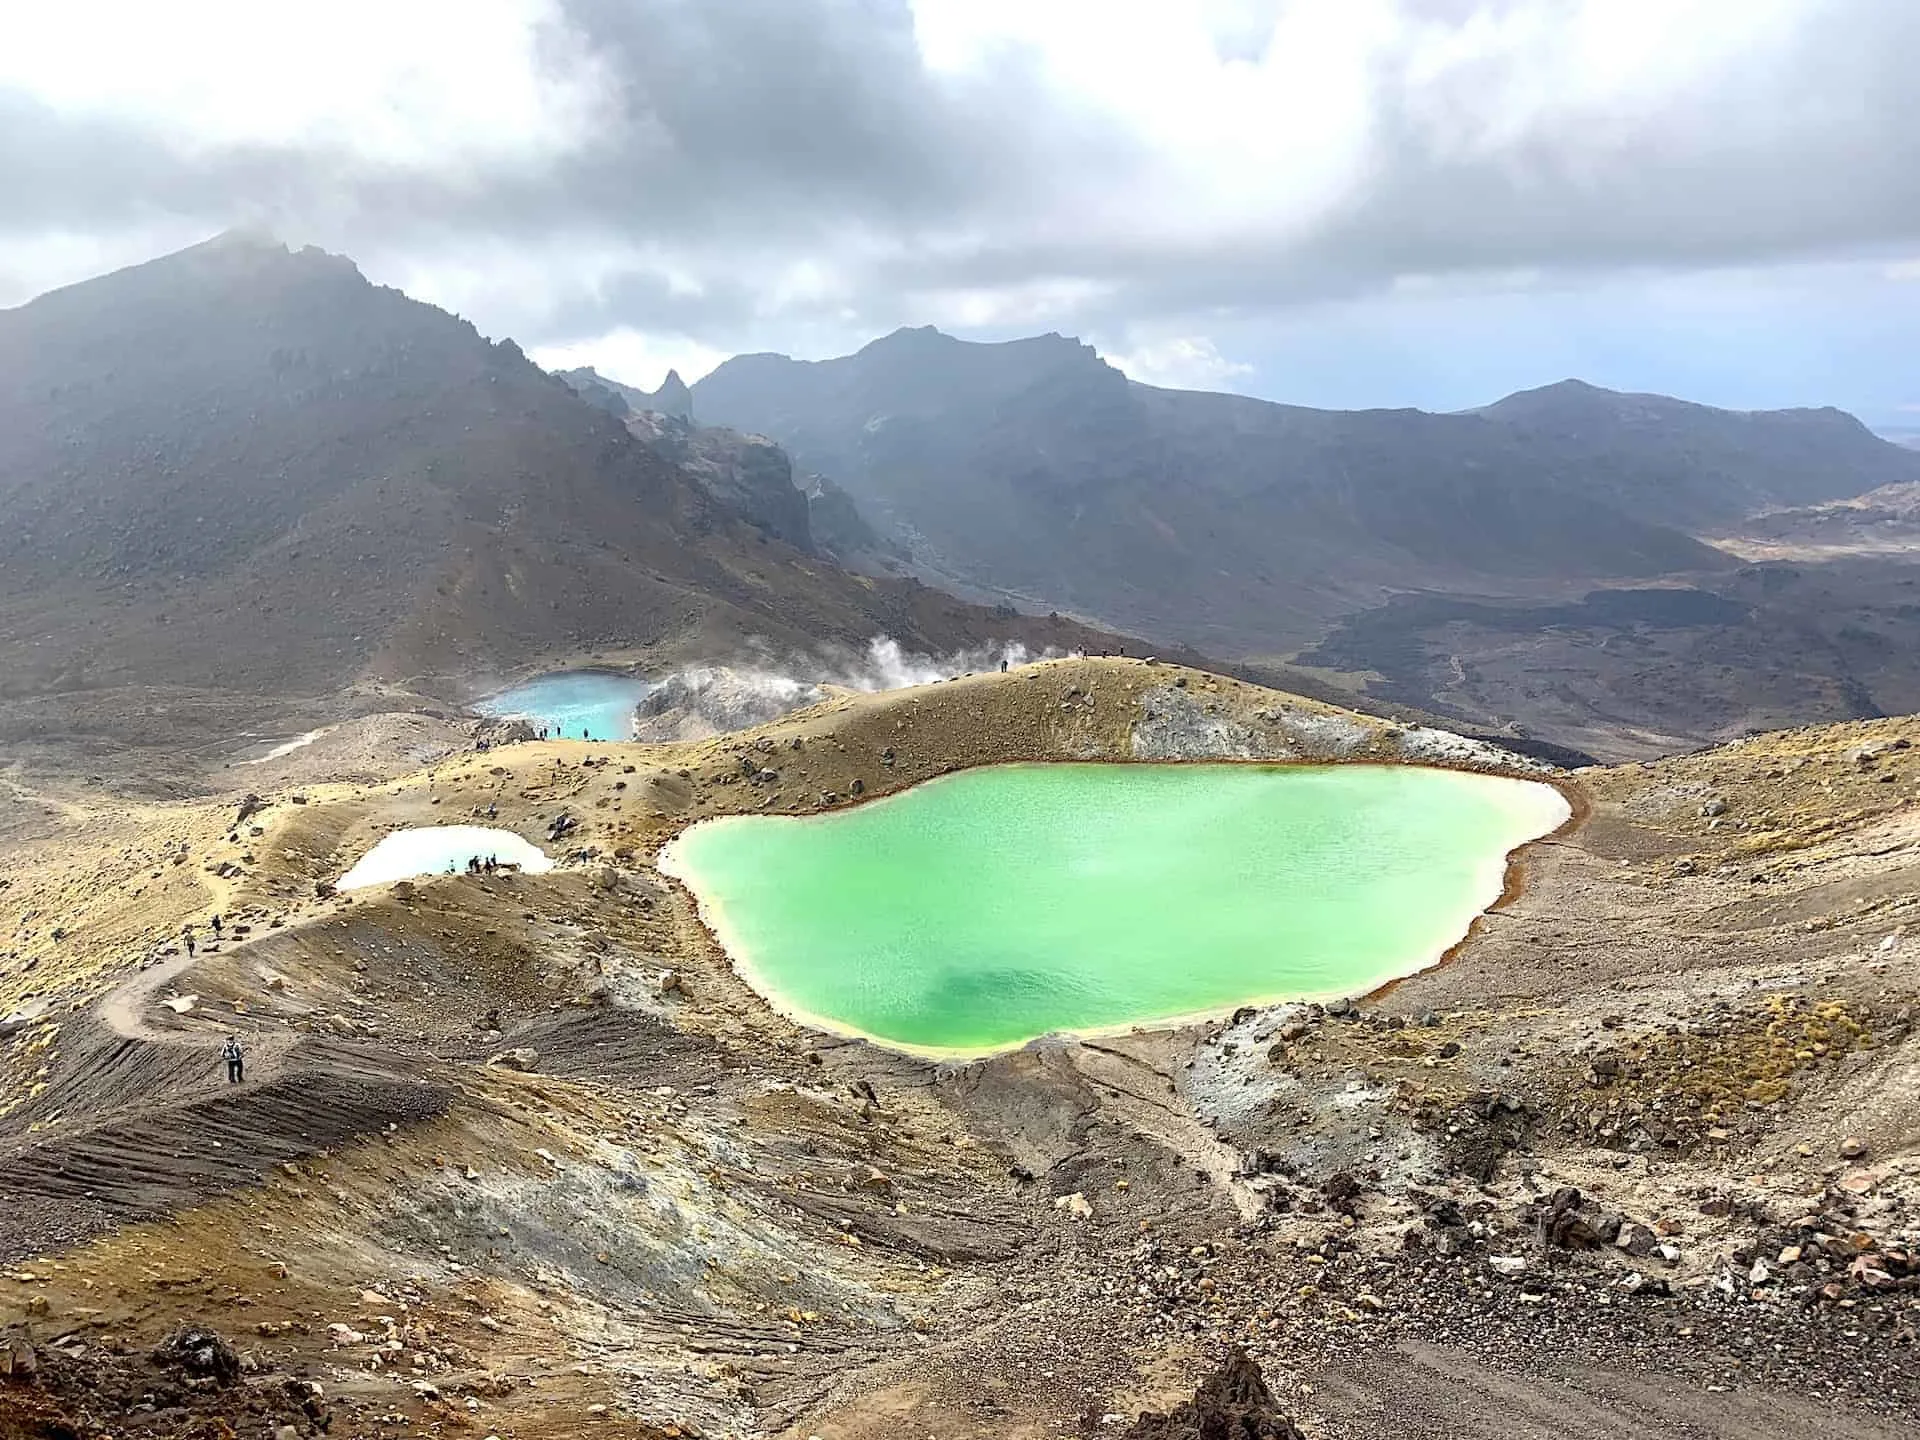
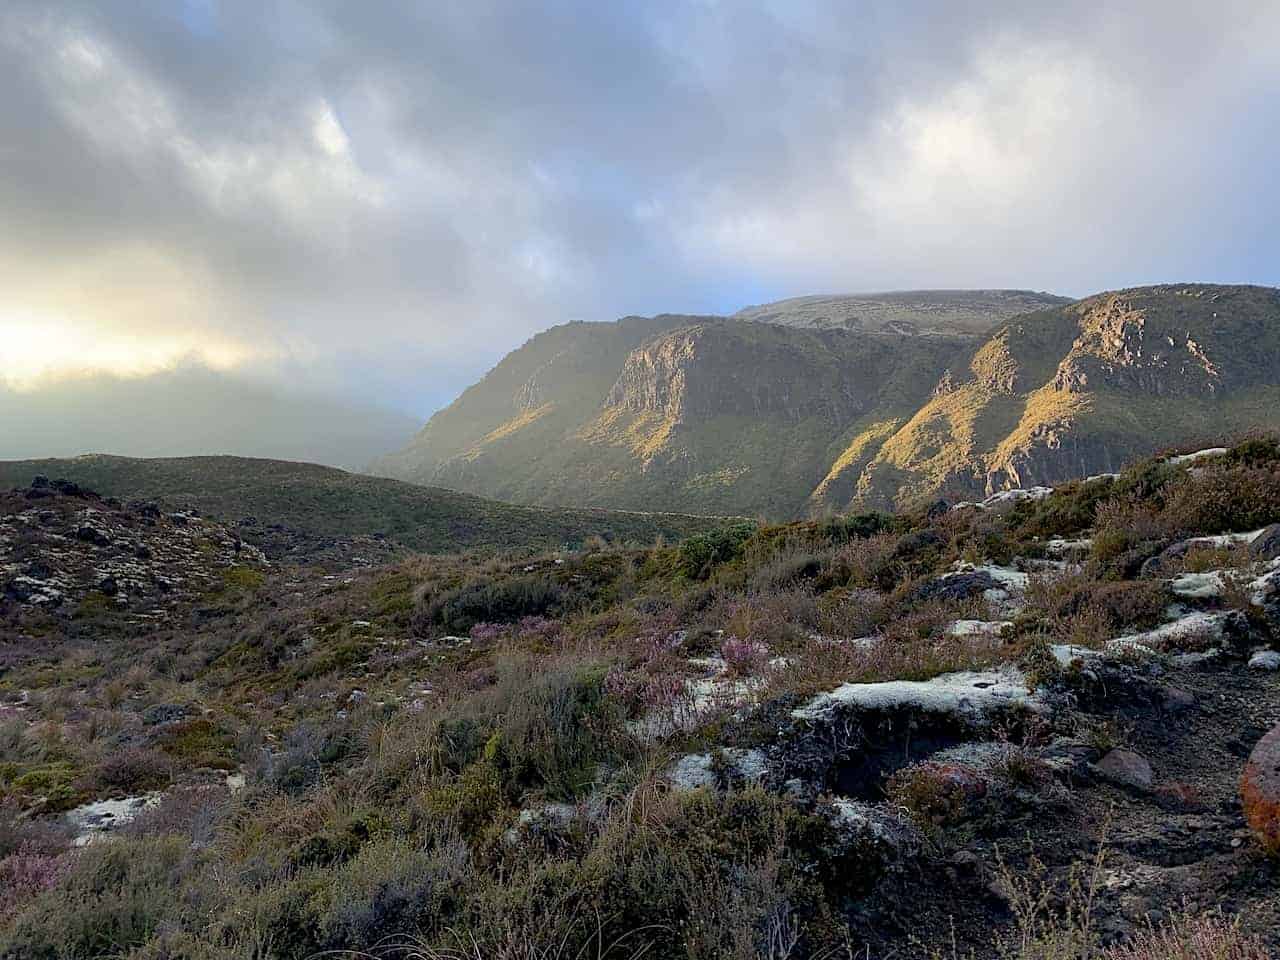
The hike takes you through various volcanic landscapes such as the iconic Mount Ngauruhoe (aka Mount Doom) featured in Lord of the Rings, and the very photogenic multi colored Emerald Lakes.
By no means though is this an easy trail to take part of. I mean they don’t call one of the sections the Devil’s Staircase for no reason (more on that later!).
But at the end of the day, it is one hike that you will not forget and you will be sure to bring back some incredible memories.
A few quick facts about the trail:
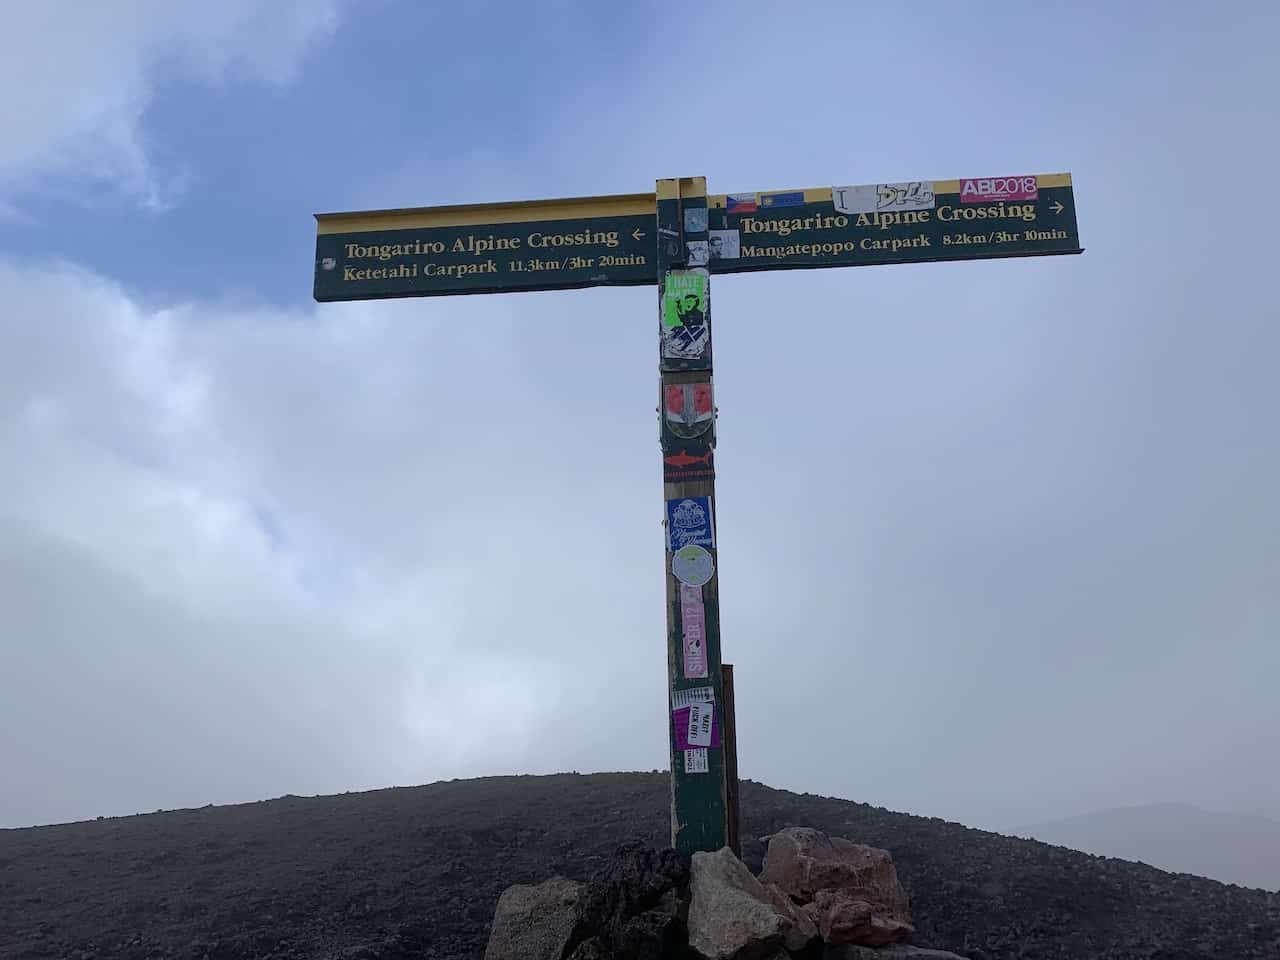
- Starting Point*: Mangatepopo
- Ending Point*: Ketetahi
- Length: 19.4 km / 12.1 miles
- Elevation Gain: 840 meters / 2,755 feet
- Elevation Detail:
- Start: 1,120 meters / 3,670 feet
- Finish: 760 meters / 2,490 feet
- Highest Point – 1,886 meters / 6,188 feet
- Duration: 6 – 8 Hours
- Type: One Way
- Track: Dirt / Rock / Lava Rock / Platform
- Difficulty: Hard
- Time of Year: Year Round – very weather dependent (more on this soon)
*This can be reversed but it is not advised due to the higher elevation gain
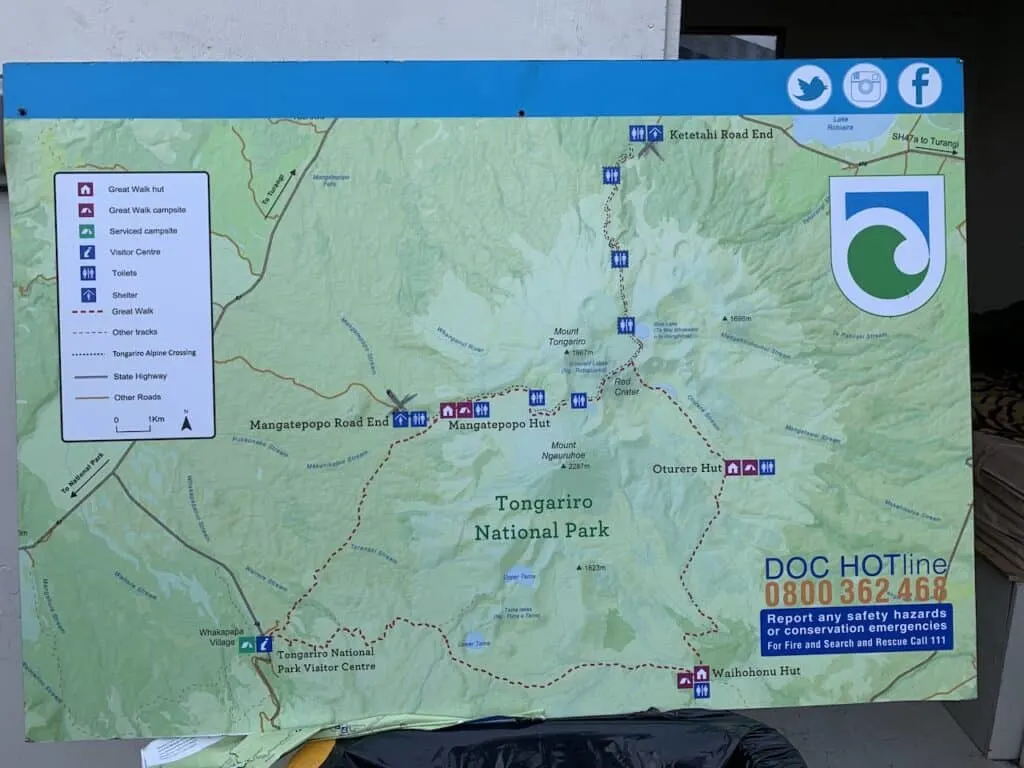
Below is a map that can give you a better sense of what the trail entails.
The trail starts at Manhatepopo before gaining elevation towards the Red Crater (high point). From there, the trail begins its descent, past the Blue Lake and to the Ketetahi Road finish point.

Learn More: Take part of the Tongariro Alpine Crossing as part of your New Zealand North Island Itinerary or 3 Week North & South Island Itinerary!
2) Tongariro Alpine Crossing Logistics
As you just saw above, the starting and ending points are in two different places (Mangatepopo and Ketetahi). Due to this, the logistics of taking part of the trail can get a little tricky and there are a few options to choose from depending on where you are staying.
This section will go over options of where to stay around the area and getting to the starting point (Mangatepopo).
A) Where to Stay Near Tongariro
There are basically five main options to choose from when deciding where to stay when taking part of the Tongariro Alpine Crossing. In parentheses is the time it will take to get to the starting point in Mangatepopo.
- 1. Taupo (1:20)
- 2. National Park Village (0:20)
- 3. Whakapapa Village (0:30)
- 4. Tongariro Holiday Park (0:20)
- 5. Turangi (0:40)
I would say that the most popular options would be Taupo and National Park Village but depending on your preference and itinerary you can opt for the others.
Recommended Hotel Options
To make things simple, I have included one main highly rated hotel option to consider for each one of these locations.
- Taupo: Gables Lakefront Motel
- National Park Village: Plateau Lodge
- Whakapapa Village: Skotel Alpine Resort
- Tongariro Holiday Park: Tongariro Holiday Park
- Turangi: Creel Lodge

B) Getting to the Mangatepopo Starting Point
No matter where you choose to stay though, on the morning of the hike you will need to get to Mangatepopo (the starting point of the hike). This can be done in one of two ways:
Round Trip Shuttle
Take a ROUND TRIP shuttle service that will pick you up in Taupo, National Park Village, Whakapapa Village, Tongariro Holiday Park, or Turangi.
The shuttle will bring you to Mangatepopo at the beginning of the day, pick you up from Ketetahi at the end of the day, and bring you back to wherever you are staying.
Drive + One Way Shuttle
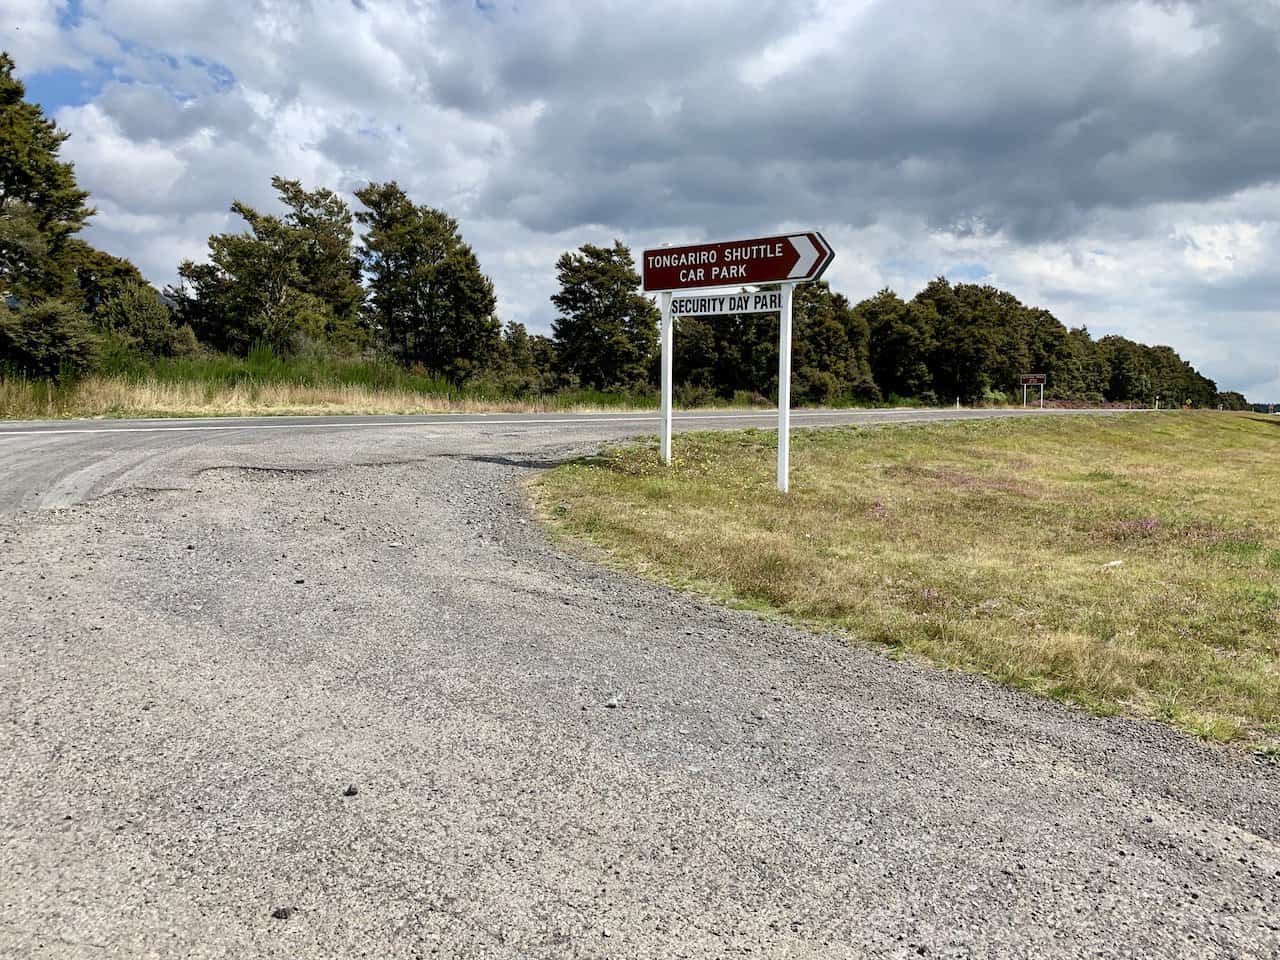
The second option is to drive yourself in the morning to the ending point of the Tongariro Alpine Crossing (Ketetahi) and then opt for a ONE WAY shuttle service from the Ketetahi parking lot to the start of the hike (Mangatepopo).
The reason why this is such a popular option is that you do not need to worry about timing and catching a shuttle back to wherever you are staying.
Once you begin the hike you will be on your own time and be able to take as short or as long as you want on the trail. Once complete, just hop into your car and head on home.
Be sure to check out Rentalcars.com when it comes to renting a car in New Zealand. The site will show you car options & prices from a variety of companies. This ensures that you will be able to choose the perfect car (and deal) for your trip to the country.
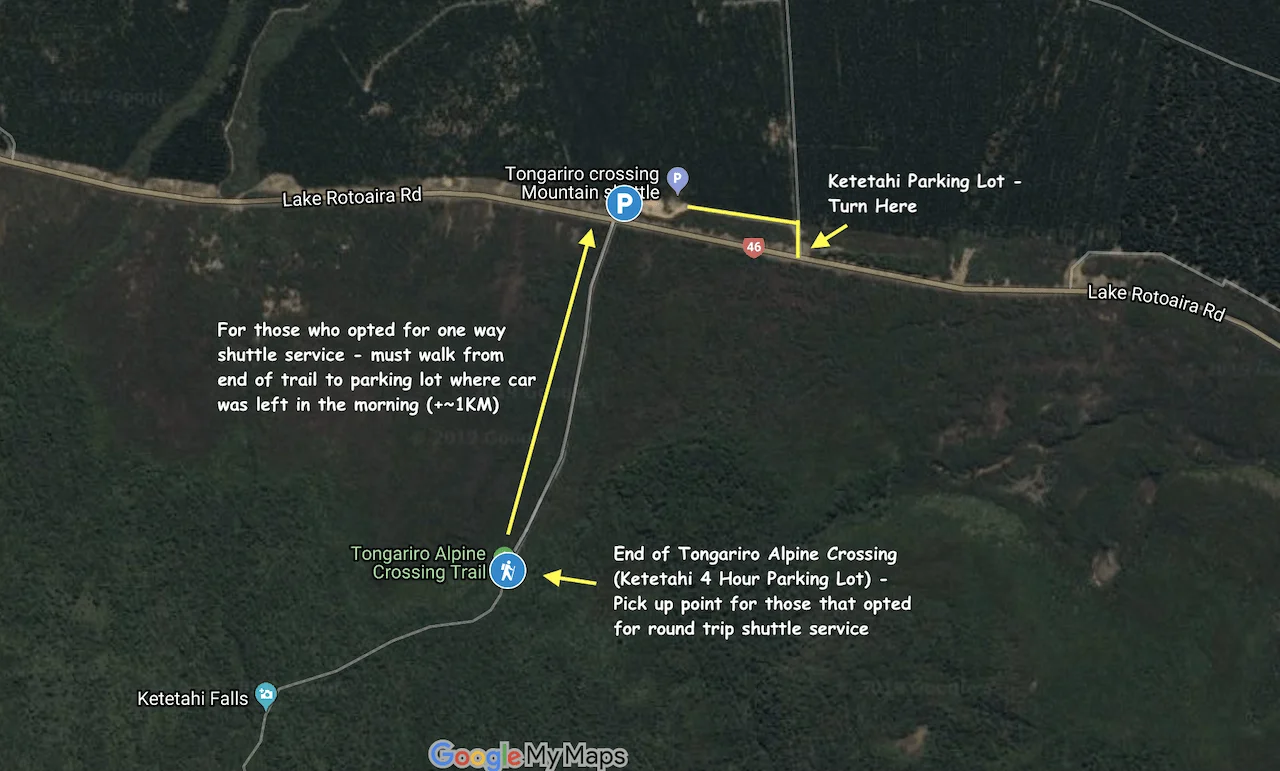
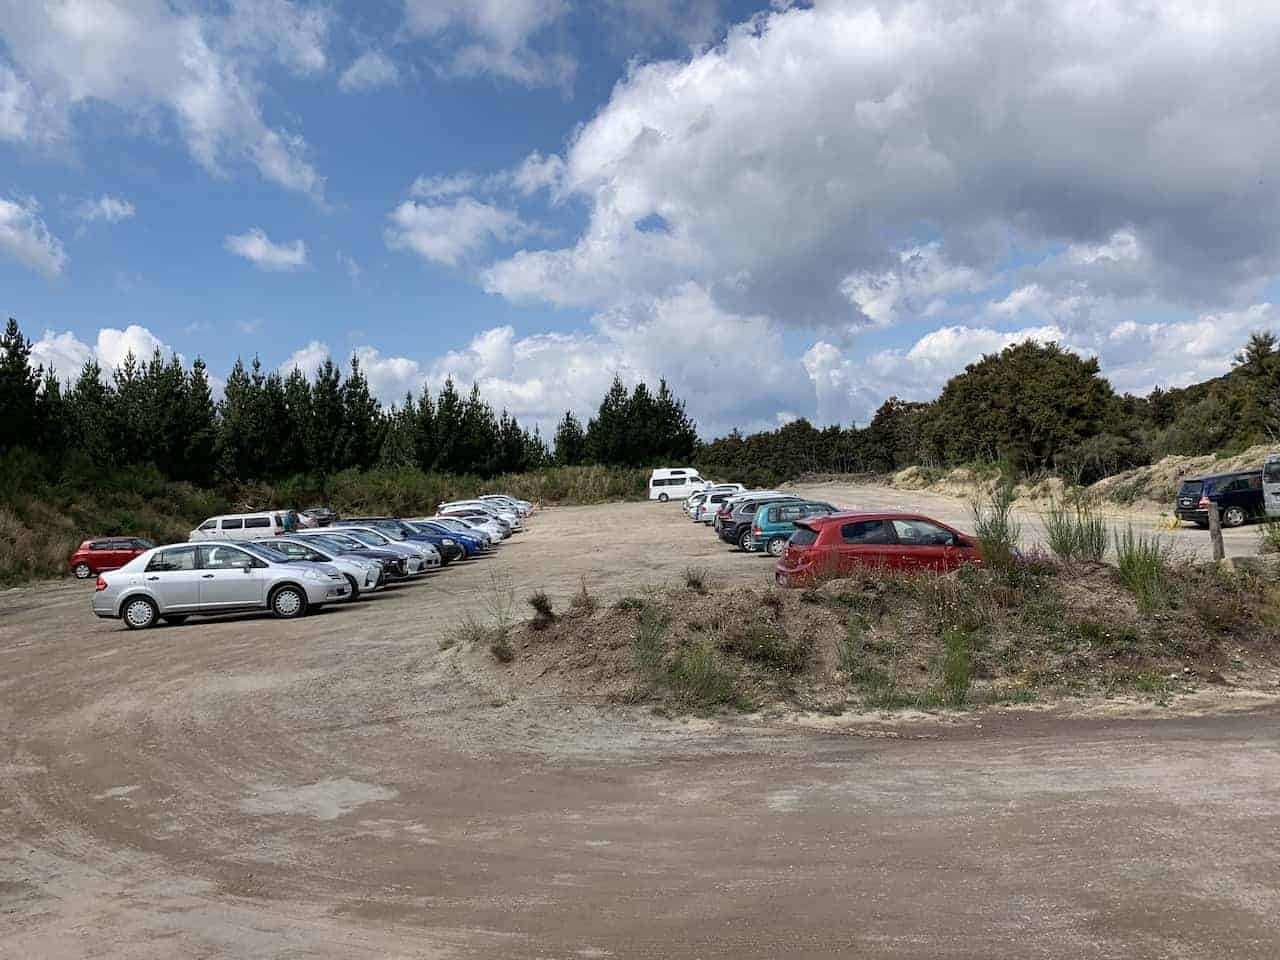
Ketetahi Parking
If you opt for #2 and drive yourself to the starting point of the hike, you will need to park in the Ketetahi parking lot on the north side of highway 46 / Lake Rotoaira Road (pinned on the map below).
You CANNOT park in the Ketetahi parking lot at the immediate end of the trail – that parking lot is only for people who choose to stay for a maximum of 4 hours on the trail.
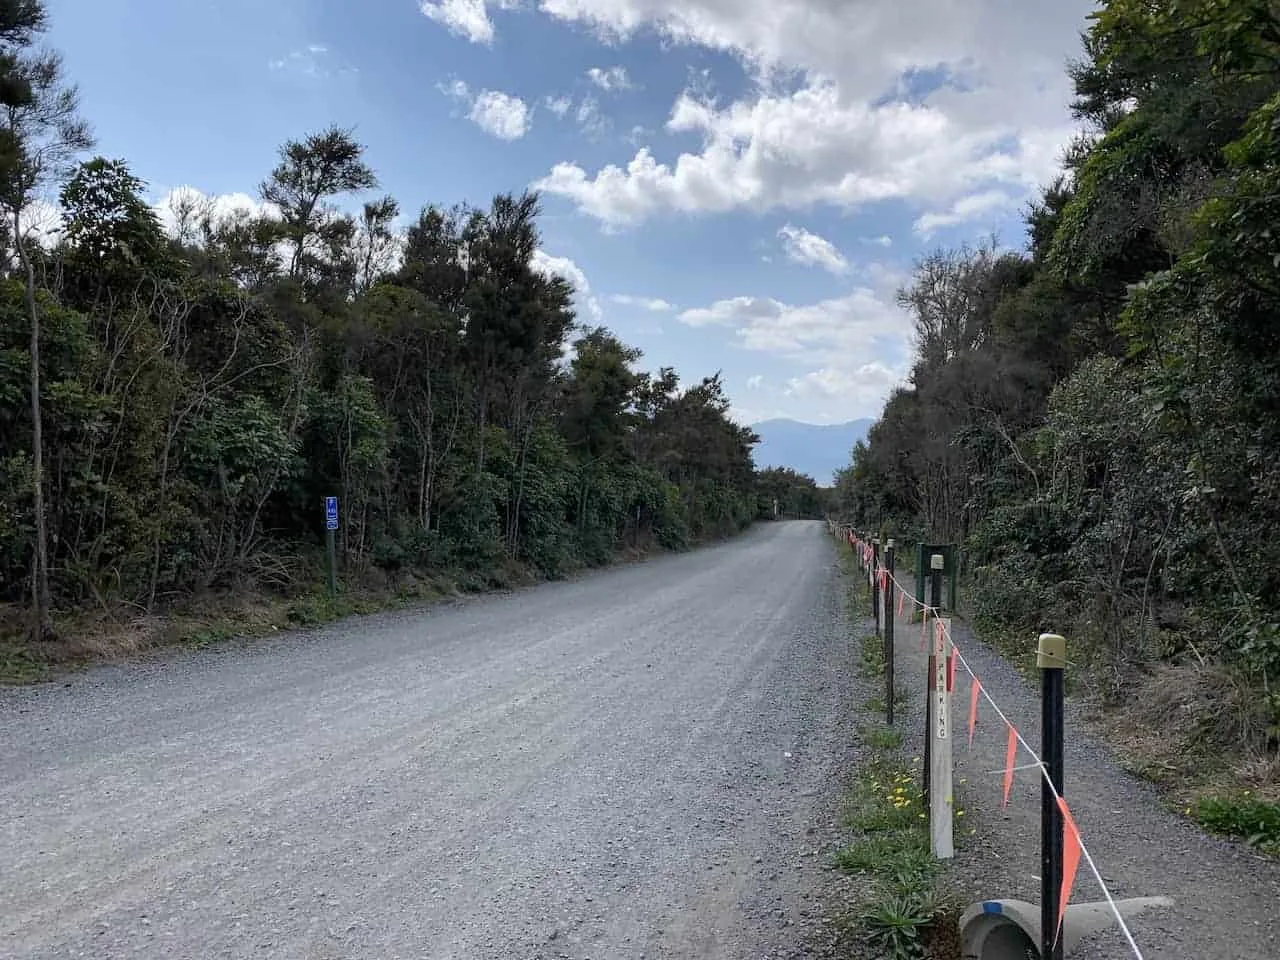
By choosing this option you will add about another 1 kilometer / 0.6 miles to the end of the trail as you walk down the dirt road towards the parking lot where you left your car earlier in the day.
You can also opt to just park on the side of the road instead of inside of the lot.
For those that opted for the round trip service, the shuttles will pick you up from the immediate end of the trail (in the 4 hour parking lot).
Take a look at the map below for any clarification:


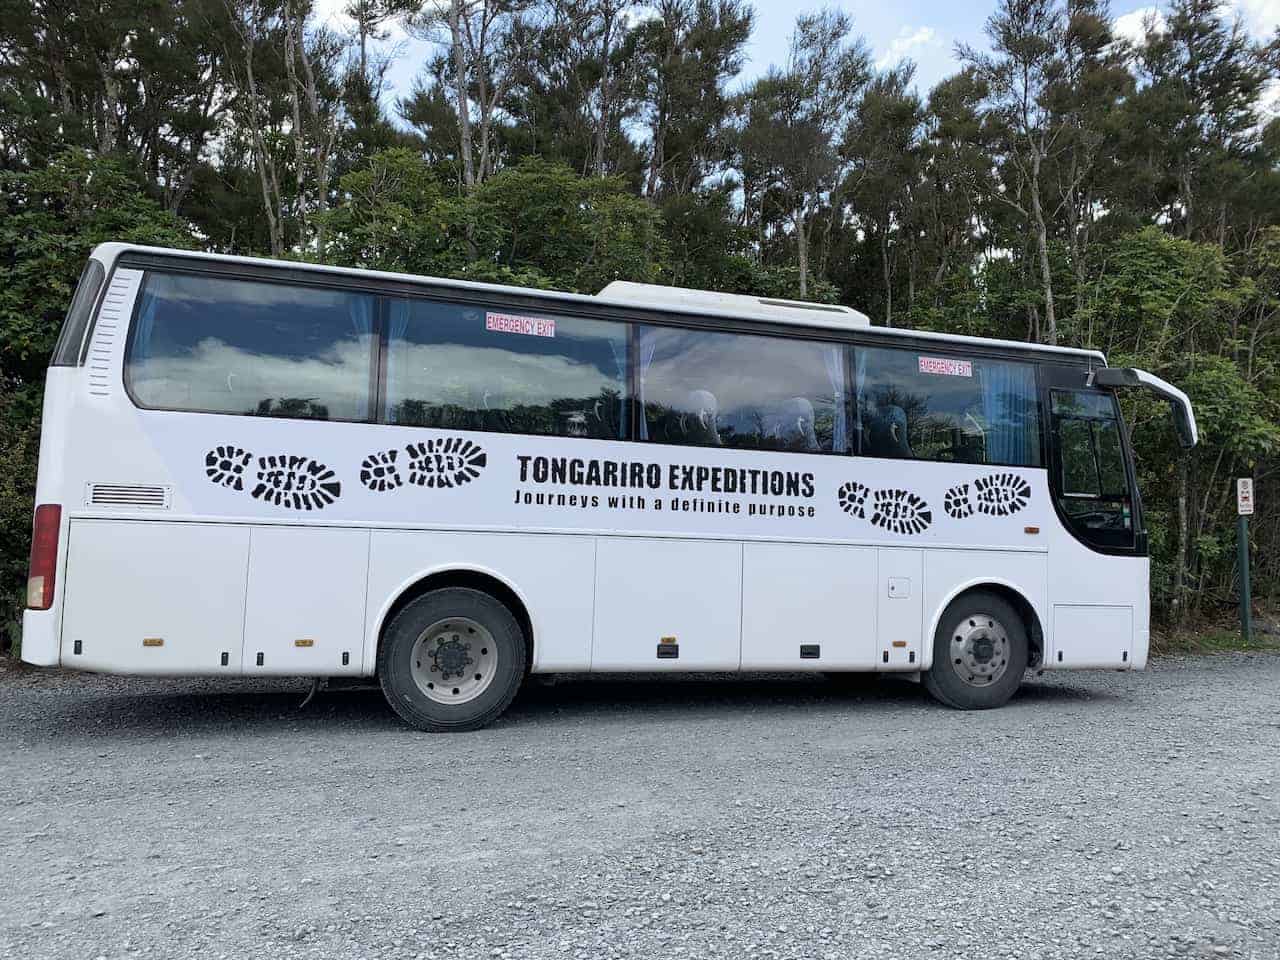
C) Tongariro Crossing Shuttle
However you decide to go about your day, you basically need to take a shuttle – either a round trip or a one way. There are several companies to choose from and they are all pretty similarly priced.
Below are a few of the main companies that offer shuttle service. Also note that each company does not offer every pick up option from every place mentioned above so just take a look at some of the below to see what works best for you.
- Tongariro Expeditions
- Tongariro Crossing Shuttles
- National Park Shuttles
- Summit Shuttles
- Alpine Shuttles
- Adventure Outdoors
- Adventure HQ
D) Tongariro Shuttle Prices (may vary by company)
- • Ketetahi to Mangatepopo one way shuttle: $t5 NZD
- • Taupo Round Trip: $120 NZD
- • National Park Village Round Trip: $t5 NZD
- • Whakapapa Round Trip: $50 NZD
- • Tongariro Holiday Park Round Trip: $50 NZD
- • Turangi Round Trip: $75 NZD

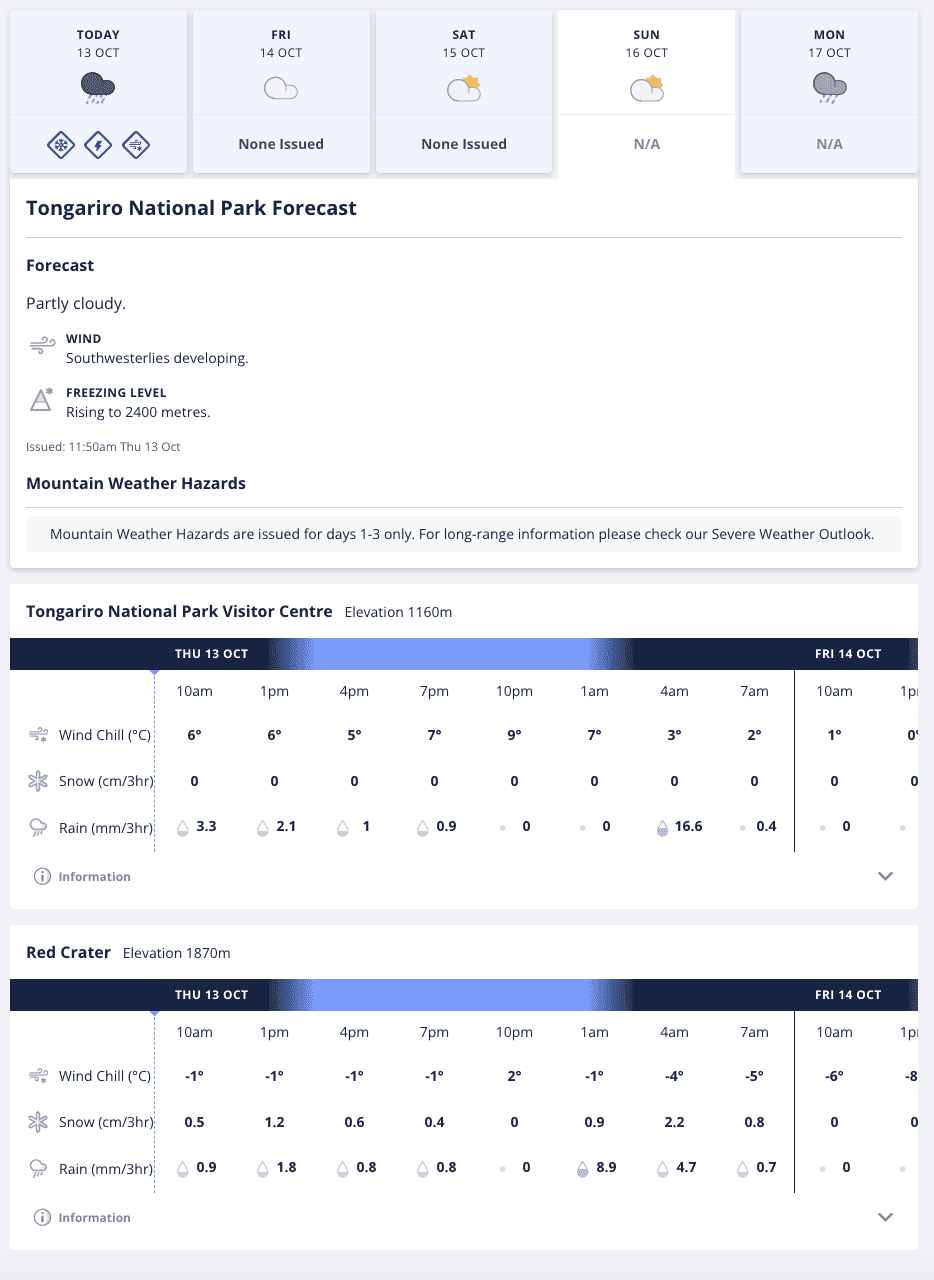
3) Tongariro Crossing Weather
While the Crossing is truly one of the best hikes I have ever done, that would not have been the case if the weather did not cooperate. The Tongariro National Park is notorious for its crazy and unpredictable weather.
One moment it can be nice and sunny out and the next it can be windy and rainy. Clouds can come and go, obstructing views and getting in the way of enjoying the incredible landscape around you.
Due to this I highly advise that you do not pin point one exact day to take part of the Crossing. Instead I would say to set aside 2-3 days to optimize for the best weather conditions possible.
There really is no reason to take part of the hike in extreme wind, rain and clouds just to say you completed it.
To have a better idea about which day would be best to complete the Crossing take a look at both Metservice and Meteoblue. Once it gets to a few days out, the weather should become more accurate.
And note, just because the weather forecast says one thing does not mean it will stay that way the entire day. It is very possible that there will be low laying clouds coming in and out throughout the hike bringing potential rain as well. Just be prepared for any type of conditions either way!

Hiking Resources & Checklist
Before heading out for the trails, be sure to read up on some of the hiking resources up on the site. These are here to better prepare you for all types of outdoor adventure.
- Gear: Hiking Packing List
- Weather: How to Prepare for Hiking Weather
- Navigation: Hiking GPS & Navigation
- Tips: 20+ Hiking Tips & Tricks for the Trail
- Accommodation: Book Your Hotel Today
- Rental Car: Book Your Car Rental Today
4) What to Bring On the Crossing
Due to the highly unpredictable weather conditions and the various terrain of the trail, there are some items you should most definitely prepare to bring with you. These include:
Hiking Shoes: comfortable and durable hiking shoes will do wonders for you on the trail. There were plenty of folks who were doing the Crossing in their sneakers and you can tell they were struggling in certain parts
Multiple Layers: I would advise on at least a shirt, outer layer, shorts, pants, waterproof jacket. During the most part I wore shorts, a t-shirt, and an outer layer light jacket but also had pants and a packable rain jacket just in case. It can get chilly at the higher elevations even if the sun is out.
WATER: there are no water stations throughout the trail so bring enough (2+ liters) to keep yourself hydrated throughout the day.
Food: since you will be out on the trail for 6-8 hours, bringing lunch alongside energy bars, trail mix, snacks etc. will be very important to give you the energy you need to keep your body going.
Hat/Sunglasses/Sunscreen: do not underestimate the sun! Make sure to put on some sunscreen and protect your face/eyes as the sun can get strong even if it is not completely sunny out.
Just a final note here – there are restrooms throughout the trail so do not worry if you gotta go!
Check out the below packing list to get you ready for this hike and other hikes in New Zealand.
Hiking Packing List
In general when it comes to hiking, there are a few main aspects to consider. These includes clothing layers, hiking shoes, hydration & fuel, electronics, and other essentials.
Below in a breakdown of some of the top items, but be sure to check out the Hiking Packing List for a more comprehensive view.
Clothing Layers
Layering is going to be a top consideration when hiking. You will want to be prepared for all sorts of weather so you can be comfortable in different situations. Some items may include:
→ Hiking Shorts
→ Hiking Pants
→ Short Sleeve Shirt
→ Long Sleeve Shirt / Sun Hoodie
→ Mid Layer Fleece
→ Puff Jacket (not always needed)
→ Packable Rain Jacket (Columbia Watertight II)Note that your layers should be made of moisture wicking material as they are breathable and quick drying.
Footwear
Having appropriate footwear will also be very important. You will want to have shoes with the necessary grip and support to keep you safe on the trail.
→ Hiking Shoes (Keen Targhee)
→ Hiking Socks (Darn Tough)Other Essentials
Whether it is hiking gear, electronics, or just some miscellaneous items, here are some other essentials to bring along on hikes.
→ Hiking Backpack (Osprey Talon 22) & Rain Cover (Joy Walker Cover)
→ Hiking Poles (Black Diamond Trekking Poles)
→ Water Bottle (CamelBak Chute or Katadyn Filter Bottle)
→ Portable Charger (Anker PowerCore 5000mAh)
→ Action Camera (GoPro Hero)
→ Energy Bars & Snacks
→ Hat & Sunglasses
→ Sunscreen & Bug Spray
5) Tongariro Alpine Crossing Map
Before jumping into the hike itself, you can take a look at this interactive map that shows the Tongariro Alpine Crossing hiking trail.
In addition, you can find the parking lot, trail starting point, and trail ending point.
6) The Tongariro Alpine Crossing
Now that you have all the necessary information to prepare yourself for the Tongariro Alpine Crossing, it is time to talk about the hike itself.
What I love most about the trail is that the landscape really does change throughout and your views will constantly be switching up.
I have split up the trail in several parts to give you a better idea of what to expect as you take part.
Note that the first half of the trail from Mangatepopo to the Red Crater is uphill while the second part down to Ketetahi is downhill.

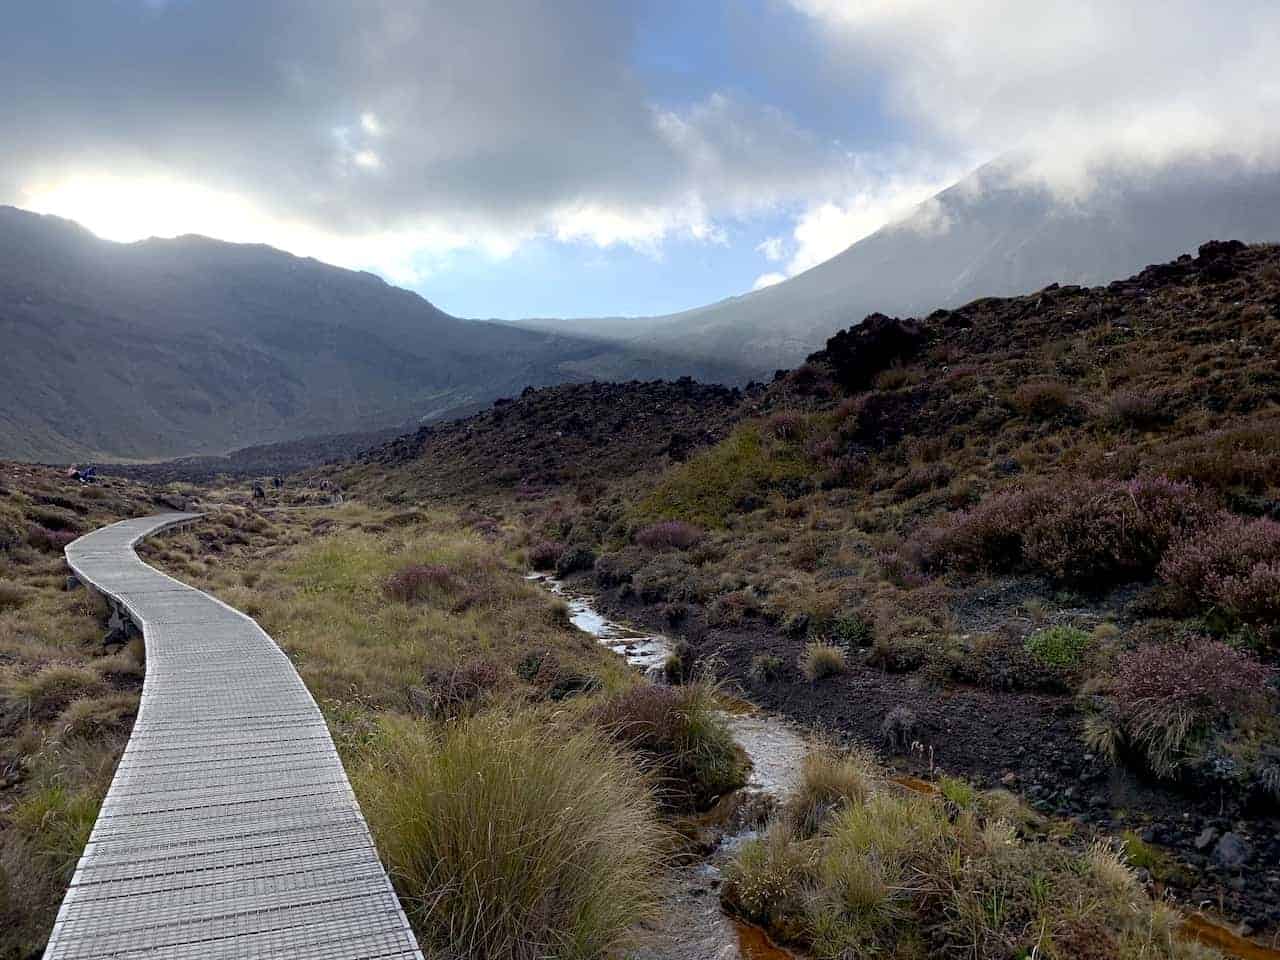
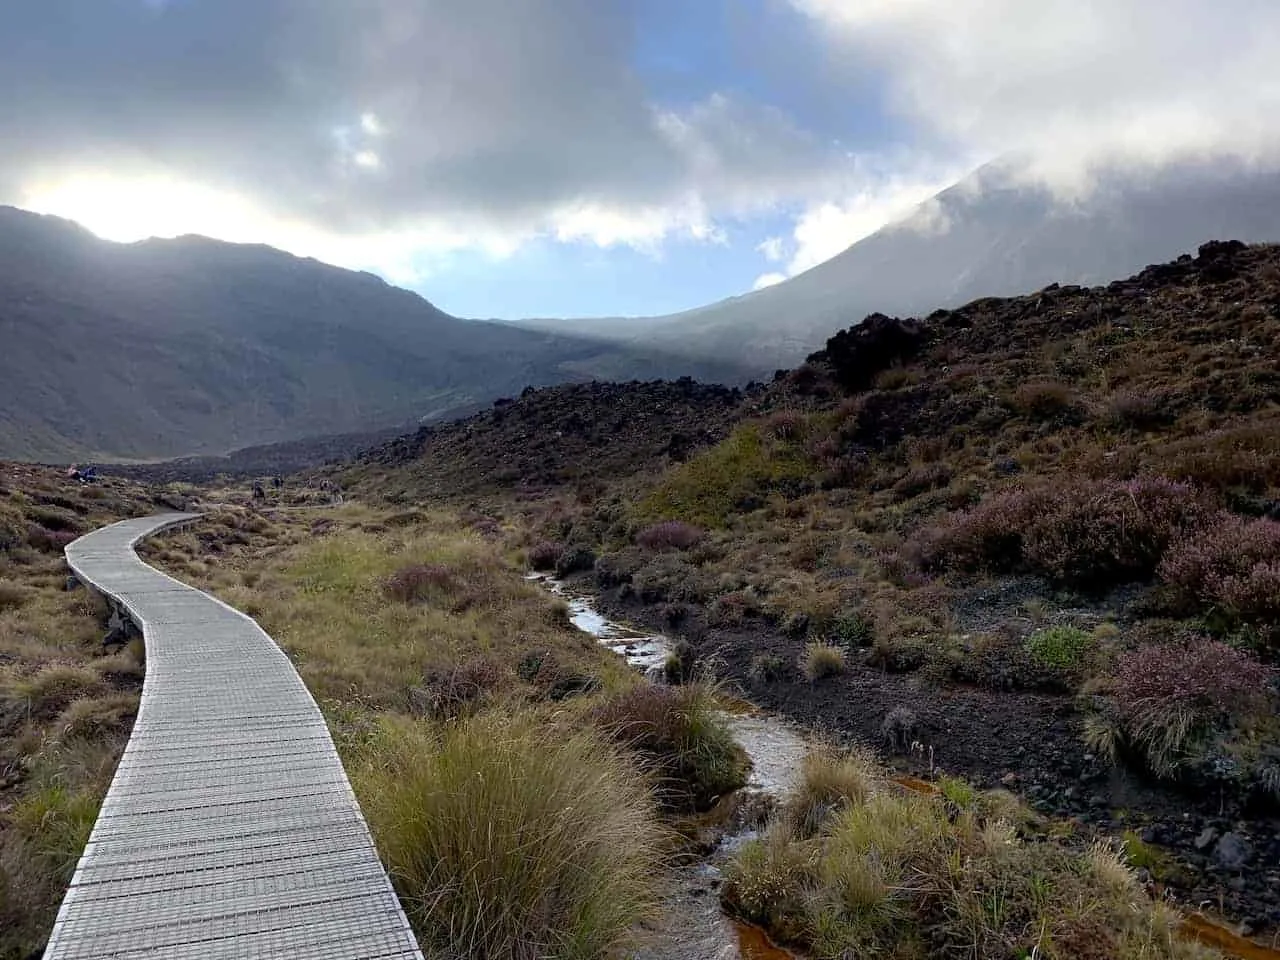
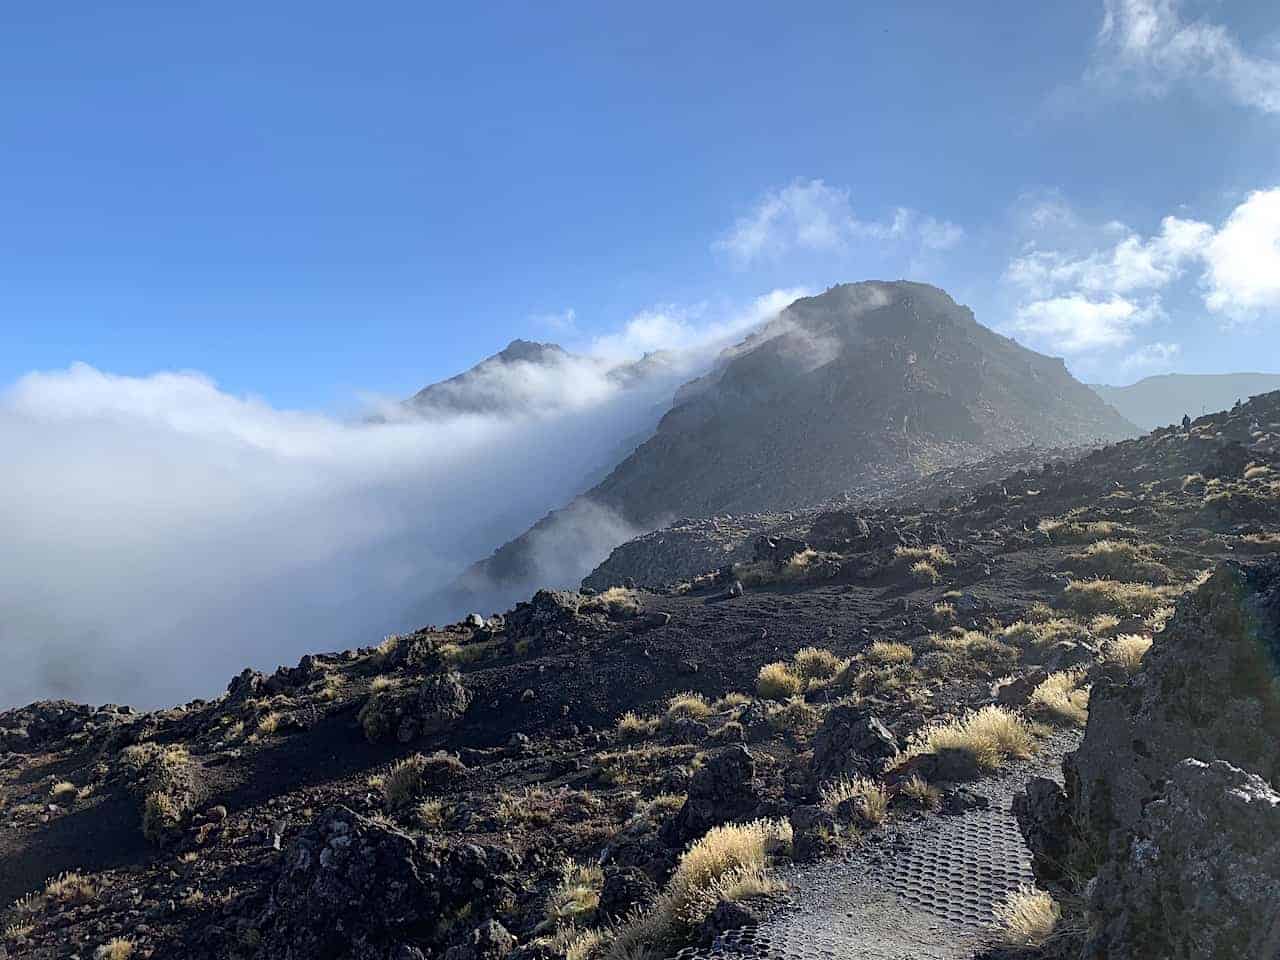
Part I: Mangatepopo to Soda Springs (4 km / 2.5 miles)
The first part of the trail takes you from the Mangatepopo starting point to Soda Springs. This part will take you through the valley as you walk through various flowers and fauna with some dramatic mountain landscapes out in the distance.
The path will be anything from a regular track to a walking platform to dark volcanic dirt as you continue your way slowly up. You will also see plenty of volcanic rock lava formations with Mount Ngauruhoe (aka Mount Doom) out in the distance.
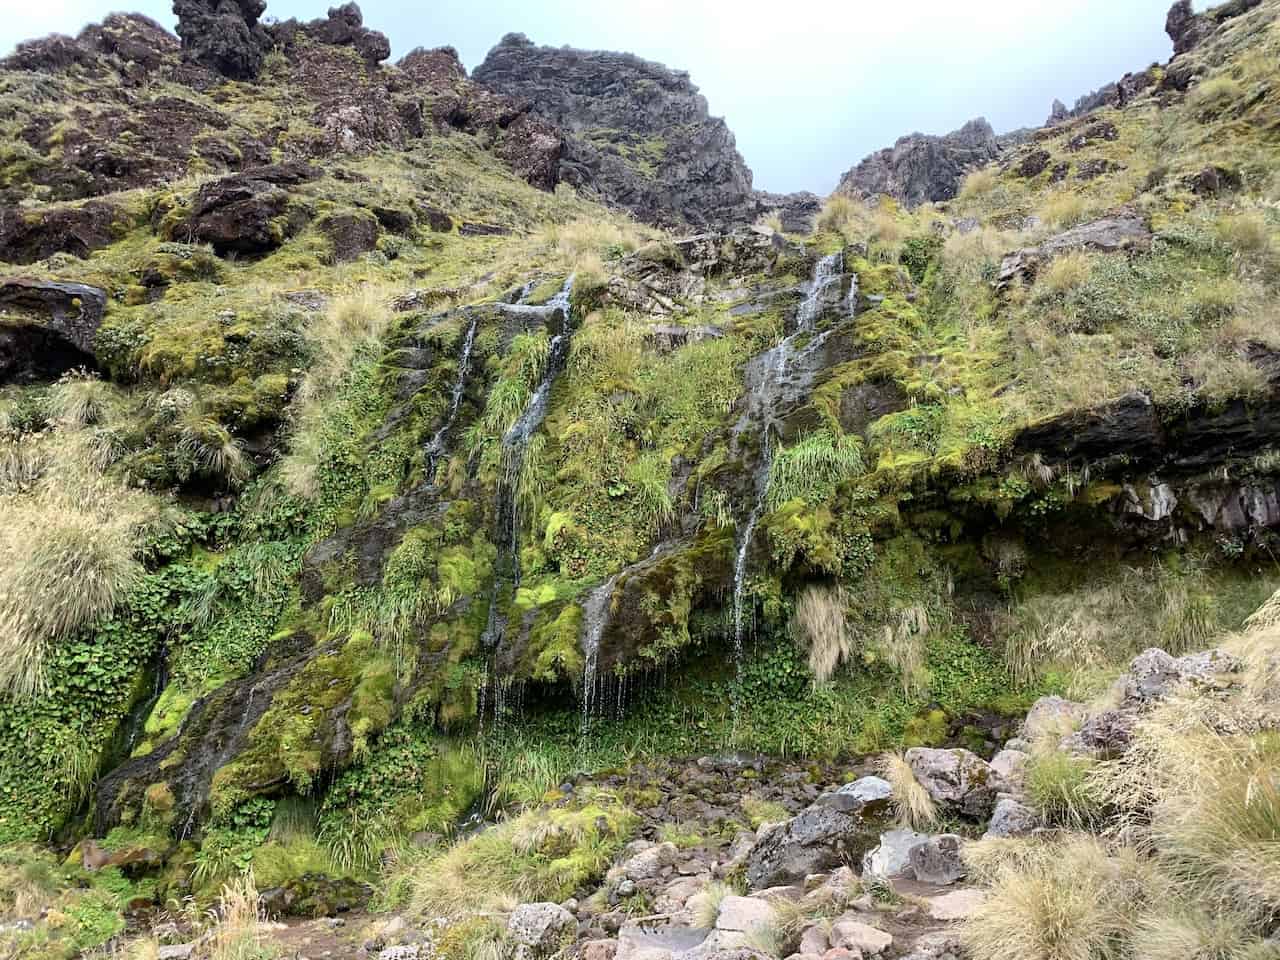
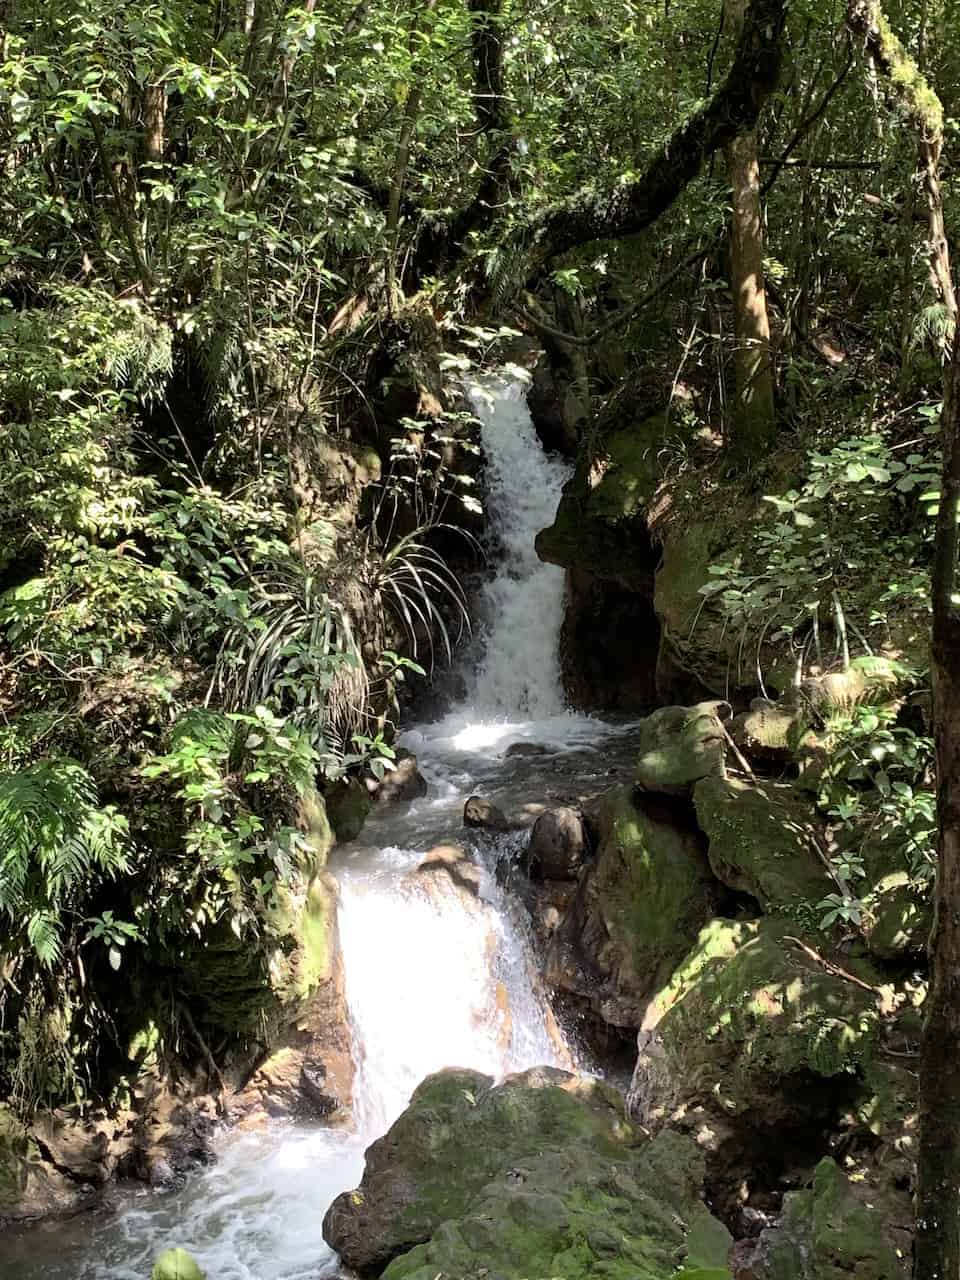
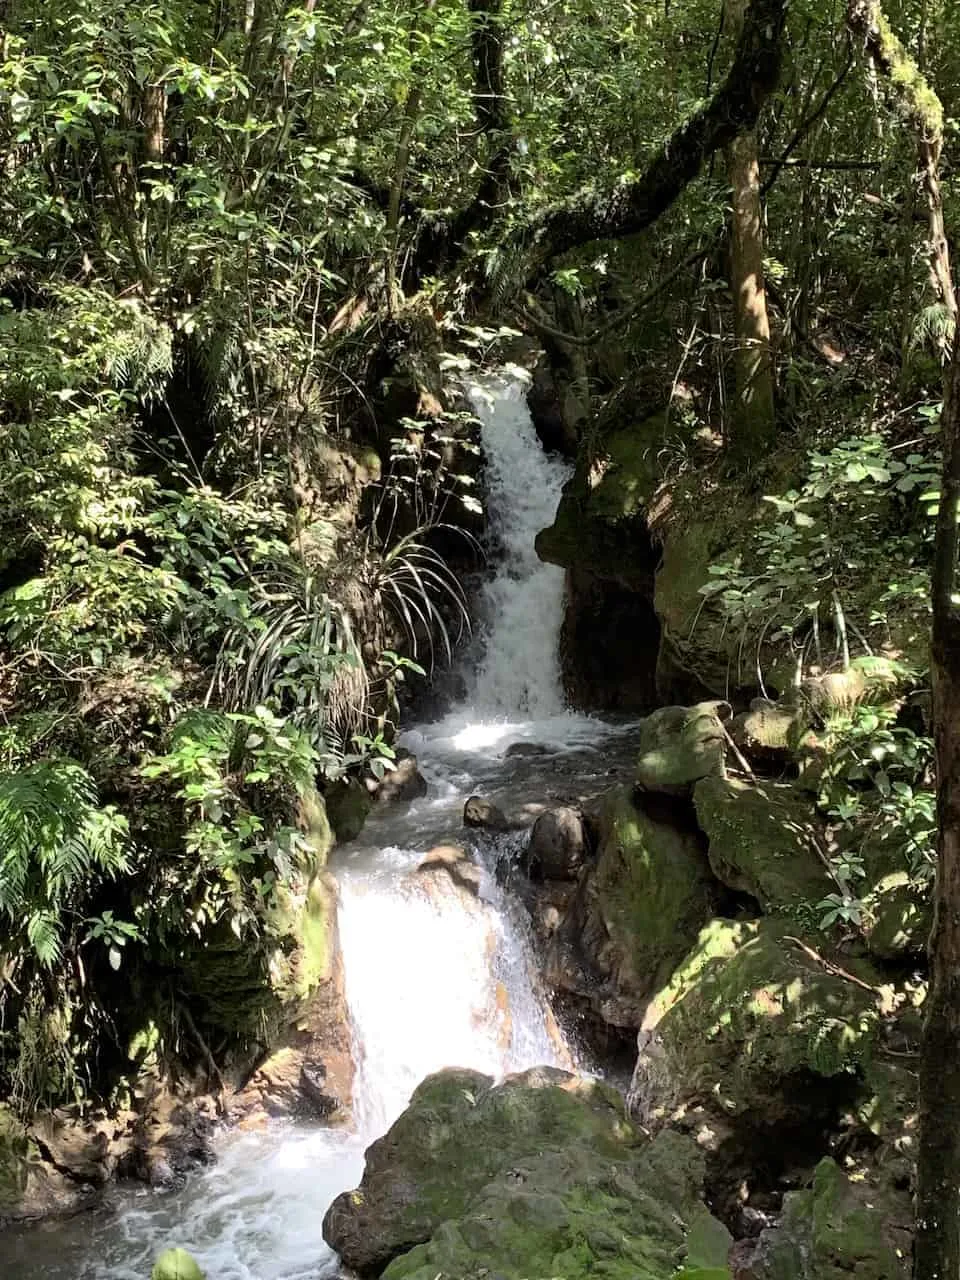
A little after 4 km / 2.5 miles into the hike, you will see a sign pointing you to the left for a detour to Soda Springs. It is about a 10 minute detour (5 minutes each way) to see a pretty unique waterfall coming off the side of the mountain.

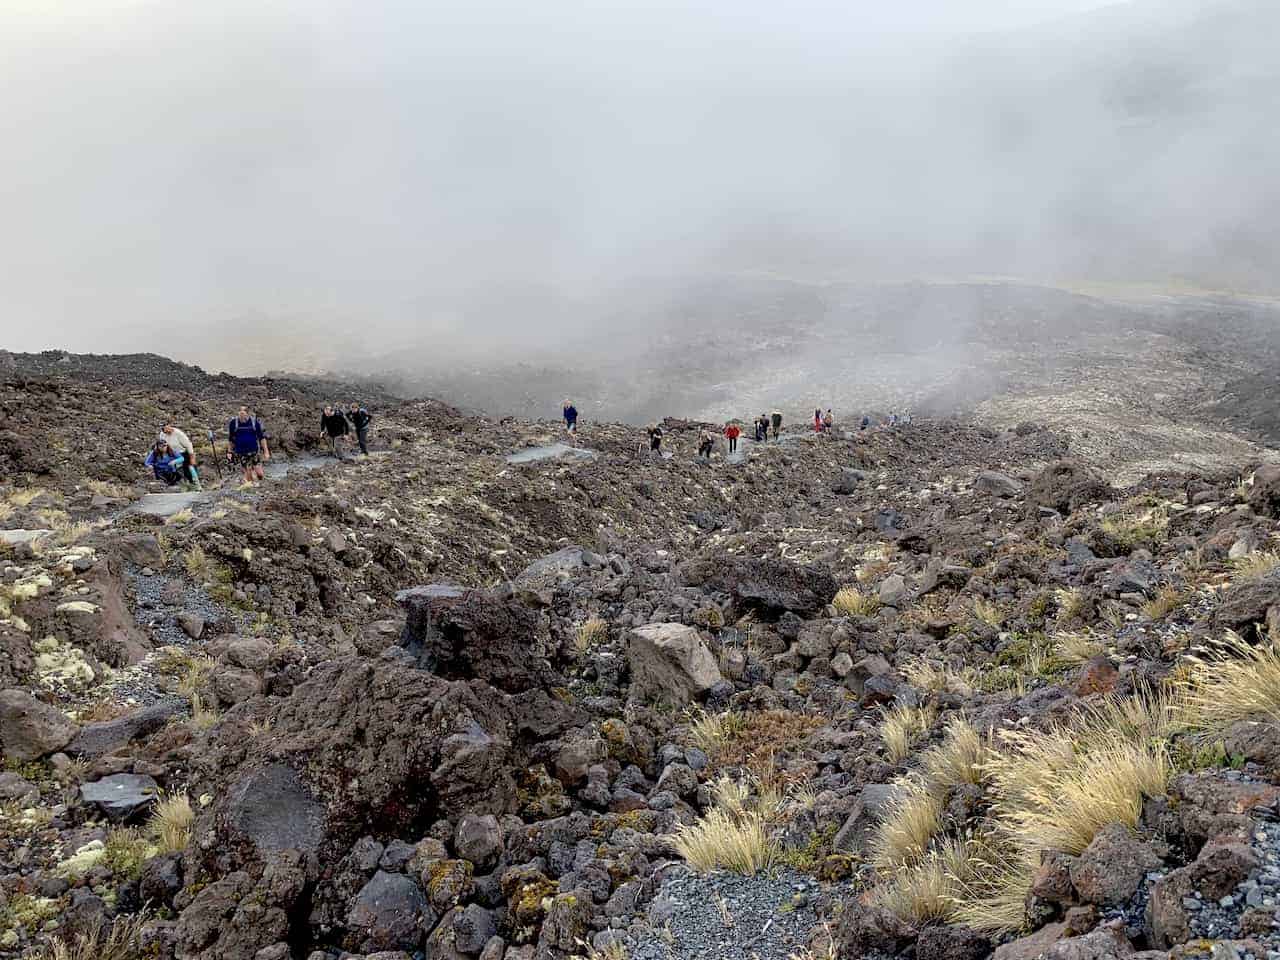
Part II: Soda Springs to South Crater (aka Devil’s Staircase) (2 km / 1.2 miles)
Here is where things get a bit tough as the notorious Devil’s Staircase comes into play. For the next 45 to 60 minutes you will be climbing up hill (with plenty of stairs) up to the South Crater.
Just prior to starting this portion, there is a clear warning for those who are already not feeling too great about completing the hike.
But believe me, once you are on top of the staircase and up and close to Mount Doom, it will all be worth it!


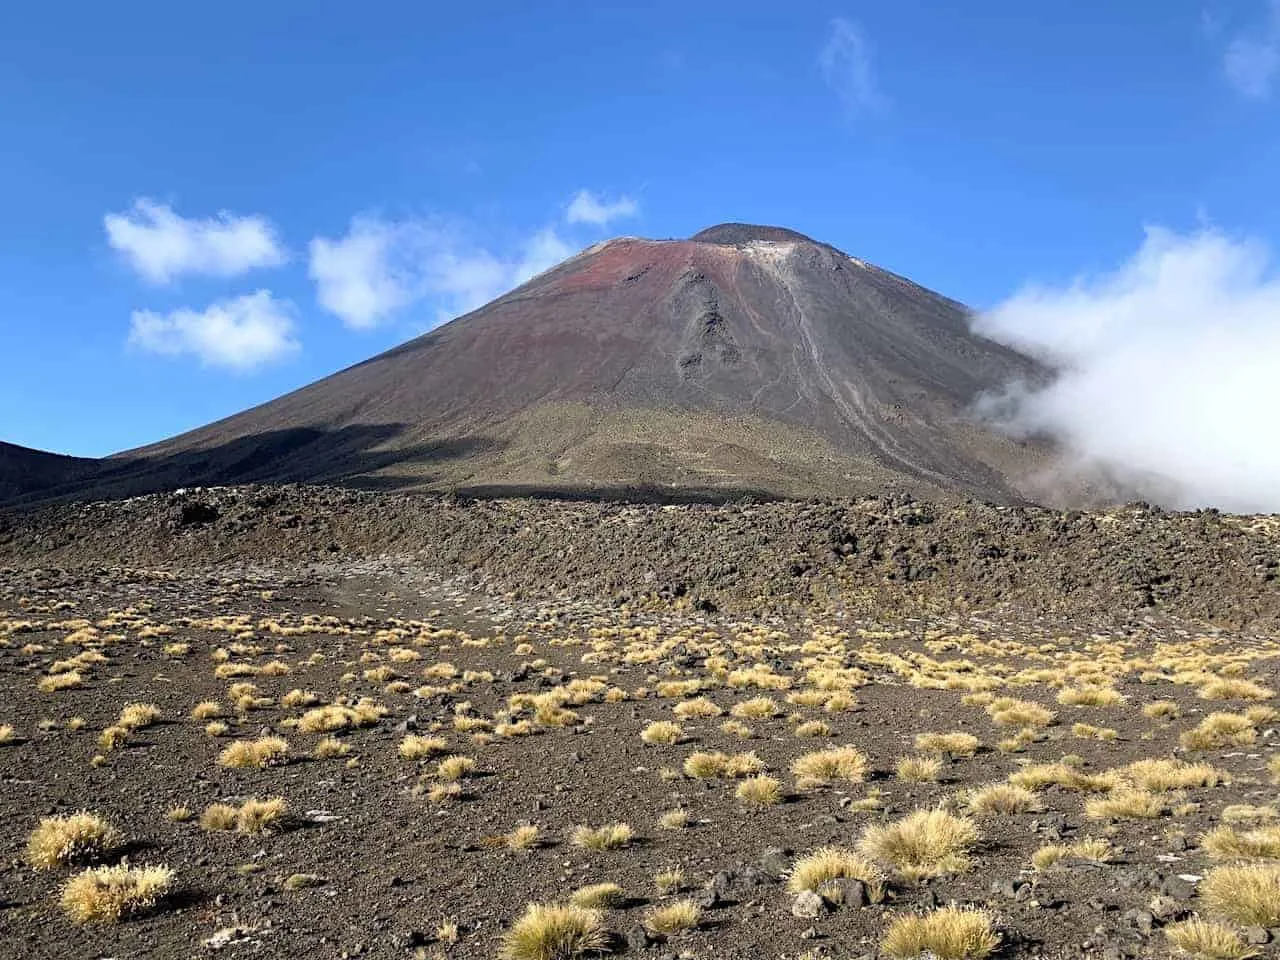
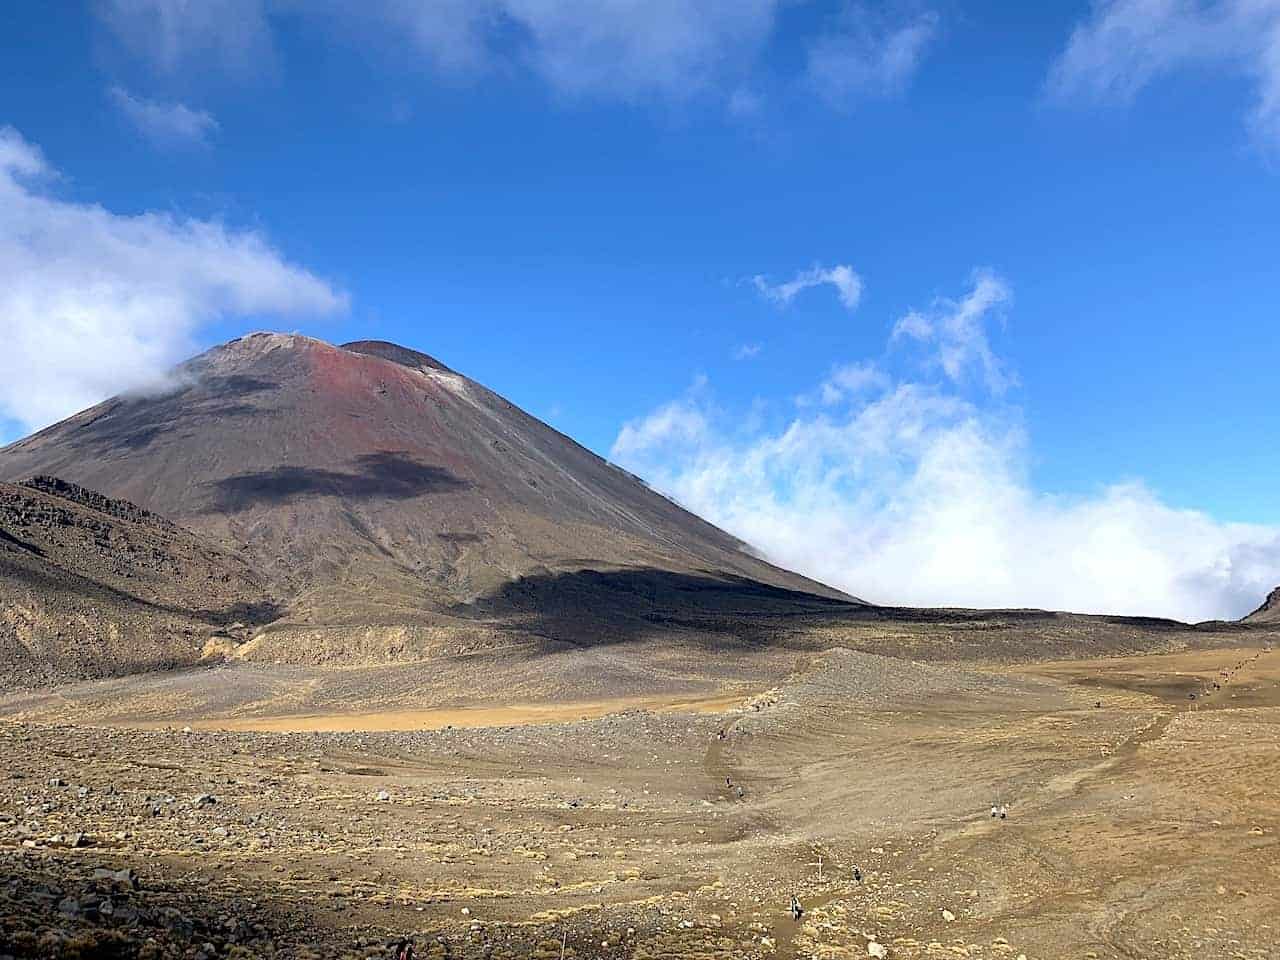
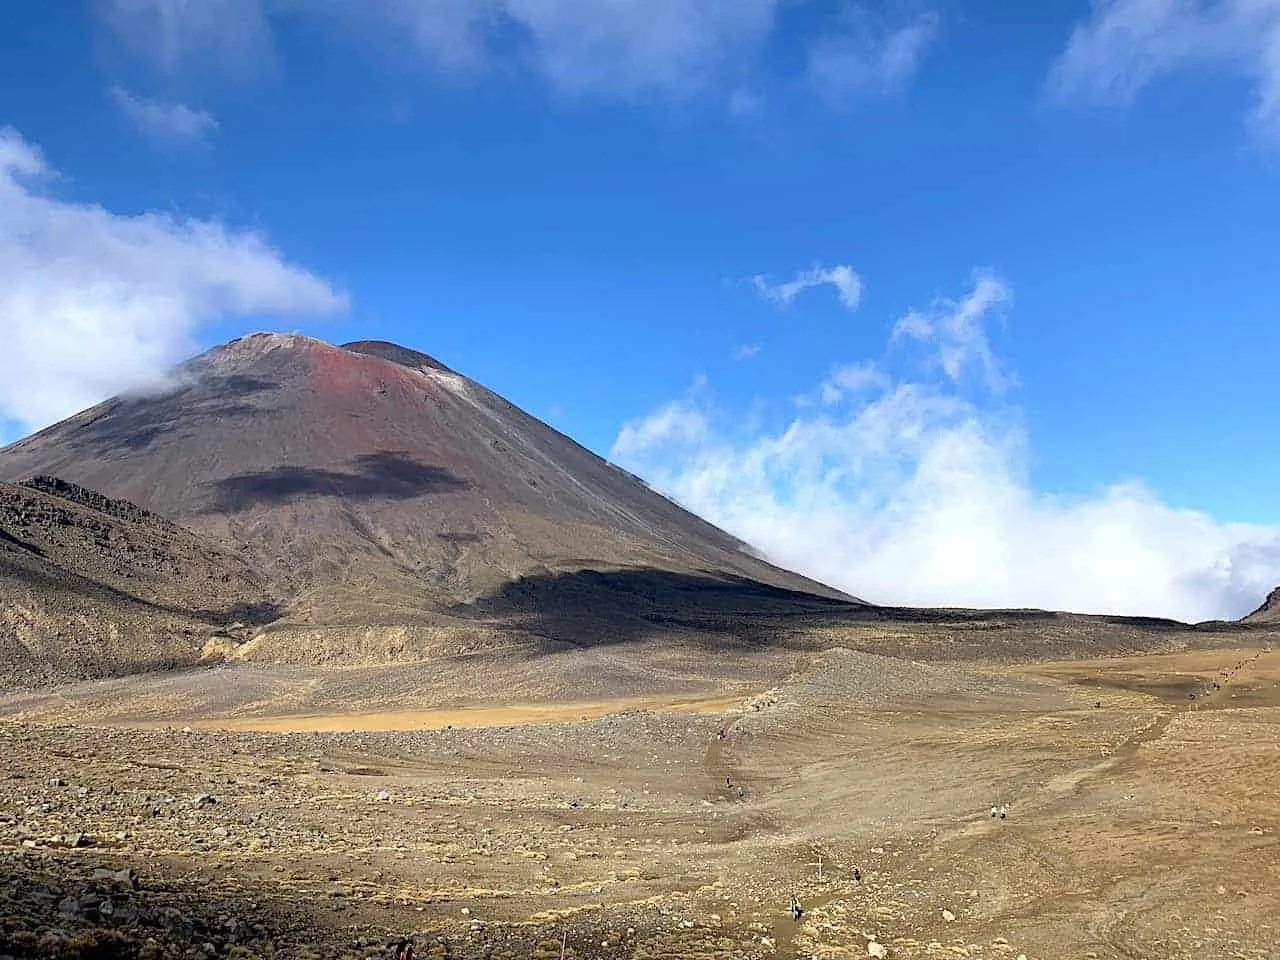
Part III: South Crater to Red Crater (2 km / 1.2 miles)
This was one of my favorite parts of the trail as you make your way across the flat South Crater and then up to the highest point of the hike to the Red Crater.
To your right you will have Mount Ngauruhoe, and in front of you there will be a vast crater to walk through and enjoy. Once at the end of the crater though it is back uphill for a tough final stretch to the Red Crater.
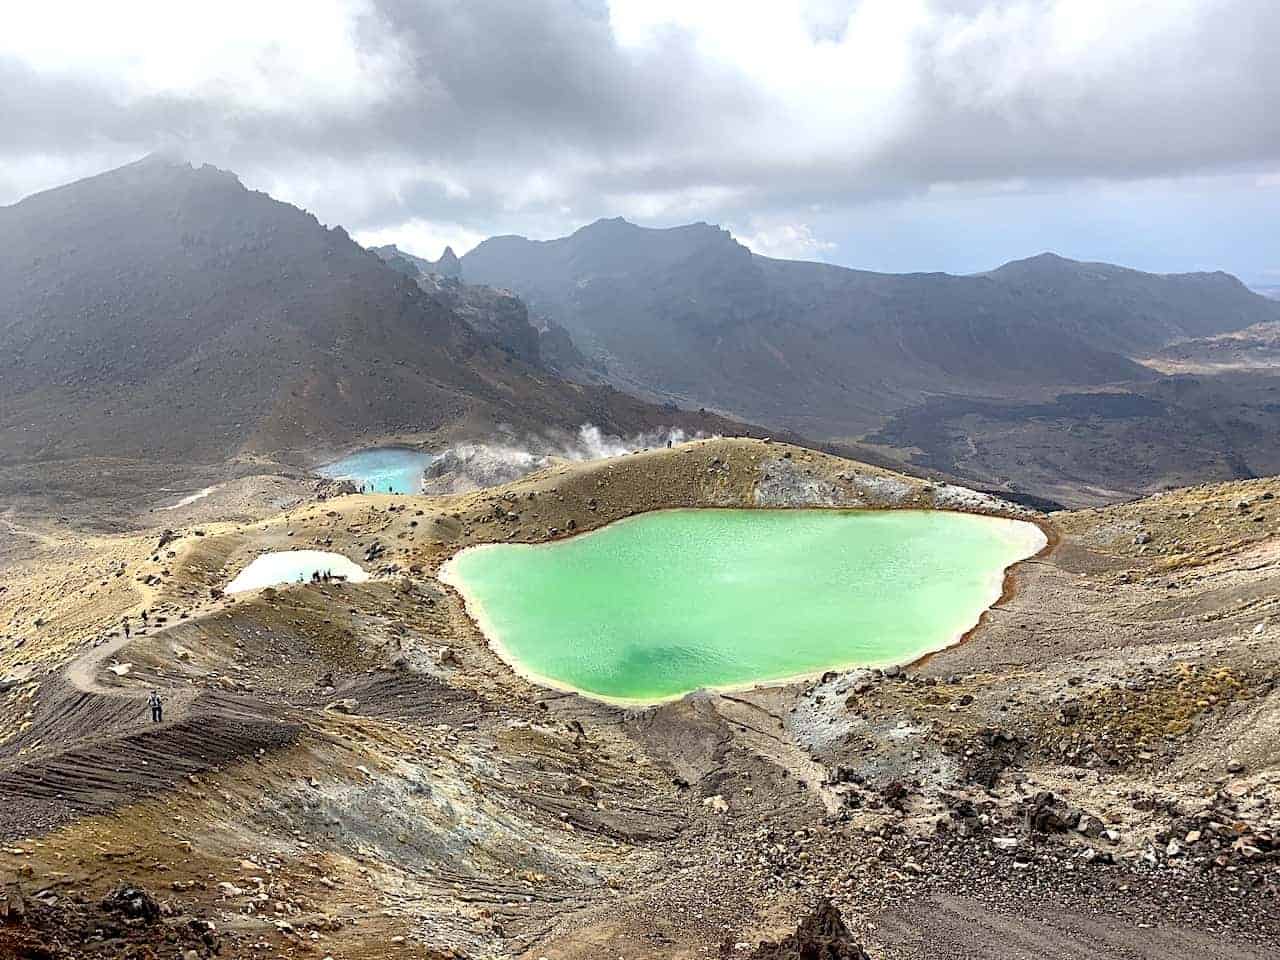
Once at top of the Red Crater is when you will be able to see the famous Emerald Lakes come into view.
The three multi colored lakes are one of the highlights of the trail and probably the most picturesque photo ops of the Tongariro Alpine Crossing.
Important Note: since this is the highest point of the trail, it is possible that there could be some low cloud coverage getting in the way of the view.
When I first made it up top there were some clouds but after just 5 minutes of waiting they started to open up a bit and let the sun shine through. So do not get discouraged if you do not get the view at first – try and be patient and hopefully the lakes come into view soon enough!

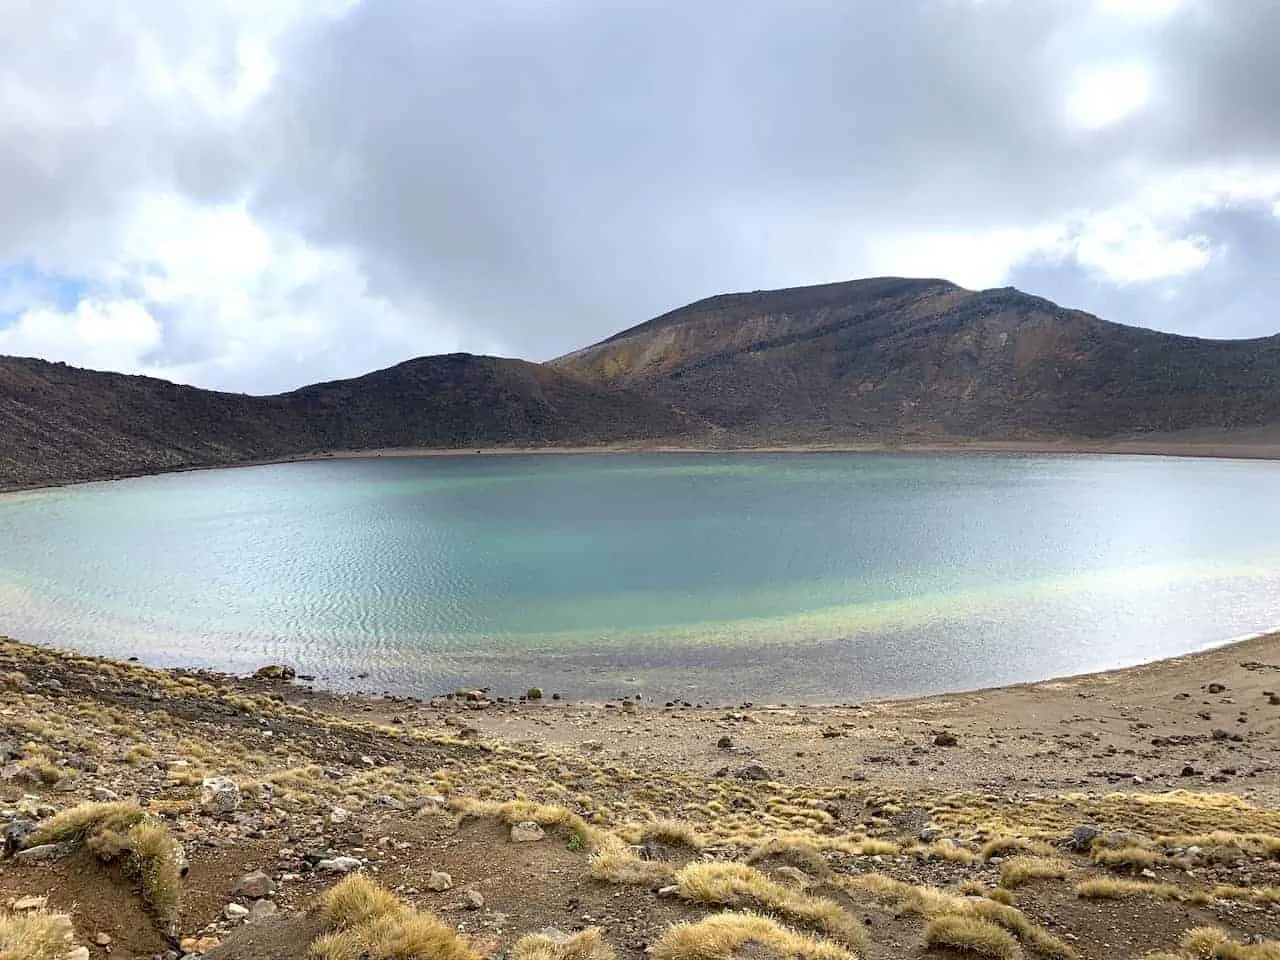
Part IV: Red Crater to Blue Lake (2 km / 1.2 miles)
As you make your way down from the Red Crater you must be extra careful. This was probably the most technical part of the trail as you are basically making your way down volcanic sand and small rocks.
It is very difficult to find a good footing so be sure to take it slowly. Once down though you will pass by the Emerald Lakes from up close and then make your way through the Central Crater.
Be sure to turn around a few times here and take in the incredible volcanic landscape behind you. Soon enough you will come across the Blue Lake and head onto the final few parts of the trail.


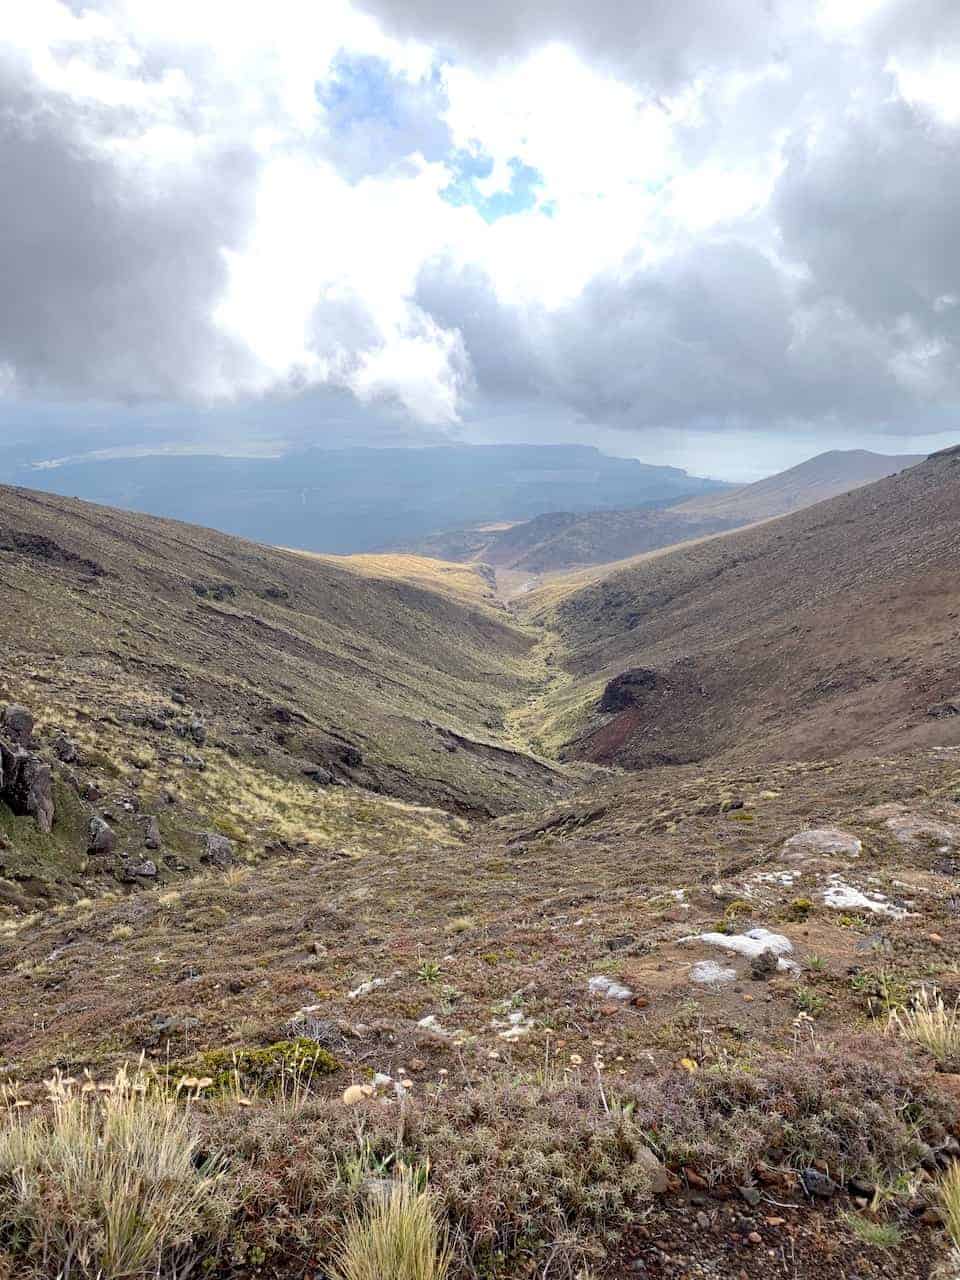
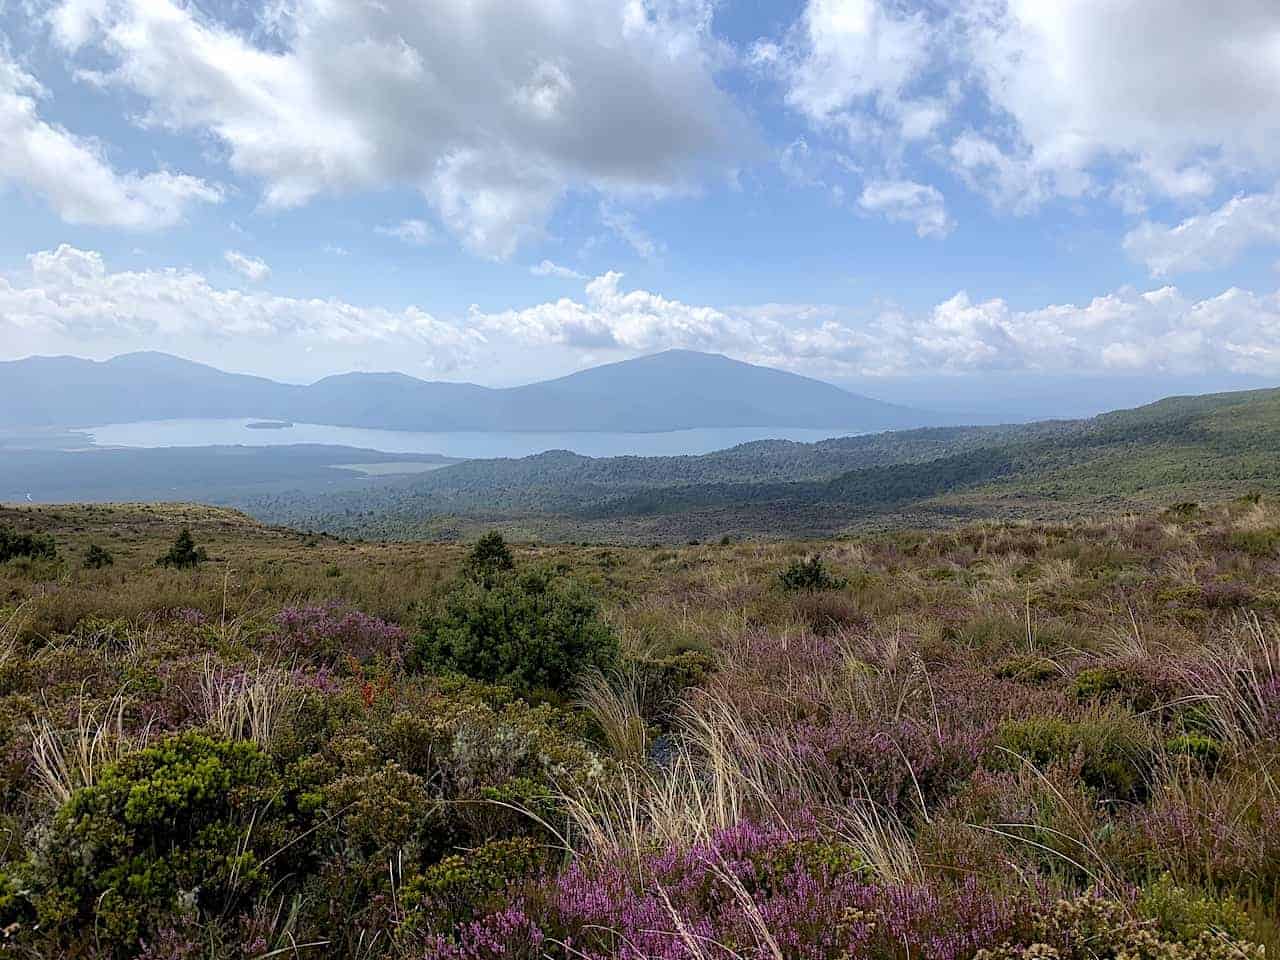
Part V: Blue Lake to Ketetahi Bushline (6 km / 3.7 miles)
After the Blue Lake, you will soon walk a path alongside a vast valley with Lake Rotoaira out in the distance. For the most part it is a pretty easy part of the trail as you then zig zag your way down towards the carpark.


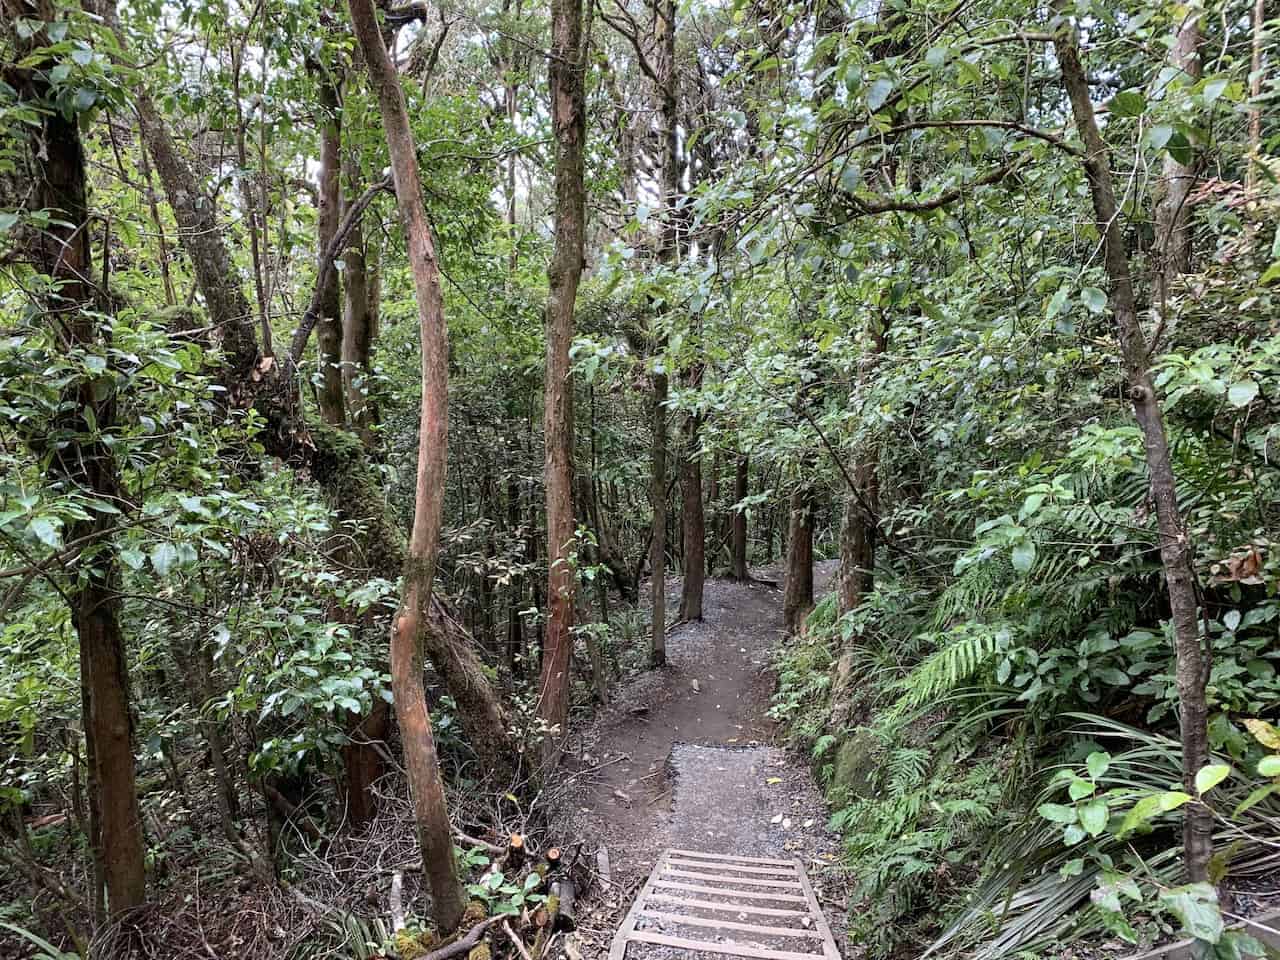
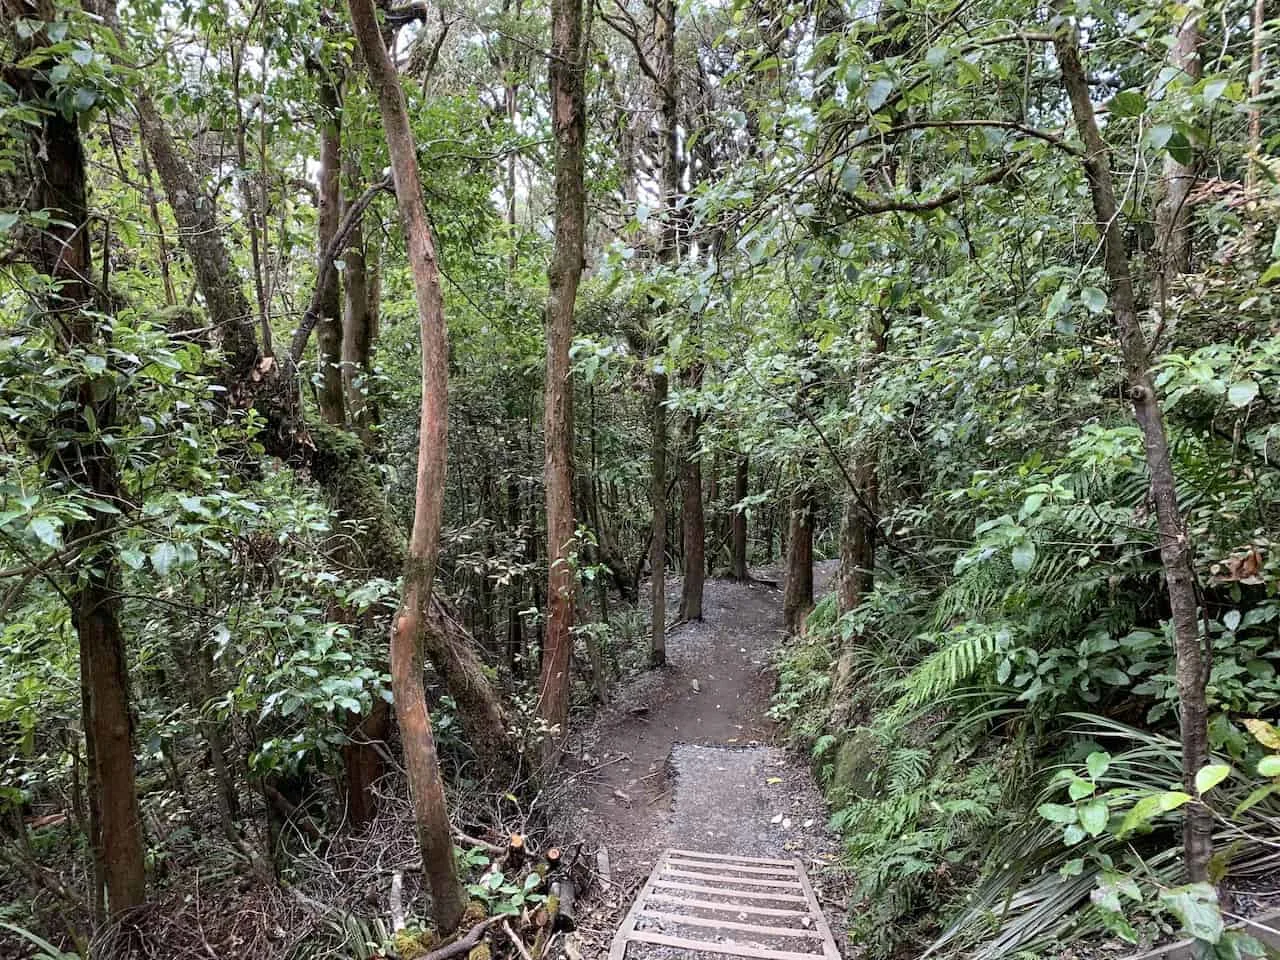
Part VI: Ketetahi Bushline to Ketetahi Parking Lot (3 km / 1.8 miles)
The final part of the trail takes you down into the forest and on a track through the trees. It definitely is a different feel from the rest of the trail as you no longer have those dramatic volcanic mountain views.
Soon enough though you will end back up in the Ketetahi parking lot. If you opted for the round trip shuttle, this is where you will get picked up.
If you drove yourself to the starting point, you will need to walk an additional 1KM down the dirt road to the parking lot you left your car in earlier on in the day.

Well then, that about does it for a complete detailed guide to the one and only Tongariro Alpine Crossing.
I think I covered all the important facts to know but if you do have any questions feel free to write them in below and I will get back to you as soon as I can!
Also check out the other New Zealand itineraries and guides I have up on the site to help out with any other trip planning. Have fun out there and safe travels!
Some of the guides currently up on the site include:
- Top Things to Do in Auckland
- Best Walks in the Waitakere Ranges
- 8 Must Do Wellington Activities
- 12 Best Rotorua Activities
- Driving in New Zealand
- 21 Helpful New Zealand Travel Tips


Kim
Saturday 3rd of September 2022
Great summary!
I am considering doing this in December, but I have a fear of heights/ledges.
Are any parts of the hike particularly perilous, here you’re hiking alongside a steep cliff or drop-off?
Charles
Monday 5th of September 2022
Hi Kim - thanks! I would not consider this hike perilous. The hike of course does get to a high elevation, so your fear of heights may kick in. But the trail in general would not be alongside steep cliff drop offs. Hope you enjoy the trip!