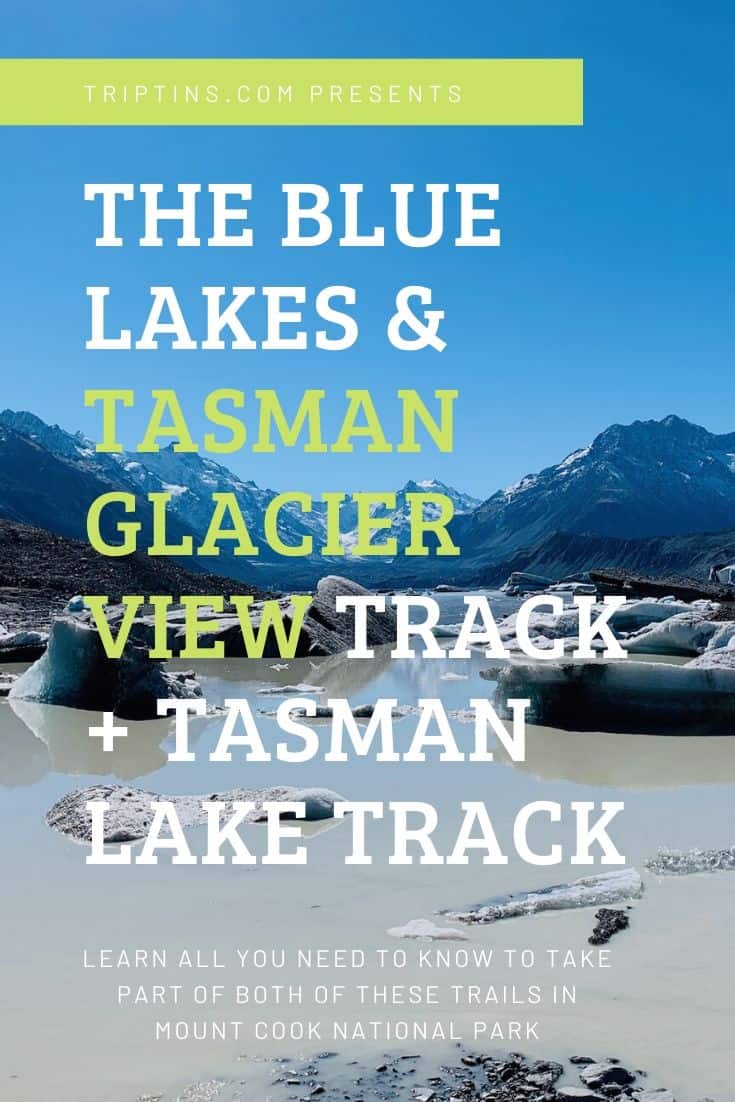
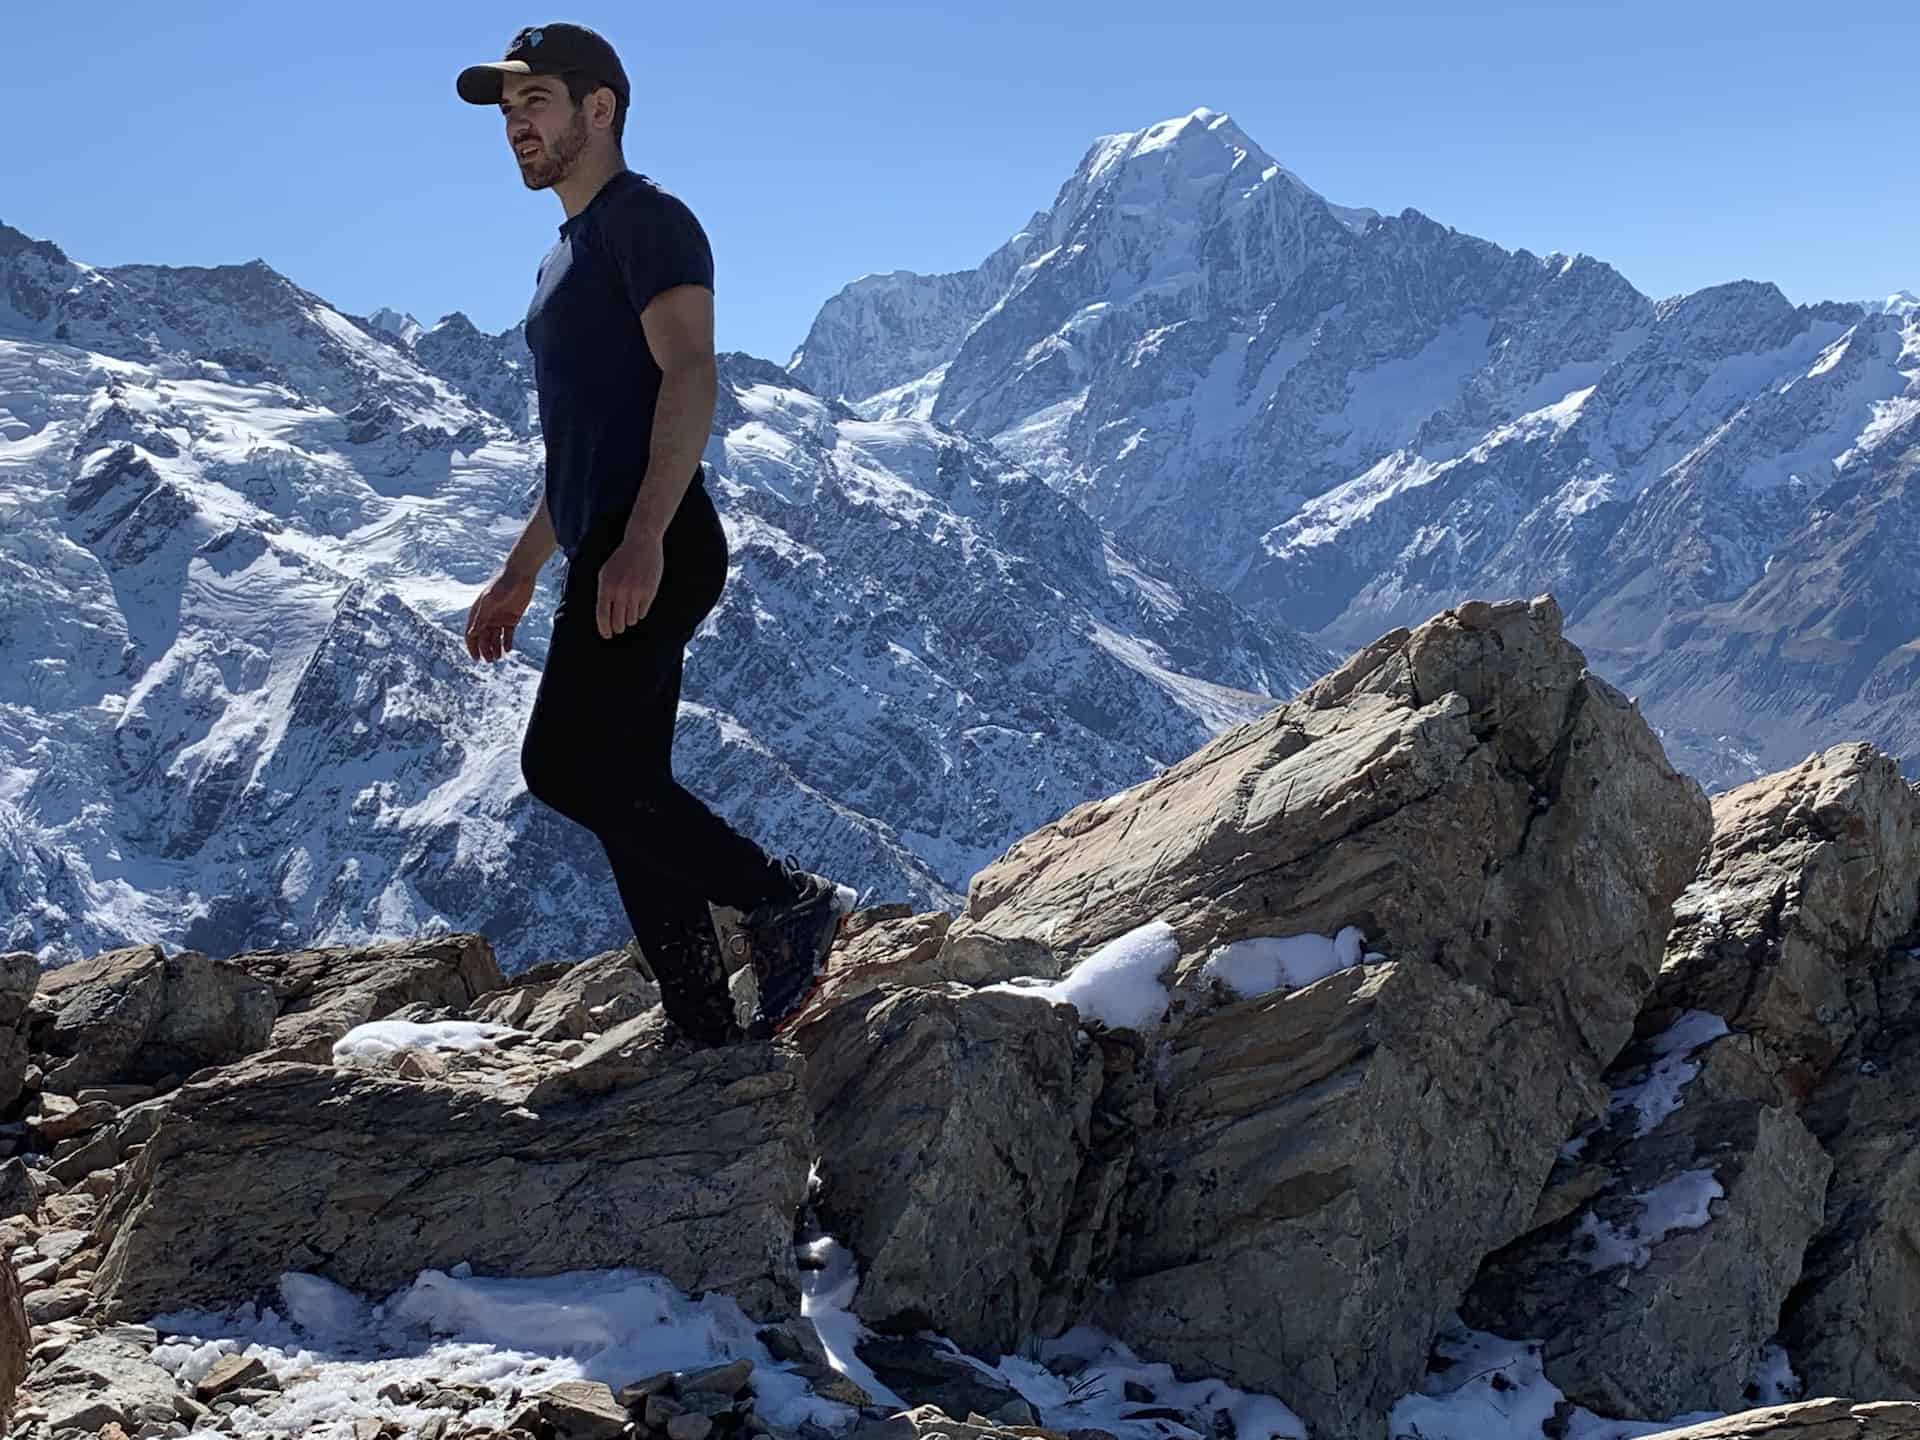
Mount Cook National Park is full of different types of hiking trails all throughout the area. If you are looking for one that combines lakes, glaciers, and plenty of viewpoints then the combination of the Blue Lakes and Tasman Glacier View Track and Tasman Lake Track is for you.
While technically two separate tracks, the two can easily be combined into one longer one. This guide will go over both hikes and how to best take part of them.
* Affiliate Disclosure: This post may contain affiliate links, which means I may receive a commission if you make a purchase through the links provided, at no additional cost to you. Thanks for supporting the work I put into TripTins!
1) Track Overviews
I will split up the two tracks just in case you just want to go to one or another. Below are some quick facts about each the Blue Lakes and Tasman Glacier View Track and the Tasman Lake Track:
A) Blue Lakes and Tasman Glacier View Track Overview
- Starting and Ending Point: Tasman Glacier Car Park
- Pit Stops: 3 Blue Lakes and Tasman Glacier View
- Length: ~2.5KM / 1.5 Miles
- Time: 1 Hour
- Elevation Gain: 100 Meters / 328 Feet
- Track Type: Dirt / Rock / Stairs
- Difficulty: Easy
B) Tasman Lake Track Overview
- Starting and Ending Point: Tasman Glacier Car Park
- Pit Stops: Tasman Lake Jetty & Tasman Glacier Lake / River
- Length: ~2.5KM / 1.5 Miles
- Time: 1 Hour
- Elevation Gain: Flat
- Track Type: Dirt / Rock
- Difficulty: Easy
Altogether you are looking to take part of both hikes it will take about 2 hours or so to complete depending on how long you will want to relax at the stops along the way.
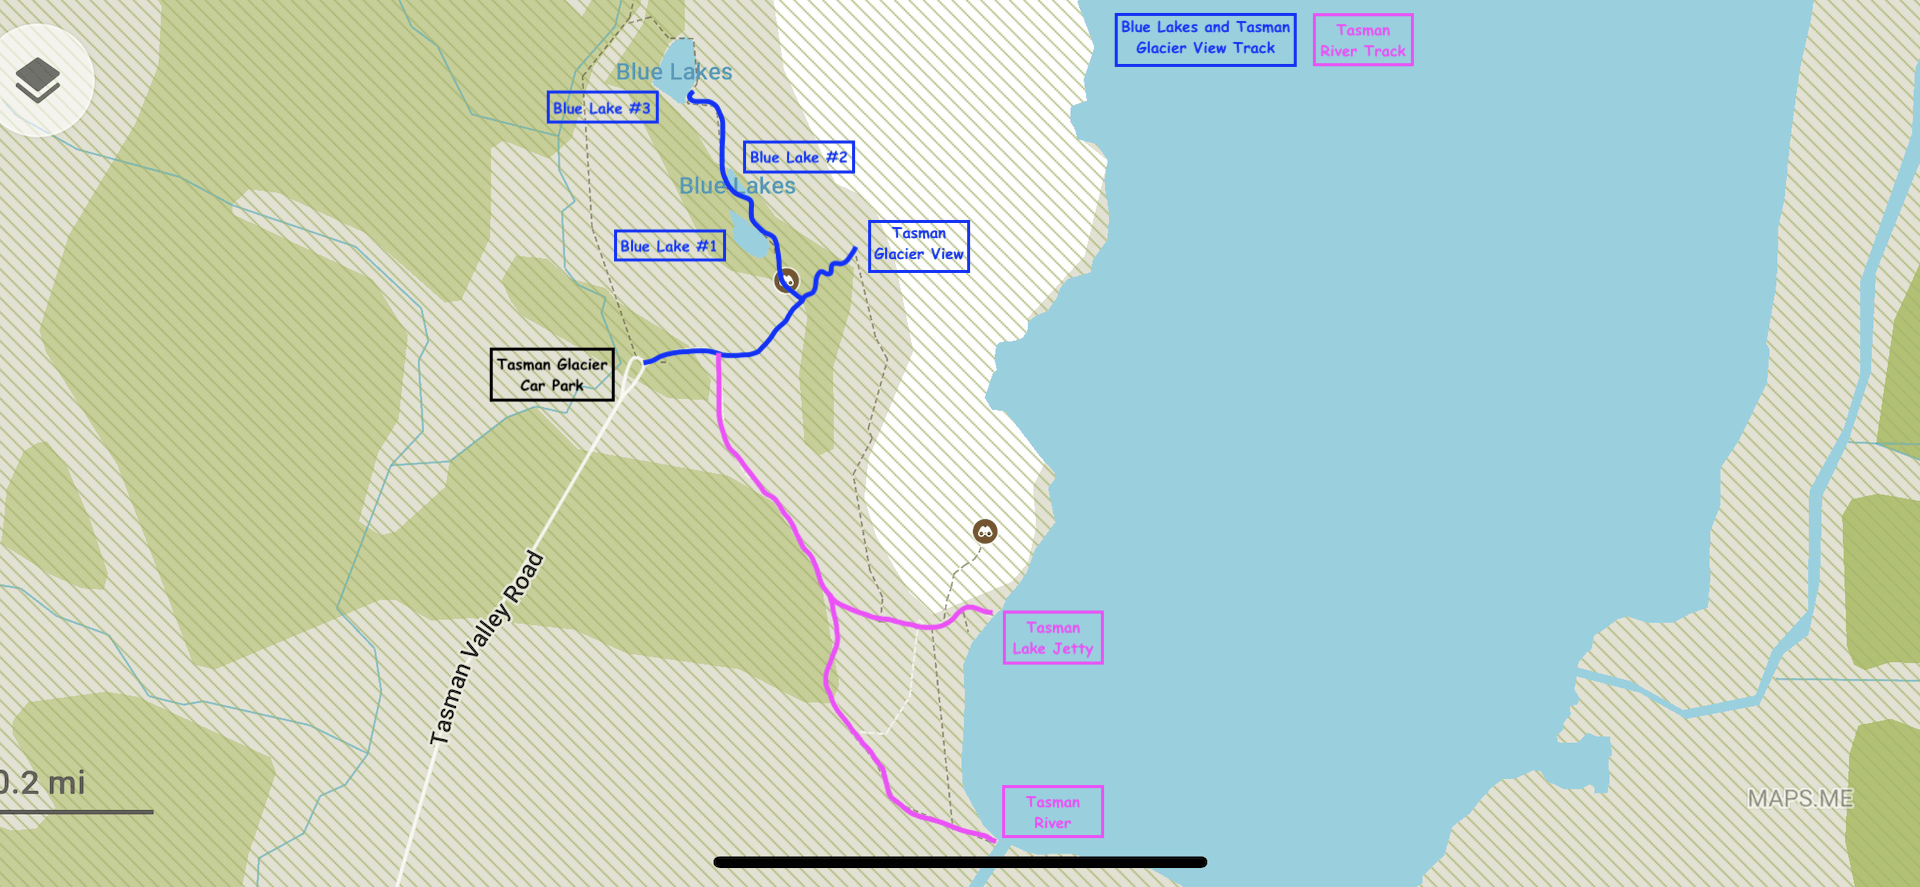
2) Tasman Glacier, Blue Lakes, & Tasman Lake Map
Below is a screenshot of the combined path I took on the maps.me app. I have highlighted all the key points along the way that you can make the stop at.
Everything should be pretty well signposted but it is always helpful to have a app like maps.me handy just in case.
You can also see on the app/map that there are some other viewpoints and trails to get you from one place to the next.
I opted to head on the trails that were signposted but there are some alternate (less obvious) trails in the area too.
» Take part of this trail as part of the 14 Day New Zealand South Island Itinerary or 3 Week New Zealand Road Trip

Hiking Resources & Checklist
Before heading out for the trails, be sure to read up on some of the hiking resources up on the site. These are here to better prepare you for all types of outdoor adventure.
- Gear: Hiking Packing List
- Weather: How to Prepare for Hiking Weather
- Navigation: Hiking GPS & Navigation
- Tips: 20+ Hiking Tips & Tricks for the Trail
- Accommodation: Book Your Hotel Today
- Rental Car: Book Your Car Rental Today
3) Getting to the Starting Point
The starting point of the trails is at the Tasman Glacier Car Park, a 15 minute / 10KM drive from Mount Cook Village. Simply type that into Google Maps and you will be on your way.
The best way to get around New Zealand in general is by having your own car but if you do not have one, you can walk, bike, or maybe try and hitch a ride from the village. If you do have your own car, take a look at the Driving in New Zealand Guide up on the site.
→ Be sure to check out Rentalcars.com when it comes to renting a car in New Zealand. The site will show you car options & prices from a variety of companies. This ensures that you will be able to choose the perfect car (and deal) for your trip to the country.
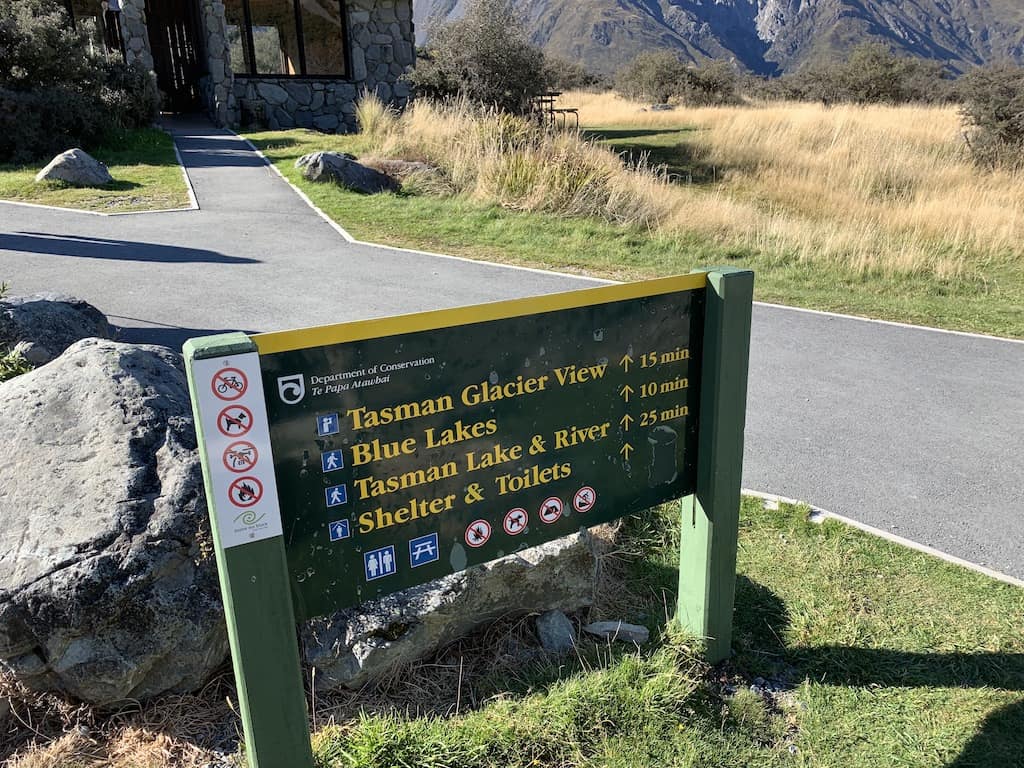
Once at the parking lot, you will have signs throughout the trail pointing you in the right direction.
I started out by heading to the Blue Lakes first, then the Tasman Glacier View, followed by Tasman Lake and River, before turning around and making my way back to the parking lot.

4) What to Bring on the Trail
Whenever heading off on longer day hikes, I always recommend being adequately prepared when it comes to the type of gear to bring along.
The packing list below includes everything I bring along on day hikes, and it will have you better prepared when taking part of trails all over New Zealand.
Hiking Packing List
In general when it comes to hiking, there are a few main aspects to consider. These includes clothing layers, hiking shoes, hydration & fuel, electronics, and other essentials.
Below in a breakdown of some of the top items, but be sure to check out the Hiking Packing List for a more comprehensive view.
Clothing Layers
Layering is going to be a top consideration when hiking. You will want to be prepared for all sorts of weather so you can be comfortable in different situations. Some items may include:
→ Hiking Shorts
→ Hiking Pants
→ Short Sleeve Shirt
→ Long Sleeve Shirt / Sun Hoodie
→ Mid Layer Fleece
→ Puff Jacket (not always needed)
→ Packable Rain Jacket (Columbia Watertight II)Note that your layers should be made of moisture wicking material as they are breathable and quick drying.
Footwear
Having appropriate footwear will also be very important. You will want to have shoes with the necessary grip and support to keep you safe on the trail.
→ Hiking Shoes (Keen Targhee)
→ Hiking Socks (Darn Tough)Other Essentials
Whether it is hiking gear, electronics, or just some miscellaneous items, here are some other essentials to bring along on hikes.
→ Hiking Backpack (Osprey Talon 22) & Rain Cover (Joy Walker Cover)
→ Hiking Poles (Black Diamond Trekking Poles)
→ Water Bottle (CamelBak Chute or Katadyn Filter Bottle)
→ Portable Charger (Anker PowerCore 5000mAh)
→ Action Camera (GoPro Hero)
→ Energy Bars & Snacks
→ Hat & Sunglasses
→ Sunscreen & Bug Spray
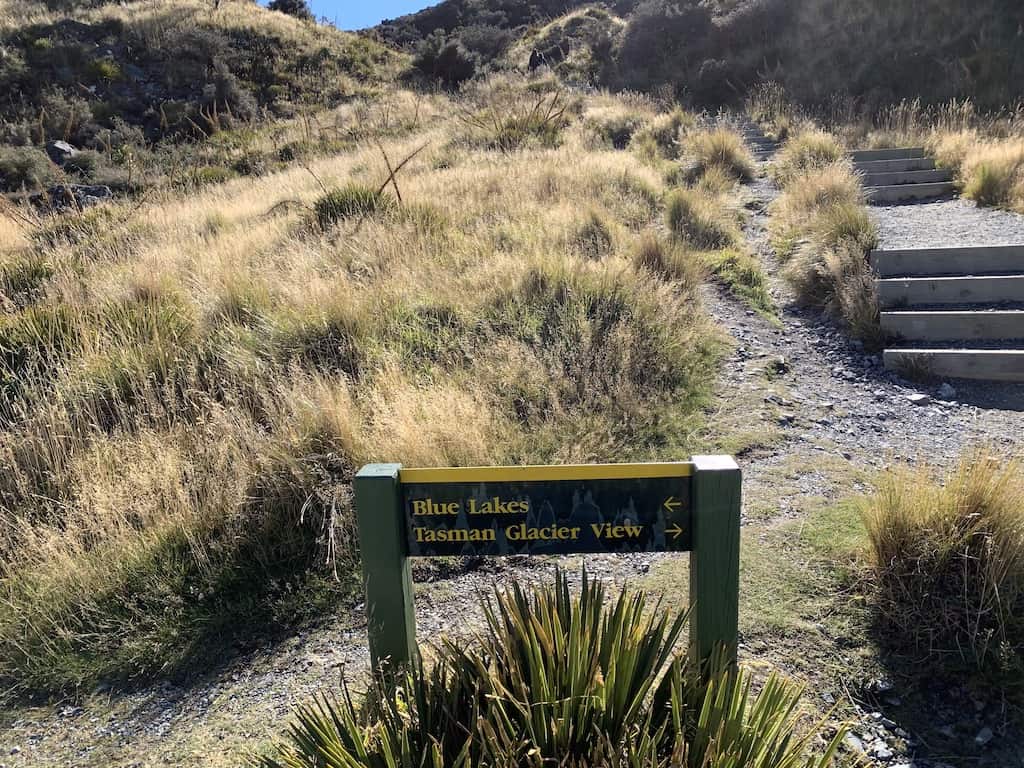
5) Blue Lakes and Tasman Glacier View Track
Since there are a few different points of interest on this longer track, throughout the hike you will come by intersections that are signposted pretty nicely. As long as you follow the signs you should have no trouble getting from one spot to the next.
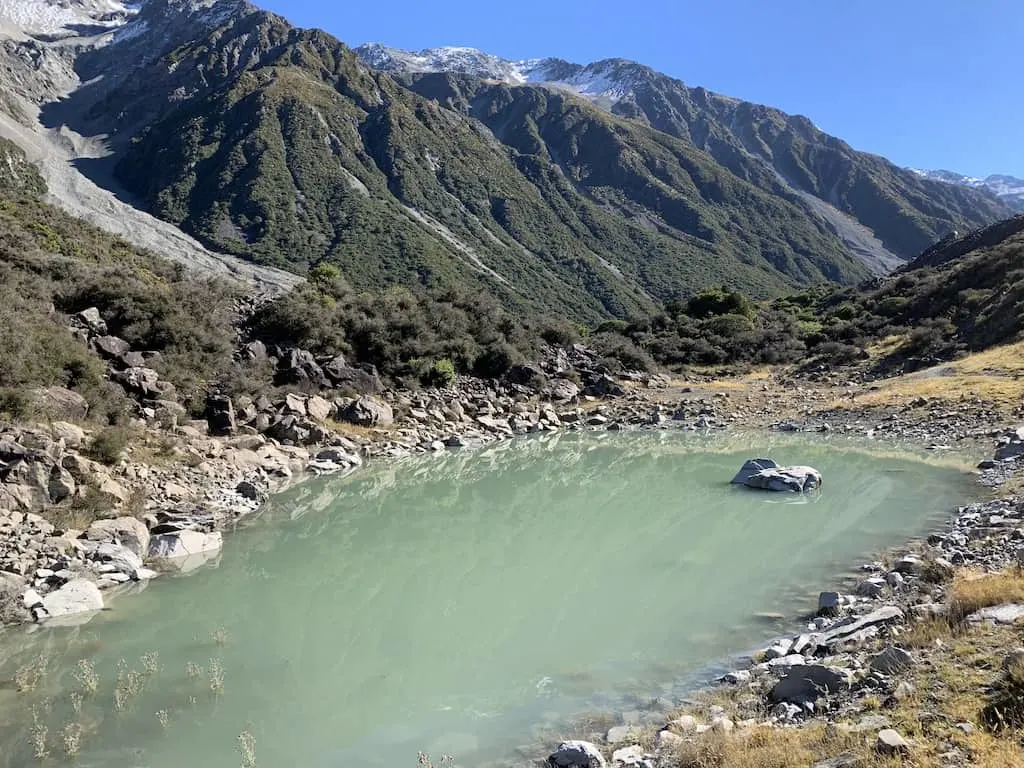
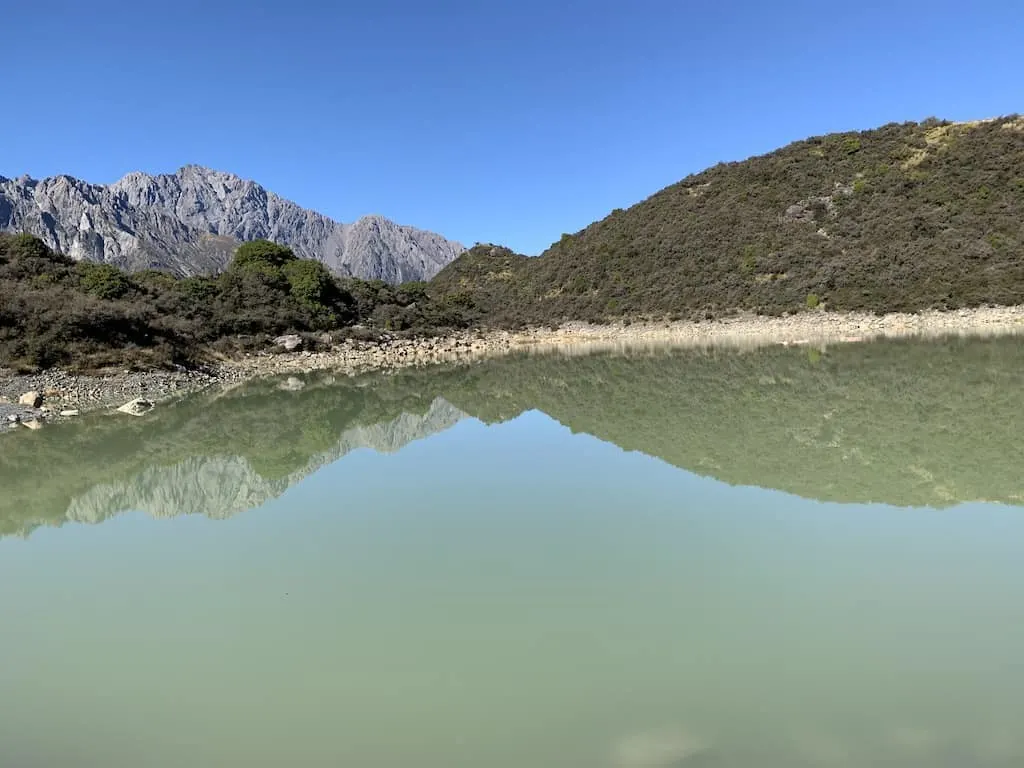
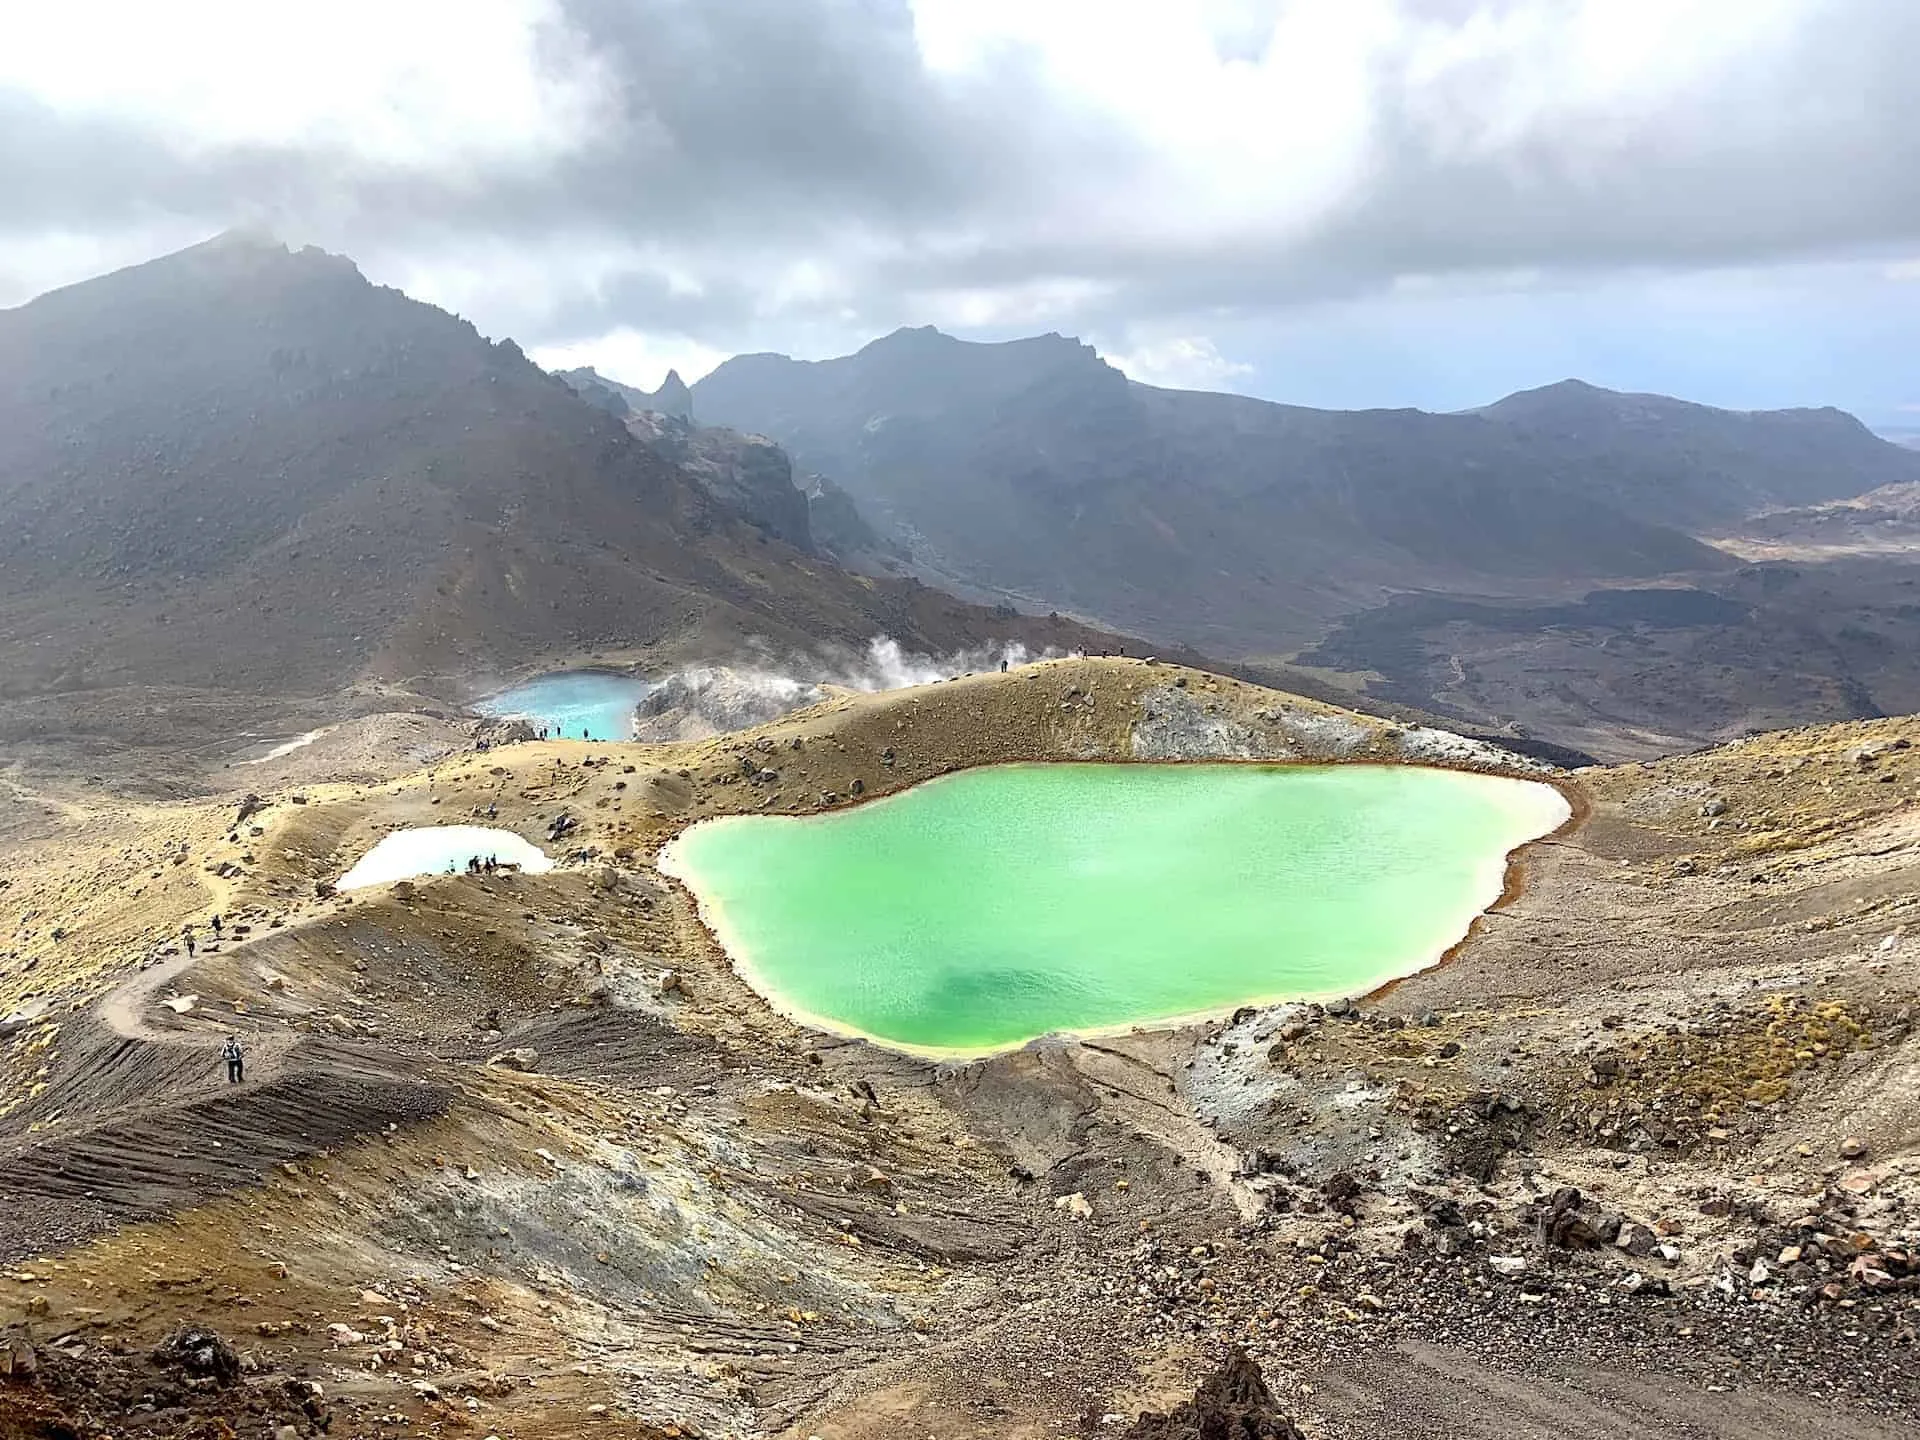
The first stop on the track will be the Blue Lakes. After leaving the parking lot you should see signs pointing you in that direction. You can follow the path to the first of the lakes, which is only 10 minutes away.

Now while they are called the Blue Lakes, you may be a bit confused that they are actually green in color. They are called the Blue Lakes because in the past the lakes were fed by the glacial water.
However, today since the glacier has shrunk in size, it no longer feeds the lakes water. The water in the lakes is rainwater that is turned green by the growing algae.

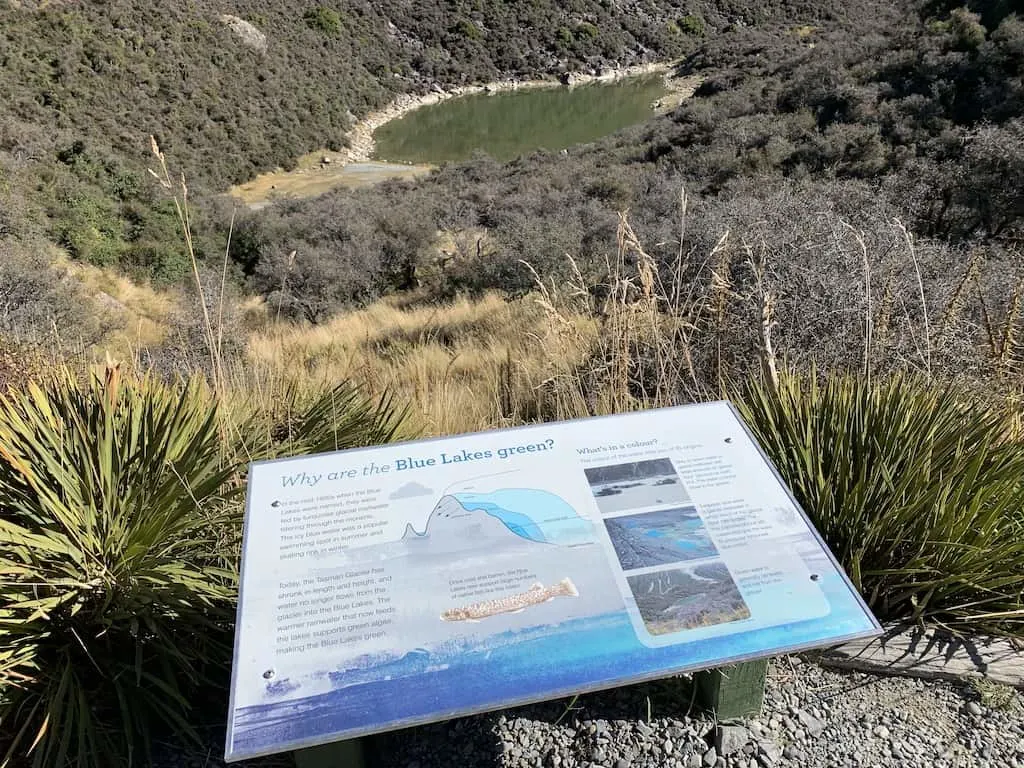
Many people head to just the first of the lakes, not realizing that there are actually two more lakes beyond the initial one.
It may be tough to tell, but there is a path that goes along the edge of the first lake and onto the next two.
Feel free to head off to 1,2, or 3 of them before making your way back to the intersection that points you up to the Tasman Glacier View.
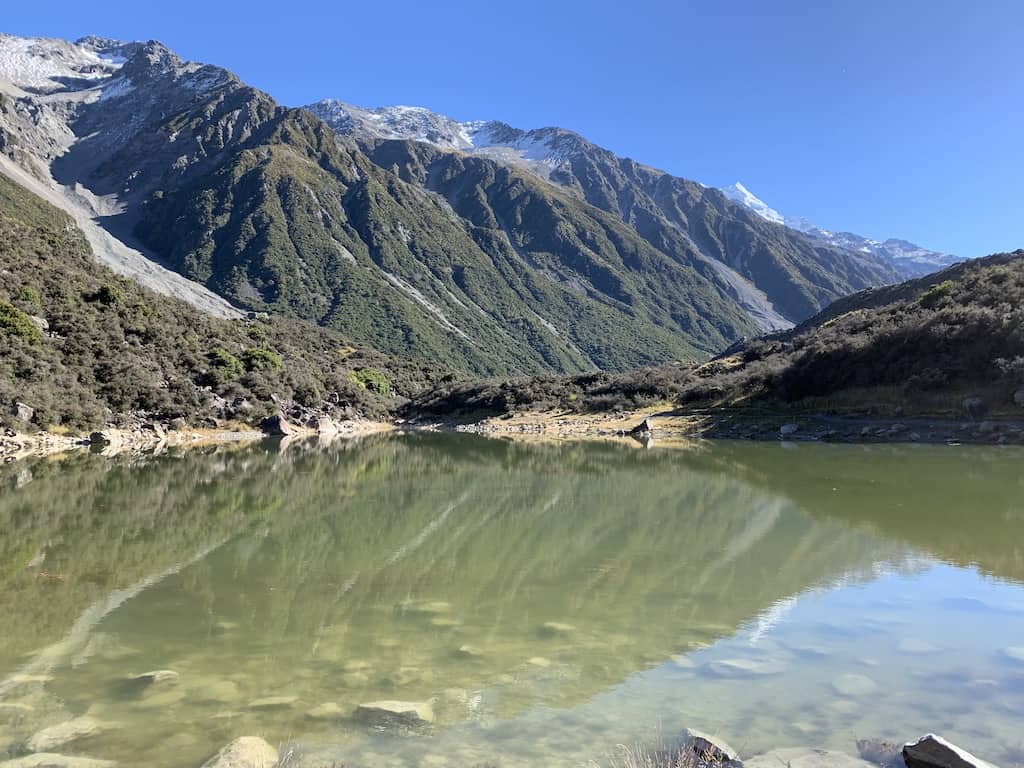


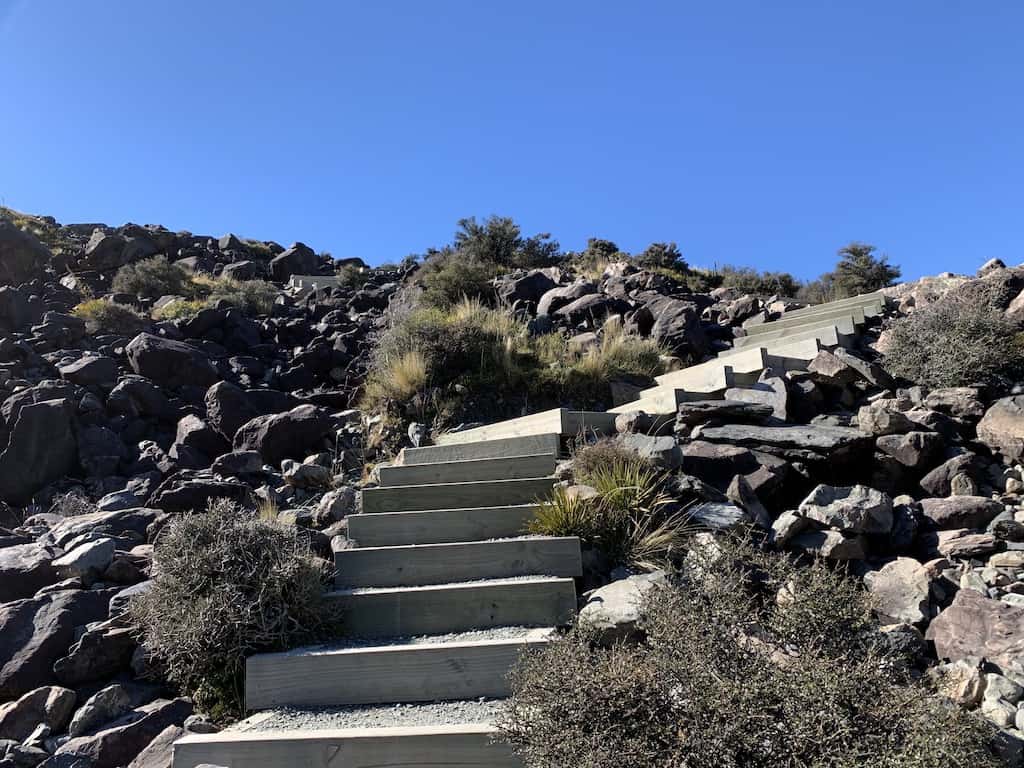
Here comes a bit more incline of the trail as you continue your way up the staircase to the Tasman Glacier View.
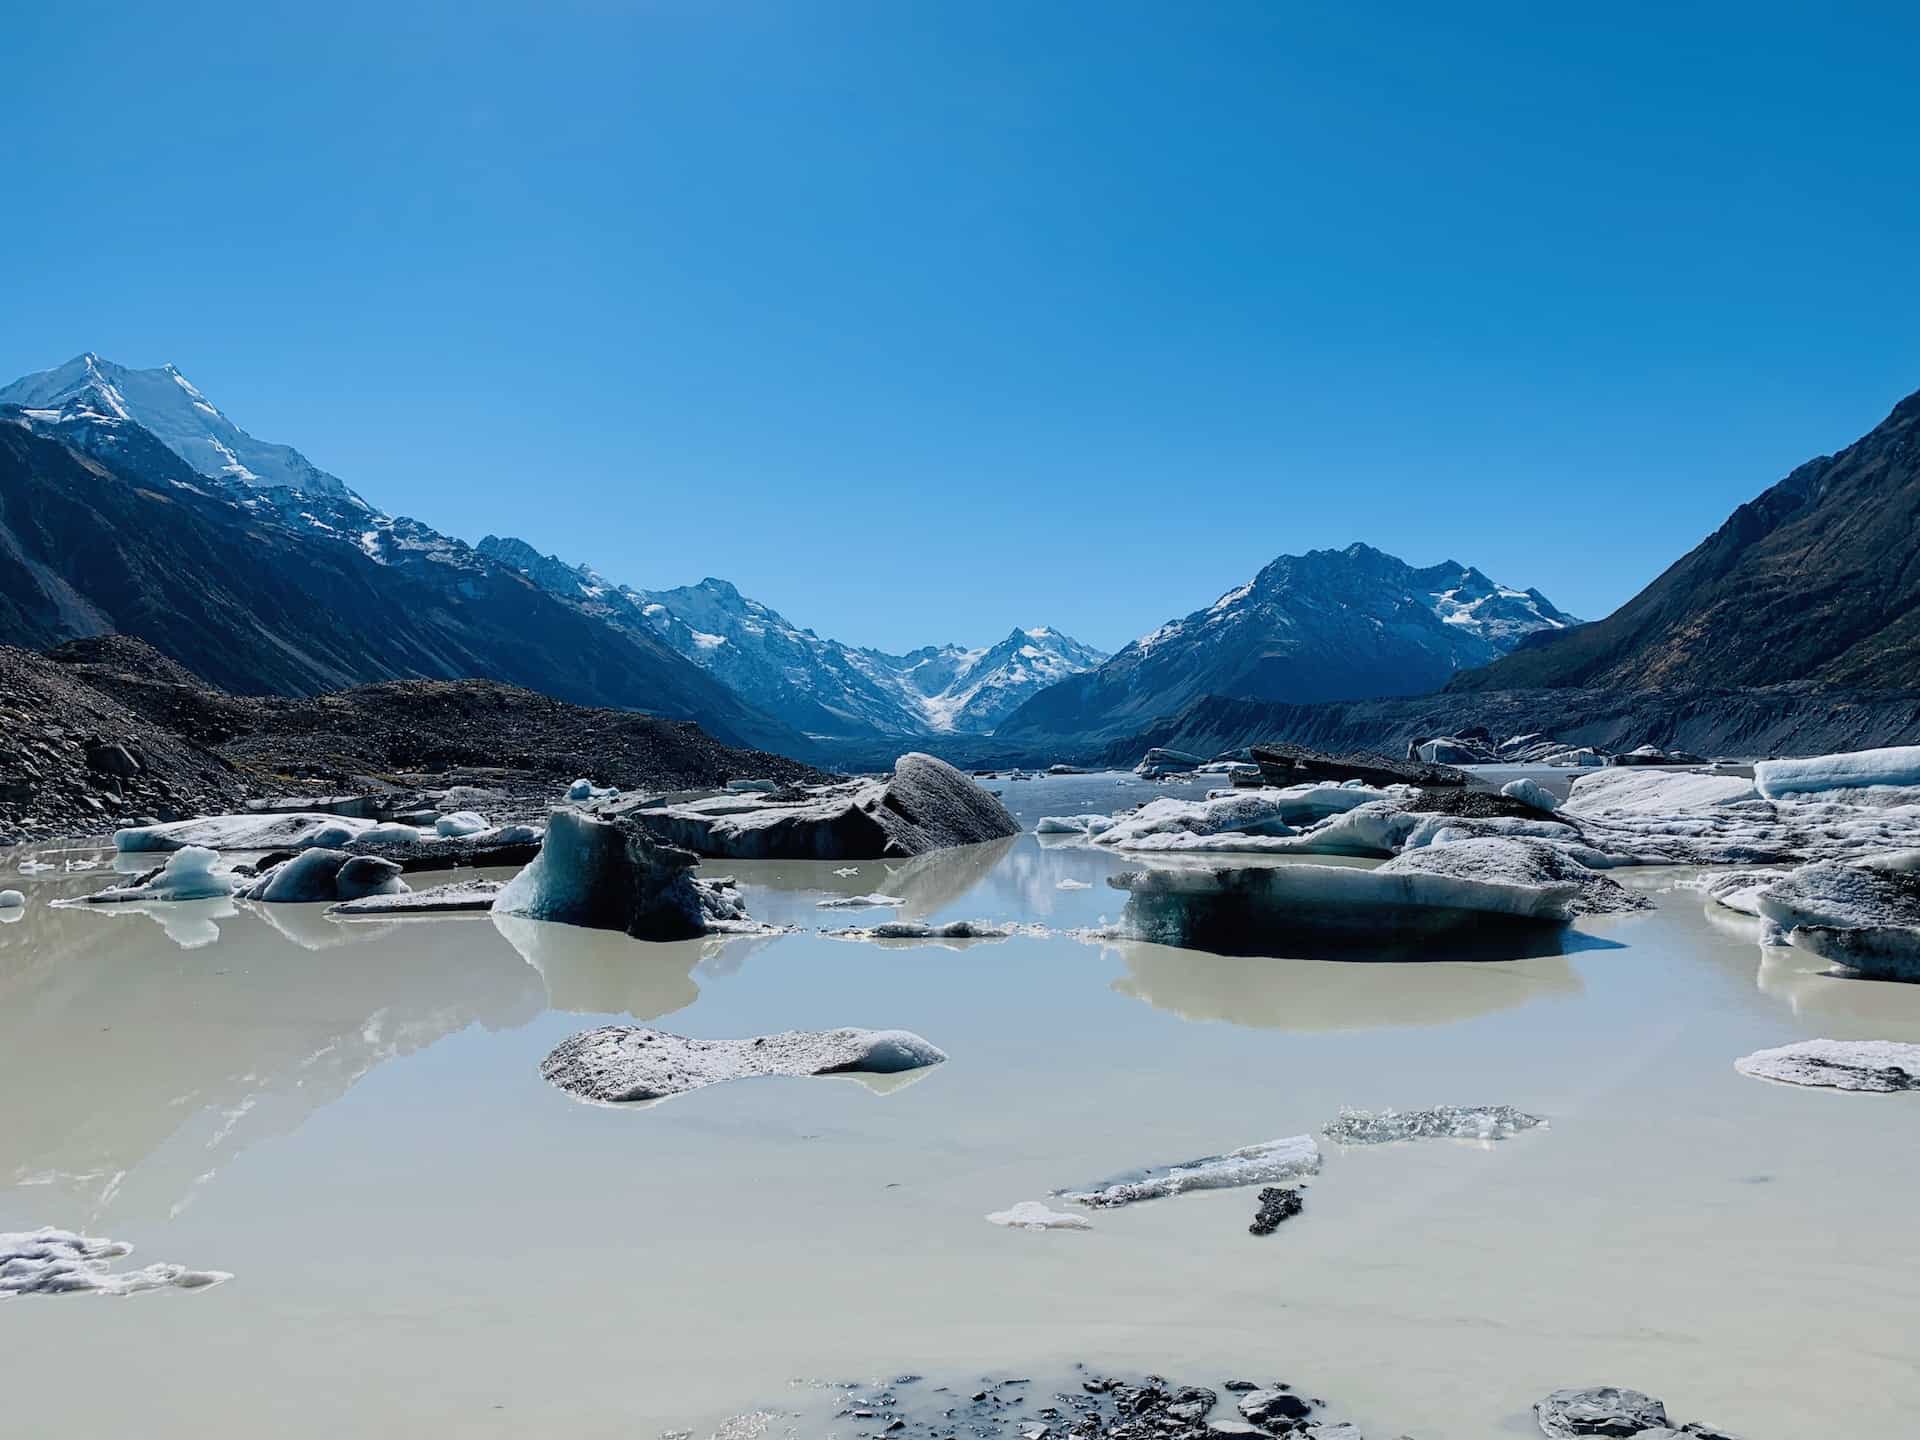
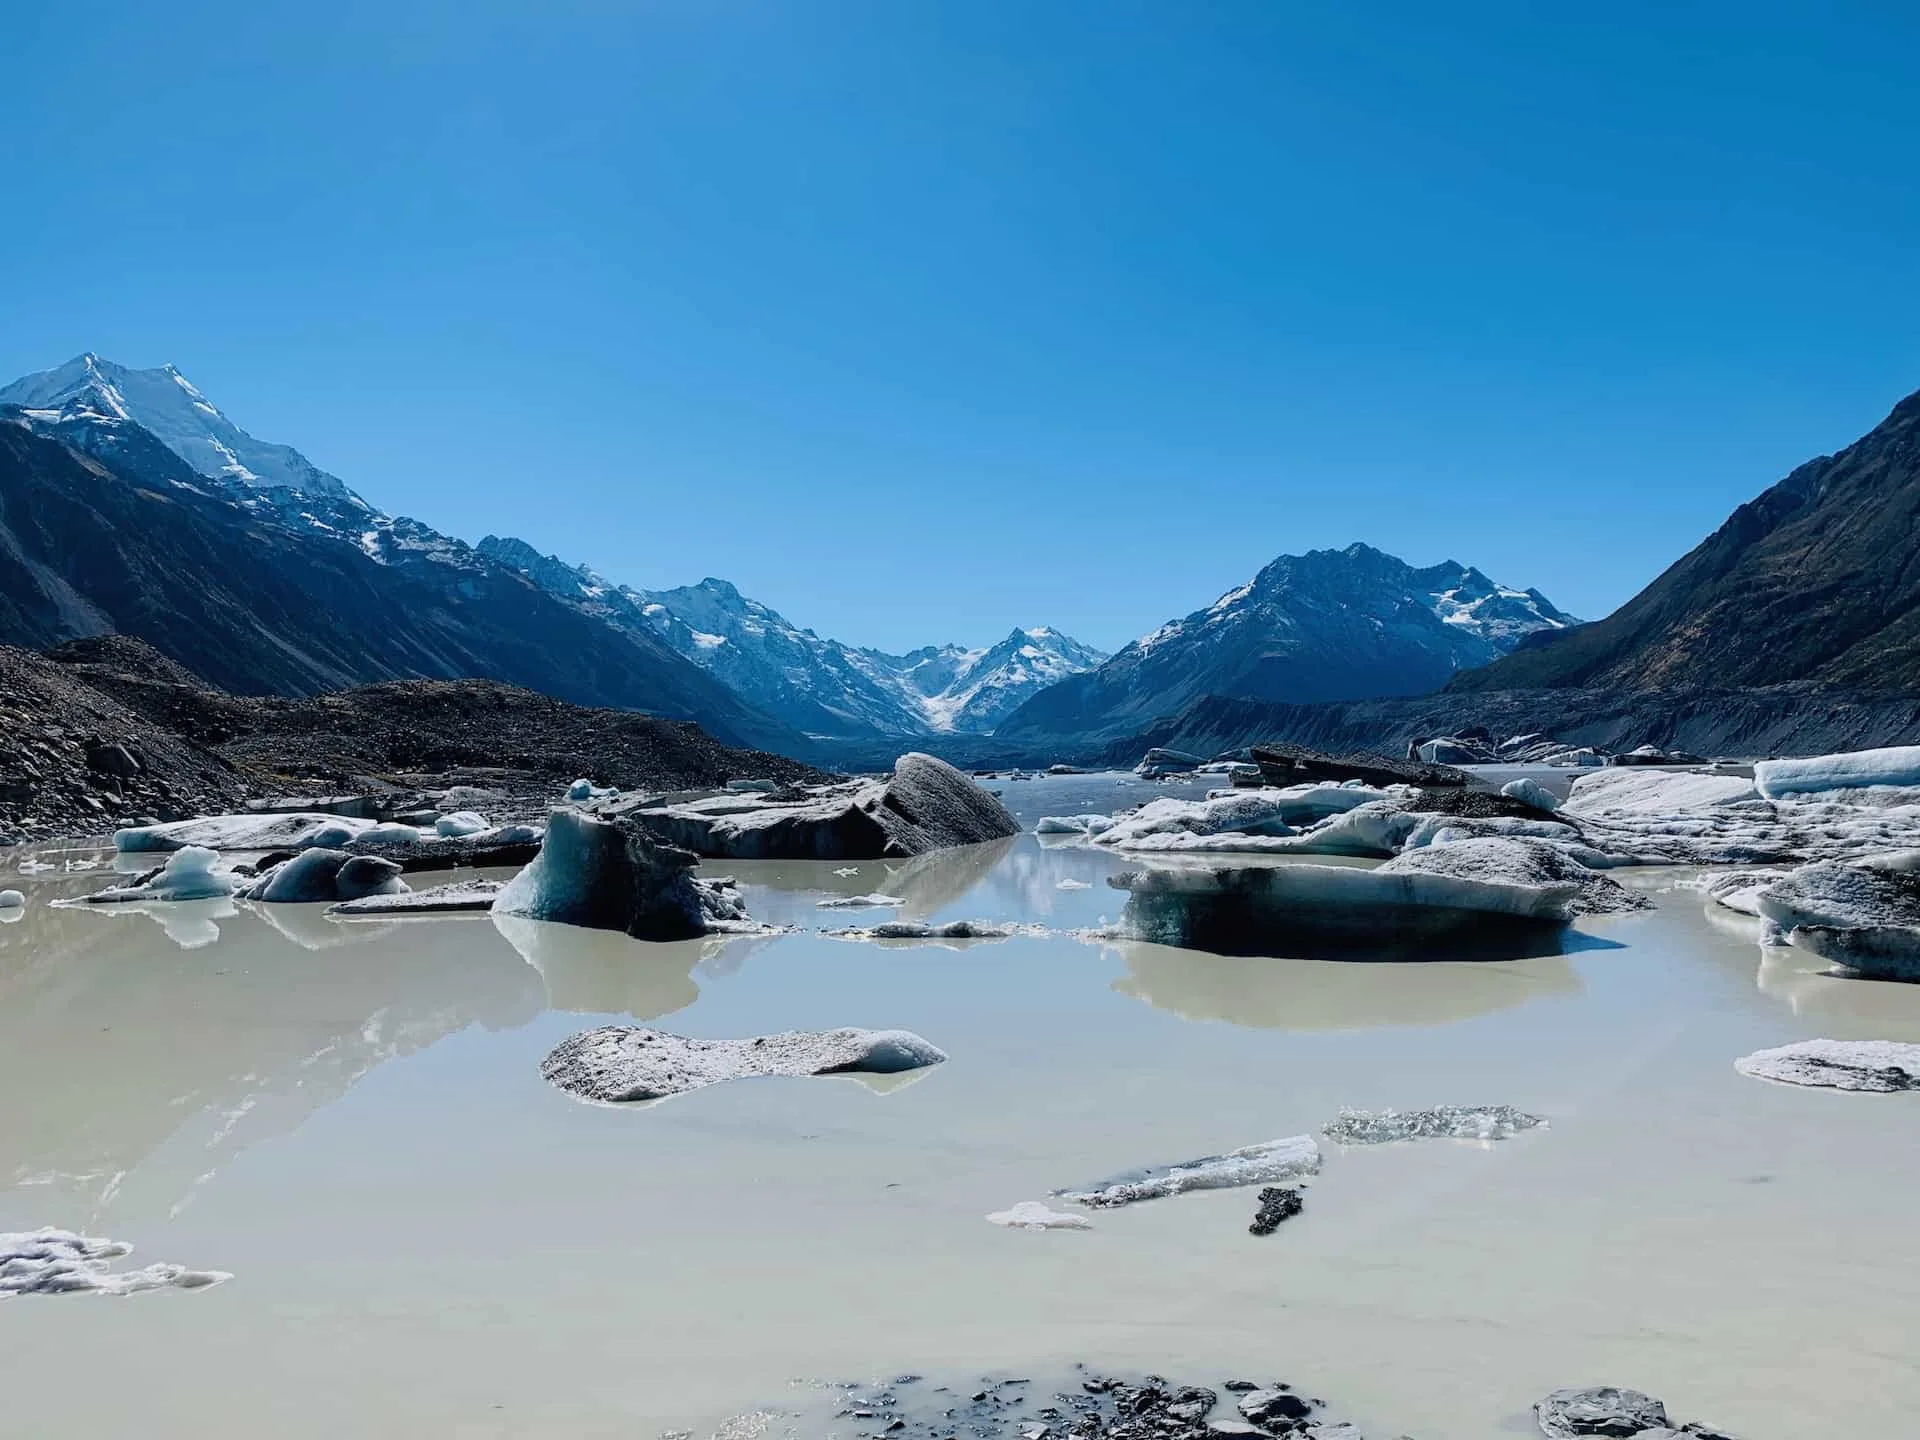
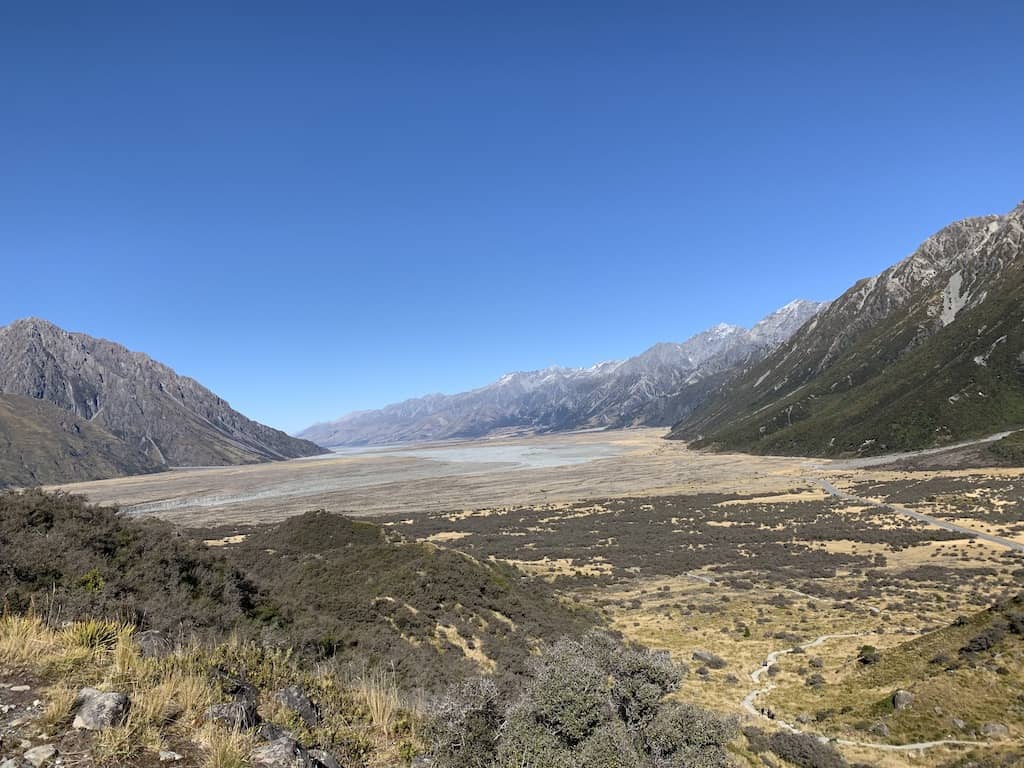
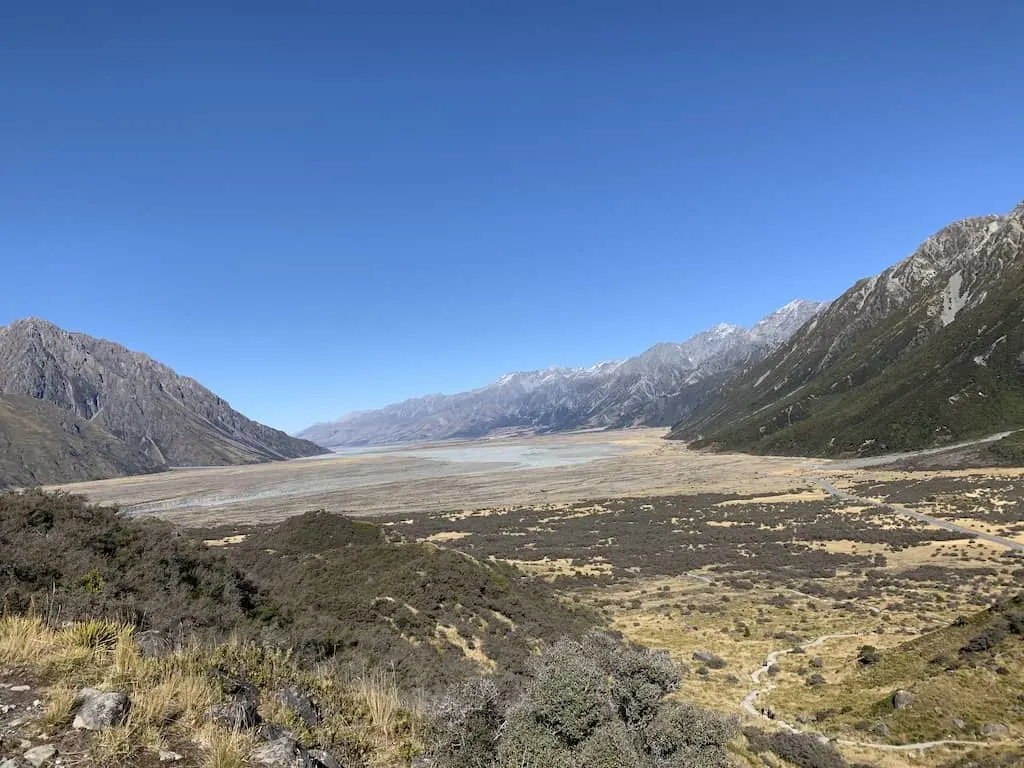
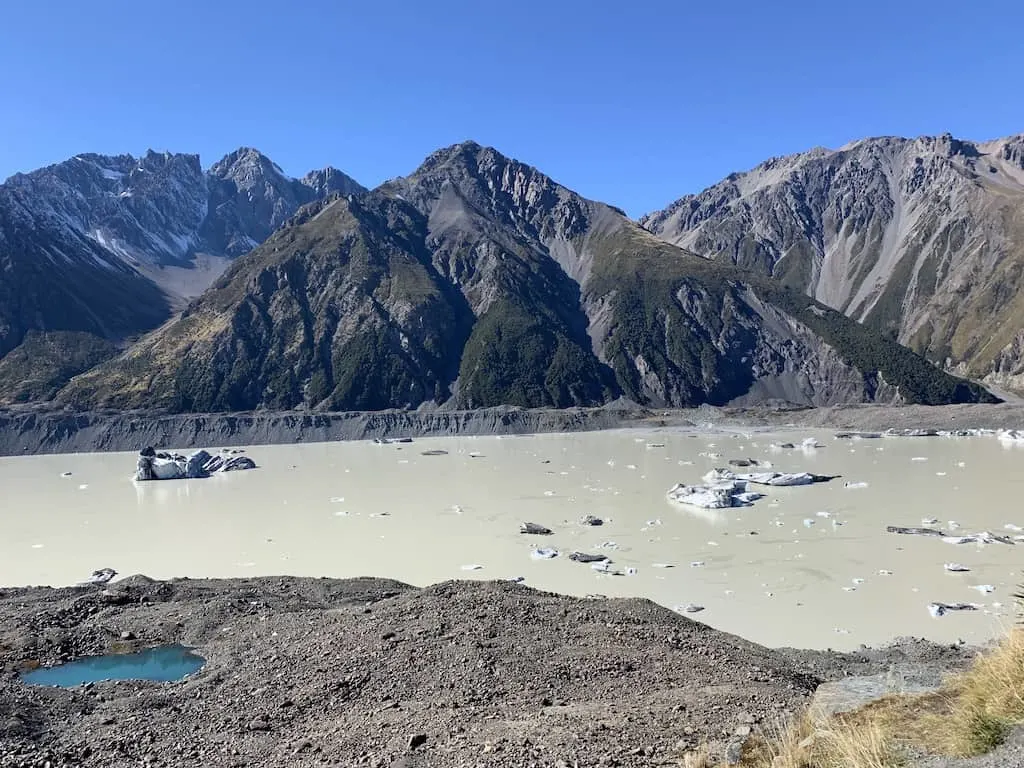
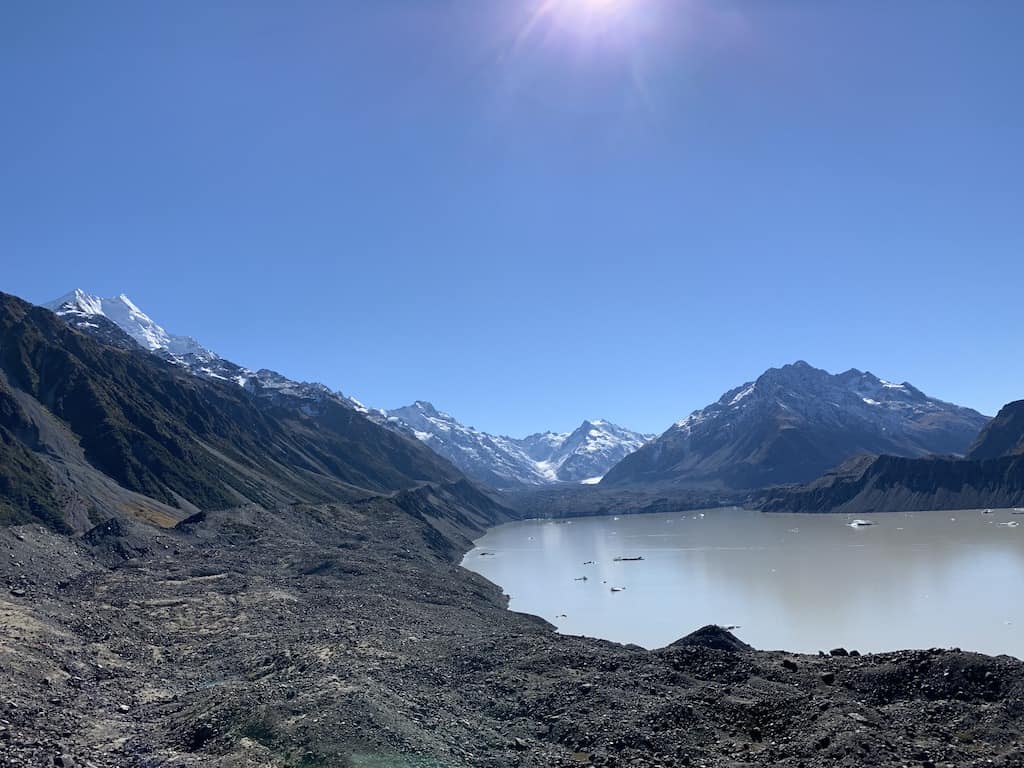
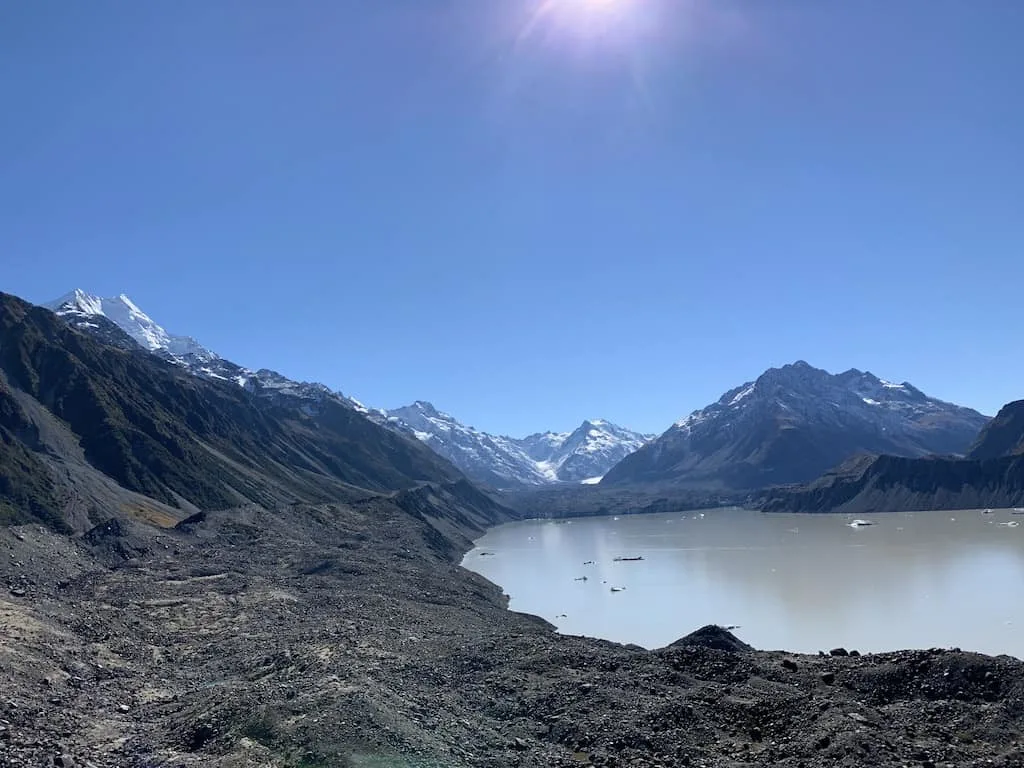
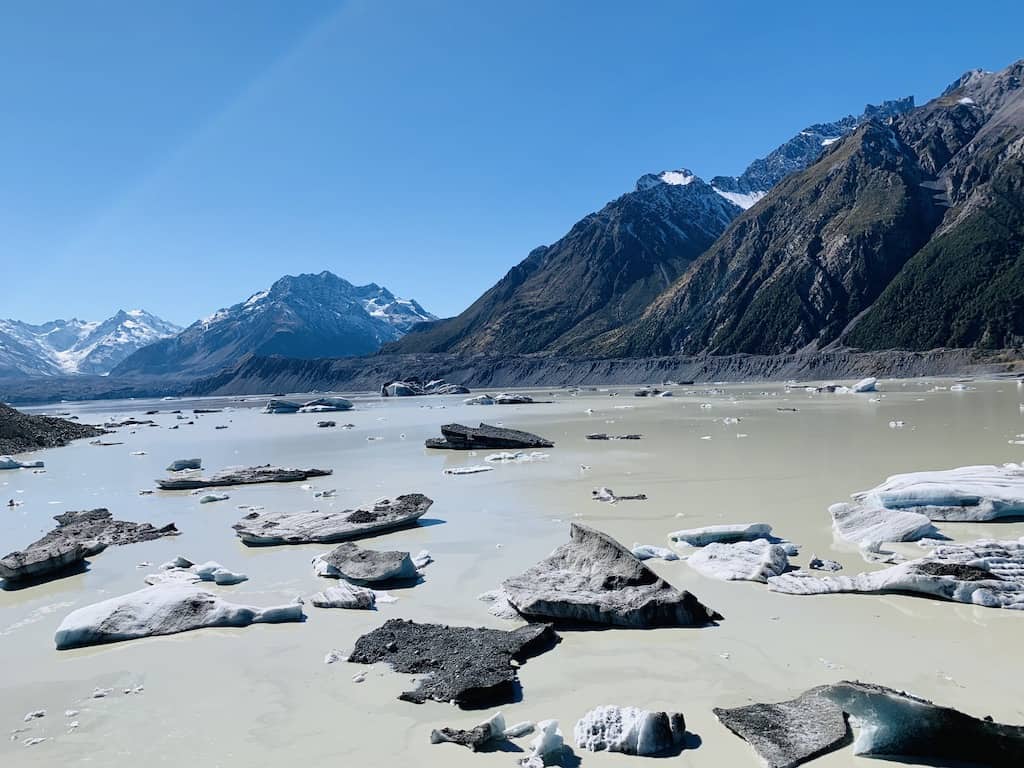
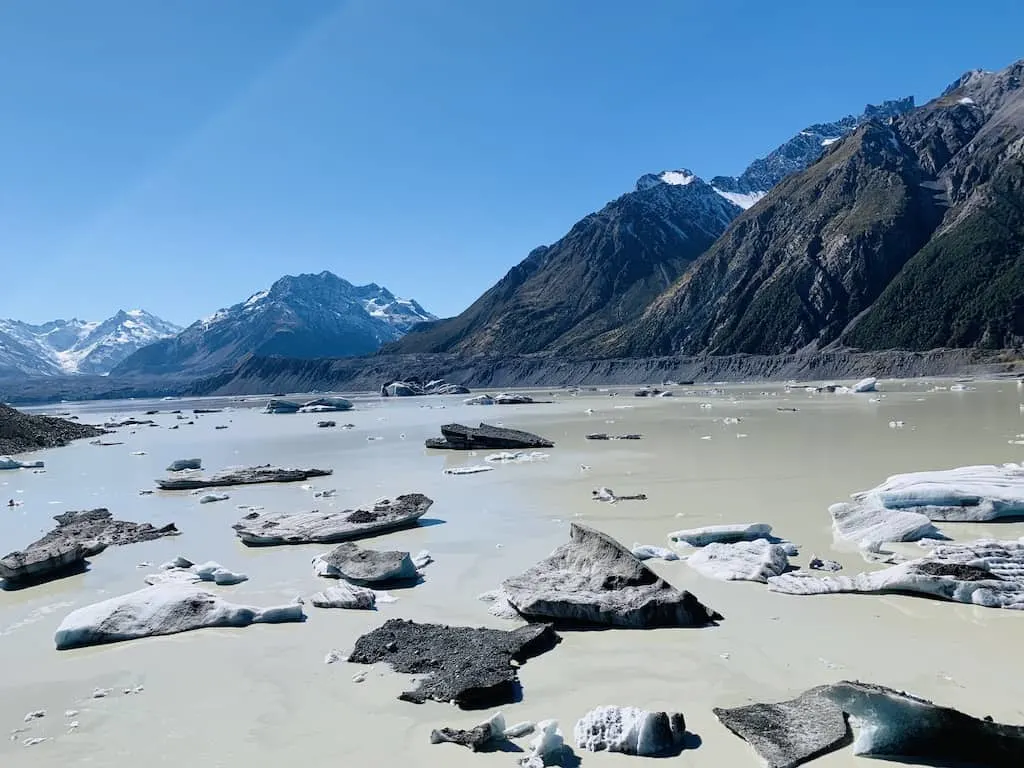
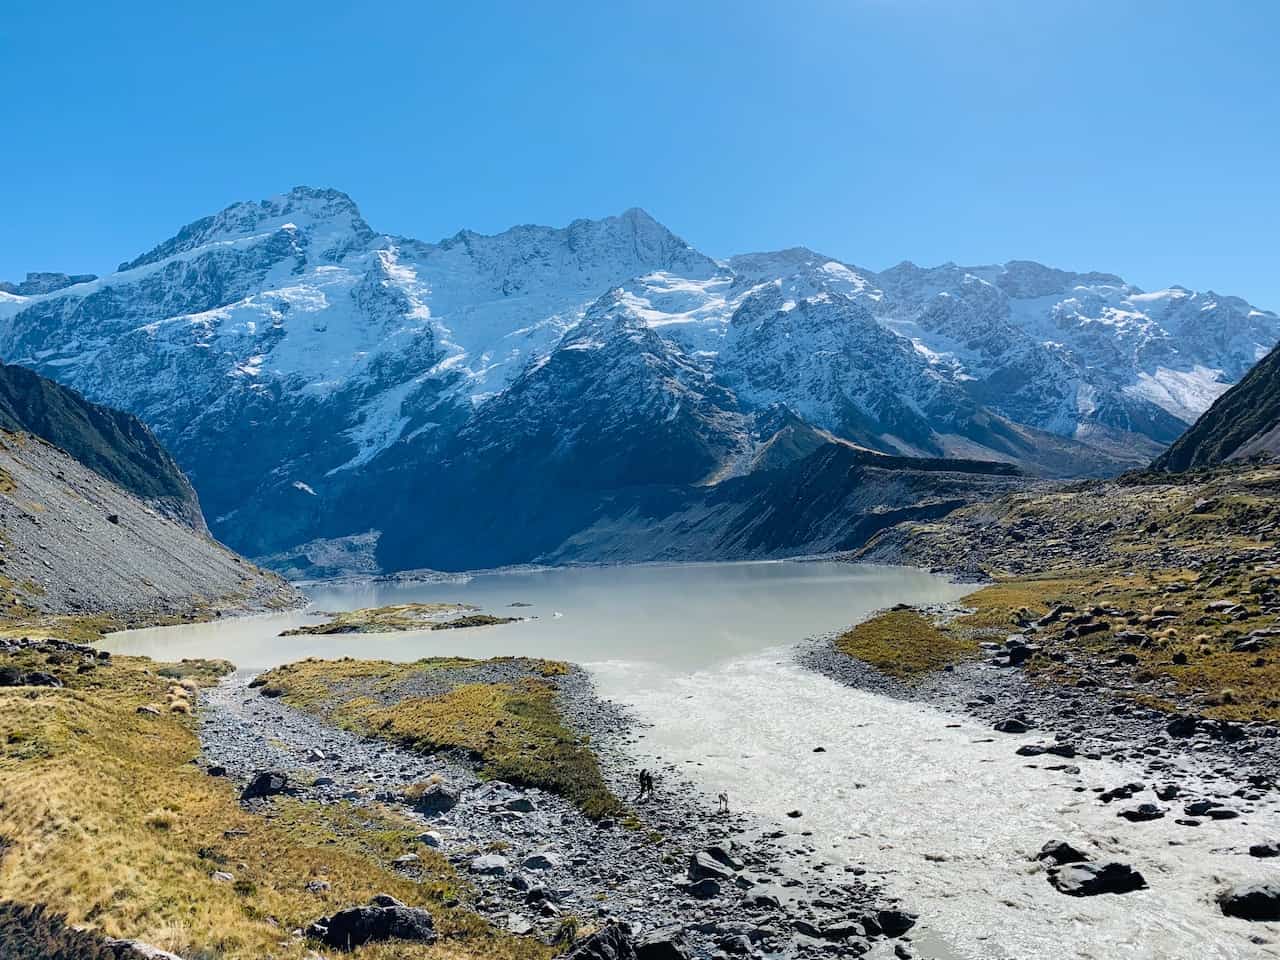
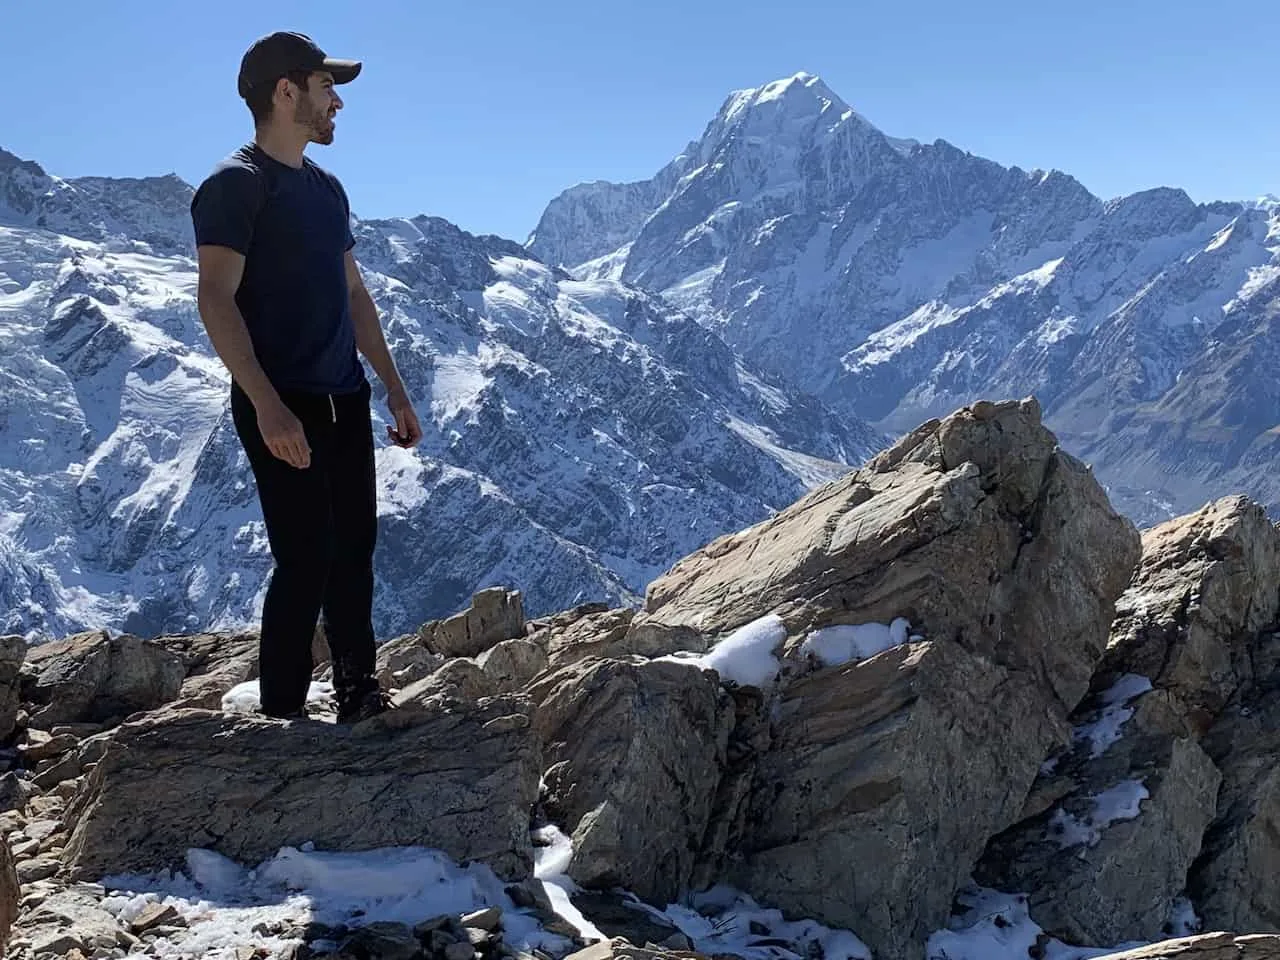
After about 10 minutes of stairs and some nice views of the Blue Lakes from above, you will reach a beautiful viewpoint of the vast Tasman Glacier Lake and moraine wall down below.
Unfortunately, you shouldn’t expect to see a large iced glacier down below. The Tasman Glacier has been receding and the Tasman Lake has been expanding. At the far end of the lake you will see the glacier wall out in the distance.


Once all done with the view from above, head back down the stairs, where you will soon be pointed in the direction of the Tasman Lake Track.

6) Tasman Lake Track
Instead of just ending the hike after the Blue Lakes and Tasman Glacier View, you can continue on the Tasman Lake Track that brings you to some additional views closer to the lake itself towards the southern end of the lake.
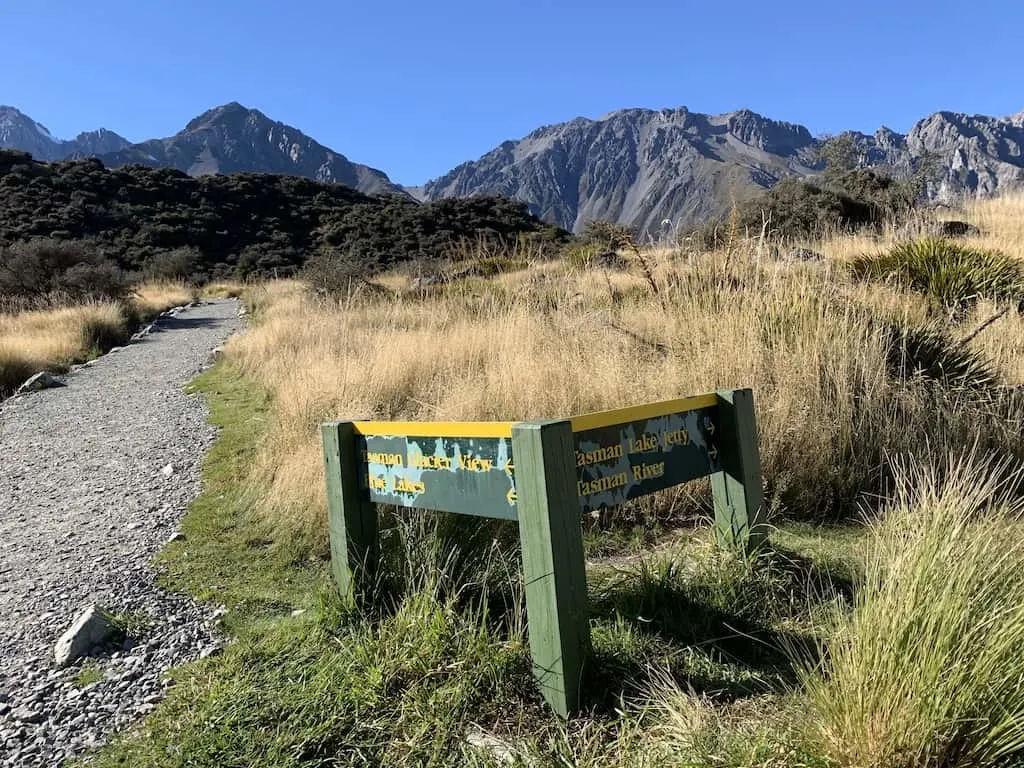
As you continue down the path, you will see another intersection, one pointing to the Tasman Lake Jetty and another to the Tasman River.
The Tasman Lake Jetty is where the Tasman Lake Glacier Boat Rides depart from and gives you a view of the lake from down below.
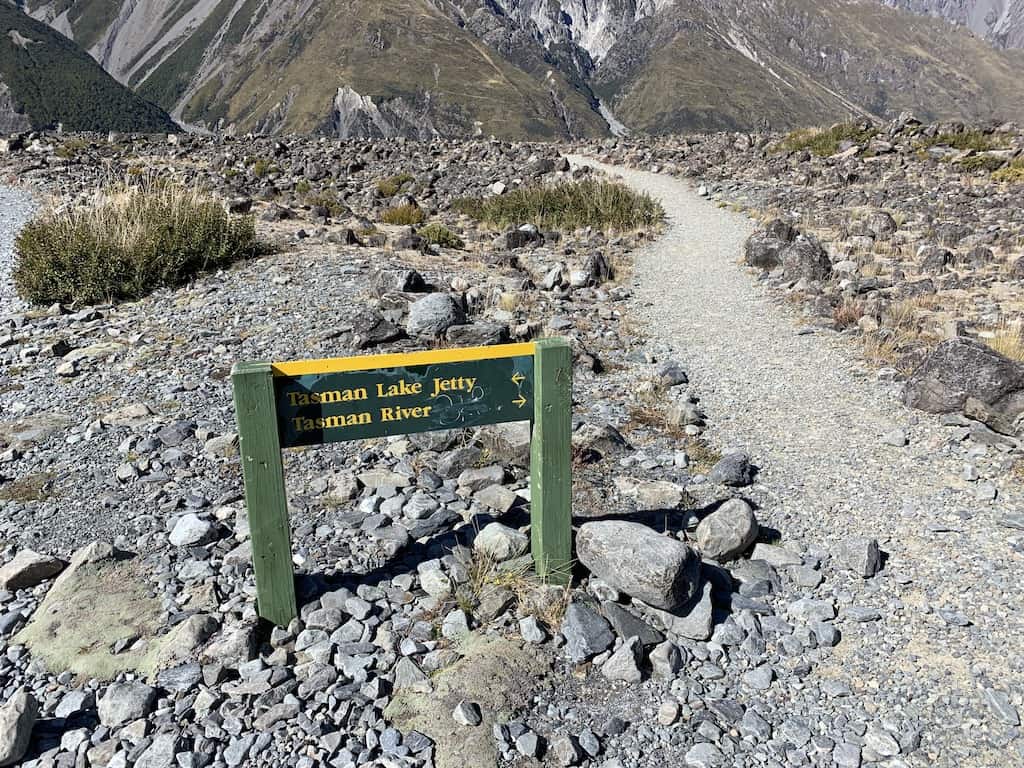

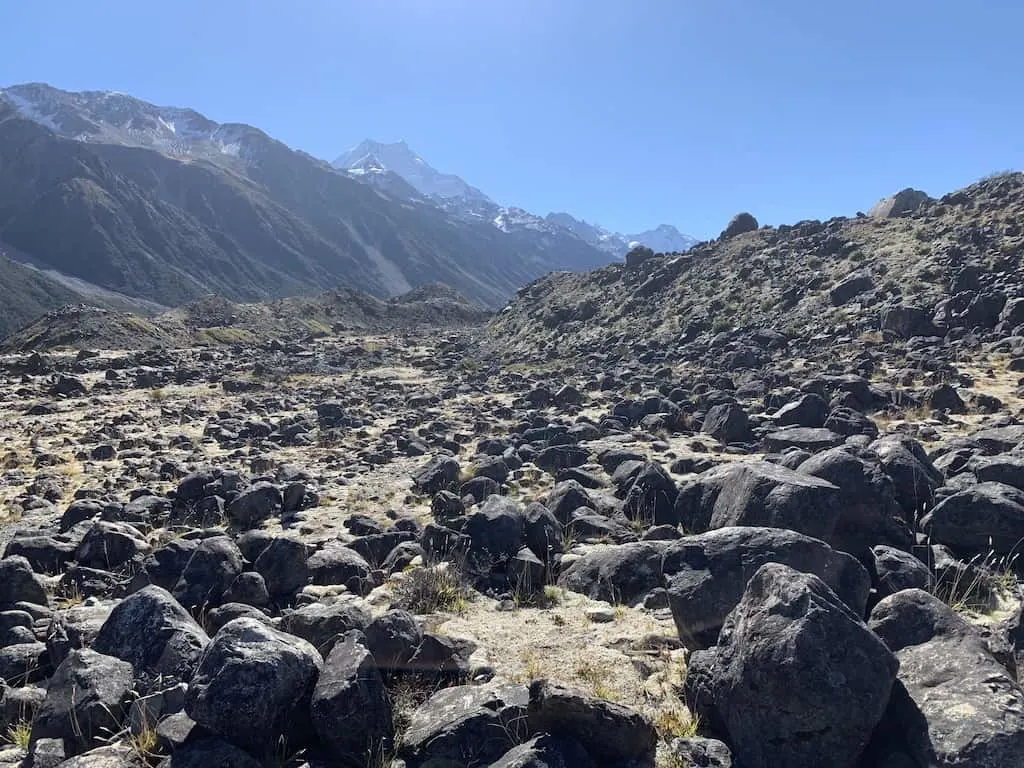
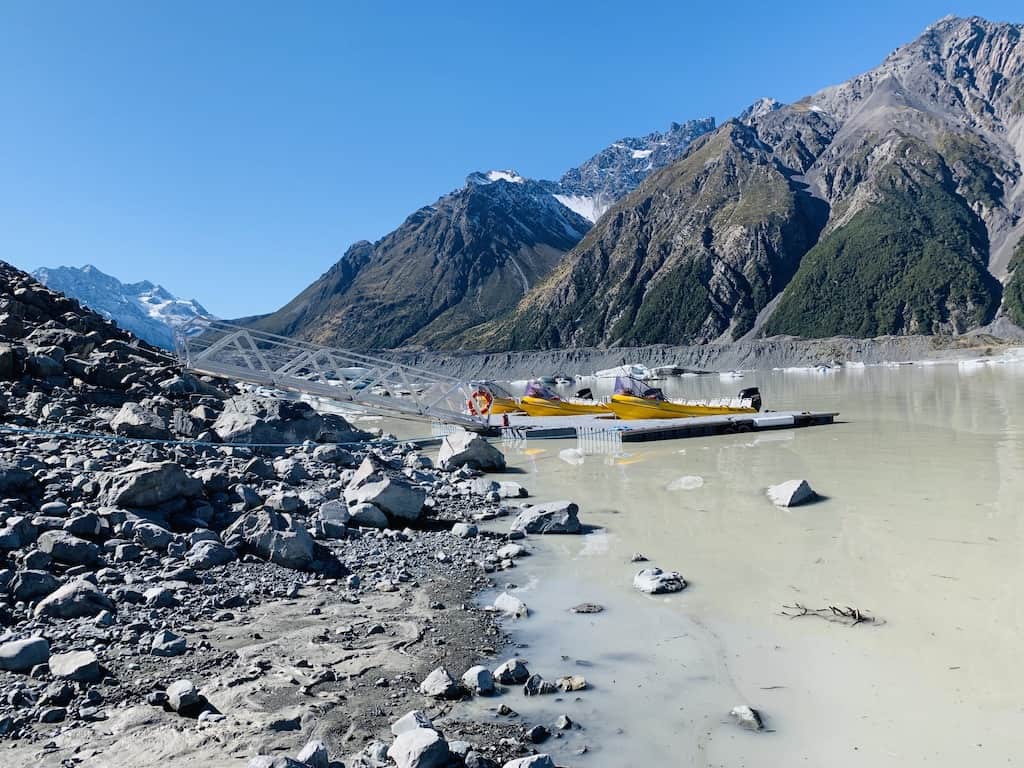

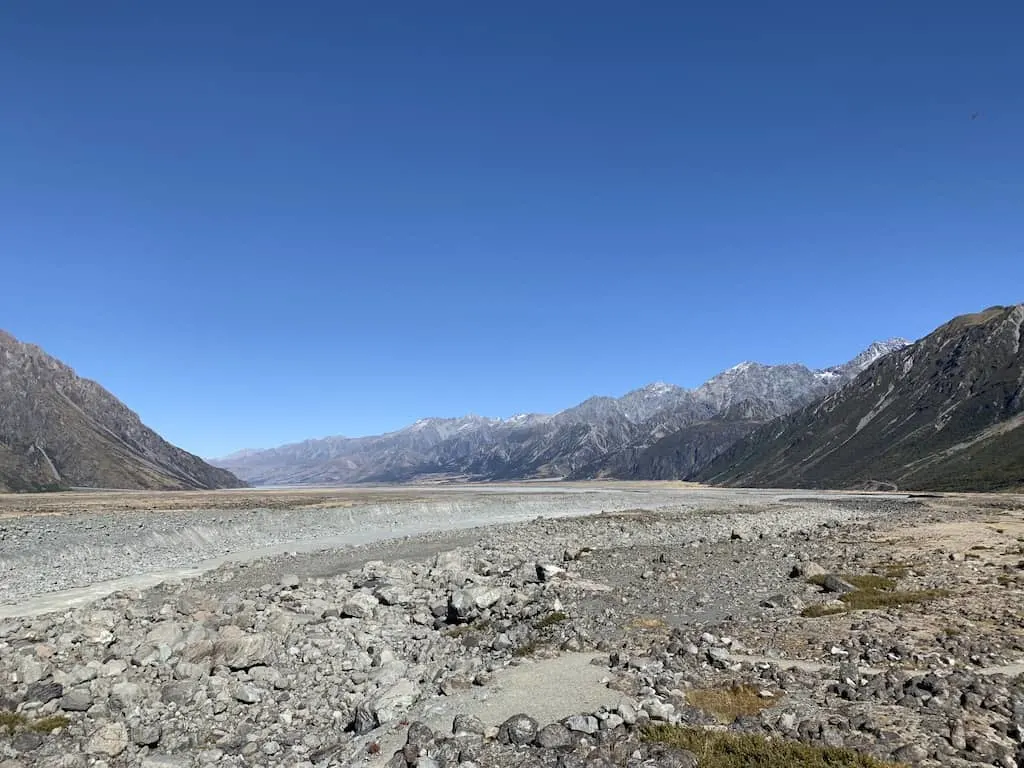
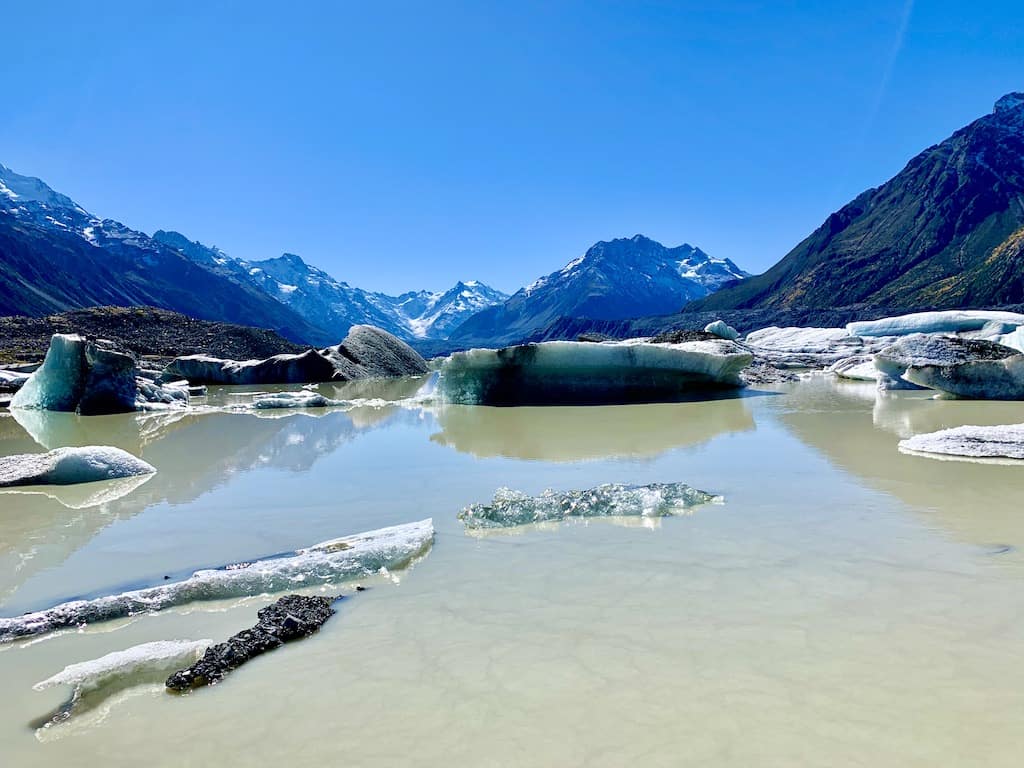
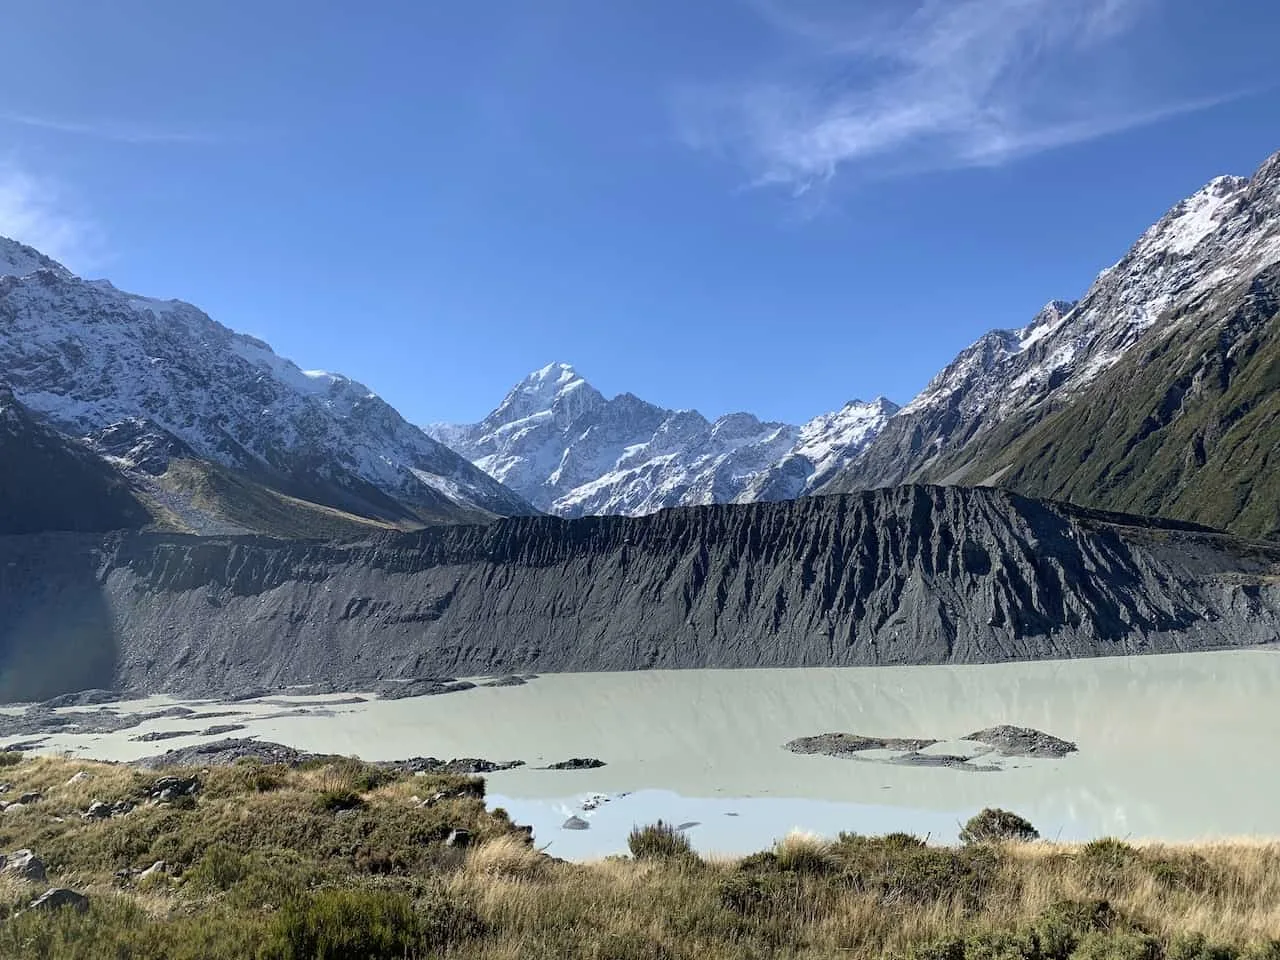
Whether or not you head to the jetty, you should definitely continue the trail to the Tasman River. At first you will get a beautiful view of the lake from up top as you see plenty of icebergs floating in the water. To your right you will see where the lake flows into the Tasman River down into the valley.
After taking in those views from up top, you can follow a rocky path right down to the edge of the lake, where you will be able to see these icebergs up close.
At this point there will be plenty of smaller pieces of ice flowing from the lake into the river, a pretty unique site to see.


Once all done at the edge of the Tasman lake/river, backtrack the same way you came as you make your way to the parking lot.
7) Other Mount Cook National Park Hikes
There are several other hiking trails around the area to choose from ranging from less than an hour to 8+ hours. Depending on your interest level you can choose from a variety of the below among plenty others.
» Check out an overview of every single hike in the Mt Cook Hikes Guide «
1. Hooker Valley Track
The “must do” hike in Mount Cook National Park would be the Hooker Valley Track. An easy 3 hour trail round trip trail, this hike takes you alongside and into the valley beneath Mount Cook itself.
During the hike you will pass by the Mueller Lake, and onto three suspension bridges on your way to the base of Hooker Lake overlooking Mount Cook in the distance.
Since it is a valley walk, there is barely any elevation gain/loss, making this a hike for nearly everyone to take part of.

2. Kea Point
An easy add on to the Hooker Valley Track is Kea Point. The hike to Kea Point starts in the same area as the Hooker Valley trail, and is a simple 1 hour round trip walk.
Once you have reached Kea Point, you will get a great view of Mueller Lake from another angle and Mount Cook out in the distance. You will also be able to see parts of the Hooker Valley Track that you may have just completed.
» Take a look at the Kea Point Track Guide to get you prepared for the trail

3. Red Tarns
If you are looking to get some views from above, one option is the Red Tarns Track. This track will take you above the valley with views of the glacier lake and Mount Cook out in the distance.
Now the track is full of plenty of stairs as you make the 300 meter ascent. But once up top you will be able to relax and take in those views before making your way back down in the direction you came.
» Take a look at the Red Tarns Track Guide to get you prepared for the trail

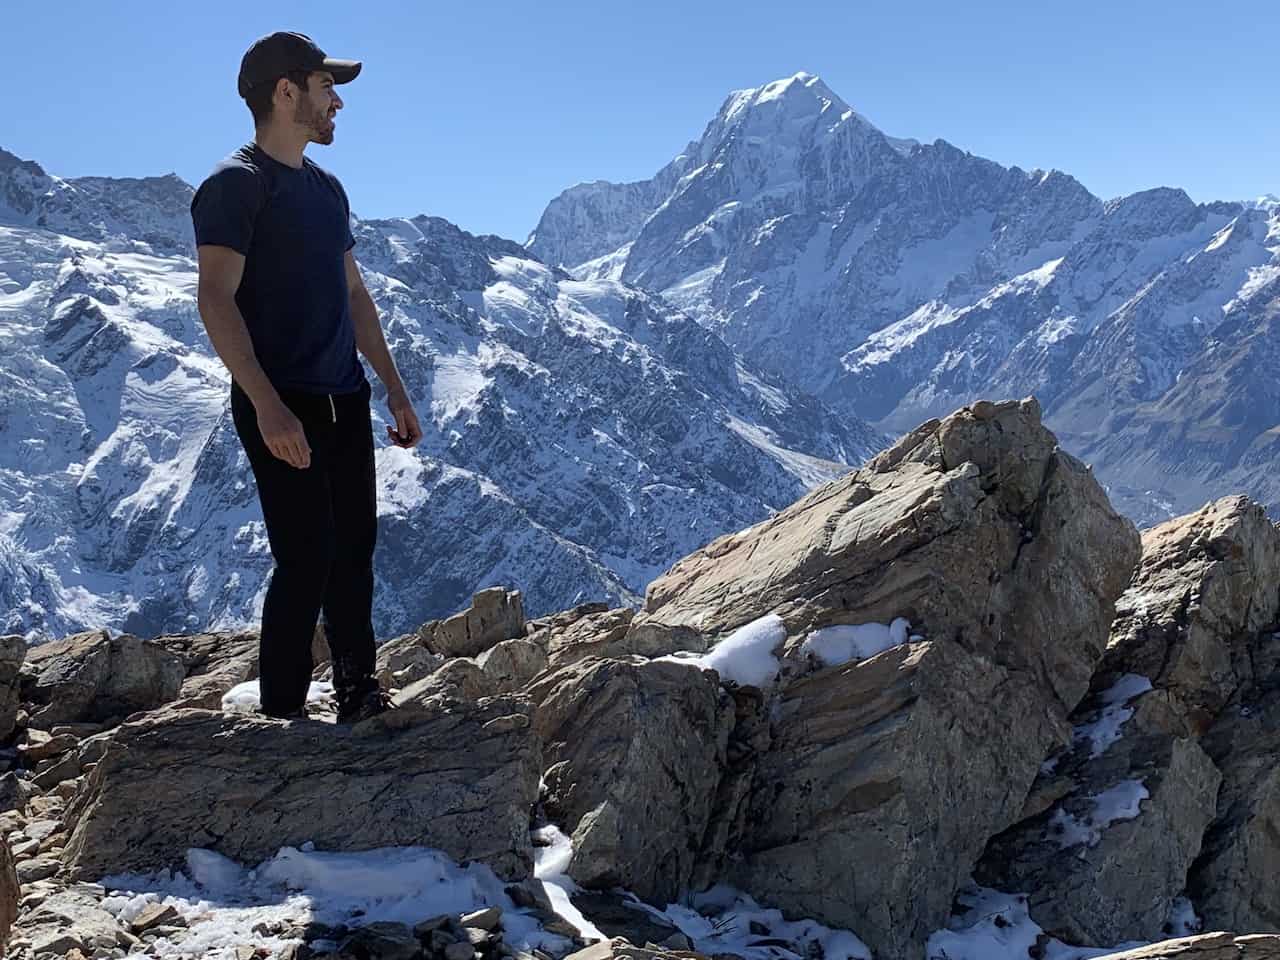
4. Mueller Hut
The most demanding of hikes in the Mount Cook region is that of the Mueller Hut. While many may opt to do the hike in two days, it can also be done in one day instead.
Expect the total round trip to be around 6-8+ hours depending on fitness level and the amount of time you want to spend at various viewpoints and the hut itself.
The track begins with 2000+ stairs (as part of the Sealy Tarns track), before continuing the ascent on steep rocky ground towards the Mueller Hut.
Throughout the hike you will be taking in views of the lakes down below, with Mount Cook out in the distance. As you get higher, the views just get better and better.
» Take a look at the Mueller Hut Track Guide to get you prepared for the trail
Note: The Sealy Tarns Track is another option here if you do not want to complete the full trail to the Mueller Hut. Set aside about half the time if you are looking to just head up to the halfway point to the Tarns.
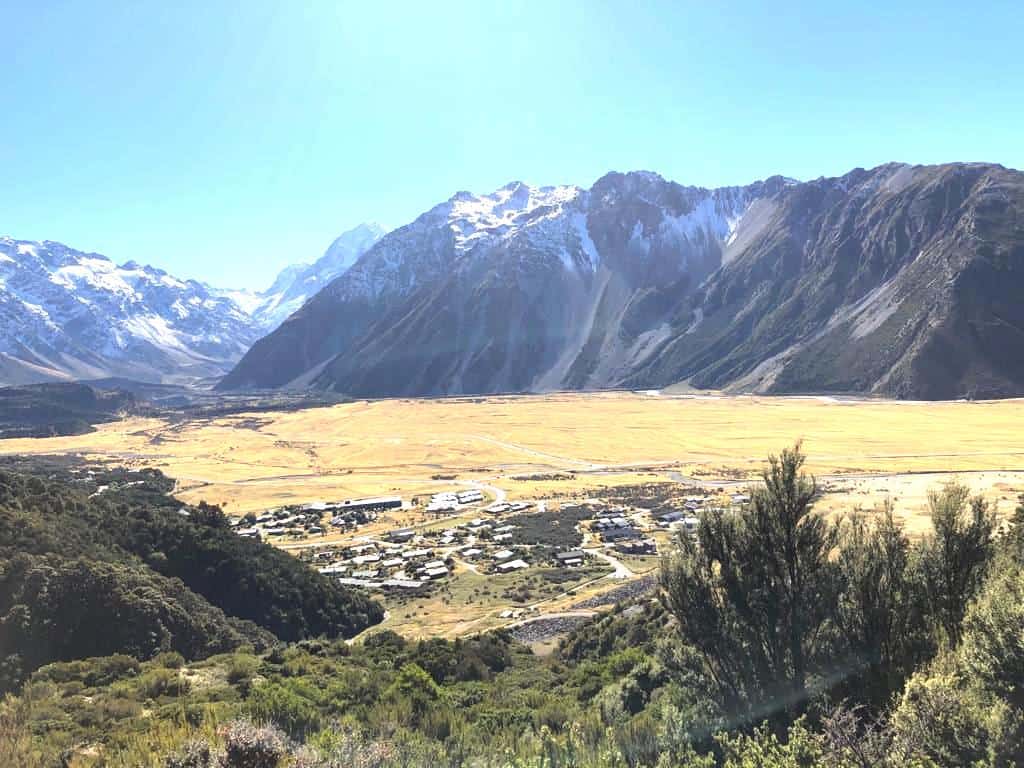
8) Where to Stay in Mount Cook Village
The village of Mount Cook is pretty small altogether. There are basically just a few hotels and a couple restaurants that make up the town center.
Now while there isn’t much going on per se in the village, it is the most convenient of options if you are looking to take part of the various trails in Mount Cook National Park. Below are a some of those options to choose from:
If you cannot find accommodation within the village, you can also take a look at some options in the towns of Twizel and Tekapo, which would be some of the closest main towns from Mount Cook.
That about does it for a combined hiking guide to the Blue Lakes and Tasman Glacier View Track & Tasman Lake Track.
Don’t forget to check out the other New Zealand itineraries and guides up on the site and feel free to ask any questions down below. Have fun out there and safe travels!


Karen Woo
Saturday 30th of September 2023
Hi Charles, I am really enjoying your blog and photos. I am planning a 3-week trip to New Zealand for October/November 2024. Is it feasible to drive from Christchurch to Mt. Cook Village in one day? We hope to take the scenic route from Christchurch to Lake Tekapo (SH 77, 72 & 79) which I know is longer than the more direct route. At first I thought we would spend one night in Lake Tekapo and 2 nights in Mt. Cook Village. Now we think we prefer to spend all 3 nights in Mt. Cook Village instead of spending a night in Lake Tekapo. Does it make more sense to do this? I read somewhere there is more lodging and restaurant choices in Lake Tekapo but I think it would be more enjoyable and practical to spend all 3 nights in Mt. Cook Village.
And is 3 nights a good amount of time for Mt. Cook? My husband and I are in our 70's. We are not heavy duty hikers but would like to take some of the easier, flatter walks, including perhaps the Hooker Valley Track. And a small boat tour would be nice.
Thank you, Karen Woo
Charles
Sunday 1st of October 2023
Hi Karen - glad you have enjoyed the posts. To help answer your questions..
Yes, it is possible to do that route in one day as long as you get an early start. You dont want to rush through some of the highlights on the Lake Tekapo to Mt Cook scenic drive. If you get an early enough start, you will be able to make several stops along the way around Tekapo and Pukaki, and along the drive up to Mt Cook.
While there are more hotel options in Tekapo, Mt Cook is where you will find the top hikes in the region. I would recommend all three nights there as it gives you more flexibility just in case the of poor weather. You can enjoy shorter hikes such as the Blue Lakes, Tasman Lake, Hooker Valley, Kea Point, and also have time for some activities as you mentioned.
Hope you have a great trip