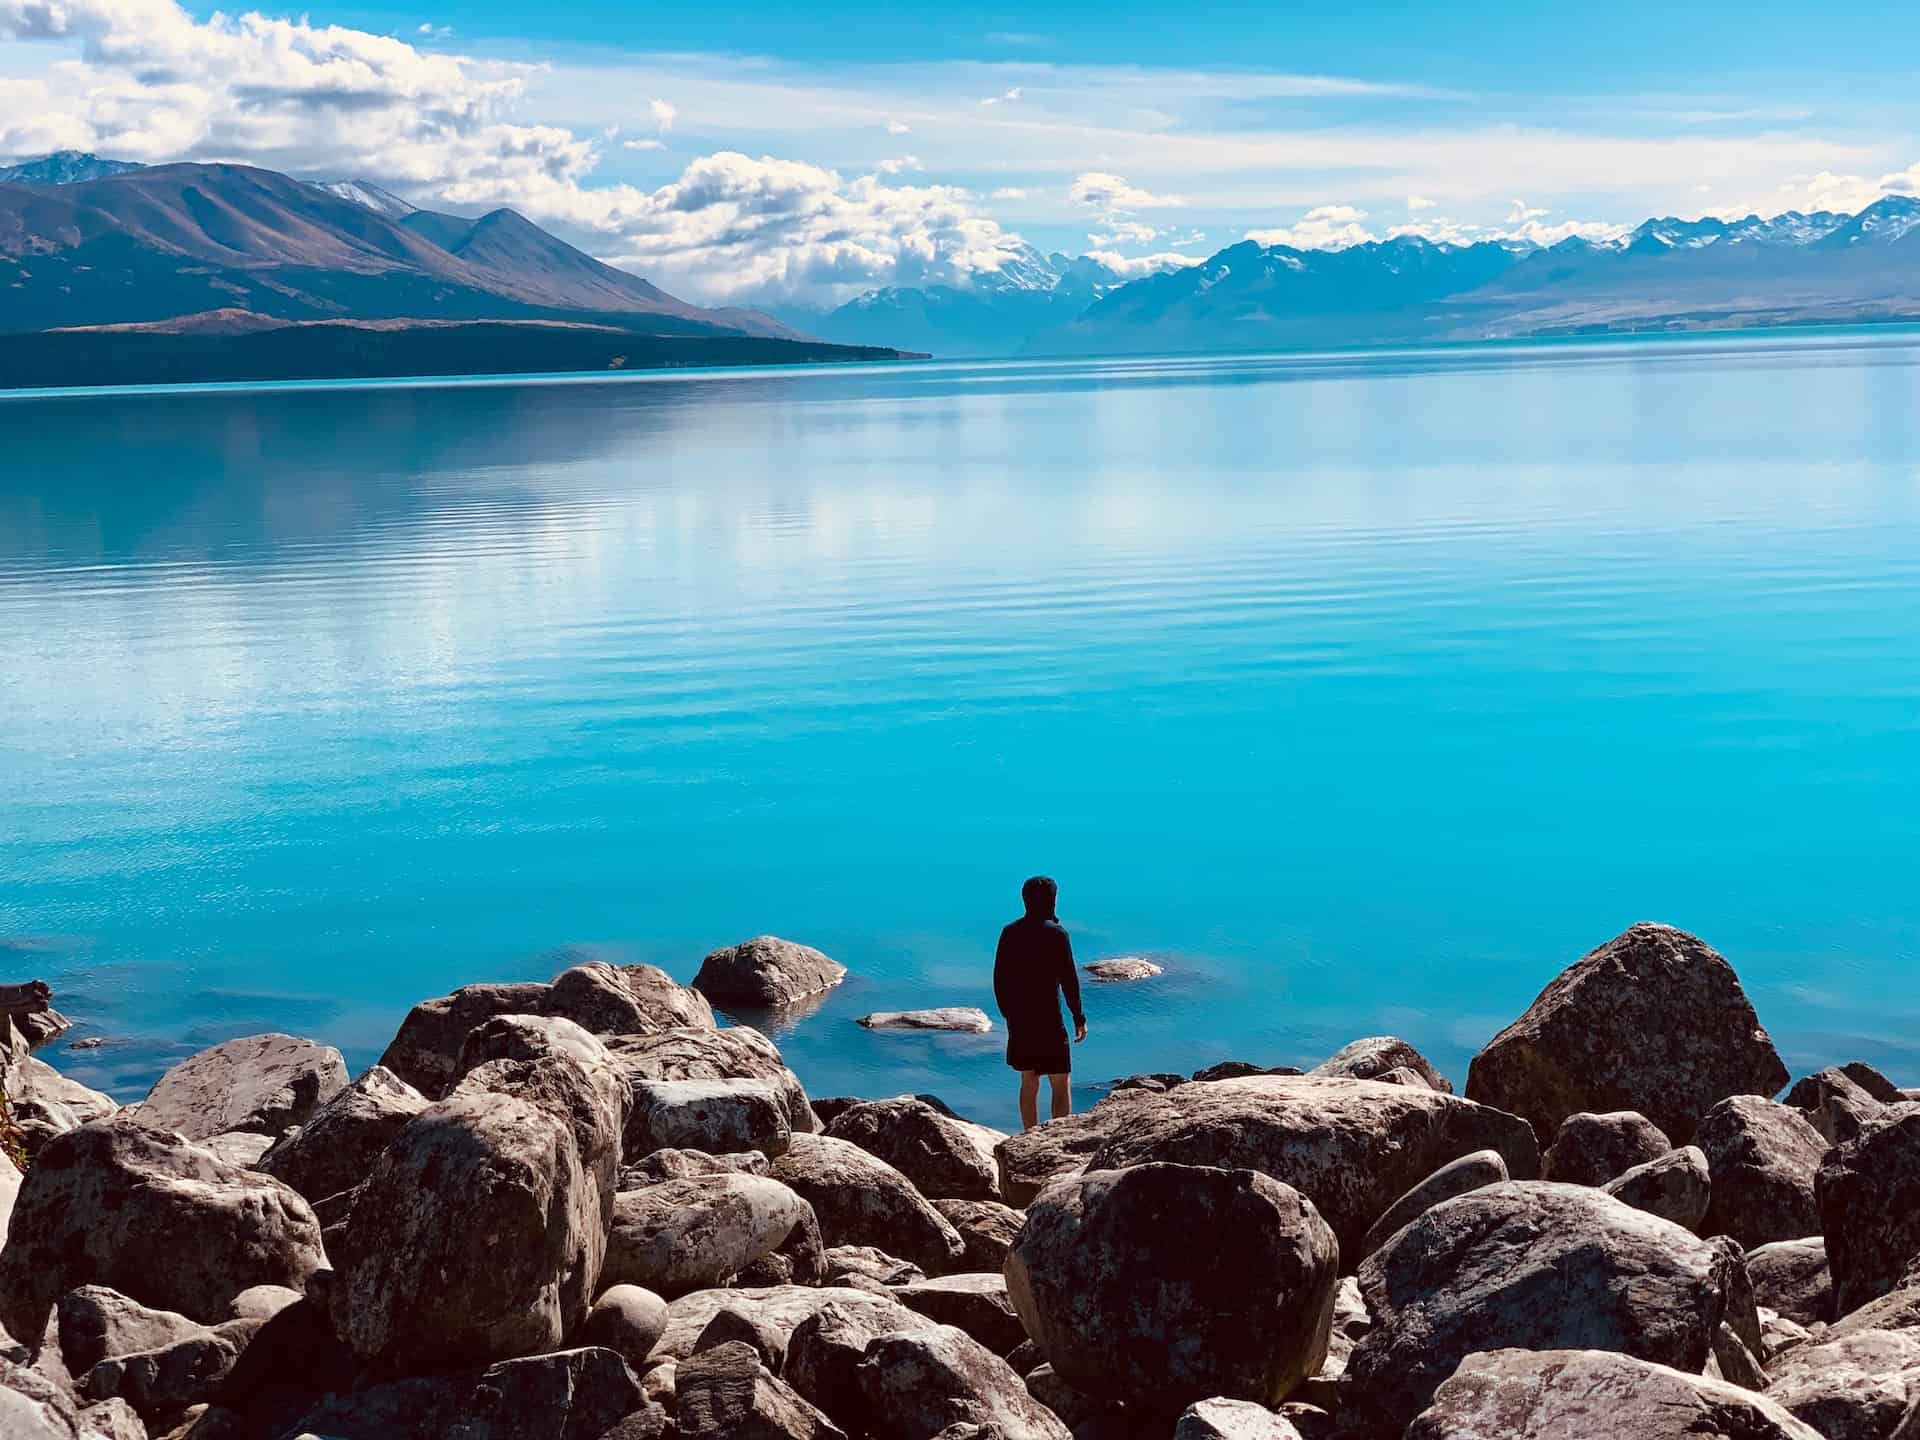

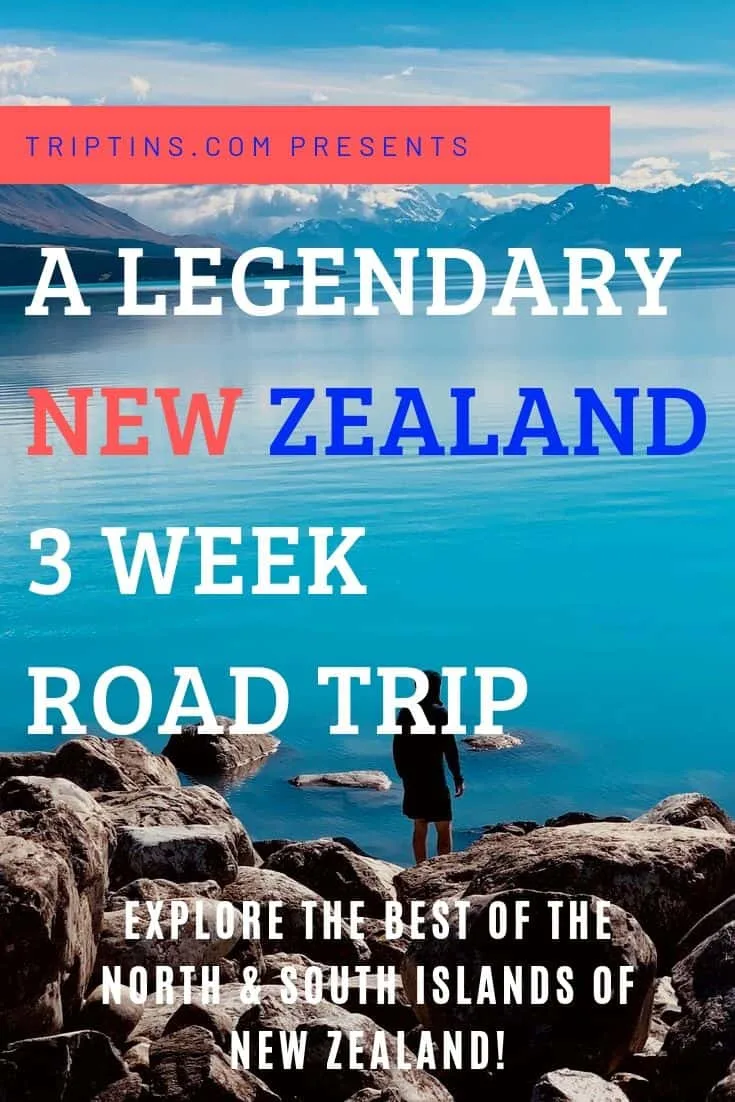
When looking for countries that have it all, New Zealand is high on the list. Do you want beautiful natural landscapes including mountains, valleys, and beaches? How about some crazy adrenaline activities like skydiving or bungy jumping? Maybe you are interested in doing some of the best hikes that the world has to offer?
Well, New Zealand has it all for you and much, much more! And if you are looking to plan a New Zealand road trip itinerary for 3 weeks around the North and South Islands, then you have come to the right place.
* Affiliate Disclosure: This post may contain affiliate links, which means I may receive a commission if you make a purchase through the links provided, at no additional cost to you. Thanks for supporting the work I put into TripTins!
New Zealand Overview
There is just so much to do around the country and having 3 weeks to see the best of the North and South Islands is a great amount of time to enjoy it all. You can choose to follow it from North to South as this New Zealand road trip will go over, or you can reverse it and head in the opposite direction.
This itinerary will go over one week on the North Island followed by two weeks on the South Island.
Before jumping into the 3 week itinerary, I wanted to point out some important things to know that you should take into consideration when planning your trip…
Renting a Car: Since this is a New Zealand ROAD TRIP, your best bet here is to rent a car (or campervan if that is your thing) to get yourself all around the North and South Islands. It would be nearly impossible to complete everything on this itinerary without your own car, so I would highly recommend doing so.
Believe me, it will make everything so much easier for you throughout the entirety of the trip. With this itinerary, you can choose to pick up the car at either Auckland Airport or in Auckland City and then drop the car off in Christchurch, Nelson or Wellington – whatever is easiest for you!
Be sure to check out Rentalcars.com when it comes to renting a car in New Zealand.
The site will show you car options & prices from a variety of companies. This ensures that you will be able to choose the perfect car (and deal) for your trip to the country.
Driving in New Zealand: Continuing on the driving topic…remember that New Zealand drives on the left hand side of the road and the country also has some important driving rules/signs to follow. You should also expect there to be a lot of driving that takes place to get in between cities.
While some routes may seem short on the map, the windy roads can really take some time. Having a couple people switch off between driving can be very helpful during these longer drives.
Take a look at the Driving in New Zealand Guide for everything you need to know about driving the roads.

A Full 3 Weeks: Assume that this road trip is 21 FULL DAYS. That means you should plan to arrive early on day 1 or the night before, and then leave later on day 21 or sometime on day 22.
If you are coming from a farther away place like the US or Europe, you will probably need to set aside closer to ~24 days to account for travel time.
Flight Logistics: If following this itinerary, you will want to fly into Auckland and then fly out of either Christchurch, Nelson or even Wellington. The last stop on the itinerary is Abel Tasman National Park, which is only an hour away from the Nelson Airport.
You could do a round trip to/from Auckland and then have one internal flight on the last day from Nelson to Auckland.
Outdoors & Nature: This itinerary is very outdoors focused from beginning to end. There is a ton of natural beauty to see all throughout both islands and this road trip will take you to plenty of it.
If you are not someone who wants to spend so much time outdoors and a good amount of time on your feet, then this trip may not be for you.
Time of Year: While you can take part of most of this itinerary year round, the optimal time of year would be from September to May.
Since there are a lot of hiking and outdoors activities involved, snow and low temperatures can get in the way of completing certain things. On top of that you will be dealing with slick curvy roads and shorter days during the winter season.
Be Flexible: One thing you can never control on a vacation is the weather. Unfortunately, some parts of New Zealand can be quite frustrating at times.
The wind, the rain, the clouds – all of these can get in the way of completing certain activities or hikes. My best advice here is to just stay as flexible as possible.
I know this may be difficult though when dealing with a finite period trip. But if the weather is looking very poor in a certain city, maybe just continue along and spend some more time in the next place instead of just being stuck in the rain.
Both Islands: This itinerary combines the New Zealand North Island Itinerary and New Zealand South Island Itinerary I have up on the site.
You can head on over to either one if you happen to be interested in just heading to the North or South, or just want a bit more detail on each island.
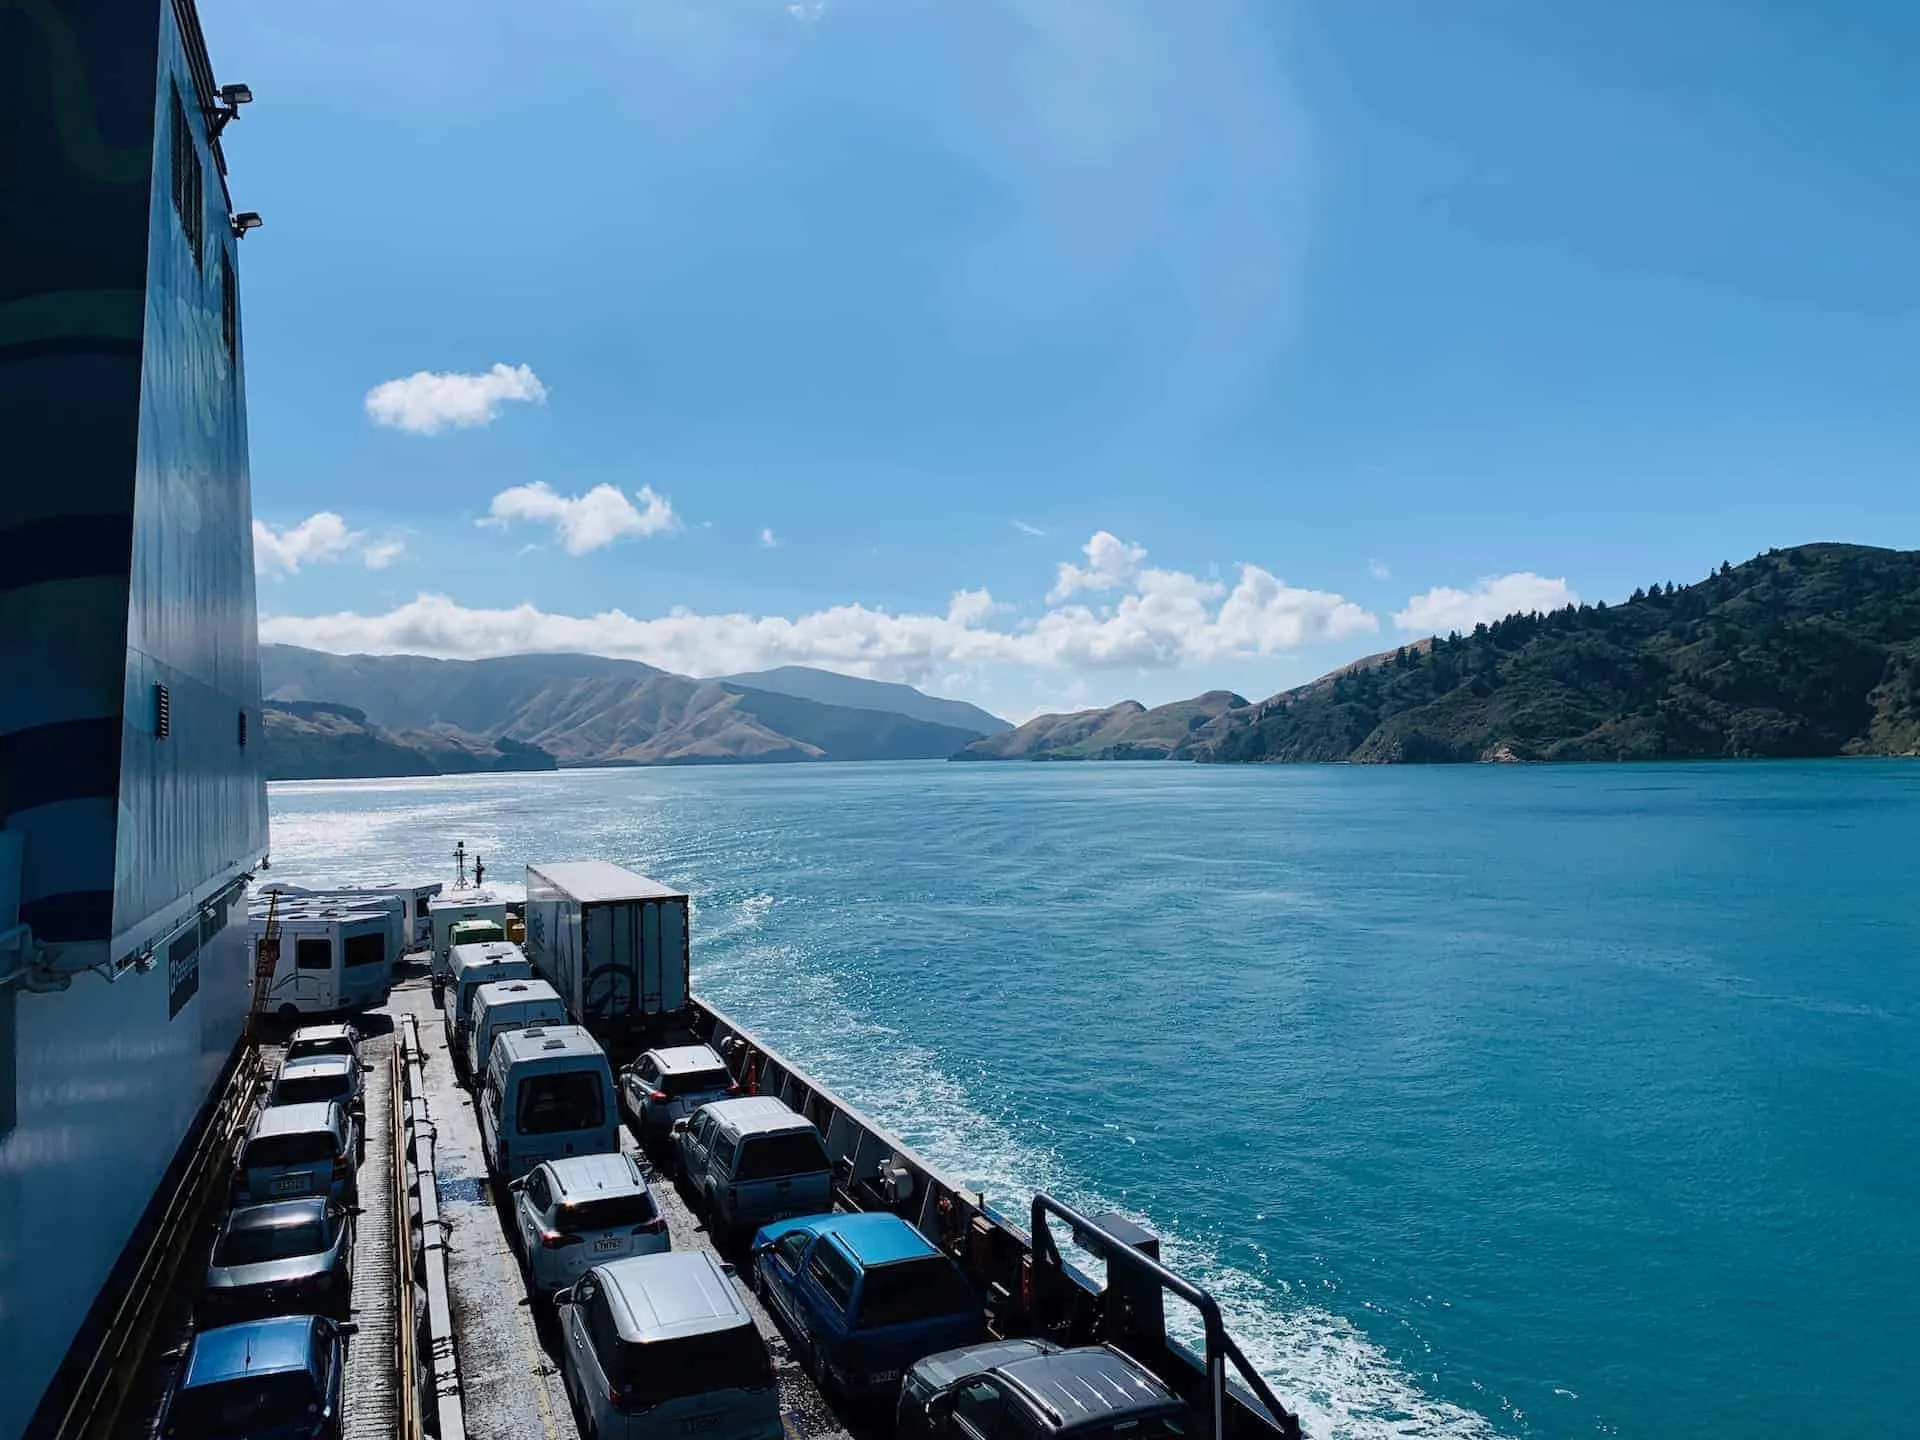
Cook Strait Ferry: To get between the North and South Island, you will need to take a ferry across the Cook Strait. Don’t worry though, as these ferries can load cars onto them and have you between the islands in less than 4 hours.
The Wellington to Picton Ferry Guide goes over all you need to know about making the journey.
Helpful Tips: And finally don’t forget to take a look at the 21 Helpful New Zealand Travel Tips to get you all prepared for your trip!


New Zealand Itinerary 3 Weeks Map View
The map below shows you the type of route that you will be taking from North to South. This is just to give you a better sense of what the overall drive will look like.
It does not include each and every hike or activity mentioned throughout the itinerary. For those, head into the specific guide that will be linked in this itinerary.
A Detailed New Zealand Itinerary 3 Weeks
It is now time to dive on into the itinerary itself. This is going to be a bit of a long one – 3 weeks is a good amount of time. Much of what I write in below may be a bit more high level.
As just mentioned though, for many of the hikes or cities, I do have additional guides that will go into much more detail about certain questions you may have.
Feel free to click on those along the way to get a better idea of what to expect during this New Zealand road trip.
Since you will be visiting so many different places during your trip, I have also added in several accommodation options to choose from in each city that you will be sleeping in.
As a quick overview you will need to book hotels in the following places:
- Auckland (2 nights)
- Rotorua (1 night)
- Taupo (2 nights)
- Wellington (2 nights)
- Kaikoura (1 night)
- Christchurch (1 night)
- Mount Cook Village (2 nights)
- Queenstown (3 nights)
- Wanaka (2 nights)
- Franz Josef (2 nights)
- Abel Tasman (2 nights)

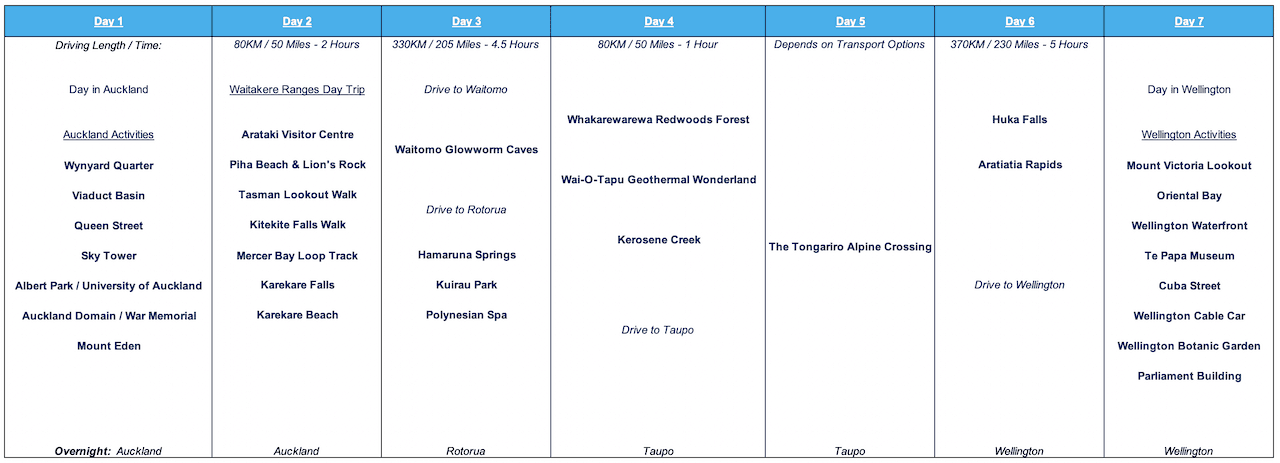

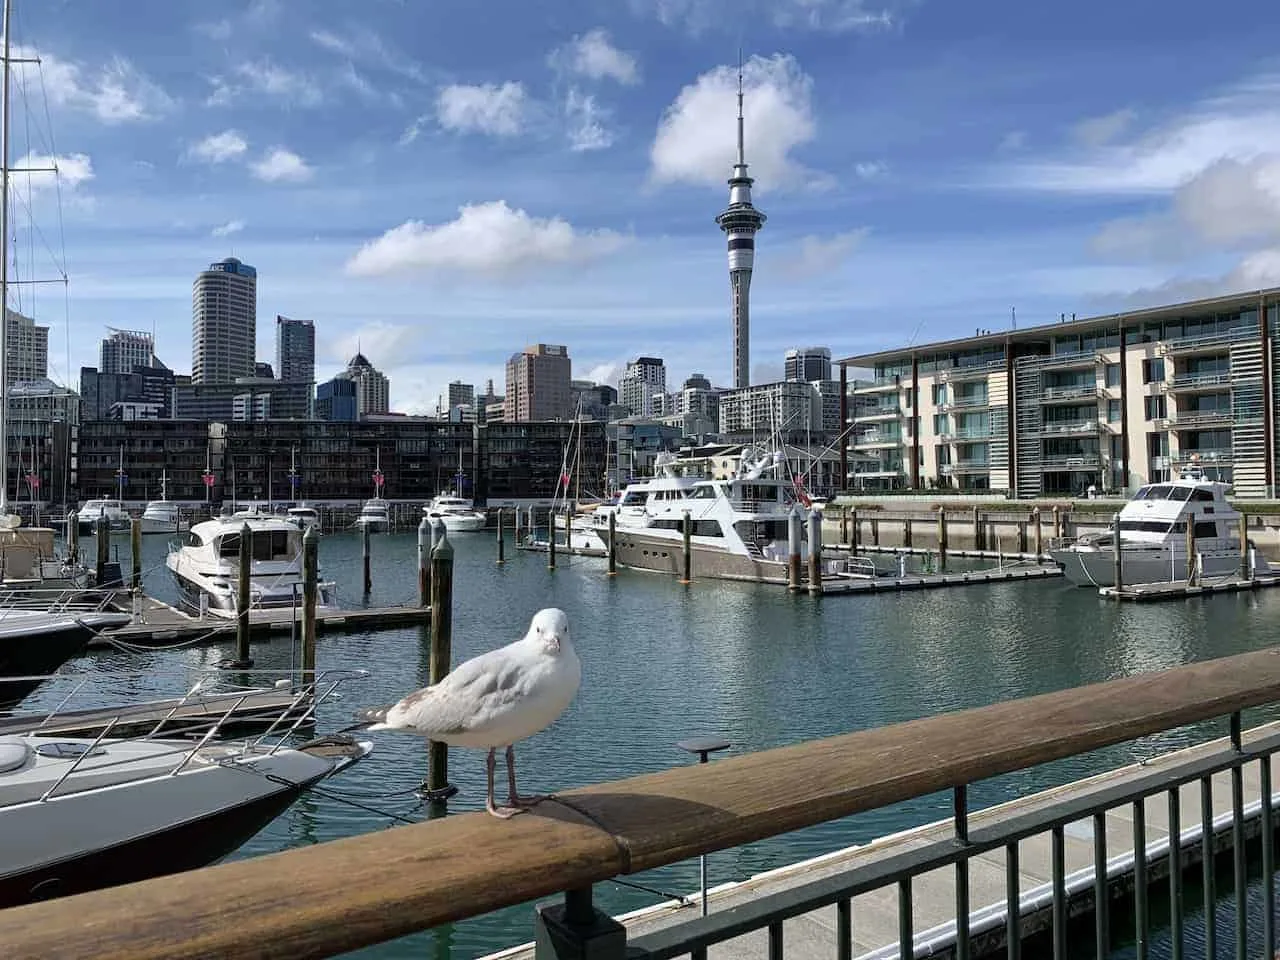
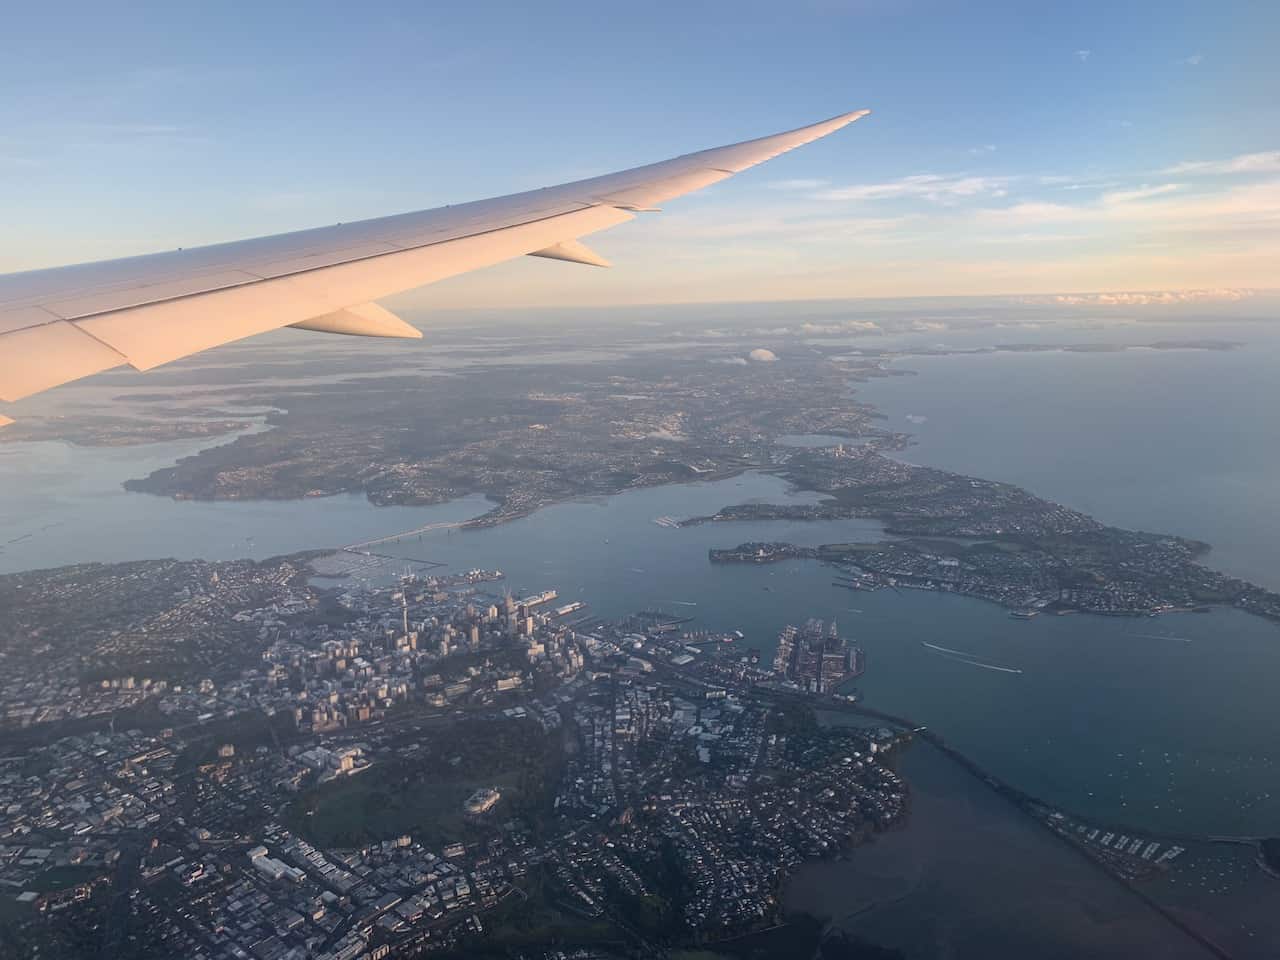
Day 1 – Auckland
Your first day of this New Zealand itinerary 3 weeks road trip will have you exploring the ins and outs of Auckland.
As mentioned before you can choose to pick up your car immediately from the airport or you can also opt to pick it up early on day 2 from Auckland city, once you are ready to head out of the city itself.
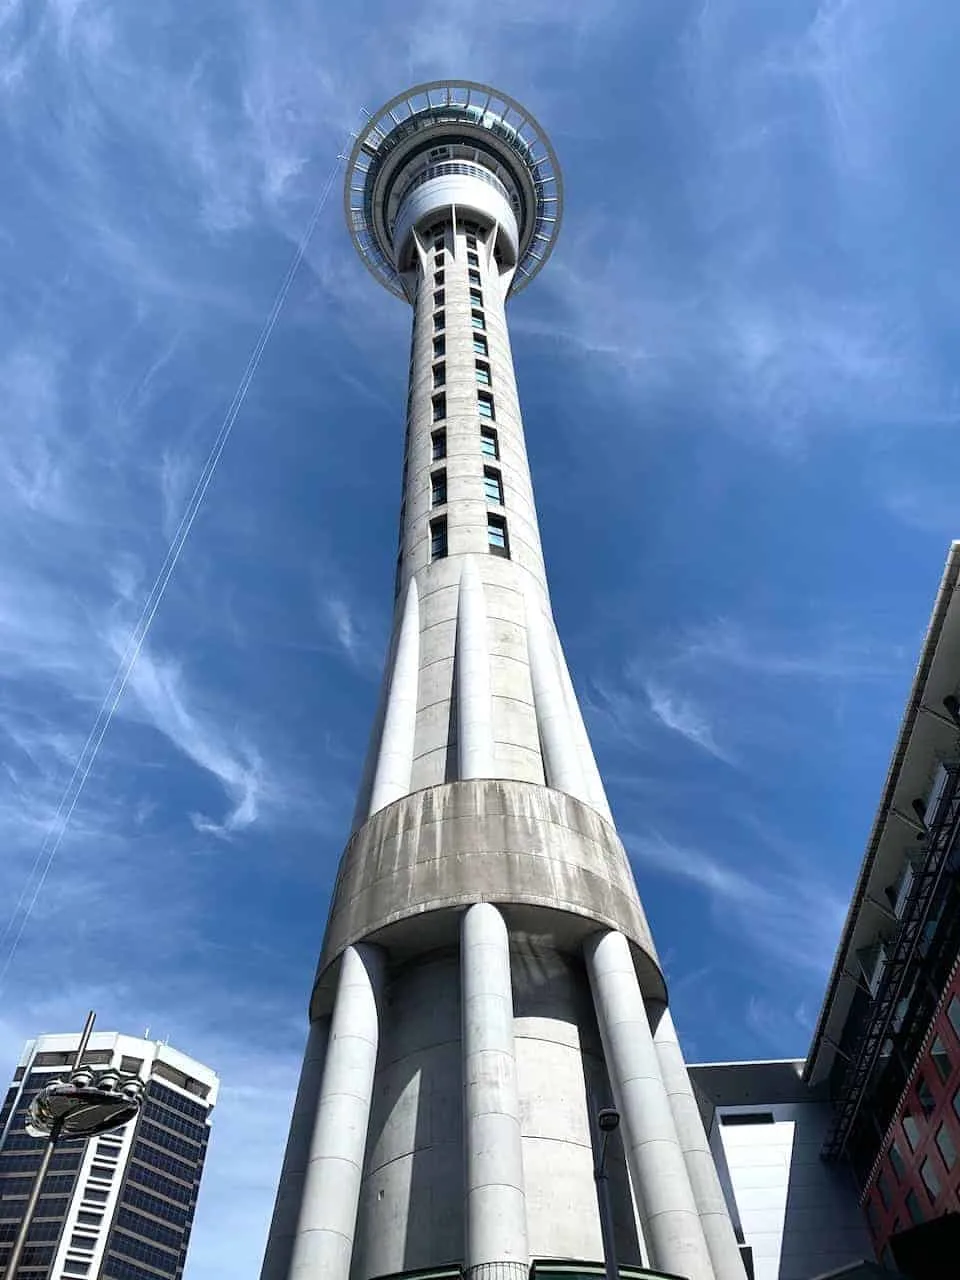
There are several main attractions to see all throughout Auckland, many of which are easily accessible by just walking around (the only time I opted for a cab/Uber was to/from Mount Eden). During my time there I visiting the following 7 places:
- Wynyard Quarter
- Viaduct Basin
- Queen Street
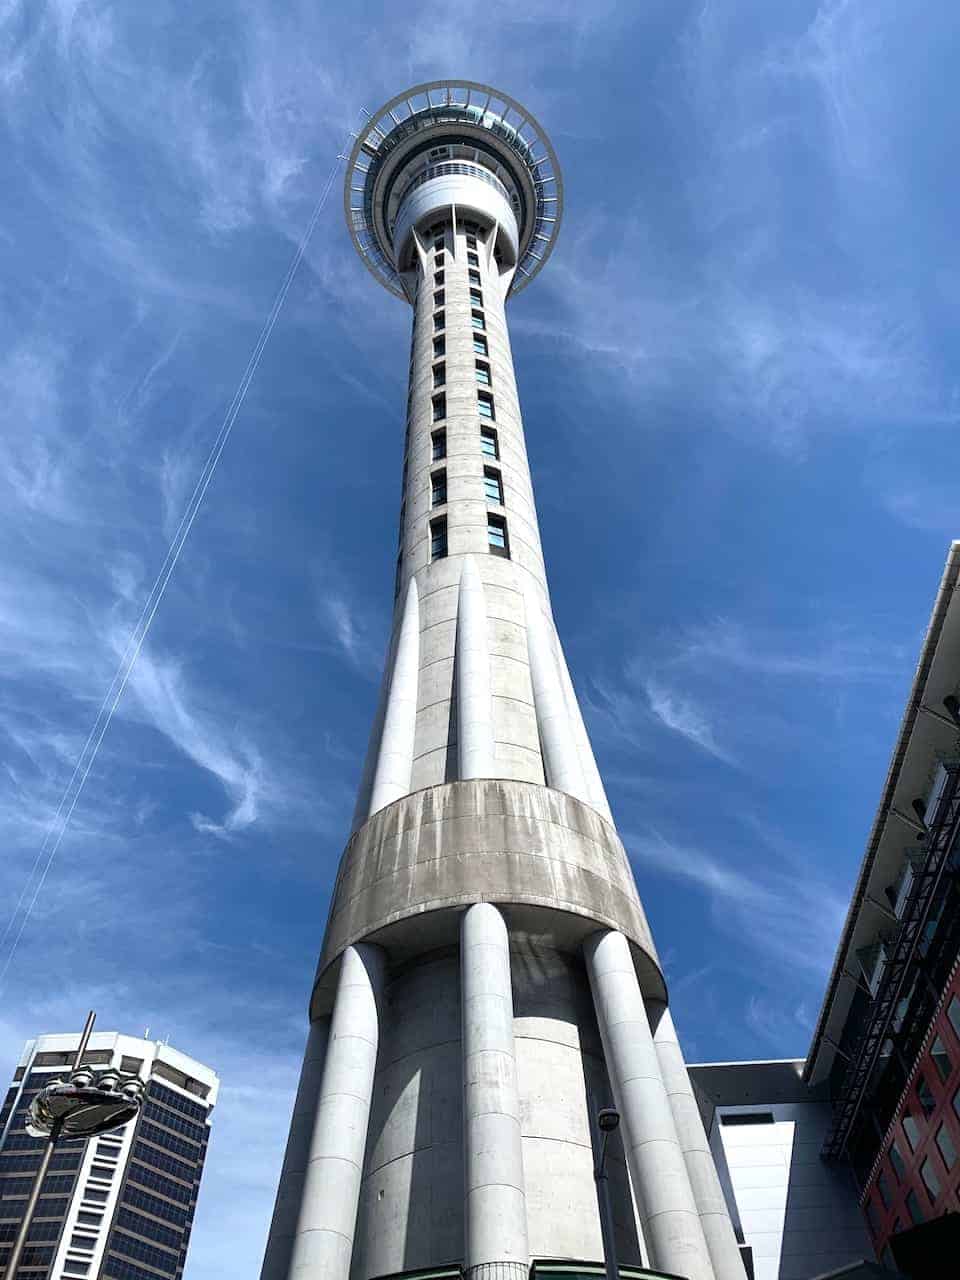
- Sky Tower
- Albert Park / University of Auckland
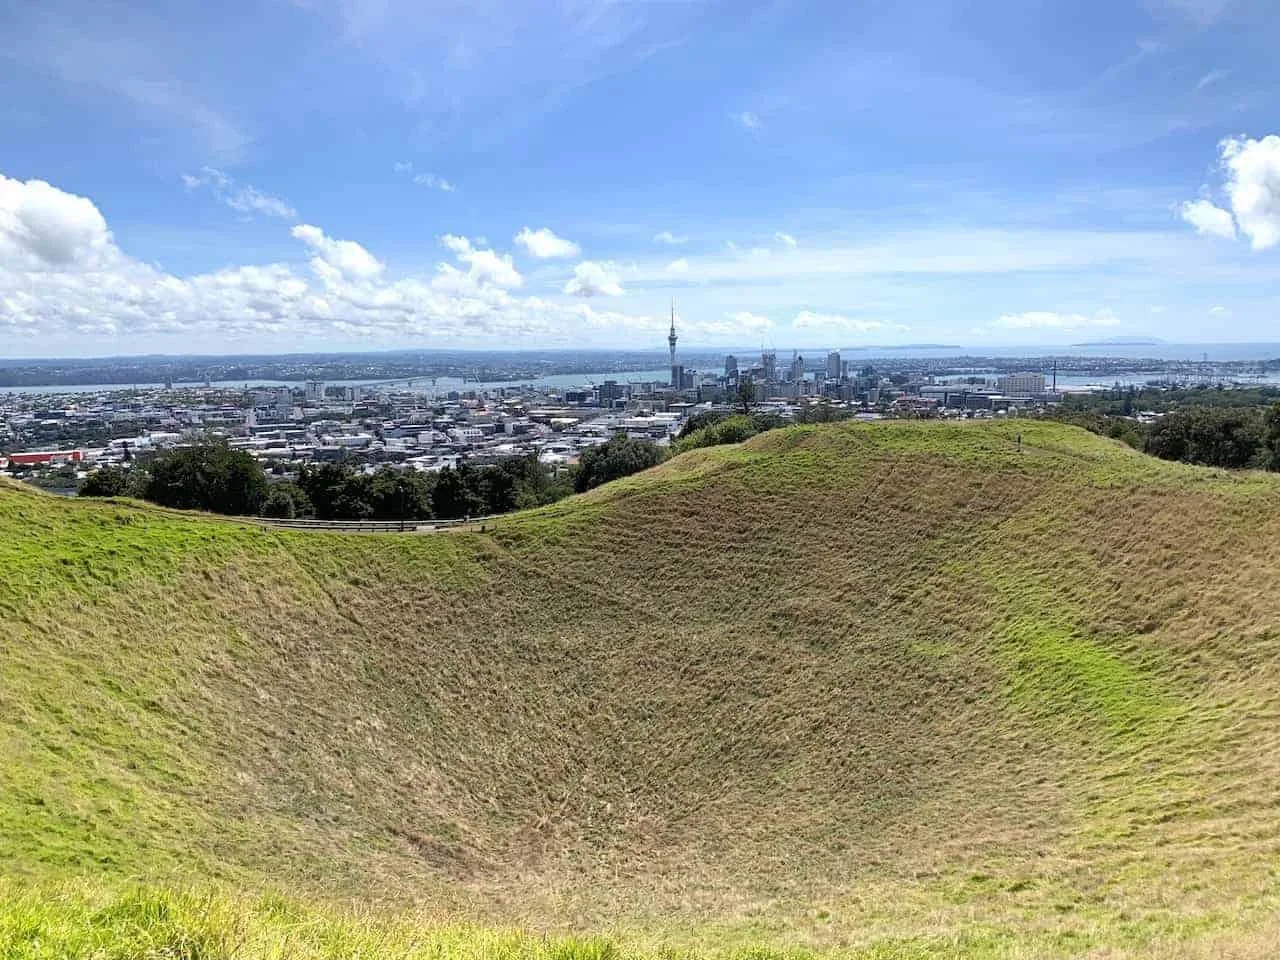
- Auckland Domain / Auckland War Memorial Museum
- Mount Eden → Learn more about the Mount Eden Crater
Learn More: The 1 Day in Auckland Guide will go over all you need to know about your time in the city
Where to Stay in Auckland (Nights 1 & 2)
- All Around: SKYCITY Hotel
- Budget: Haka Lodge
- Luxury: Sofitel Viaduct Harbor


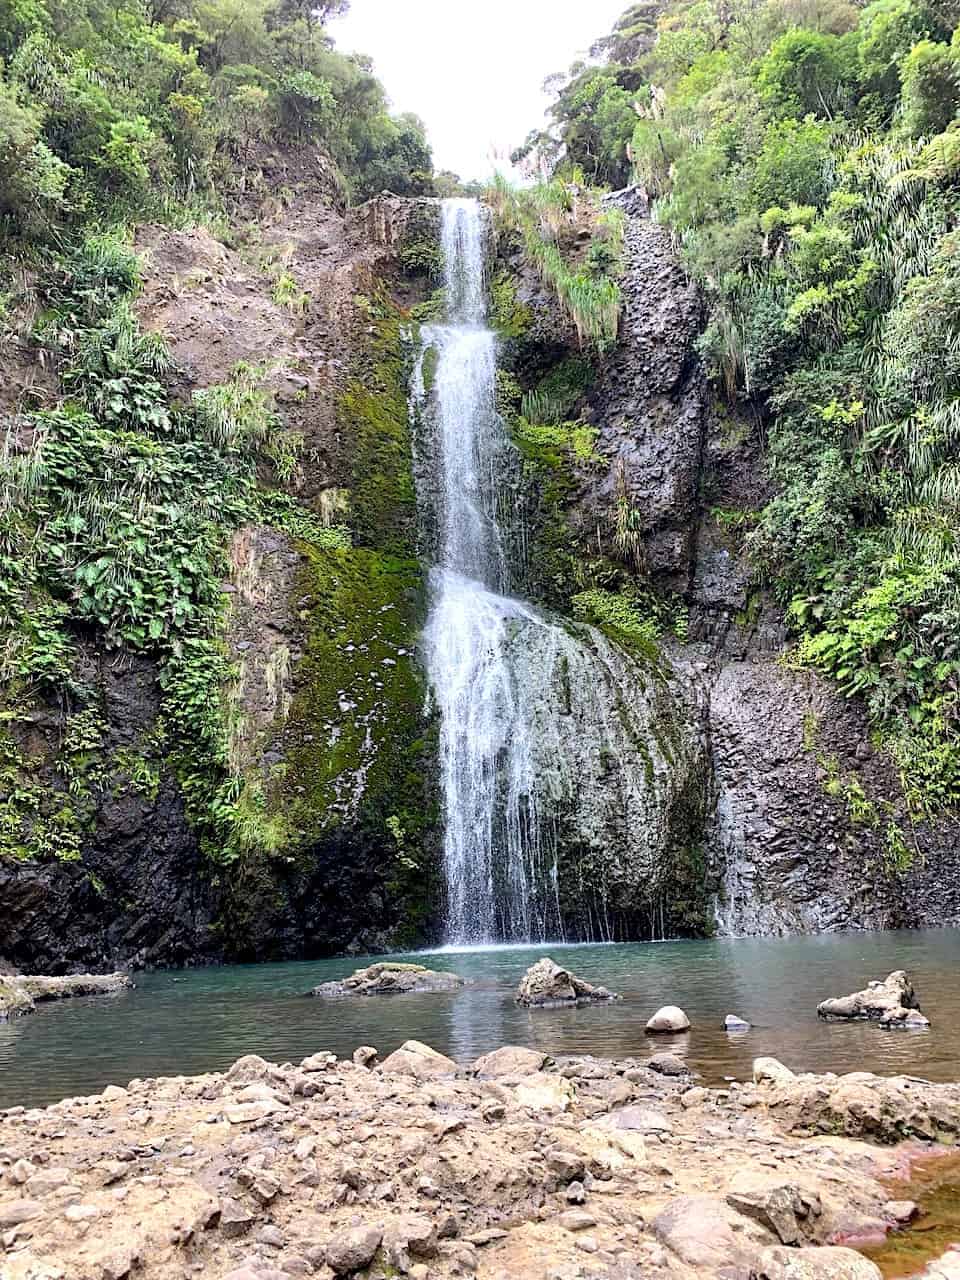
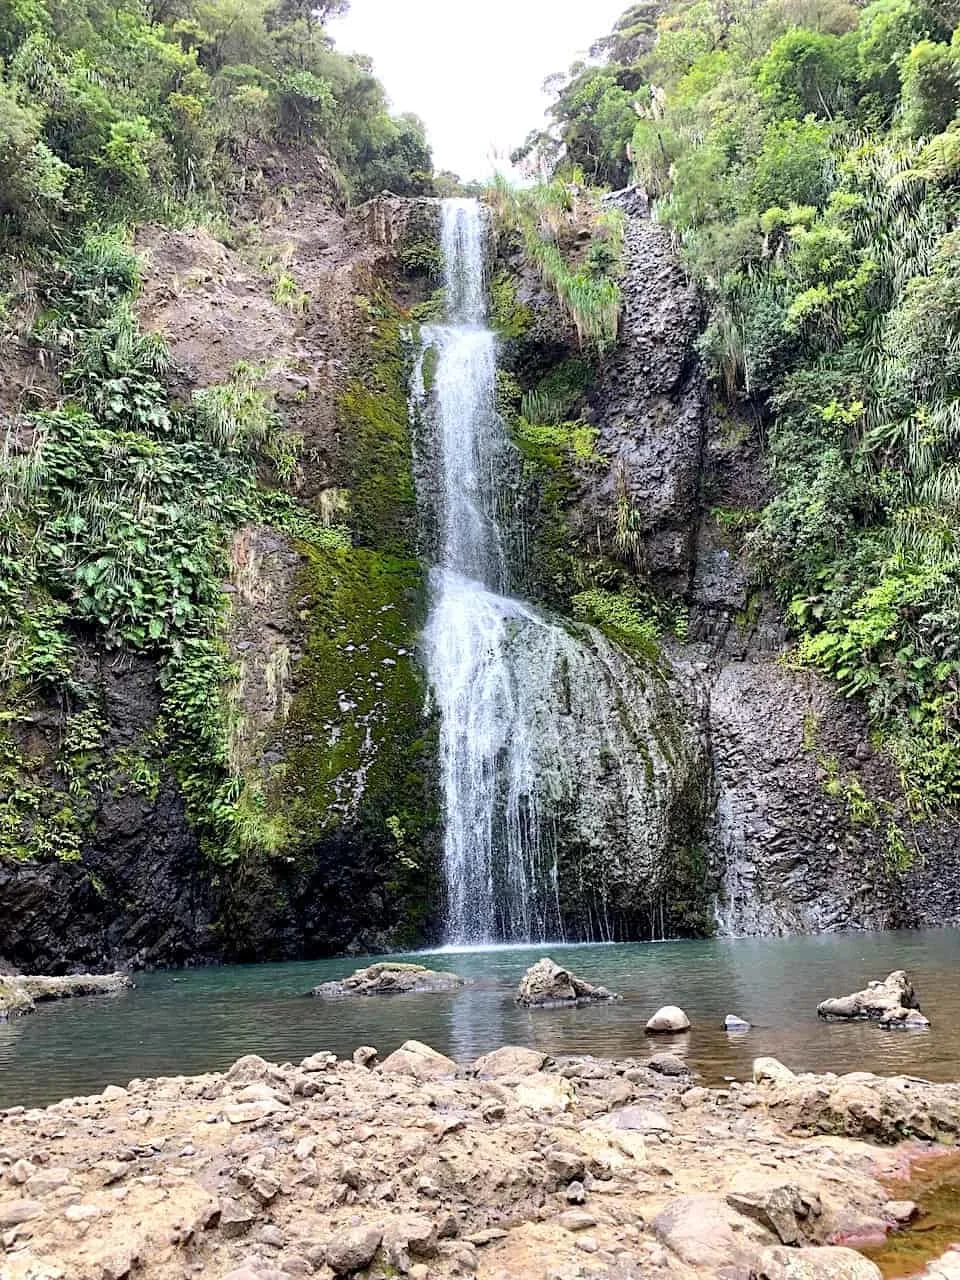
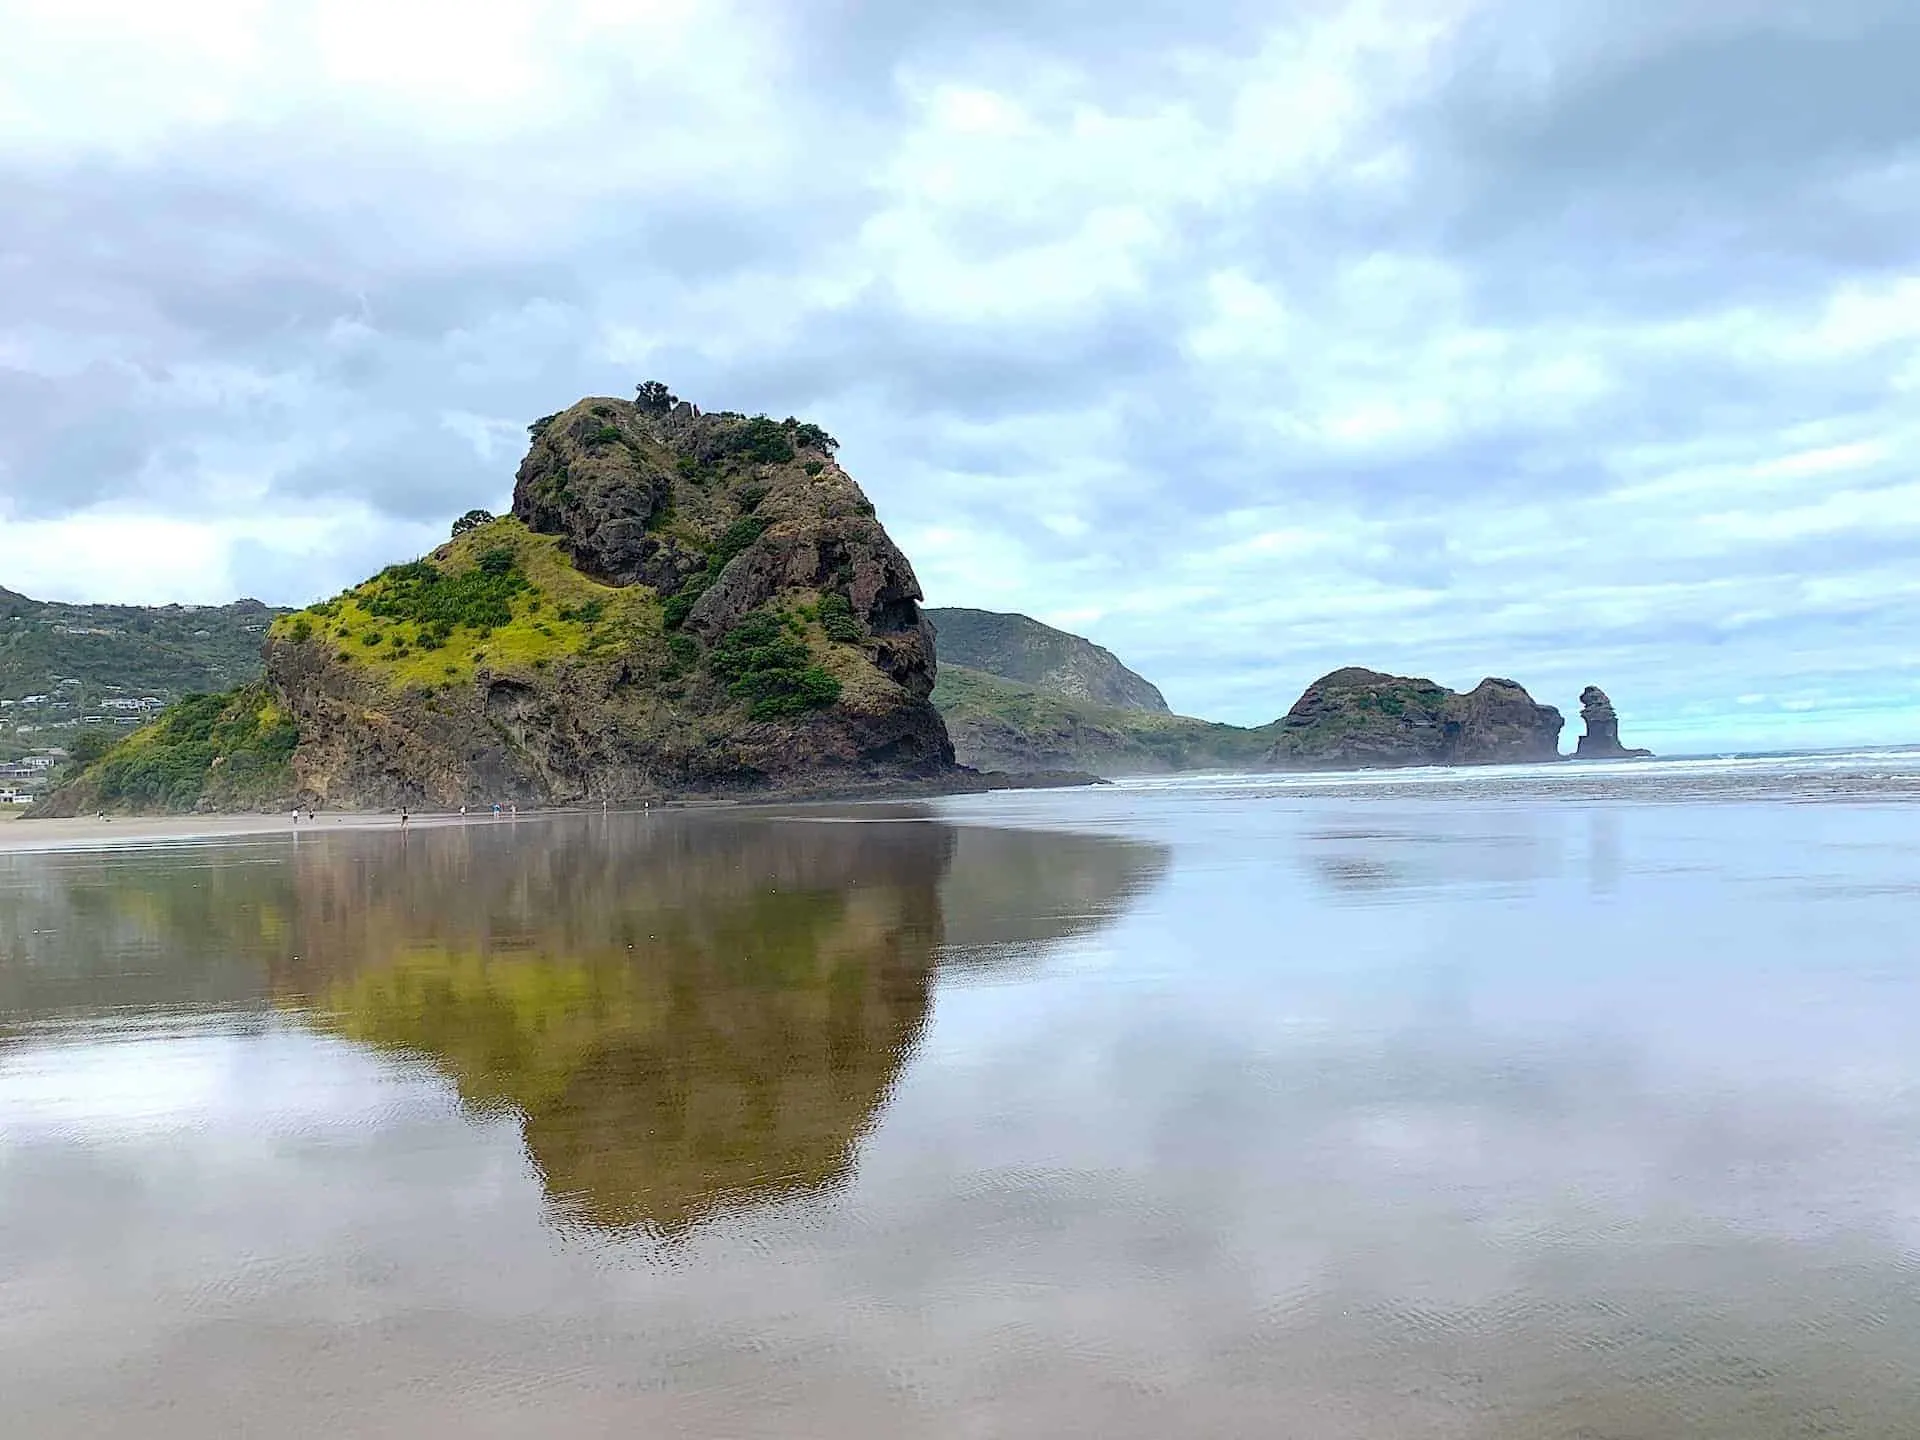
Day 2 – The Waitakere Ranges
On your second day in New Zealand, it is time to head on out to the Waitakere Ranges for a one of kind day trip.
The Waitakere Ranges are located just 45 minutes away from Auckland, and are full of hiking trails, waterfalls, and beaches.
It is a great way to be introduced to New Zealand’s nature and experience what the North Island has to offer.
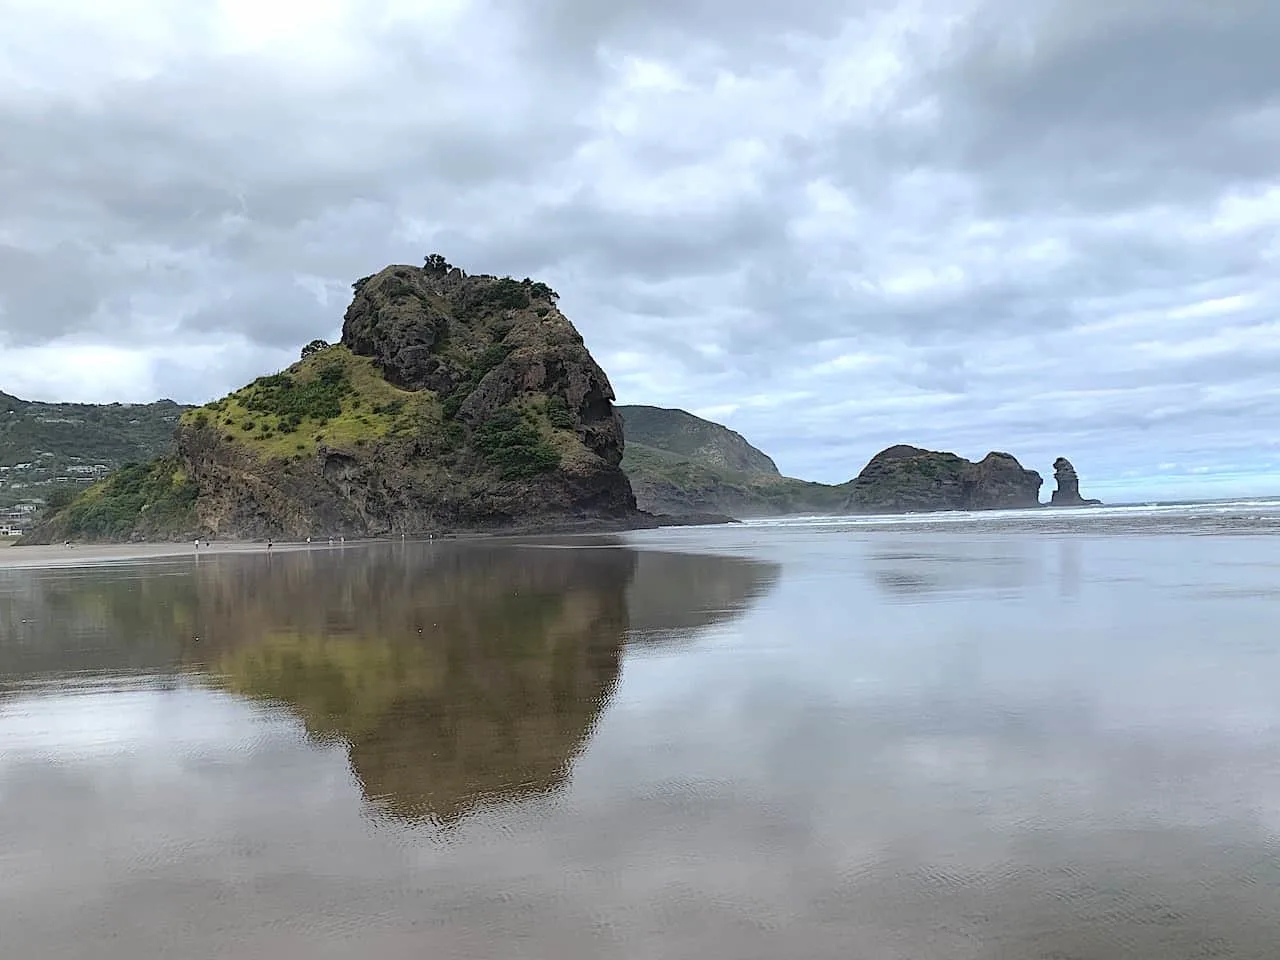
When I visited the Waitakere Ranges, I wanted to get a good taste of it all and headed off to 7 main spots all around the ranges. You can pick and choose which places / hikes are best for you depending on what you are most interested in, or you can take part of them all!
- Arataki Visitor Centre
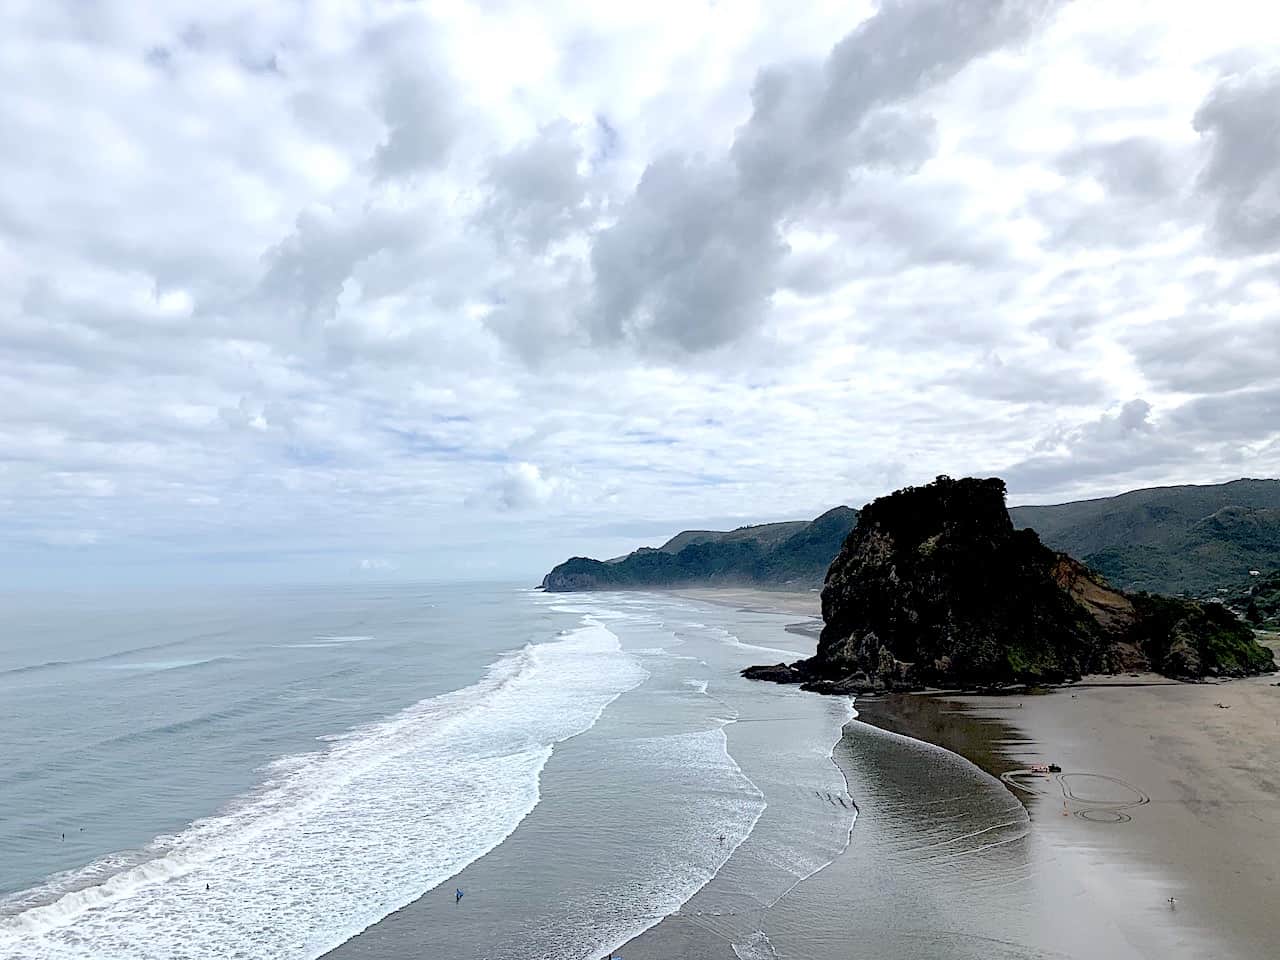
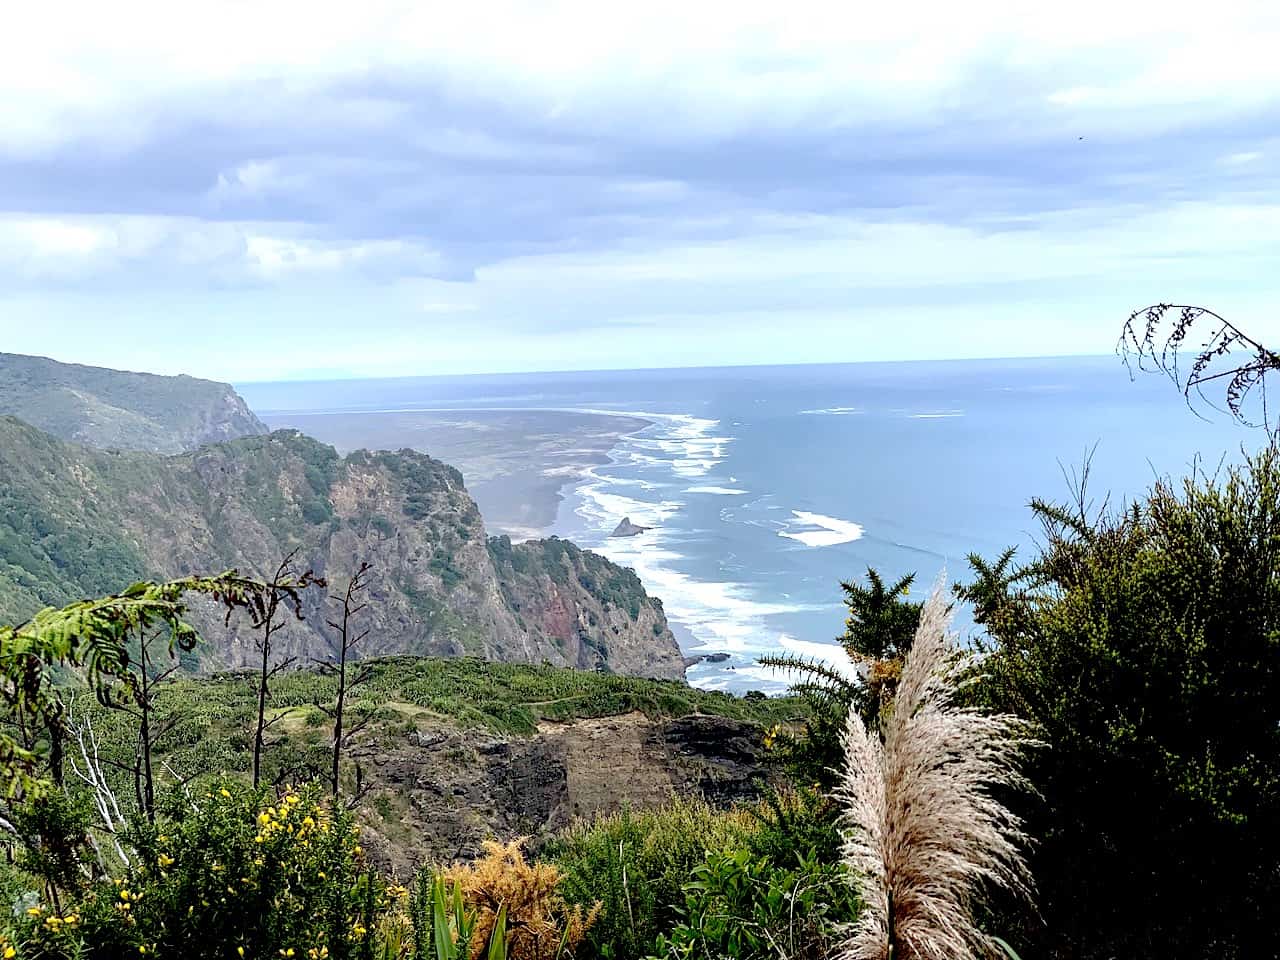
- Piha Beach & Lion’s Rock
- Tasman Lookout
- Kitekite Falls Track
- Mercer Bay Loop
- Karekare Waterfall
- Karekare Beach
Learn More: Take a look at the 7 Best Walks in the Waitakere Ranges for more


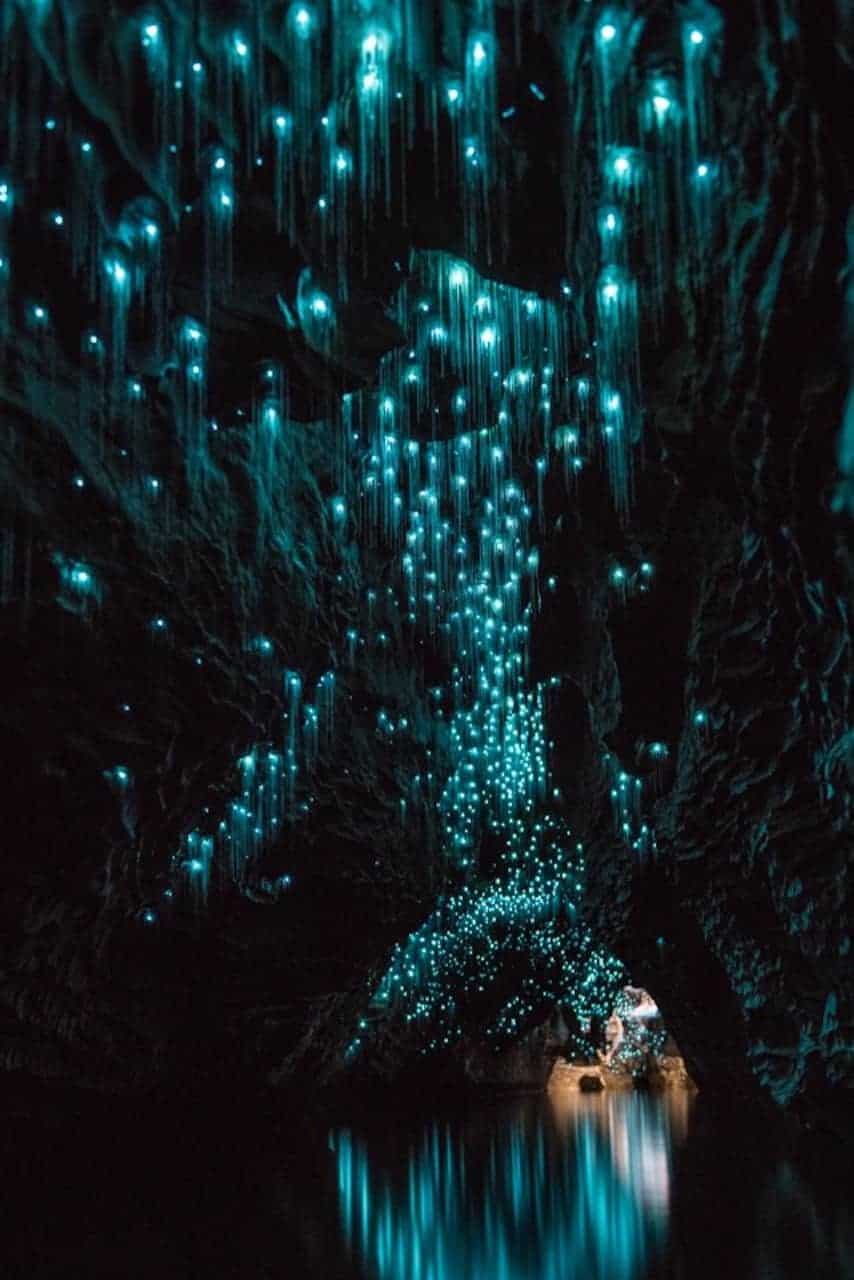
Day 3 – Waitomo Caves & Rotorua
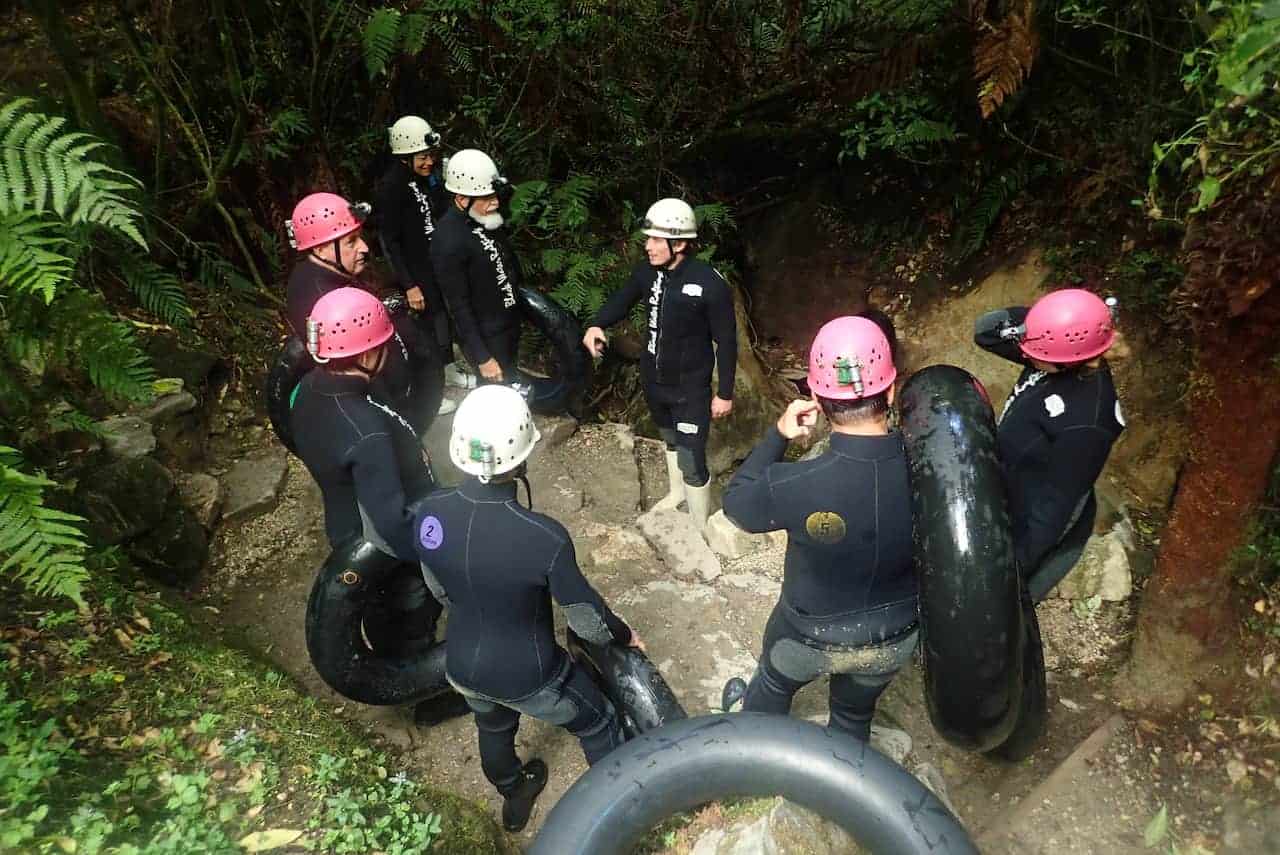
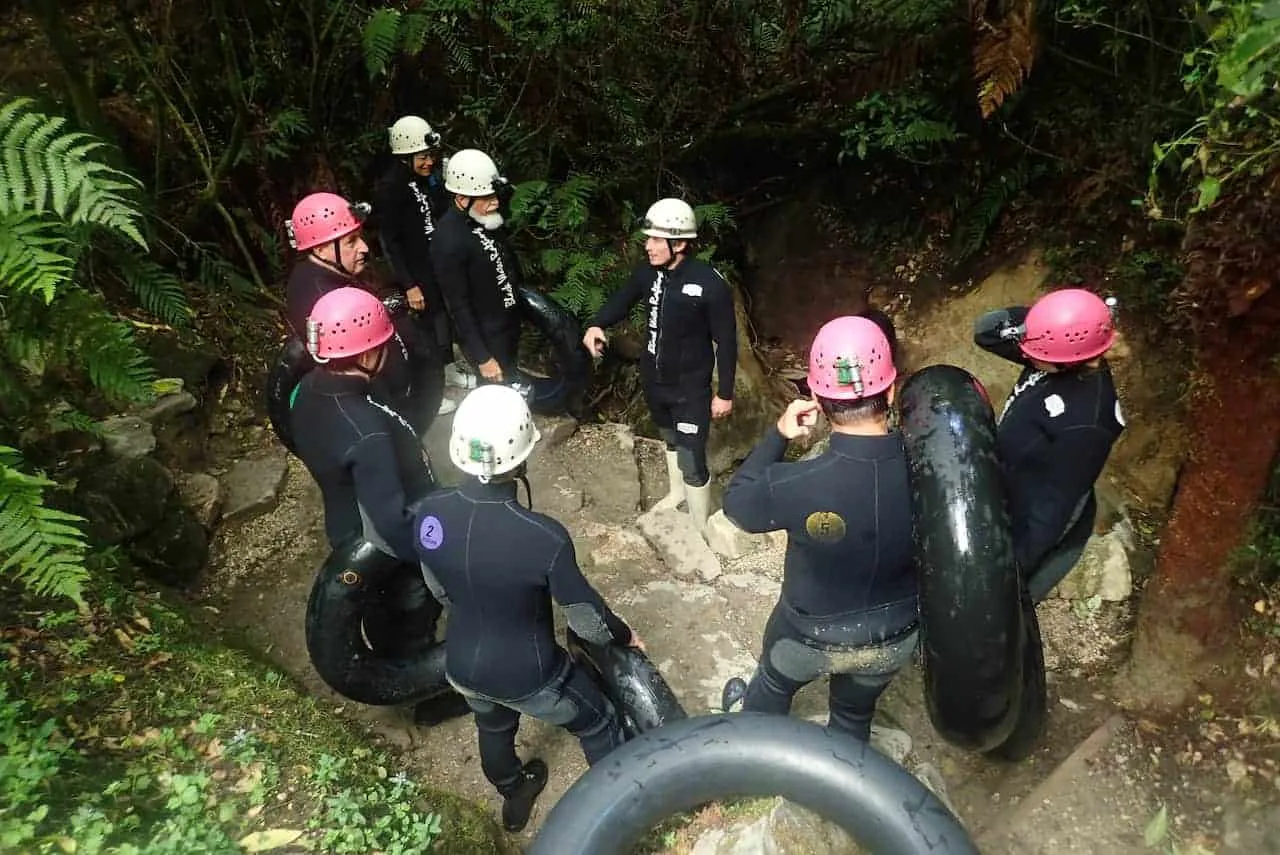
It is now time to start heading south as you make your way to the Waitomo Glowworm Caves. If you want to see thousands of bioluminescent glowworms light up some dark underground caves, then this place is for you.
Waitomo Caves
There are a few of these around the country but Waitomo is definitely the most popular option and it has the most to offer its visitors. I would advise to get an earlier start to the day if possible so you will have the time to explore Rotorua later on in the afternoon.
I opted for the Black Water Rafting – Black Labyrinth tour, which was a 3 hour adventure through the caves on inflatable tubes. If you don’t want to take part of a tubing experience, there is also the normal 45 minute tour through the caves on boardwalk / boat.
You can take a look at the Waitomo website to get a better idea of the different offerings they have.

After you are all finished with your glowworm experience, continue the drive to Rotorua, where you should have some time later in the afternoon to take part of a few Rotorua activities…
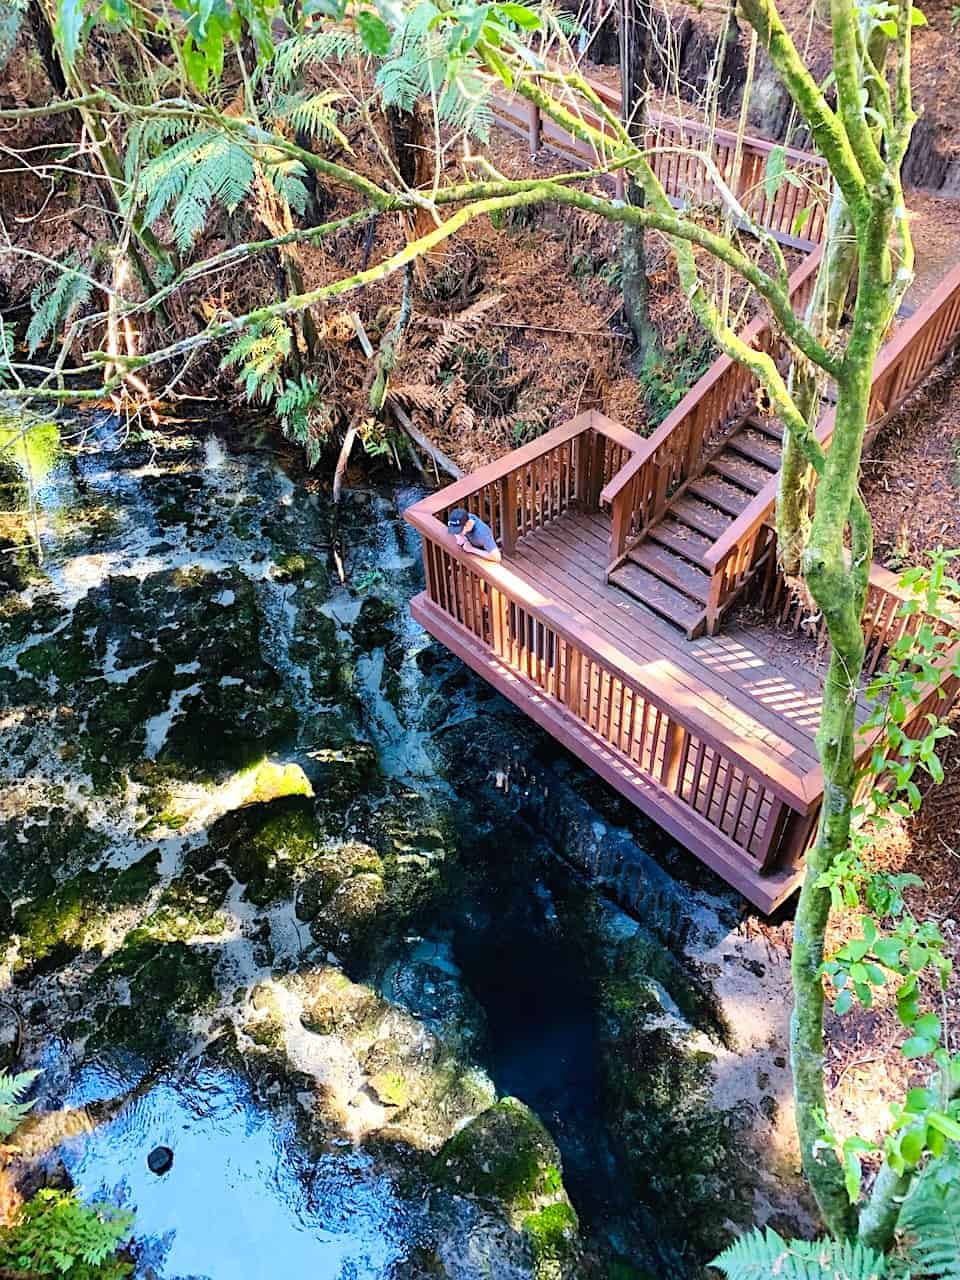
Hamurana Springs
Hamurana Springs consists of a short 30 minute path around the area, seeing one of the largest natural water springs in New Zealand. Alongside the crystal clear water you can actually see down into this spring pumping out 4 million liters of water per hour.
Learn more in the Hamurana Springs Walk Guide for all you need to know about the area

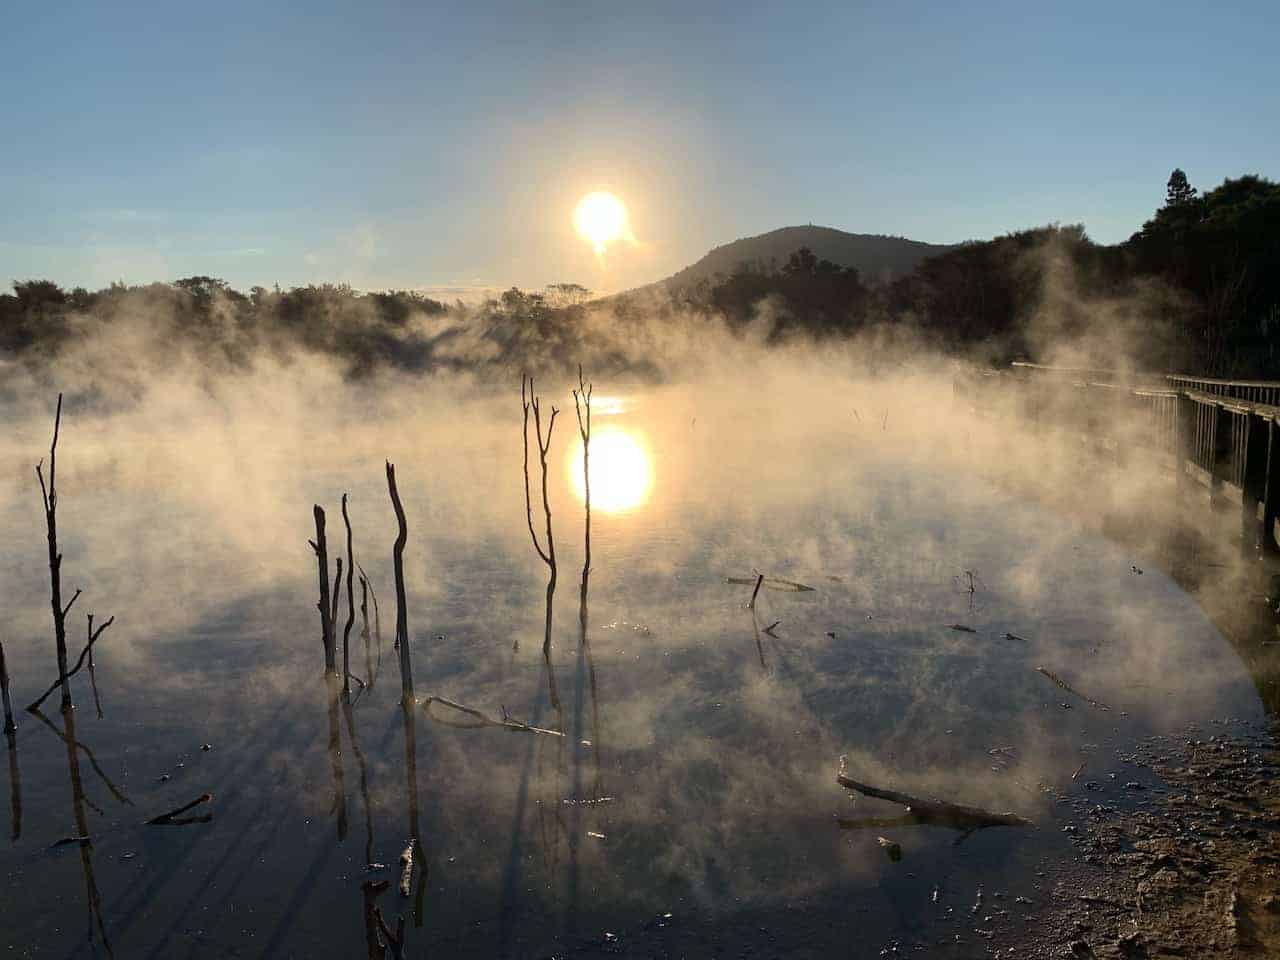
Kuirau Park
Located right within the city of Rotorua you will find Kuirau Park.
Spending some time walking through the park and visiting the various geothermal lakes and mud pools is a great way to get to know what Rotorua is all about.
Learn more in the Kuirau Park Guide up on the site.

Polynesian Spa (if time permits)
After days of exploring it is always nice to end up in a nice geothermal spa.
That is what the Polynesian Spa is all about and you will really be able to wind down and relax in one of the geothermal pools. It is open until 11PM so it gives you plenty of time for a visit.
Learn More: Take a look at the Best Rotorua Activities Guide I put together, so you can pick which places you might have more interest in over your 1.5 days here.


Where to Stay in Rotorua (Night 3)
- All Around: Silver Fern Rotorua
- Luxury: Black Swan Lakeside Boutique Hotel
- Budget: Hideaway of Rotorua
Day 4 – Rotorua / Drive to Taupo
On day 4, you can spend some more time enjoying what the Rotorua area has to offer before making your way down to Taupo for the night.
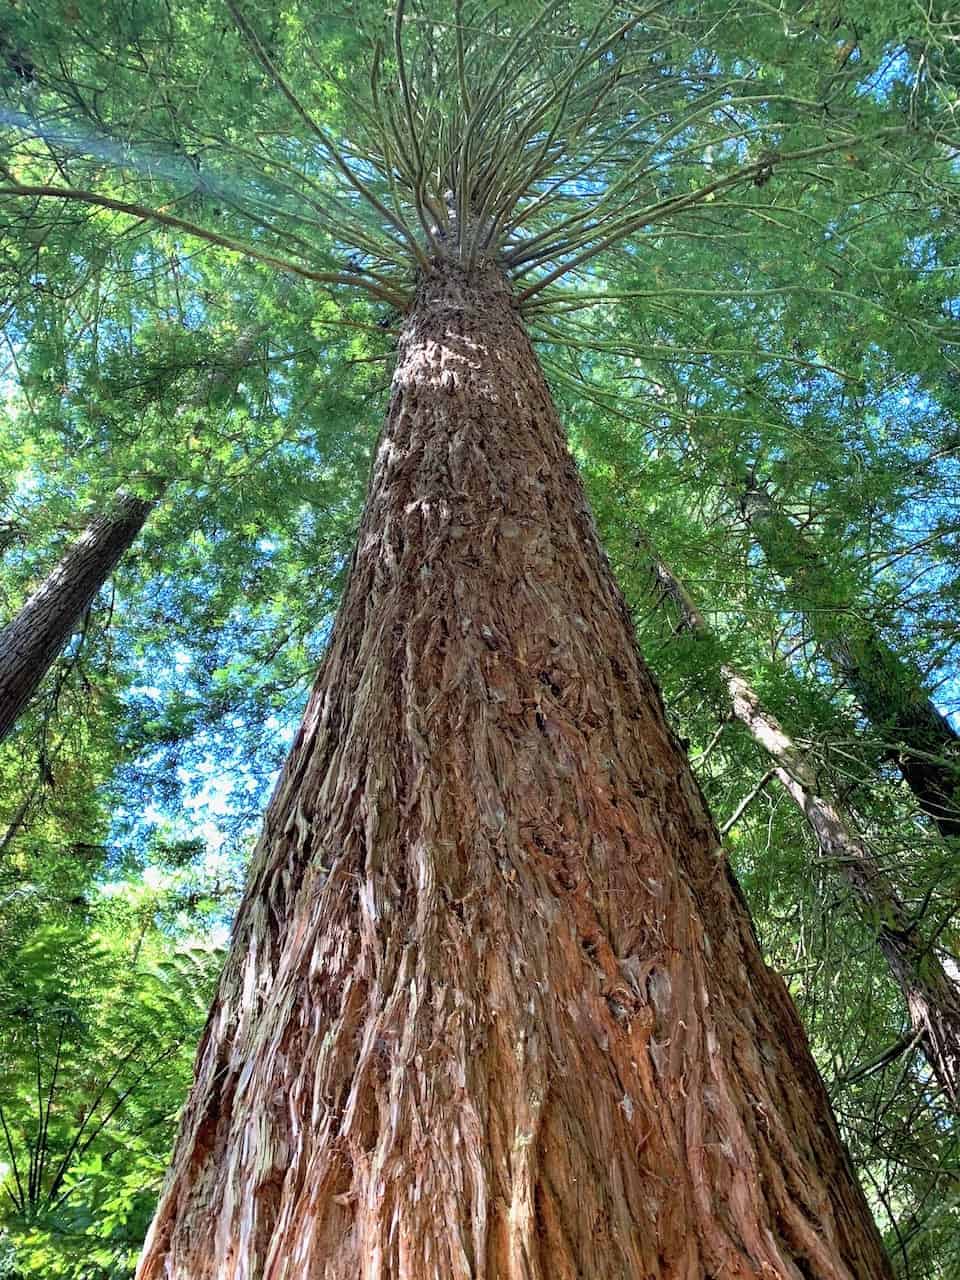
Whakarewarewa Redwoods Forest
You can start off the day by heading to the famous Whakarewarewa Redwoods Forest, which is full of hundreds of redwoods trees all throughout the area.
You can take part of some hiking trails, head up onto the Redwoods Treewalk, or do some cycling around the forest.
Learn more about the trails in the Whakarewarewa Rotorua Walking Guide

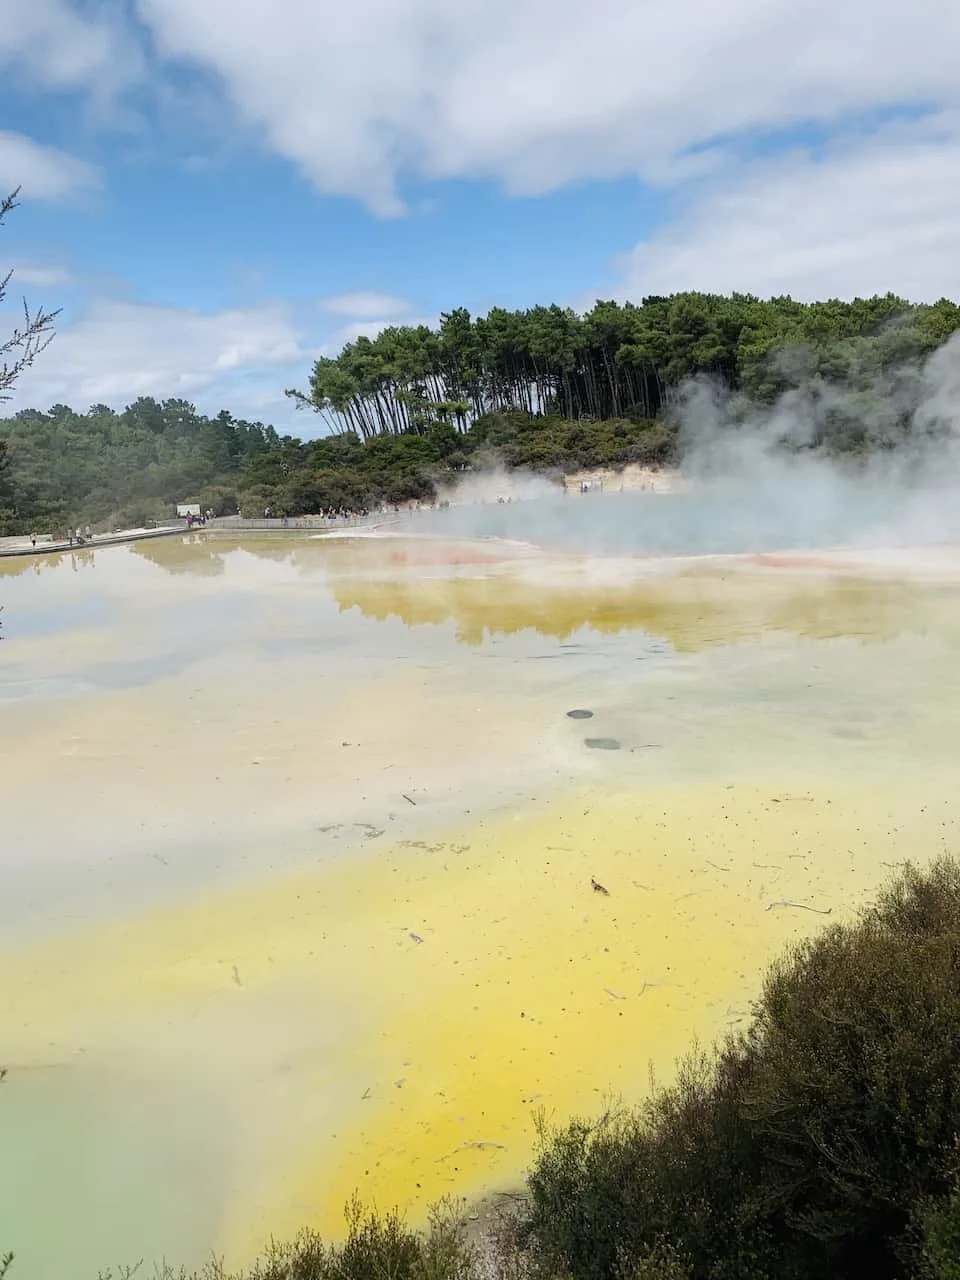
Wai-O-Tapu Geothermal Wonderland
After a morning at the forest, make your way to the Wai-O-Tapu Geothermal Wonderland. This geothermal area is packed with plenty of different lakes, geysers, and craters that are sure to have you in awe.

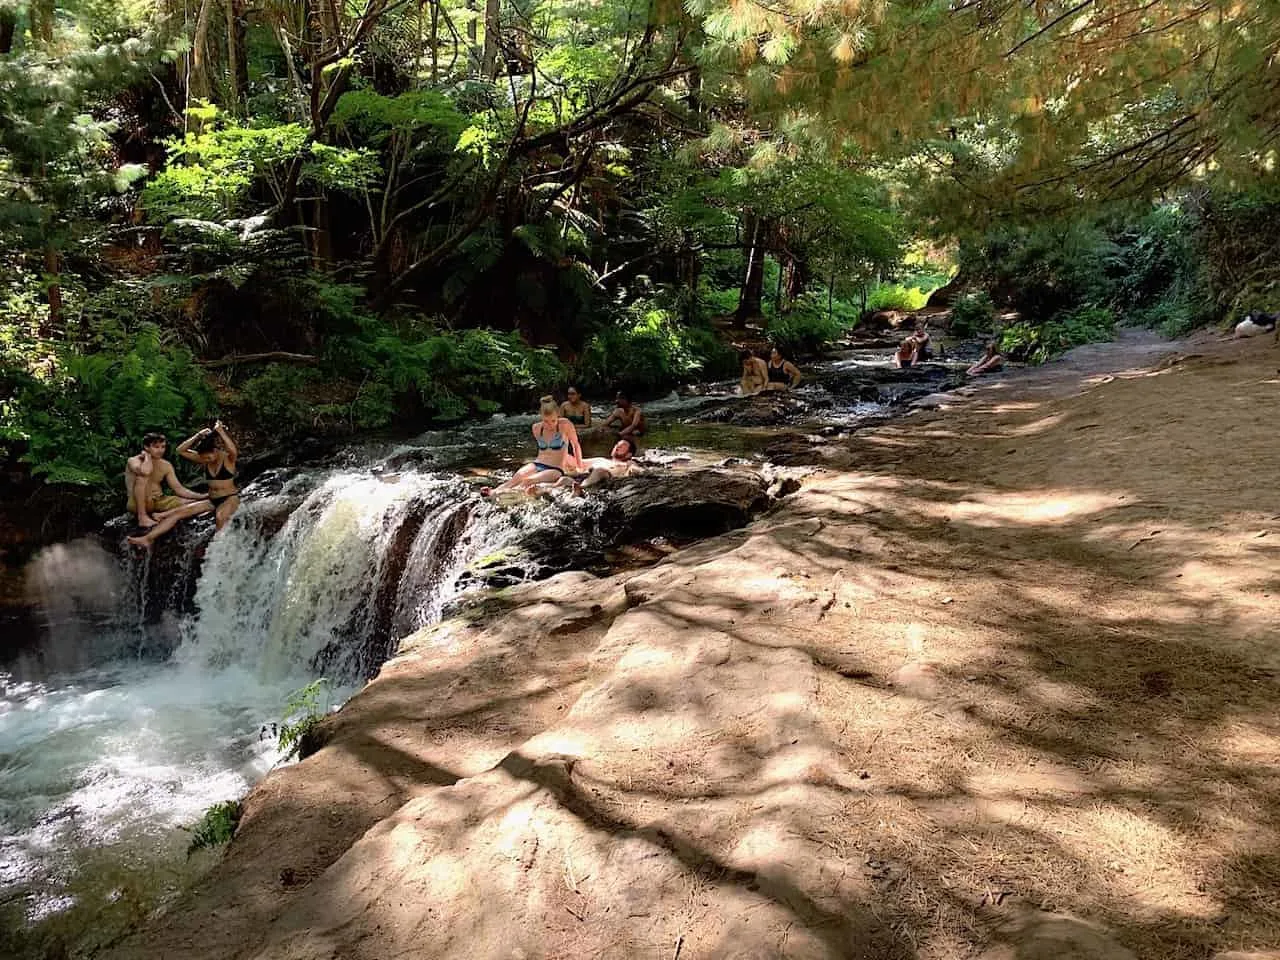
Kerosene Creek
A natural thermal river, Kerosene Creek gives you the chance to sit down, relax and soak in the warm water to finish up your time around Rotorua.

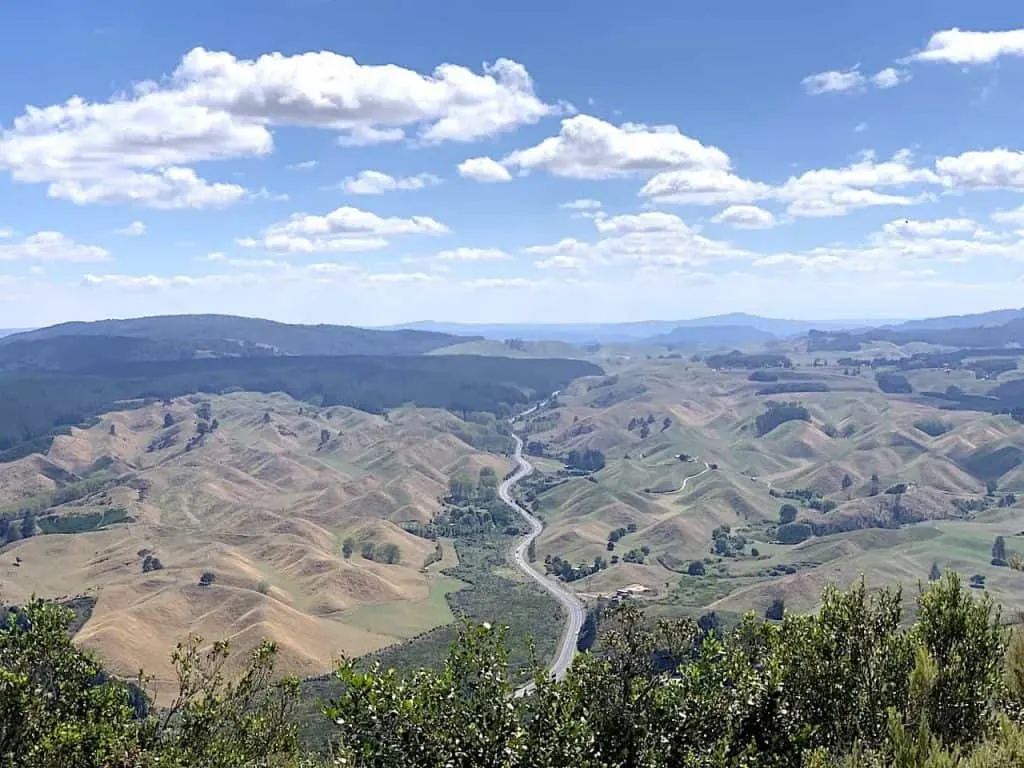
Rainbow Mountain
If you still have some time (depending on what time you started the day) or if you want to switch things up, there is a fantastic 2 hour hiking trail at Rainbow Mountain. Along the way you will pass by a bright blue lagoon, get some great views of the multi colored rocks, and take in one incredible landscape shot of the surrounding hills and forests.

After you are finished up with some activities around the Rotorua area, it is time to continue on with the drive towards Lake Taupo.
Where to Stay in Taupo (Nights 4 & 5)
- All Around: The Reef Resort
- Luxury: Sacred Waters Taupo
- Budget: Haka Lodge
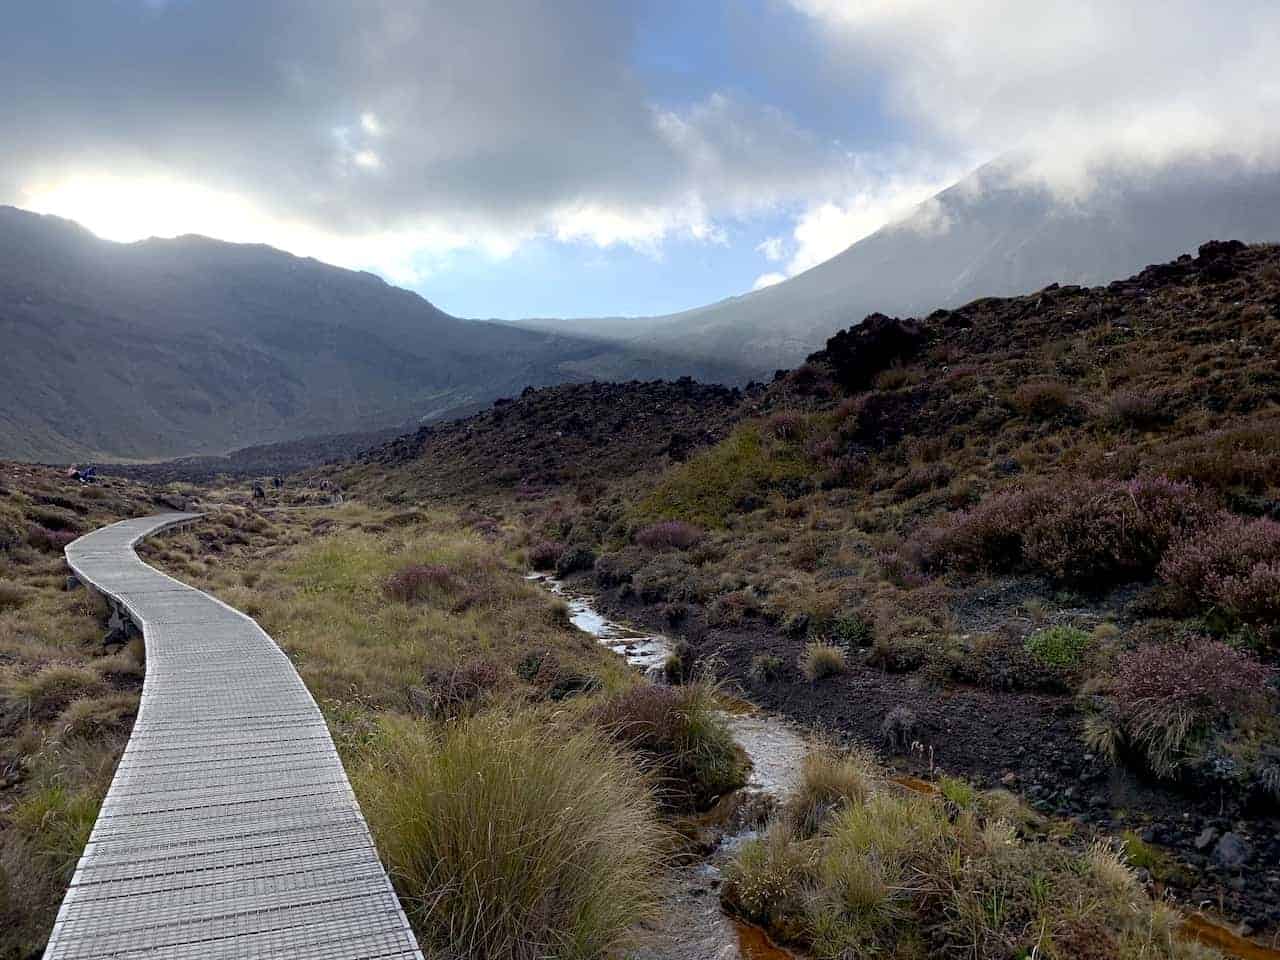
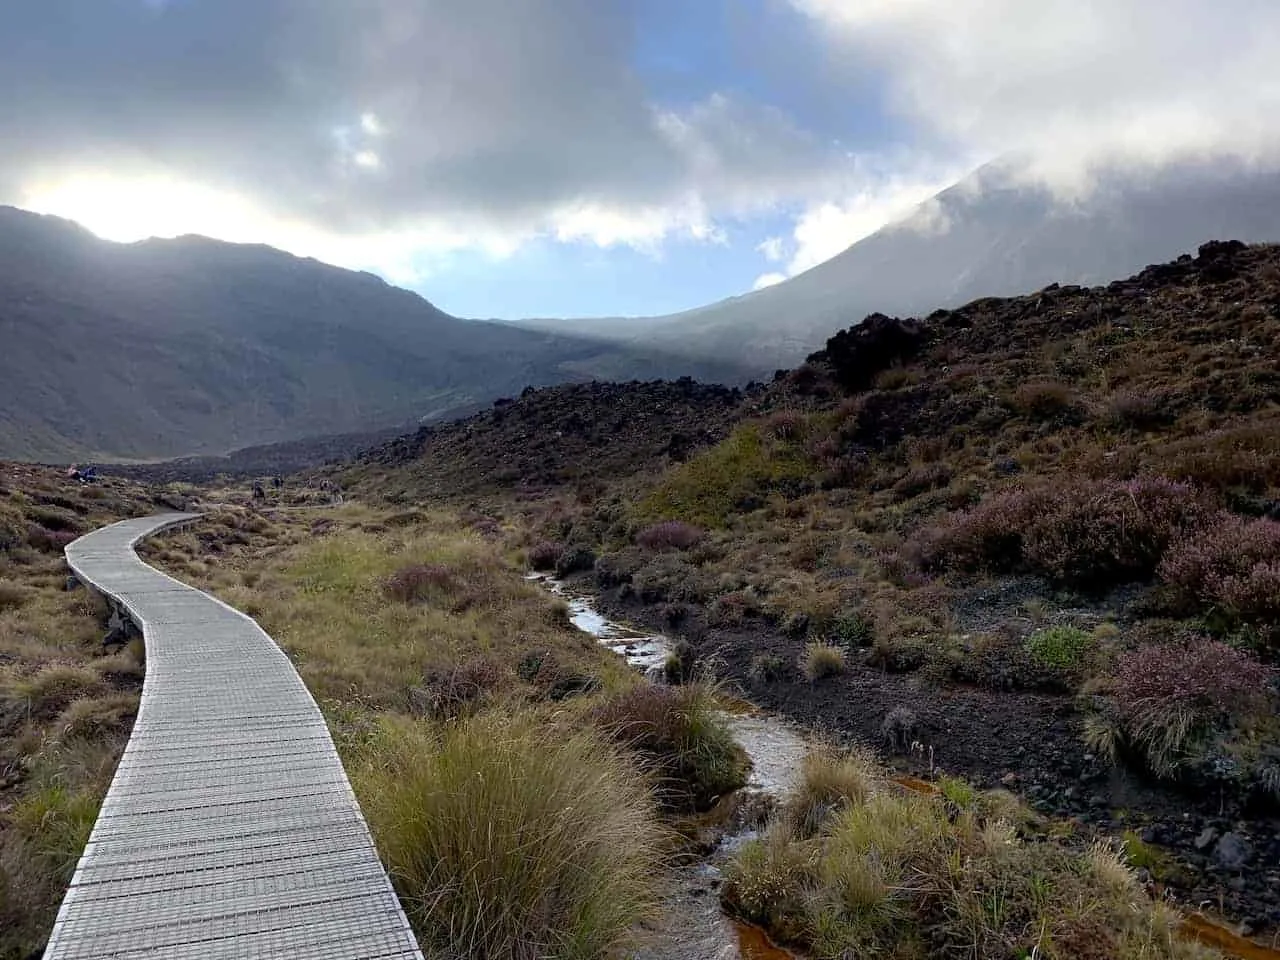
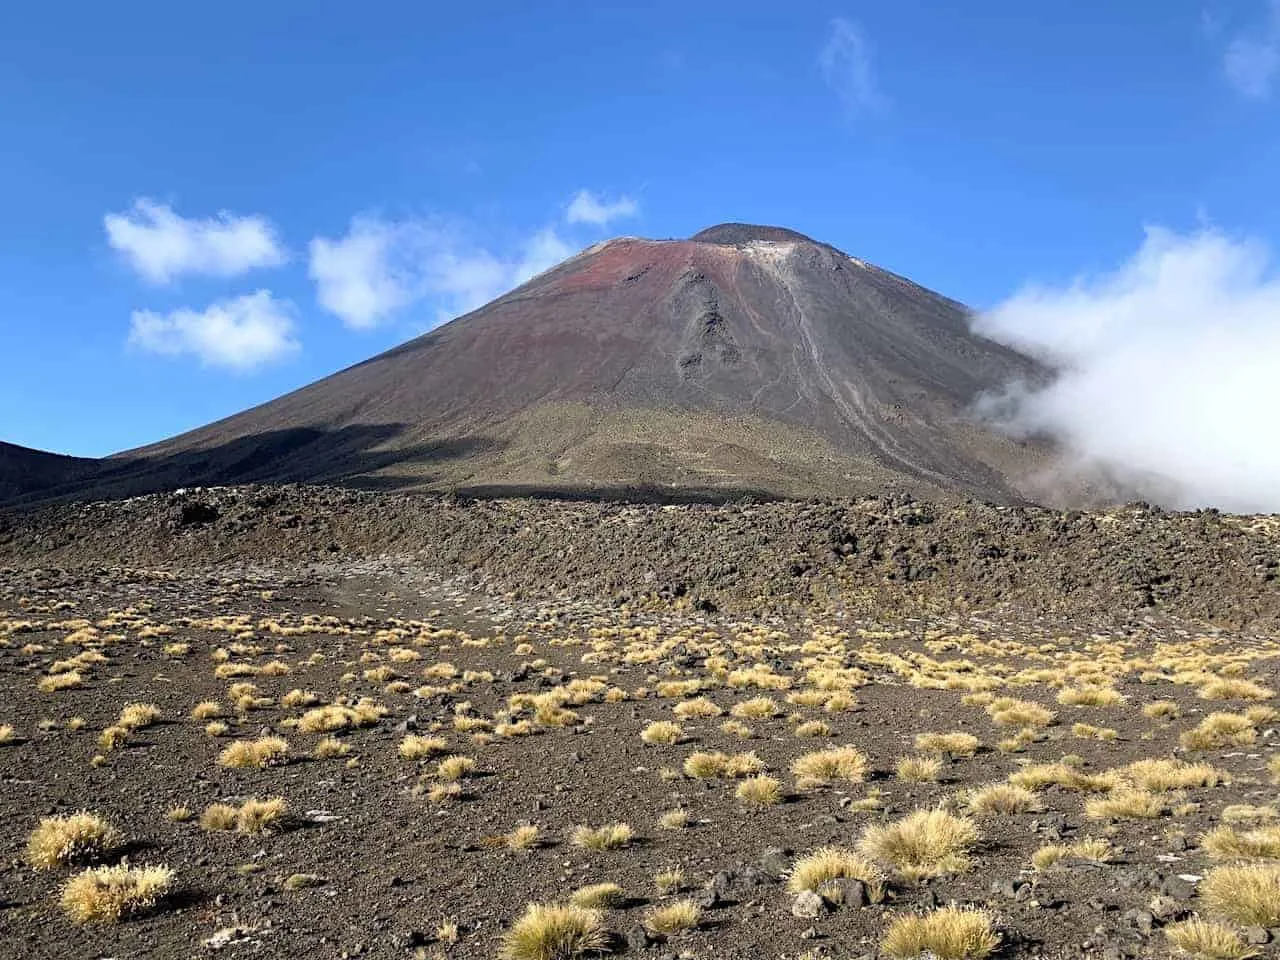
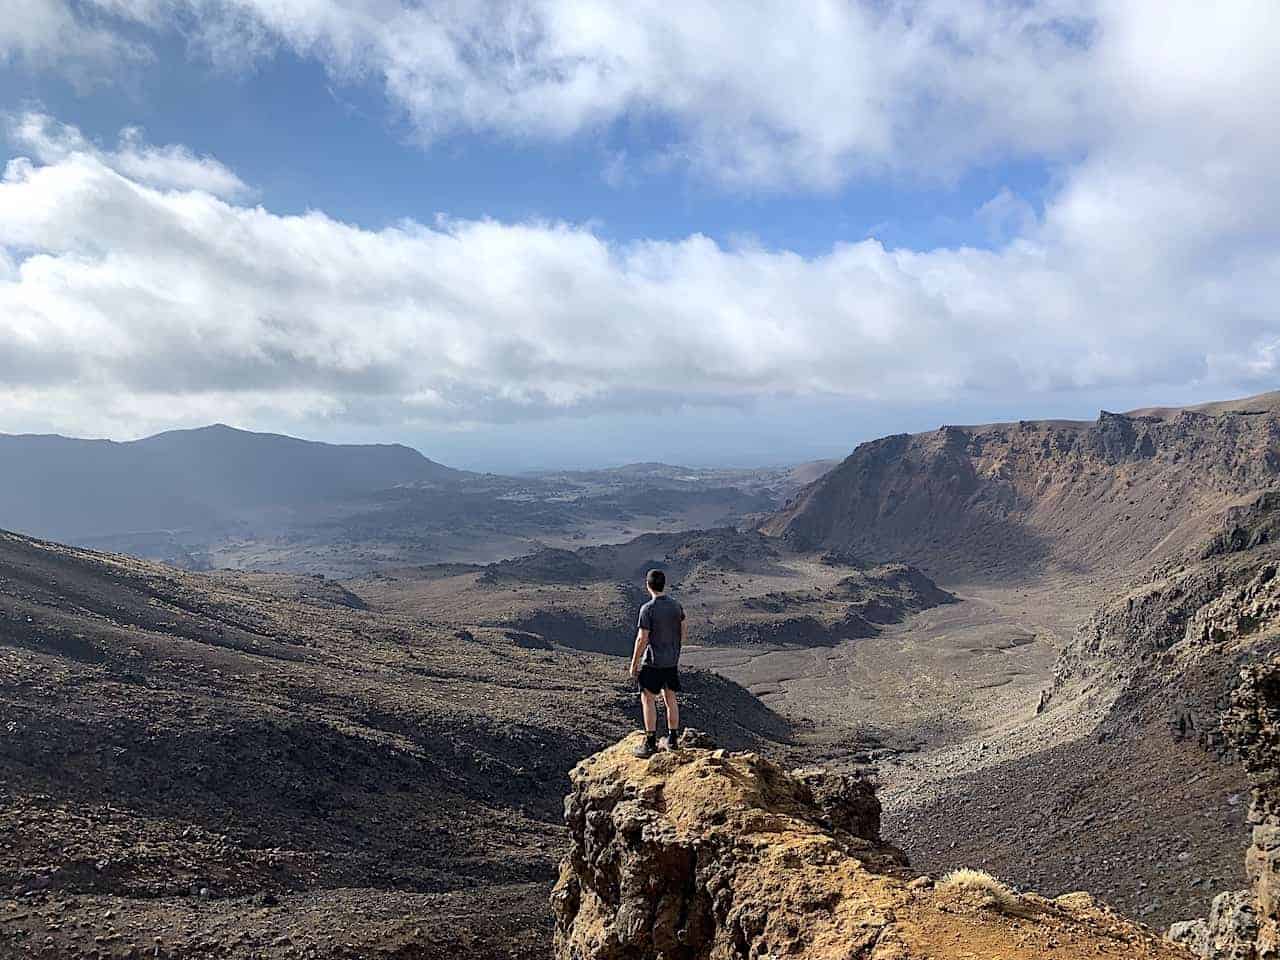
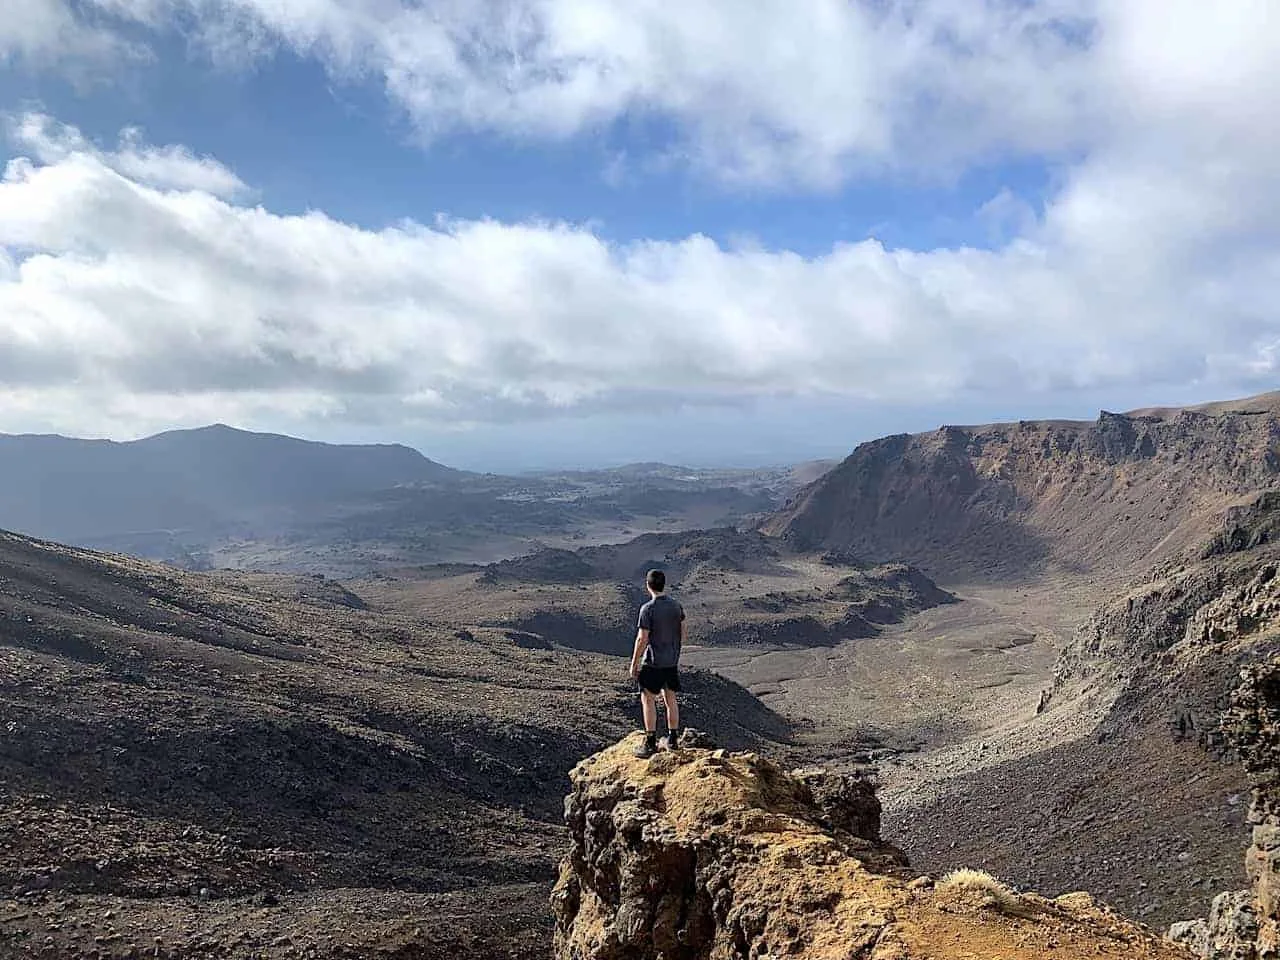
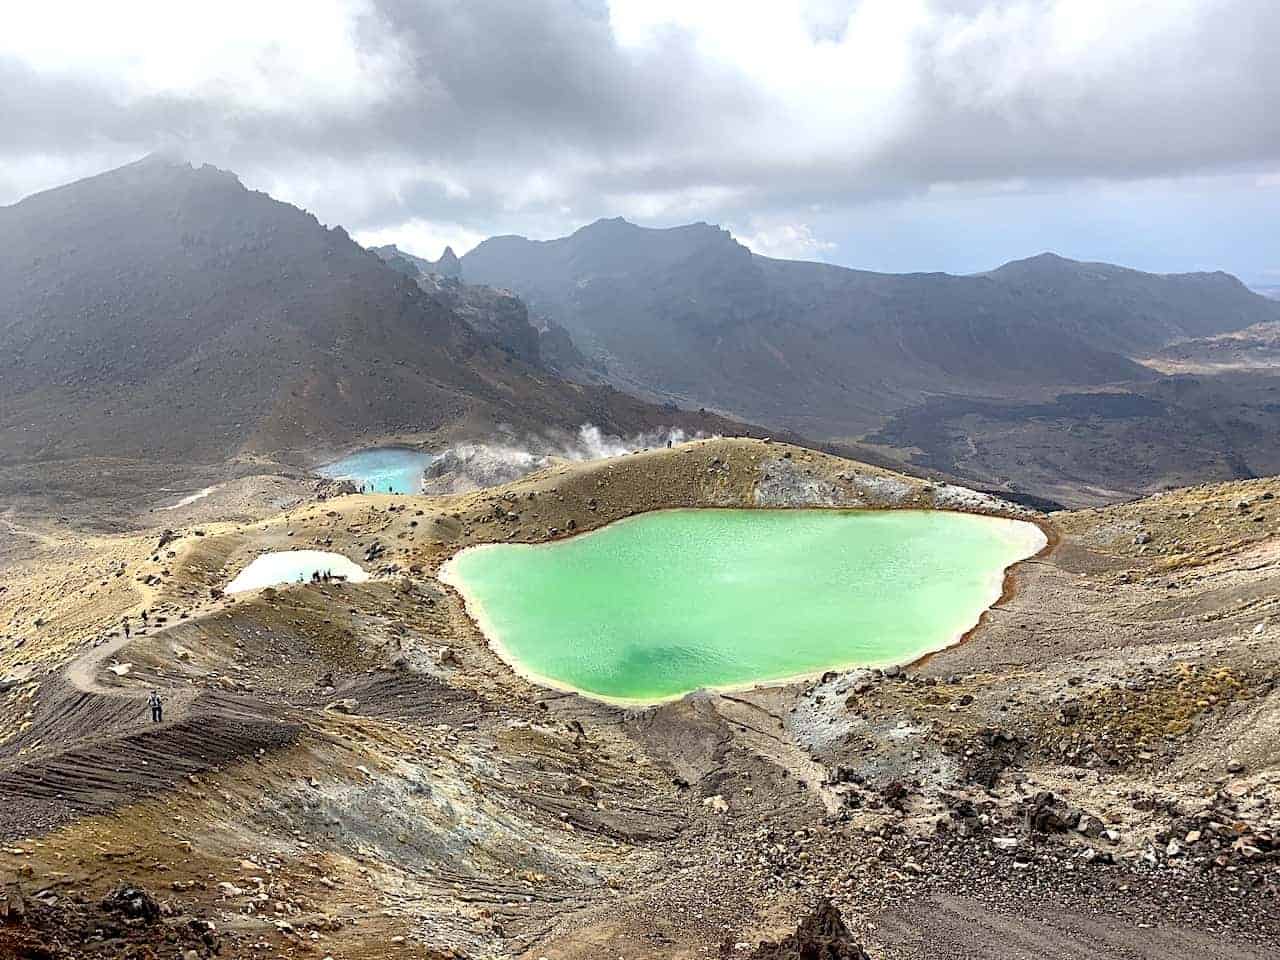
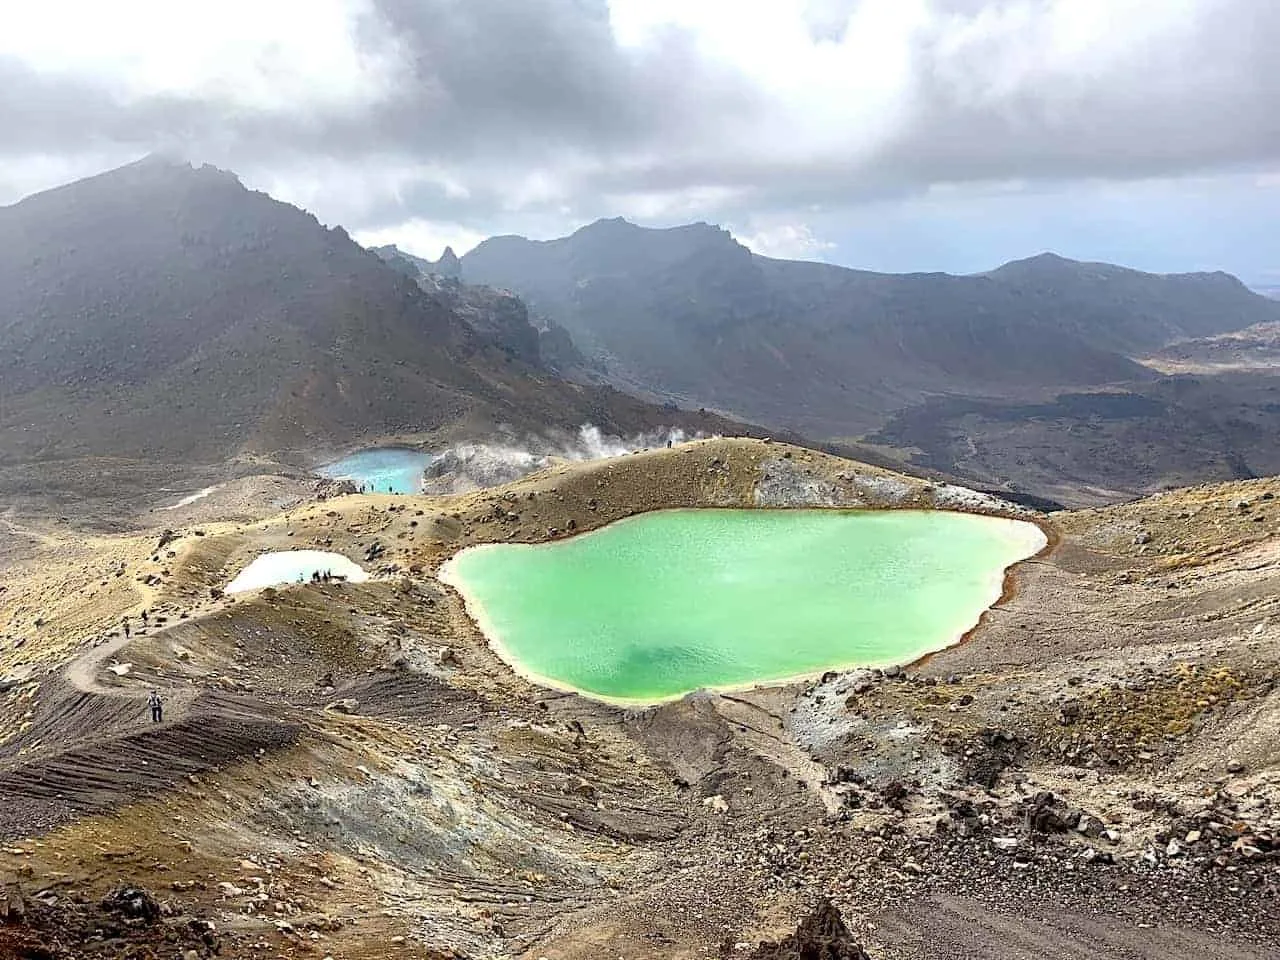
Day 5 – Tongariro Alpine Crossing
Next up on this 3 week New Zealand itinerary is the North Island’s most famous hike – the Tongariro Alpine Crossing.
This hike is a 19.4 KM / 12 Mile trek through all different types of landscapes. You will pass through valleys, get up and close to volcanoes, and see the famous emerald lakes.
It really is one of the most diverse hikes I have taken part of during my travels.
Since this is a one way hike, you have two main options to get to the starting point of the trail – 1) take round trip transportation from Taupo to the beginning of trail at Mangatepopo and back to Taupo from the end of the trail at Ketetahi or 2) Self drive to the end of the trail at Ketetahi, where you can park your car, and then take the one way transport option to the start of the trail.
Either one works – with the first option you don’t need to worry at all about driving and logistics but you will need to wait for a shuttle at the end of the trail to get you back to Taupo.
With the second option, you can make your way at your own pace without worrying about getting transport back.
Read up on the Tongariro Alpine Crossing Hiking Guide for everything you need to know about completing the trail

Day 6 – Taupo / Drive to Wellington
You will probably need a little bit of rest and recovery today after the big Tongariro hike the previous day.
Today will mostly be filled with the 5 hour drive from Taupo to Wellington but you can check out a couple main sites in Taupo before heading out.
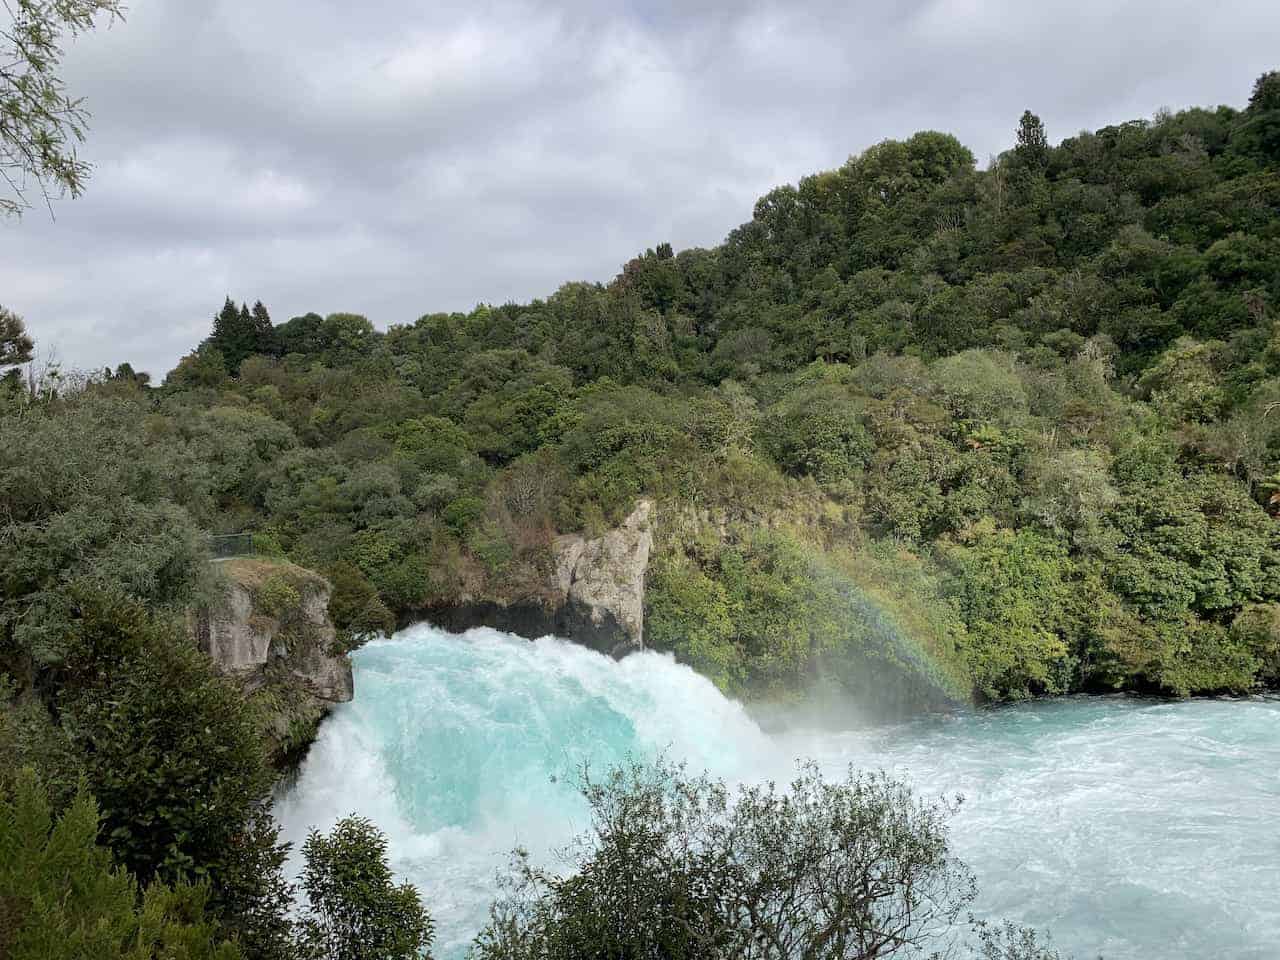
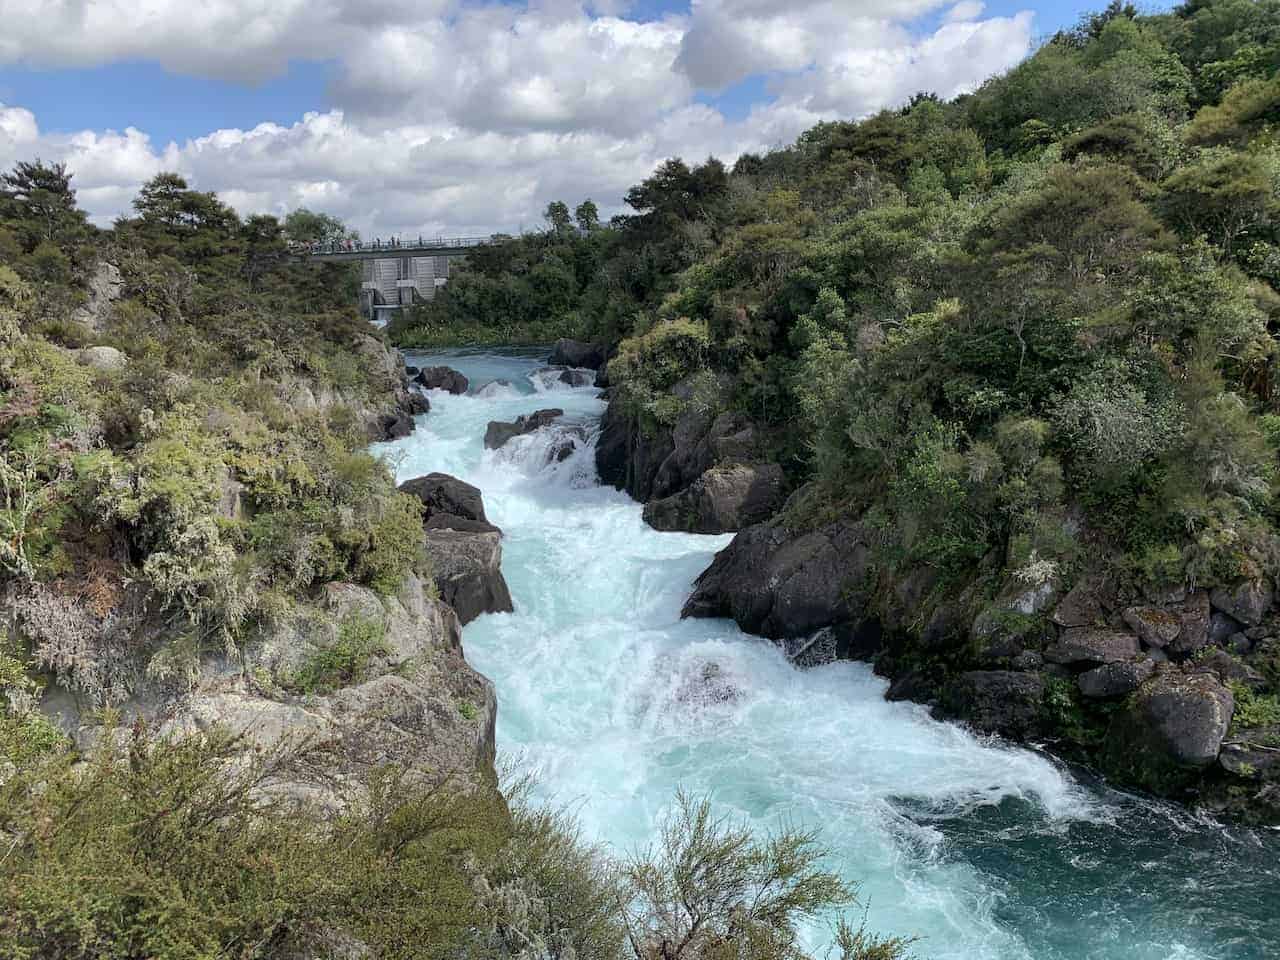
Huka Falls
The first place you can stop at is Huka Falls, a bright blue 11 meter waterfall coming from the roaring Waikato River. You can head to a few different viewpoints around the area to take it all in.
Learn more about the Huka Falls Walk & Lookout for your time in the area.

Aratiatia Rapids
You can then head to the Aratiatia Rapids, a dam that releases water 4 times a day (10AM, 12PM, 2PM, 4PM). Note the 4PM release is only in summer months.
Before they release the water, there is basically just a small stream of water a few feet high. After only a couple minutes they open the dam, the water levels rise significantly through the canyon.

Once all done with the sites, it’s time to jump into the car and make the drive to the southern tip of the North Island to the capital of Wellington.
Where to Stay in Wellington (Nights 6 & 7)
- All Around: Bolton Hotel
- Luxury: Intercontinental Wellington
- Budget: YHA Wellington
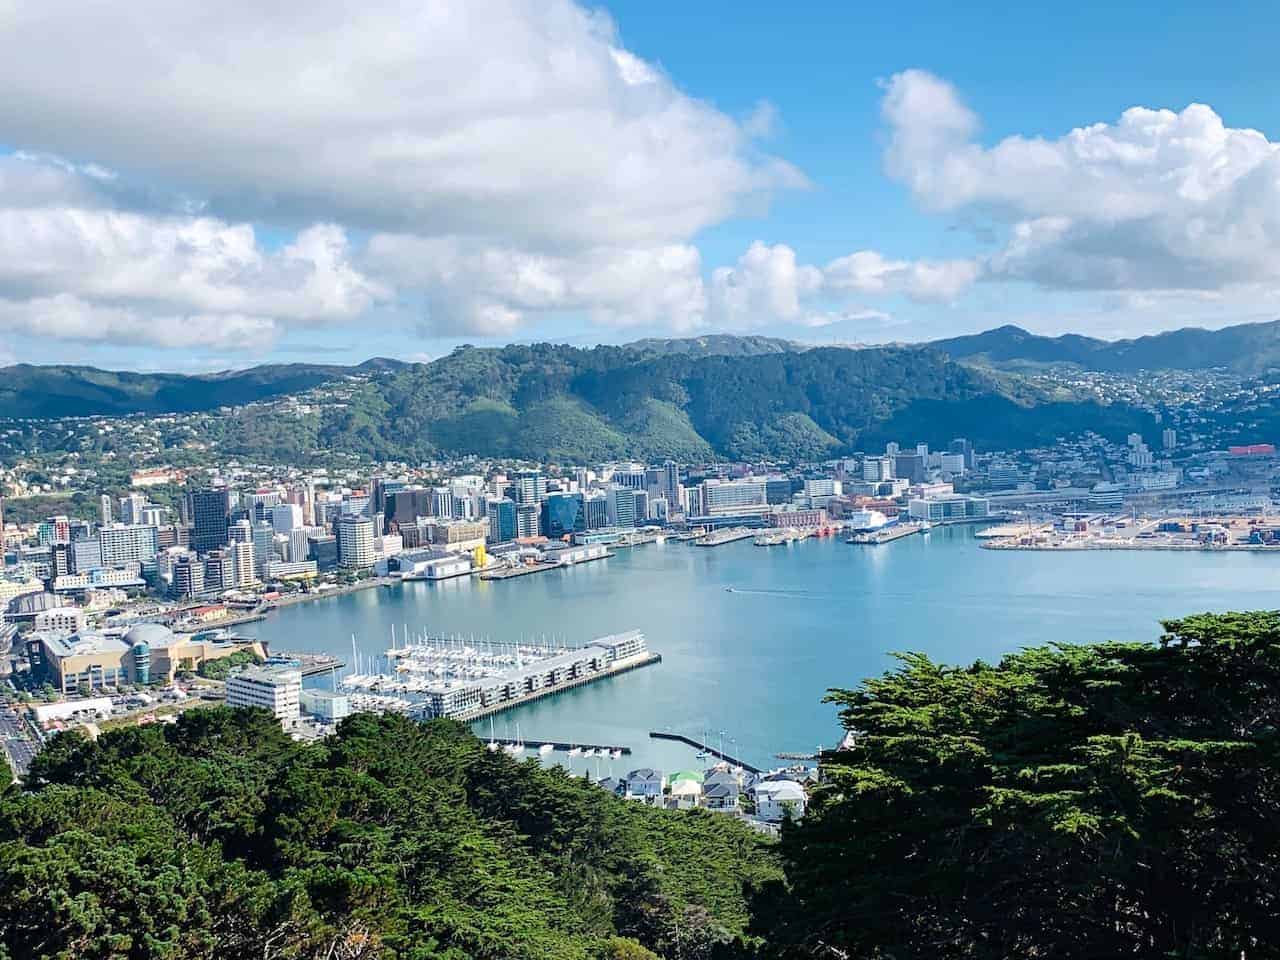
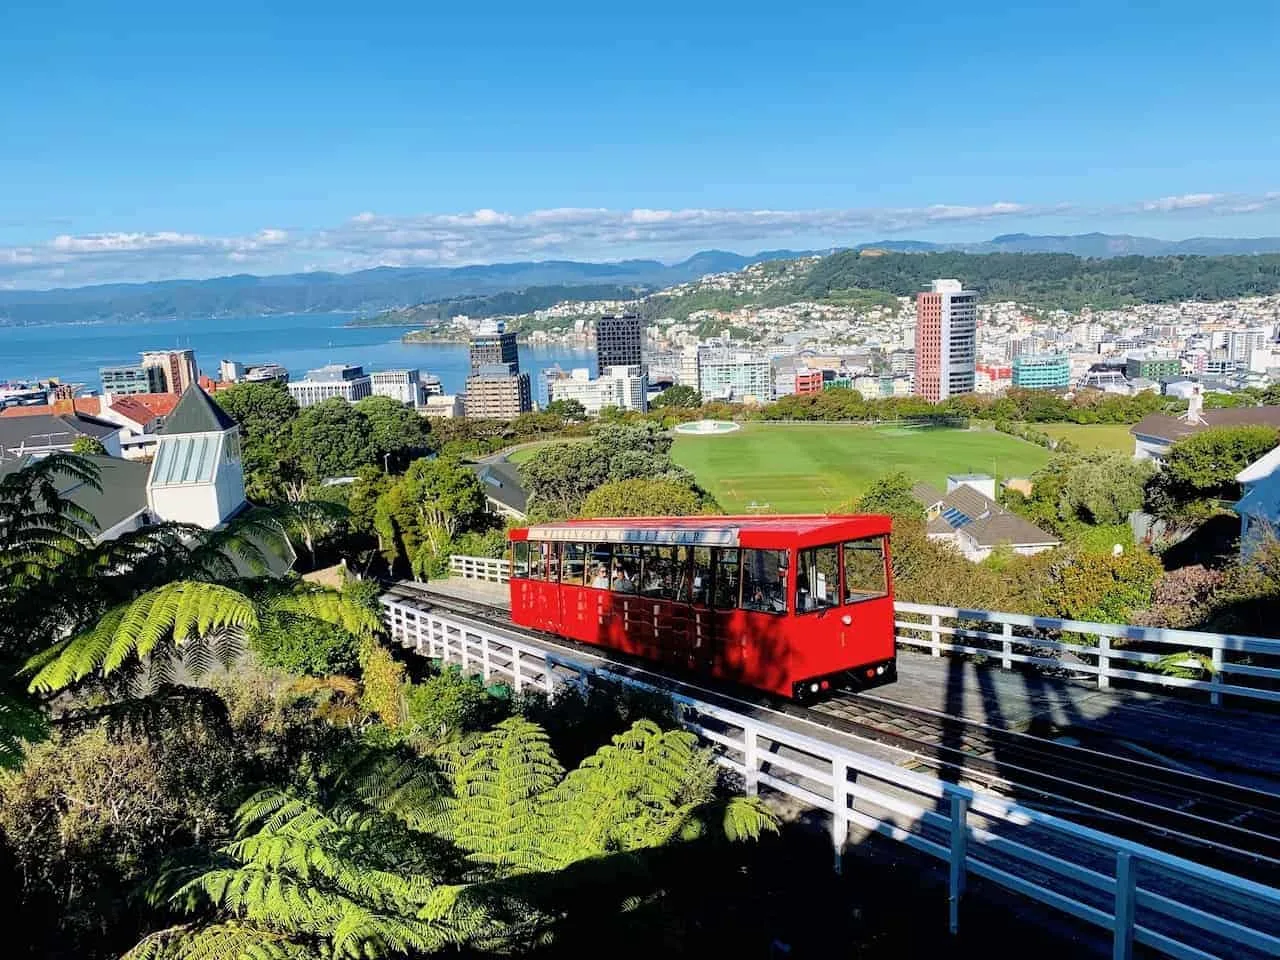
Day 7 – Wellington
On your last day on the North Island of New Zealand, you will spend some time exploring the capital city of the country.
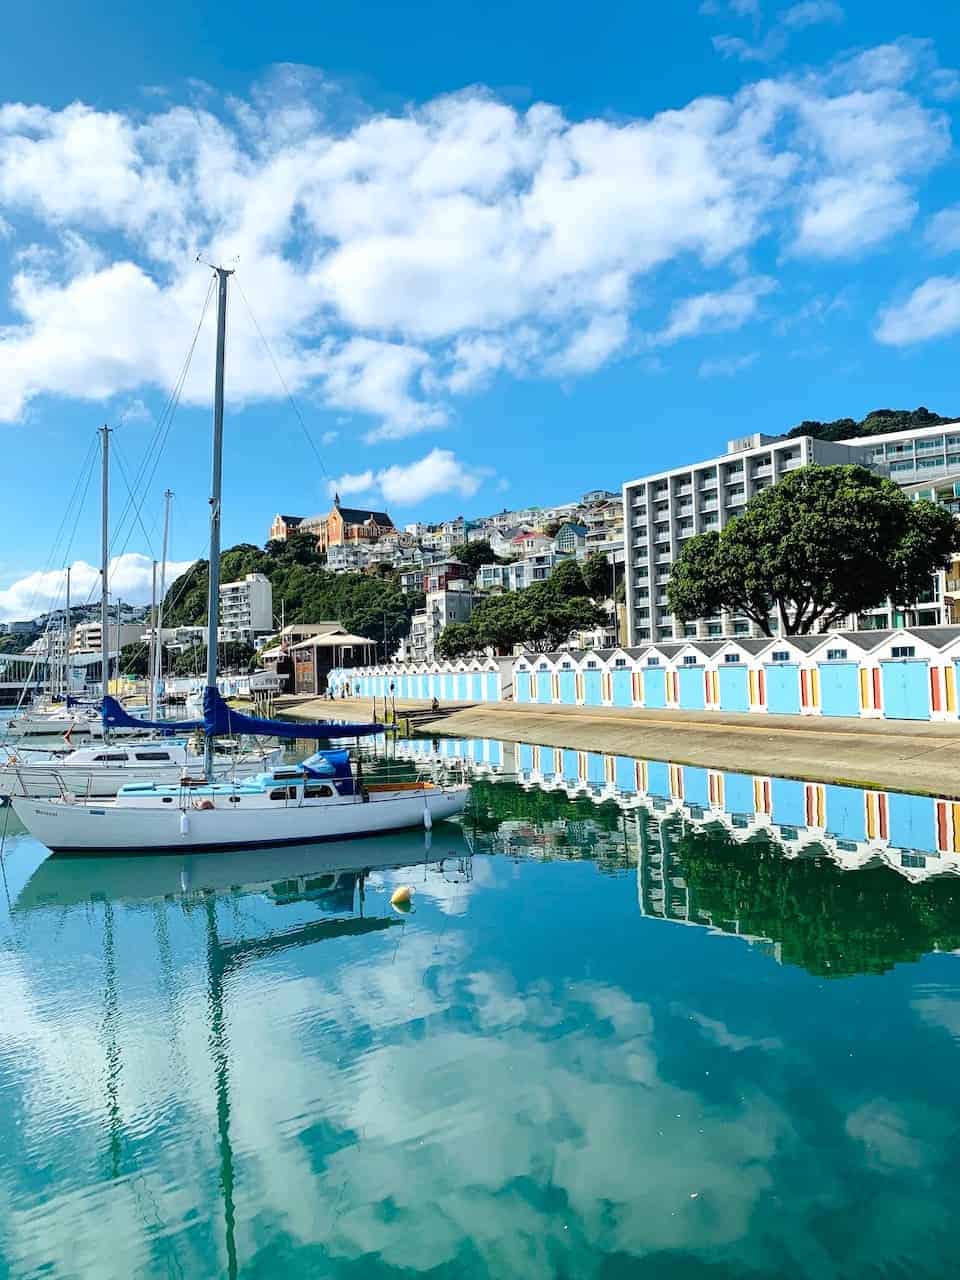
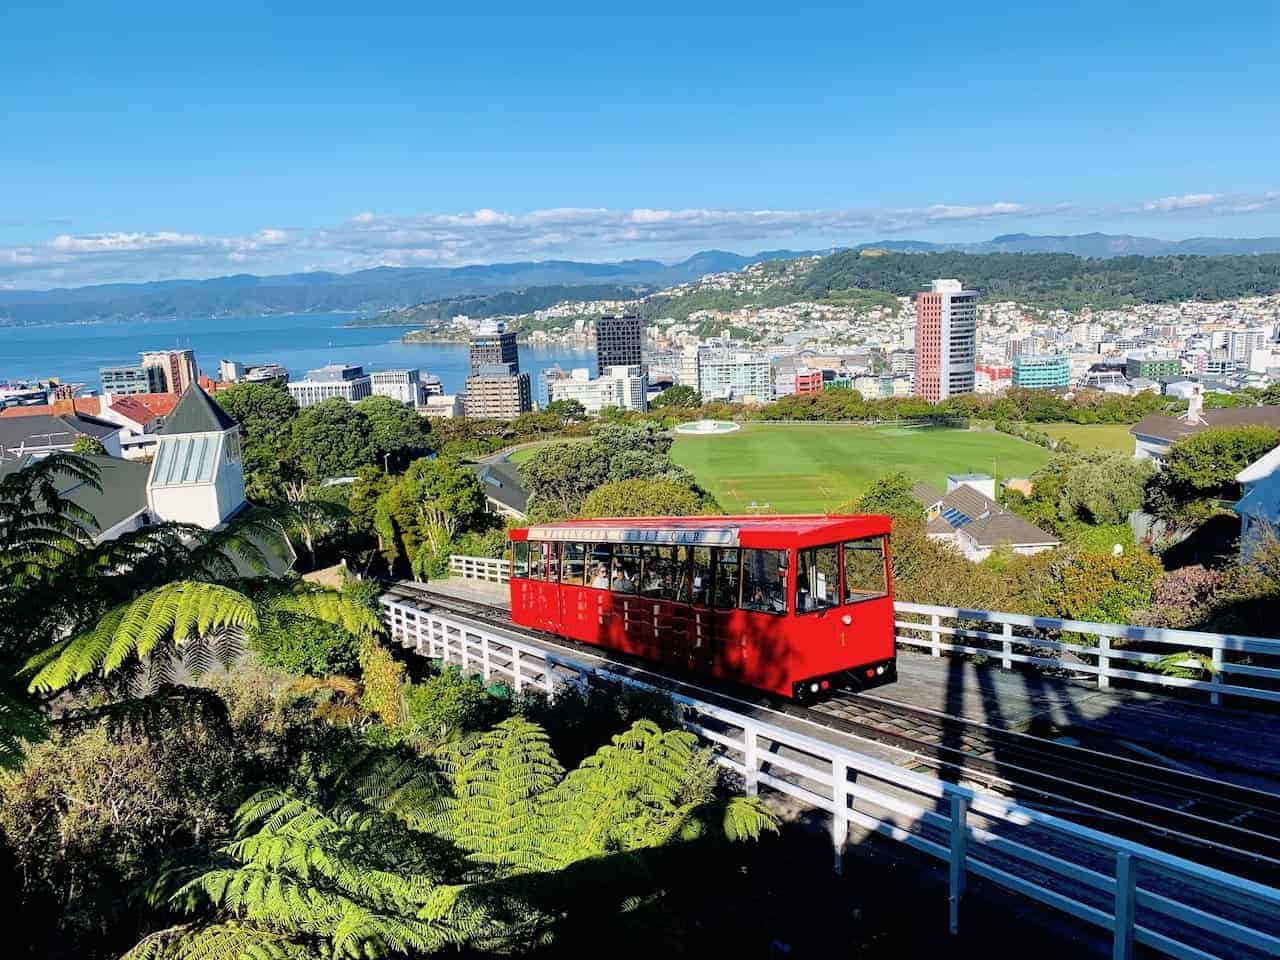
Wellington is a fantastic city located right on the waterfront and there is plenty to do to keep you busy. I would try and head off to the following 8 places during your day in the city:
- Mount Victoria Lookout
- Oriental Bay
- Wellington Waterfront
- Te Papa Museum
- Cuba Street
- Wellington Cable Car
- Wellington Botanic Garden
- Parliament Buildings
To learn more about the day check out the 8 Must Do Wellington Activities Guide up on the site.


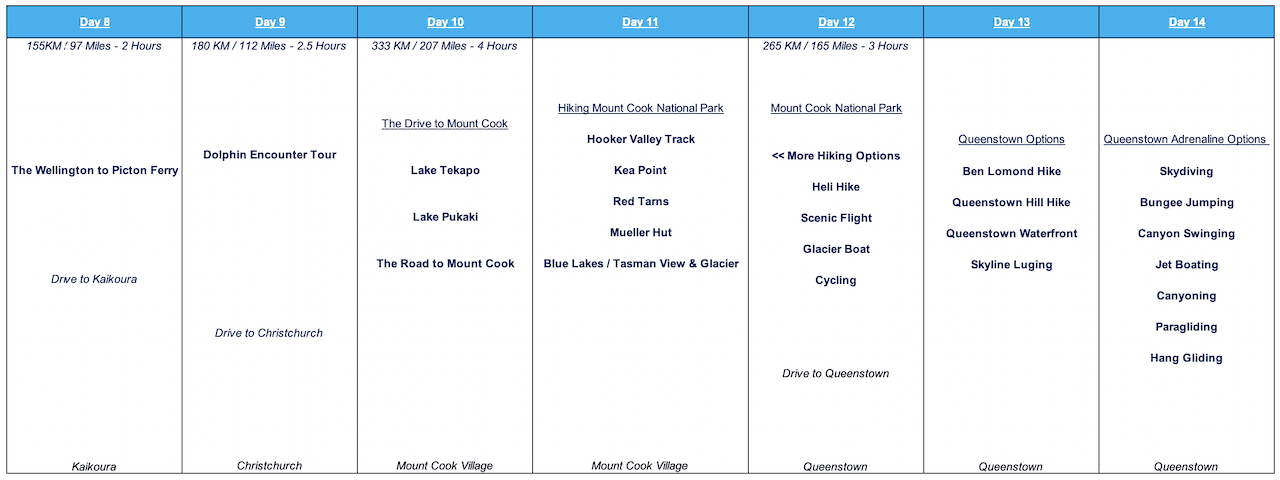
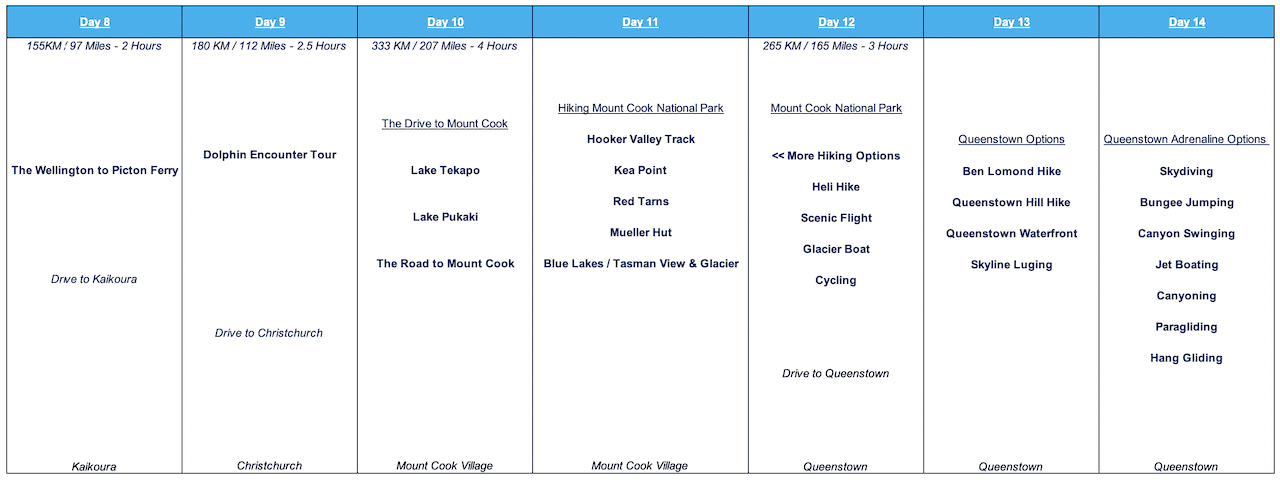
Day 8 – The Wellington to Picton Ferry / to Kaikoura
It is now time for this New Zealand road trip to head off the North Island and onto the South Island. Like I mentioned earlier on, you will simply need to utilize the Wellington to Picton ferry to get you there.
The ferries are operated by two companies – Interislander and Bluebridge, and you shouldn’t have much difficulty booking yourself a ride across (with your car too!).
Some car rental companies include the car ticket for the ferry (you still would need to pay for the passenger ticket though) so you may be able to save a little bit of money here.
The Wellington to Picton Ferry Guide will help you out with what to know for the journey
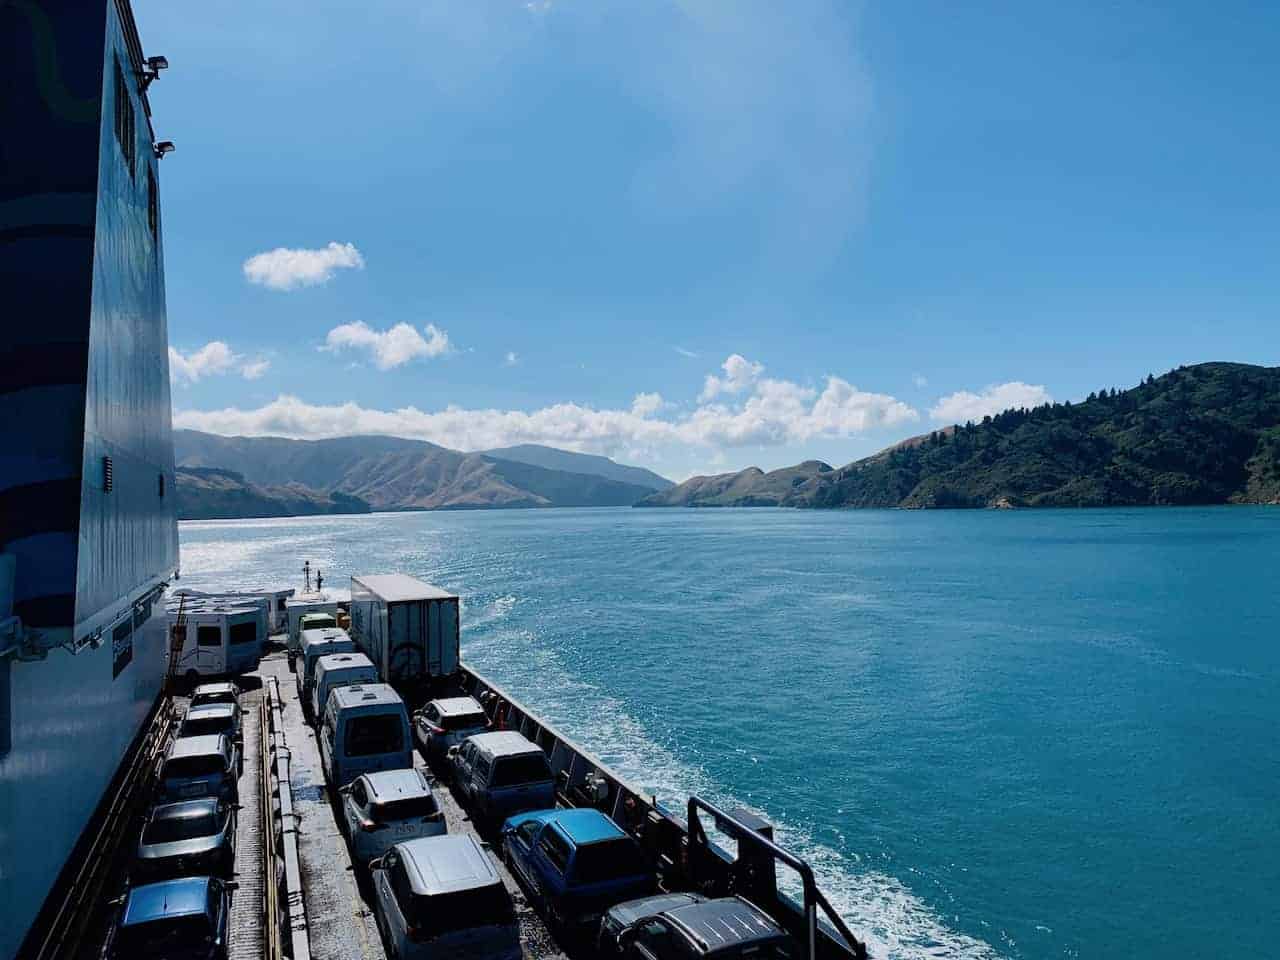

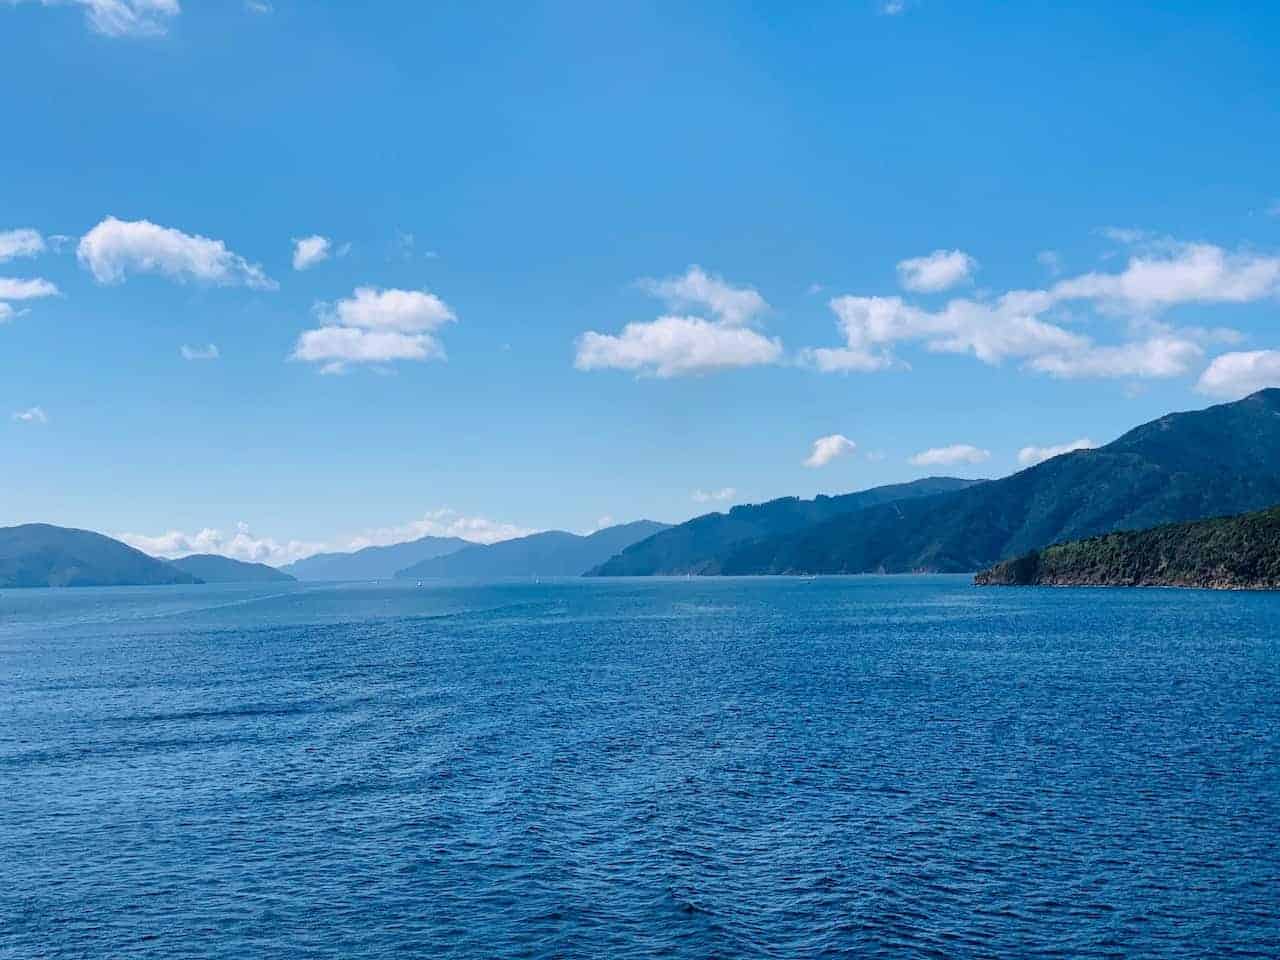

Once you make the 3 hour journey across the Cook Strait and onto Picton, you will just need to drive another 2 hours to Kaikoura.
Note: near Picton there are many vineyards around the area. If you want to give yourself a nice break from the day, head on over to one of them to enjoy some lunch and a stroll around the vineyards.
Where to Stay in Kaikoura (Night 8)
- All Around: The White Morph Heritage Collection
- Budget: Dolphin Lodge
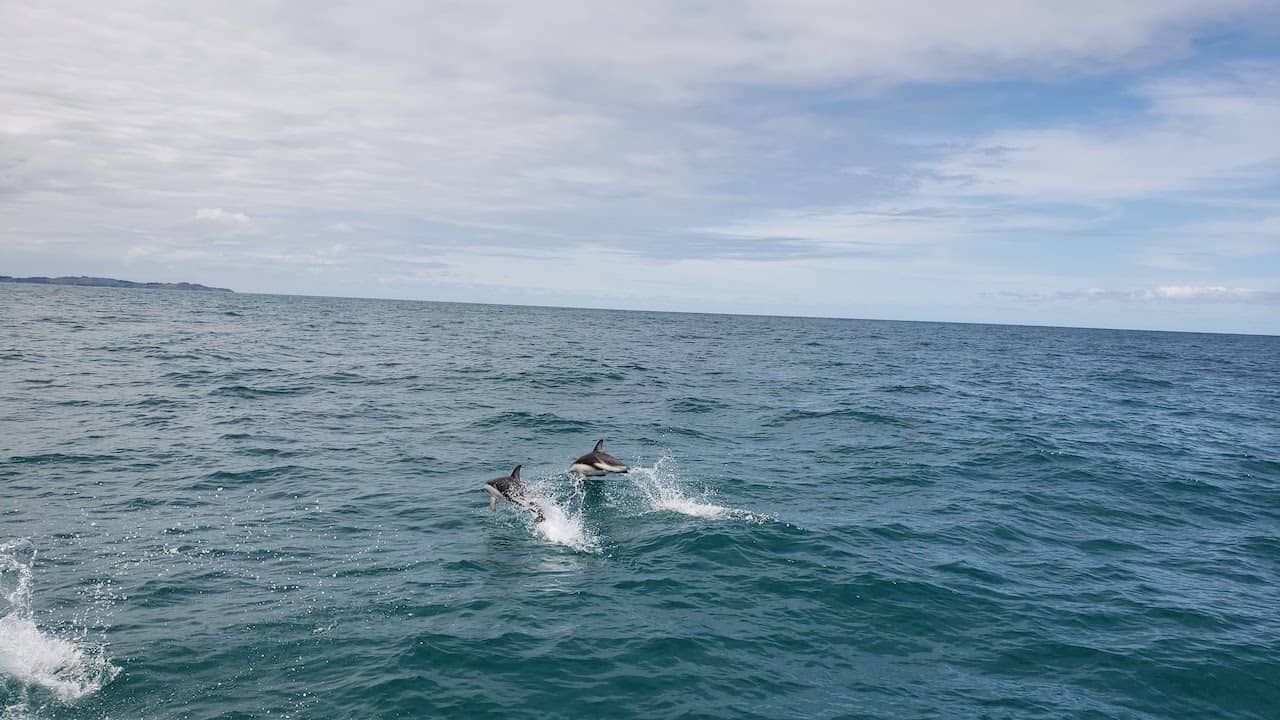
Day 9 – Kaikoura / to Christchurch
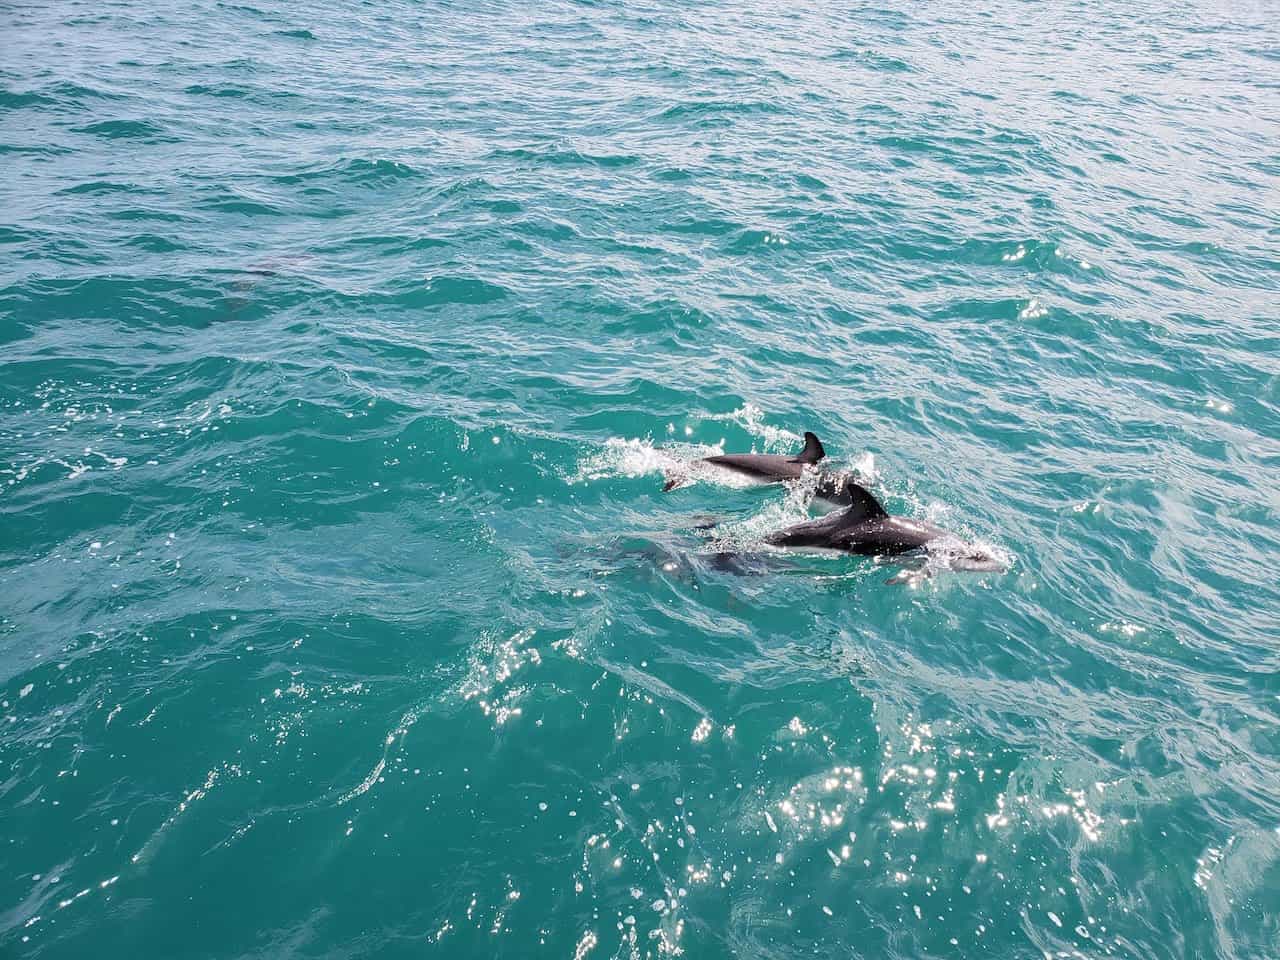
Your first full day on the South Island will take you into the water for a once in a lifetime experience – swimming with dolphins in the open water! This is not one of those touristy type places where they keep the dolphins roped off.
The boats will head out and find the dolphins out in the wild, where you will then hop into to the water and swim right alongside of them.
It is a very special experience to have and Kaikoura is one of the best spots to take part. Take a look at the Dolphin Encounter website to learn more about the day and to make your booking.


After getting all dried off, make your way to Christchurch where you will be spending the night. If you have some time when you arrive, feel free to walk the town, enjoy the riverside, and maybe head to the botanical gardens.
Where to Stay in Christchurch (Night 10)
- All Around: The George Christchurch
- Budget: Hotel Give
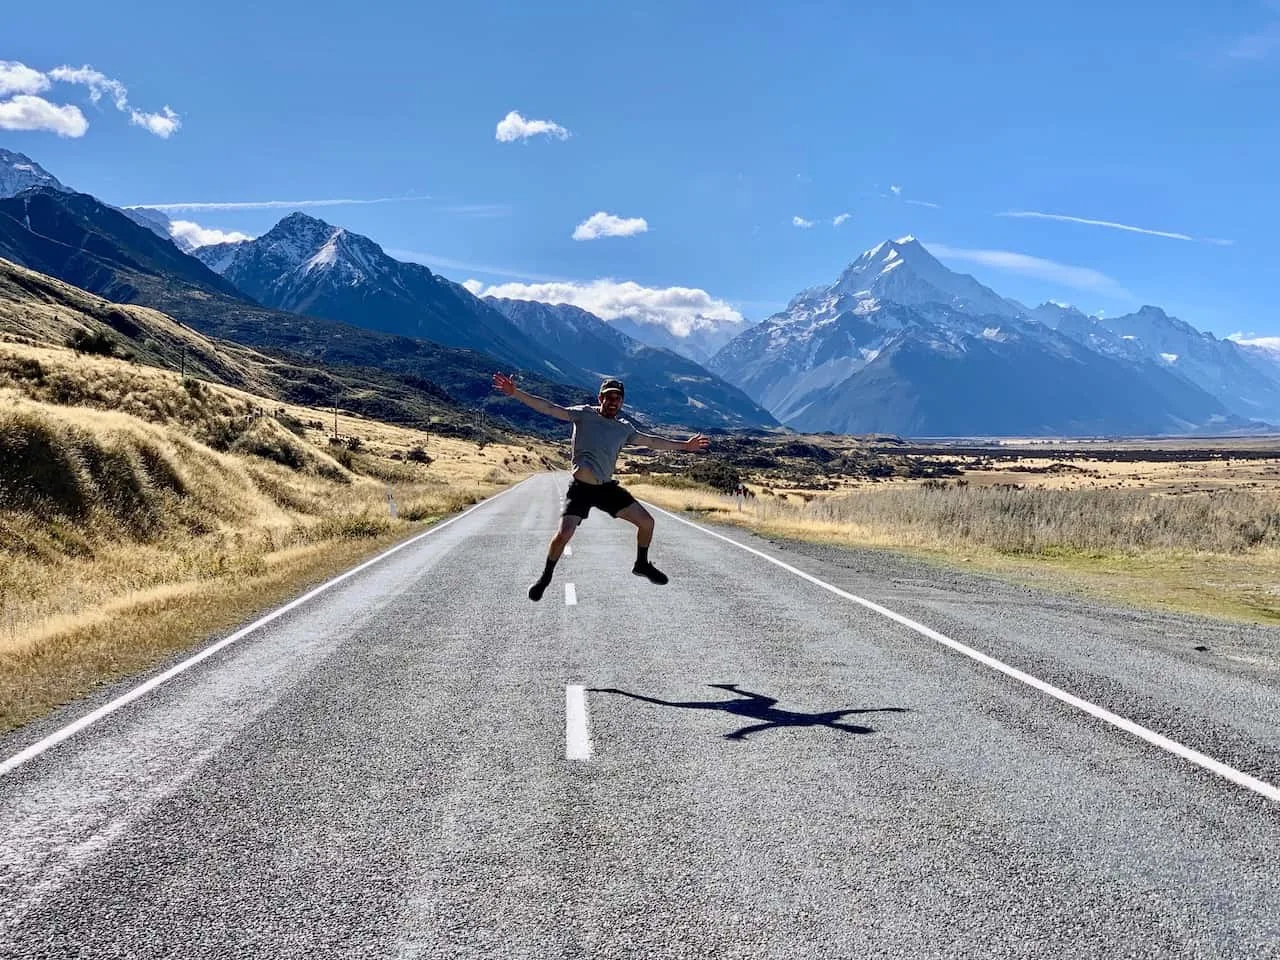
Day 10 – The Drive to Mount Cook
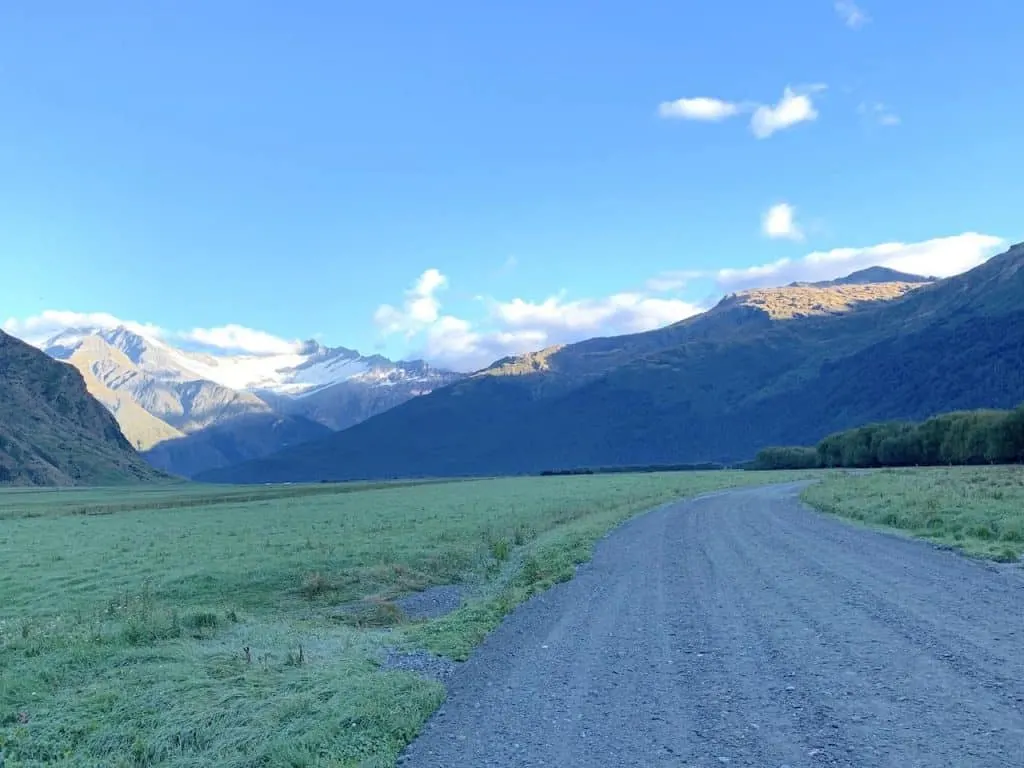
If you did not know already, the driving in New Zealand is an experience on its own – especially on the South Island.
The drive from Christchurch to Lake Tekapo to Mount Cook Village will have you pulling off onto the side of the road numerous times during the journey as there is just so much scenery to take in.
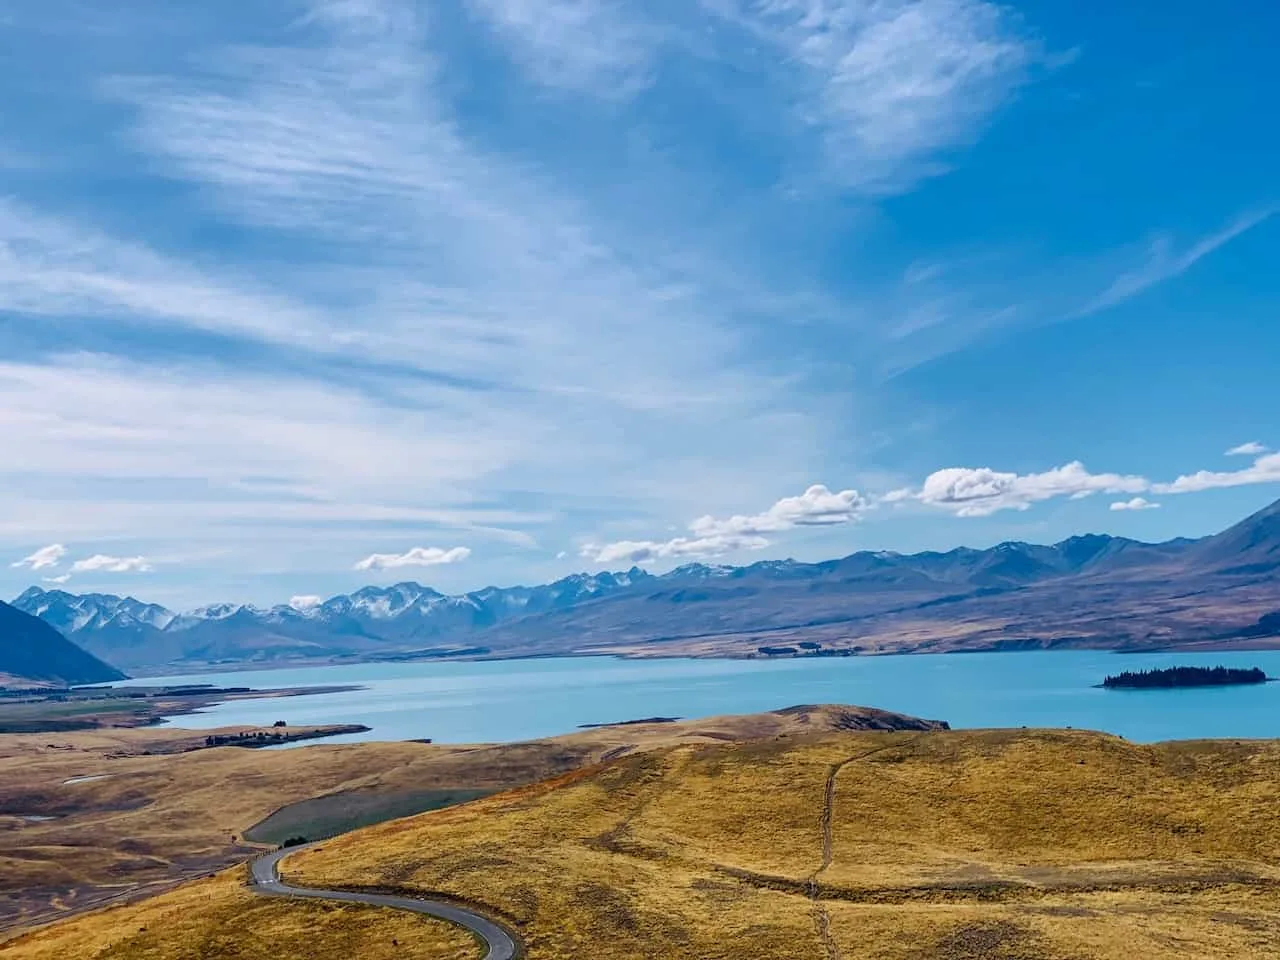
Lake Tekapo
Your first major stop here will be Lake Tekapo. Along the way you should see some signs pointing you to some viewpoints but also be sure to head to the Church of the Good Sheperd right by the waterside for some great photo ops.
Another must do viewpoint in my book is the one on top of Mt John Observatory. There is a small fee to use the road that heads up to the top but it is most definitely worth it. The views from the observatory of the lake and surrounding mountains are just surreal.

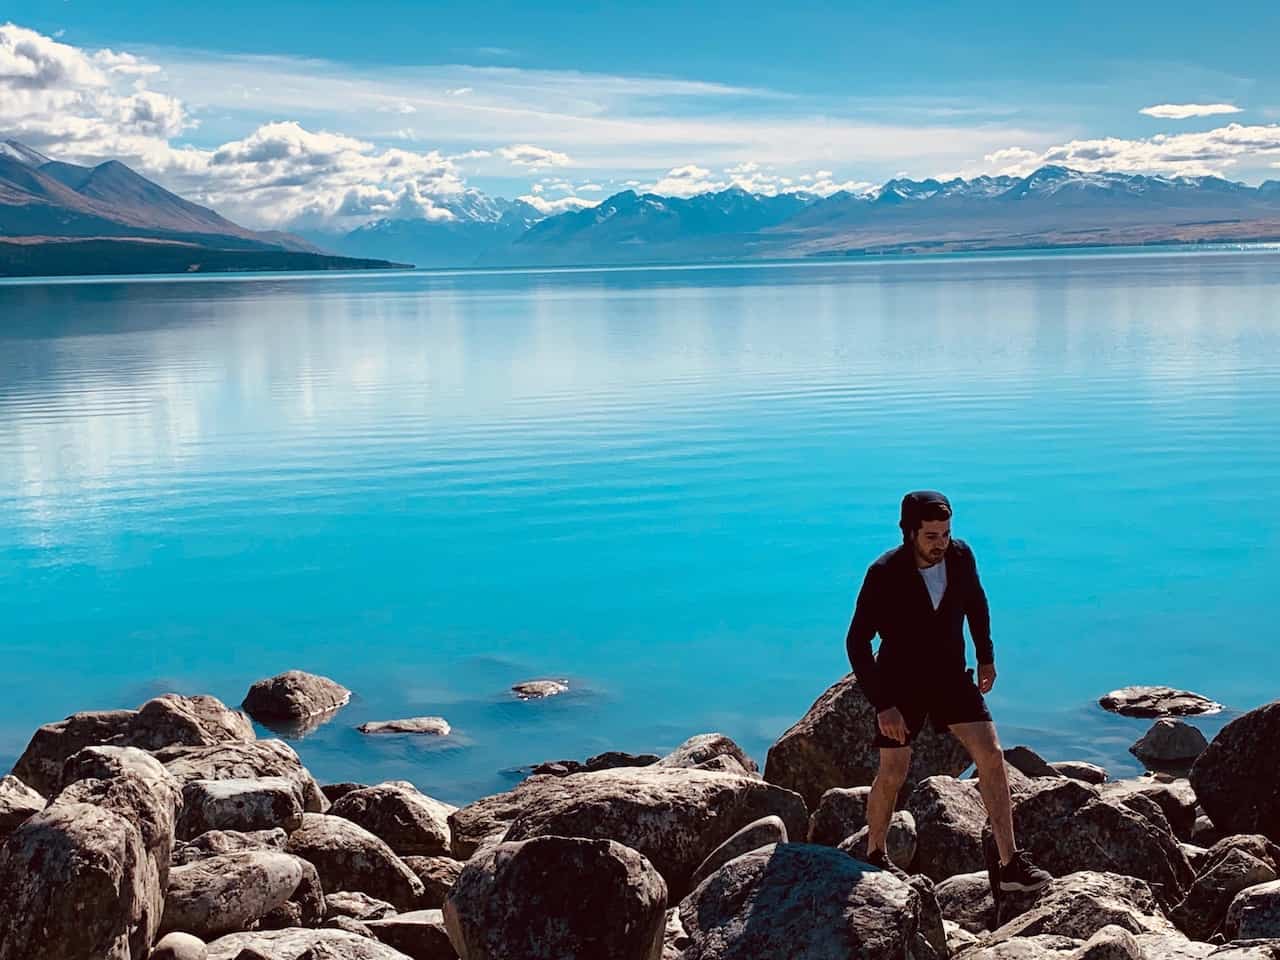
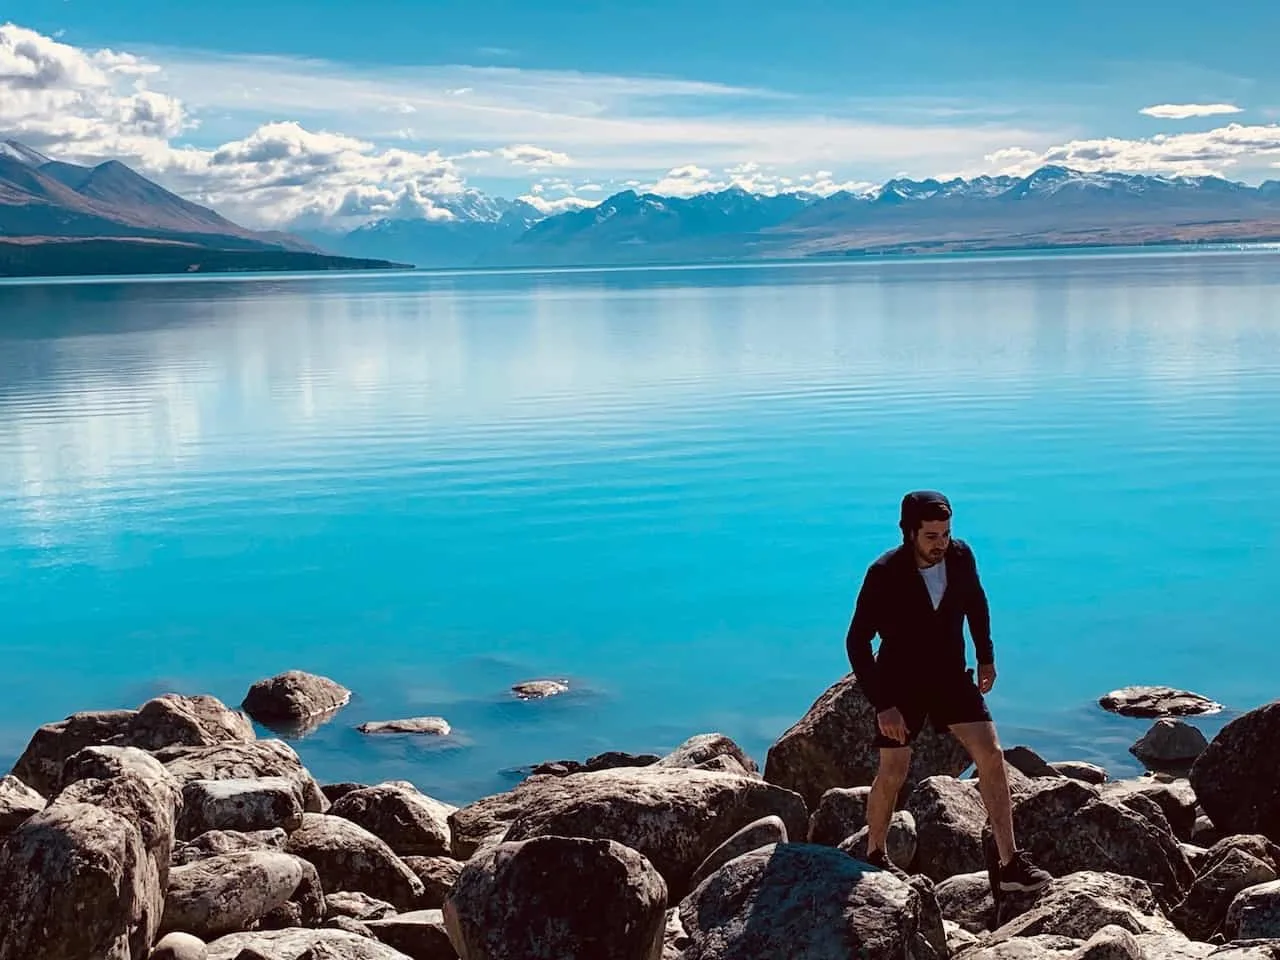
Lake Pukaki
Next up on the drive is Lake Pukaki. Just like Tekapo, there will be plenty of viewpoints to stop at along the way to pull over and enjoy the view.
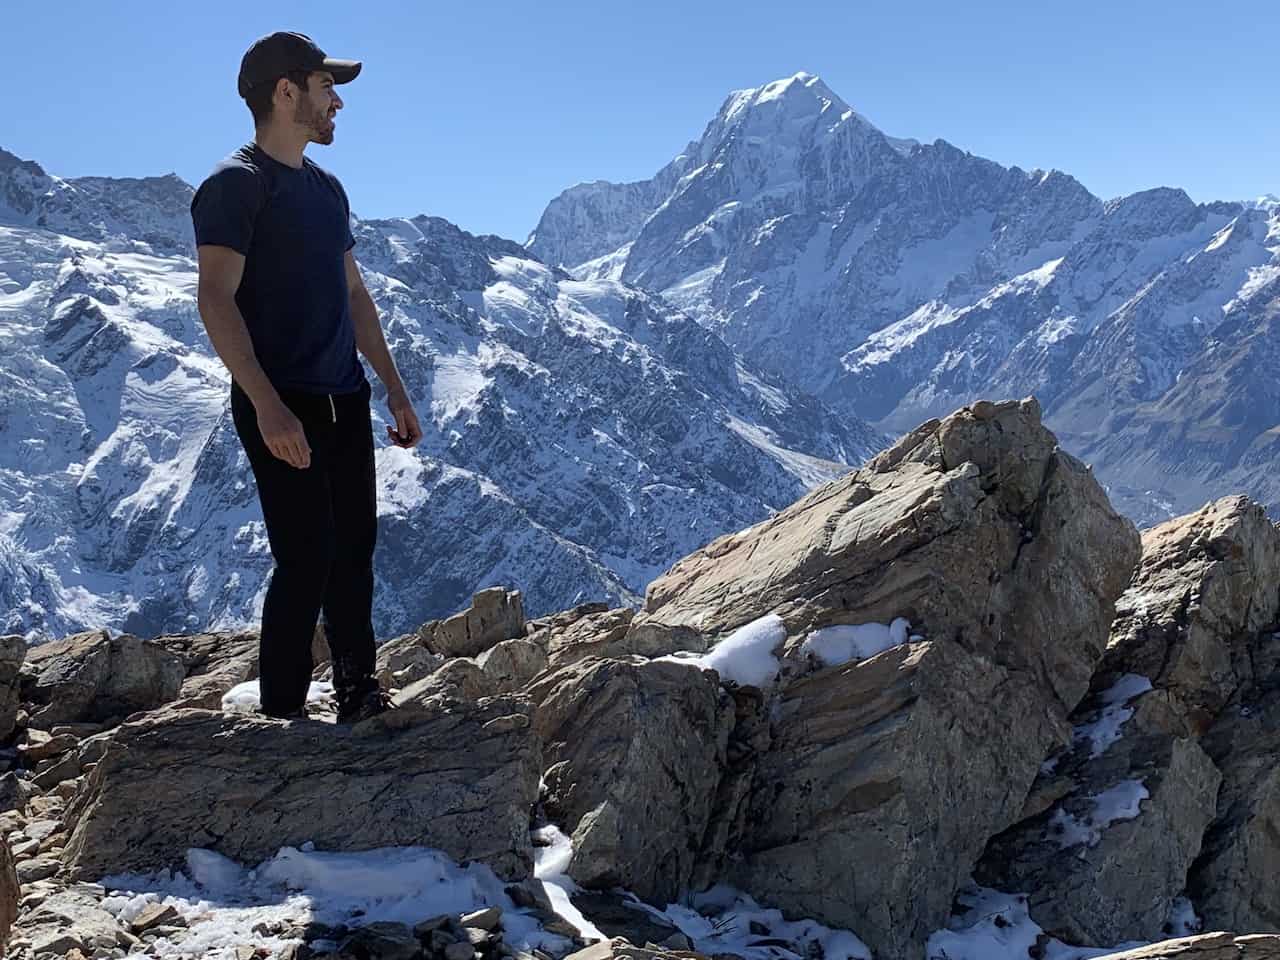
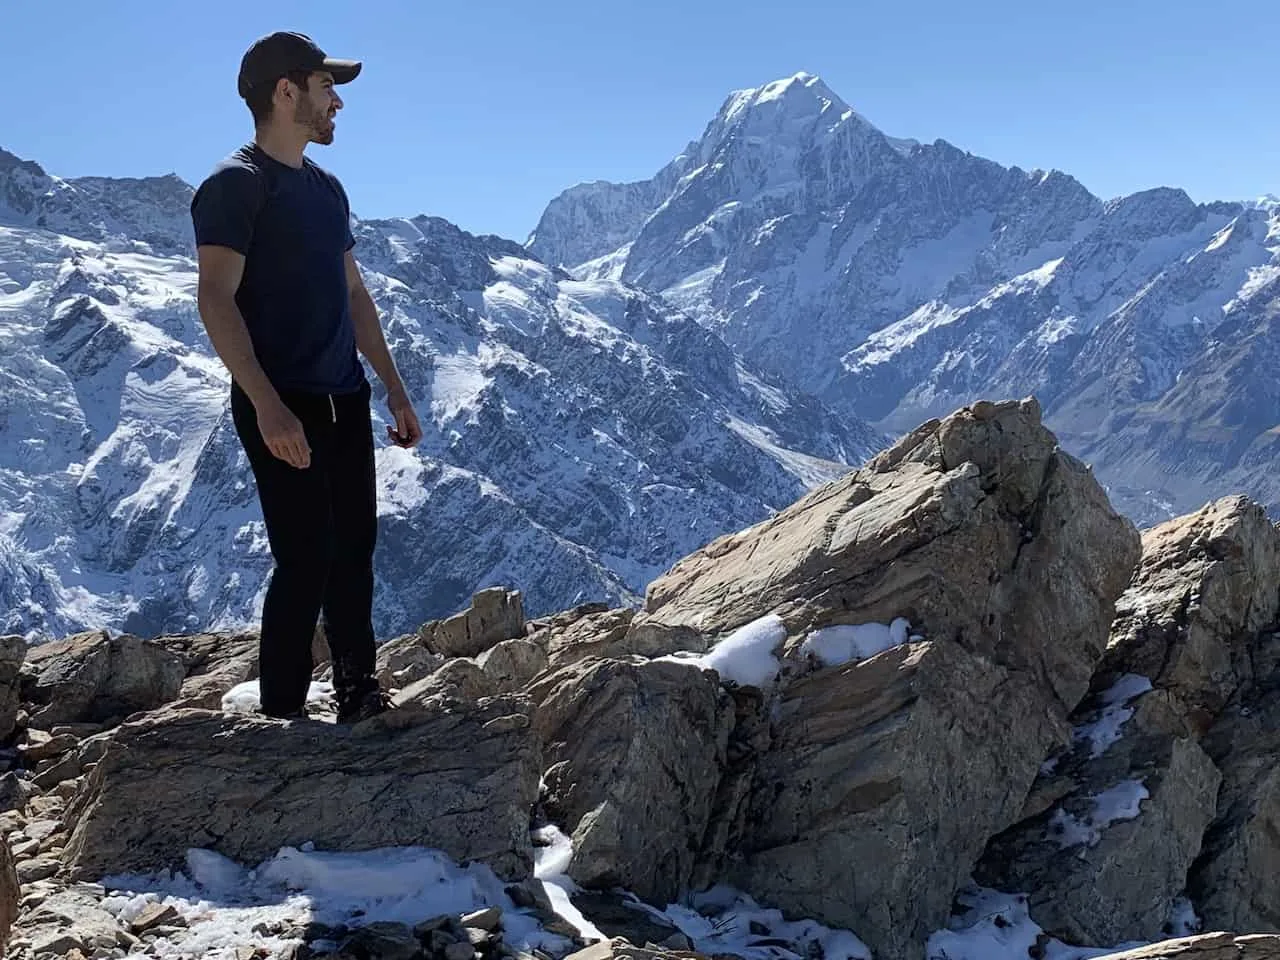
On a clear day you should have a straight shot at Mount Cook out in the distance.
The Drive to Mount Cook
Once you have had enough time taking in the views from afar, it is time to make the turn towards Mount Cook Village. During this portion of the drive you will have Lake Pukaki off to your right and Mount Cook straight ahead of you.
When it comes to driving in New Zealand, there aren’t too many roads better than this one.
While there are some official spots to pull over, there are plenty of unofficial ones as well. If you do pull over just be careful and make sure to get completely off the road.

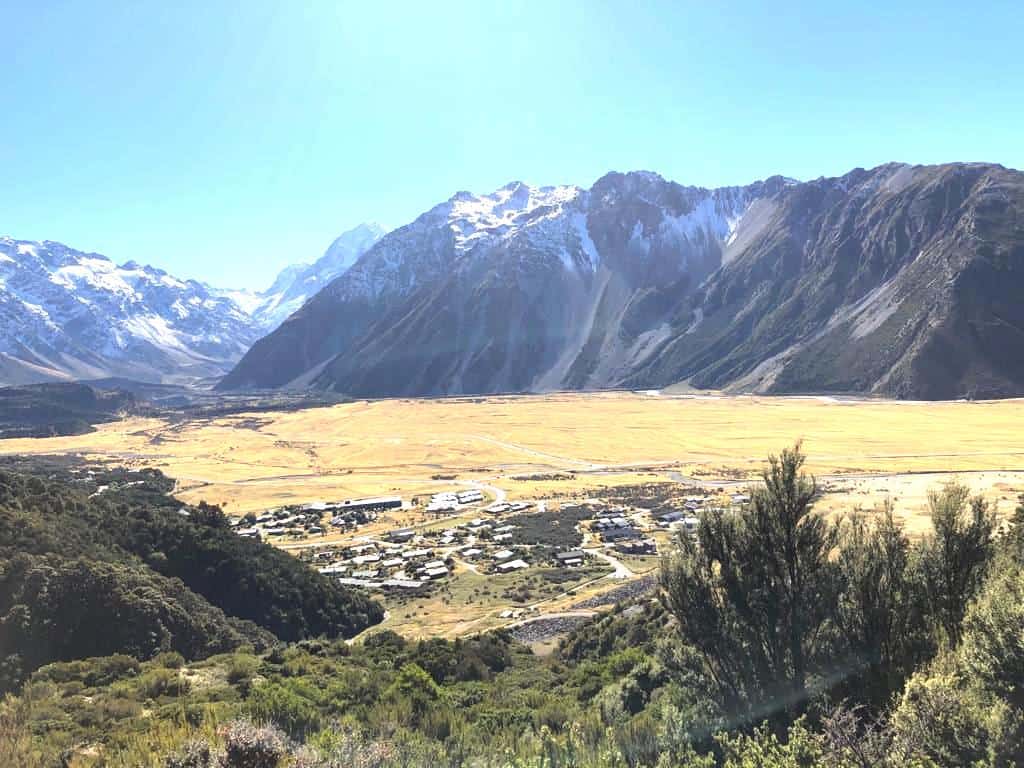
Soon enough, you will arrive in Mount Cook Village, a small town based right in the national park with all the natural beauty surrounding you.
I prefer to stay in Mount Cook Village itself instead of Tekapo or Twizel, as all the hiking trails are right at your doorstep.
Where to Stay in Mount Cook Village (Nights 10 & 11)
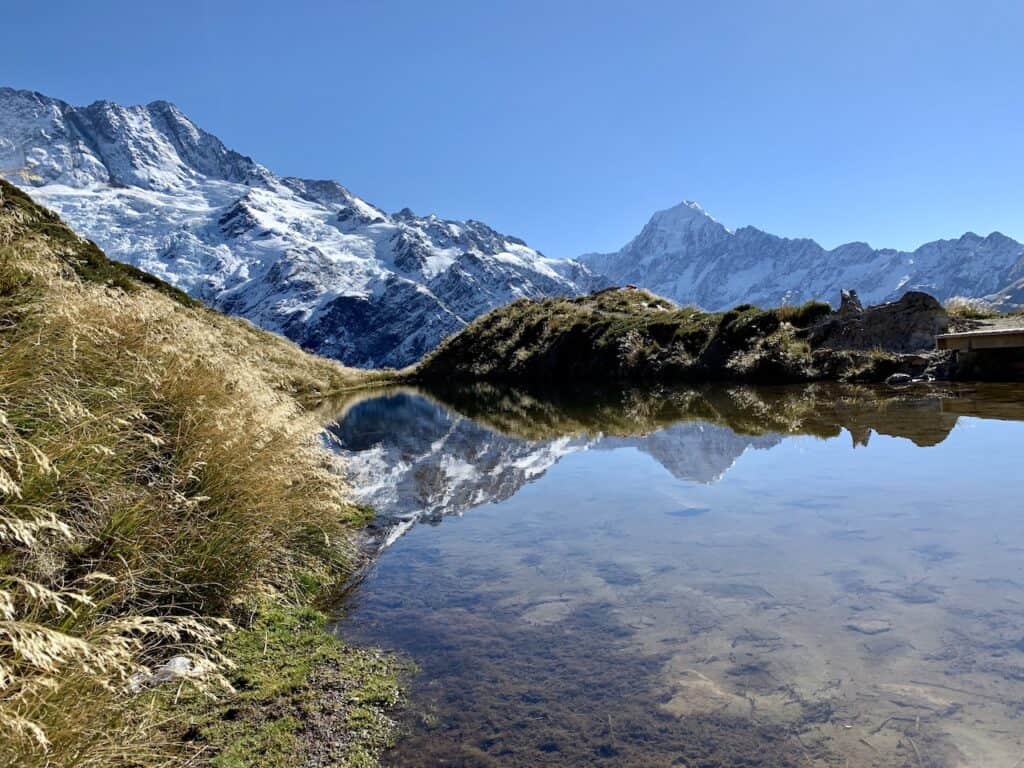
Day 11 – Mount Cook National Park
The next two days will be spent exploring all that Mount Cook National Park has to offer. There are hikes for every skill level and you should have no problem enjoying a few of them during your stay there.
Below are the main hikes to choose from ranging from less than an hour to 8+ hours:
Learn More: Check out this overview of every single one of the Mt Cook Hikes
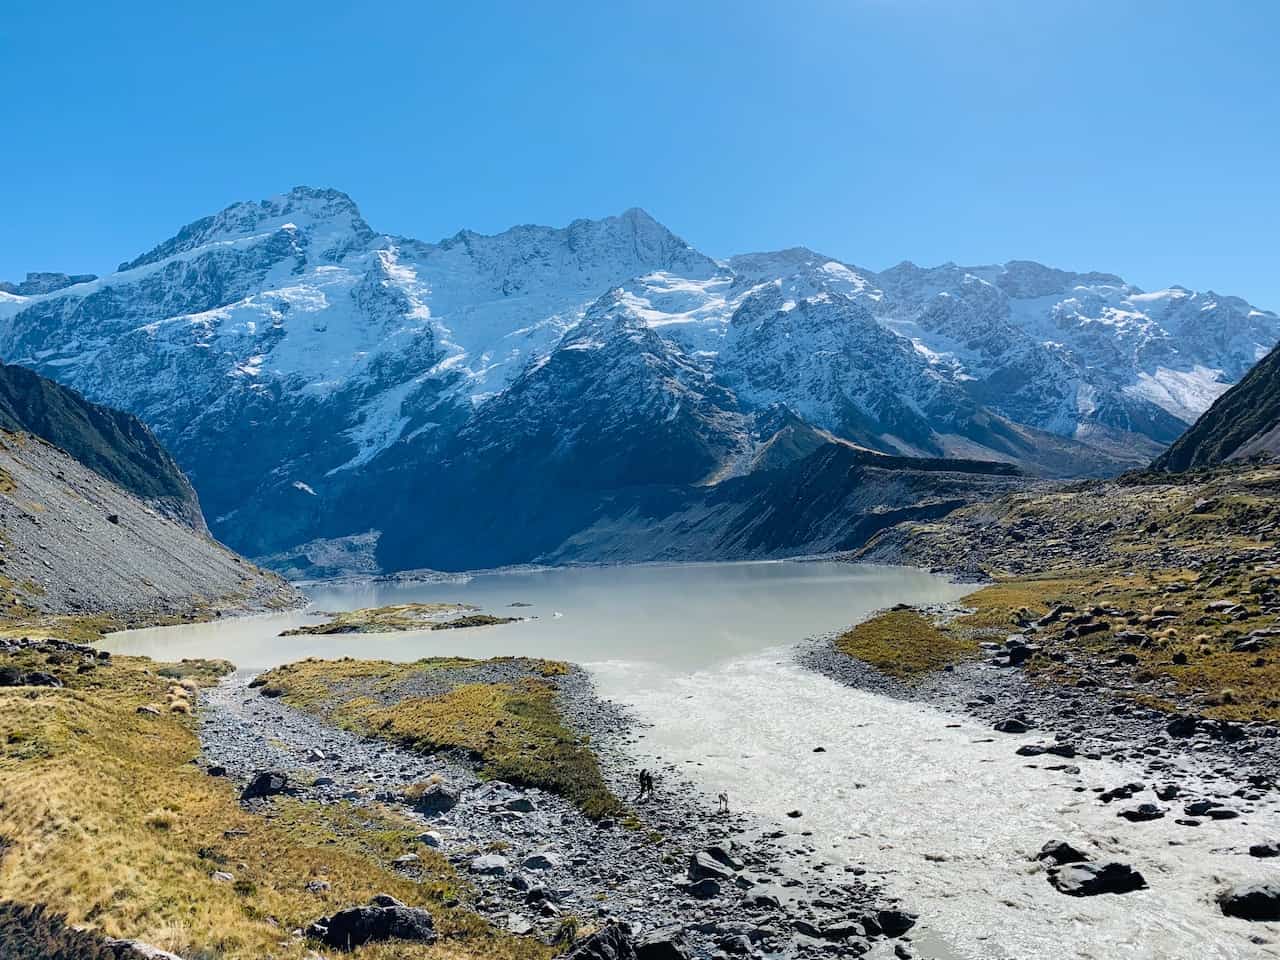
Hooker Valley Track
The “must do” hike in Mount Cook National Park would be the Hooker Valley Track. An easy 3 hour trail round trip trail, this hike takes you alongside and into the valley beneath Mount Cook itself.
During the hike you will pass by the Mueller Lake, and onto three suspension bridges on your way to the base of Hooker Lake overlooking Mount Cook in the distance. Since it is a valley walk, there is barely any elevation gain/loss, making this a hike for nearly everyone to take part of.

Kea Point
An easy add on to the Hooker Valley Track is Kea Point. The hike to Kea Point starts in the same area as the Hooker Valley trail, and is a simple 1 hour round trip walk.
Once you have reached Kea Point, you will get a great view of Mueller Lake from another angle and Mount Cook out in the distance.
Take a look at the Kea Point Track Hiking Guide to learn more.

Red Tarns Track
If you are looking to get some views from above, one option is the Red Tarns Track. This track will take you above the valley with views of the glacier lake and Mount Cook out in the distance.
Now the track is full of plenty of stairs as you make the 300 meter ascent. But once up top you will be able to relax and take in those views before making your way back down in the direction you came.
Take a look at the Red Tarns Track Guide to get you prepared for the trail

Mueller Hut
The most demanding of hikes in the Mount Cook region is that of the Mueller Hut. While many may opt to do the hike in two days, it can also be done in one day instead.
Expect the total round trip to be around 6-8+ hours depending on fitness level and the amount of time you want to spend at various viewpoints and the hut itself.
The track begins with 2000+ stairs (as part of the Sealy Tarns track), before continuing the ascent on steep rocky ground towards the Mueller Hut.
Throughout the hike you will be taking in views of the lakes down below, with Mount Cook out in the distance.
Take a look at the Mueller Hut Track Guide to get you prepared for the trail
Note: The Sealy Tarns Track is another option here if you do not want to complete the full trail to the Mueller Hut. Set aside about half the time if you are looking to just head up to the halfway point to the Tarns.
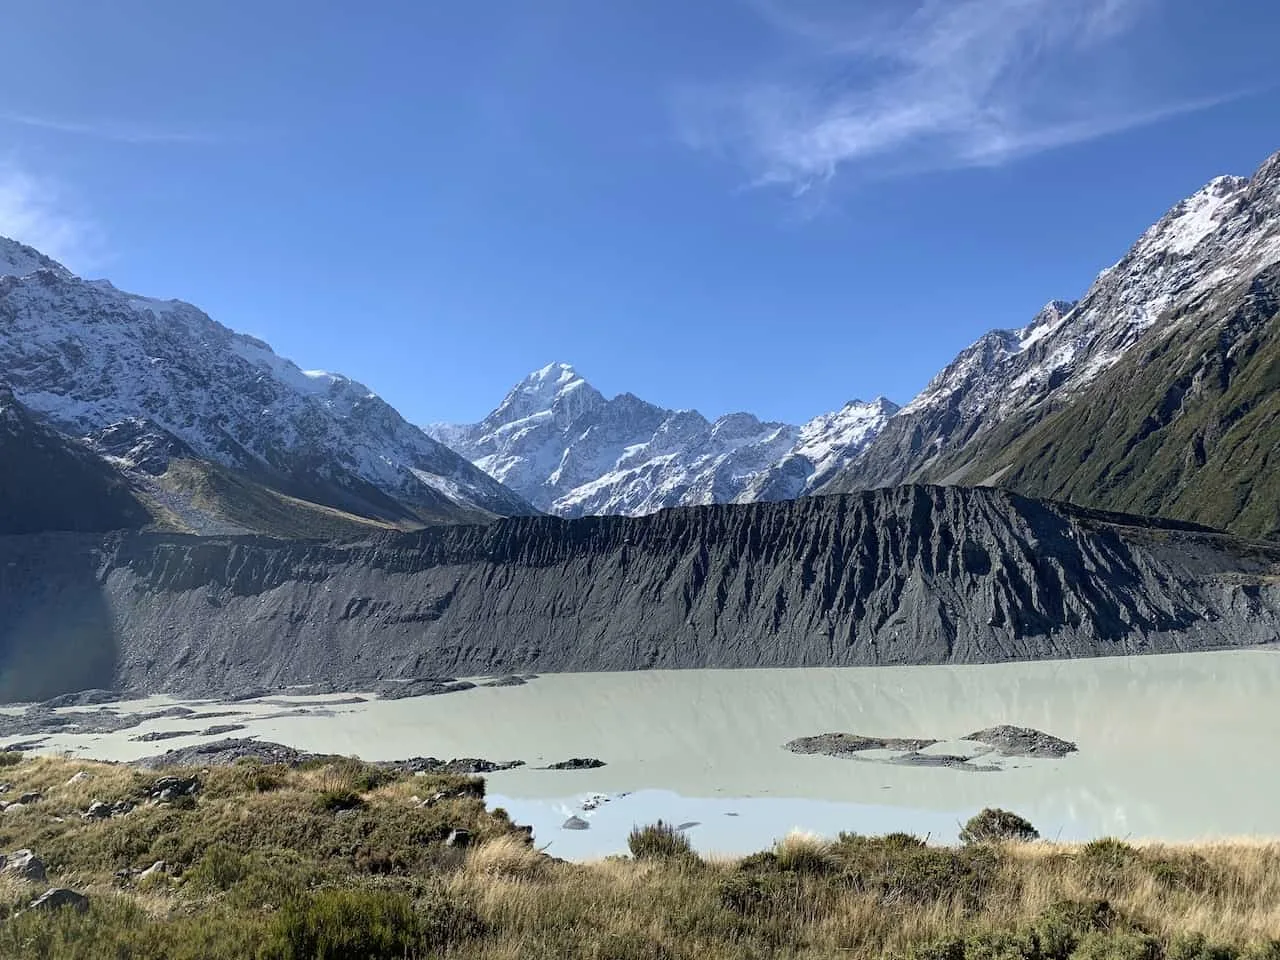
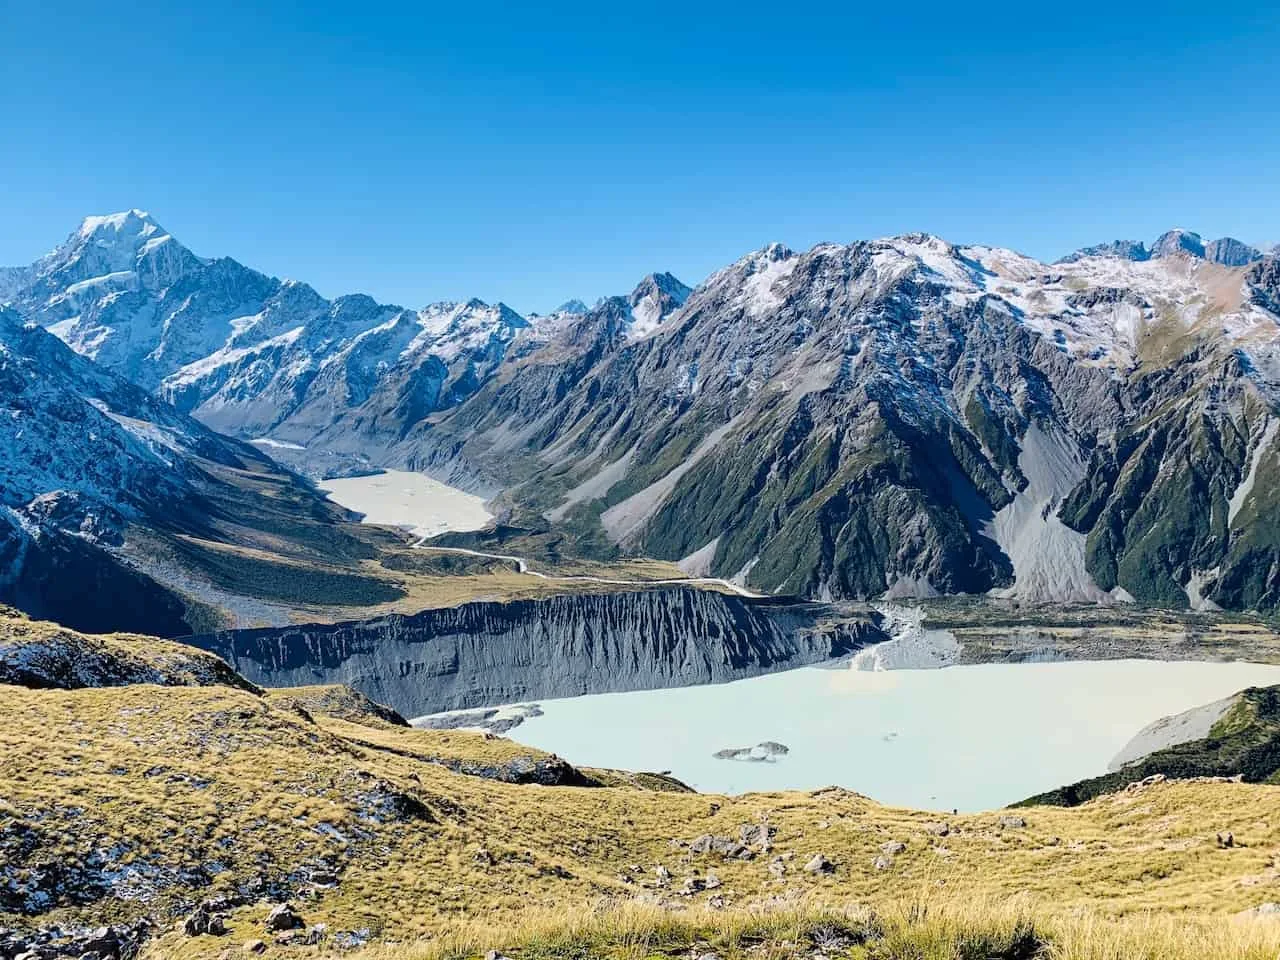
Blue Lakes and Tasman Lake View & Tasman Lake Track
While these may technically be a couple different trails, you should have no problem combining them into one longer route, taking you a couple hours to complete.
An easy trail takes you to 3 different small lakes around the Mount Cook area. The hike begins at the Tasman Glacier Car Park and follows a path to the first of the lakes.
When you get to each of these lakes note that you can go around each one and follow a path to the next. It may not be so obvious at first, but there is a path around. Once you have seen all of them, turn back around and head back towards the starting point.
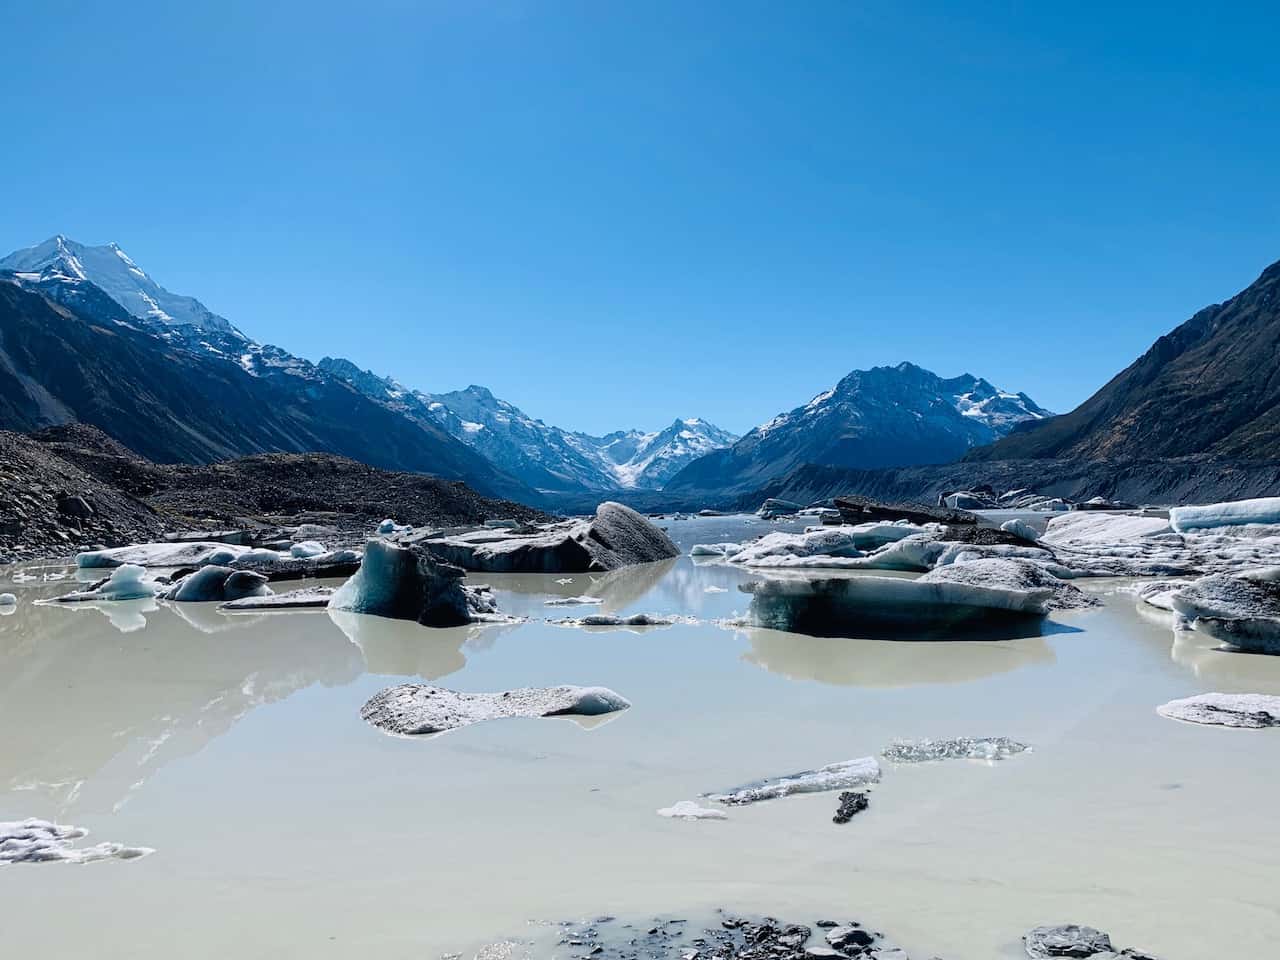
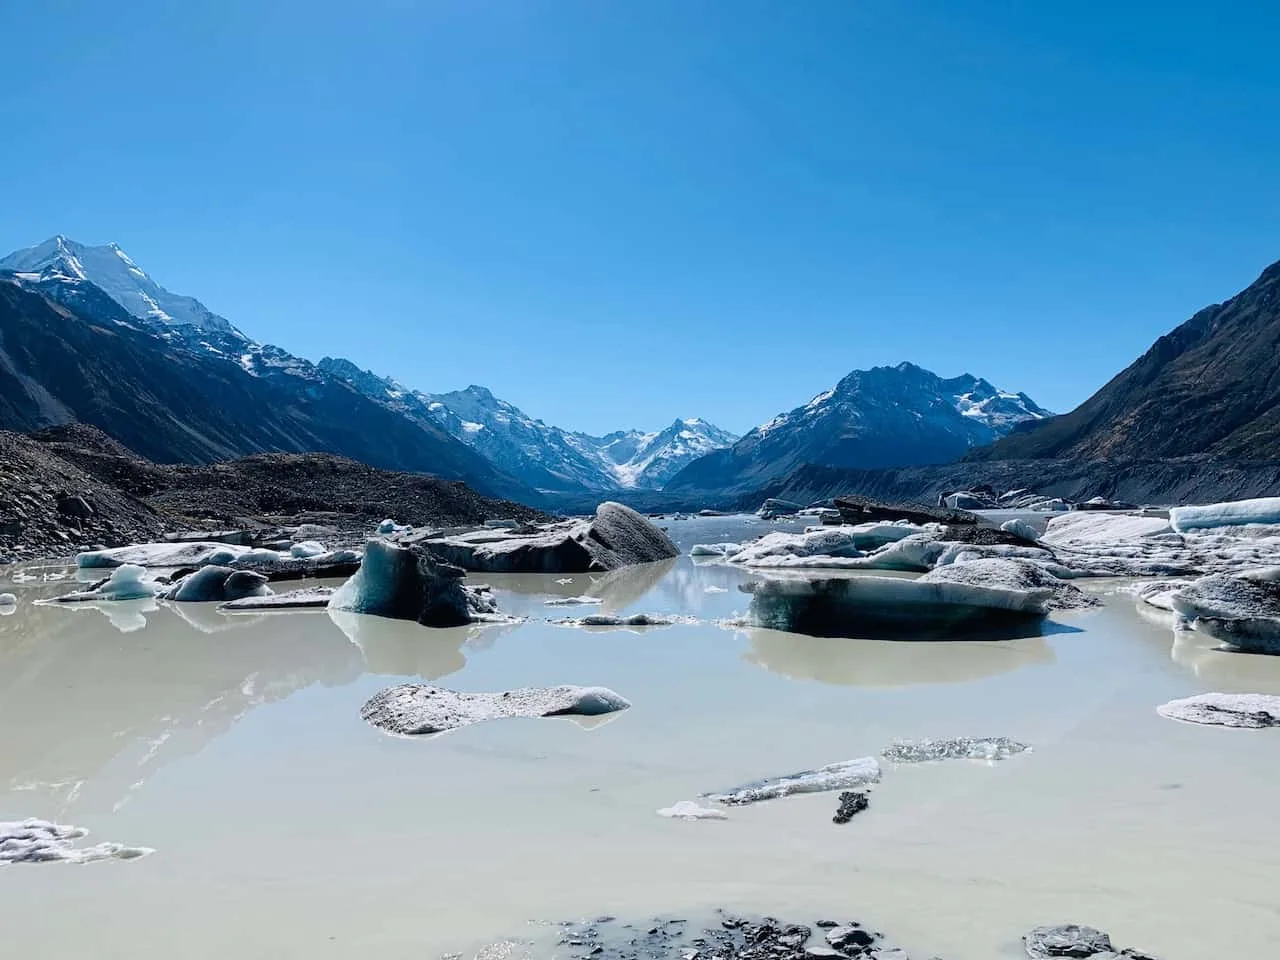
On the way back you should see a sign pointing you towards the Tasman Lake View (you would have passed this same sign on the way to the lakes trail). Head up the path where you will be welcomed to a vast view of Tasman Lake down below.
Similarly, as you are walking back you should be pointed in the direction towards the base of Tasman Lake. Follow that path to get you right towards the waters edge, where you can take in the view from down below. It was quite surreal seeing the small icebergs pass by as you enjoy the glacier lake’s surroundings.
Take a look at the Blue Lakes and Tasman Lake View & Tasman Lake Track Guide
Day 12 – Mount Cook National Park / to Queenstown
On day 12 of this New Zealand road trip, you can continue on hiking the park and choosing some other trails from above. You also have the option to head off to some other activities that are offered in the area.
These include cycling, glacier boating, heli glacier hiking (similar to Franz Josef), or taking a flight around the mountain ranges.
Click on the links to head over to some of the company websites that offer those activities.

At day’s end though, hop back into your car and make the 2 hour drive to Queenstown, your next stop on this New Zealand 3 week itinerary.
Where to Stay in Queenstown (Nights 12, 13, & 14)
- All Around: Lomond Lodge Motel
- Budget: Absoloot Value Accommodation
- Luxury: Sofitel Queenstown
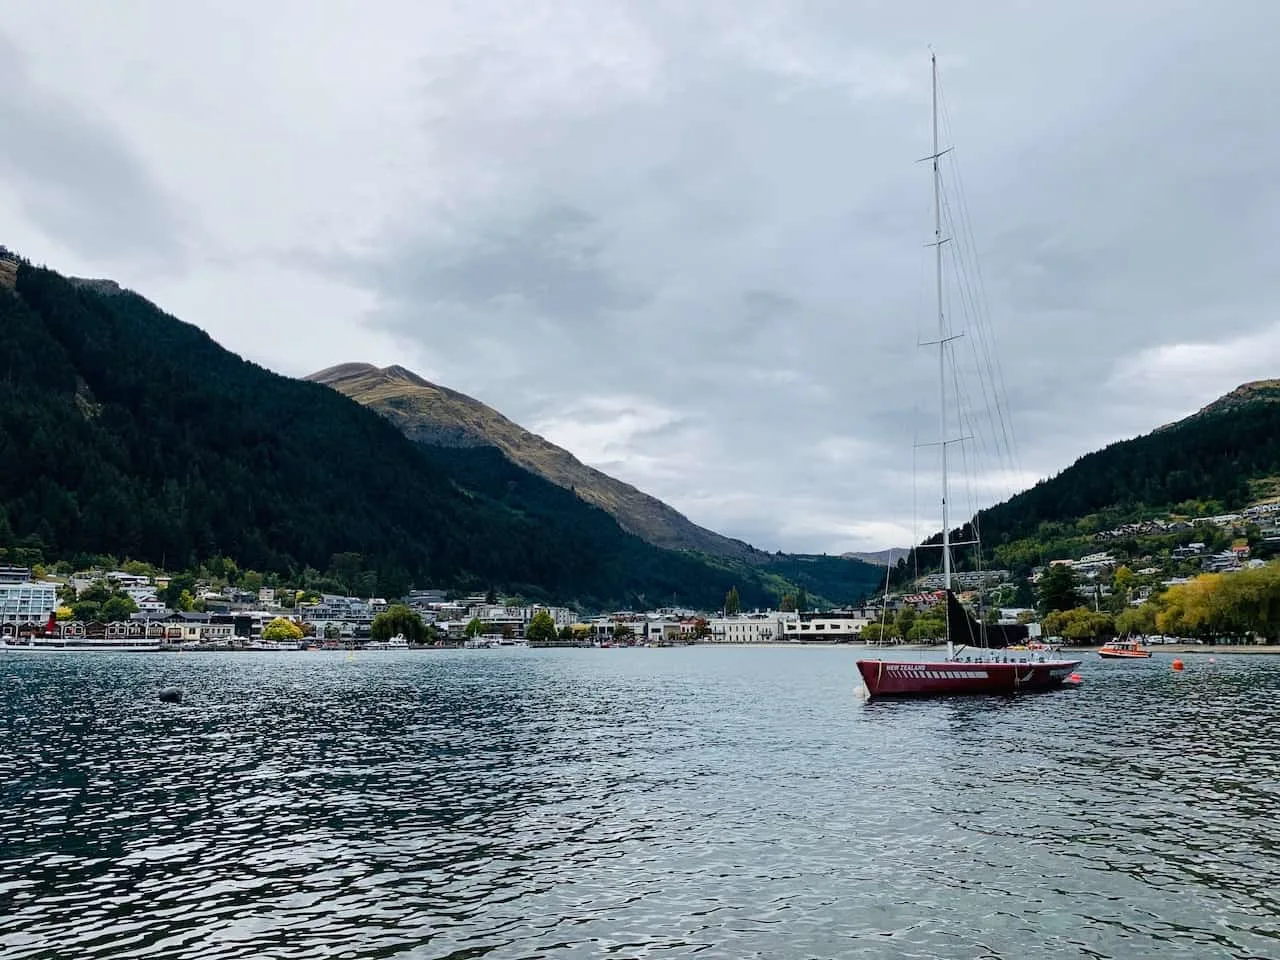
Day 13 – Queenstown
For the next two days you will have the chance to explore the ins and outs of what Queenstown has to offer – from hiking to adrenaline activities to just enjoying the beautiful lakeside town.
On your first day you can choose from the following options to fill up your day:
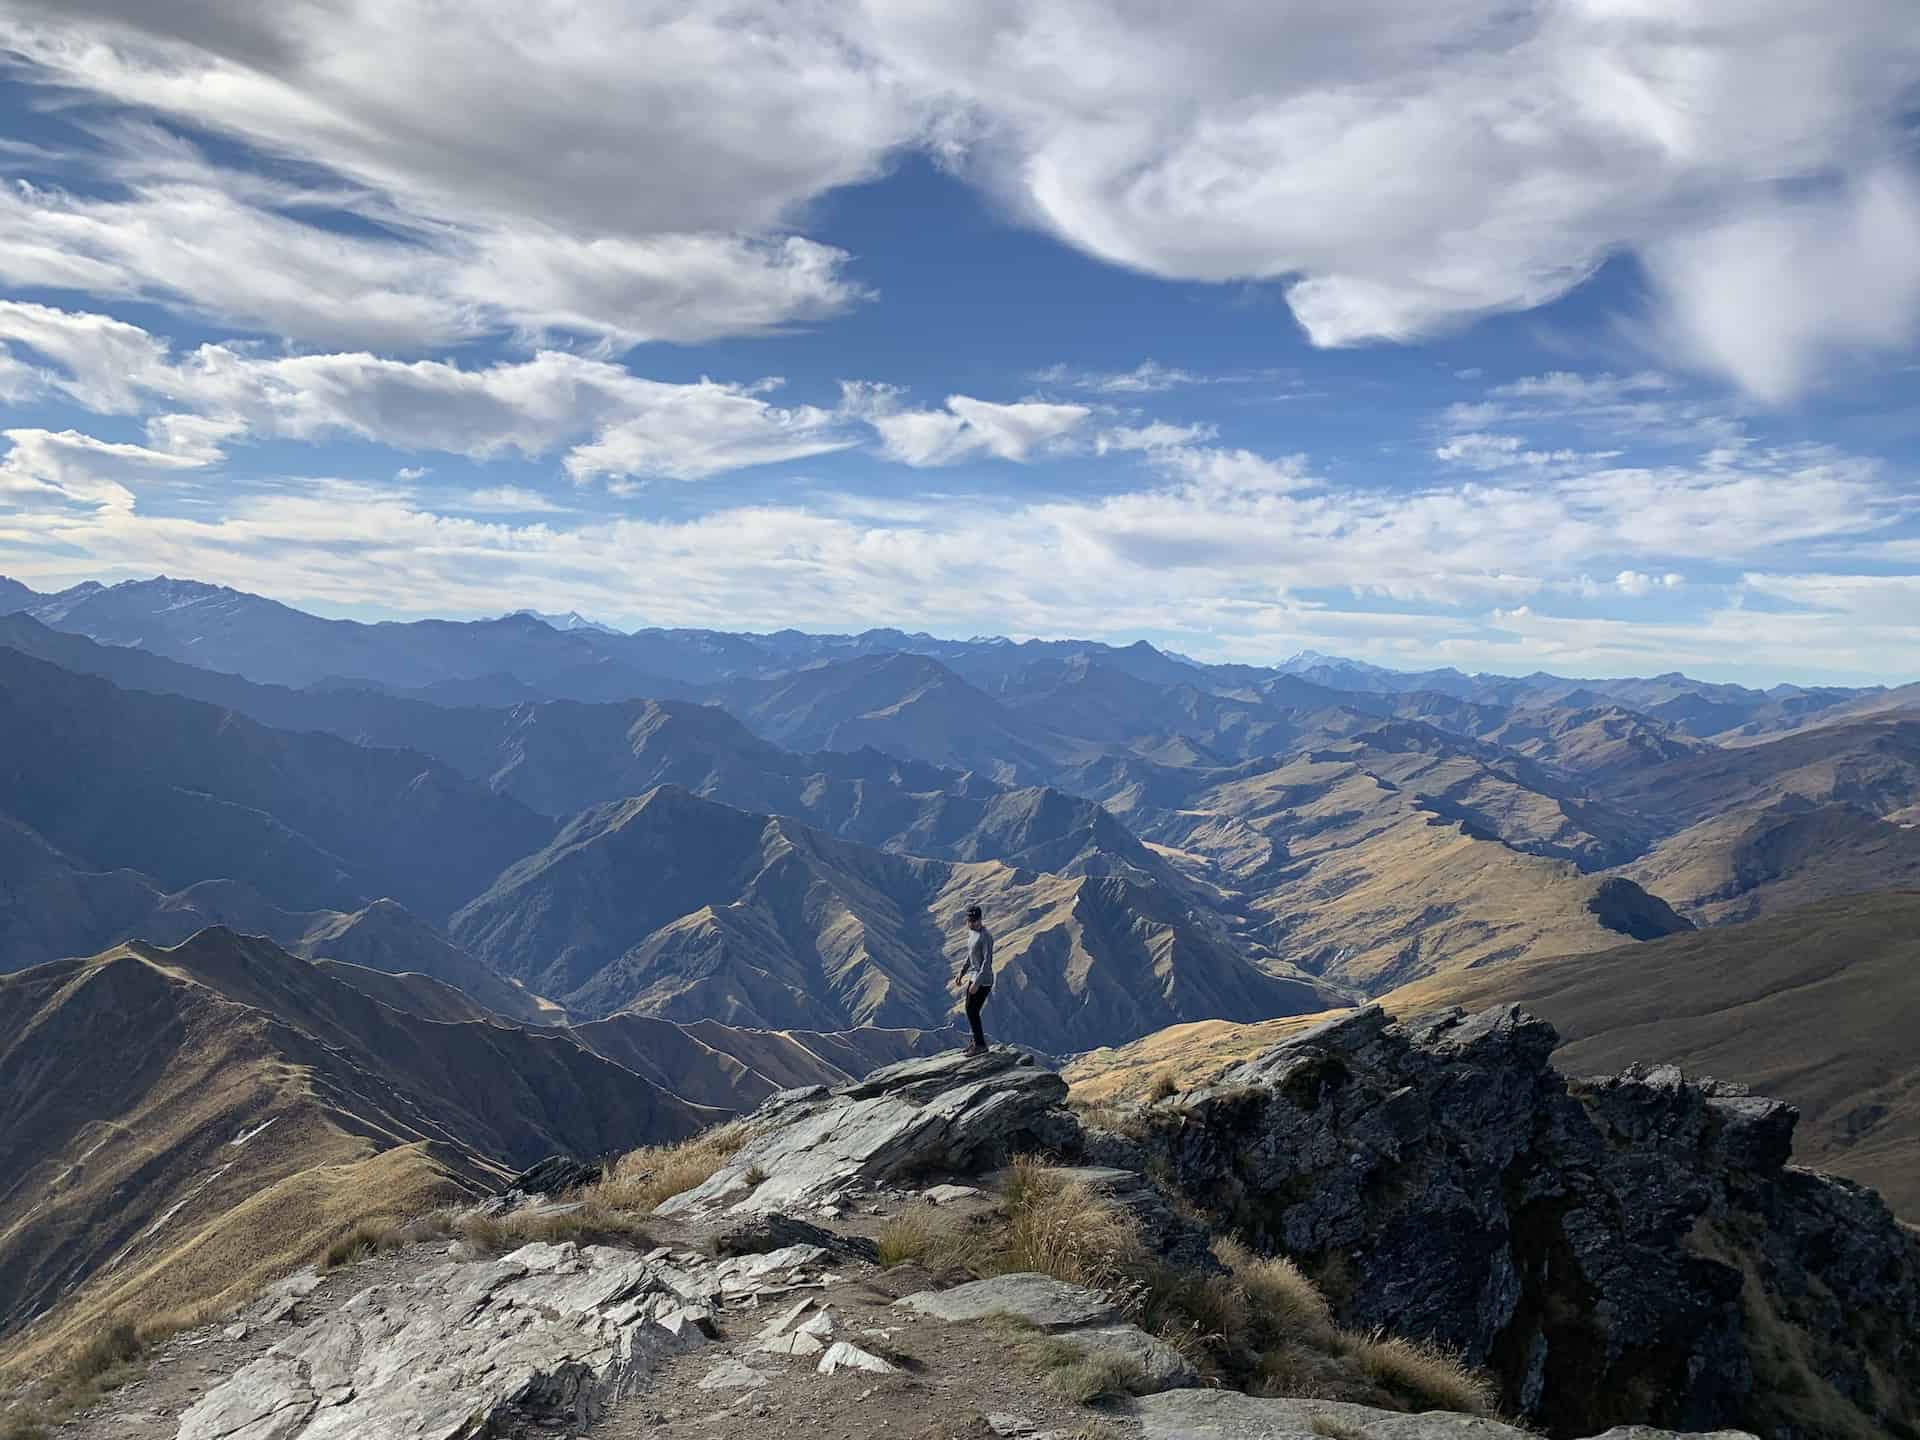
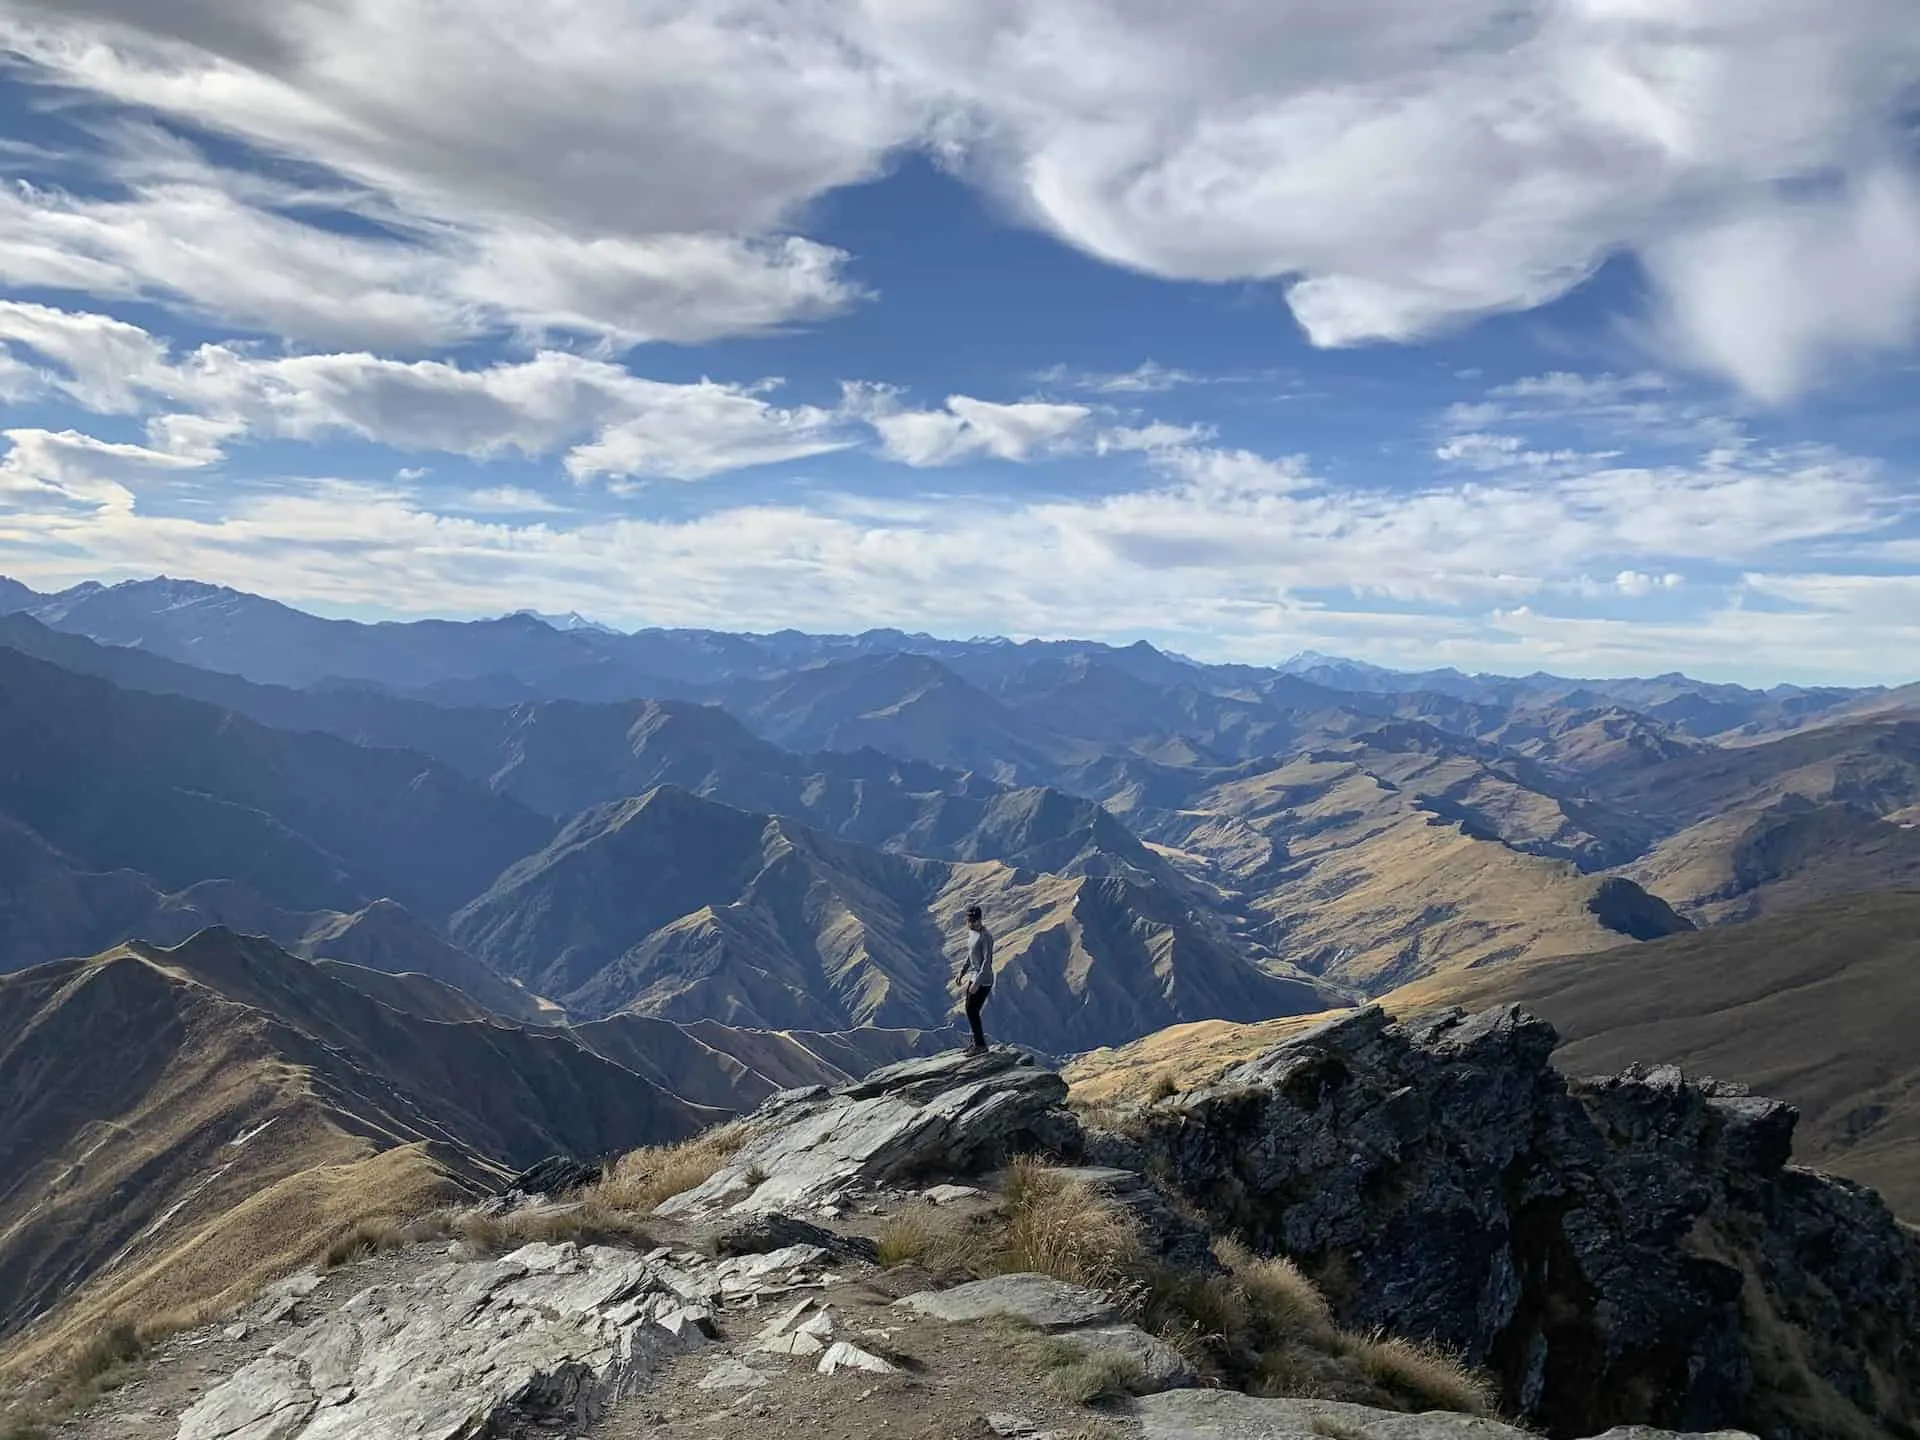
Hike Ben Lomond
You can get started right away and hike Queenstown’s most challenging climb – Ben Lomond. Climbing this mountain that overlooks Queenstown, Lake Wakatipu, and the never ending mountain ranges in every direction will 100% be worth it at the end of the day.
If you do decide to take part of the hike, leave around 4-5 hours to complete the round trip. You can start the hike on top of the Queenstown Gondola or at the base of the Gondola, where you can take the Tiki Trail up (add another 1.5 hours of hiking round trip if you opt for the Tiki Trail).
Check out Hiking the Ben Lomond Track to learn more!
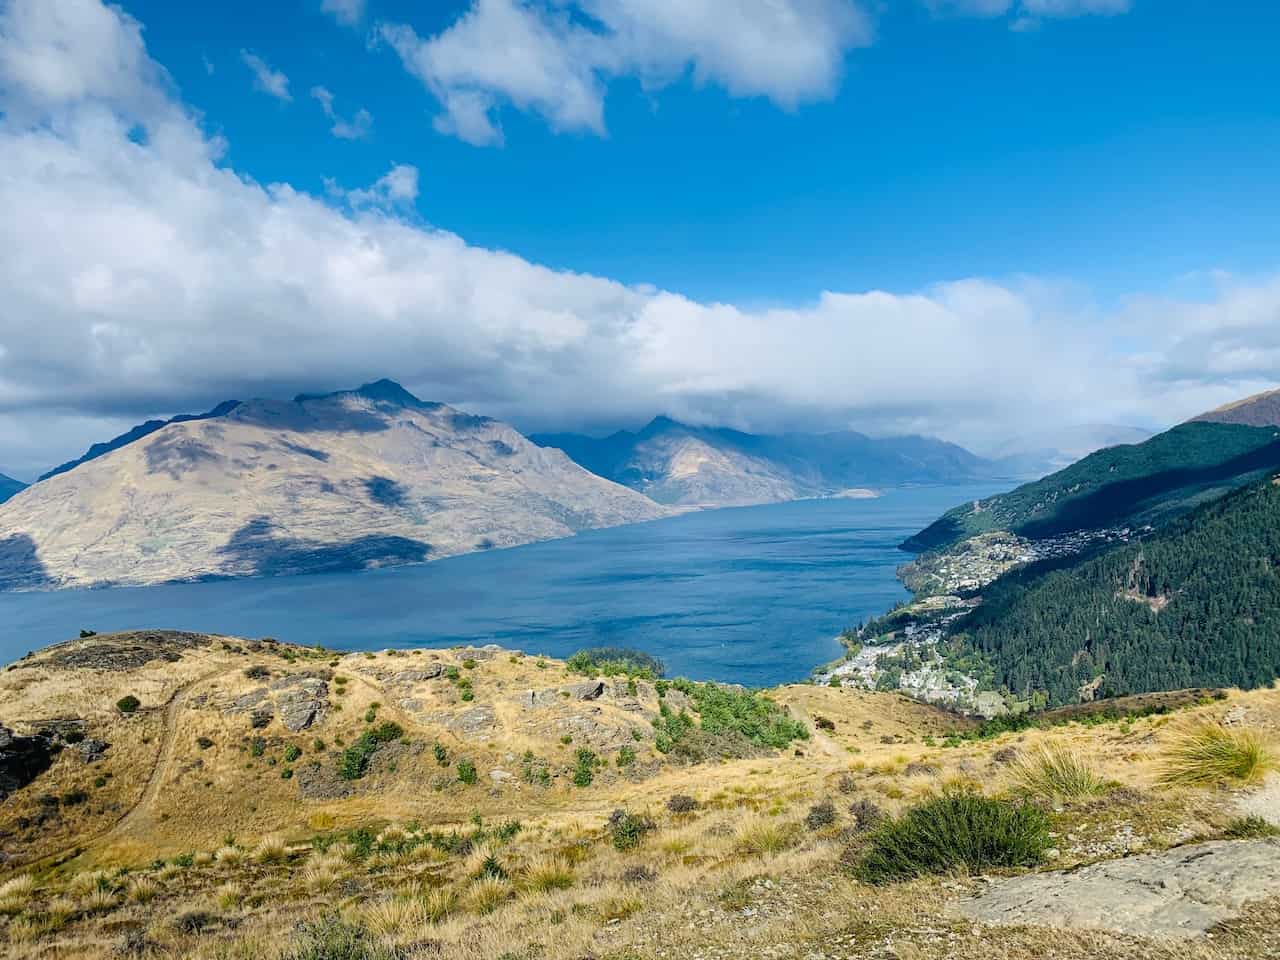
Queenstown Hill
A much less challenging of a climb is the one up to Queenstown Hill. It takes just about 45 minutes to get to the top (1.5 hours round trip), where you will get some incredible views of Queenstown and the lake down below.
Although it is a much shorter climb than Ben Lomond, it is a great alternative for those that do not want to take part of a full day type of climb. Note that the hike up Queenstown Hill is nearly all uphill so it can get a bit tough at times.
Much of it is also in the forest until the last part, when you then exit through the trees and are able to take in the views.
Read More: Check out the guide to the Queenstown Hill Walk to learn all about the hike up

Enjoy Queenstown’s Waterfront
If you take part of a hike or not, you should still have time to explore the waterfront area of Queenstown. You can walk along the water to Queenstown Gardens, which is full of ponds, flowers, lake views, and lots of ducks!
You can also just sit back and relax near the water with the beautiful scenic mountains all around.

Do Some Luging
On top of the Queenstown Skyline Gondola (where Ben Lomond track begins), there is actually a luge circuit that takes you down a portion of the mountain.
If you are looking for some fun (and some views!!) then luging could be a great activity for you. Take a look at the Queenstown luging website to learn more.
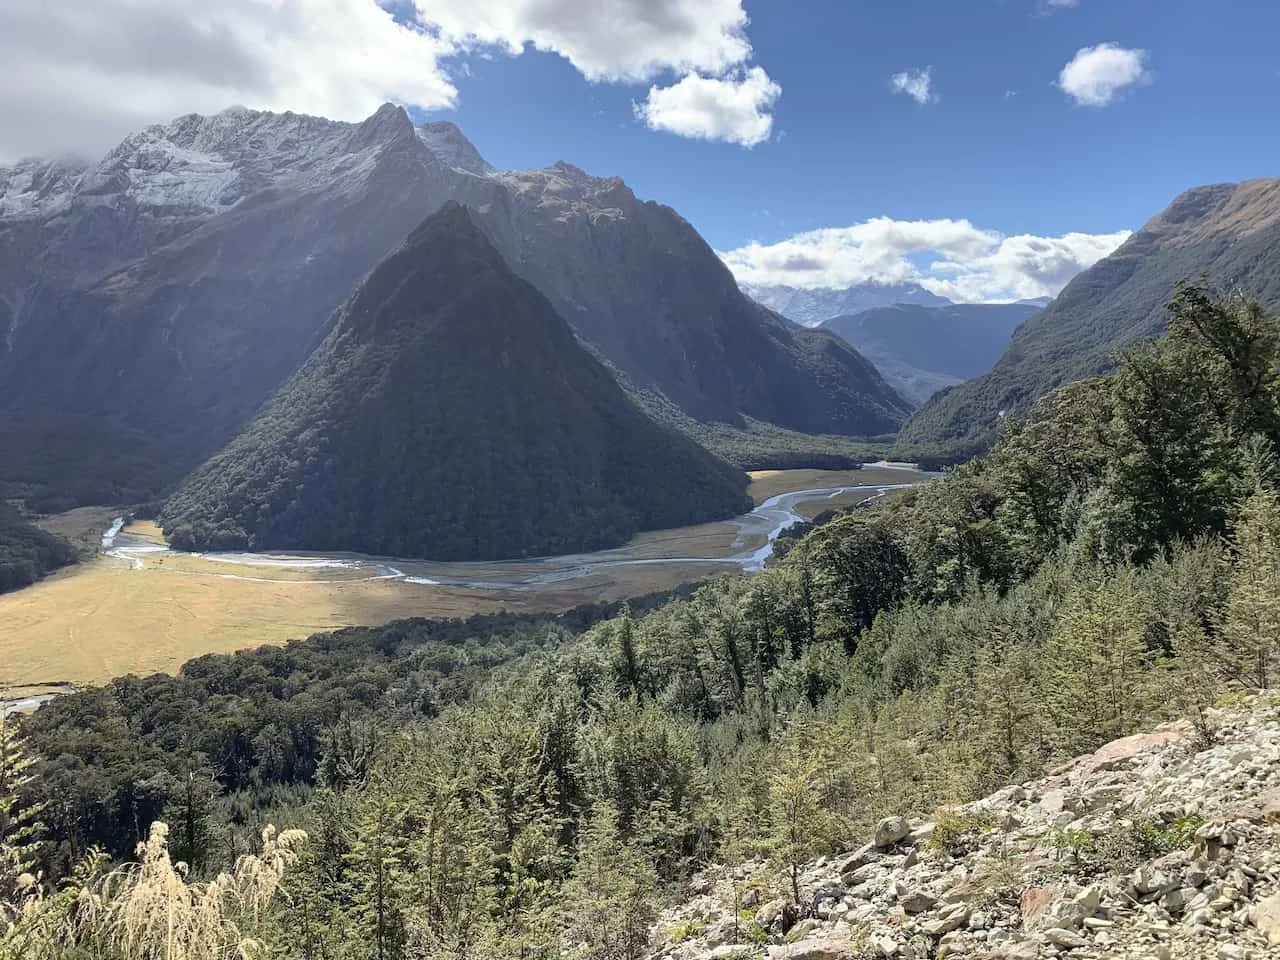
Day Hike the Routeburn
One of the most famous of hikes in New Zealand is the Routeburn Track. From Queenstown you can take part of a Routeburn Track day hike that will bring you on the first portion of the trail.
Not only will you get to do some hiking but you will also drive along one of the most scenic roads from Queenstown to Glenorchy.
Learn more in the Routeburn Track Day Hike Guide

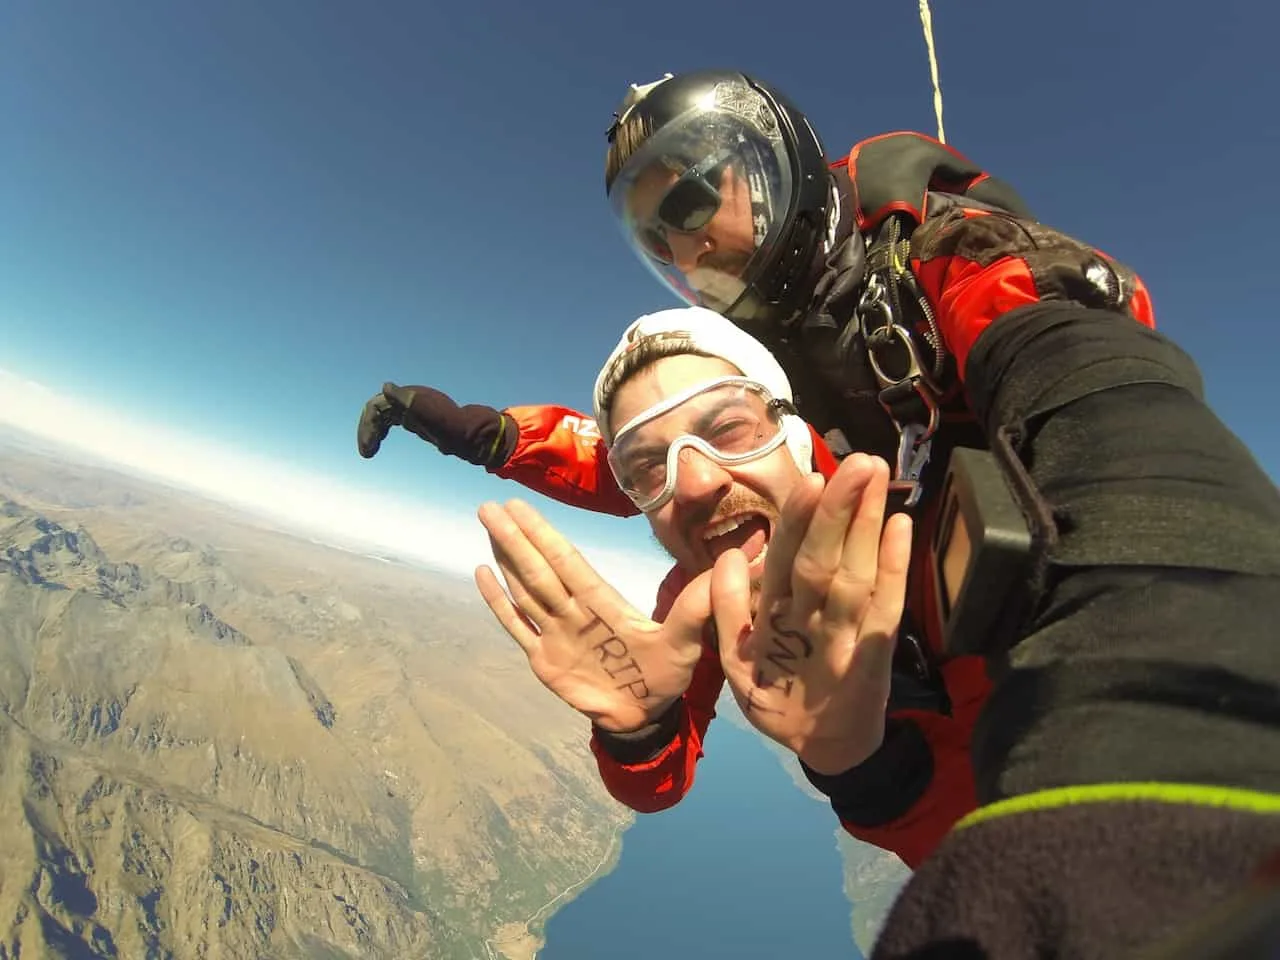
Day 14 – Queenstown
During your second day in Queenstown it is time to get that adrenaline going. Queenstown offers everything you can imagine when it comes to heart pumping activities.
You can take a look at some of the activities below and decide what you are most interested in (click on each one to book through some reputable companies):
I opted for a once in a lifetime skydiving experience over the mountains of Queenstown. It was just surreal being above the lake and the never ending mountain ranges out in the distance.
Feel free though to pick 1-2 that you think you will enjoy most to cap off your time in Queenstown.

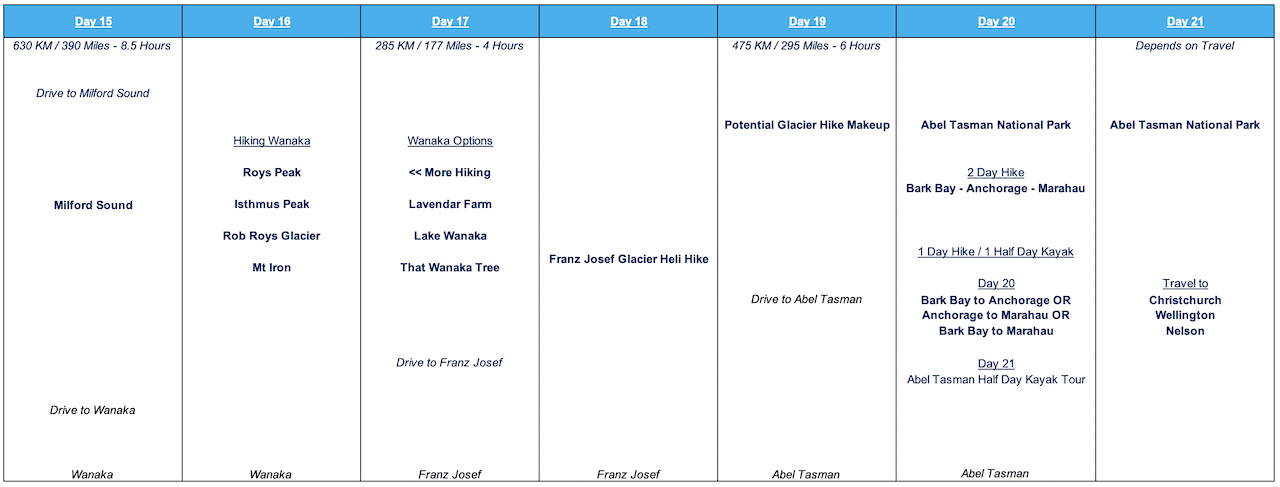
Day 15 – Milford Sound / Drive to Wanaka
This is probably going to be the longest driving day of the trip but at the end of the day it sure will be worth it. Get up nice and early to make the 3.5 hour drive out to Milford Sound – one of the most picturesque fjords in the world.
Once you arrive at Milford, you can join in on a boat tour that will take you all around the Sound towards the open sea. There are a few companies that offer these boat rides including: Real Journeys, Jucy and Southern Discoveries to name a few.

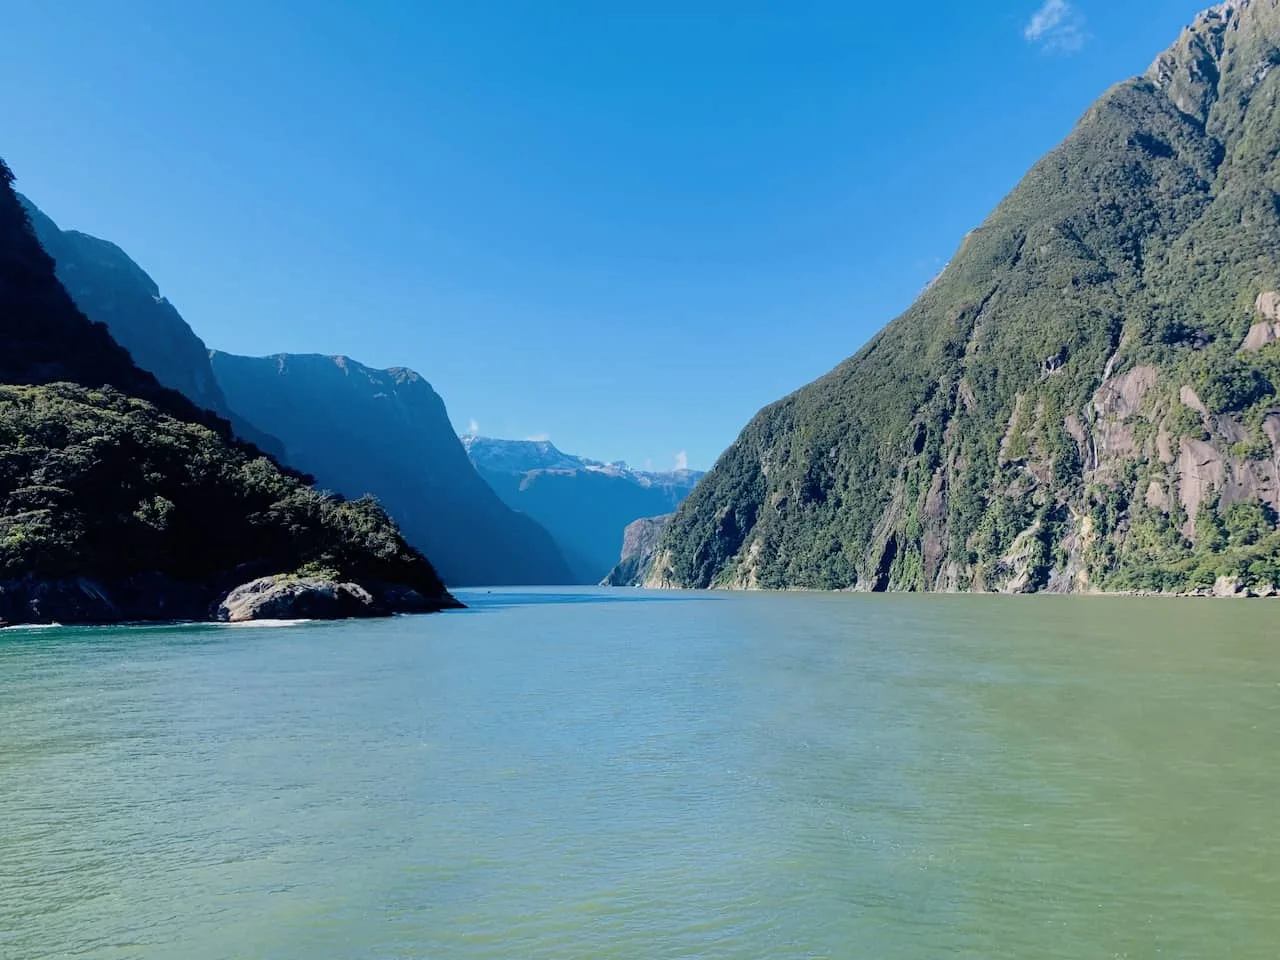

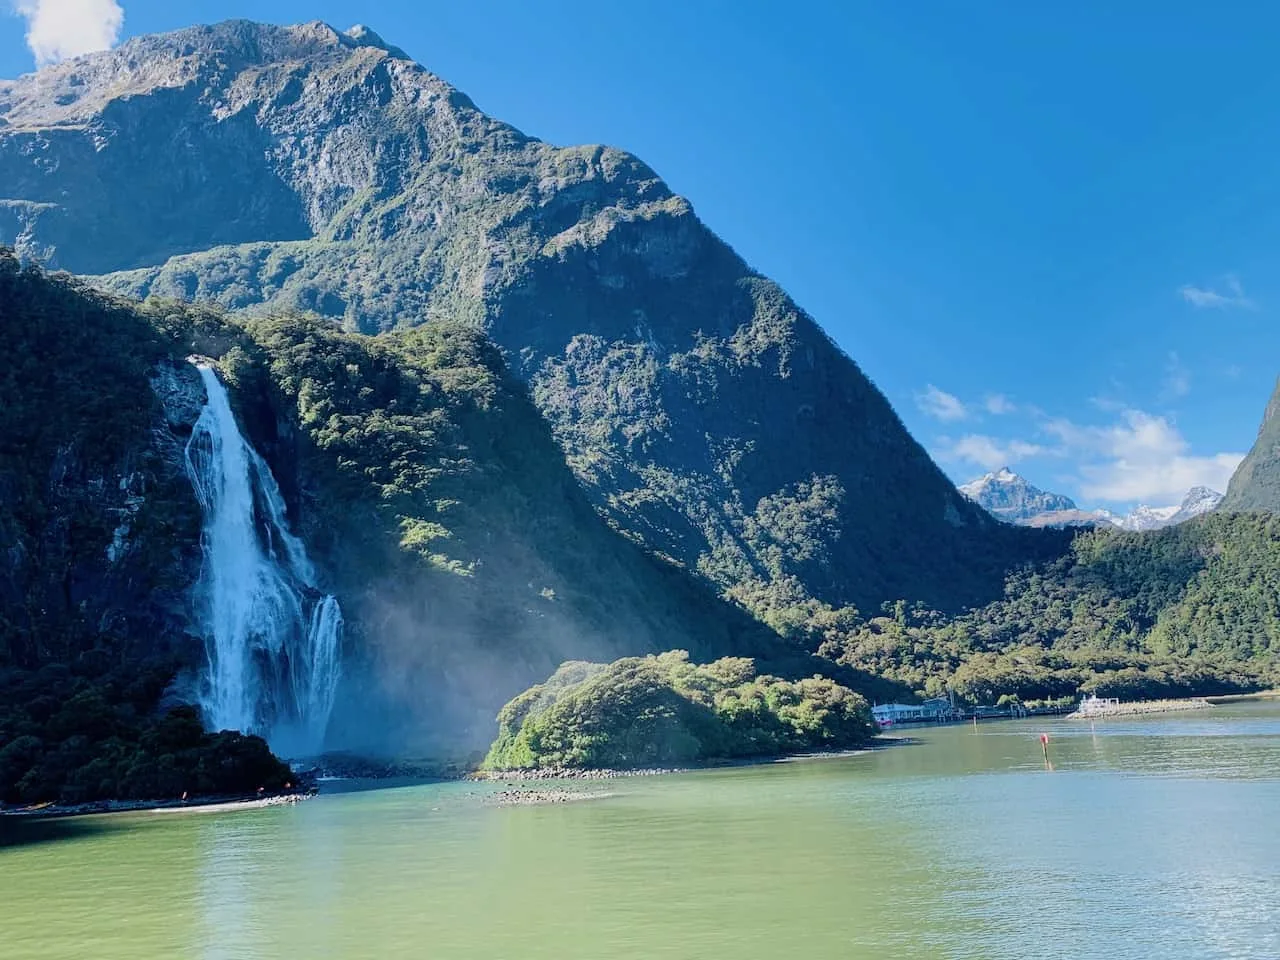
Once all done with the boat tour, you can spend some time on land, walking the waterfront and enjoying some nice views of Milford Sound out in the distance. Do not head out too late though because your next stop will be Wanaka, a 4.5 hour drive away.
Day 15 Notes
Rainfall: Milford Sound is one of the wettest regions in New Zealand, receiving rainfall on over 200 days per year! Don’t worry though if you get stuck in the rain as the waterfalls will be in full force and the fjord itself will have a more mystical element to it.
Logistics: If you want to save some driving time in the morning, you could head out to the town of Te Anau on the night of day 14 and spend the evening there.
Where to Stay in Wanaka (Nights 15 & 16)
- All Around: Edgewater
- Budget: Altamont Lodge
Day 16 – Wanaka
Wanaka is truly one of my favorite places I have visited. It is a small lakeside town and is just surrounded by mountains in every which direction.
Not only can you sit back and enjoy the lake, but you also have the chance to climb those mountains and get some vast views of the surrounding areas.
There are plenty of hikes to choose from including some of my favorite South Island New Zealand hiking trails:
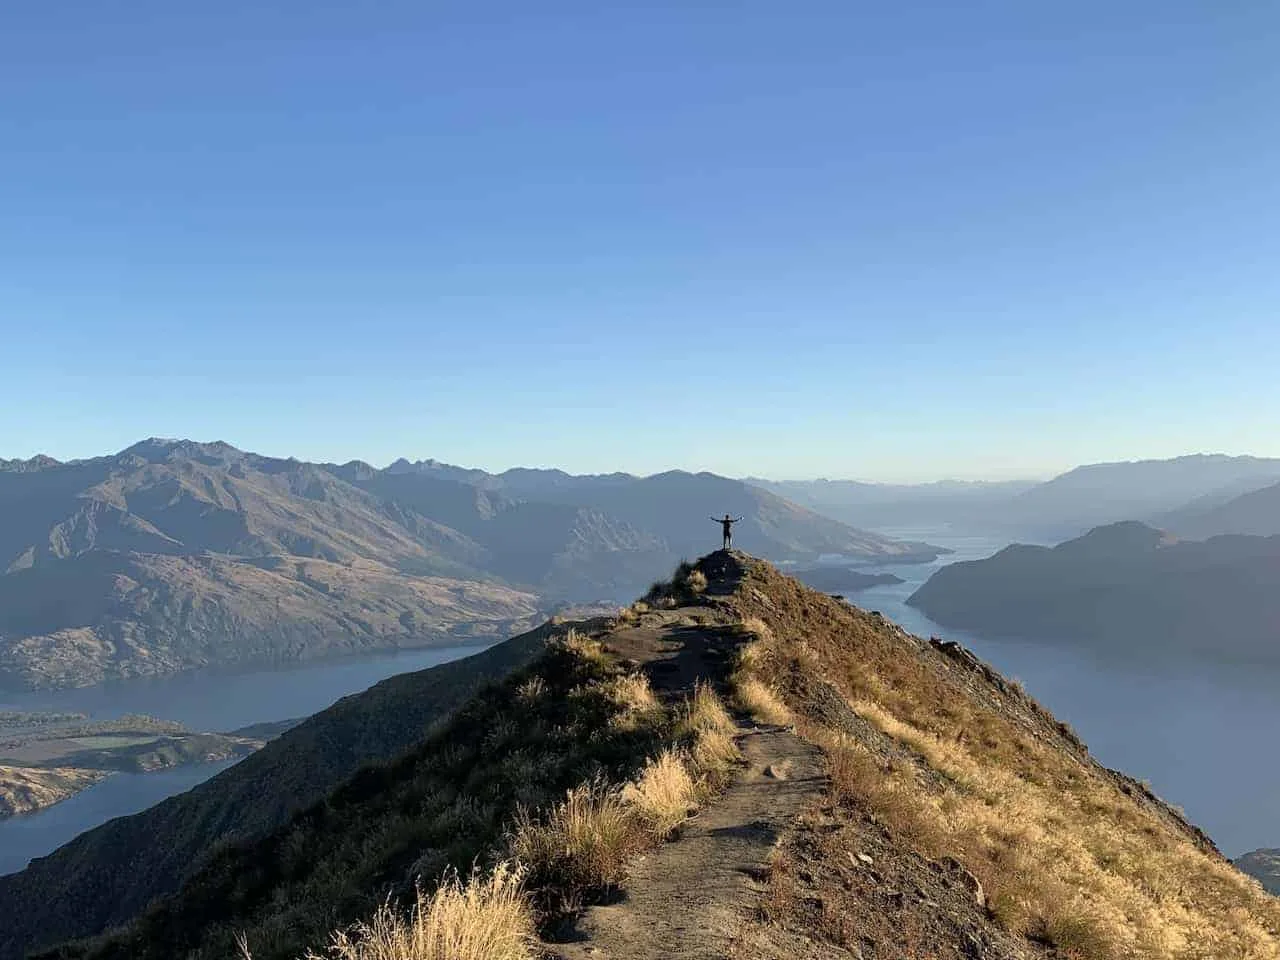
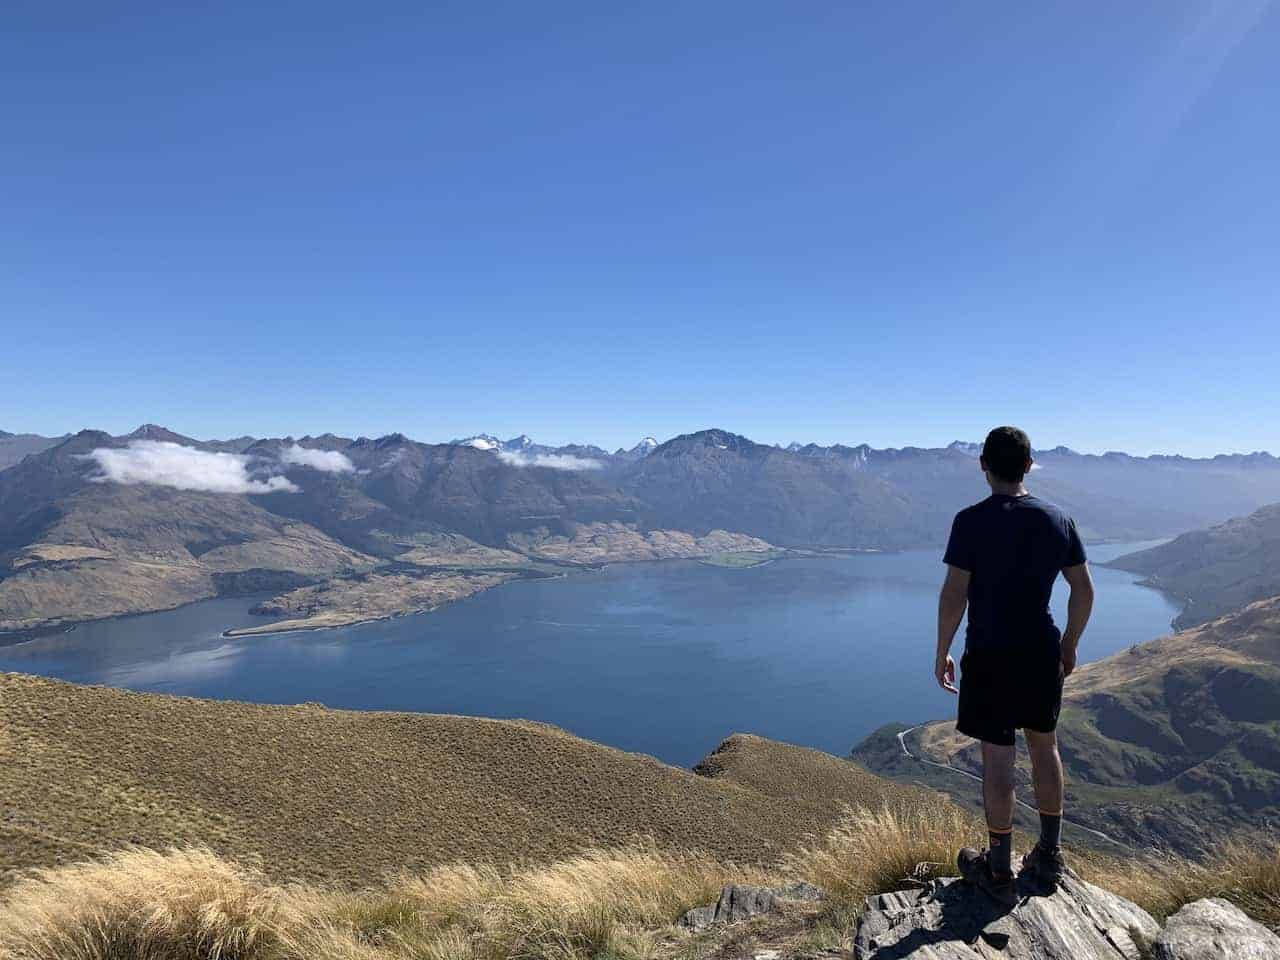
Roys Peak
The most famous of hikes around Wanaka is Roys Peak. During this 5-6 hour trek you will take in some of the most scenic views over Lake Wanaka and the surrounding mountains.
Learn more in the Roys Peak Hiking Guide

Isthmus Peak
While not as famous as Roys Peak, Isthmus Peak is high up on my list of hikes in New Zealand. It is similar in length and difficulty, and it comes will some incredible views as well. It also will definitely be the less crowded option out there.
Learn more in the Isthmus Peak Hiking Guide

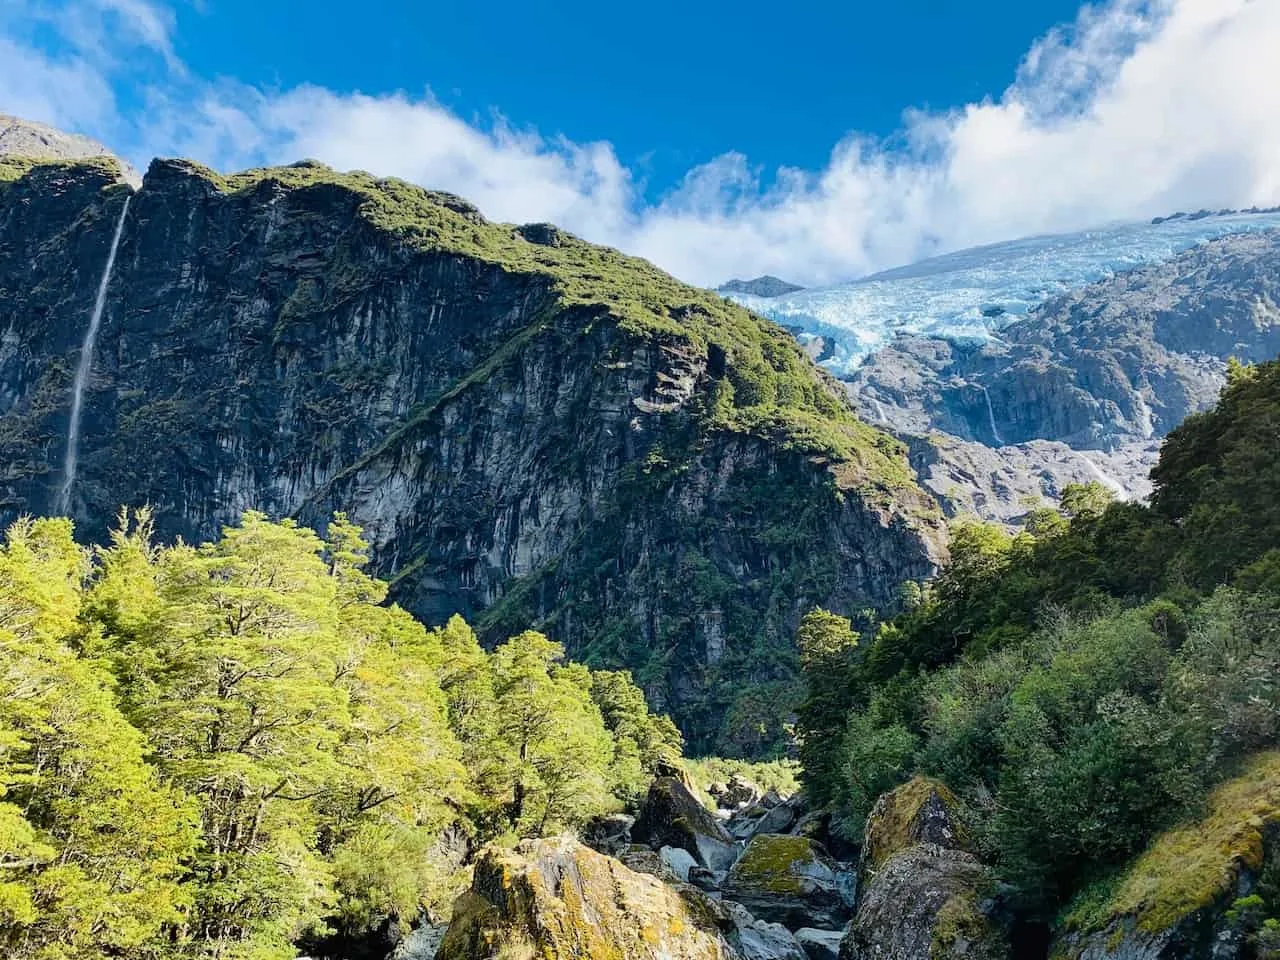
Rob Roys Glacier
A bit different than Roys and Isthmus peaks is Rob Roys Glacier. This one is a bit further away from Wanaka and instead of a mountain climb, you will head through a valley until you reach the foot of Rob Roys Glacier.
Learn more in the Rob Roy Glacier Track hiking guide

Mt Iron
Lastly on the list is Mt Iron, located just a few minutes from town. The easiest and shortest of all treks, Mt Iron will give you some great views of the city itself, with the lake and mountains out in the distance.
Learn more in the Mount Iron Track Hiking Guide


Day 17 – Wanaka / Drive to Franz Josef
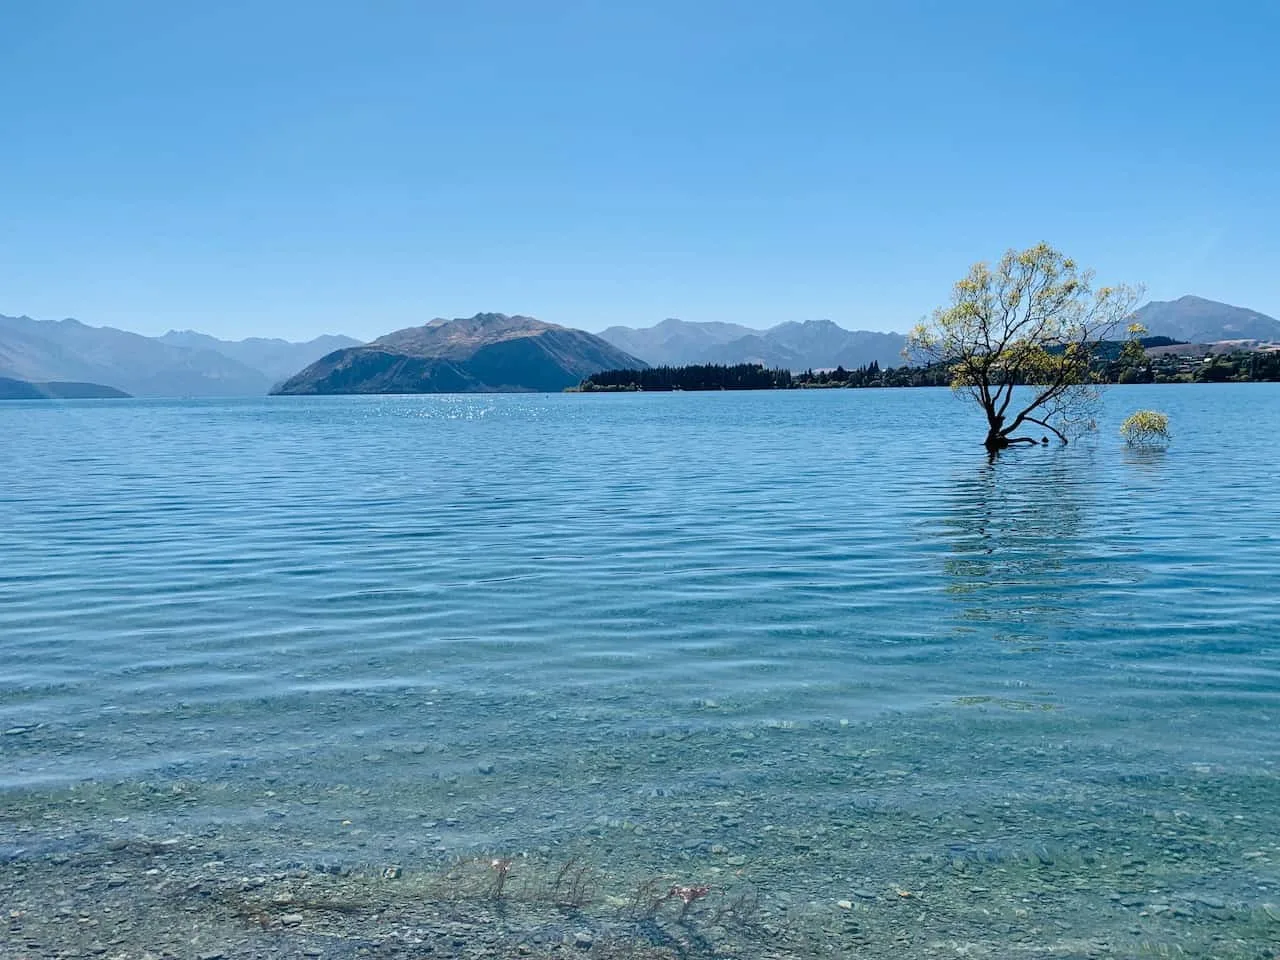
On day 17, you can rest up after hiking the previous day and just enjoy the town of Wanaka and the nearby lake. Head on over to That Wanaka Tree to take in one of the most famous trees out there.
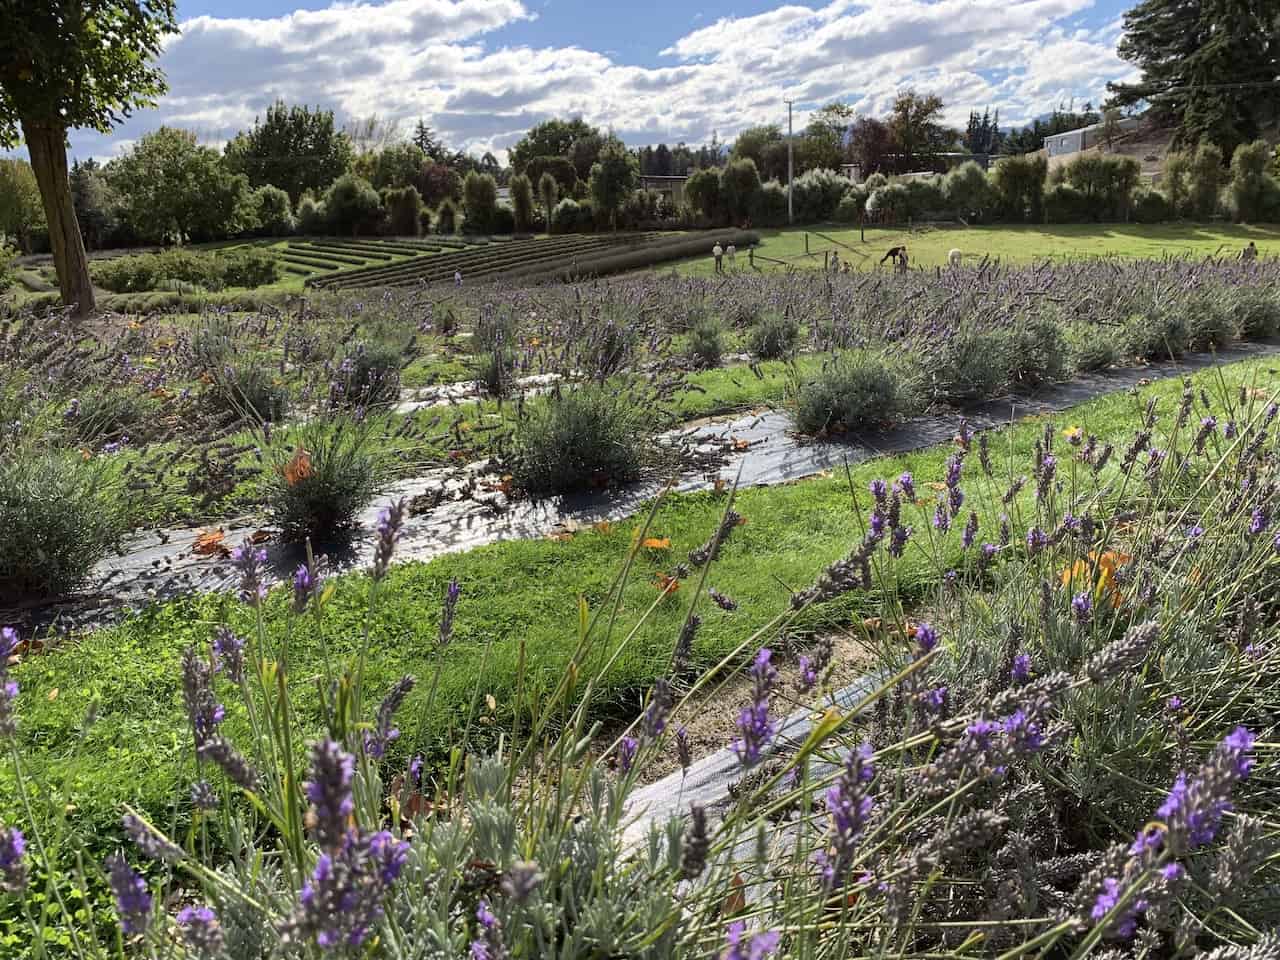
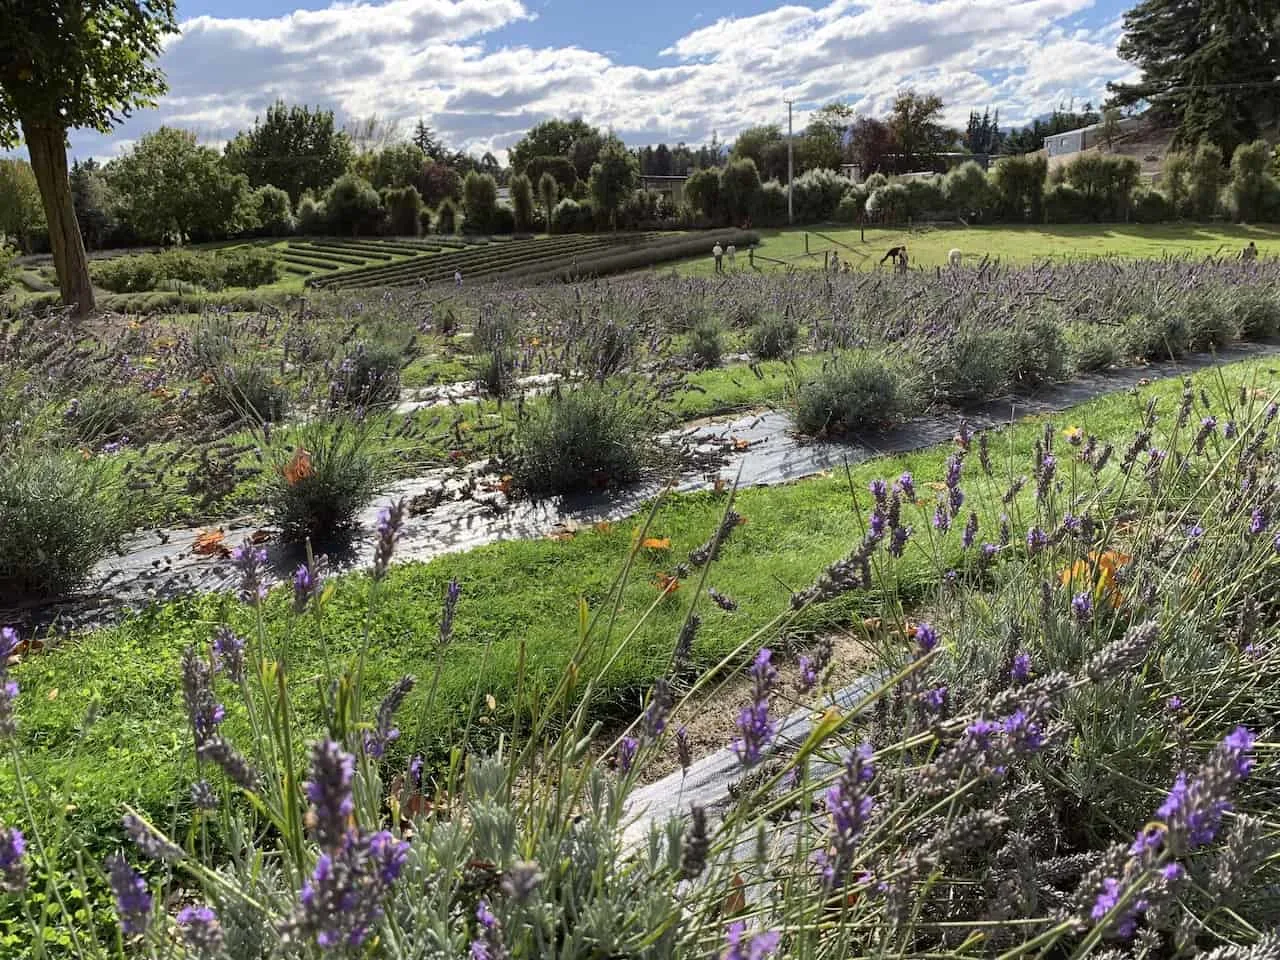
You can also make your way to the nearby lavender farm to stroll the fields and even doing some honey tasting. And if you still have that desire to hit the trails, head out on another hike around the area!

At some point though you will need to jump back in the car and continue your New Zealand road trip with a 4 hour drive to Franz Josef.
Where to Stay in Franz Josef (Nights 17 & 18)
- All Around: Aspen Court Franz Josef
- Budget: Glow Worm Accommodation
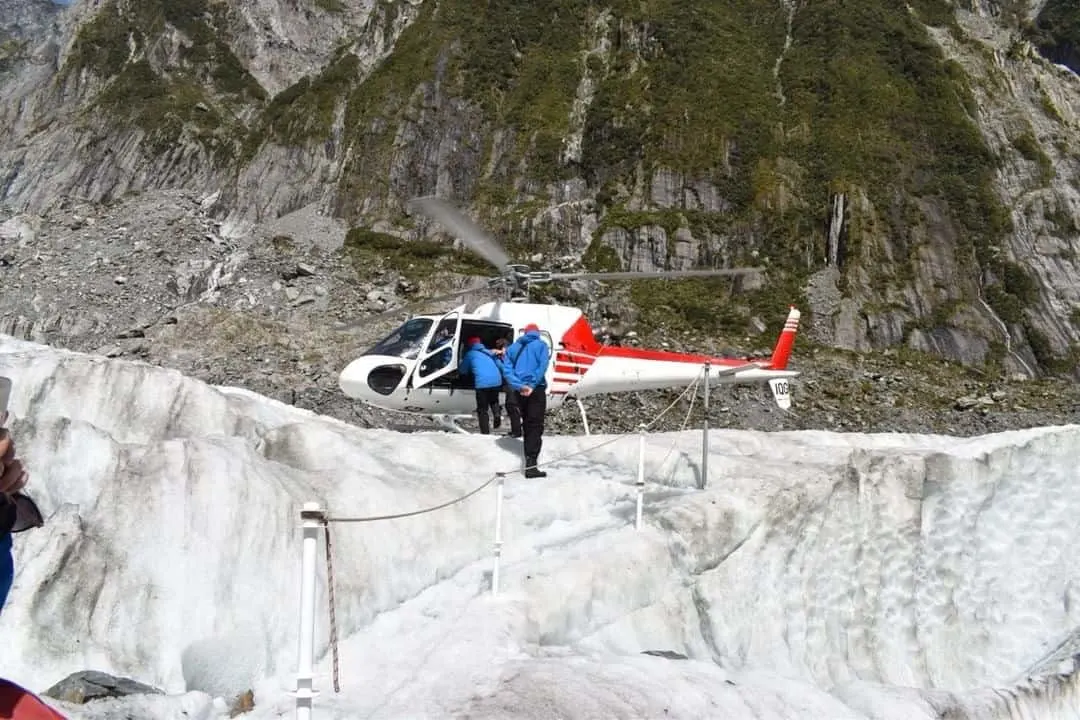
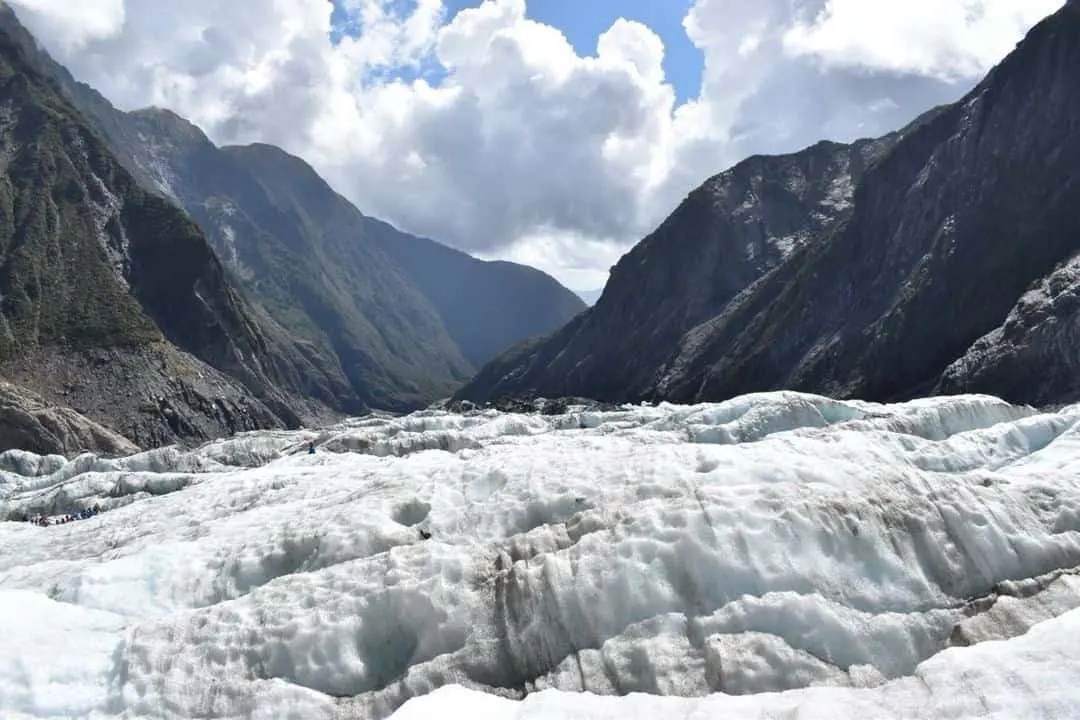
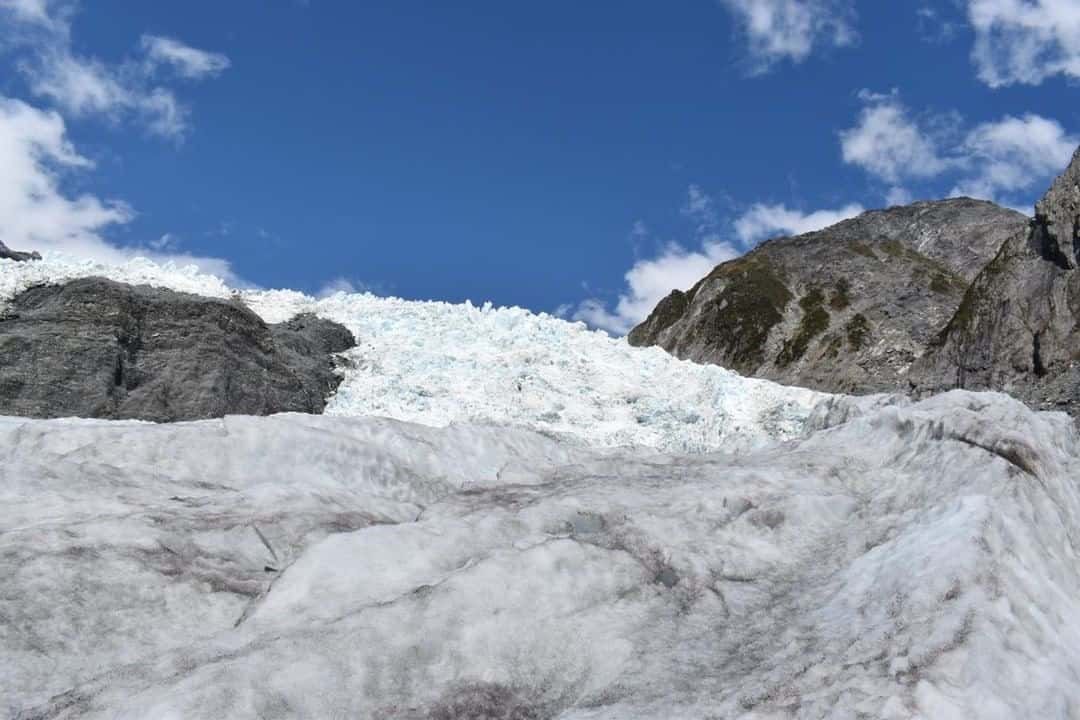
Day 18 – Franz Josef Heli Hike
A highlight of the West Coast of New Zealand is the Franz Josef Glacier. Here you have the chance to take a helicopter ride onto the glacier, where you will then spend the next several hours exploring the ins and outs of this massive piece of ice.
You can book your glacier hike in advance to secure your spot on the trek.


If you do not want to take part of the glacier hike, another option here is to do the ~5 hour Roberts Point Track, which takes you across some suspension bridges right up close to the glacier (but not onto the glacier itself). It is a great alternative if you do not want to spend the money on the glacier hike.
Day 19 – Drive to Abel Tasman
Day 19 Note: the weather in Franz Josef can be hit or miss and there is a chance the glacier hike can be cancelled or delayed. If you do not have the chance to take part on day 18, then try to reschedule nice and early on day 19. If this happens you will not get to Abel Tasman until later in the evening most likely.
Another long drive is up next as you make the trip from Franz Josef all the way up to Abel Tasman National Park. The drive should take you 6 hours give or take as you make your way up the West Coast of the island.
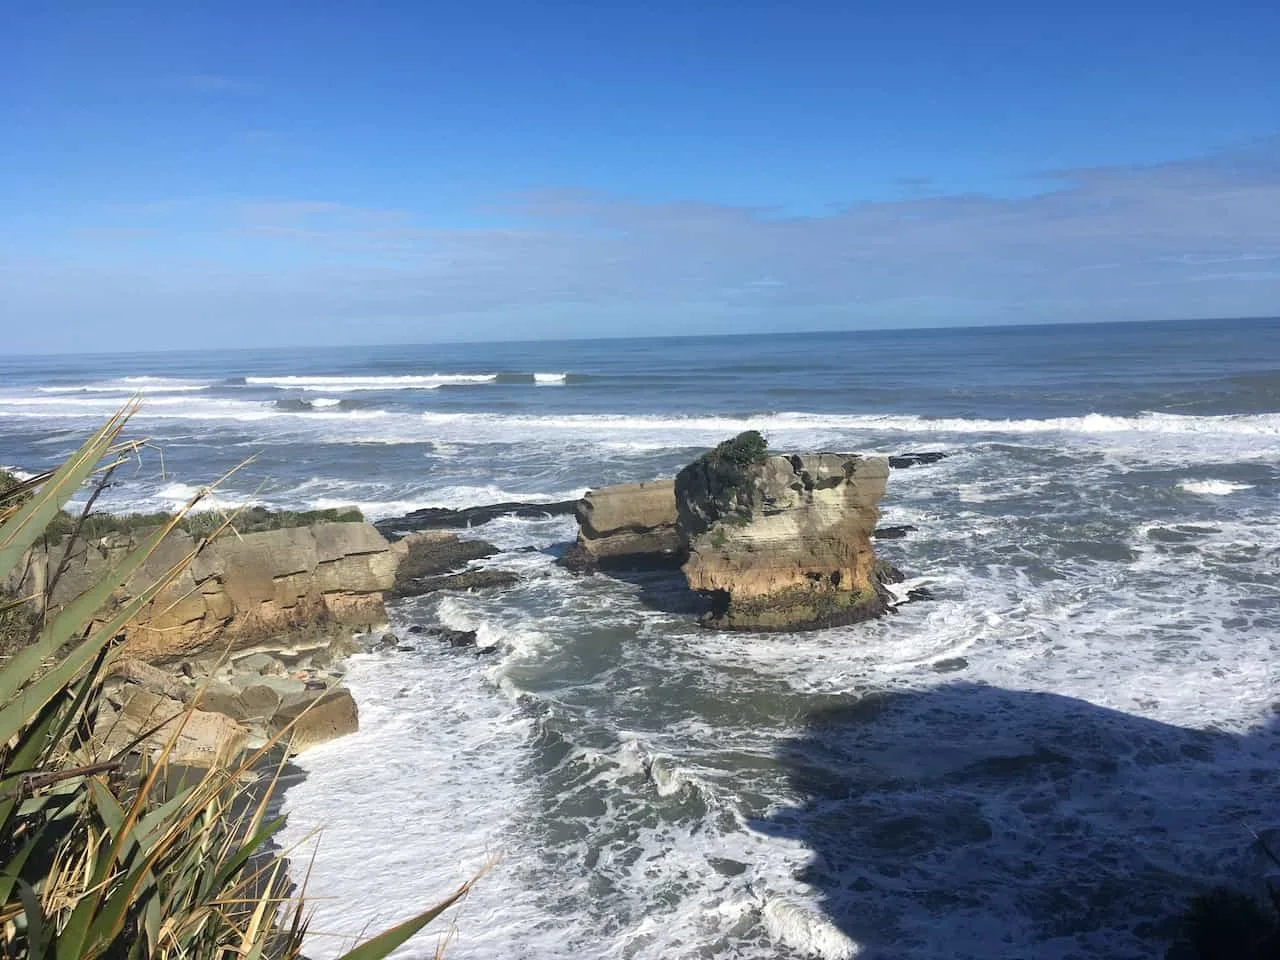
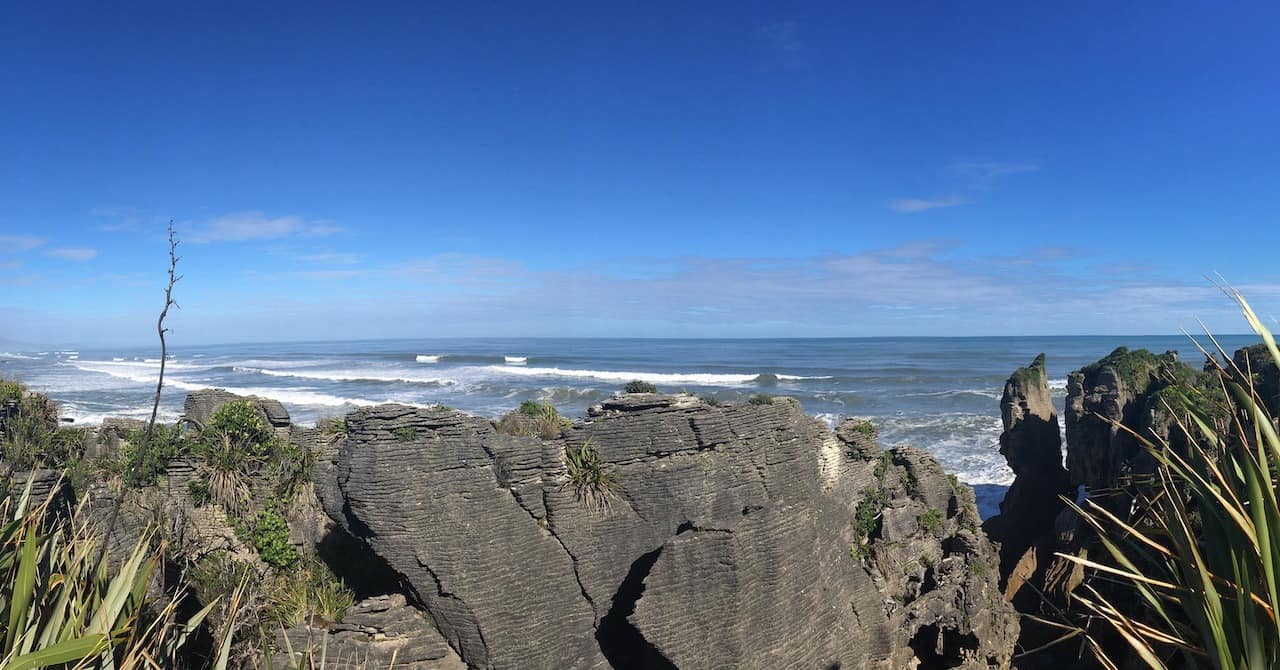
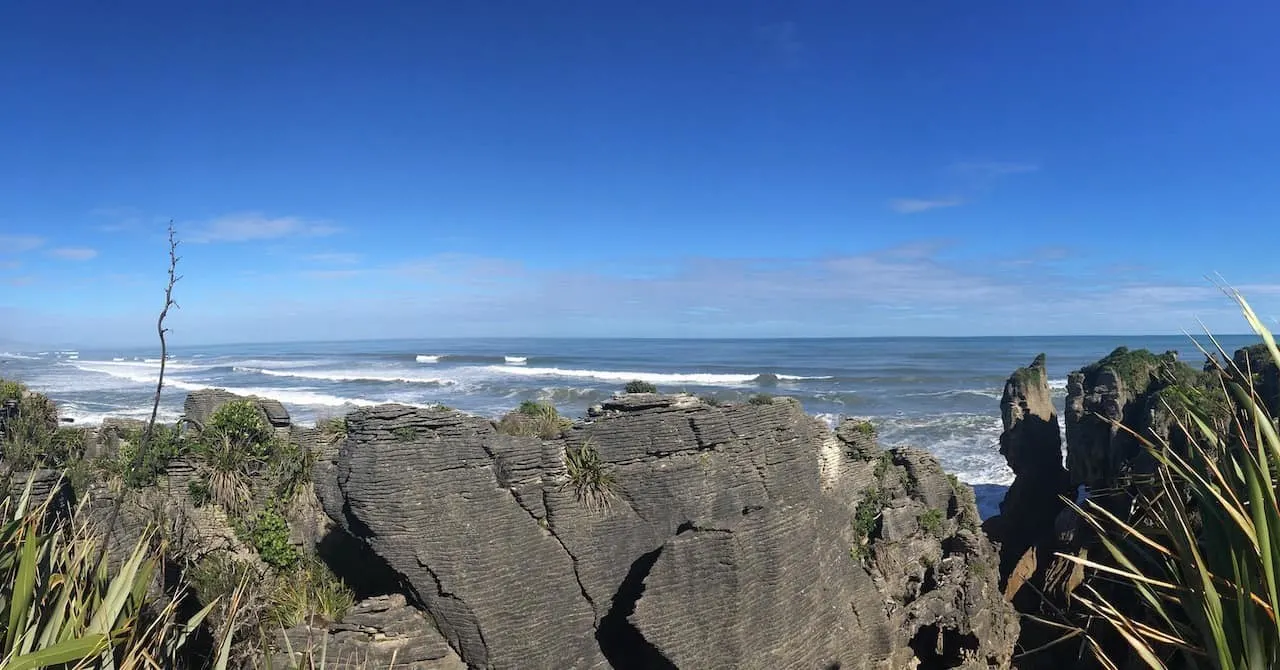
You have the chance here to make the quick stop at the pancake rocks at Punakaiki. If you do add it onto the route, expect the drive to take a bit longer (closer to 7 hours) as Punakaiki is not on the fastest route up to Abel Tasman.

When choosing where to stay in Abel Tasman I highly recommend the small town of Marahau. It is basically at the entrance of the national park, which makes it easier for hiking and/or taking part of activities such as kayaking or canyoning.
Where to Stay in Marahau (Nights 19 & 20)
- All Around #1: Abel Tasman Lodge
- All Around #2: Abel Tasman Haven
- Budget: Adventure Inn
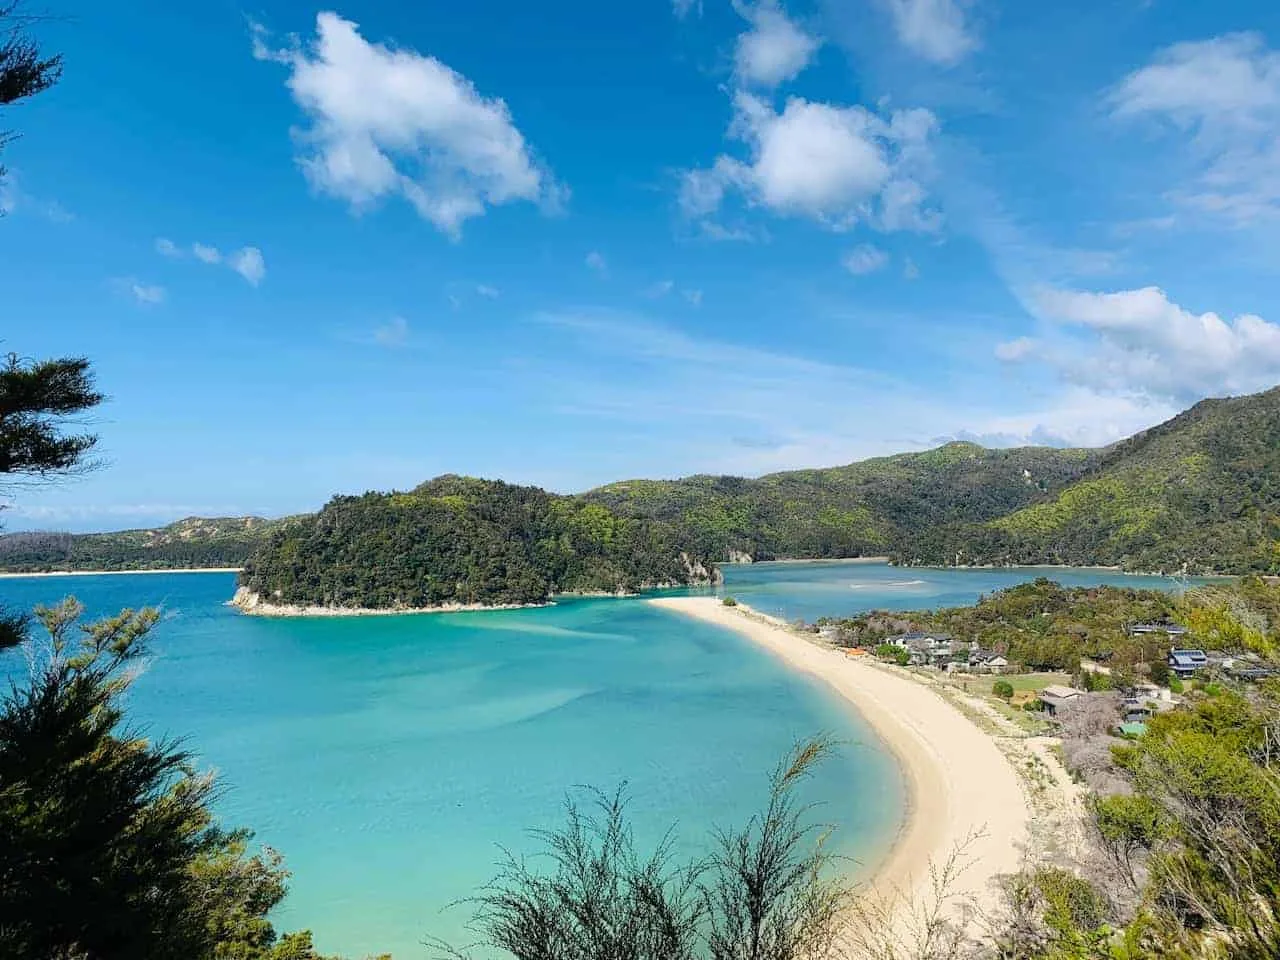
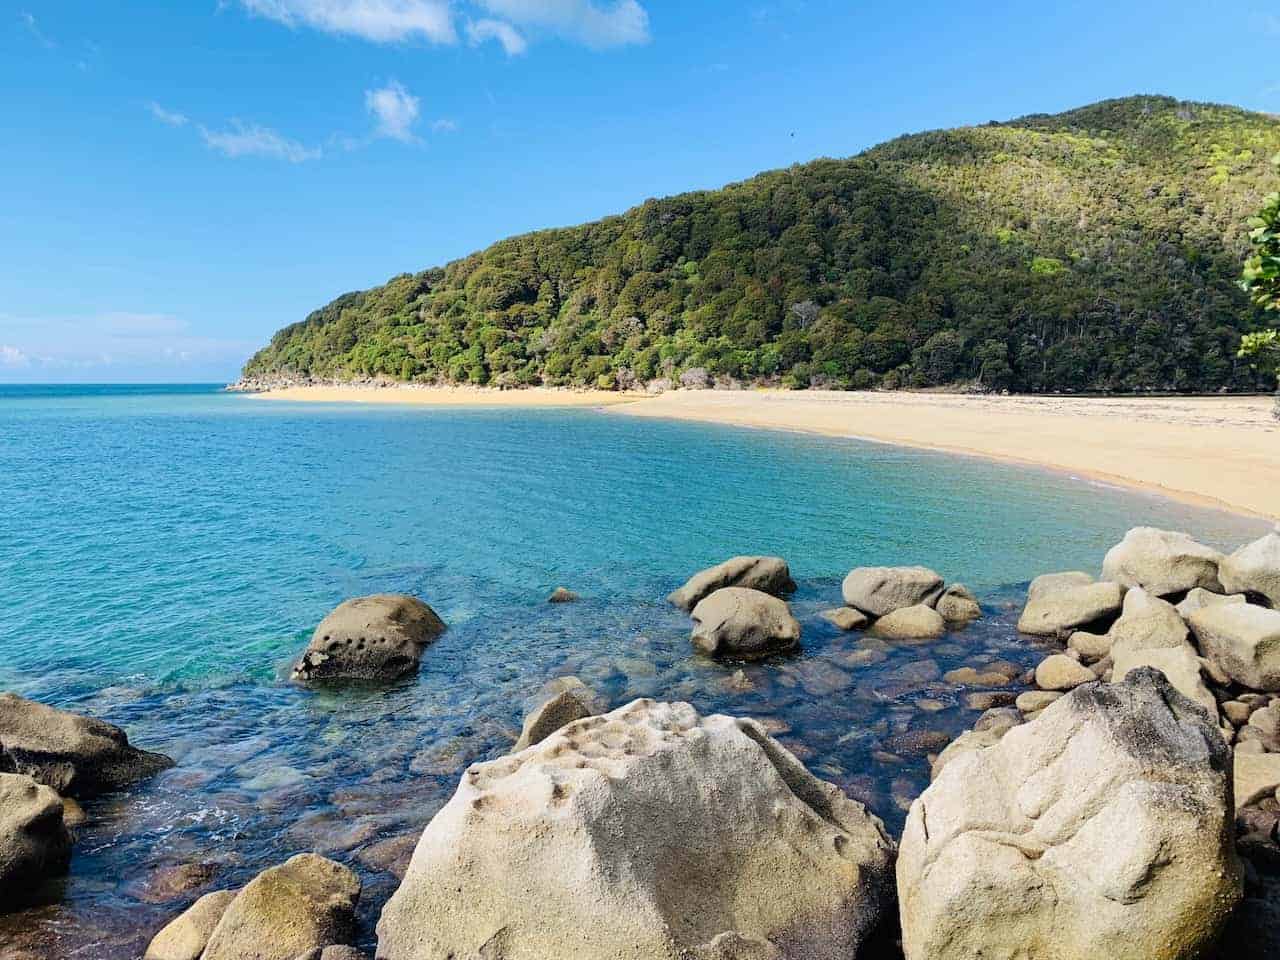
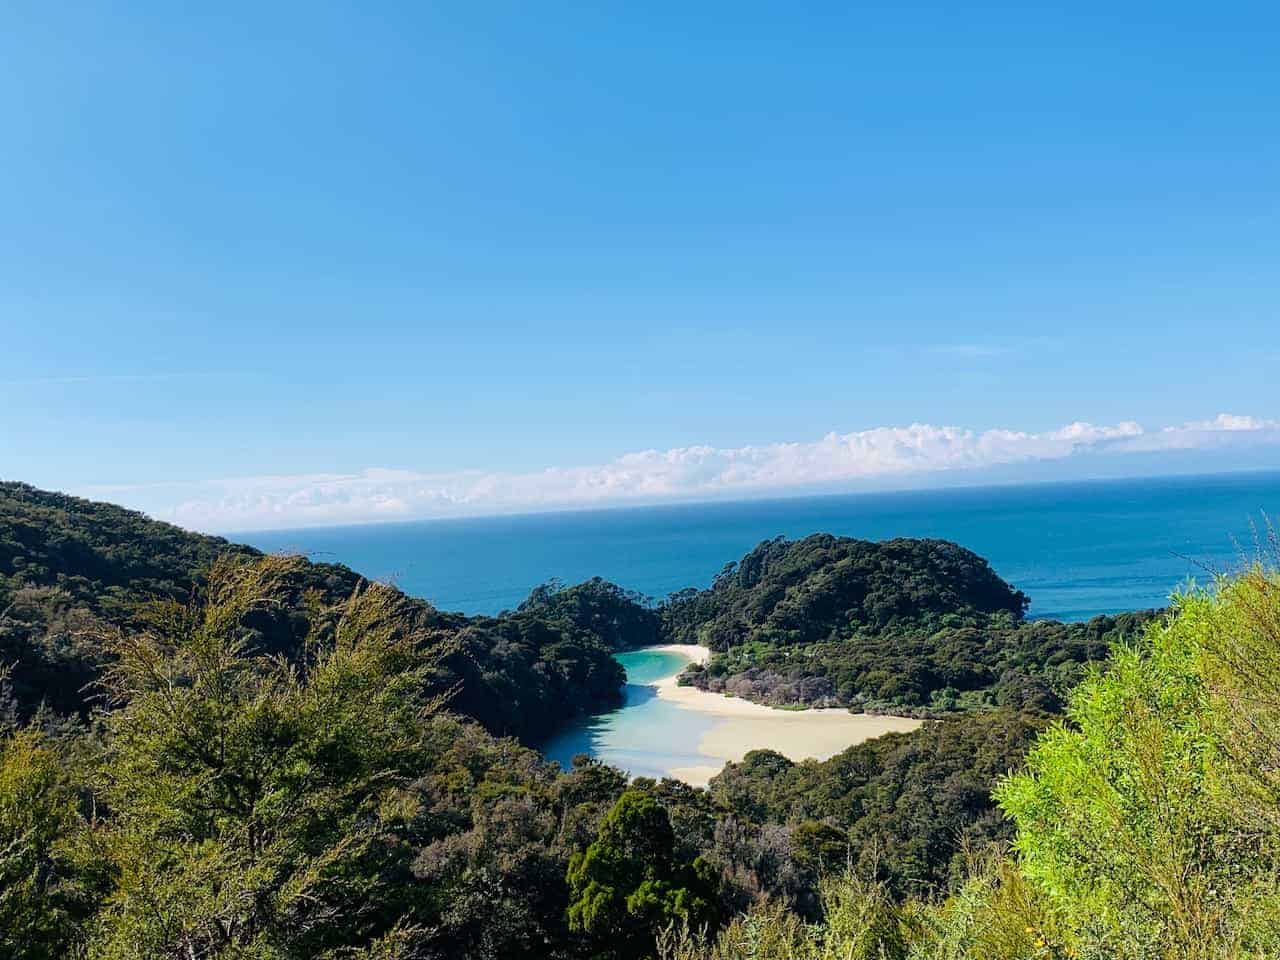
Day 20 – Abel Tasman
Abel Tasman has a ton to offer its visitors but the main attraction here is the famous Abel Tasman Coastal Track.
While the full track can take up to 5 days to complete, you can easily take part of just a section of the track during your time here.
My recommendation would be to take the water taxi out to Bark Bay and walk to Anchorage from there. Once at Anchorage, you can hop on another water taxi back to Marahau.
You can also opt for an overnight on the trail itself. That would mean getting a water taxi out to the park and then spending day 20 and the morning of day 21 hiking back to Marahau.
There is also an option to do a one day hike/kayak tour that is offered by several companies in Marahau if you do not want to just spend your time hiking.
You can learn more about all these options in the Abel Tasman Track Hiking Guide.


Day 21 – Abel Tasman / Travel
At some point on your last full day of this New Zealand road trip, it will be time to depart.
You can actually choose to leave from a number of places depending on what is easiest logistically – Christchurch (5.5 hour drive), Wellington (3 hour drive + 4 hour ferry), or Nelson (1 hour drive). Each one of those cities has an airport to fly out of, if for example you needed to get back to Auckland for your flight out.
Depending on where you are going / what time you are leaving, you could have some time to continue to explore Abel Tasman.
This could mean taking part of the 2 day hike, getting a half day kayak in, or just heading to the beach to relax. Once all done though it is time to end your New Zealand 3 week itinerary.

Getting Around
When it comes to getting around New Zealand, I have to say that renting your own car (or campervan) is the move. While there are some companies that run busses throughout the country, it really is just not going to be the same type of experience.
So many of the activities & attractions I took part of required getting to certain locations that public transport just would not cover. In addition, the ability to be on my own schedule is what made this trip possible.
There is just no way you could spend three weeks taking part of this particular itinerary by using public transport. You would just be able to see a subset of the highlights laid out.
If you haven’t already, I would highly recommend reading through the driving in New Zealand overview I put together to learn more about getting around the country.
What is the Best Time to Visit
While you can visit New Zealand year round, the most ideal time to visit will be during the warmer months of the year. This is usually between September and May.
During this time, you will have a better chance to enjoy those warmer temperatures and take part of all sorts of activities along the way.
I visited New Zealand during March (the Fall time period), which ended up being an ideal time to visit. The weather was still very comfortable, the crowds were minimal, and I got to fully enjoy the trip from beginning to end.
Is 3 Weeks Long Enough for New Zealand?
At the end of the day, New Zealand is a massive country and there is just so much to do and see throughout. If you are looking for an all encompassing trip that heads to both the North and South Islands of the country, three weeks will give you enough time to enjoy a little bit of everything.
As you can tell in this itinerary, a vast amount of the country is covered as you head from north to south. Now, it will not cover everything of course, but it is enough to really give you a great idea of what this country is all about.
If you have even longer, go for it! But if you are worried if 3 weeks is long enough, I would not sweat it. You will get to see so much during that amount of time and have a holistic overall trip.

That about does it for a New Zealand itinerary 3 weeks road trip! I hope this guide has given you a better idea of how to plan your New Zealand itinerary and has helped out with some logistics.
Obviously this itinerary can be mixed and matched a bit to change things up, but overall this can be a good starting point to get you going in the right direction.
If you have any questions or comments feel free to write them in below. Also don’t forget to check out the rest of the New Zealand itineraries and guides up on the site. Have fun out there and safe travels!


Donald
Wednesday 24th of April 2024
The most amazing itinerary for New Zealand. Followed it to the T.
Will be following this one for the other cities as well
Audrey Schnyder
Friday 14th of October 2022
Thanks for the amazing itinerary! I will be following it when I visit NZ in March. Do you have idea gas/food costs for this trip as an estimate? Trying to get my budget together :) thanks!
Charles
Sunday 16th of October 2022
Hi Audrey - glad you enjoyed it! You will have a great time there (March is when I visited too). Gas prices certainly have changed so it is a bit tough to give an estimate. It also depends on your car choice, etc. Same with food - I was a solo traveler on a budget so my food choices may be very different than yours. I can say on average though my totals costs came out to somewhere around $110-$120 per day. Hope that helps a bit, but there may just be a few too many variables to give you an accurate number for yourself.
Satvinder
Thursday 18th of November 2021
Thank you for this itinerary. It is perfect for me. Nothing too crazy and still seeing all the main sights. Well written.