The Ben Lomond Track in Queenstown, New Zealand is one of the top hikes to take part of in the country. While it is a tough climb up to the summit, believe me when I say it is well worth the effort.
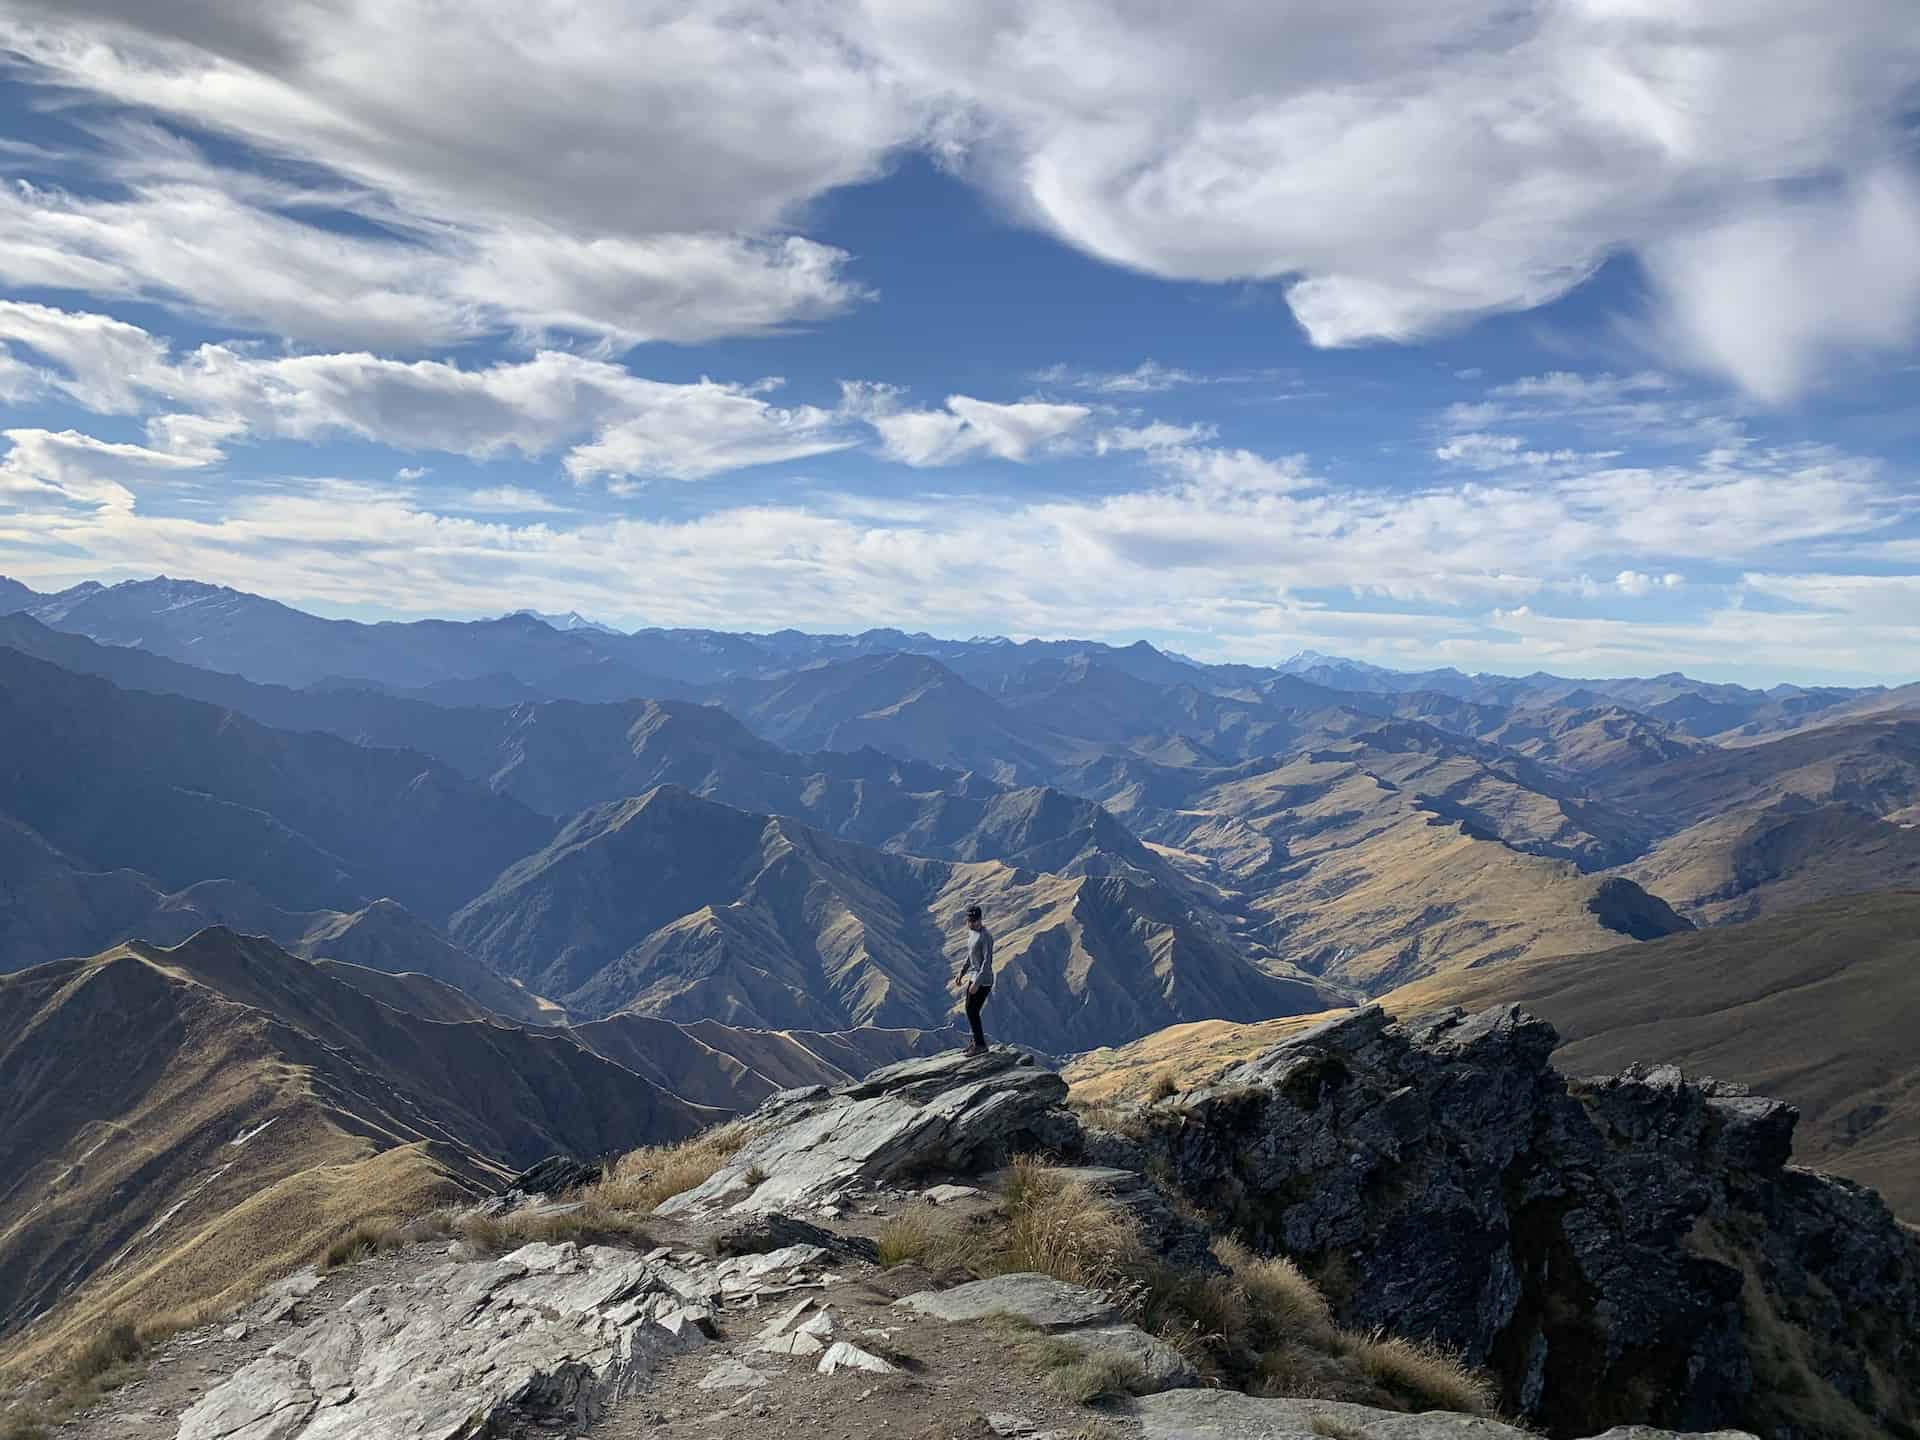
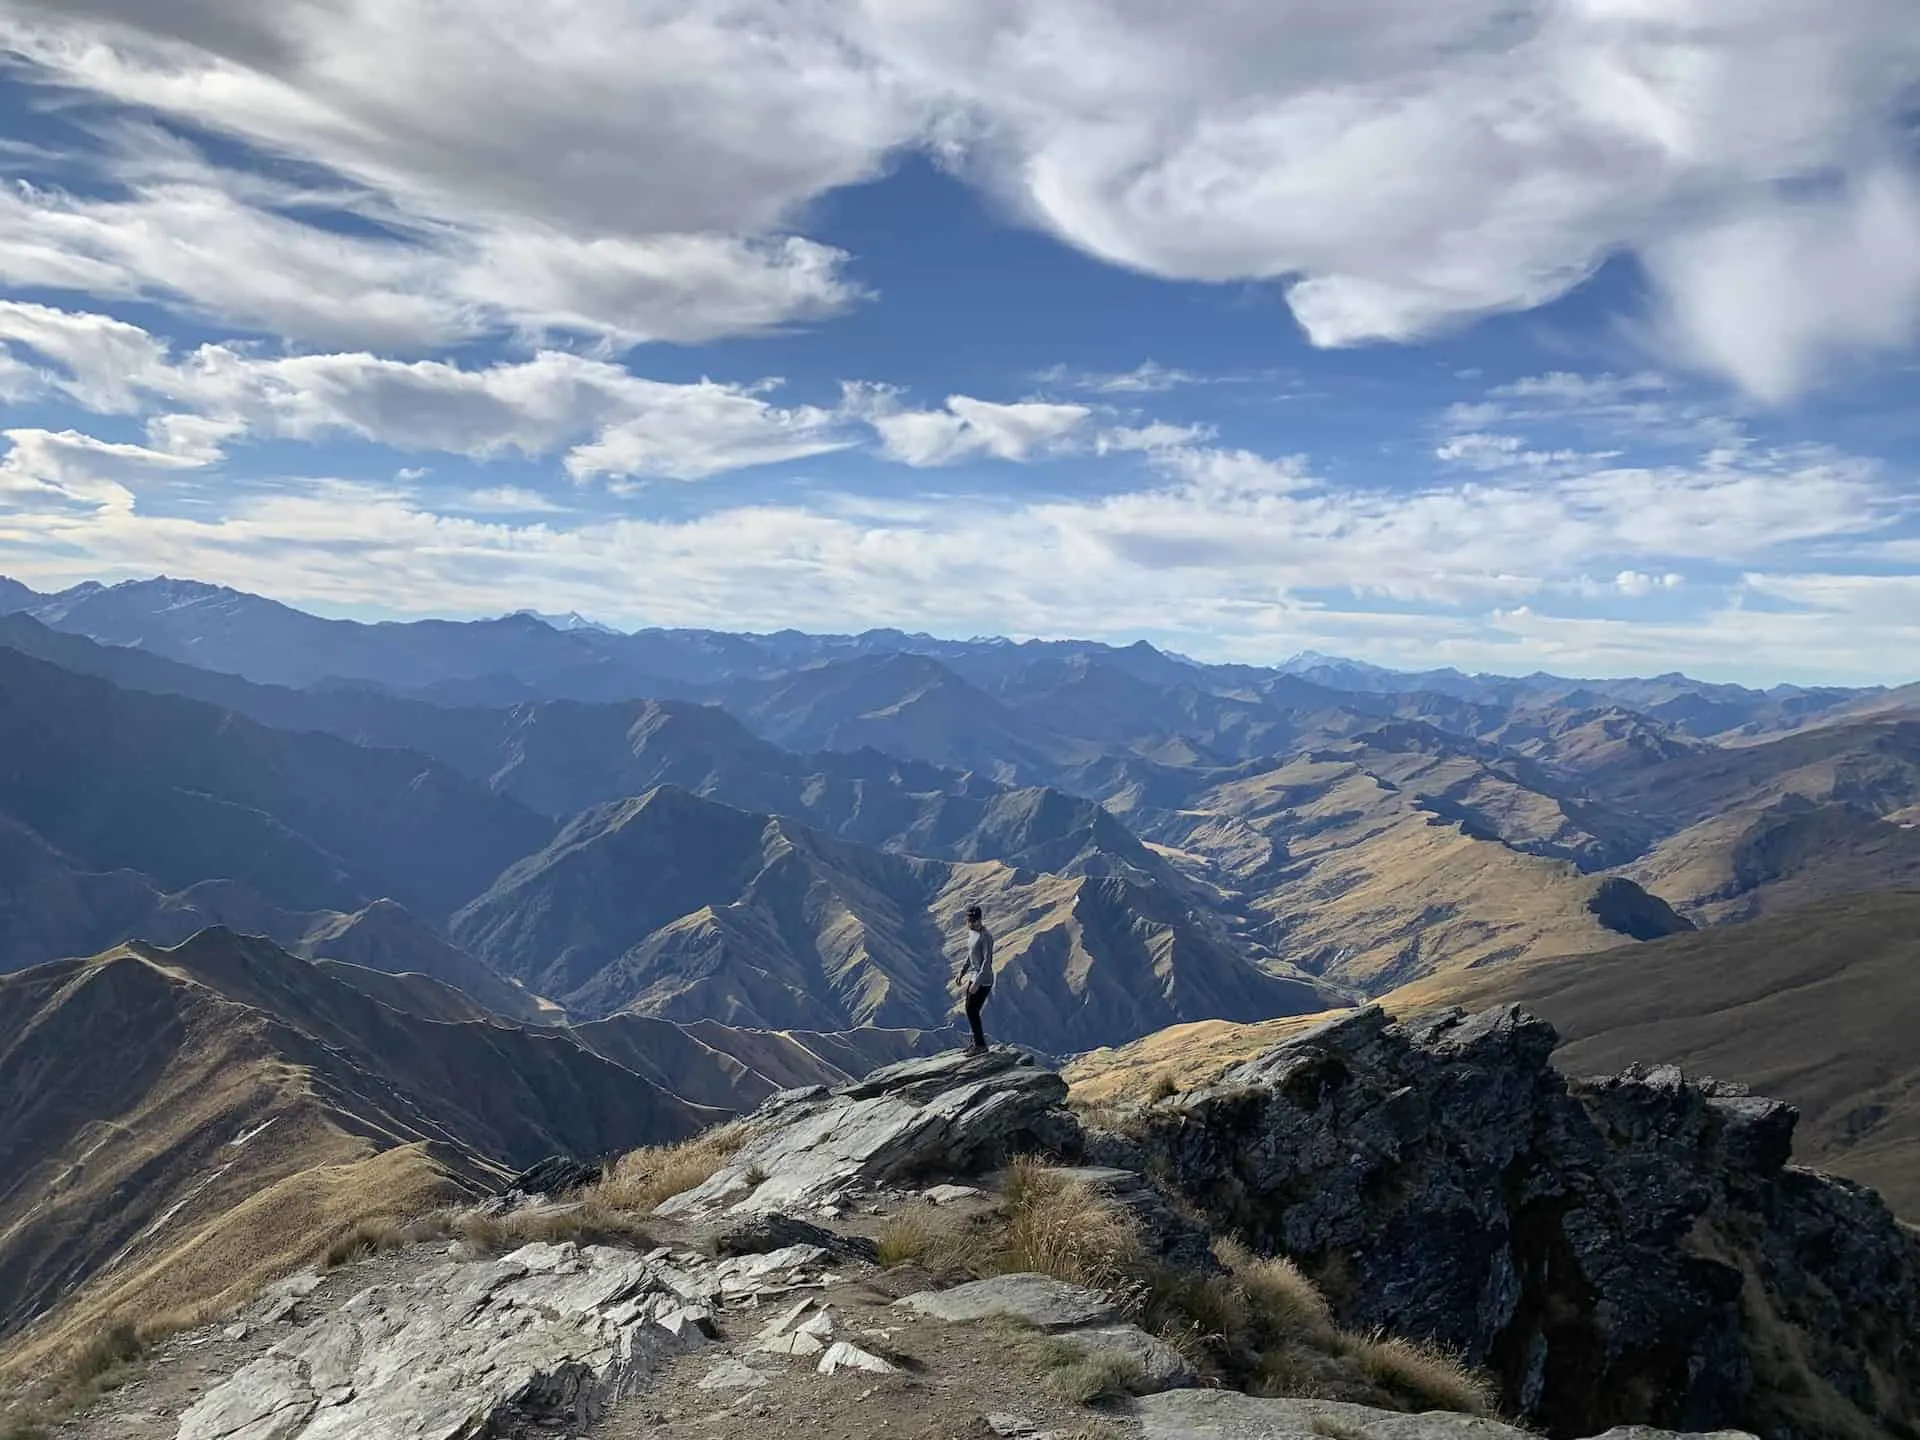
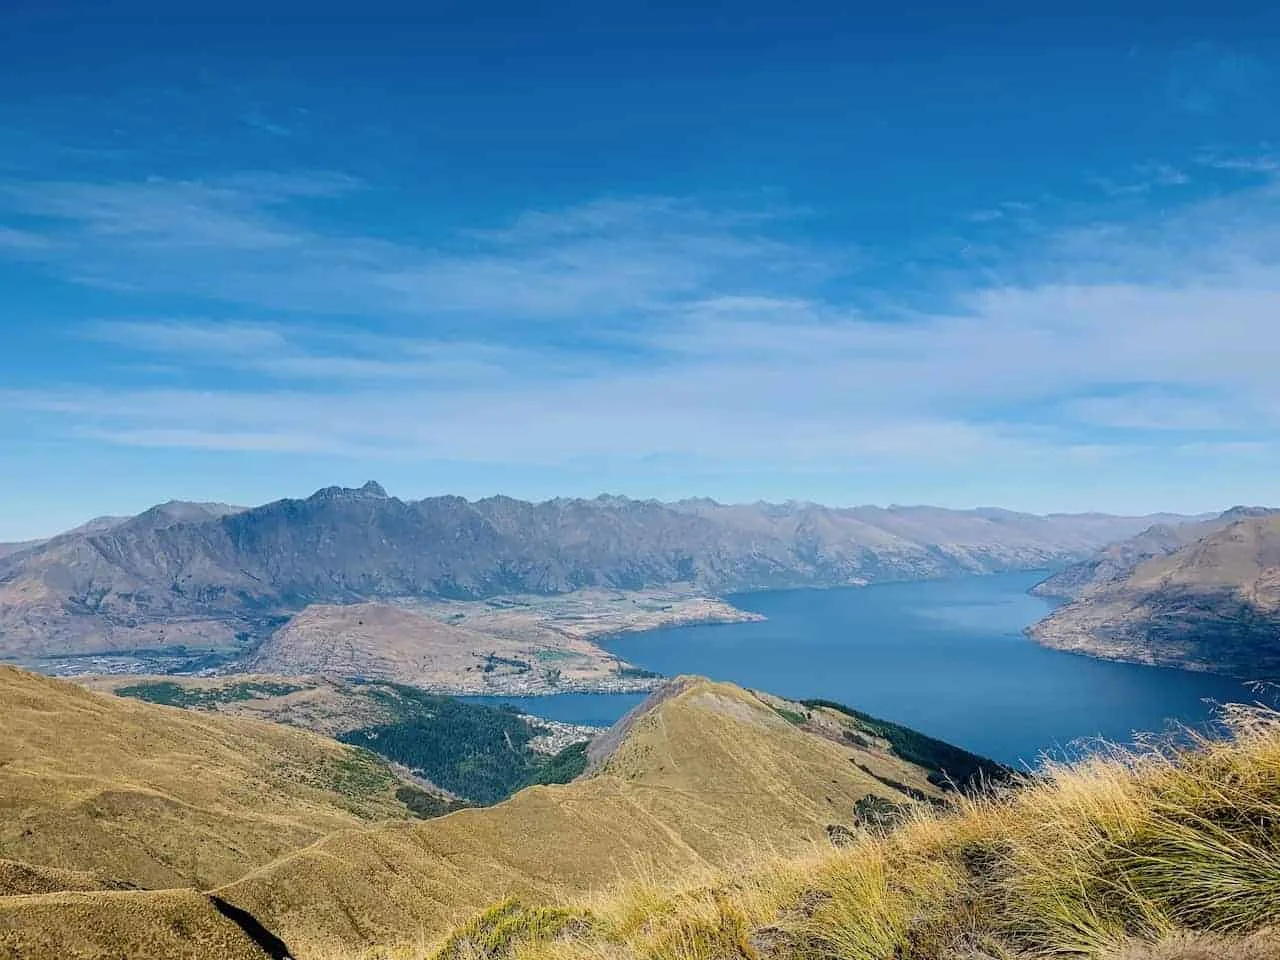
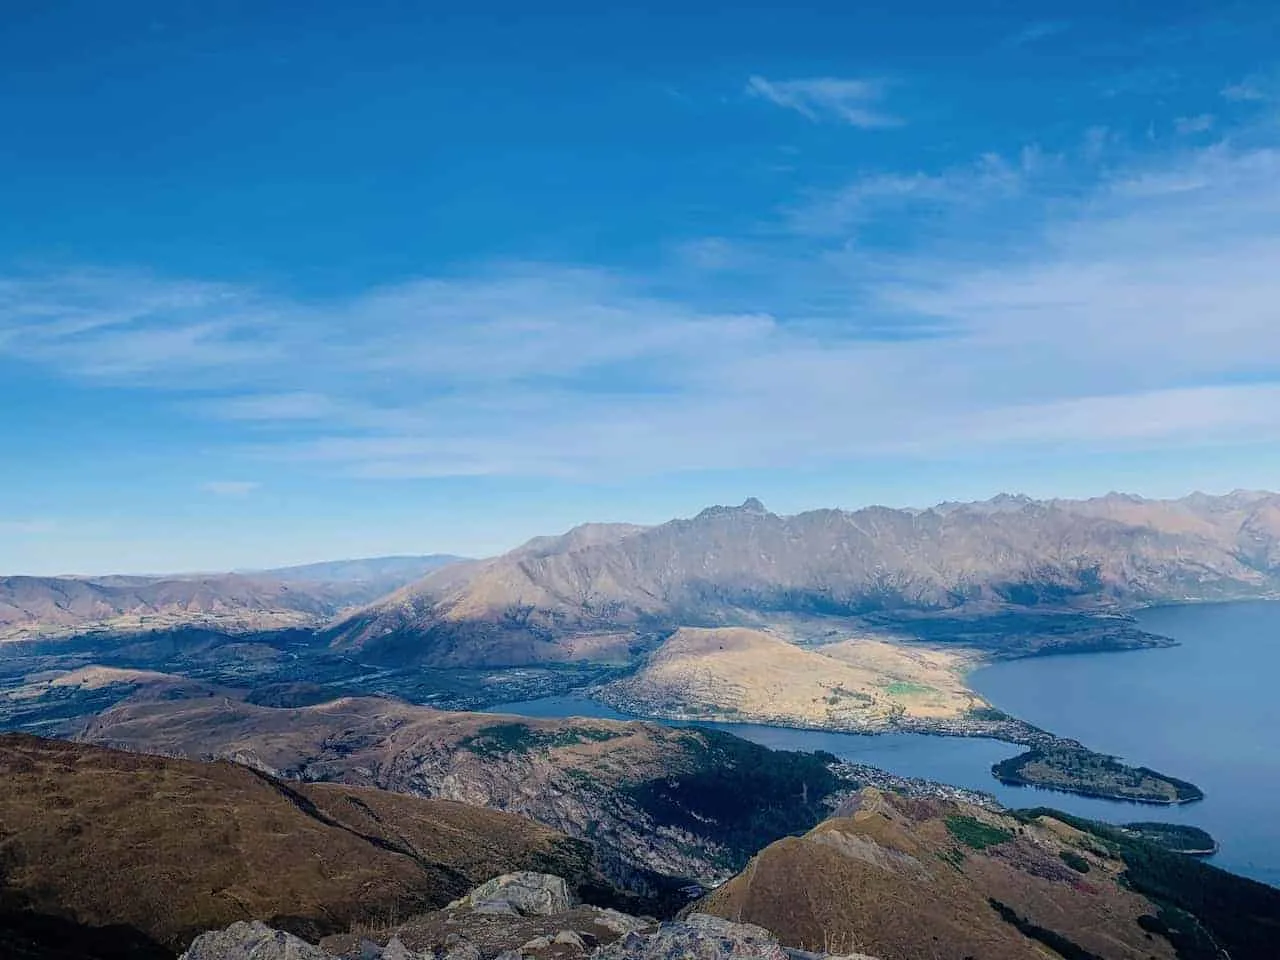
From up top you will get the best panorama views you can ask for, including Queenstown, Lake Wakatipu, and the rest of the surrounding mountains in all directions. When it comes to summit viewpoints, it doesn’t get much better than this.
This guide will go into detail regarding what to expect on the track including starting points, maps, hiking details, and much more. By the end of reading this, you should have a much better idea on how to prepare yourself to conquer the peak.
* Affiliate Disclosure: This post may contain affiliate links, which means I may receive a commission if you make a purchase through the links provided, at no additional cost to you. Thanks for supporting the work I put into TripTins!
1) Ben Lomond Track Facts
I wanted to highlight some important facts to know before heading off for this hike. It is NOT for everyone and you need to be in good physical condition to complete the track.
Below you can find the round trip hiking details for hiking Ben Lomond:
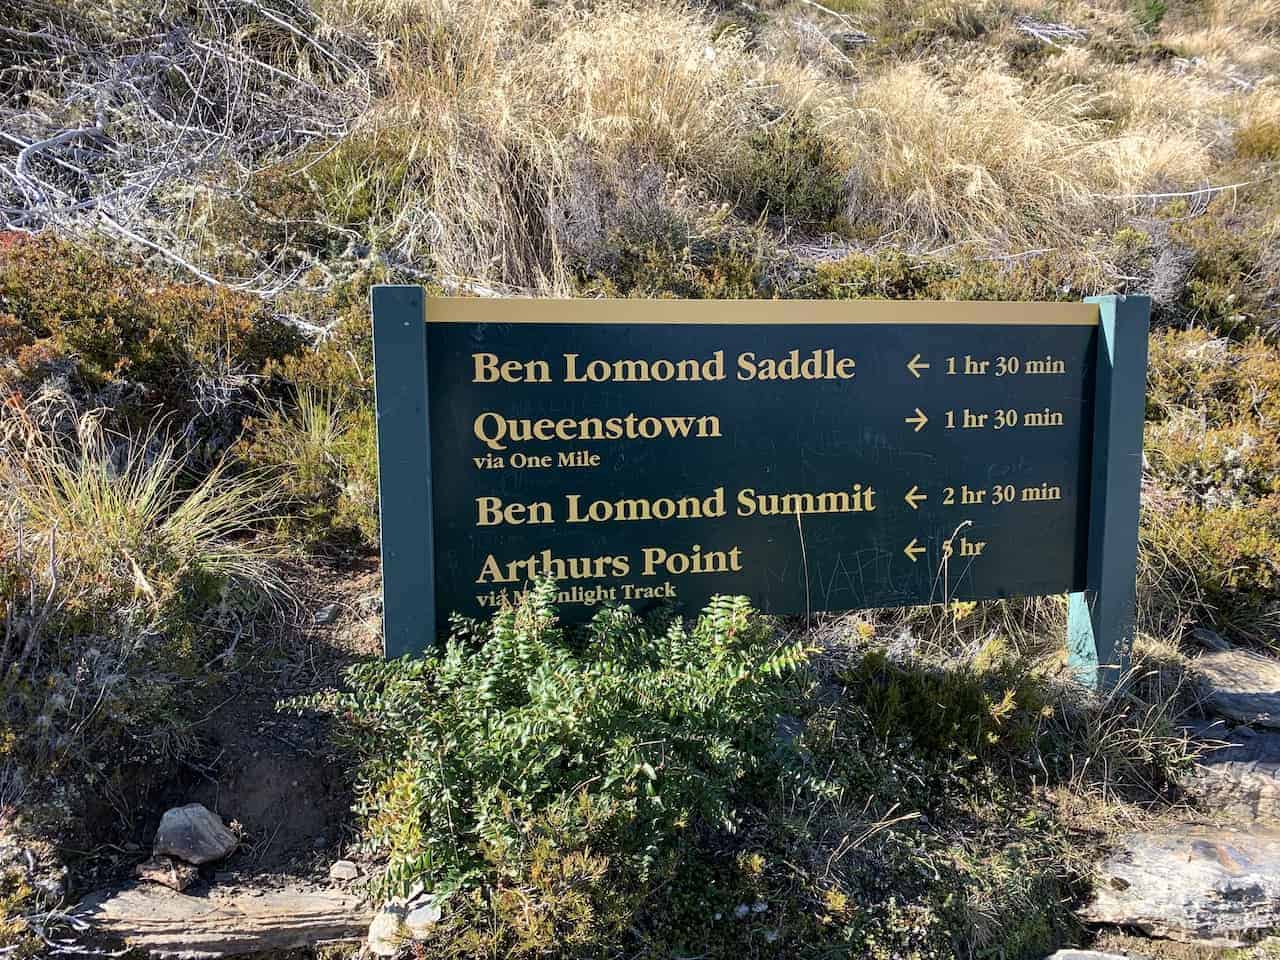
- Starting & Ending Point: EITHER 1) From Base of Queenstown Gondola OR 2) Top of Queenstown Gondola (more on those options soon)
- Type: Out & Back (same path)
- Length: 11 km / 6.8 Miles from Top of Gondola | 14 km / 8.7 Miles from Bottom of Gondola
- Elevation Gain: 1,000 Meters / 3,280 Feet from Top of Gondola | 1,438 Meters / 4,718 Feet from Bottom of Gondola
- Summit Elevation: 1,748 Meters / 5,735 Feet (Saddle Elevation: 1,326 Meters / 4,350 Feet)
- Time: 4-6 Hours from Top of Gondola / 6-8 Hours from Bottom of Gondola (round trip)
- Track: Dirt / Technical Rock for final summit push
- Difficulty: Hard
- New Zealand Official Hiking Website
As you can tell, there are two main ways to go about the hike. You can either start the trail from Queenstown, at the bottom of the gondola, along what is called the Tiki Trail. Or you can take the gondola up and start the hike from the top of the gondola.
I will be diving into both of these options further along in this Ben Lomond track overview.
→ Take part of the Ben Lomond Track during a longer New Zealand South Island itinerary or two island New Zealand itinerary

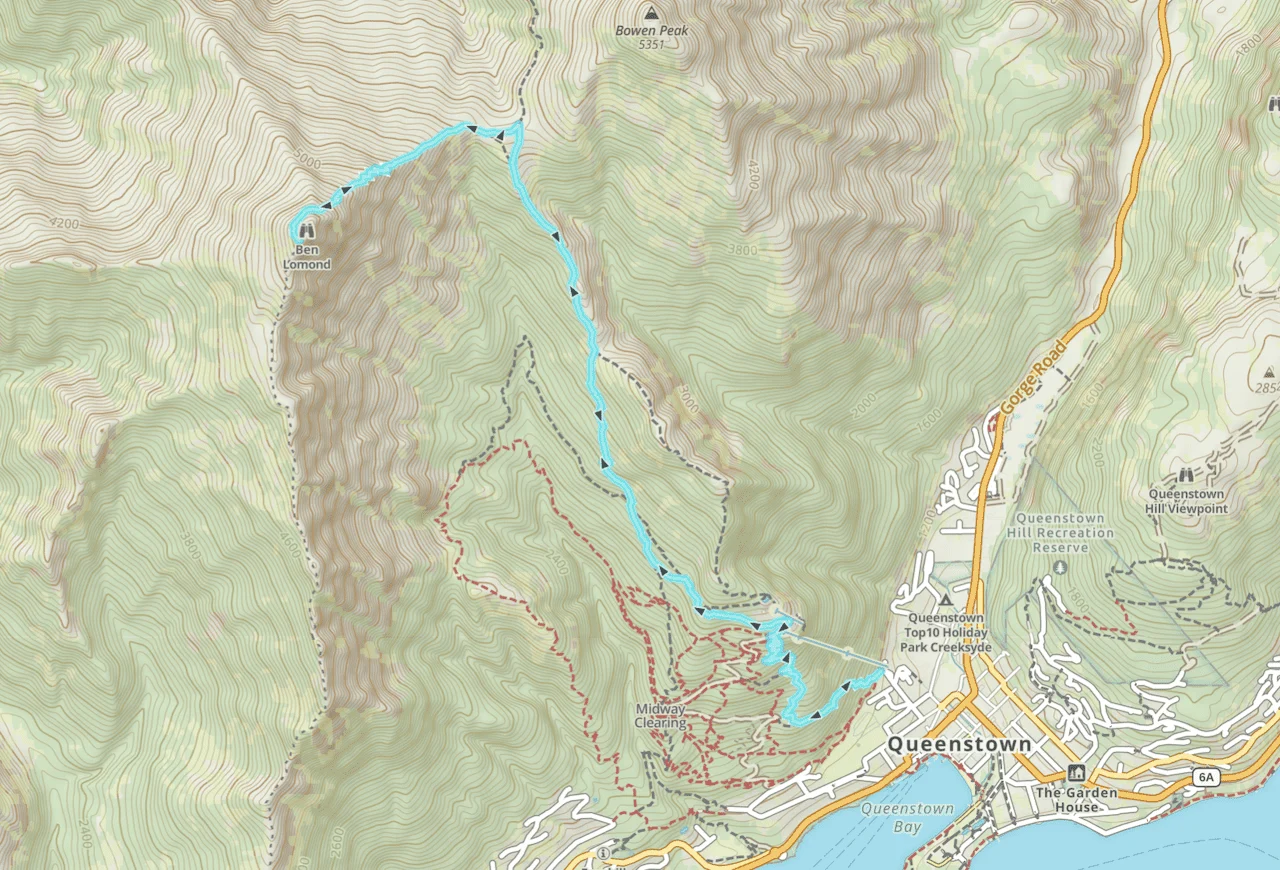
2) Ben Lomond Track Map
Below you can find a hiking map for the Ben Lomond track. The trail here is the full hike from the bottom of the gondola.
This first portion of the hike is a zig zagging route in the forest along the Tiki Trail. Once you reach the top of the gondola, you can enjoy a little break between continuing along to the Ben Lomond summit.
Since this is an out and back track, once you reach the summit you will turn around and head down the same way you came up.

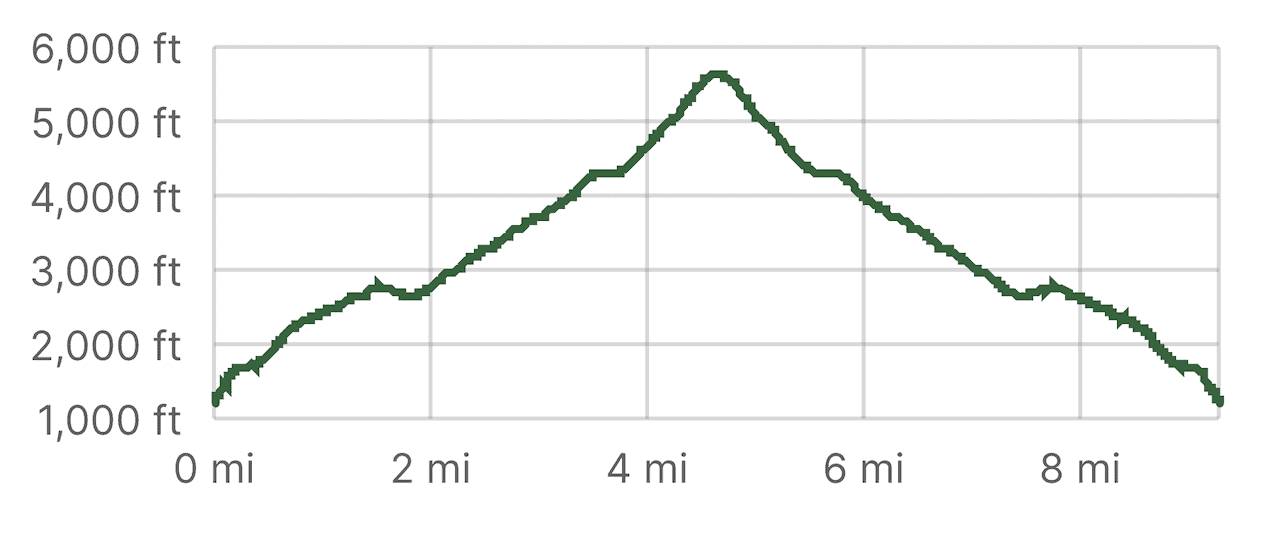
3) Elevation Profile
In addition to the map, it is also helpful to show what the elevation profile of the hike looks like (from the bottom of the gondola). This is essentially going to be a continuous incline up to the summit. You can also see just before the 4 mile mark, the trail flattens out near the Ben Lomond saddle.
From this point up to the summit, the trail gets steeper and more technical. Be sure to take your time and watch your step as you continue your way on up to the peak from here.

Hiking Resources & Checklist
Before heading out for the trails, be sure to read up on some of the hiking resources up on the site. These are here to better prepare you for all types of outdoor adventure.
- Gear: Hiking Packing List
- Weather: How to Prepare for Hiking Weather
- Navigation: Hiking GPS & Navigation
- Tips: 20+ Hiking Tips & Tricks for the Trail
- Accommodation: Book Your Hotel Today
- Rental Car: Book Your Car Rental Today
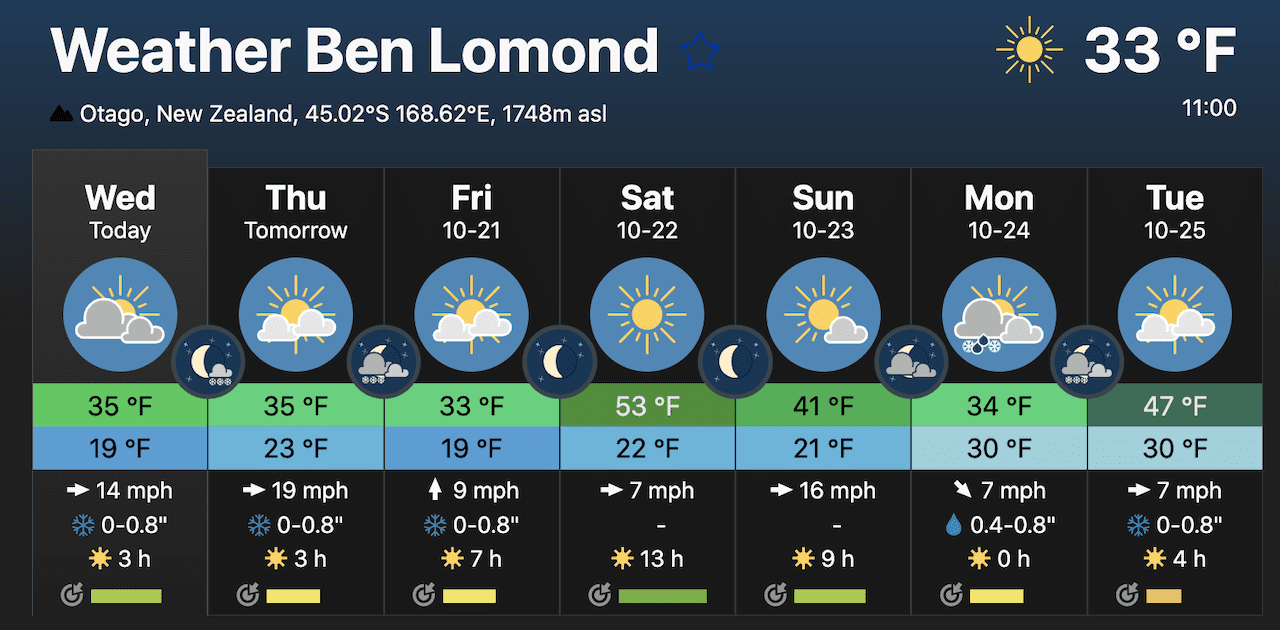
4) Ben Lomond Track Weather
While it is an accomplishment within itself to complete the trek to the top of Ben Lomond Peak, it will not be the same experience if the views are not out there to see.
As you decide when to head out on the trail I highly recommend doing so on the clearest day possible. If there is low cloud coverage, that can get in the way of the views both during the hike and on top of the mountain.
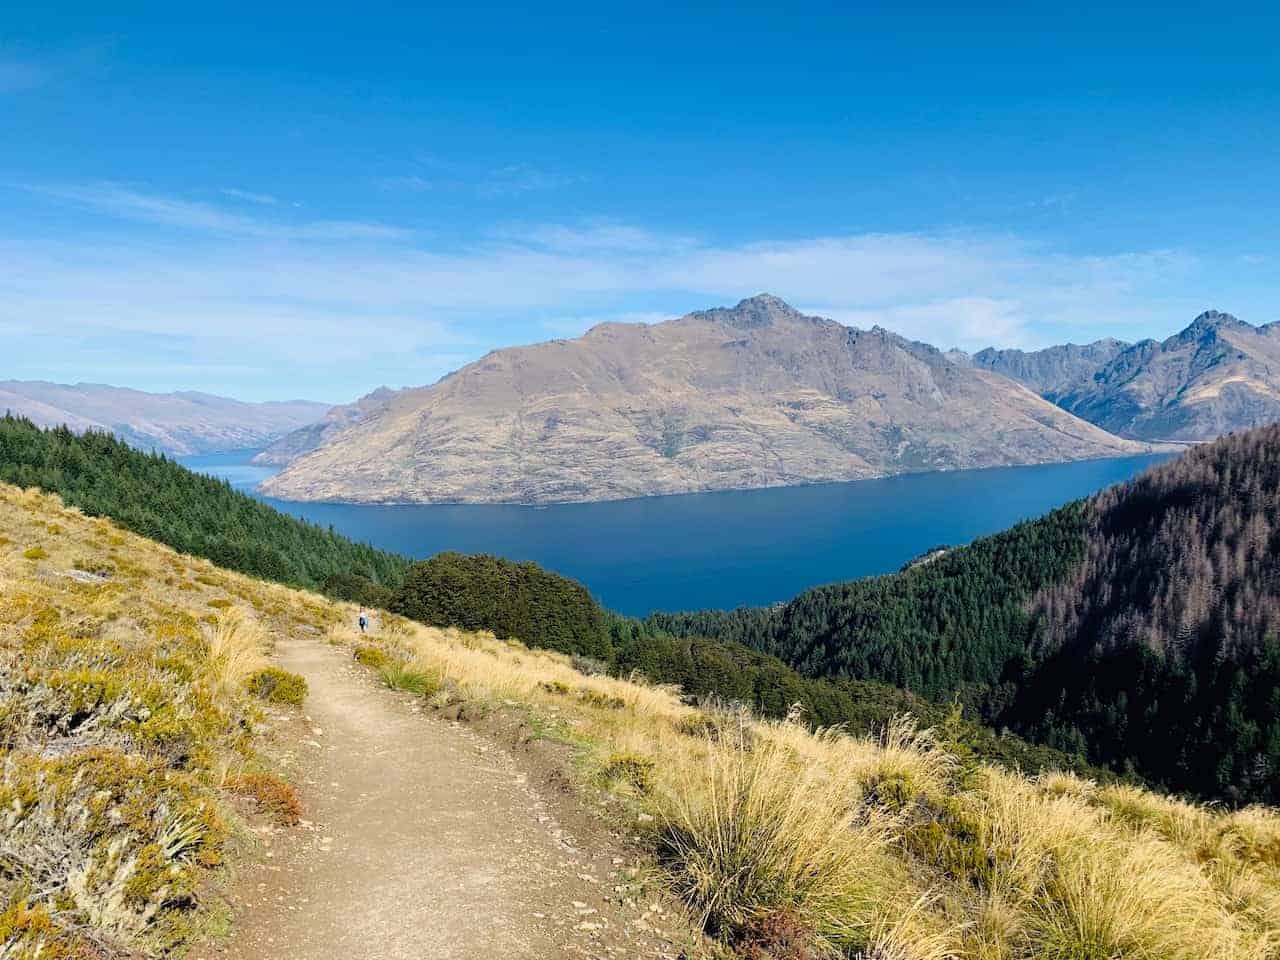
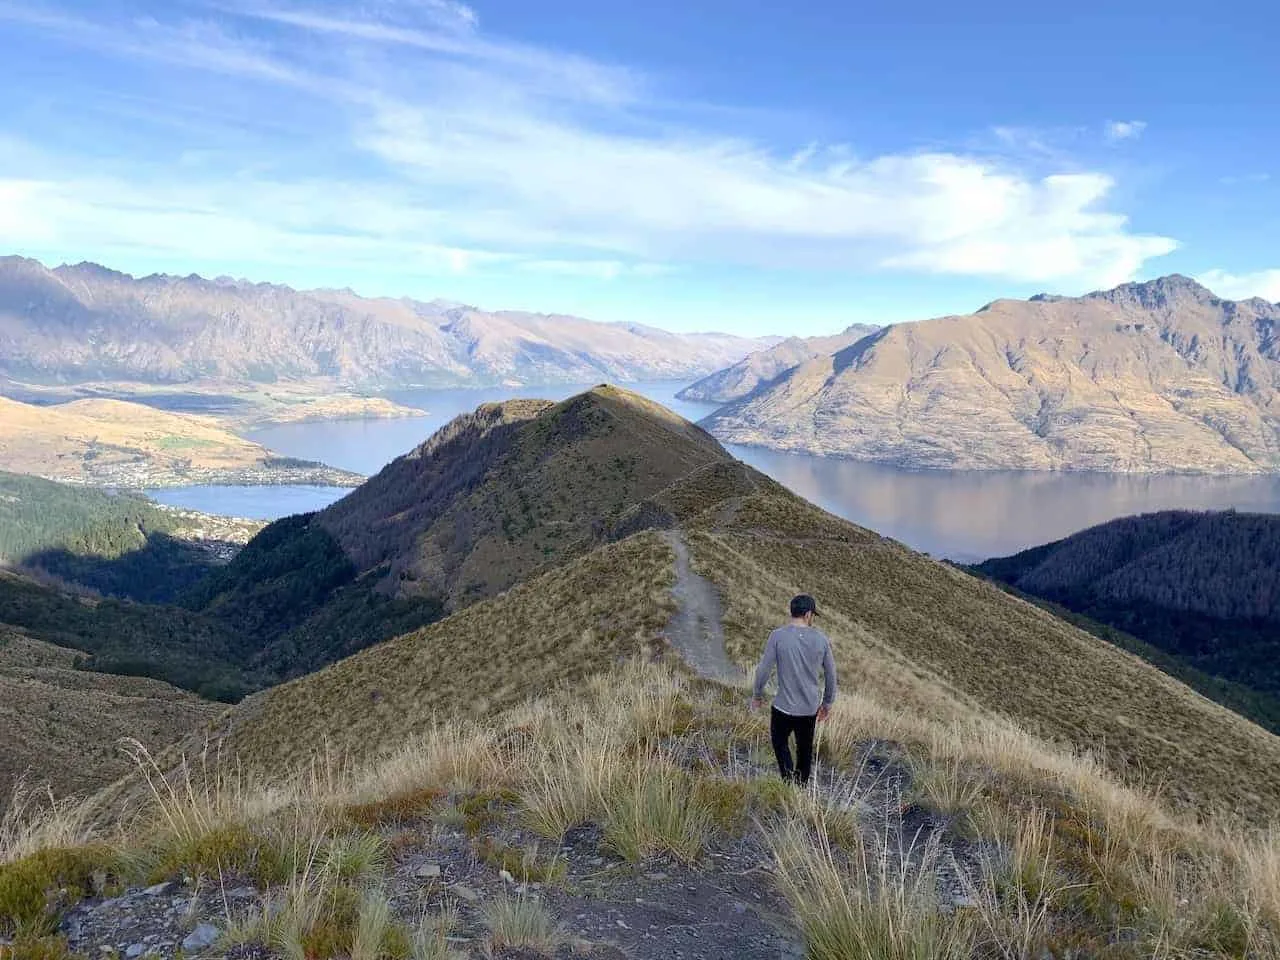
What made Ben Lomond so special for me was the constant views of Lake Wakatipu down below during the first part of the hike, followed by the never ending views of the mountain ranges as I made my way to the summit.
If there are many clouds on the day you are hiking, these views may be obstructed and could have a negative impact on the trail.
Depending on daylight hours, time of year, and hiking level, you may want to start the hike earlier on in the day. This way you can avoid hiking up during the hottest point of the day, and you can get back down in Queenstown before the sun starts going down.
Also, be on the lookout for the wind speed at the summit. While some days may seem like great hiking days, wind speeds can certainly pick up on the mountain. You don’t want to be hiking a mountain like Ben Lomond in high wind!
Weather Tip: I usually use Meteoblue for my mountain weather and you are able to see cloud coverage / number of hours of sun on a day by day basis. You can head over the Ben Lomond weather page for the latest – there are many Ben Lomond’s on the website so follow the link for the correct one.
5) Prepare for the Trail
If you are wondering what to bring along when taking part of hikes in general take a look at the comprehensive packing list that I put together.
It includes everything I bring along on day hikes, and it will have you better prepared when taking part of trails all over New Zealand.
This was one hike I particularly remember sweating and be very hot on the way up and then when I reached the top it was frigid as the wind picked up and I felt that drop in temperature.
Bringing those layers can work wonders on top of Ben Lomond.
Hiking Packing List
In general when it comes to hiking, there are a few main aspects to consider. These includes clothing layers, hiking shoes, hydration & fuel, electronics, and other essentials.
Below in a breakdown of some of the top items, but be sure to check out the Hiking Packing List for a more comprehensive view.
Clothing Layers
Layering is going to be a top consideration when hiking. You will want to be prepared for all sorts of weather so you can be comfortable in different situations. Some items may include:
→ Hiking Shorts
→ Hiking Pants
→ Short Sleeve Shirt
→ Long Sleeve Shirt / Sun Hoodie
→ Mid Layer Fleece
→ Puff Jacket (not always needed)
→ Packable Rain Jacket (Columbia Watertight II)Note that your layers should be made of moisture wicking material as they are breathable and quick drying.
Footwear
Having appropriate footwear will also be very important. You will want to have shoes with the necessary grip and support to keep you safe on the trail.
→ Hiking Shoes (Keen Targhee)
→ Hiking Socks (Darn Tough)Other Essentials
Whether it is hiking gear, electronics, or just some miscellaneous items, here are some other essentials to bring along on hikes.
→ Hiking Backpack (Osprey Talon 22) & Rain Cover (Joy Walker Cover)
→ Hiking Poles (Black Diamond Trekking Poles)
→ Water Bottle (CamelBak Chute or Katadyn Filter Bottle)
→ Portable Charger (Anker PowerCore 5000mAh)
→ Action Camera (GoPro Hero)
→ Energy Bars & Snacks
→ Hat & Sunglasses
→ Sunscreen & Bug Spray
6) Ben Lomond Track Start Trailhead
Mentioned earlier you can either start the trail in Queenstown, at the bottom of the gondola or you can make your way to the top of the Queenstown Gondola and begin the trail up Ben Lomond from there.
There are actually multiple spots, where you can begin the hike from if choosing to start down in Queenstown – either at the base of the Queenstown Gondola along the Tiki Trail or on Lomond Crescent road.
Below is a map that shows the three starting points followed by a quick description of them.
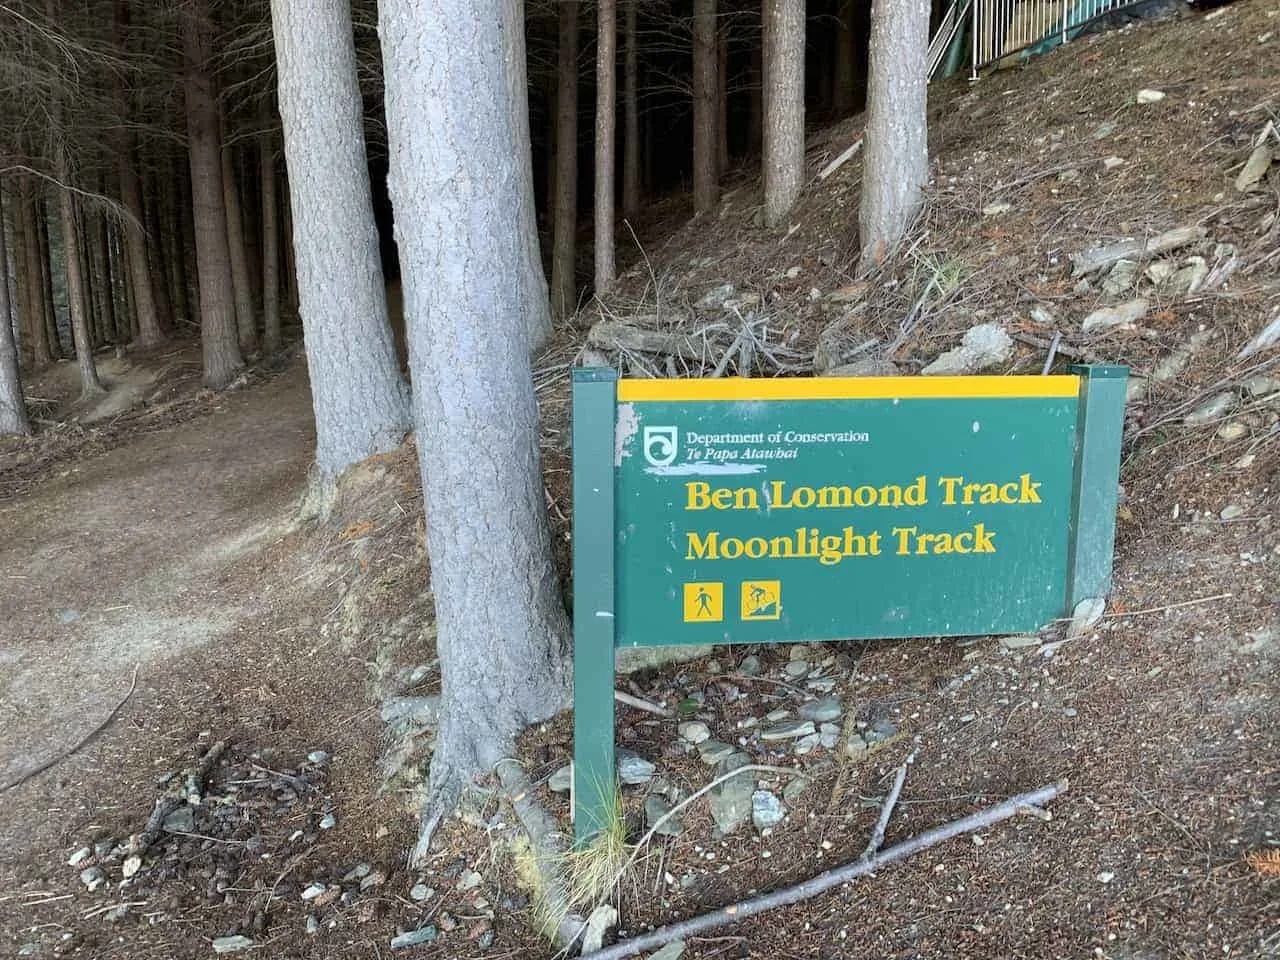
A) Tiki Trail or Lomond Crescent
At the bottom of the Skyline Queenstown Gondola, you will see signs pointing to the Tiki Trail. The Tiki Trail is a 45-minute uphill zig zagging path that takes you up the mountain and meets up with the Ben Lomond track – basically an alternate to taking the gondola up.
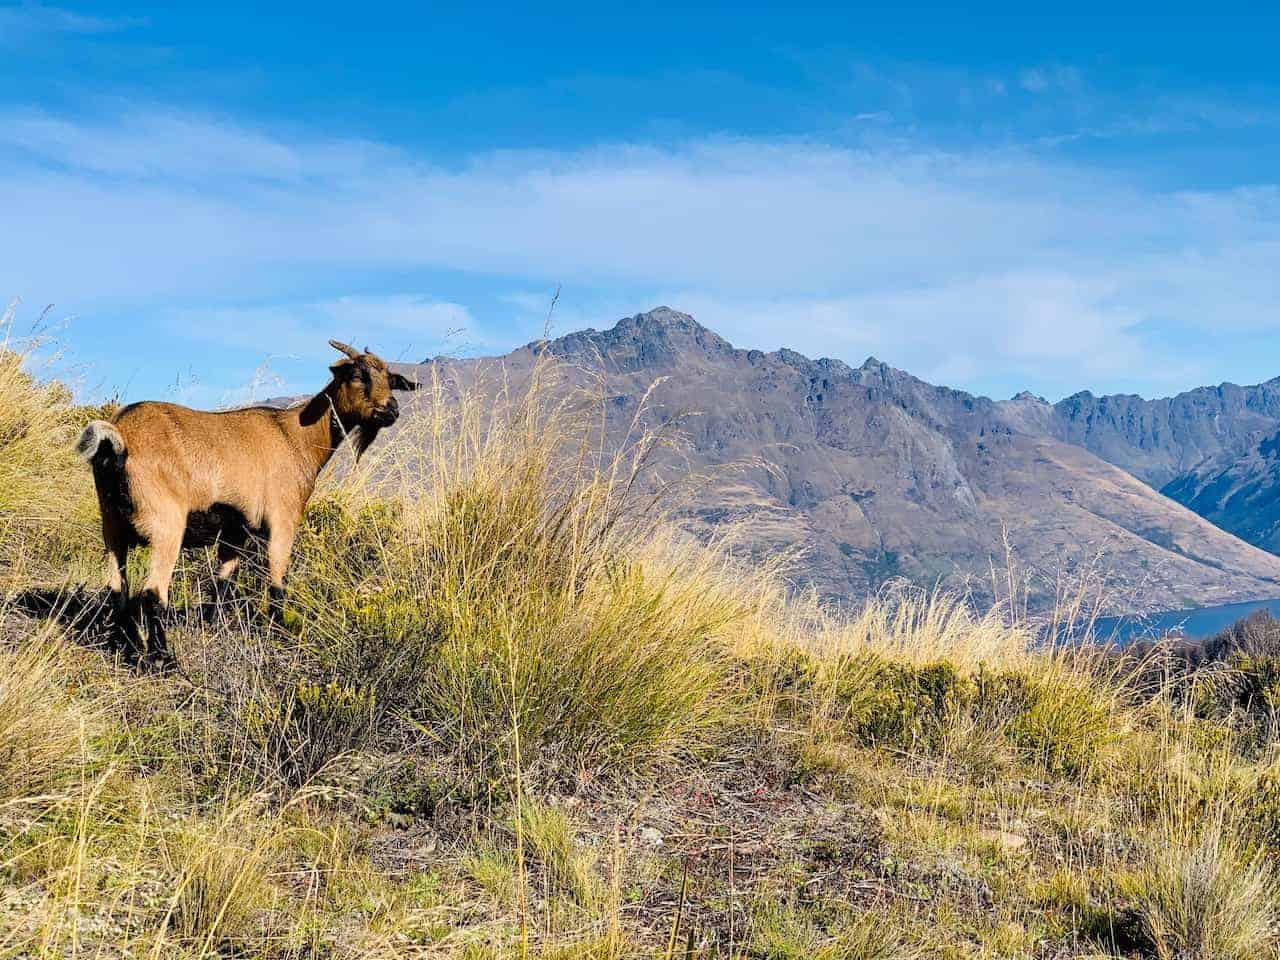
While it does not have the “views” per se, it is a nice trail that takes you through the forest greenery of Queenstown. It is a great way to have a very diverse type of hike as this part of the trail will be in the forest and the actual Ben Lomond track will be above the tree line with vast views.
Alternatively to starting at the base of the Queenstown Gondola, you can also start at Lomond Crescent road. The trail from there eventually meets up with the Ben Lomond track as you get a bit higher up the mountain.
It should also take about 45 minutes to get to the meet up with the Ben Lomond track so if you are trying to start your hike from Queenstown, either one of these options should work well for you.
B) The Skyline Queenstown Gondola
Your other option here is just to simply take the Queenstown Gondola up to the starting point of the trail.
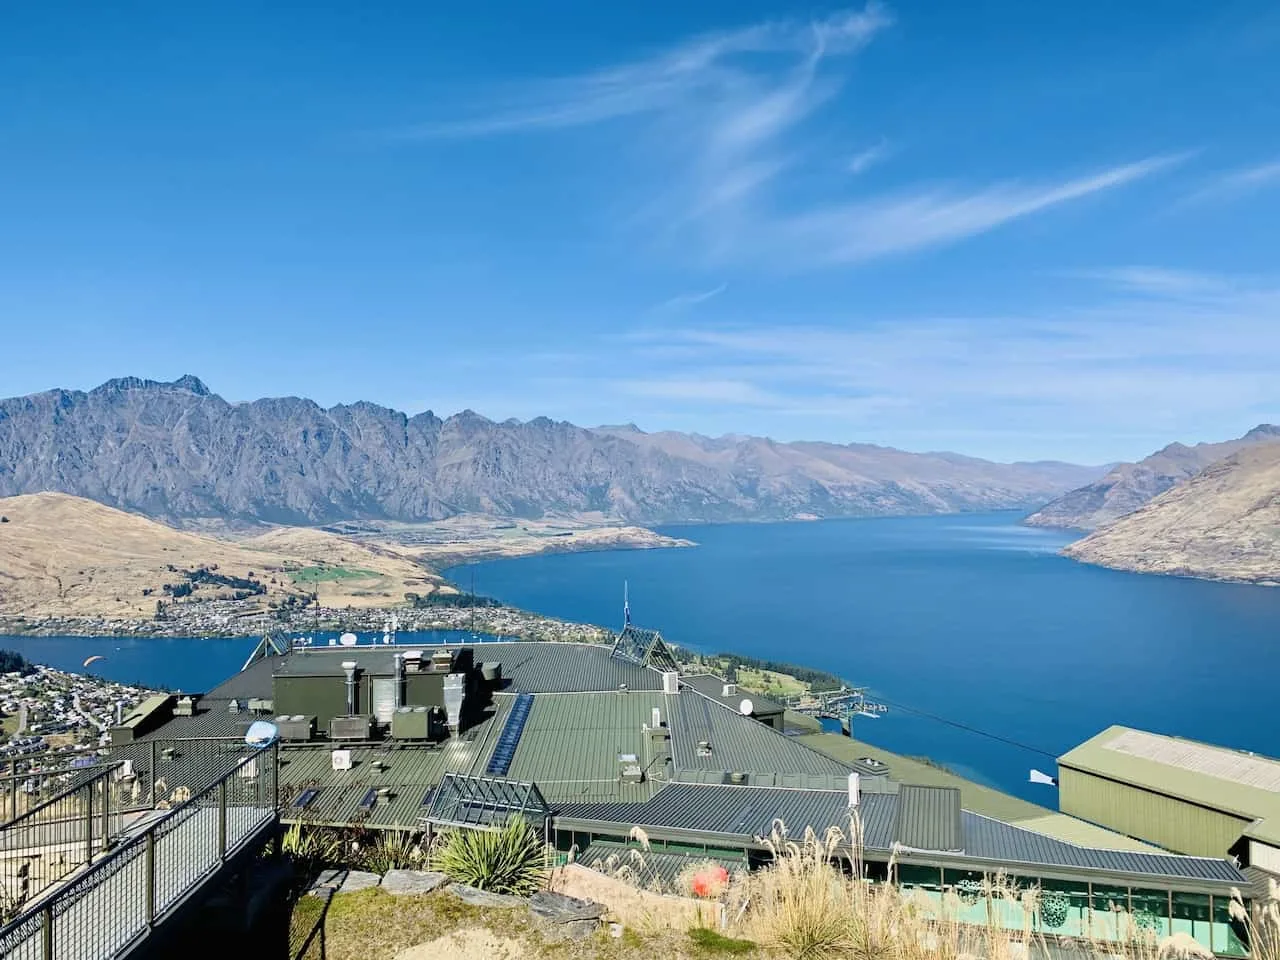
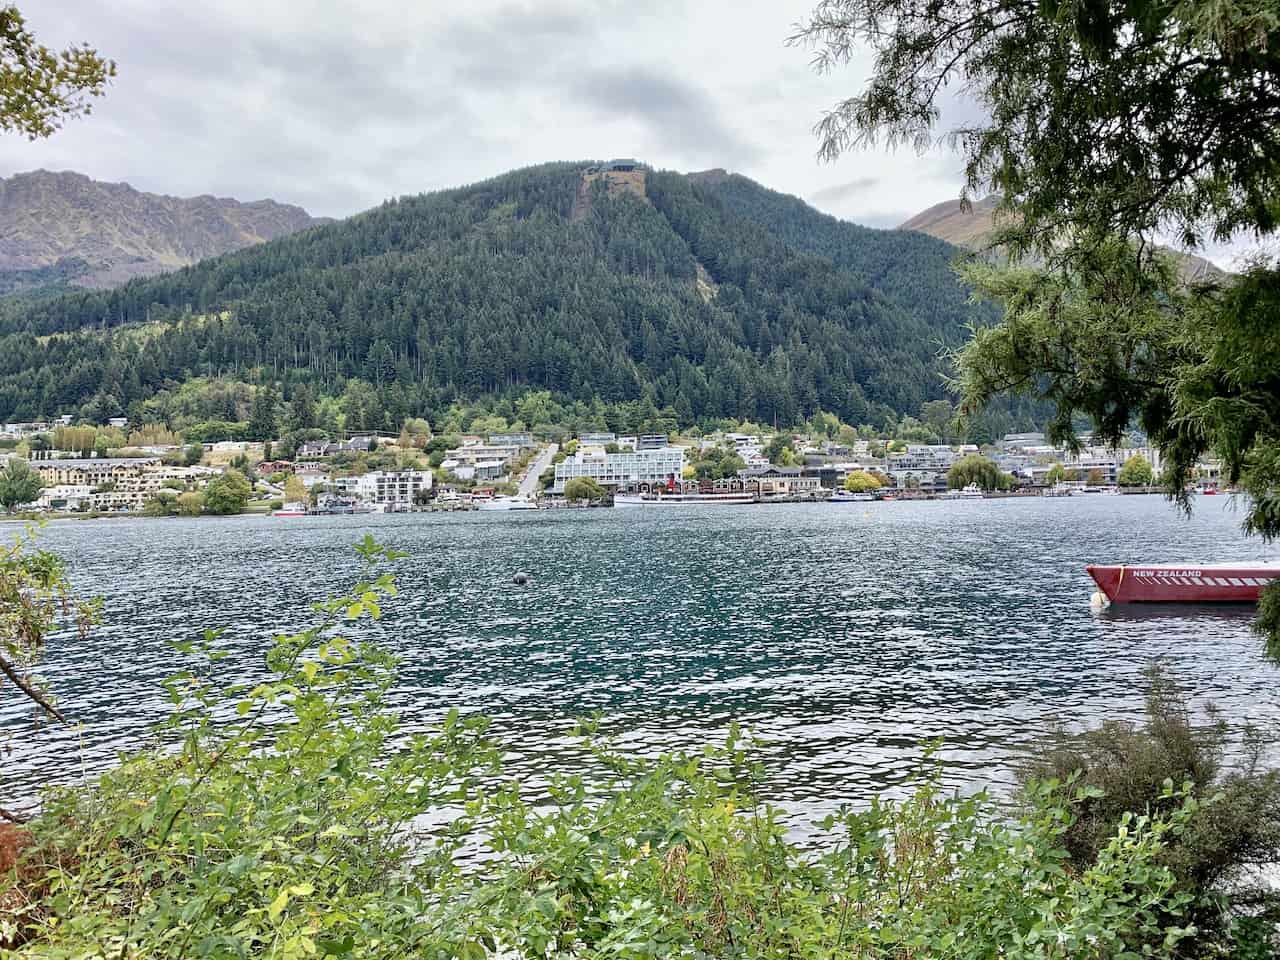
This 10 minute journey will take you above the forest, as you enjoy some views of Queenstown and Lake Wakatipu down below.
Once off the gondola you will just begin to follow the path pointing you to Ben Lomond.

So, you do actually have a few options here:
- 1) Tiki Trail / Lomond Crescent Up • Tiki Trail / Lomond Crescent Down ($0 NZD)
- 2) Tiki Trail / Lomond Crescent Up • Gondola Down ($29 NZD)
- 3) Gondola Up • Tiki Trail / Lomond Crescent Down ( $46 NZD – they do not sell one way up gondola tickets – only one way down. If you decide for this option you will essentially be overpaying for a one way gondola ride as you would need to buy a round trip)
- 4) Gondola Up • Gondola Down ($46 NZD)
• If you decide to take the Tiki Trail or trail from Lomond Crescent up and down, you will not need to pay anything to take part of the Ben Lomond track.
On the other hand, if you take the round trip gondola it will cost you $46 NZD and a one way gondola down will cost $29 NZD (one way gondolas are only sold as a one way down option).
• Another thing to point out here is that on top of the gondola you will find a restaurant/café if you need to take a break and there is also the famous Queenstown luge – a fun option to maybe add to the end of your day.
• The Skyline Queenstown Gondola opens at 9:30AM. If you want to decide before this then you would need to opt for the hike up from Queenstown.
Note the gondola closes between 6:30PM – 8:30PM, so be sure to time your hike appropriately if taking it down (check the latest hours once you are there).

The Ben Lomond track can be broken down into two distinct parts – the trail to the saddle followed by the ascent to the summit. The path from the top of the gondola to the saddle is longer but less steep while the path from the saddle to summit in shorter but much steeper and technical.
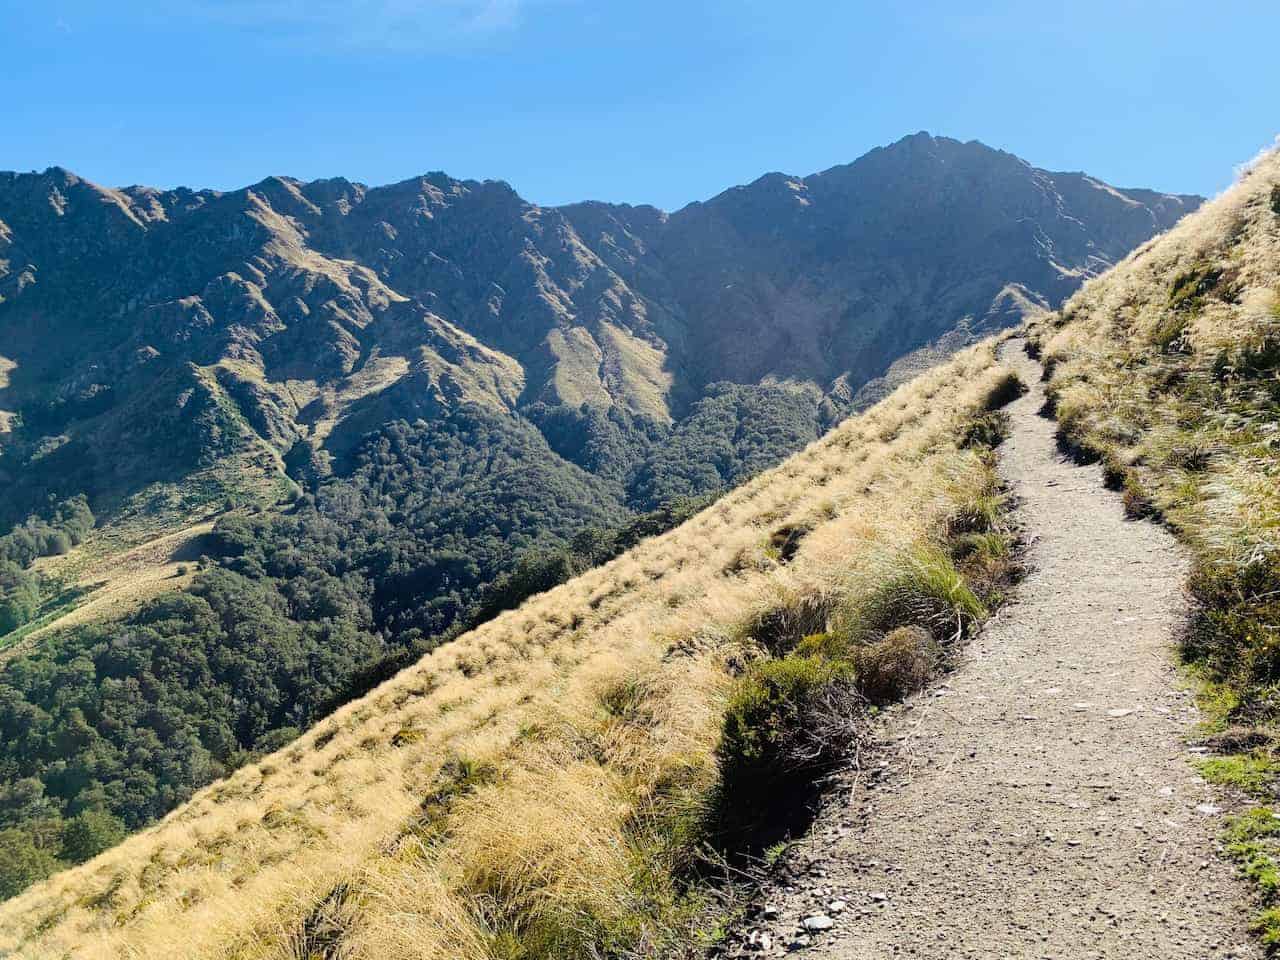
7) Ben Lomond Track – Gondola to Saddle
The path from the top of the gondola to saddle is one of my favorites in all of New Zealand.
Shortly after you begin the Ben Lomond track, you will exit the forest and be welcomed to vast views of Queenstown and Lake Wakatipu down below.
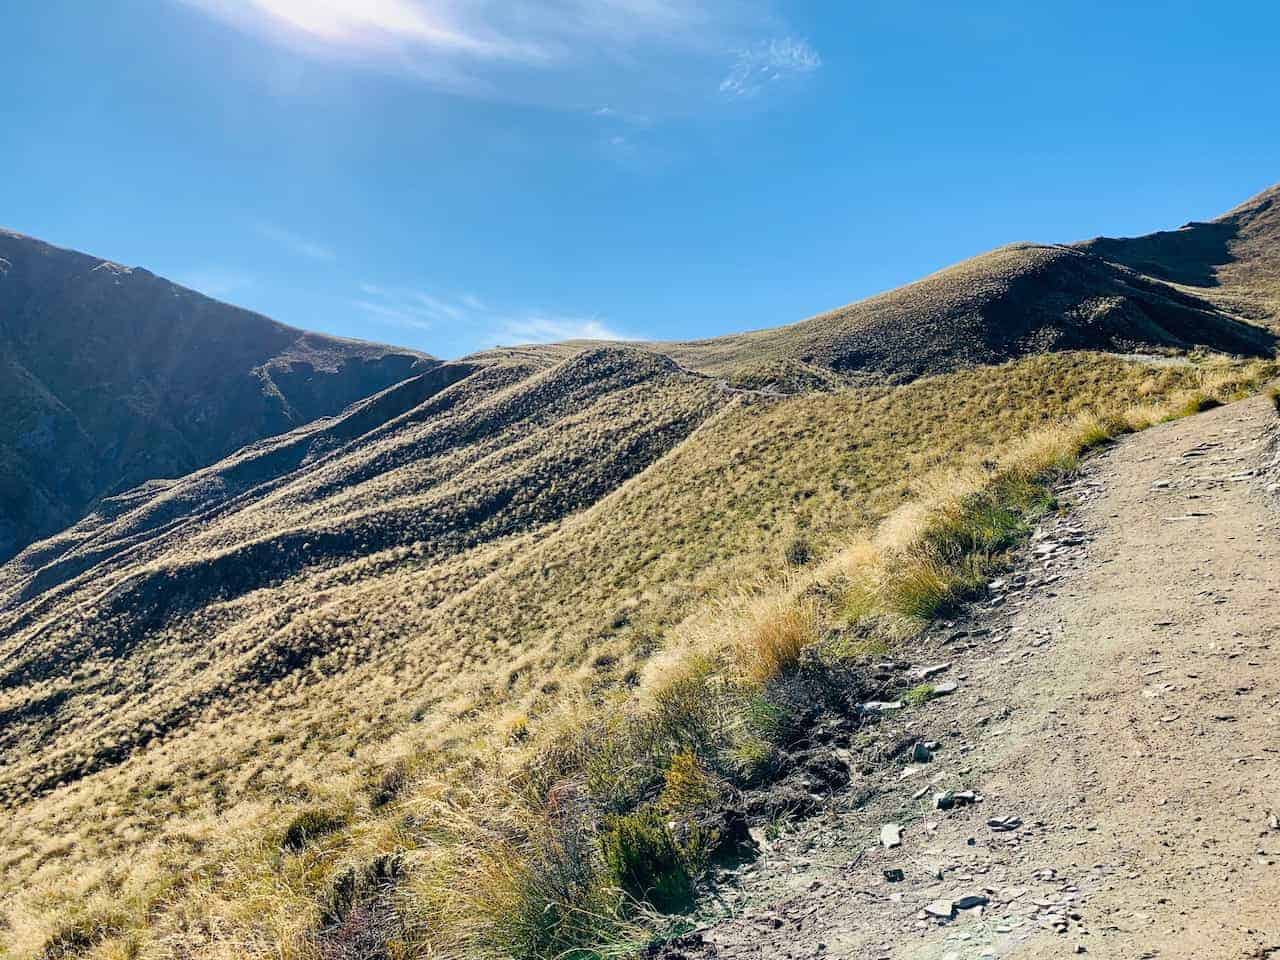
As you continue the climb, the views will just continue to get better as you get a wider perspective of the lake and the surrounding mountains. The path is on a constant incline for the most part and will be made up of a dirt track with some steps sprinkled in throughout.
As you are making the climb you will consistently see the top of Ben Lomond the entire time. This can be great as you know how close you are getting, or it can be very frustrating as you know how far away you are from the top.
As you make your way up be sure to turn around a few times to take in those lake views too!
Once you get through 2-3 hours of climbing, you should reach the Ben Lomond Saddle. At the saddle you will then be pointed left up towards the final summit push.


8) Ben Lomond Track – Saddle to Summit
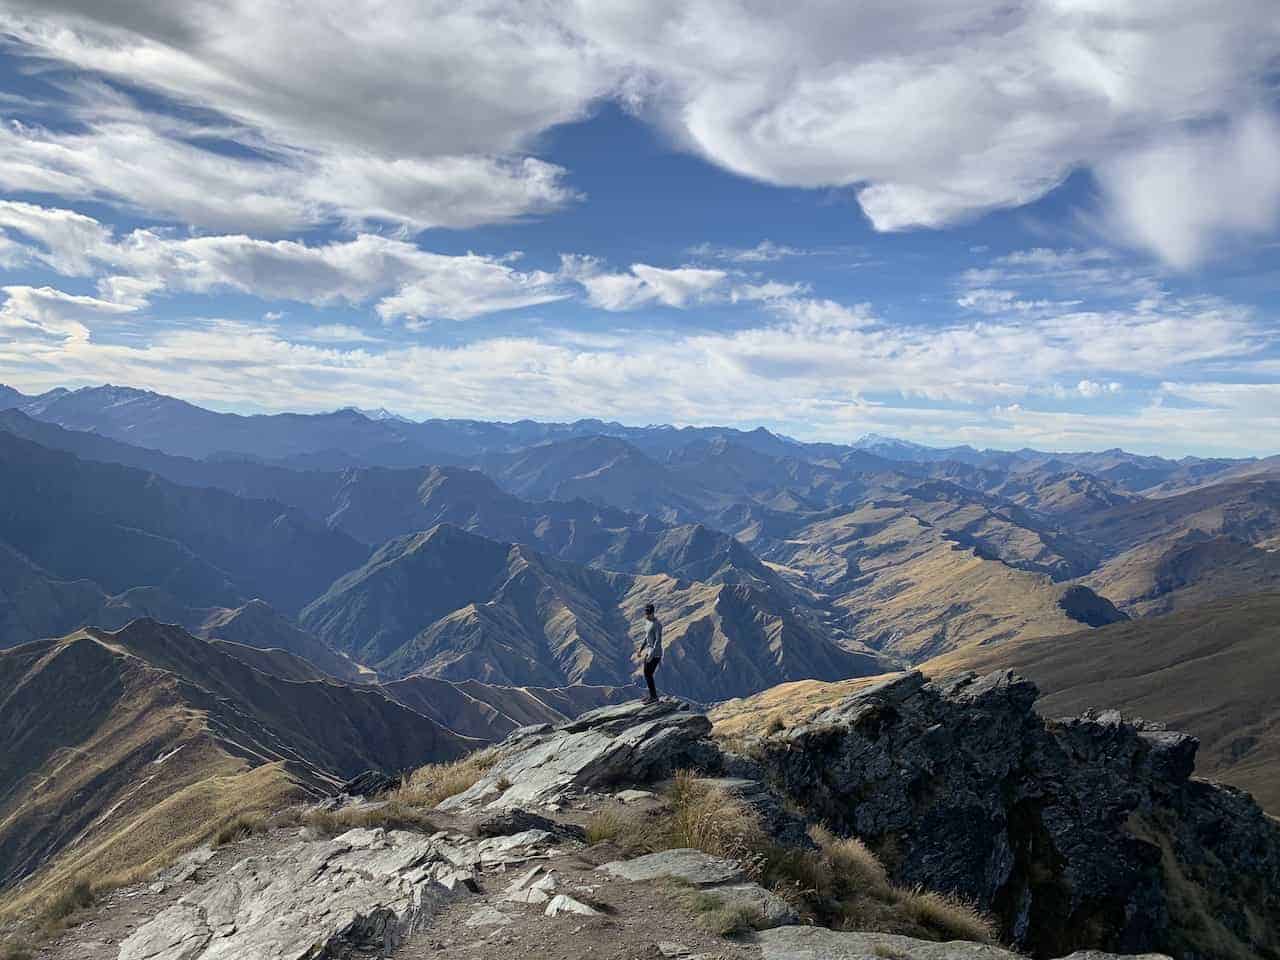
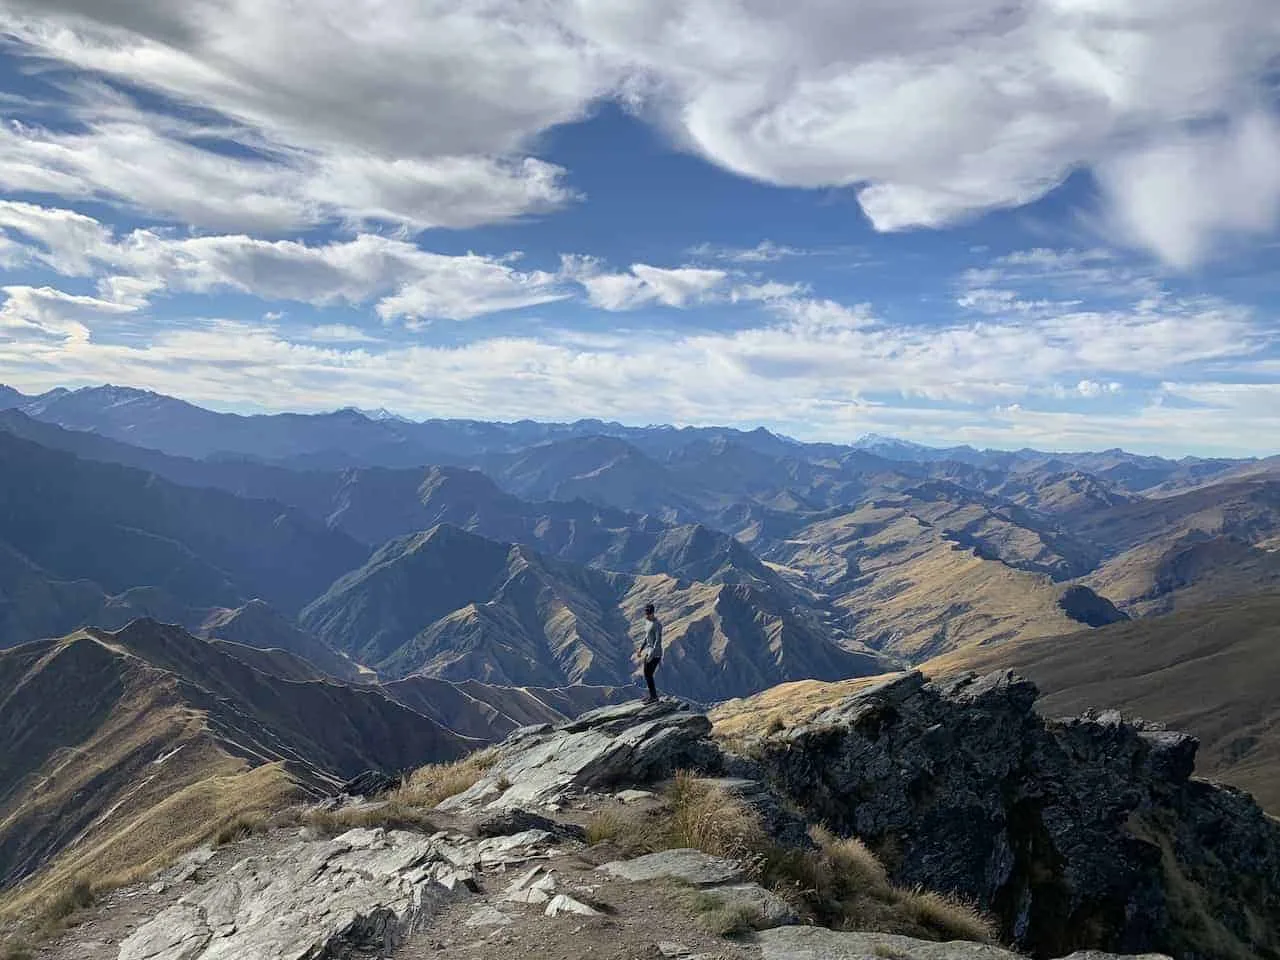
Get ready for what I think is one of the toughest parts of any New Zealand hike – the summit push from the Saddle to the Peak.
While it looks like the peak is just right in front of you, it is actually another hour to get up there. And soon enough the nice dirt path will end and you will start climbing your way up the technical rocks.
This part of the trail is seriously no joke – the incline is as tough and technical as it gets and you will need to watch each & every step.


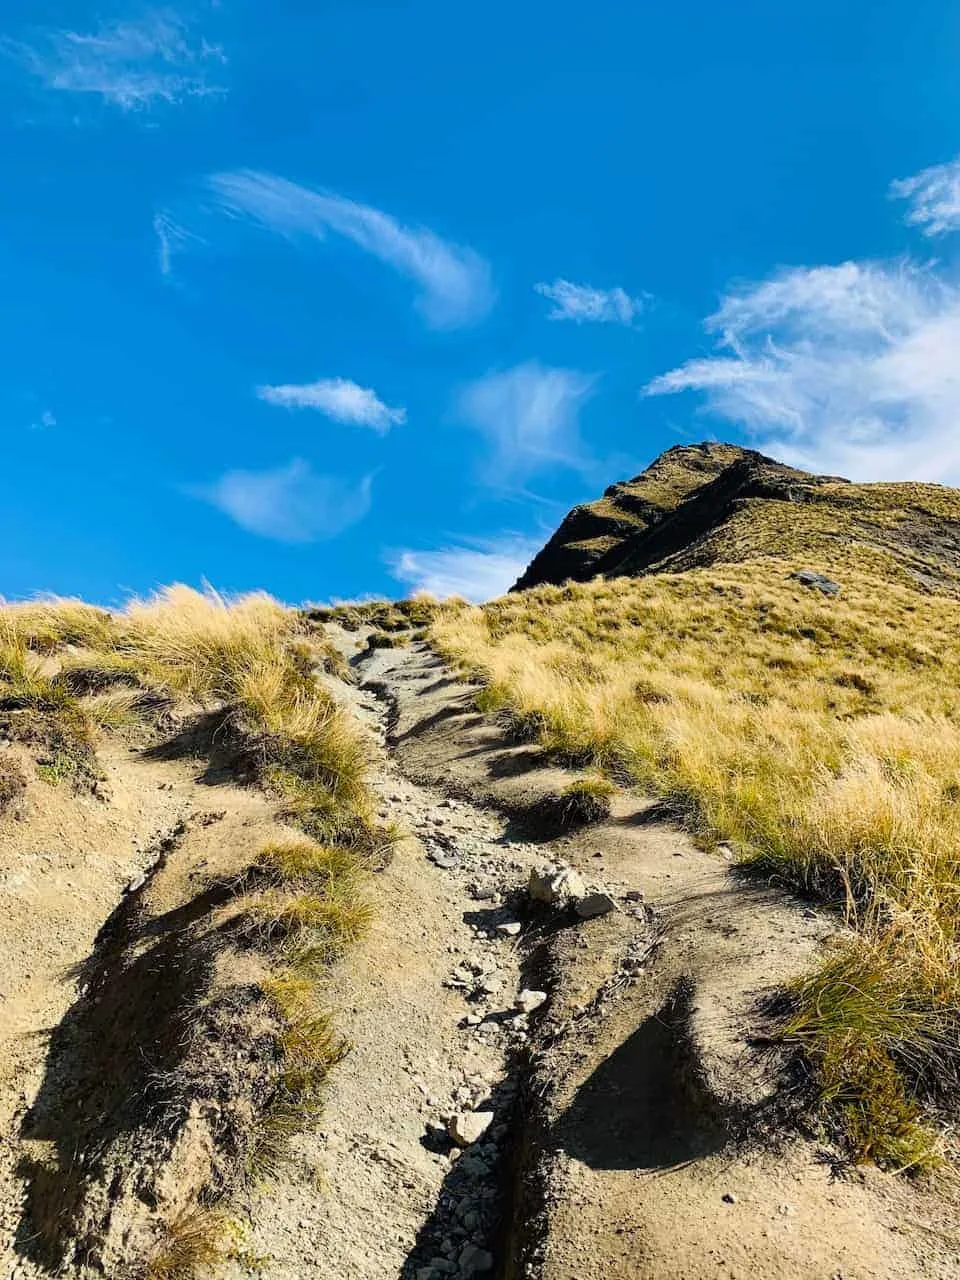
It should take just about an hour to get to the top as you pick and choose your next step up the mountain.
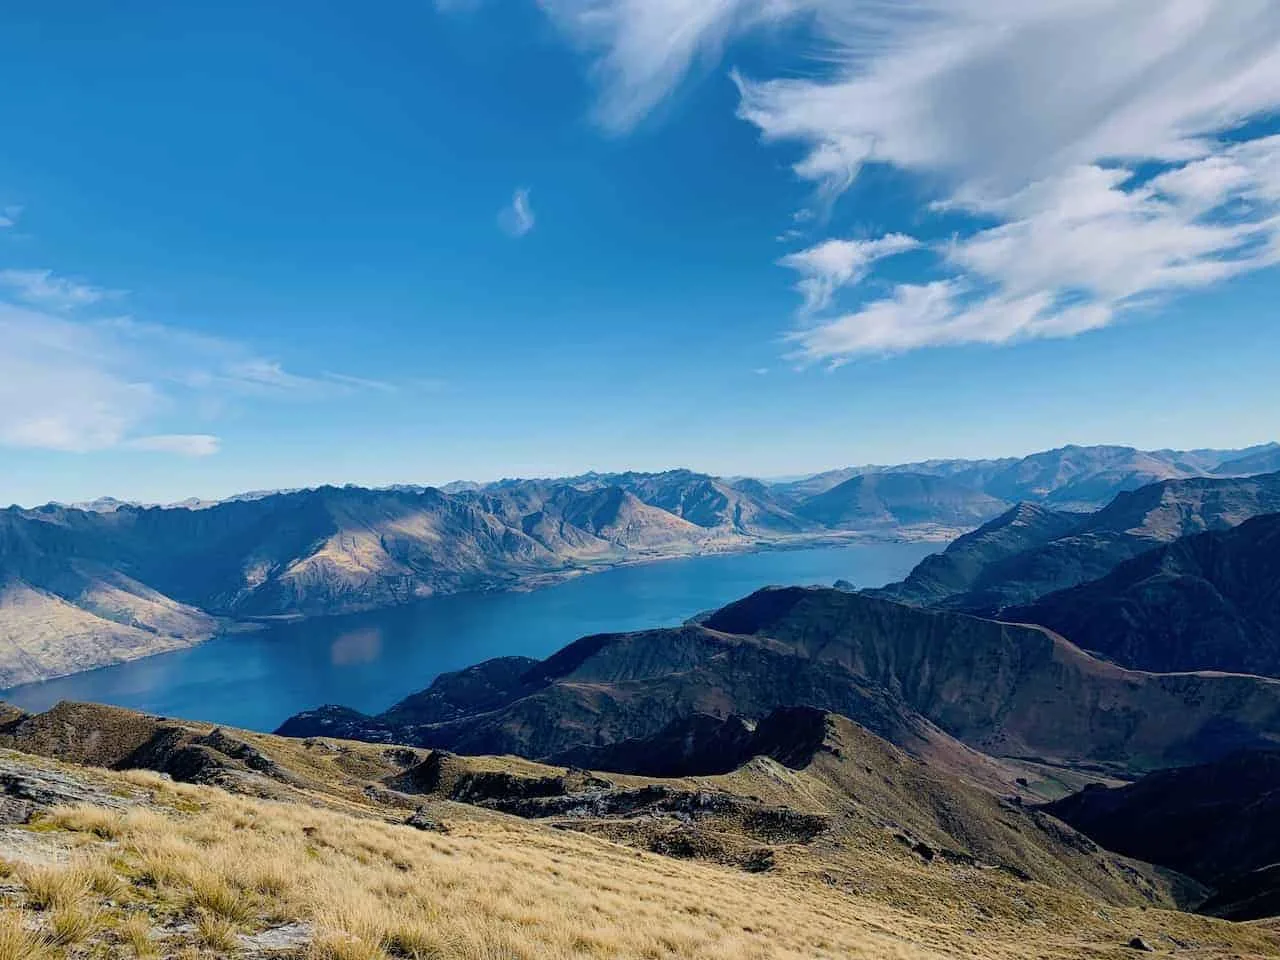
To your left will be those Lake Wakatipu views and to your right will be these incredible ever expanding mountain views (hopefully they can distract you a bit from what you are putting your body through).
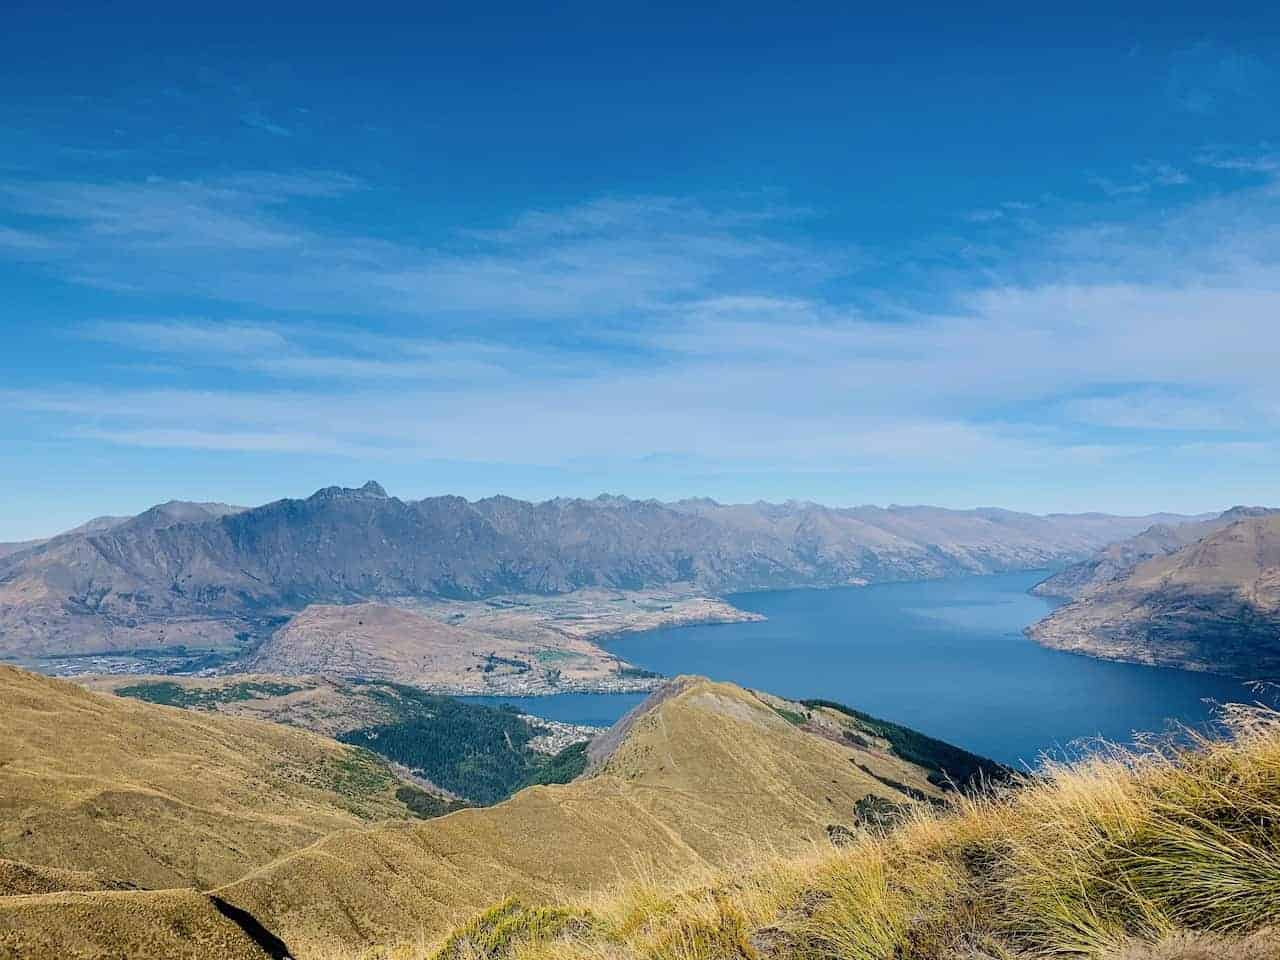
Soon enough though you will begin to reach the top of the Ben Lomond Track at 1,748 meters.


Take some time to take it all in because it is one special feeling to be on top of Queenstown and see these views for yourself.
Like mentioned earlier, it can get very chilly and windy on top now that you have stopped moving and are just standing on the peak (be sure to layer appropriately).


9) Back Down to Queenstown
Everything you just hiked up – well you will need to hike it back down. The Summit to Saddle downhill will be the toughest part of the descent.
You will need to watch your step and take it slow. It may take just about the same time on the way down that it did on the way up just because of how technical it is.
One misstep and you could seriously hurt yourself. However, once you are back on the saddle, it should get much easier from there. Just head down the track, take in the views and enjoy the last of what the Ben Lomond track has to offer.
Once at the top of the gondola, you can make the decision how you would like to get back into Queenstown (Gondola or Tiki Trail / Lomond Crescent). Once back in town, it is time to relax those legs and start the rest and recovery process.


10) Where to Stay in Queenstown
If taking part of the trail you are most likely doing so from Queenstown. It is a great lakeside town with plenty of accommodation options to choose from.
Since it is not that big, location wont be too big of a deal (however you can find some places a bit further out of the way).
Below are some options at different price points to take a look at that are mostly within walking distance of town center:
Mid Tier
• Novotel Queenstown Lakeside
• Lomond Lodge Motel
Luxury
• St Moritz Queenstown
• Sofitel Queenstown
Budget
• YHA Queenstown Central
• Haka Lodge Queenstown

Well, by now you should be all good to go to conquer the Ben Lomond track on your own. I hope this guide can get you going in the right direction and on top of that peak in no time.
Feel free to write in below with any questions or comments and check out some other New Zealand itineraries and guides up on the site. Have fun out there and safe travels!
Some of the guides currently up on the site include:
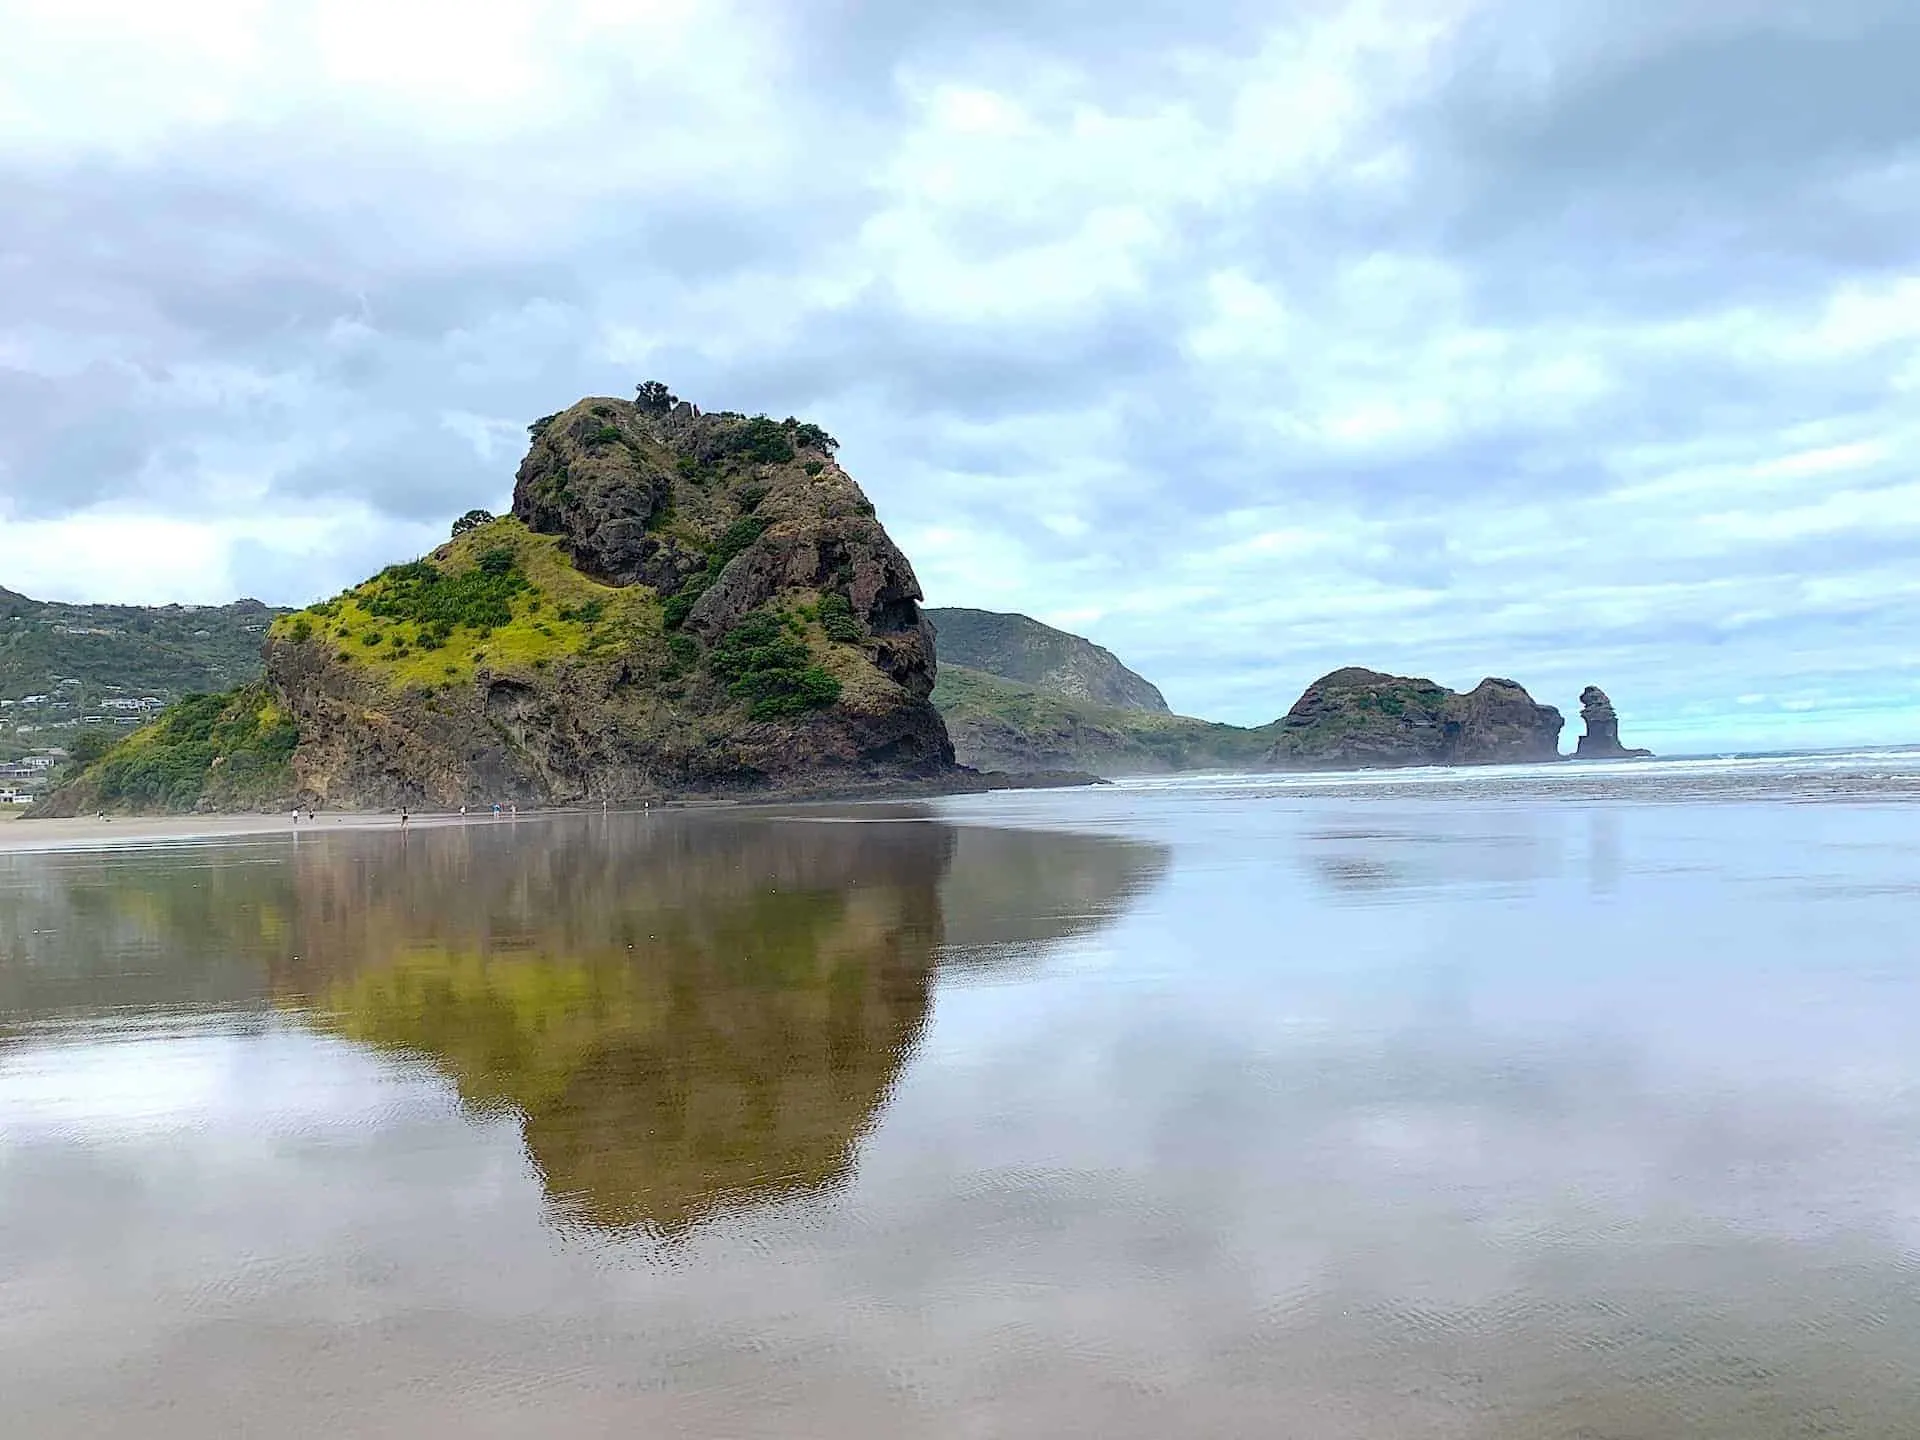
Best Walks in the Waitakere Ranges
21 Helpful New Zealand Travel Tips
A Driving in New Zealand Guide
8 Must Do Wellington Activities
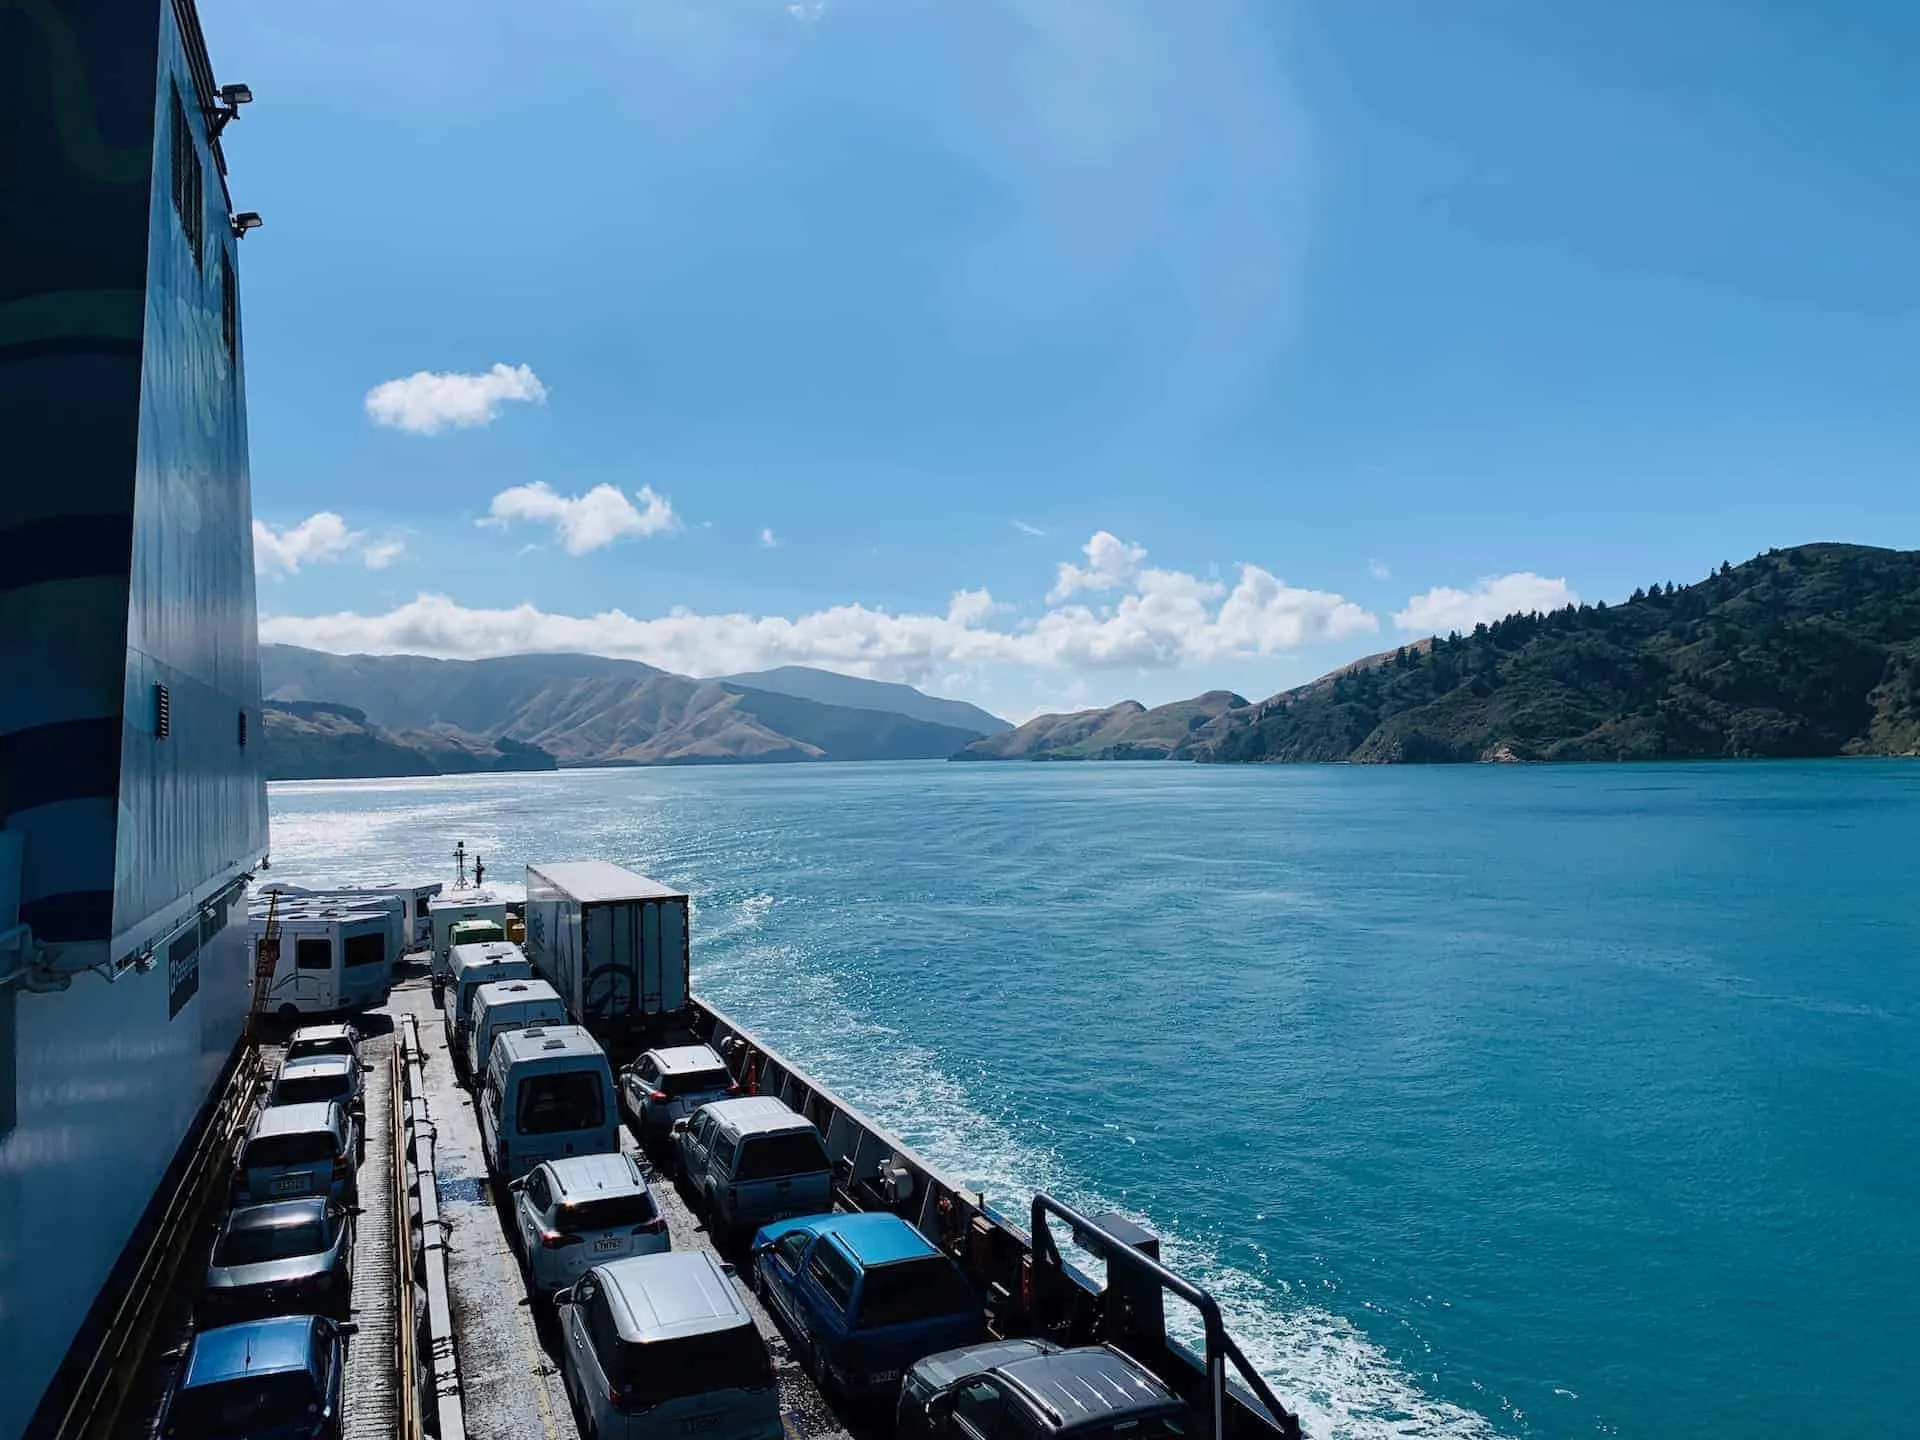
The Wellington to Picton Ferry
And Don’t Forget to Check Out the 10 Day New Zealand North Island Itinerary